
Carbon airbox and FG mold `how to` thread
clairetoo - 14/5/09 at 06:38 PM
A few people have asked for a bit of a `how it's done` thread when I next build a carbon airbox - so here goes 
Since I have been dropped in it at work and have to make three mold's in the next couple of days , this seemed the perfect time to get stuck in
and make a larger volume one for my Fury - I use a specialist mold re-finishing paint for the formers , so I can easily slip in an extra one
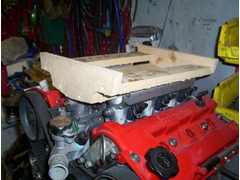
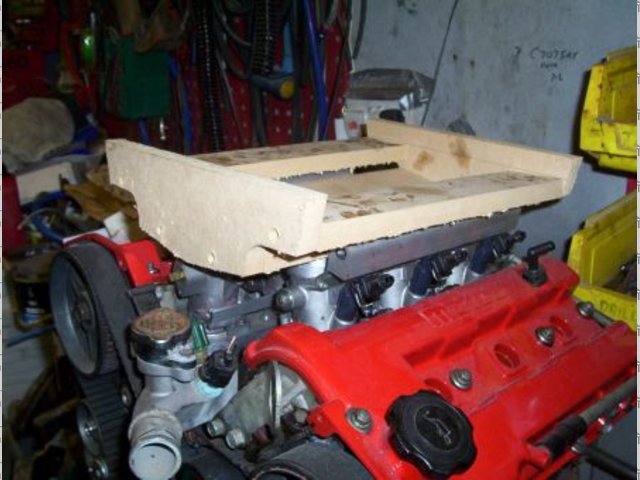
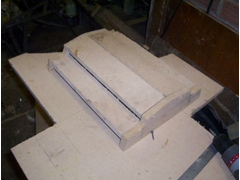
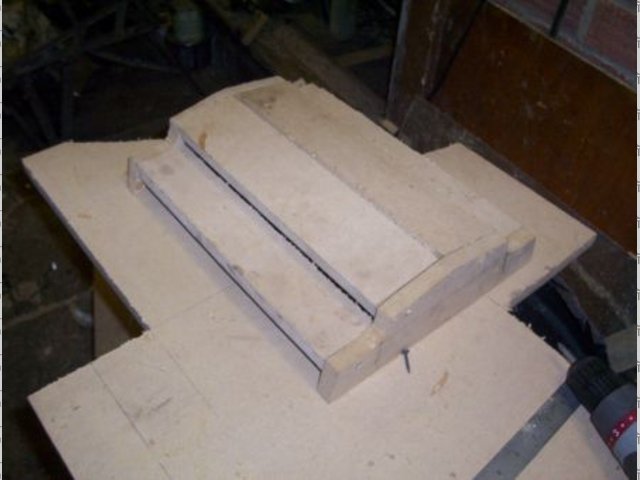
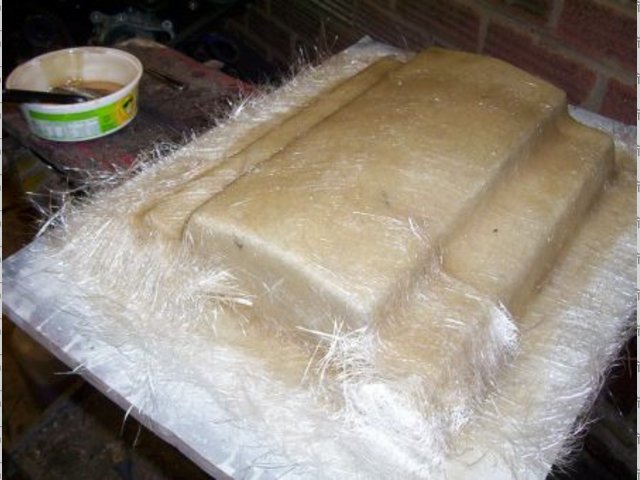
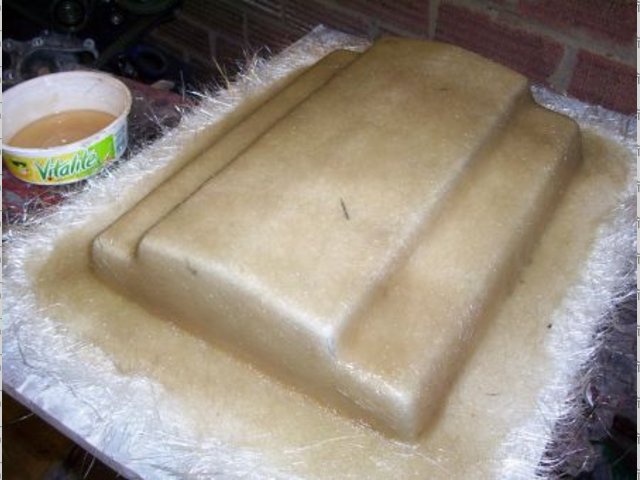
I start with a sheet of 18mm MDF and cut out the rough shape , filling in the larger flat area's is easy this way - all glued and screwed
together so it holds it's shape when power sanding .
Stage 1
Stage 1 and a bit
This it with the first stage of filler applied
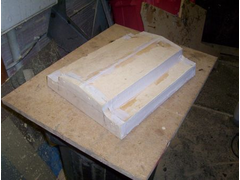
First filler
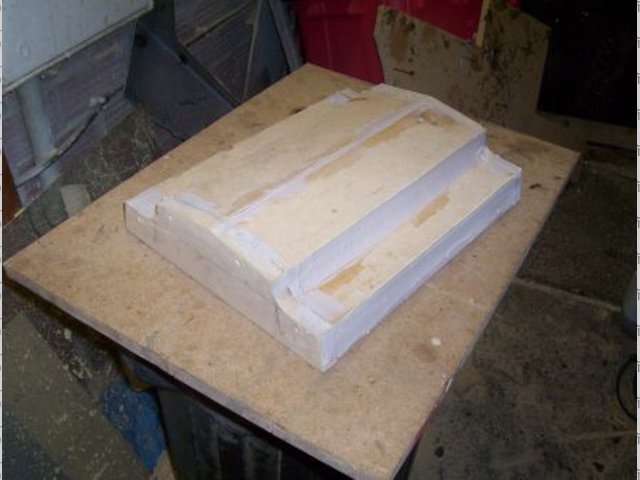
This method leaves me with a former that can be used to make a mold , but is tough enough to be used as a tool to make the finished component as well
- allso it is very fast 
Edit - I forgot to add it's important to make sure the former is tapered on all sides when making a one-piece mold (2 to 3 degrees is enough)
[Edited on 16/5/09 by clairetoo]
[Edited on 18/5/09 by clairetoo]
eznfrank - 14/5/09 at 07:34 PM
Are there more steps to follow? I'm just in the process of making an airbox, got a cardboard mock up that I'm happy with and intended to
make an ally base plate with a fibreglass lid. Never done any fibreglass or CF before though  although I imagine GRP is easier?
clairetoo - 14/5/09 at 08:40 PM
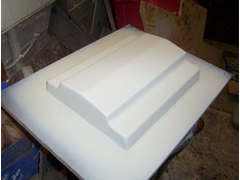
Allmost ready for paint now - it will get a couple of coats of a polyester based spray filler , after being mounted on a board (to keep it flat , and
make handling a lot easier)
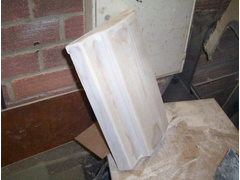
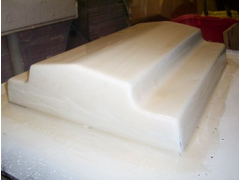
Shape finished !
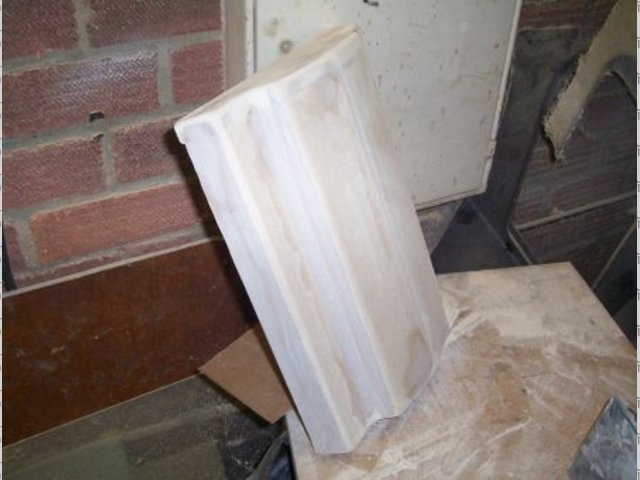
This is how it will sit on the engine - next bit to make is the inlet tube which will be on the front but bonded on separately as I plan to have the
shiny side on the inside , and adding it now would make the molding impossible to remove from the mold .

Why it's this shape....
quote:
Are there more steps to follow?
A few........
clairetoo - 16/5/09 at 12:55 PM
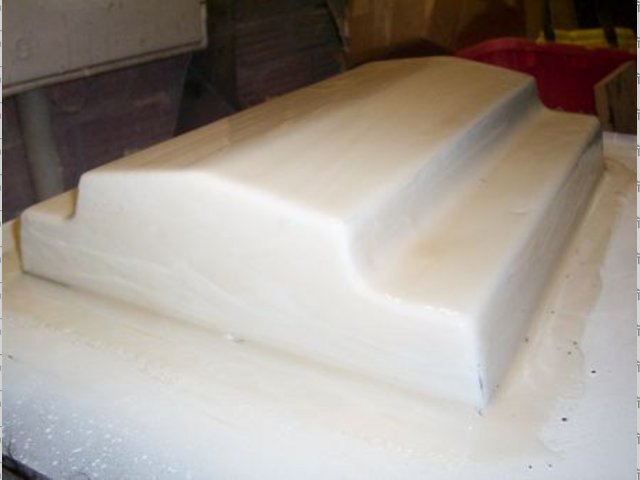
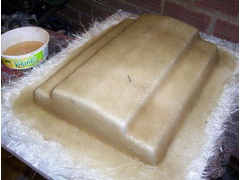
Here is the former finished - a bit of filler , and some elbow grease later........
It has had a few coats of polyester based spray filler (couldnt use the high gloss finishing paint at work - it had been sat in the cupboard too long
)
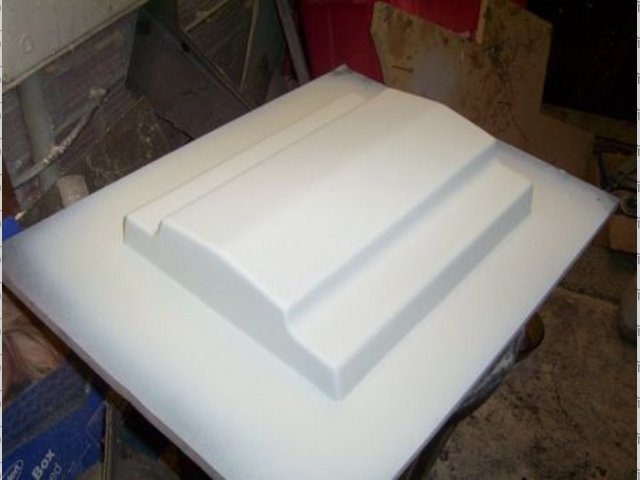
Painted former
Next stage is to smooth it off with some 1200 grit wet`n`dry - this will leave a very smooth near gloss finish to the mold which will easily polish to
a high gloss with a bit of Tcut .
Yep - I've decided to make a mold rather than mold straight off the former - more pictures to follow later today
[Edited on 16/5/09 by clairetoo]
clairetoo - 16/5/09 at 02:08 PM
With the former smoothed off , next to come is a couple of coats of wax . I use `Mequires Mirror Glaze` - not cheap , but it is very good (and a tin
last's me years )
The gel coat resin go's on next - I mix the hardener in by weighing the resin , since 1 litre of resin weighs a kilogram , I add 2% hardener .
A handy catalyst dispenser is cheap enough - so for the 200cc's of gel , just 4cc's of catalyst .
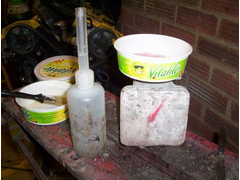
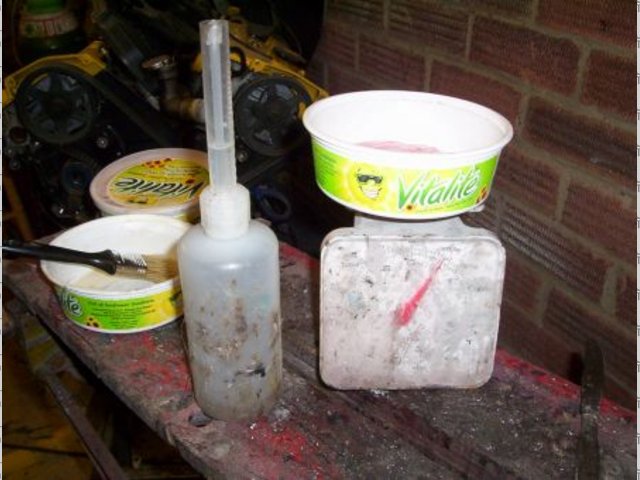
The tools.....
This mix is then painted smoothly over the former - it is best not to have any run's or sag's in the gel as this can lead to air pockets in
the mold
Gel coat on
The gel continues onto the mounting board to allow the forming of a flat lip around the mold - this will give strength to the mold , and a solid edge
to trim to .
Next - put the kettle on , feet up , and let the gel set (about 45mins should do it) - and remember it's important to keep the work area at a
minimum of 60 degrees (too cold and it will take ages to set , too hot and you wont get to use the resin before it set's )
clairetoo - 16/5/09 at 04:11 PM
Now the gel is set - just slightly tacky - it's time to add a few layers of CSM - I use 300 gram for the first layer as it wet's out a lot
quicker and will go into corner's easier that 450 gram . The catalyst is 1% (slightly less if doing a large mold to give more time)
Laying up
To get the mat to follow outside corners I wet it with some resin , let it soak for a few minutes (work on the other end of the mold while this is
happening) , then it's easy to push and stretch around corner's
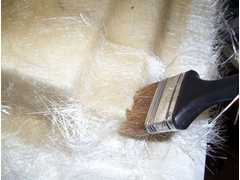
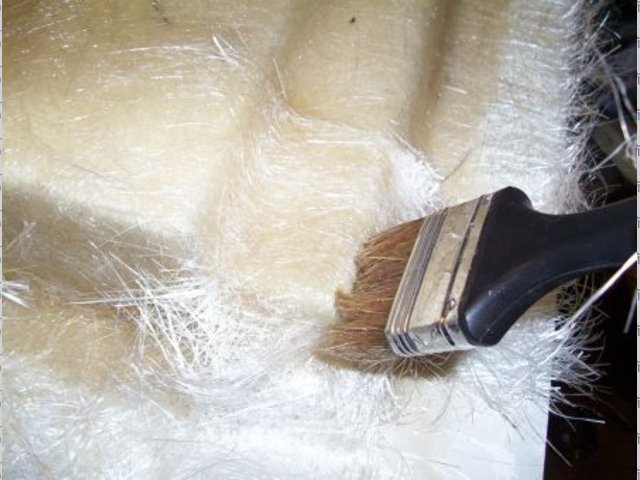
Laying up2
And here it is done - there is about four layers of mat (1 300gm , 3 400gm) - for a small mold like this I use off-cut's , just torn into
convenient sized piece's - on a larger mold I would cut bit's large enough to do the whole mold (and to keep thickness consistent)
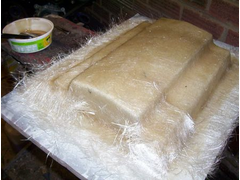
Mold layup finished
This is now left to set - I keep checking , when it is just set (but still soft) I will run a sharp knife around the edge to remove the surplus .
This will be left on the former overnight - and should come off easily in the morning.........
[Edited on 16/5/09 by clairetoo]
Peteff - 16/5/09 at 04:23 PM
Good old Vitalite tubs, where would we be without them ? I cook stuff in them. you can microwave them you know. I've got a half finished mould
for a rear wing that I'm going to have a go at later ( much later ) and I'm not sure whether to make it like this or take one from it as a
negative if you know what I mean.
clairetoo - 16/5/09 at 05:17 PM
quote:
Originally posted by Peteff
Good old Vitalite tubs
Disclaimer - other margarine tub's can be used
iti_uk - 17/5/09 at 06:10 PM
Lookin' good!!! Can't wait to see the finished product!
Will you be bonding the velocity stacks onto the TB's after fitting the airbox?
Chris
clairetoo - 18/5/09 at 05:36 AM
quote:
Originally posted by iti_uk
Lookin' good!!! Can't wait to see the finished product!
Will you be bonding the velocity stacks onto the TB's after fitting the airbox?
Chris
The trumpets will be bonded to the airbox so they come off as a unit (same as on my current setup) , sine the TB`s angle in towards each other that is
the only way I can see of doing it 
The mold is now off the former and polished so more to follow as soon as I get the kitchen floor cleared...............
clairetoo - 18/5/09 at 05:24 PM
So.........here's the reason the kitchen floor had to be cleared .
Spray starch
Before cutting the carbon mat , I roll it out , check for miss-placed threads , and give it a generous coating of spray starch . This has the effect
of sticking the strands together , making the mat a lot easier to handle , and keeps it in shape while cutting it to templates made from the mold .

templates
These are cut from old newspaper.......!
The combination of templates and spray starch means that the joins in the lay-up will be straight and tidy (I hope ) and cuts down on waste (this
stuff aint cheap )
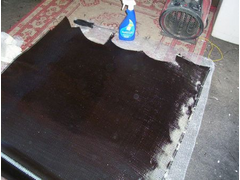
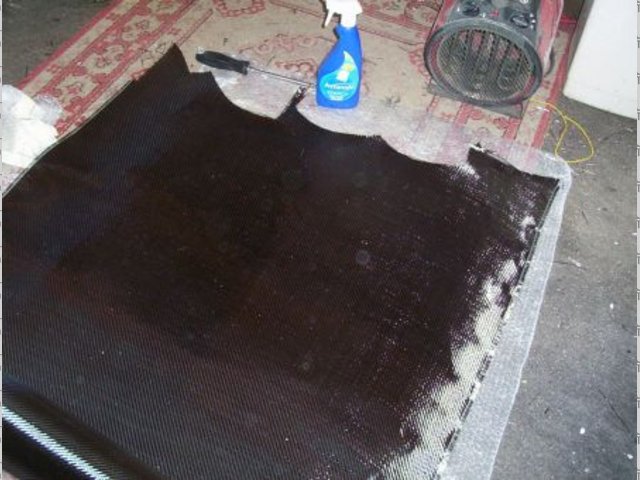
clairetoo - 18/5/09 at 07:08 PM
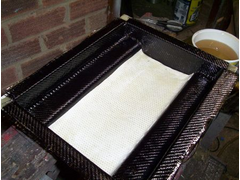
The mold got a light coat of gel while I cut the carbon mat (and a bit of coremat for some heat insulation)
Here is the first section of carbon going in - cut to fit , and drowned in resin to reduce the chance of air bubbles .
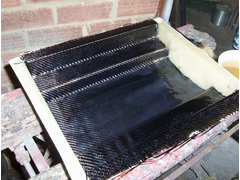
First layer of carbon
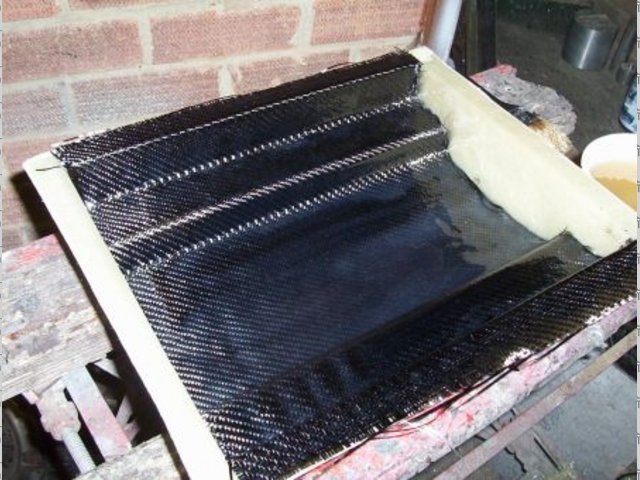
Repeat on the ends , then add a layer of coremat where it is close to the engine (to stop a bit of heat)

Cormat heat insulation
Due to the shape of the mold , the cut pieces of carbon mat have to be fed in and wetted out from the centre out , being very careful to fit the mat
to the corner's .
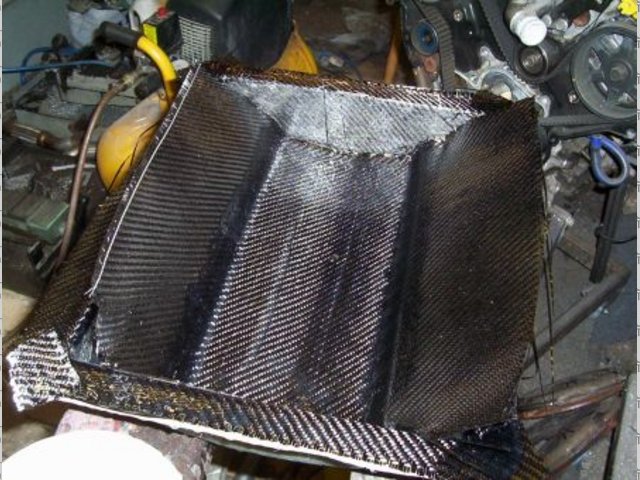
Feeding second layer in
And finally - the end's get their second layer , cut to overlap at the joins .
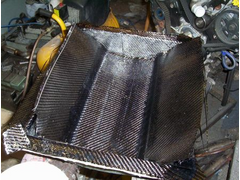
Fully done !
As a final finishing step , I go over the whole thing pressing the mat down with a well-resin'd finger - a roller would be better , but I dont
have a small enough one
Cant wait to pull it out of the mold - but that will have to wait till tomorrow .
MikeRJ - 19/5/09 at 11:19 AM
So apart from the section with the coremat and the joins with the end parts, is the rest of the structure just one layer of carbon?
mistergrumpy - 19/5/09 at 02:39 PM
I can't wait for tonights instalment. It really is a great thread this. Take your time releasing it Claire.
rusty nuts - 19/5/09 at 07:24 PM
Reminds me of the minors when I was a kid, ( Sat morning cinema for kids for those of you not old enough to remember) Can't wait for next weeks
thrilling instalment. Keep it coming Clare
Theshed - 19/5/09 at 09:07 PM
Are you using epoxy or polyester resin? Am I right in thinking that epoxy layups are much stronger but that there are issues with UV degradation? Do
you know a way around wanting a part to look "carbon" and but be UV proof?
You make this look very easy - I hate sanding!!!
clairetoo - 19/5/09 at 09:27 PM
I'm using polyester as strength isnt an issue - but I do find the trumpets can yellow a bit (but I think that may be a heat thing)
Sanding - very satisfying watching the shape emerge (a good quarter sheet sander and very coarse paper to start with sure speeds things up), what I
hate is polishing
iti_uk - 2/6/09 at 01:18 PM
Hey Claire, any news on this thread? Looking forward to seeing the results!!!
Chris
Vindi_andy - 2/6/09 at 02:04 PM
following this thread with interest as I want to do a hardtop for the family and thinking I can use claire's expertise
tomgregory2000 - 8/6/09 at 08:29 AM
Any update?
Tommy
02GF74 - 12/4/10 at 08:11 PM
yeah, and the rest????!! where is it?
40inches - 14/7/10 at 07:27 AM
Is it Ok to release it from the mould yet? 
[Edited on 14-7-10 by 40inches]
clairetoo - 14/7/10 at 08:09 PM
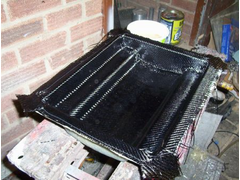
OK OK - no need to keep on at me - here , at last , is the long awaited update ! !
That first one came out of the mold OK , but with so many other jobs to do on the car it kinda got put to one side (and added to the `to do'
list....)
First job was to cut the holes for the throttle bodies , this was done by applying masking tape , then simply pressing in place on the `bodies .
The resulting `marks' are then drawn in in pencil and cut out with a die grinder .
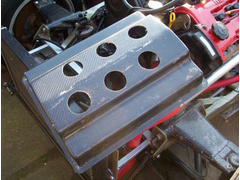
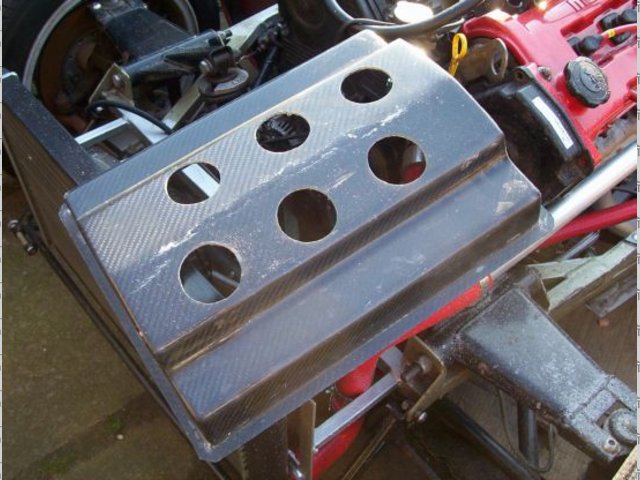
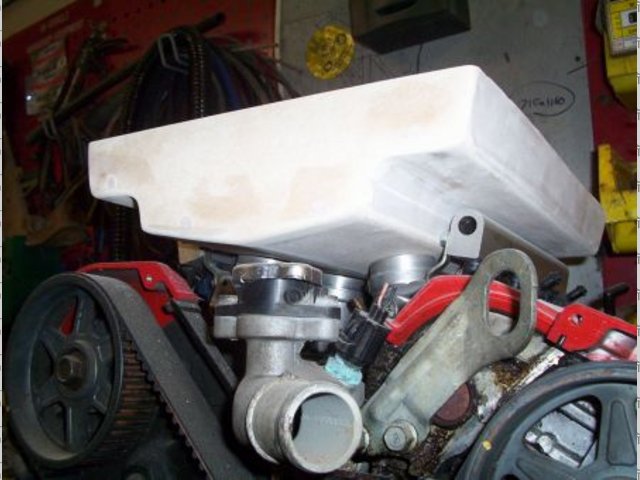
Fitting started
So it then fits like this
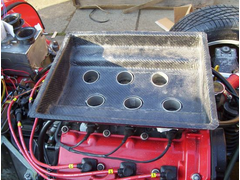
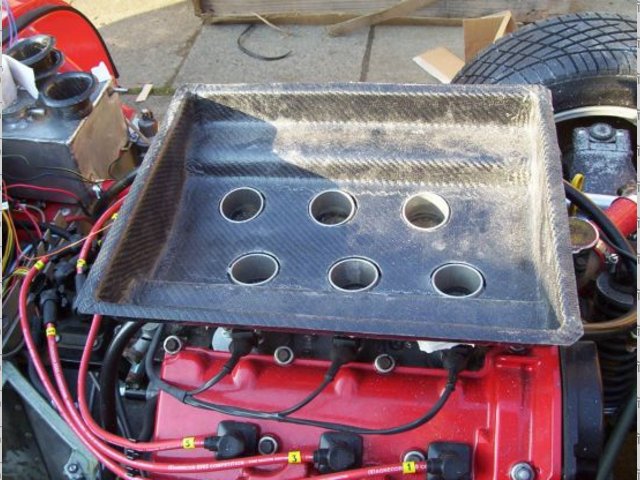
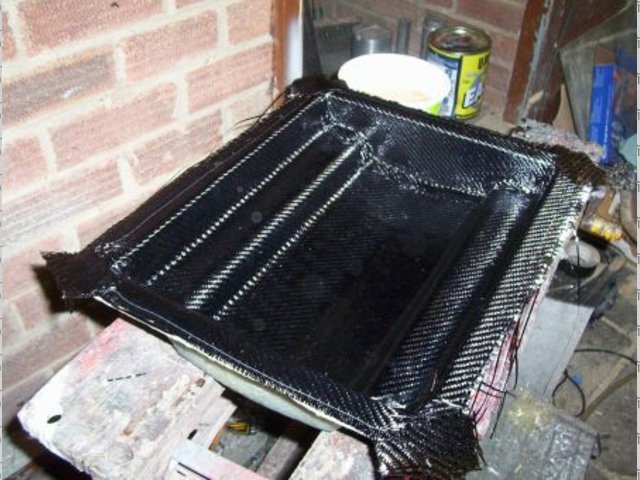
In place
The trumpets are then bonded in place with a little P40 (with a spot of black fibreglass pigment added to lose the red colour) , and the top of the
box trimmed to fit the bonnet bulge . A hole was also cut in the front of the `box , a piece of ally sheet cut and rolled to shape and taped in place
, and the inlet stub molded in place to take an inlet tube (from a Mondeo !) fitted , to fit an air filter on .
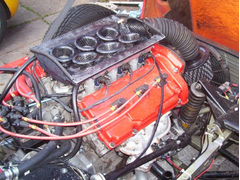
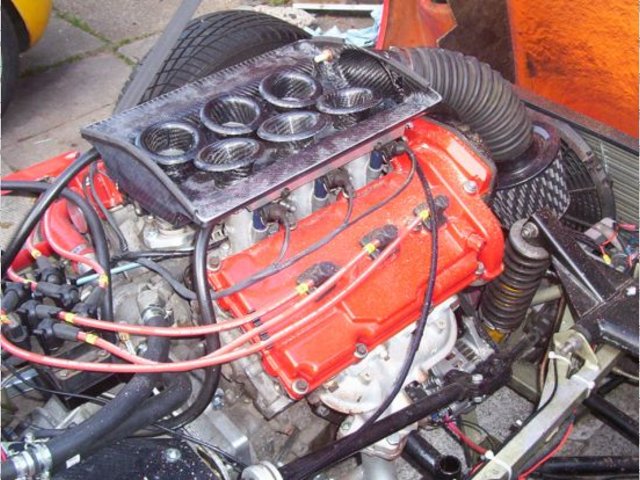
Trimmed to shape
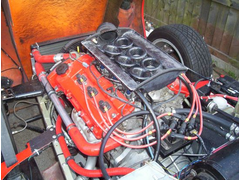
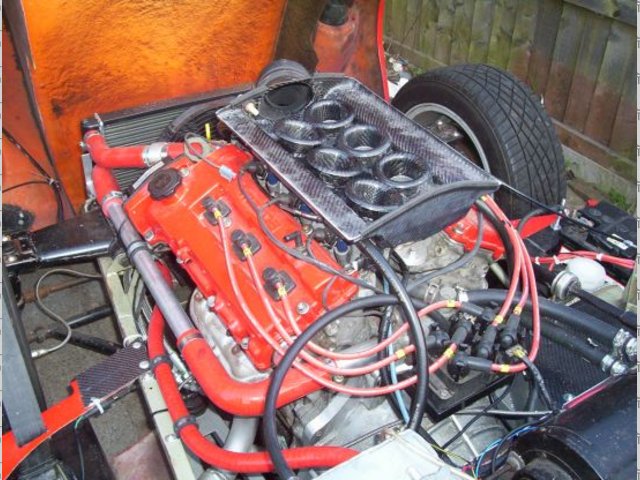
rear left view
It seals to the bonnet so no lid is needed
[Edited on 14/7/10 by clairetoo]
scootz - 14/7/10 at 08:11 PM

smart51 - 14/7/10 at 09:29 PM
Nice job. I like the idea of sealing to the bonnet too. You get the most headroom over the trumpets without having to have a bulge.
RK - 31/8/10 at 11:59 PM
Thing of beauty. Want to make a box for my intake? One of those pyramid shaped things only round - rectangular would work I suppose. Just to keep the
crap out of the filter really.
alistairolsen - 17/1/11 at 03:36 PM
Looks great, where the central sheet joins the ends, how did you manage to continue the strength accross the join?
Also, where did you get the carbon trumpets?
Yazza54 - 17/1/11 at 03:44 PM
You must be like the perfect woman
clairetoo - 17/1/11 at 05:11 PM
quote:
Originally posted by alistairolsen
Looks great, where the central sheet joins the ends, how did you manage to continue the strength across the join?
Also, where did you get the carbon trumpets?
Where the main `sheet' joins the ends , I make sure the edges of the first part are as good as possible , then overlap the end parts - and repeat
with the next layer .
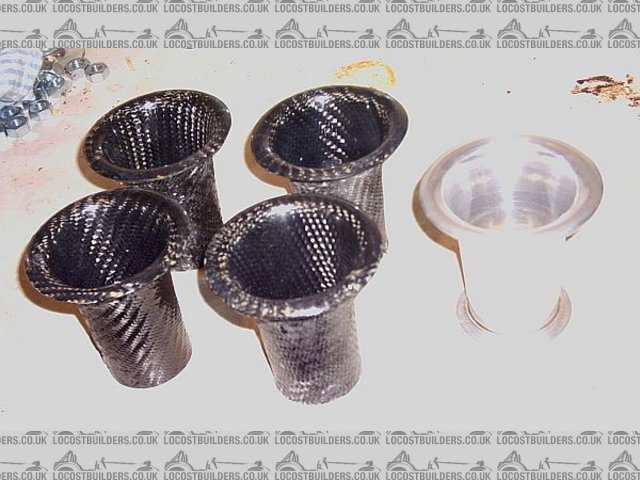
I make my own carbon trumpets - just finished a set of Jenvey-alikes for Alex (omega0684) , along with a carbon filter backplate .
alistairolsen - 18/1/11 at 02:37 PM
Very nice! What do you use to lay them up material wise and any pics of the pattern to see how you lay it out?
alistairolsen - 29/4/11 at 09:23 AM
Been thinking about resins, polyester is ok, but for a turbo inlet Id be wanted something a little more structural I think. Epoxy begins to deform at
abut 60 degree so that leaves vinylester...
Where can you get that?
iank - 29/4/11 at 10:01 AM
quote:
Originally posted by alistairolsen
Been thinking about resins, polyester is ok, but for a turbo inlet Id be wanted something a little more structural I think. Epoxy begins to deform at
abut 60 degree so that leaves vinylester...
Where can you get that?
East Coast stocks vinylester resin
http://www.ecfibreglasssupplies.co.uk/c-1006-resins-vinylester.aspx
snakebelly - 7/11/11 at 10:30 PM
a good document that outlines all the stages and an intersing project too boot:
Carbon Tank PDF


