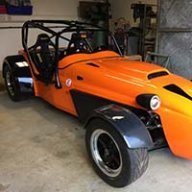
gixermark
|
| posted on 7/11/13 at 10:33 PM |

|
|
Great build this :-)
|
|
|
|
|
Boltsy
|
| posted on 13/11/13 at 08:37 AM |
|
|
Ah...Looks all too familiar!
Just a quick note....I used a 13 row oil cooler on a Blade 1000rr engine and it wasn't quite big enough to cool the oil down on really hot days.
Changed it out for a 26 row and sorted! Watch that..........Looking good 
Limitation starts where the visions end - Jimmy Johnson
|
NOTE:This user is registered as a LocostBuilders trader and may offer commercial services to other users
|
Rob55
|
| posted on 2/12/13 at 12:32 AM |
|
|
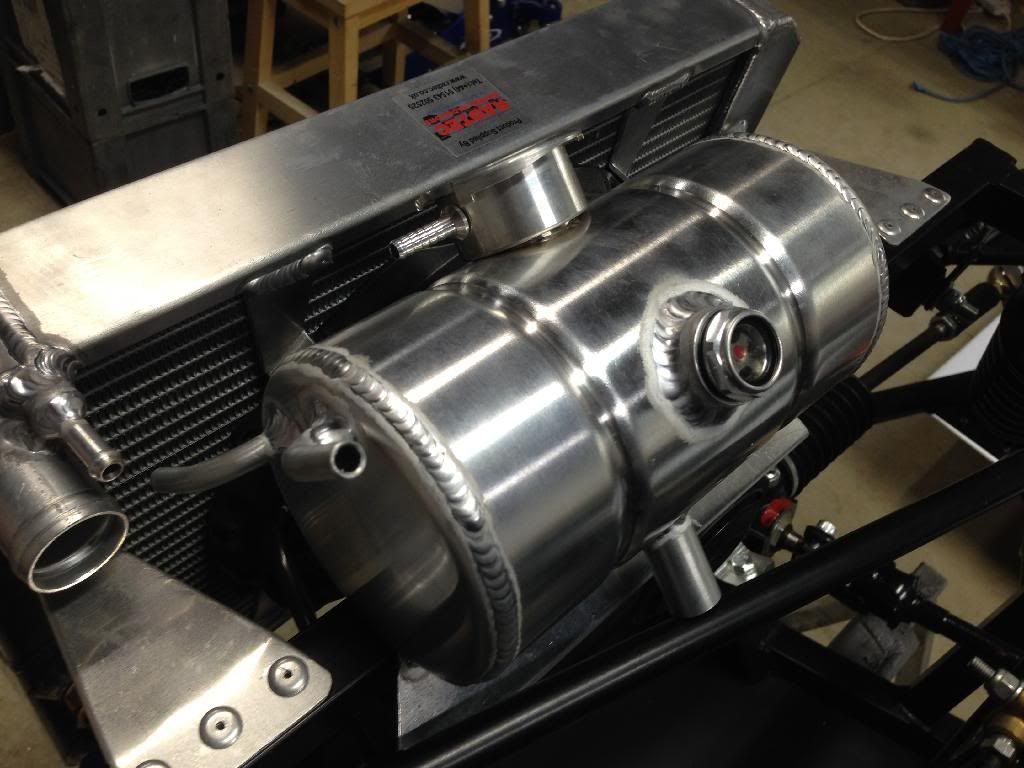
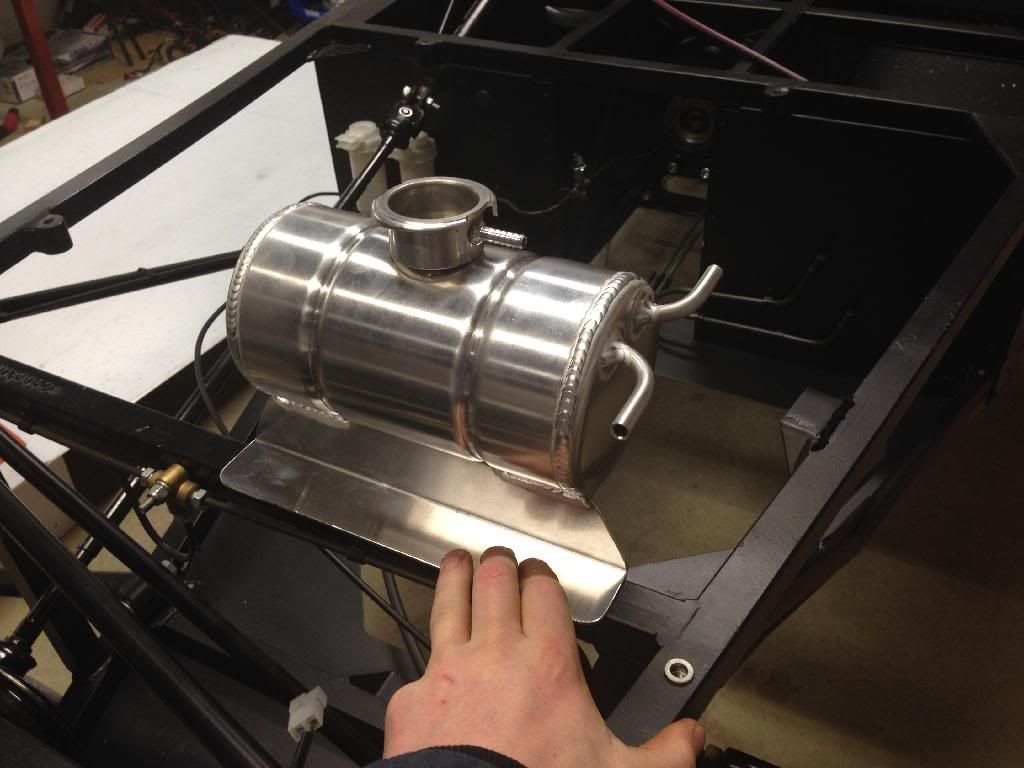
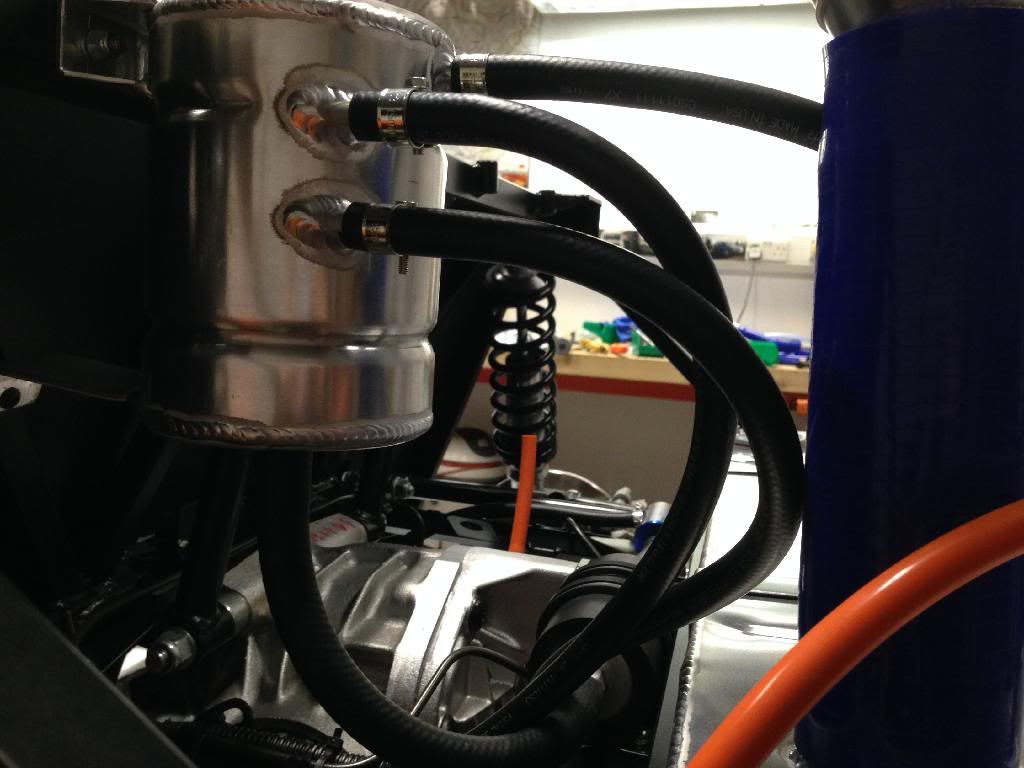
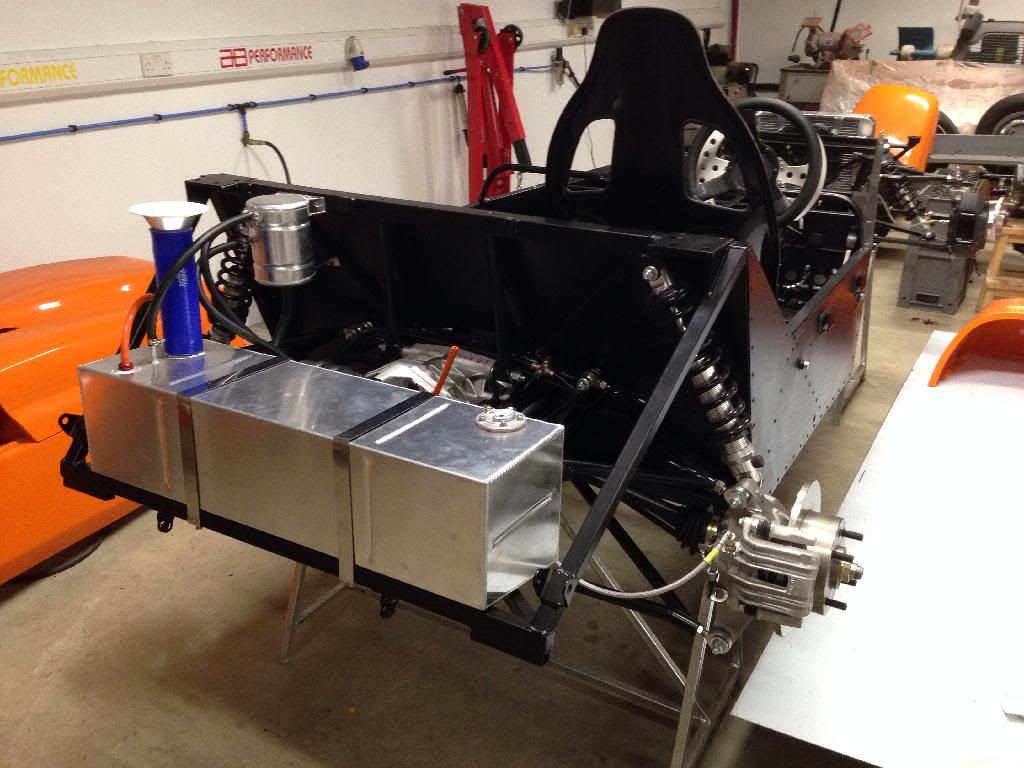
Been a while since the last instalment, thankfully progress has been fairly good. My consignment of alloy tanks arrived from Alloy Racing
Fabrications, again all top quality and made exactly to my spec. I was particularly delighted with the swirl pot, which fits perfectly where I had
envisaged it should go.

Oil Catch tank made to suit the angle of the scuttle panel
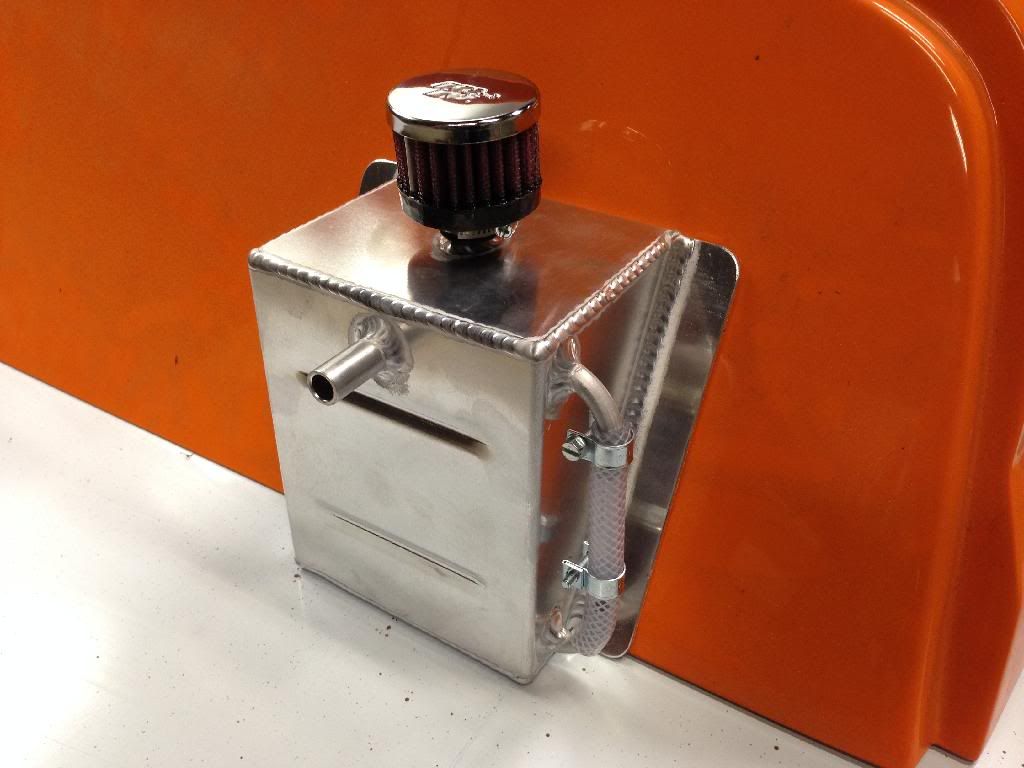
Header bottle with sight glass and pipework tailored to suit
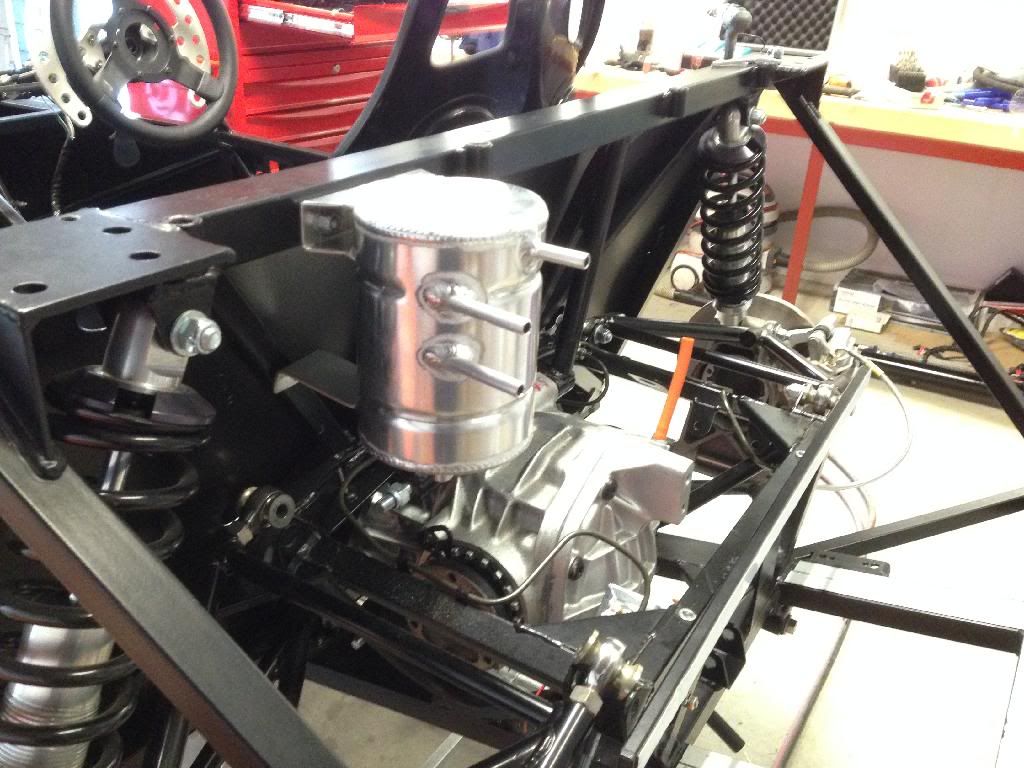
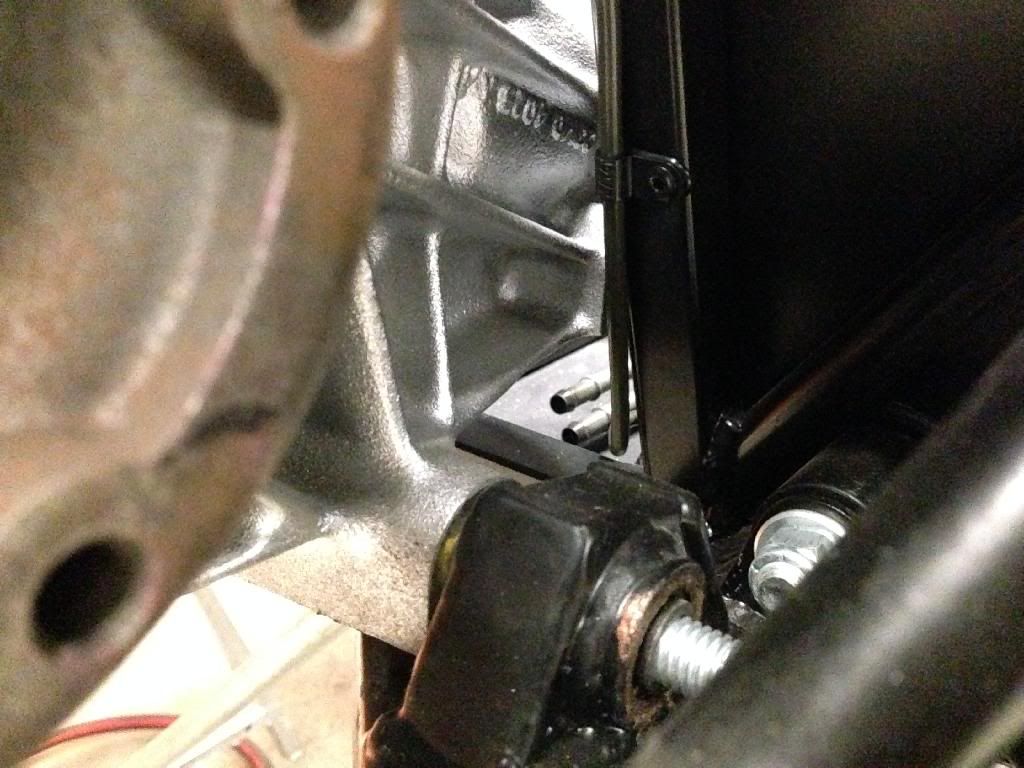
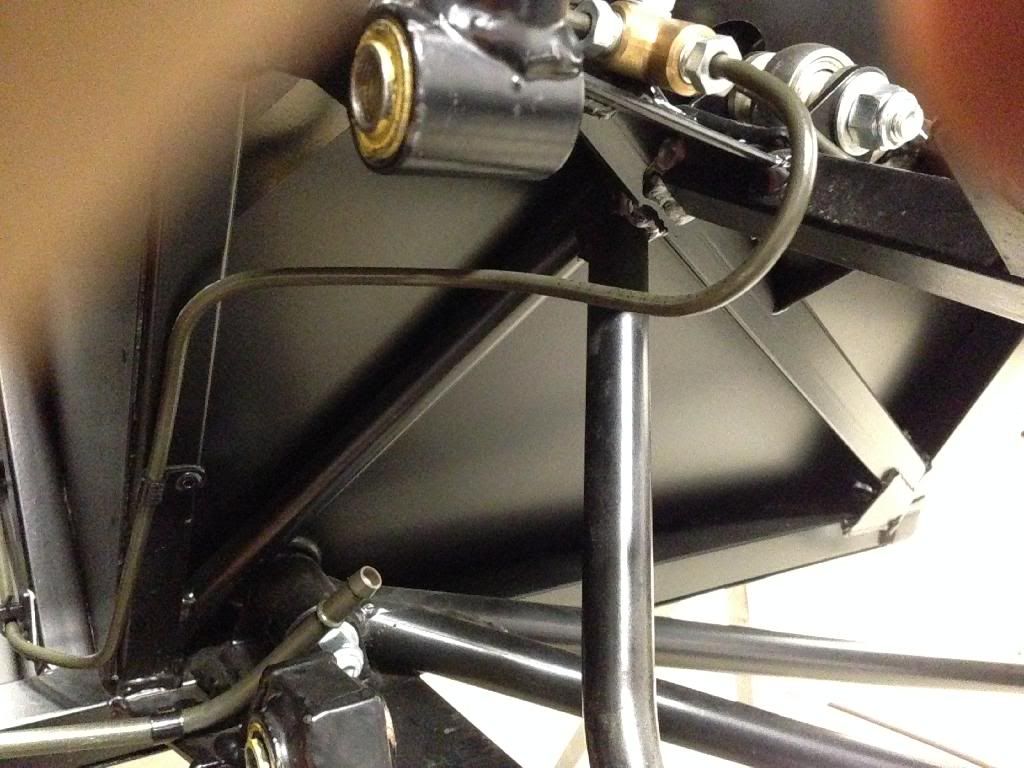
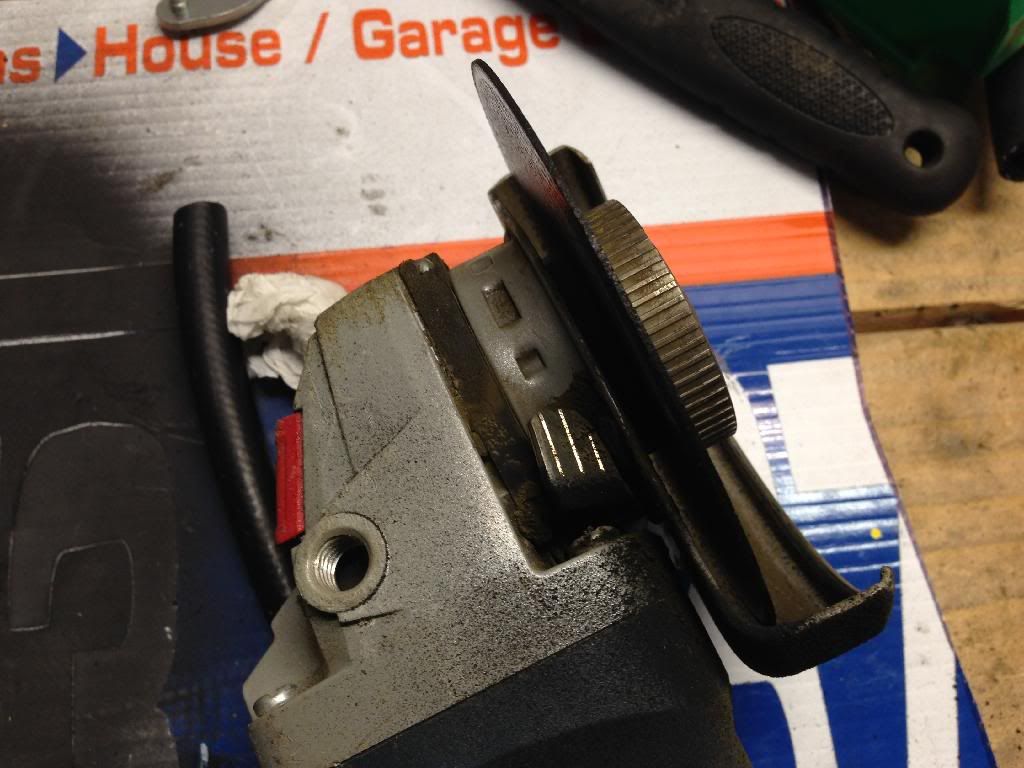
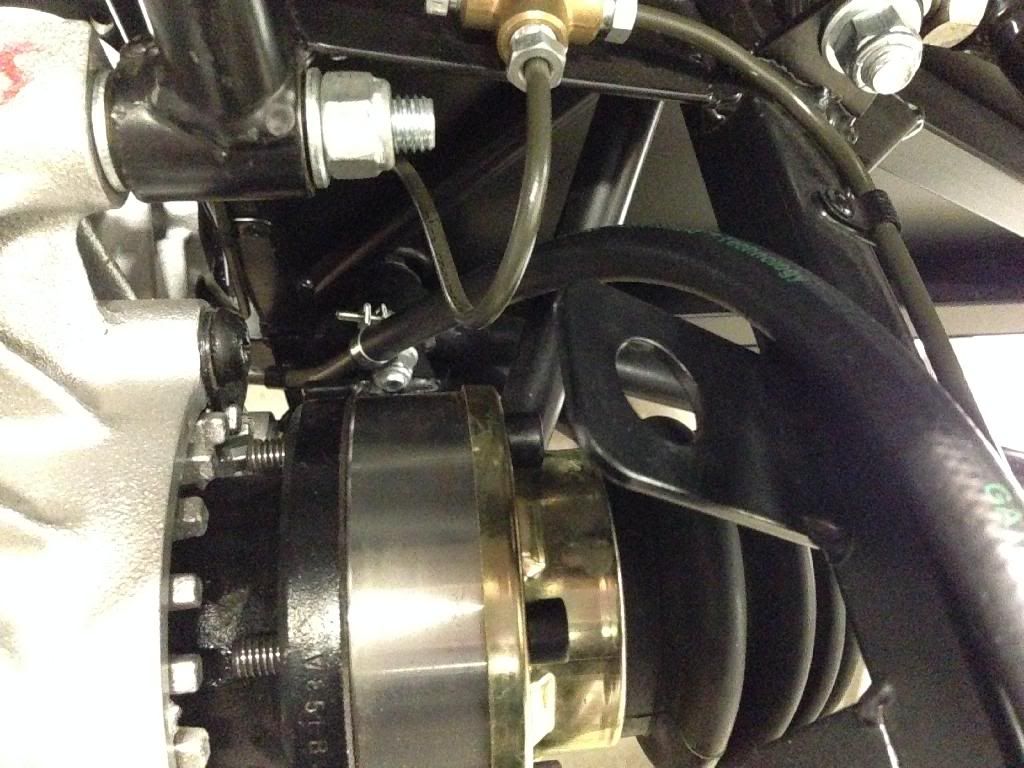
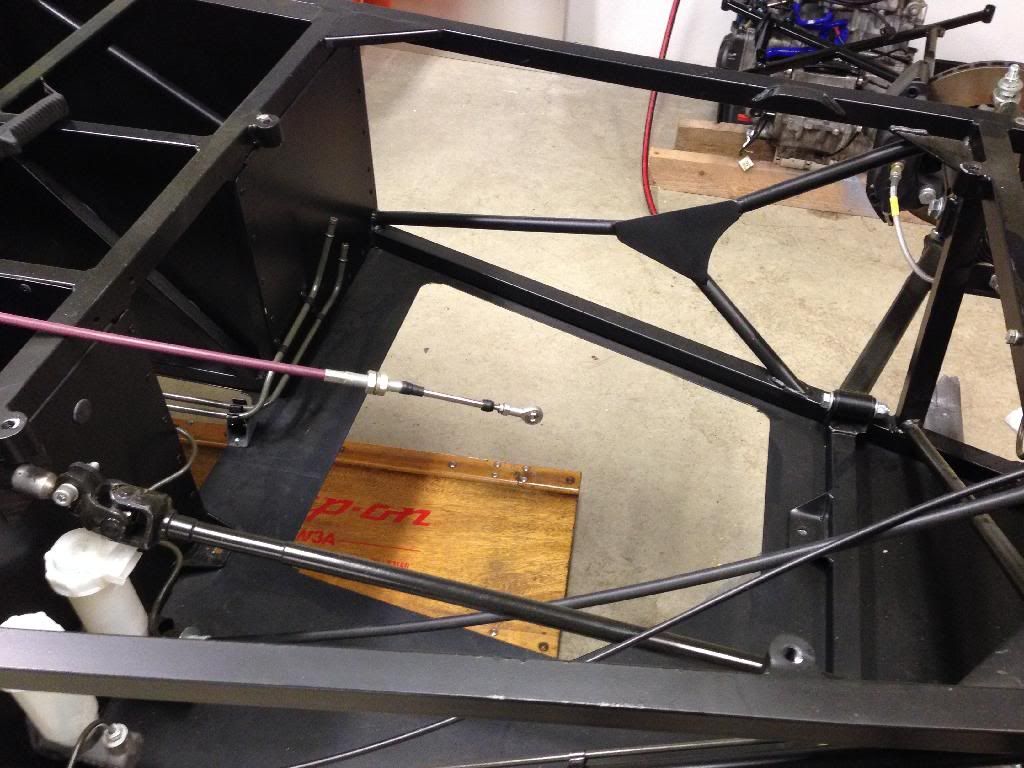
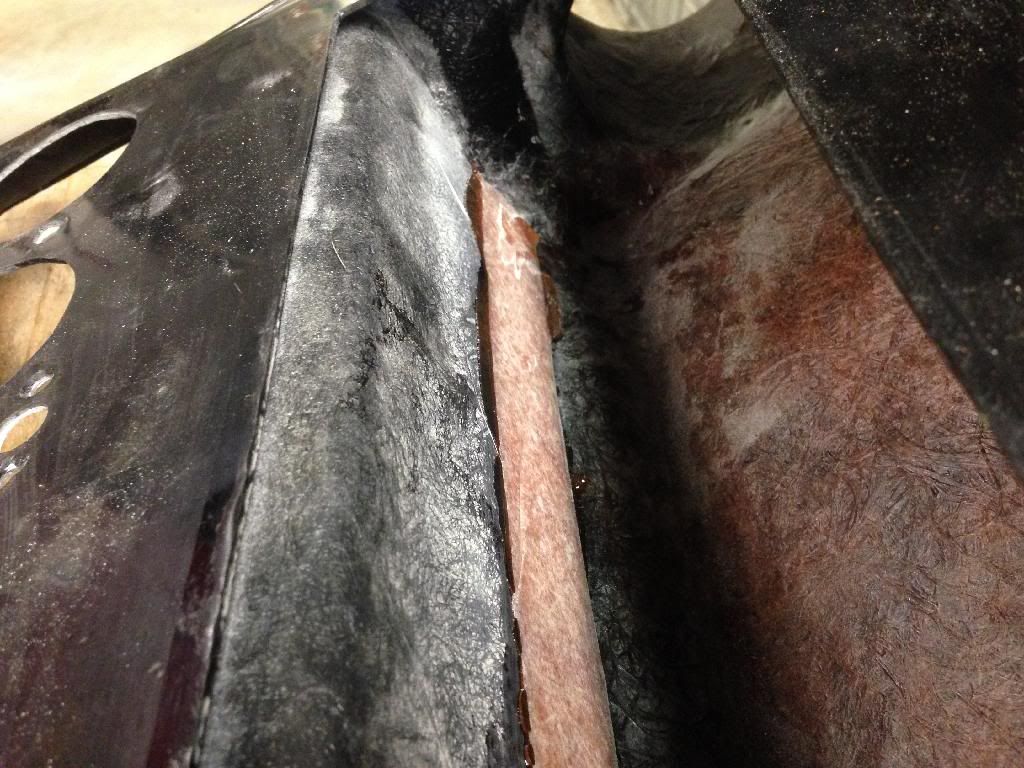
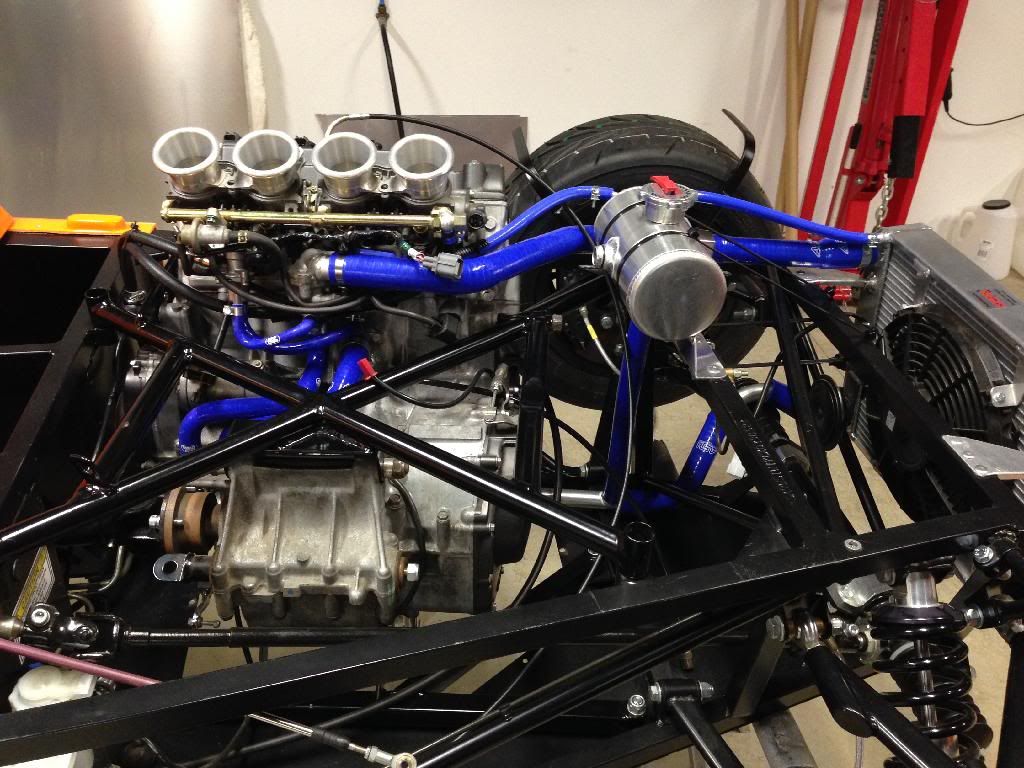
Anyway back to the work and on to a job I have been putting off, the solid fuel lines. These are 5/16" steel pipes and not the easiest thing in
the world to bend, though thankfully my cheapie pipe bender was up to the job and helped me form some decent looking pipework. The main problems were
two fold, firstly there are a few tight spaces and obstacles to avoid (namely- diff, reverse box, engine) and secondly because the pipes are already
flared at both ends meaning they are a fixed length, so judging where the pipes would start and finish was a challenge. The other thing is that once
a bend is made, you can't undo it or it can caused the pipe to fail.
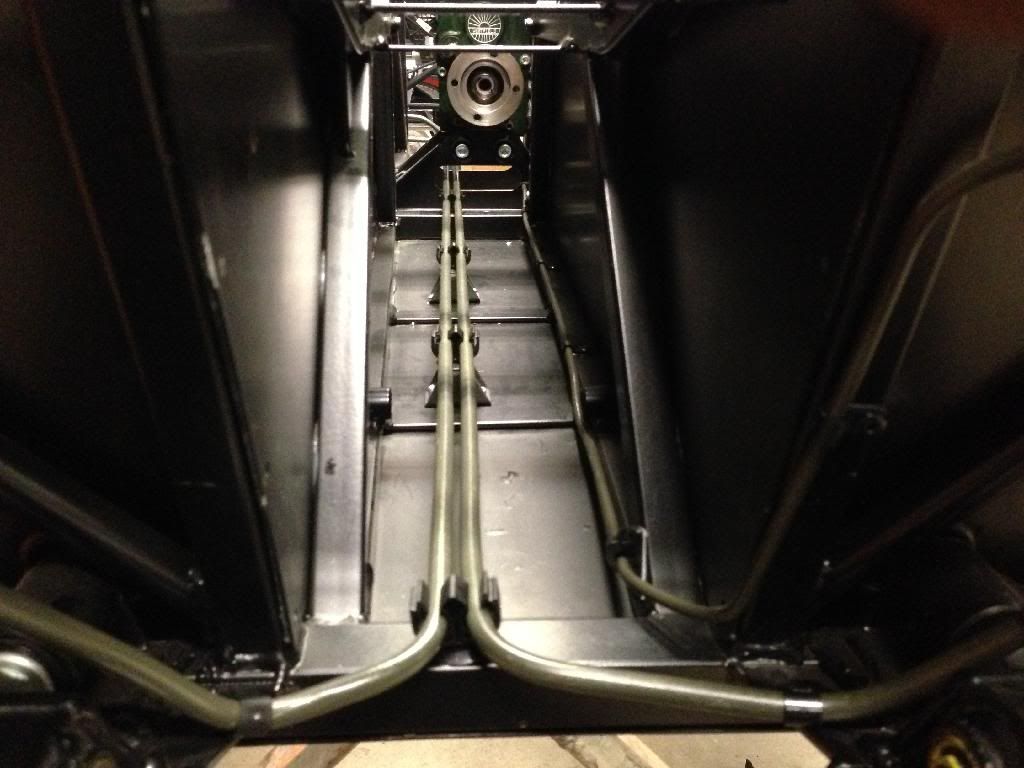
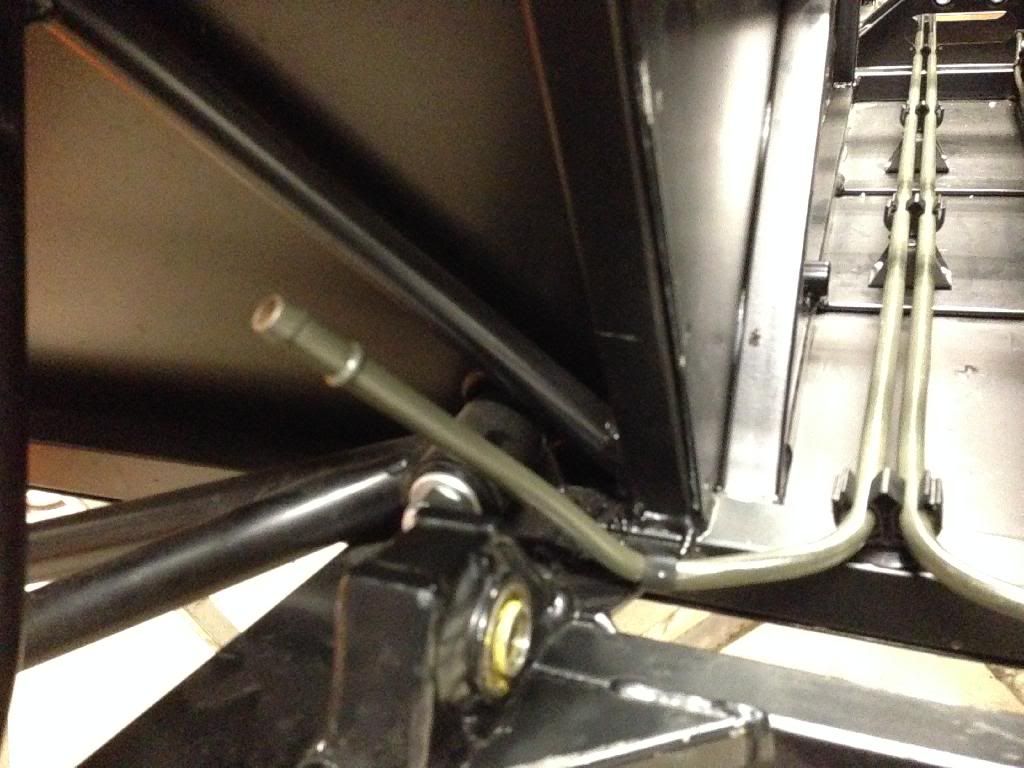
Here's an example of where the pipe needs to come through beside the diff, plus I need room to manoeuvre the diff when fitting and removing.
Anyway lots of trail fitting and careful consideration got me through and overall I'm pretty chuffed with how it turned out. Here's the
first pipe (fuel return to swirl pot).
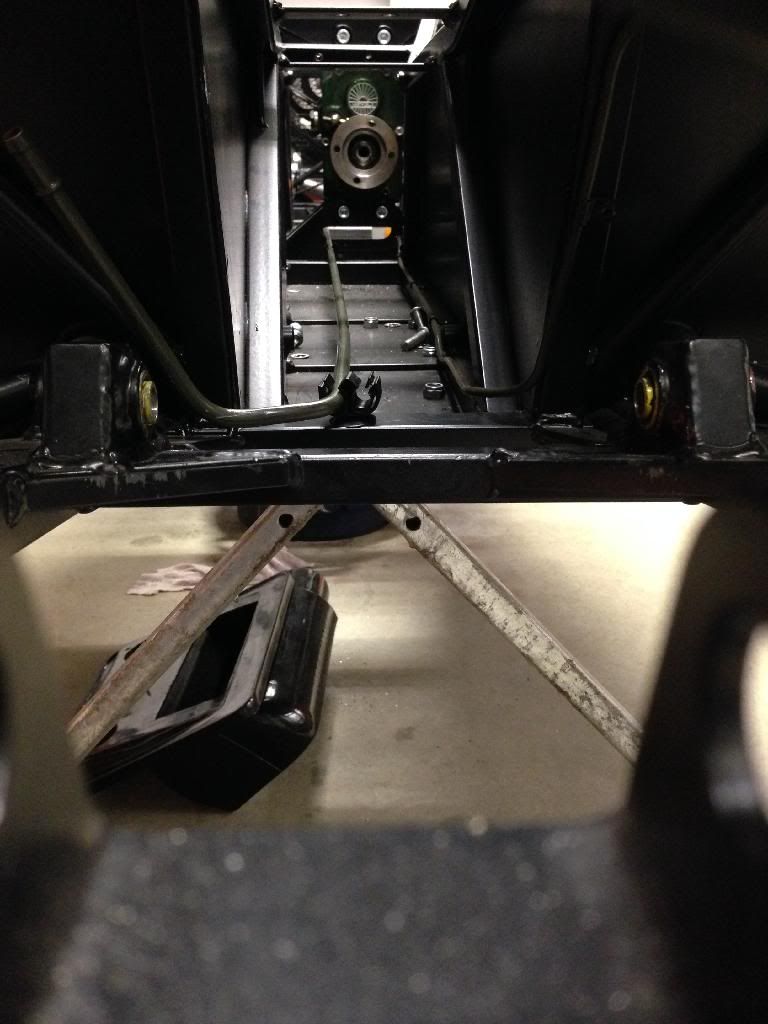
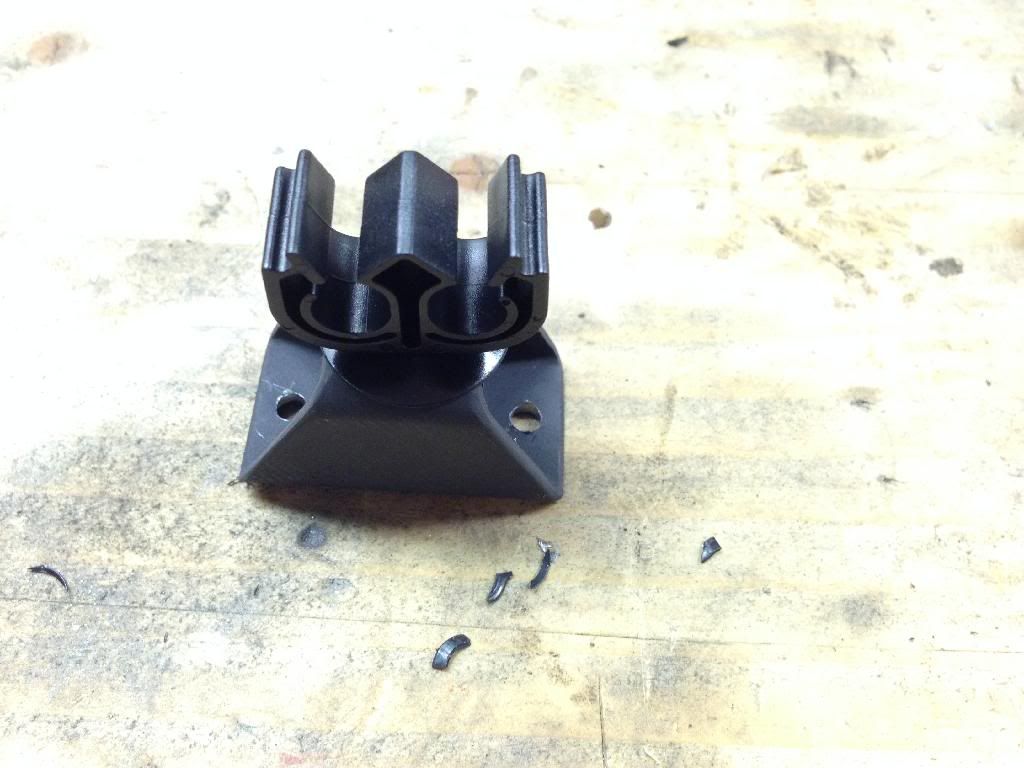
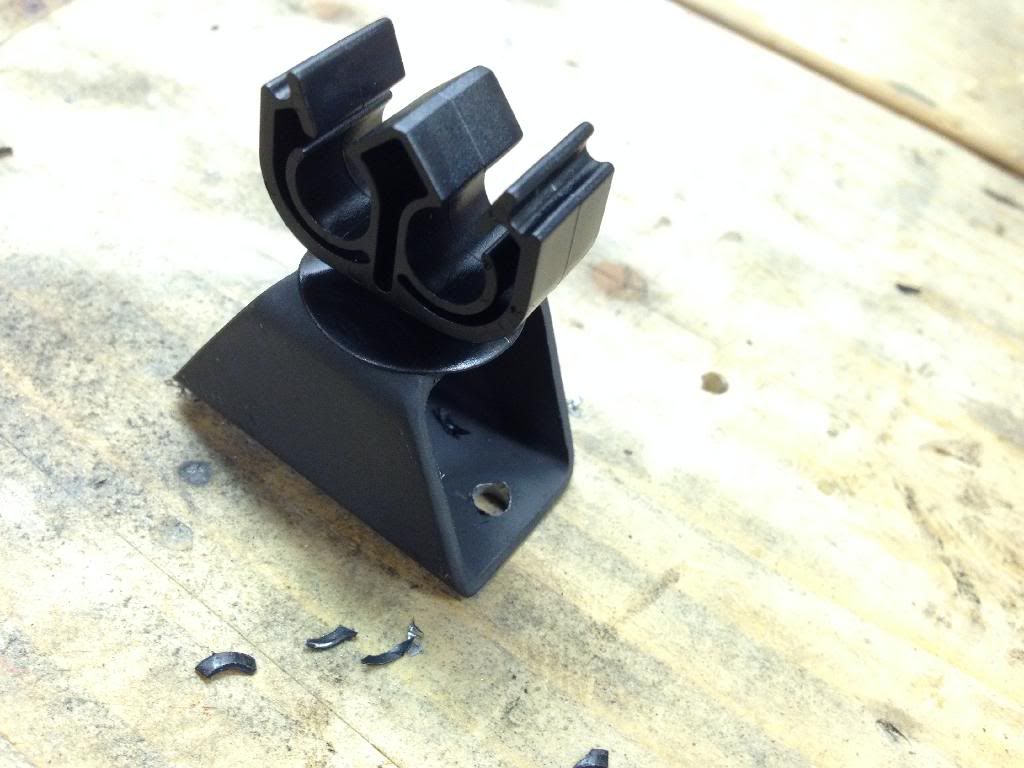
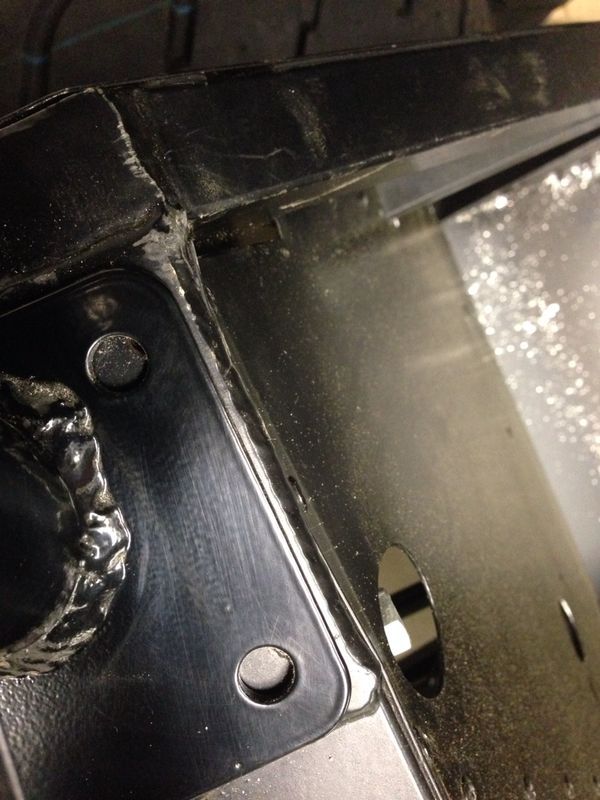
I also made up these little brackets out of box section to support my double pipe clips, and riveted them to the alu floor.

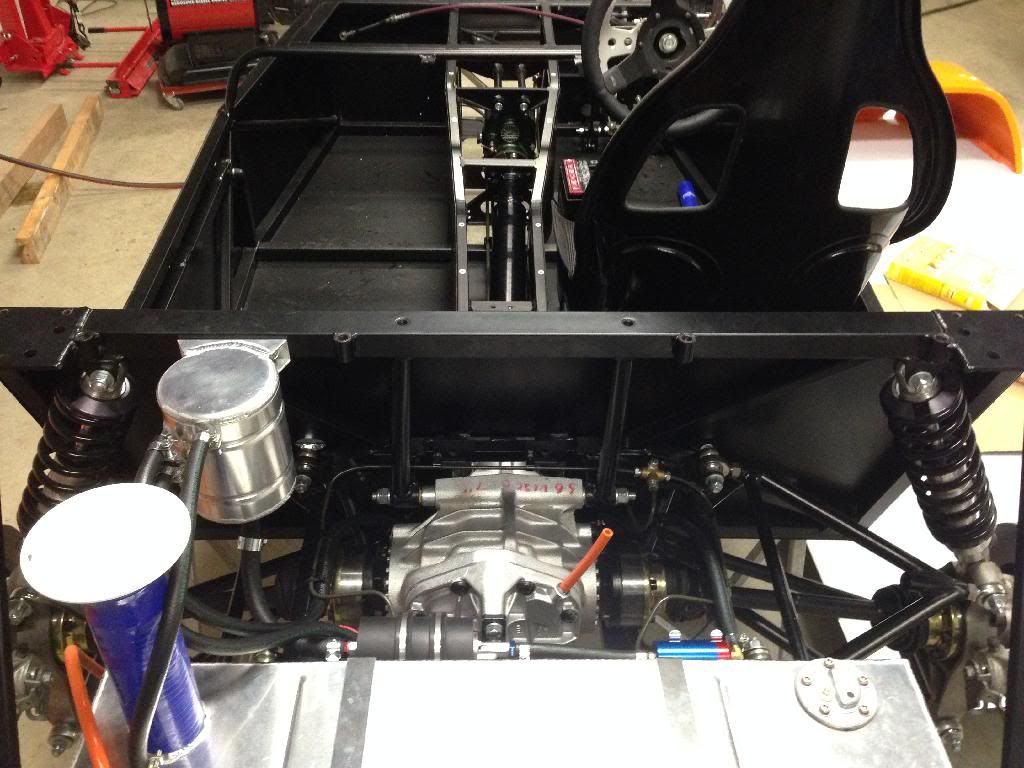
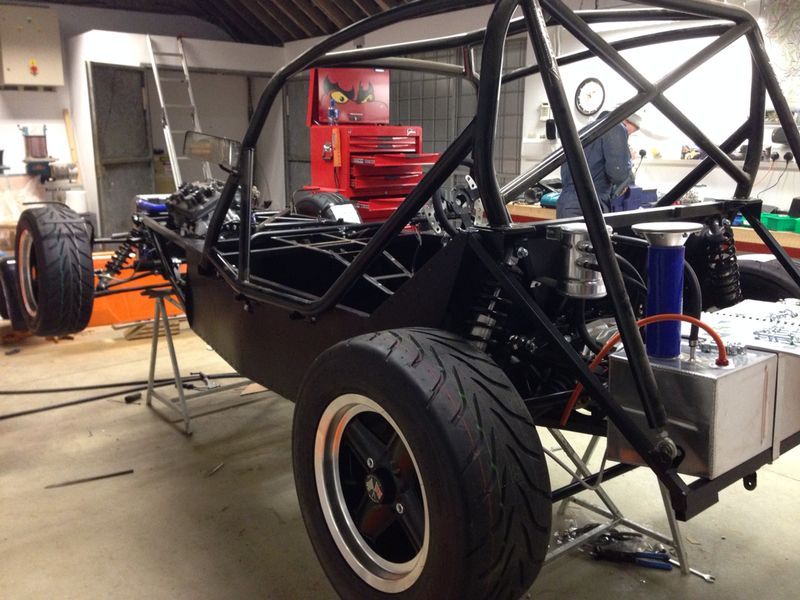
Now that the fuel lines were finished I could start to bolt things on permanently!! So first off was the diff, followed by the drive shafts.
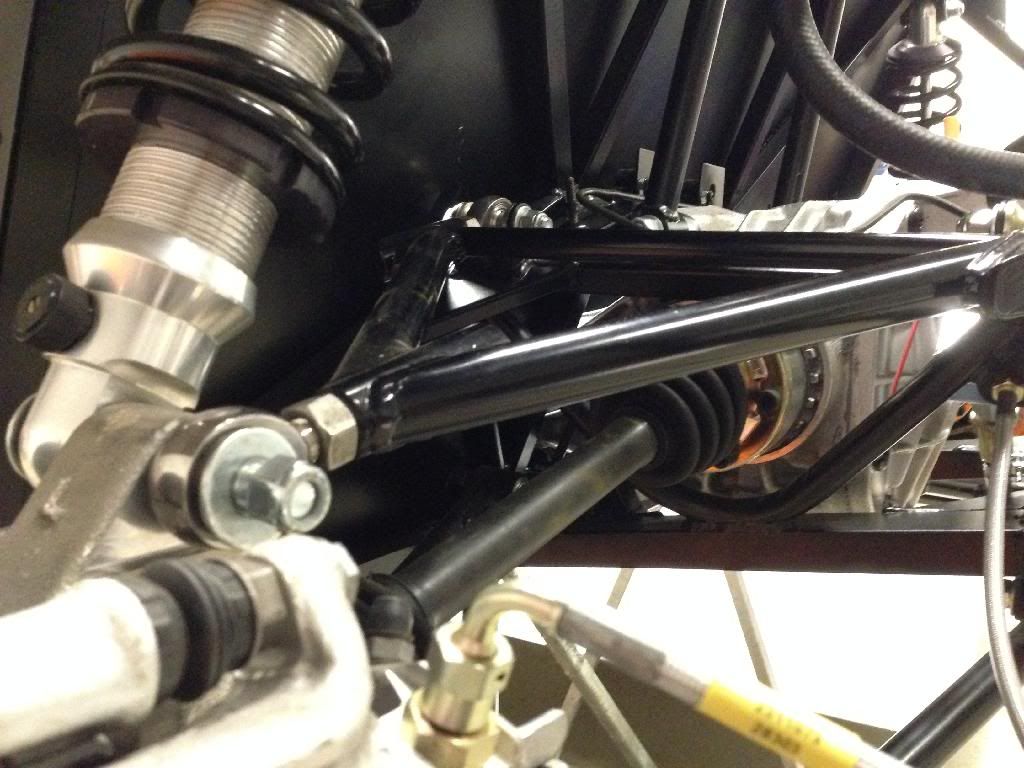
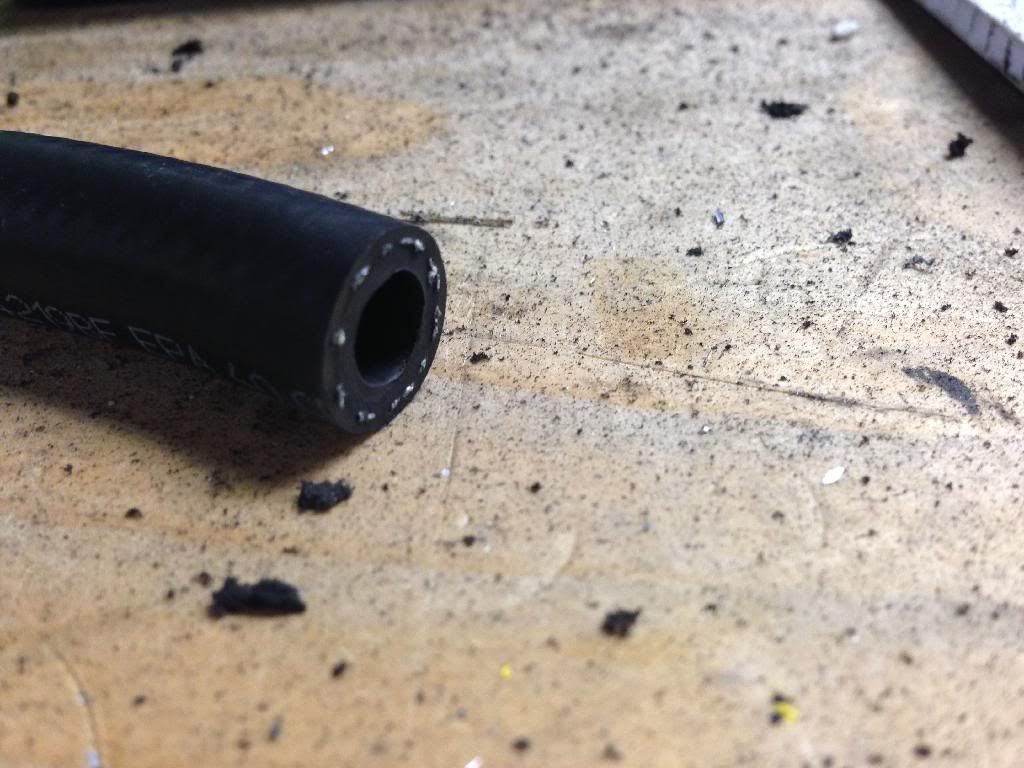
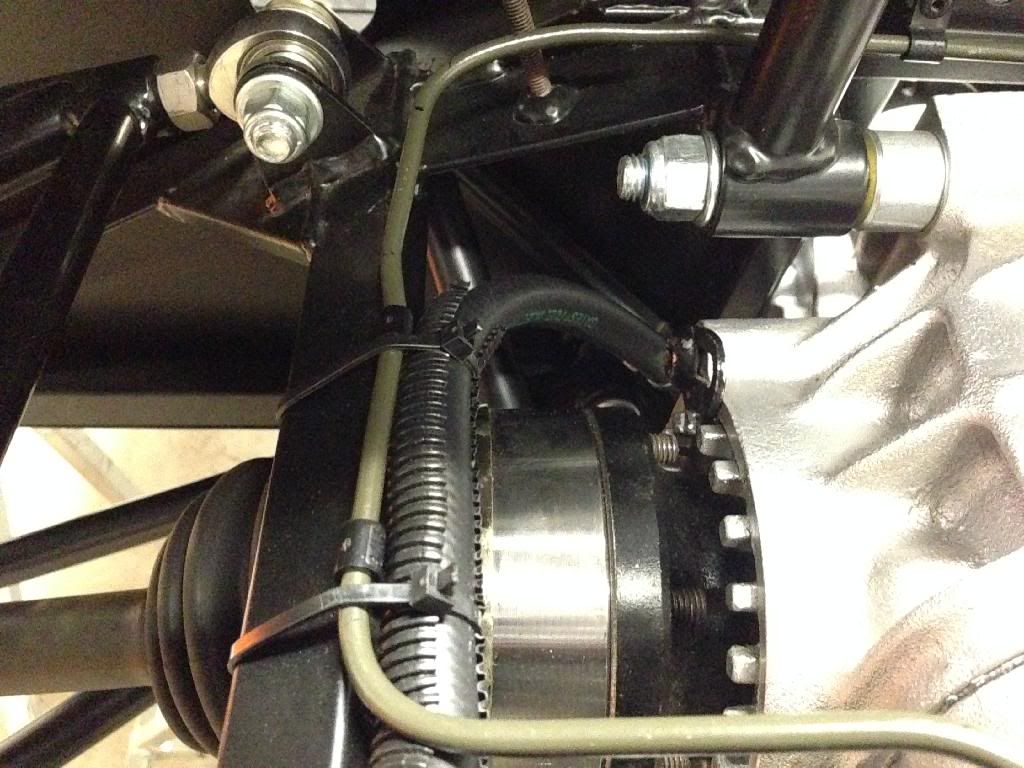
Next up was the flexible fuel lines, filters, pumps and tank. Basically the whole rear end setup. First up a couple of little tips for anyone out
there in a similar position, flexible hose can become quite hard when its cold and mine came on a reel which meant it wanted to stay tightly curled
up, so a quick soak in hot water soon made it more supple and easy to work with.
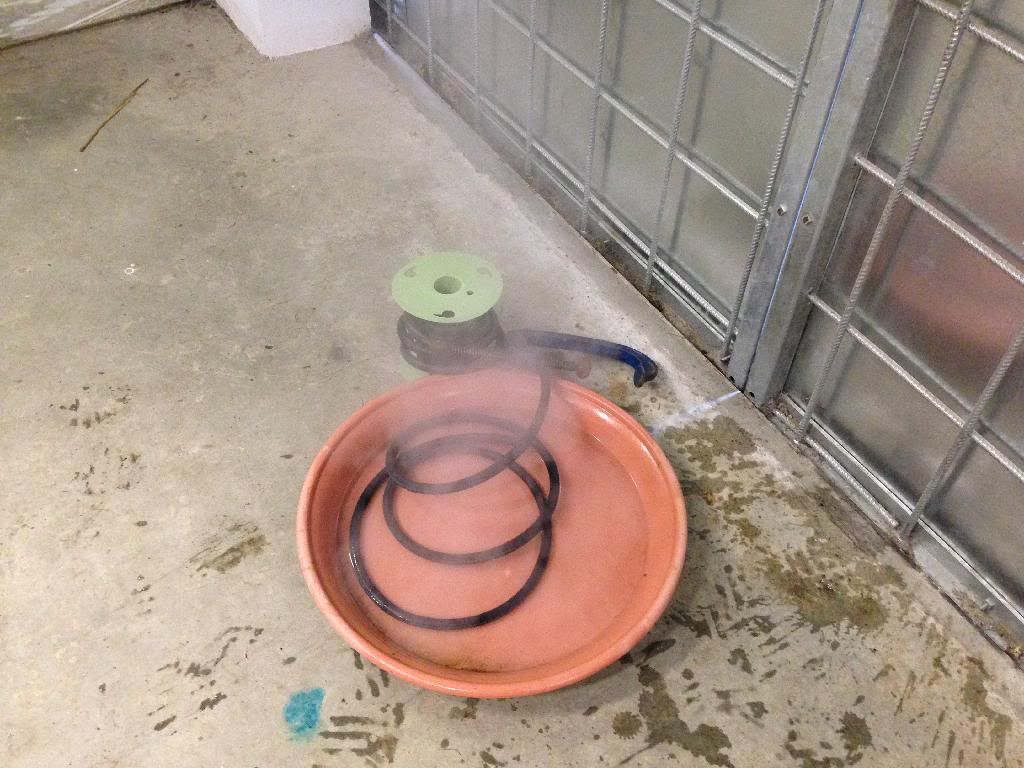
Then when it comes to cutting lengths, the skinny disc in your grinder makes a nice clean cut:
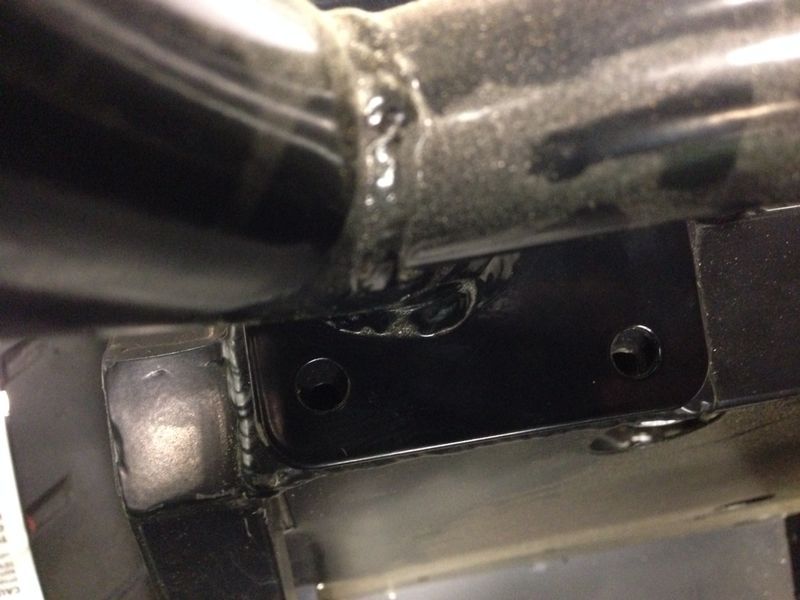
High pressure pump and filter mounted above the diff. In this pic you can just see them and behind them the bar bolted in to save the fuel tank from
being punctured by the rear suspension arm bolts in the event of an accident:

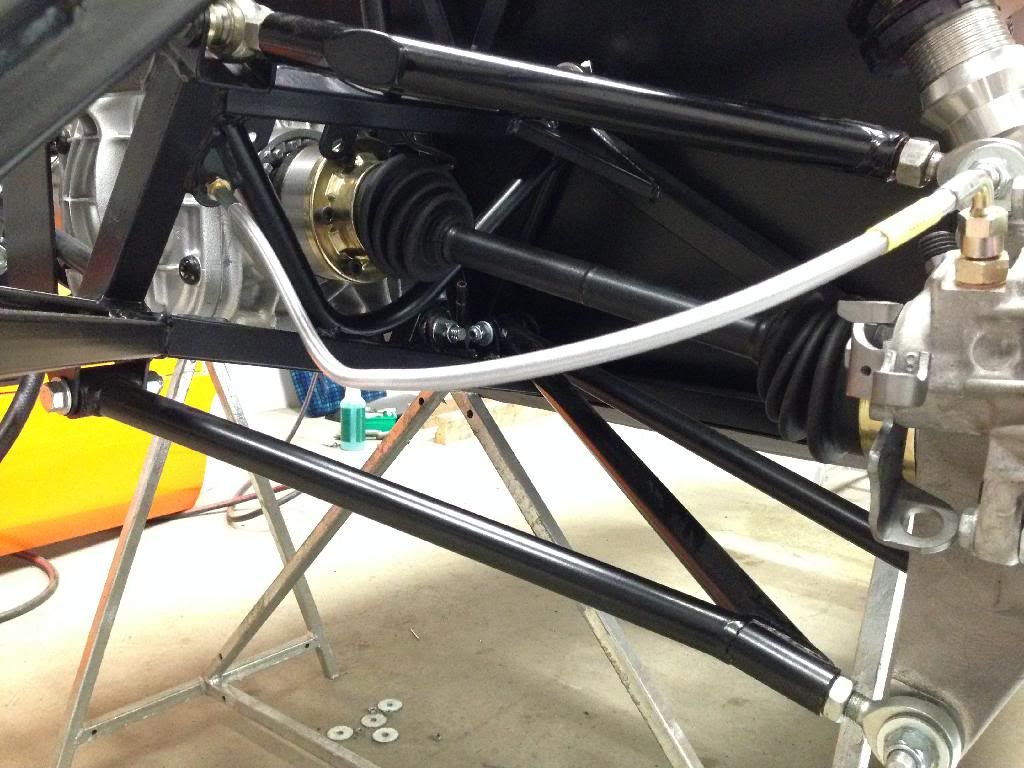
Better pic of the pump, filter, swirl pot and tank all plumbed in:
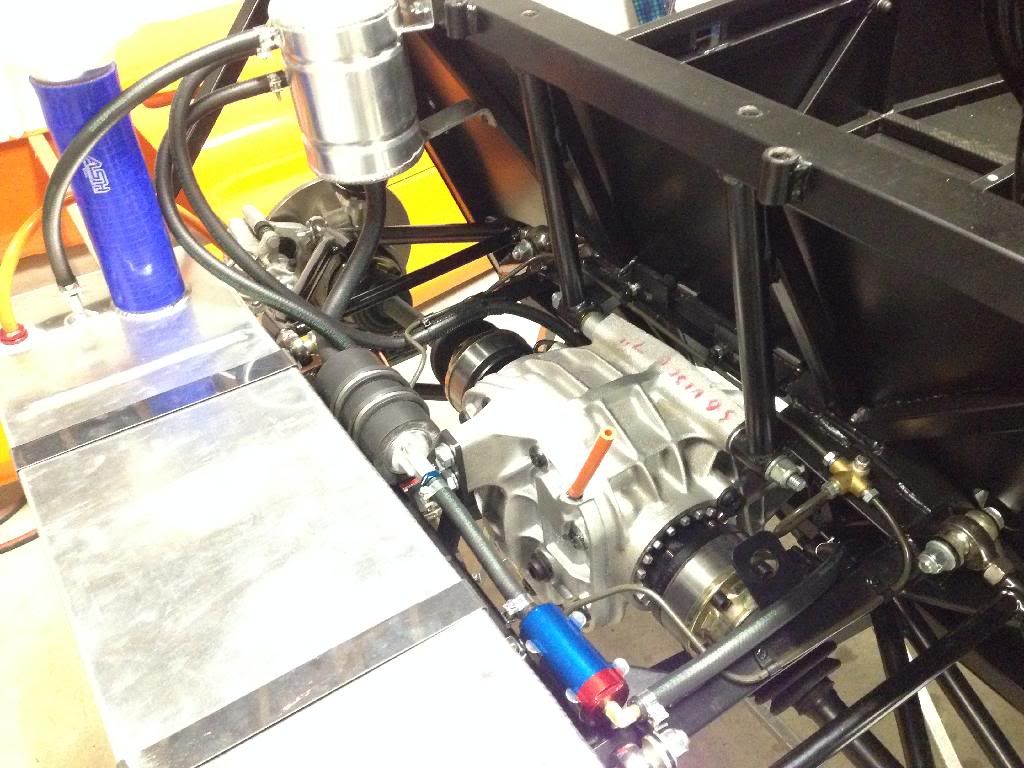
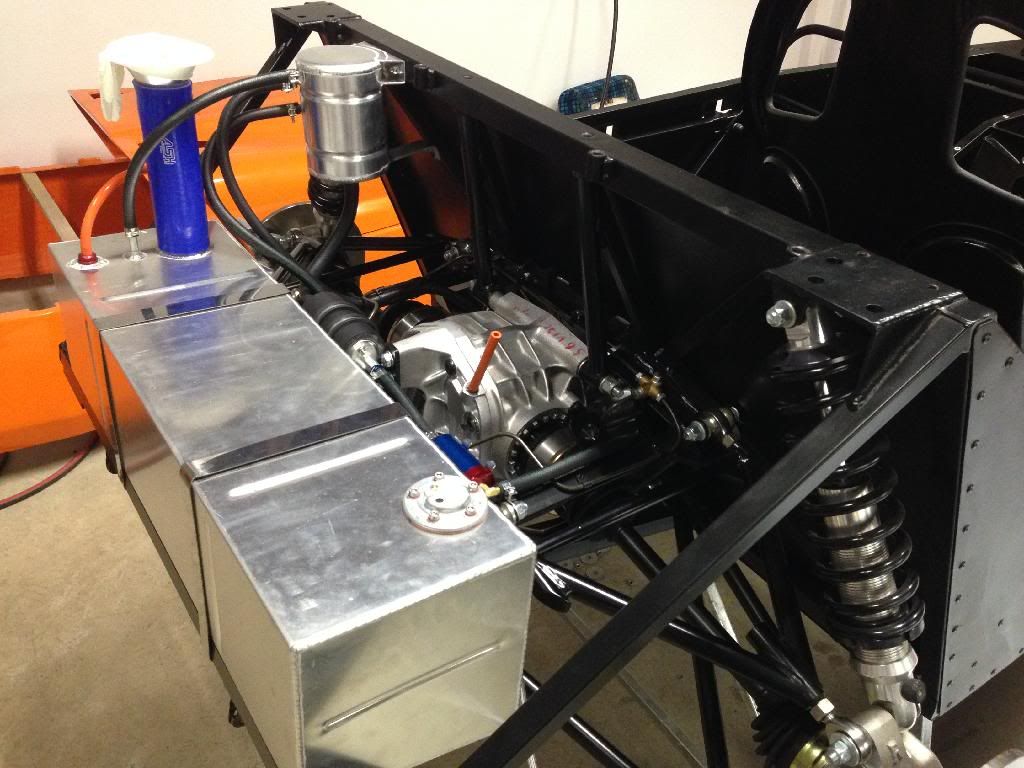
And a couple showing the route of the send/return pipes to the engine:
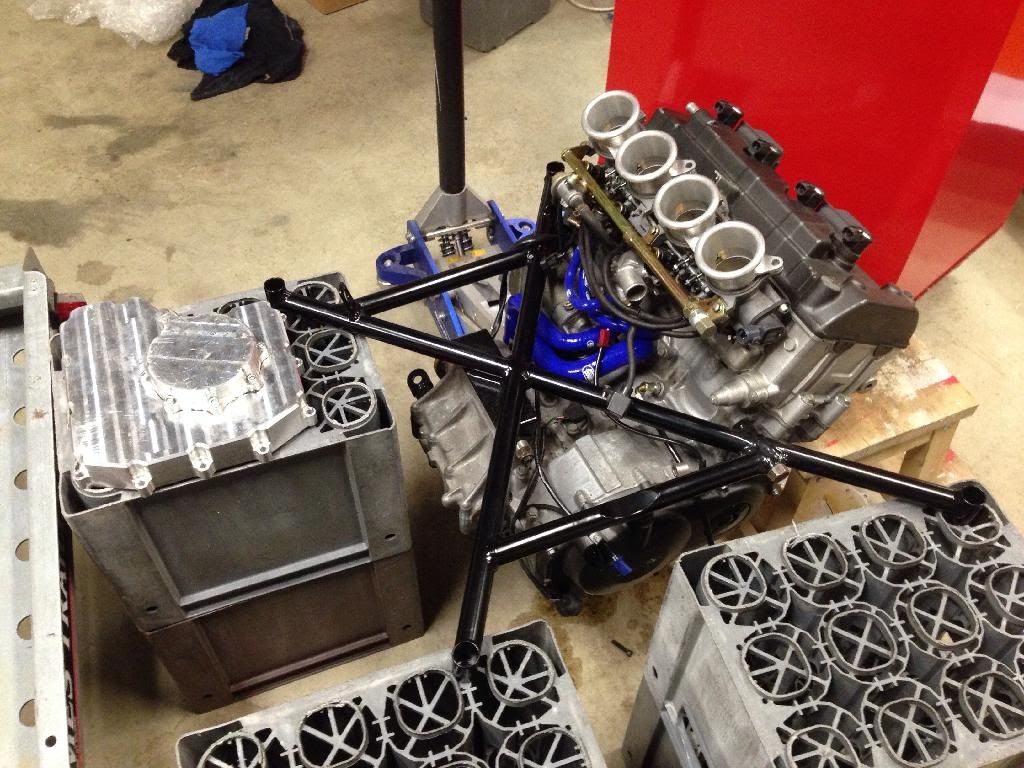
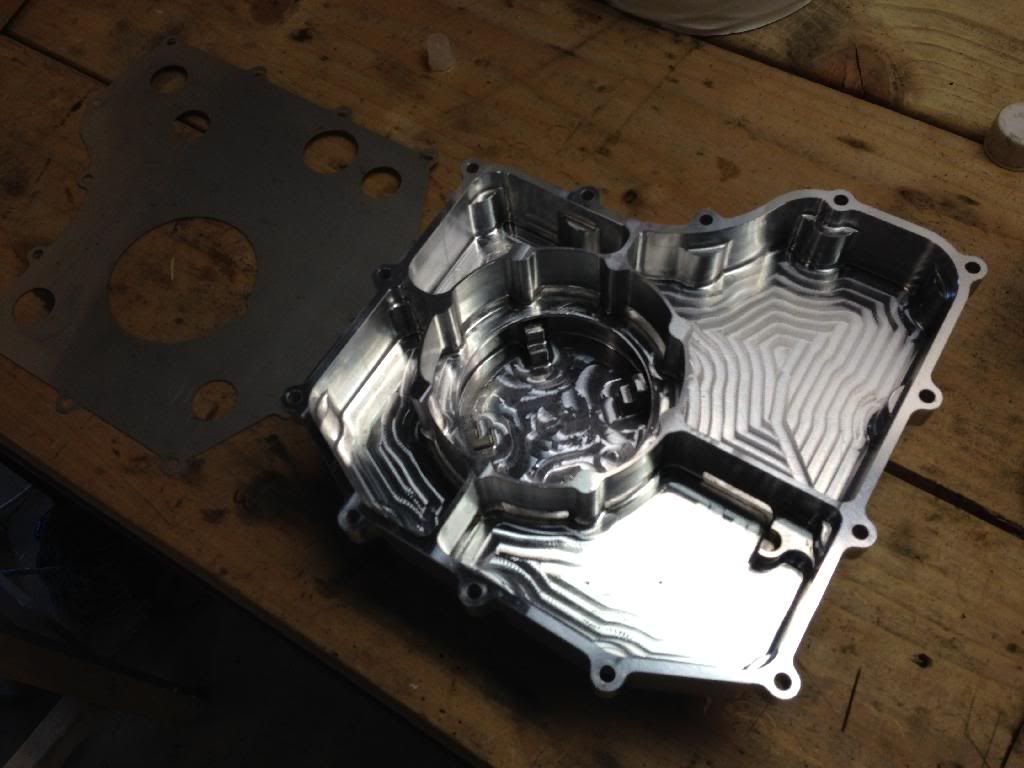
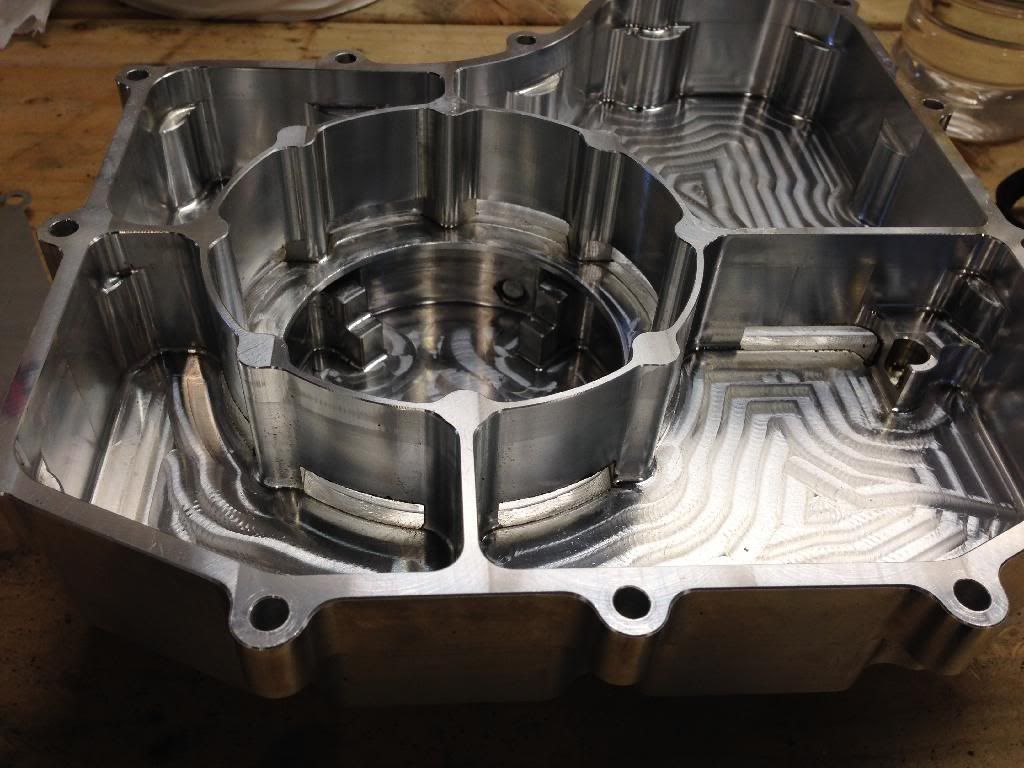
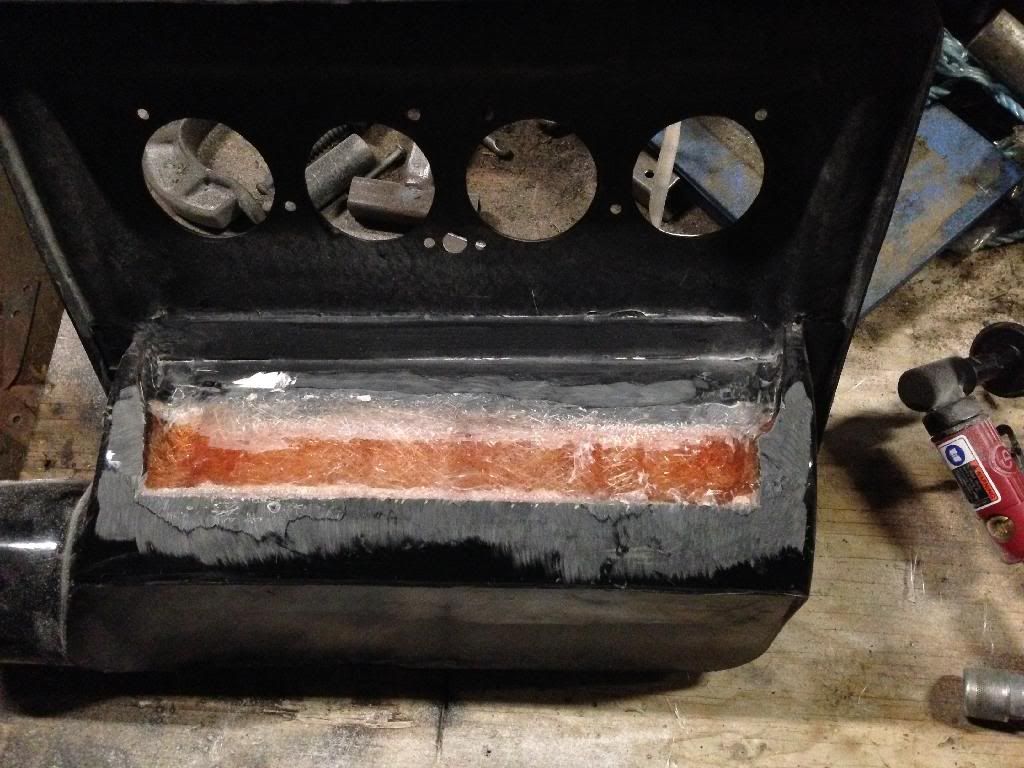
So with the rear end of the car now complete I turned my attention to the sump which I had removed from my engine to have a temperature probe welded
in, however I managed to find a drain plug adapter which will take my temp probe so I had no need to take the sump off at all..! Unfortunately the 929
blade engine does not use a paper gasket, so I had to use instant gasket, and seeing as I have a baffle plate this meant 4 surfaces to seal.
Hopefully it doesn't leak! Here's a couple of pics of the sump, its a bit of a work of art..

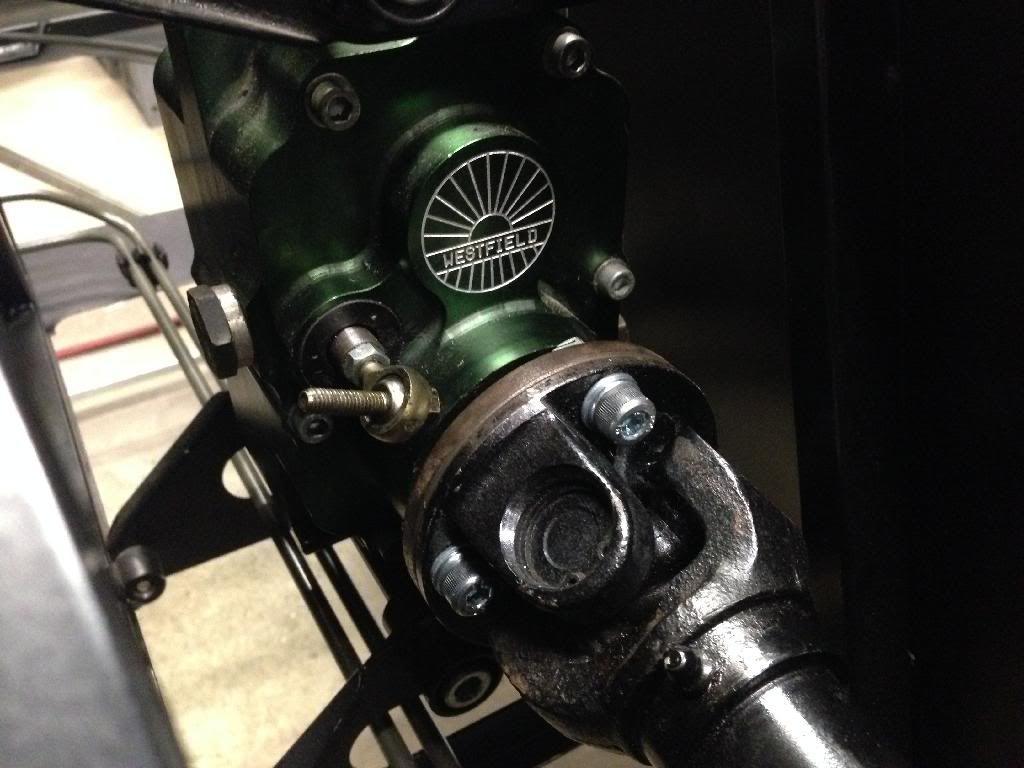
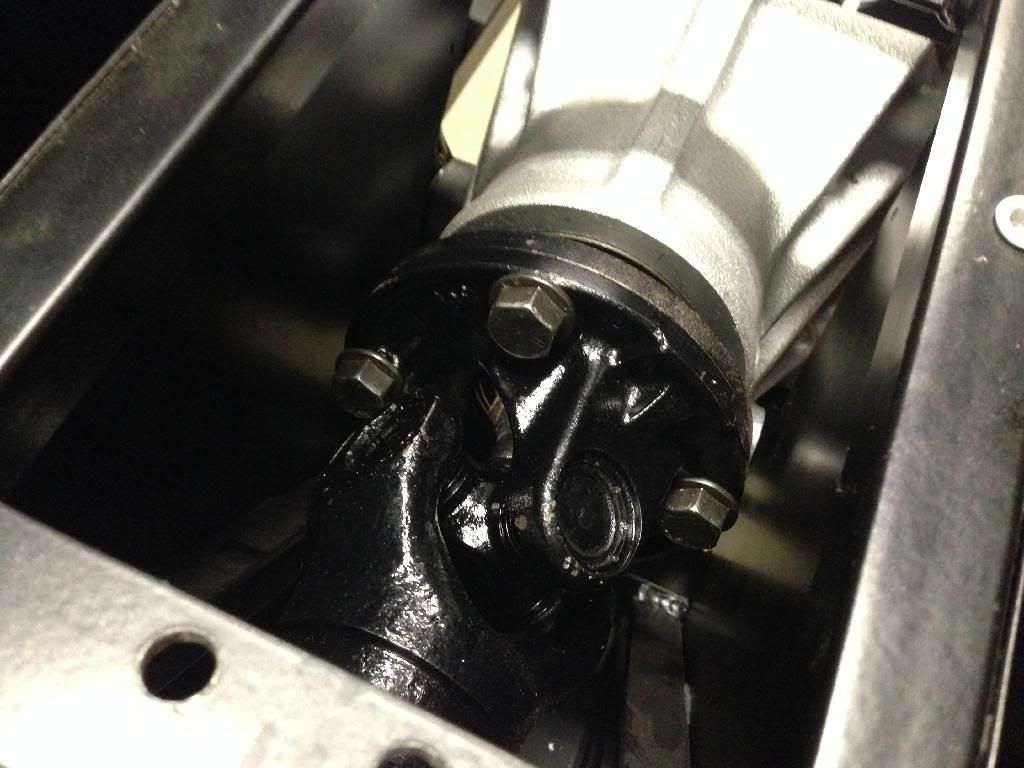
Last job for today was to fit the rear propshaft, which has now been lengthened by around 3" and a top job at that. All bolts loctite'd
and torqued to the correct values.

Final pic of this weekends work, tomorrow it'll be time to recommence work up at the front in preparation for bolting the engine in
permanently!
|
|
|
waggy
|
| posted on 4/12/13 at 05:09 PM |
|
|
Looking great Rob, really nice work, I must get a wee call over to see it some weekend. It won't be long now until you have it finished!!
Ps. If you have any spare black head rivots or any spares in fact give me a wee list and we can swap for monies!
|
|
|
hkp57
|
| posted on 5/12/13 at 11:31 AM |
|
|
Like you work so far, I just cringe every time I see those inlet trumpets not covered up while you do all that dirty work around them.
|
|
|
Pat_T
|
| posted on 6/12/13 at 06:16 PM |
|
|
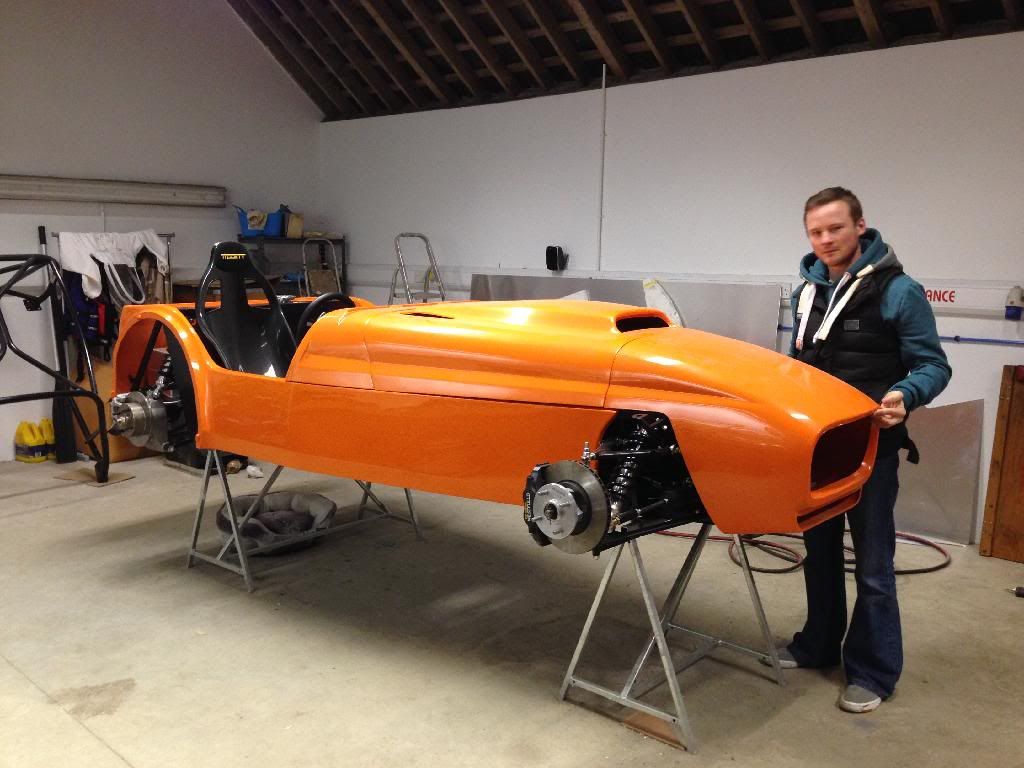
Which Tillett seat is that? is it uber light? 
I'm after something similar
www.instagram.com/patroclueus
|
|
|
yellowcab
|
| posted on 6/12/13 at 07:03 PM |
|
|
I've seen these photos somewhere before, they've been sent to me via text message via a Mr.K.Robinson
Beautie of a car - never realised you were on the forum
|
|
|
Rob55
|
| posted on 7/12/13 at 07:10 PM |
|
|
It's a Tillett B6, lovely quality and very light. Guy on WSCC does them at a good price (still expensive though!), can get you his number if
you are interested.
Hi Ollie, yeah Keith was saying he has been sending you pics Been following your own thread as well, good fun this lark...
|
|
|
Rob55
|
| posted on 15/12/13 at 11:47 PM |
|
|
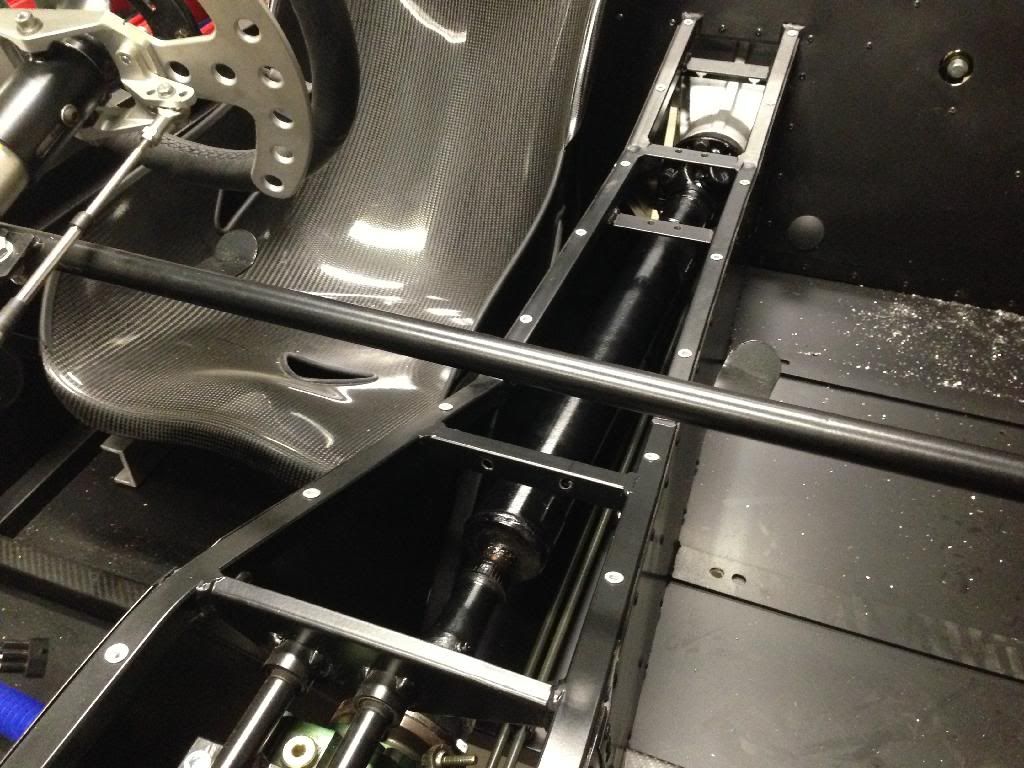
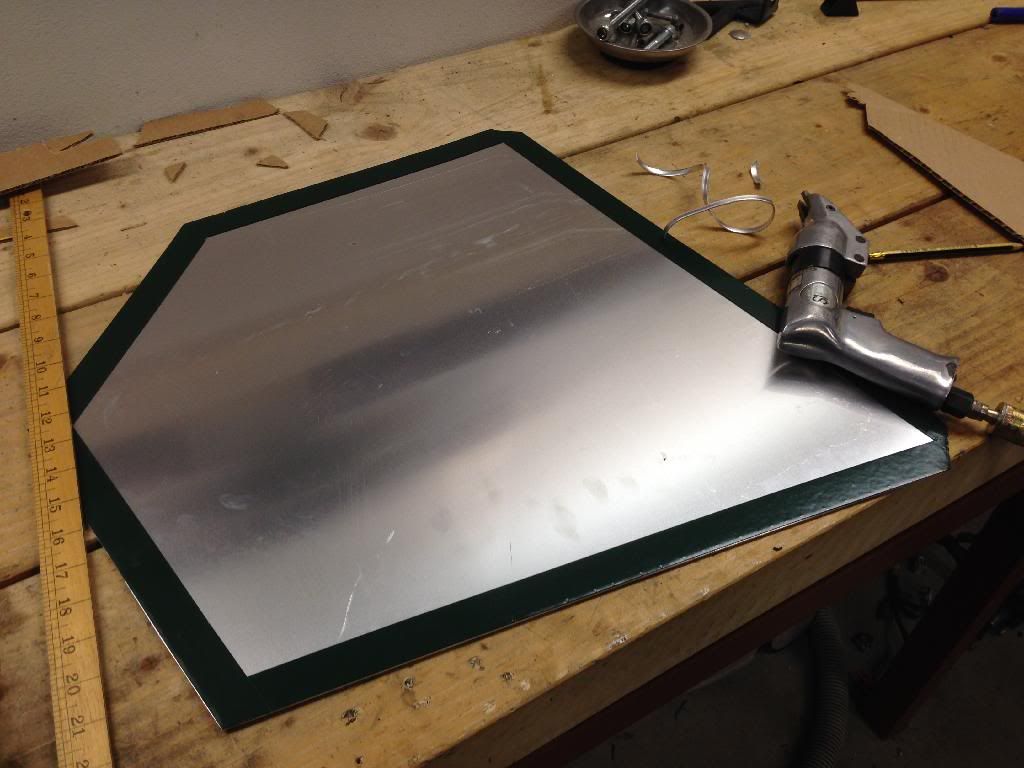
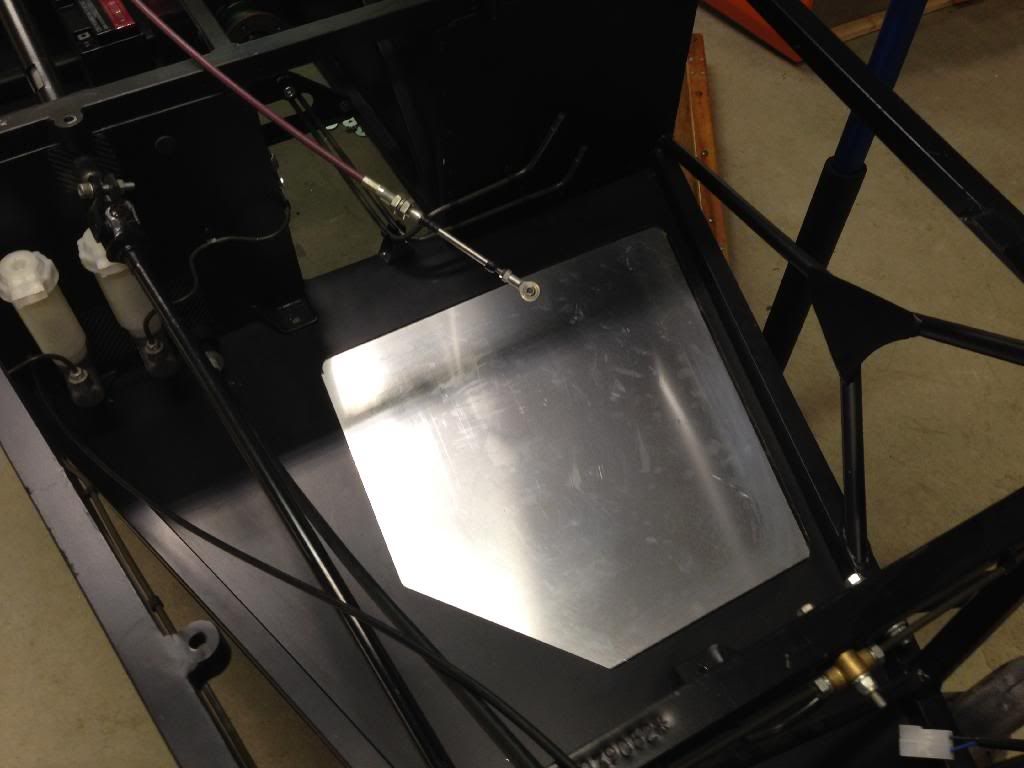
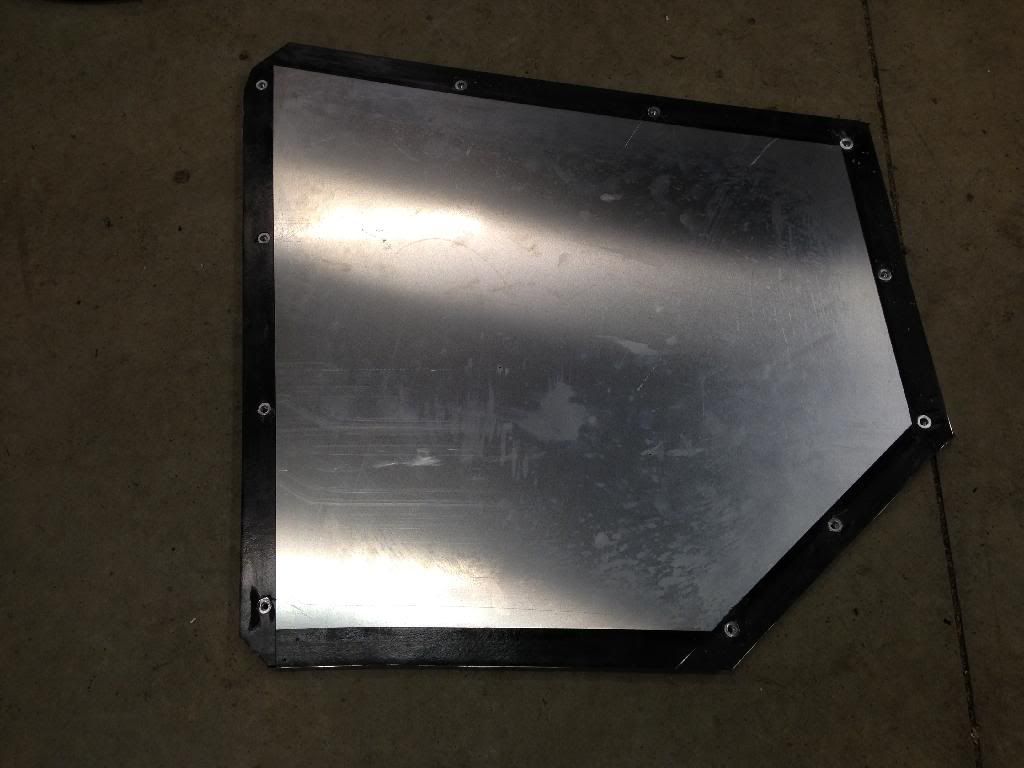
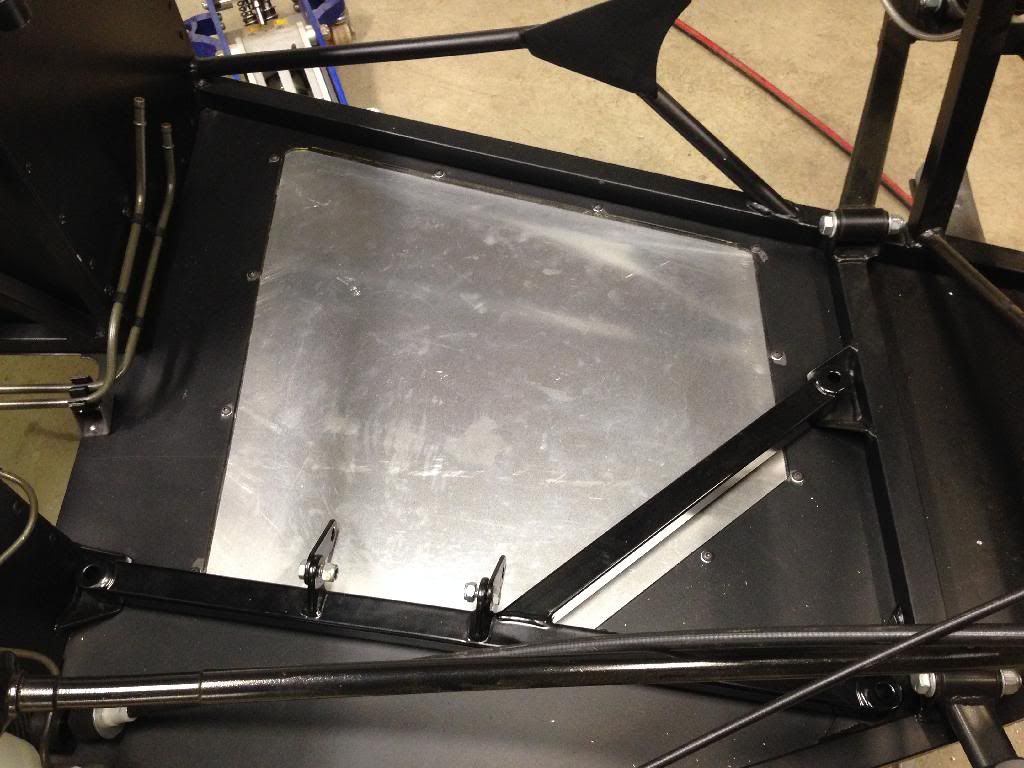
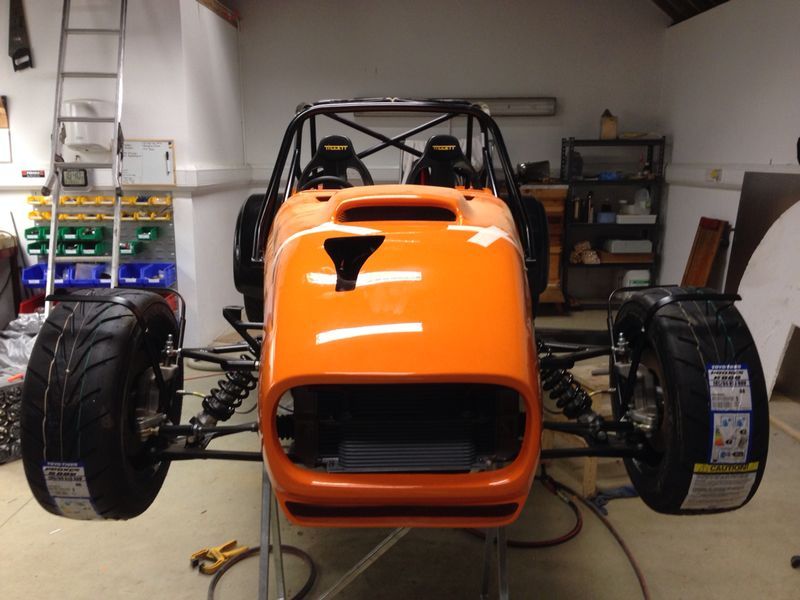
Bit more progress this weekend. First up was to make an engine cover to save drag. I decided to make it removable, as it would be handy for oil
changes and if the sump ever had to come off to save removing the engine. After some deliberation I (rightly or wrongly) decided on rivnuts placed in
the cover itself, mainly as it was a slightly thicker grade of alloy than the Westfield panelling so would hold them better. I picked up a pair of
air shears which made cutting the sheet effortless (def on my stocking filler list!!). Once cut to shape, I applied some foam tape to absorb
vibrations and inserted the rivnuts which were shaved flush with the foam. In the end the whole thing took a lot longer than I thought, but ended up
a great job which will allow good access to work at the engine.
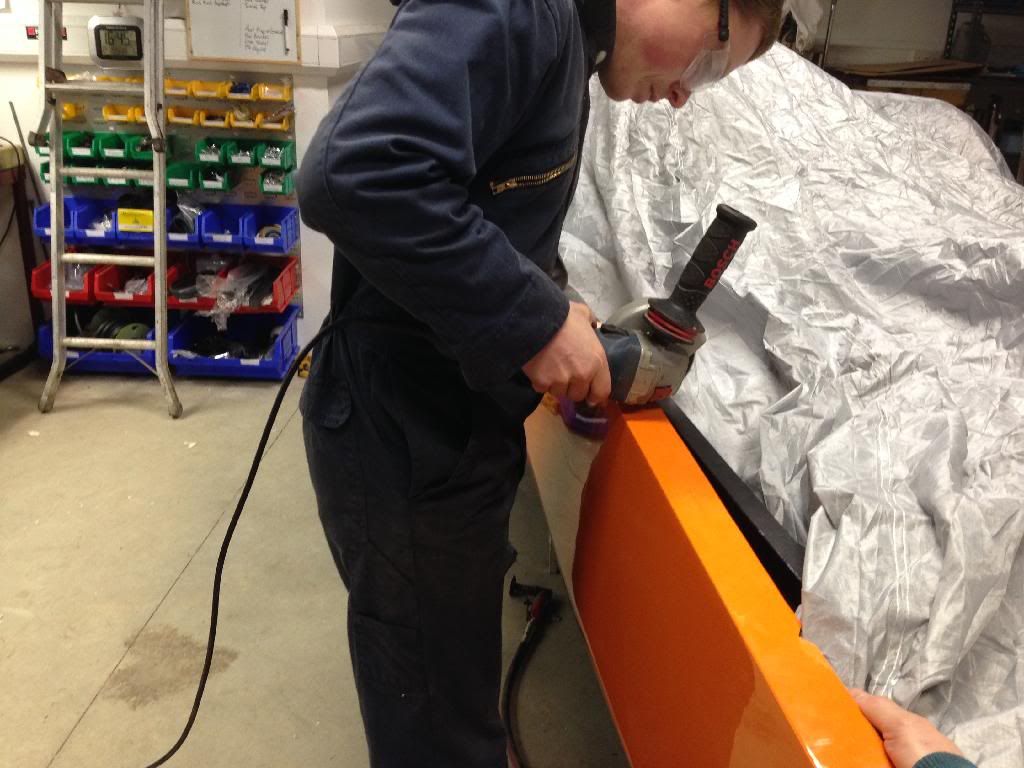
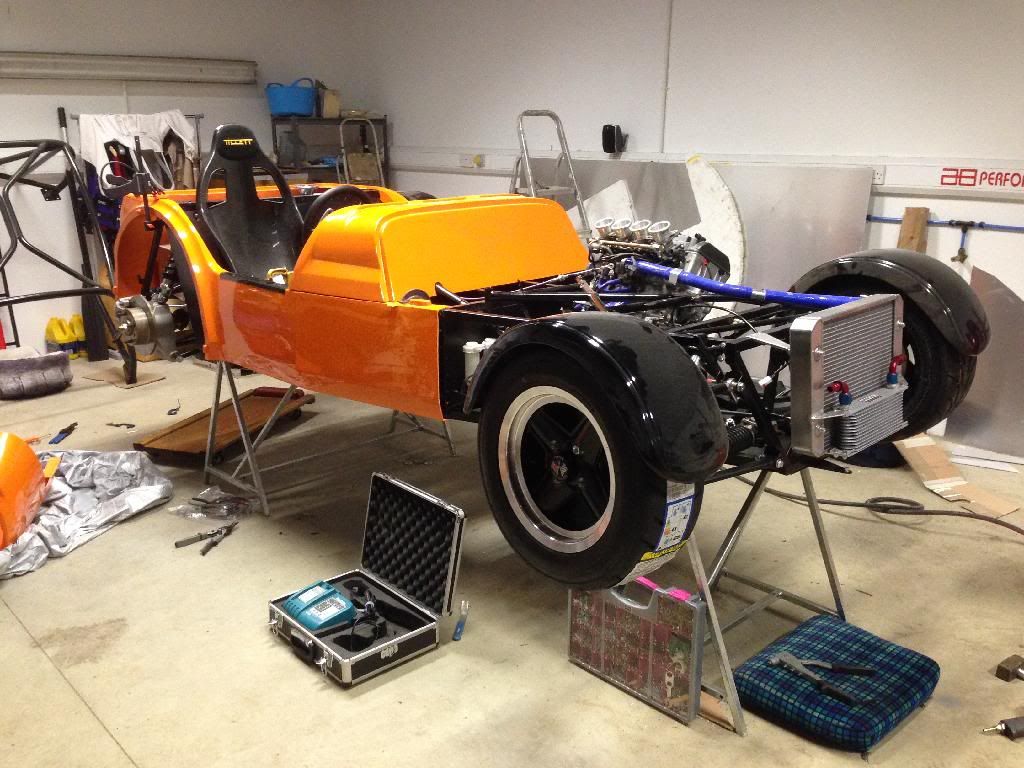
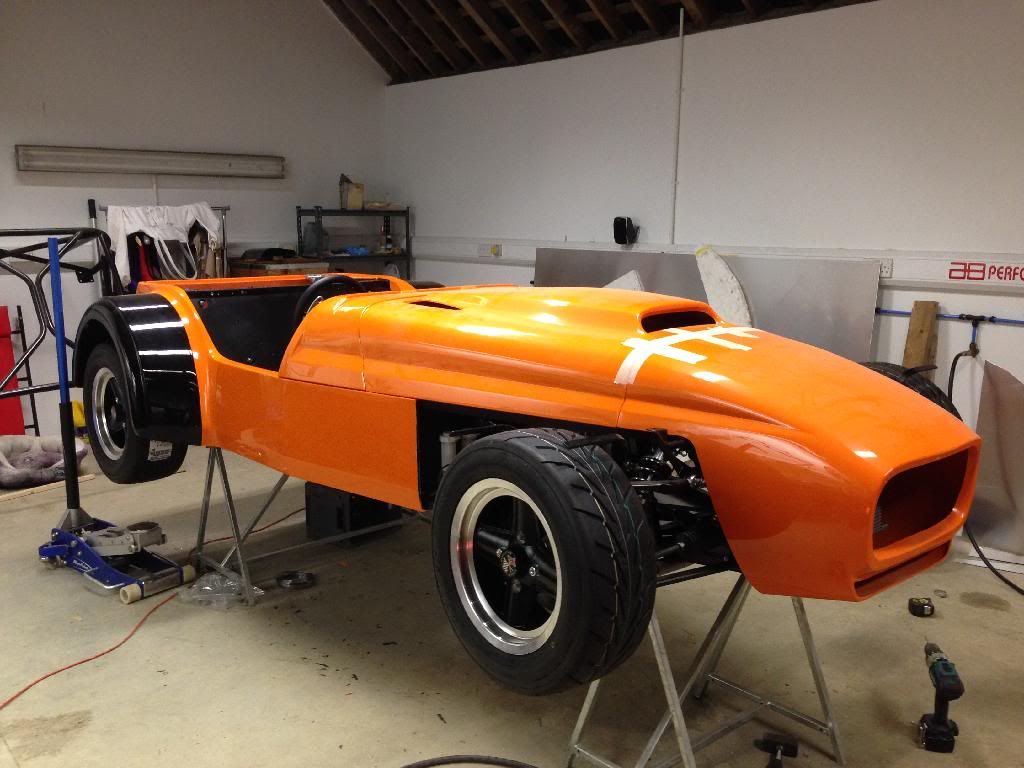
Next up I bolted the engine back in and got cracking with the bodywork. With the help of two mates we manoeuvred the tub on and off a couple of times
until we got the right fit. Some tools which really come in handy with fibreglass are a Dremel and the die grinder I previously picked up. Also a
normal angle grinder with a skinny cutting disc and a good old rasp for tidying up the edges. Before long things looked like this:
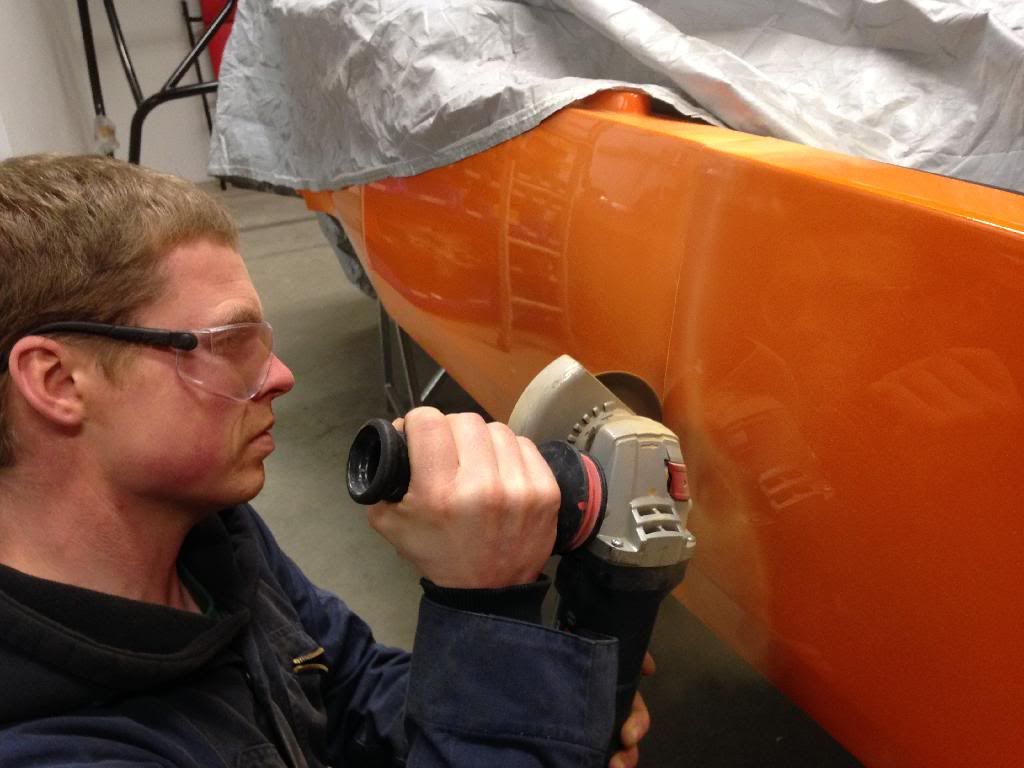
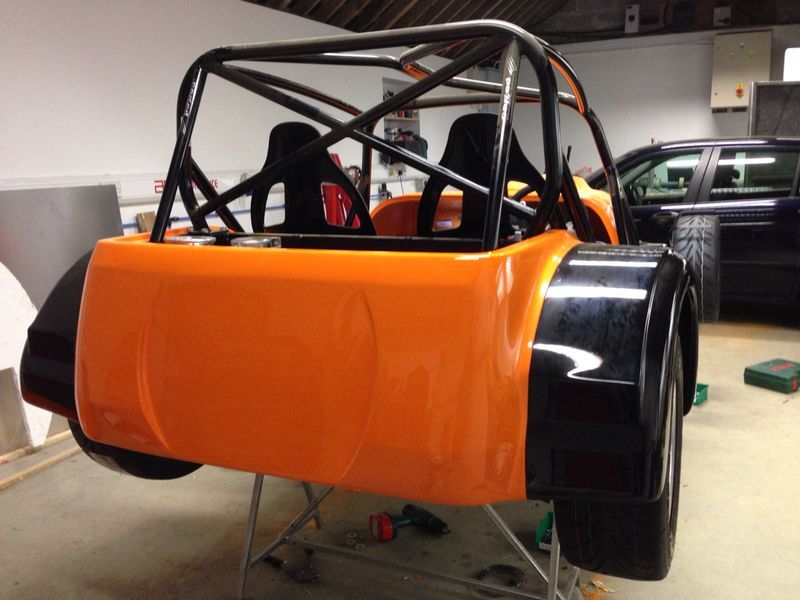
While on the theme of bodywork we decided to take the plunge and cut the tub to accept the new carbon flared side panels. Not something to be taken
lightly as theres no going back and especially when its a brand new build, but hey ho.. out with the grinder! We decided it was best to leave a
10" overlap so cut the panels off flush with the engine compartment bulkhead. This means when standing beside the car you can still see the
orange fibreglass going up inside the flared side panel, while venting the maximum amount of air from the engine. Having cut the sides off, I would
say there is a small amount of weight saved as the GRP is much thicker than the carbon, but probably only a kilo or two.


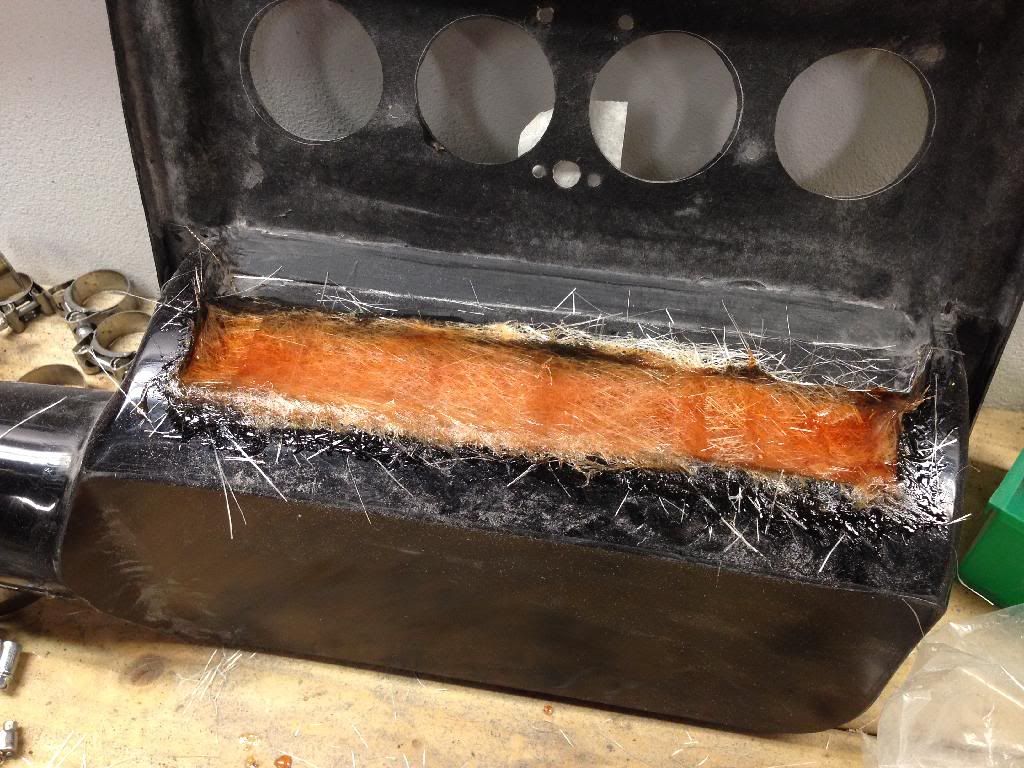
While in the mood for butchering things I decided it was time for another mod to the AB air box. Unfortunately this is far from a straight forward fit
to the 929 engine and having already reduced the base to fit over my engine cradle, I now had to removed the leading edge from the rear of the air box
to allow it to clear my top coolant pipe. This is no bad thing though as it now means the inside of the box no longer has a big ridge and the air
should flow more smoothly into the filter. Still, a pain to say the least. And I do not possess the know how to gel coat, so it will just have to go
satin black after a bit more tidying up. Thankfully it will never be seen when bolted to the engine.
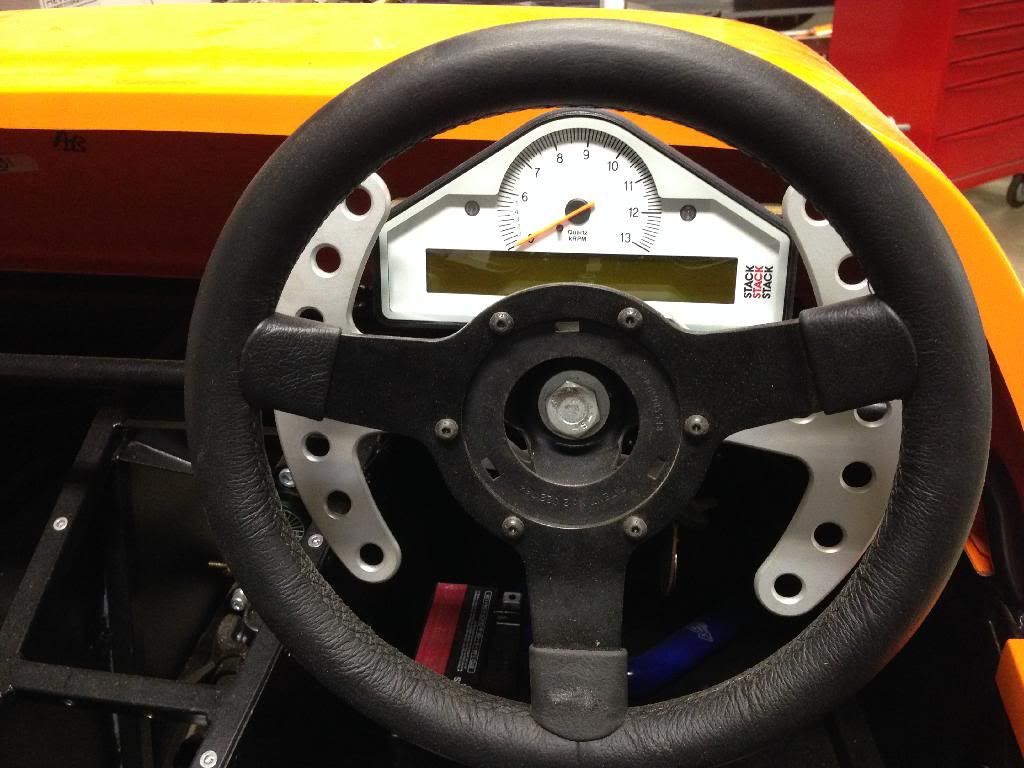
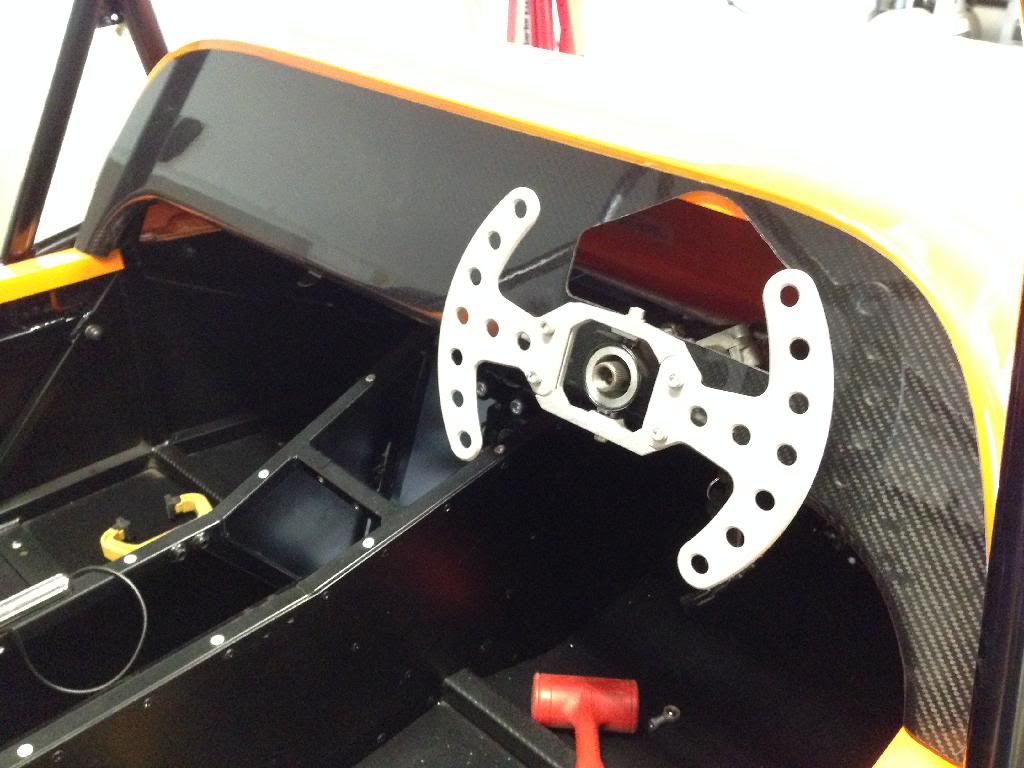
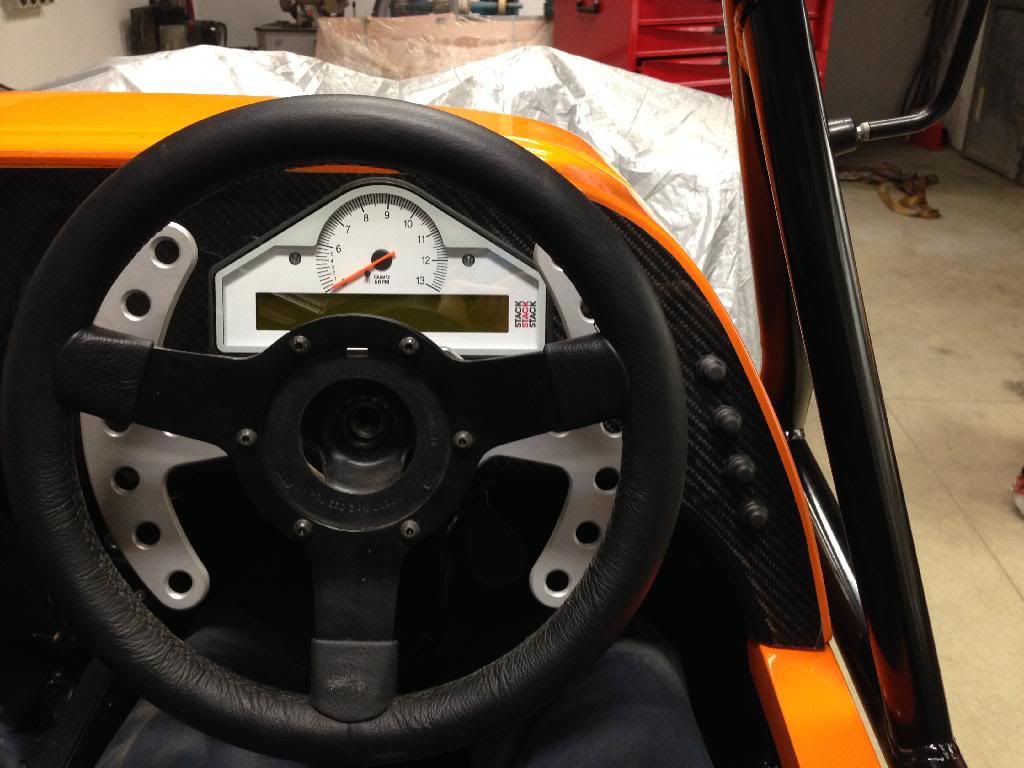
Last up before bed, I decided to try my Stack Dash in position (ignore the ugly IVA compliant wheel). As usual nothing is straight forward, and
thanks to my paddle shift I have lost valuable dash space so the Stack will be an extremely delicate fit, but I think it will work, just about....
Rob
[Edited on 15/12/13 by Rob55]
|
|
|
gixermark
|
| posted on 16/12/13 at 08:36 AM |
|
|
you have some patience !!!
on the removable plate for the sump... having been there done that, i'd strongly recommend having the rivnuts in the actual floor... and be able
to buzz the bolts off from under the car as access is much easier (always have the car raised up anyway if you are doing anything)
I can;t wait to see this thing in the flesh.. its an awesome build for a road car..... never mind for racing !!
|
|
|
Rob55
|
| posted on 17/12/13 at 08:26 AM |
|
|
Dammit thats a good idea alright... may have to make some modifications!
|
|
|
gixermark
|
| posted on 17/12/13 at 09:24 AM |
|
|
aye - worth it now.......... cos when you need access to it - especially if in the paddock between races... the last thing you want to be doing is
faffing around from the top trying to get to bolts covered in pipes, line of sight blocked by engine, HOT manifolds etc etc.......
another thing - not sure whether you have thought about how to secure the gearchange cable at the engine end ? my advise is to secure the bracket to
the engine (off sump for example) and make sure the bracket from the splines is at 90 deg to the cable... centre it up to get the same throw each way.
keep it up - superb looking build !!
|
|
|
waggy
|
| posted on 18/12/13 at 12:44 AM |
|
|
We'll having now seen it in the flesh I can tell you all that the pictures don't do it justice, beautiful build.
I wish I'd been there for the "lets cut the sides off her" balls of steel my good man.
I'm highly motivated again after seeing it.
|
|
|
Rob55
|
| posted on 20/12/13 at 02:03 PM |
|
|
Mark - gearchange is superb, Big Easy made up a solid mount where the bike frame normally mounts onto the engine and its a really precise change.
Wags - looking forward to seeing your own project taking shape!!
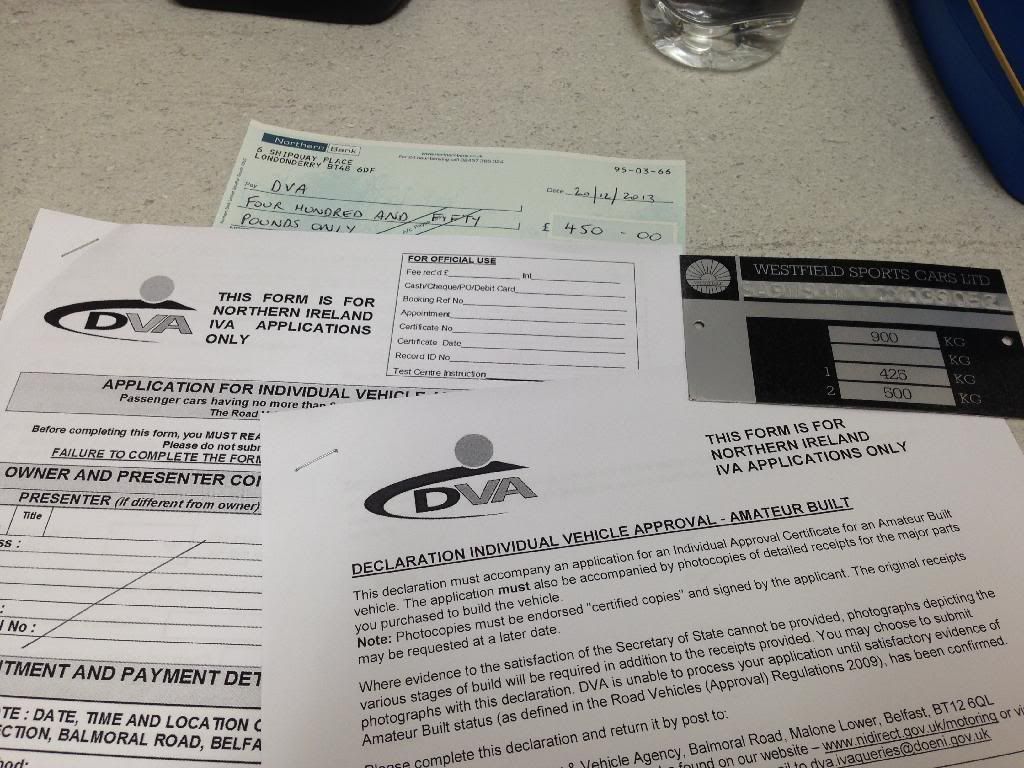
I was just speaking to the IVA Department in DVA Belfast, and have been advised to get my application submitted now even though I plan to present the
vehicle mid-Feb. They also informed me that the testing has now permanently moved from Ards to Lisburn, which cuts about 20 miles off the journey.
Test fee is still the same though, boo!!!
|
|
|
gixermark
|
| posted on 20/12/13 at 03:08 PM |
|
|
good stuff.. big easy knows his BECs well.... good man
|
|
|
Rob55
|
| posted on 20/12/13 at 08:43 PM |
|
|
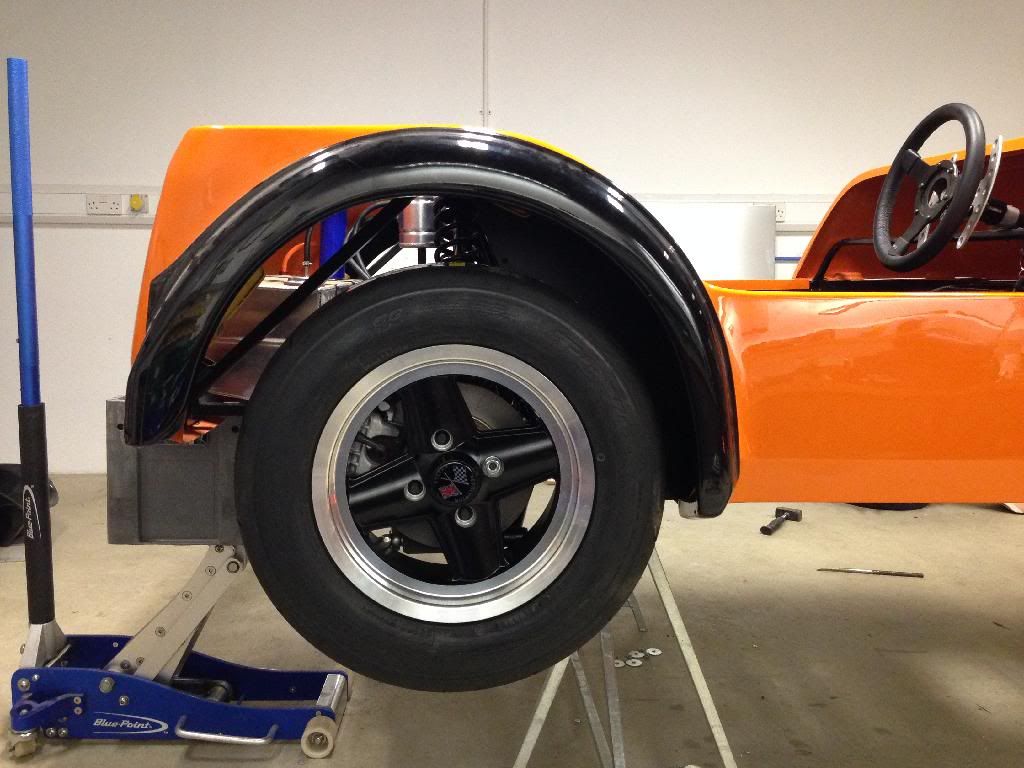
Tyres now on Think I am going to need black wheel nuts..

|
|
|
Rob55
|
| posted on 30/12/13 at 11:21 PM |
|
|
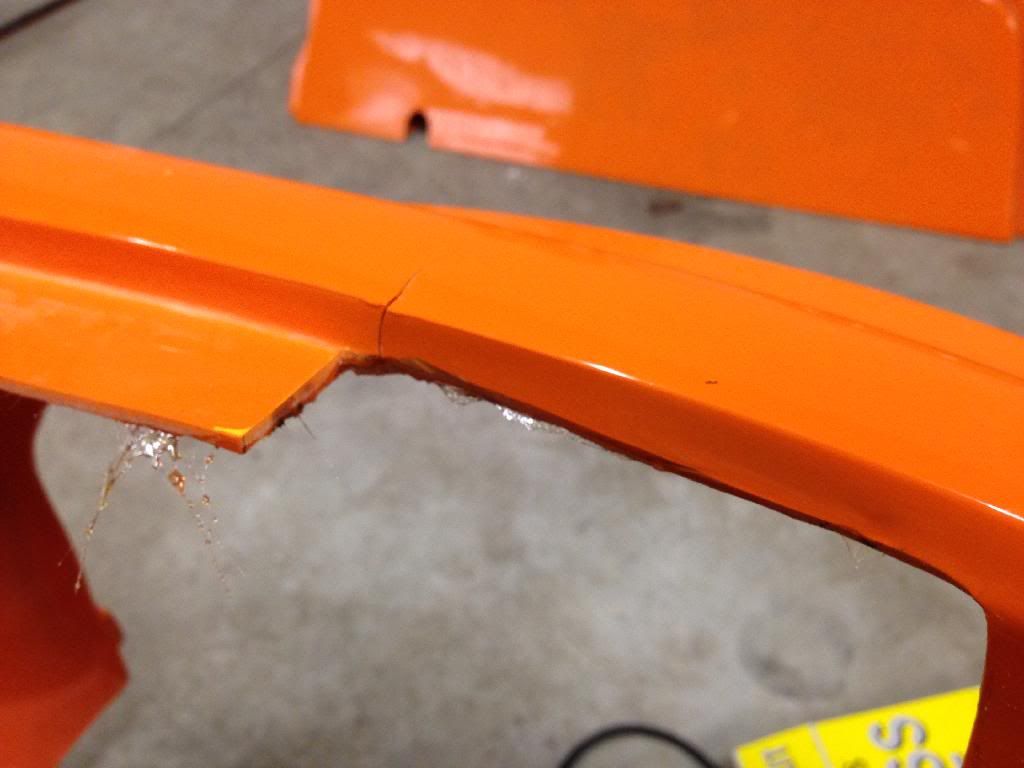
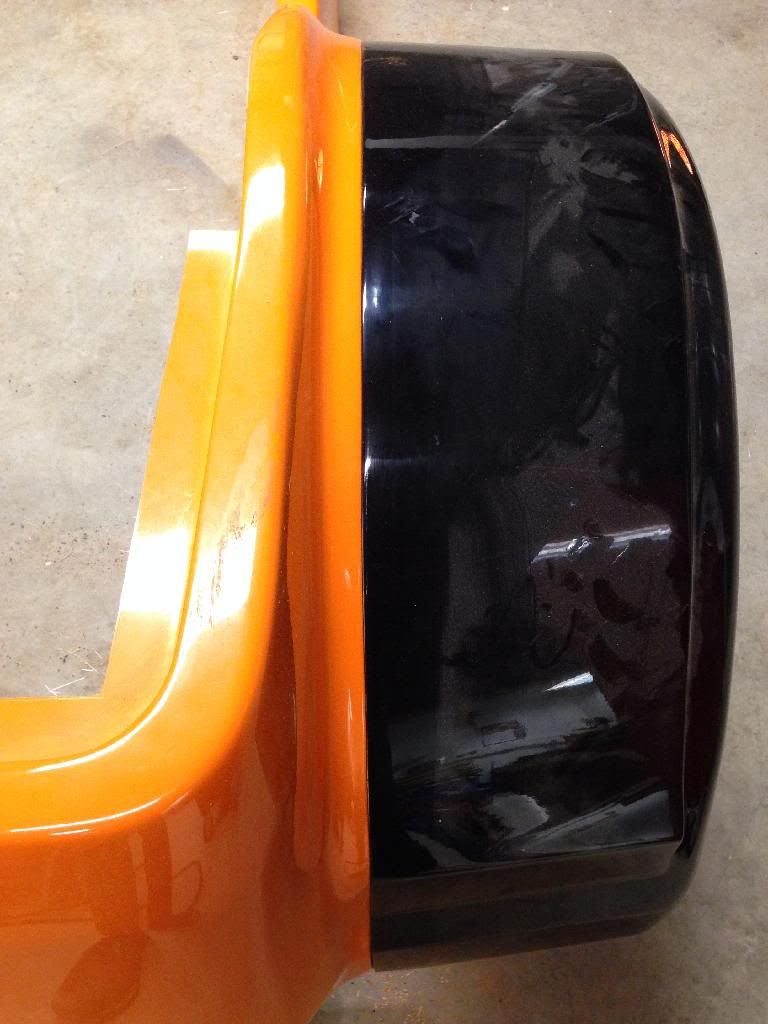
With IVA applied for, the pressure is on to get moving with things. The focus has been on bodywork, a job I knew would be a P.I.T.A! And not helped
whatsoever by my "mishap" earlier in the thread. All of the body panels are GRP and depend on the fit from each other in order to line up
properly. This means you fit everything but don't fix it, and adjust accordingly until the panel gaps are acceptable. I say acceptable, because
I believe fibreglass is damn near well impossible to get perfect unless you are very lucky.
The Westfield fitting procedure is as follows: tub, then scuttle panel, then bonnet, then nose cone. The tub is aligned 400mm from the rear chassis
bar and then the sides adjusted so that the scuttle, bonnet and nose fit properly.
However on fitting it became immediately apparent that something was wrong, the rear arches were badly off centre with the wheels, despite the top
400mm measurement being millimetre perfect.
After much deliberating I decided to call in the help of @IL for a second opinion. The strategy devised was that rear arch alignment ranked ahead of
anything else, so the only option was to move the whole tub forward. I was not happy about this at first, but I later came to realise it had quite a
number of additional benefits - the scuttle now sits further from the wheel allowing more room for my paddle shift, and importantly I have gained
about 5-6mm in dash height above the steering column to accommodate the Stack dash. Furthermore - the Westfield manual states that with a V8 bonnet
it is necessary for the tub to be 5mm longer on the passenger side and conveniently this now happens to be the case which means the bonnet and nose
sit much better than before too. So after probably a full day of head scratching and moving the tub around, I now have everything sitting nicely.
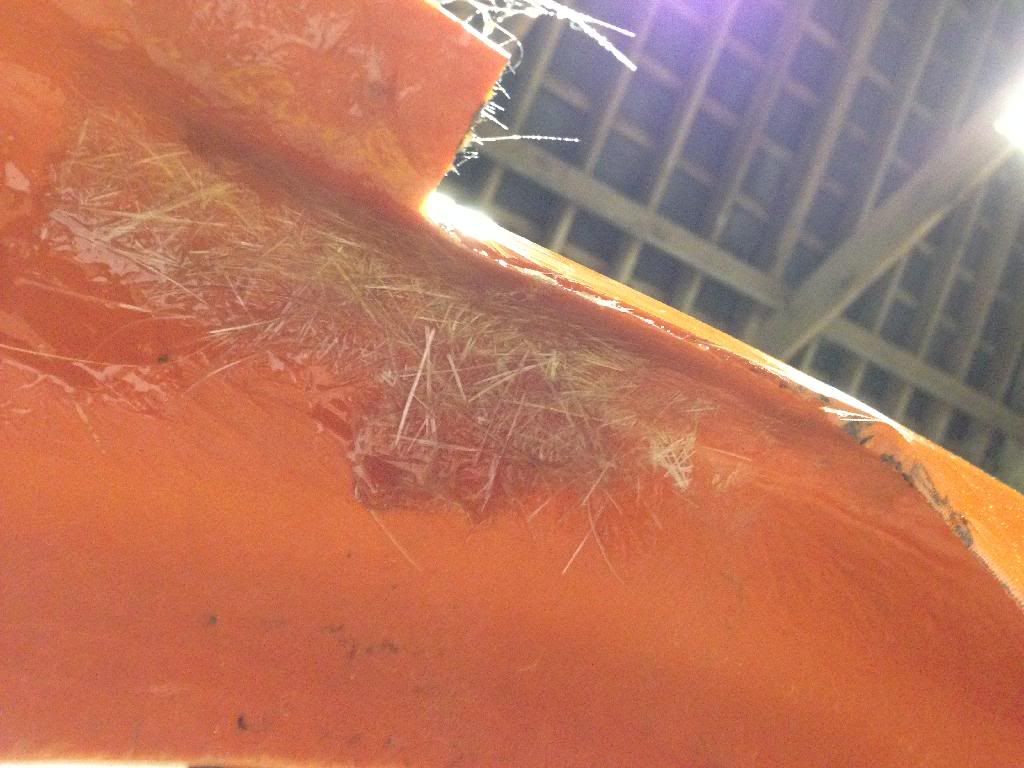
With the chassis marked, I now removed the tub one final time for slight trimming and also to strengthen the weak part behind the roll bar mounts. I
managed to put a small stress fracture in the gel coat here, so laid up some reinforcement under both sides.

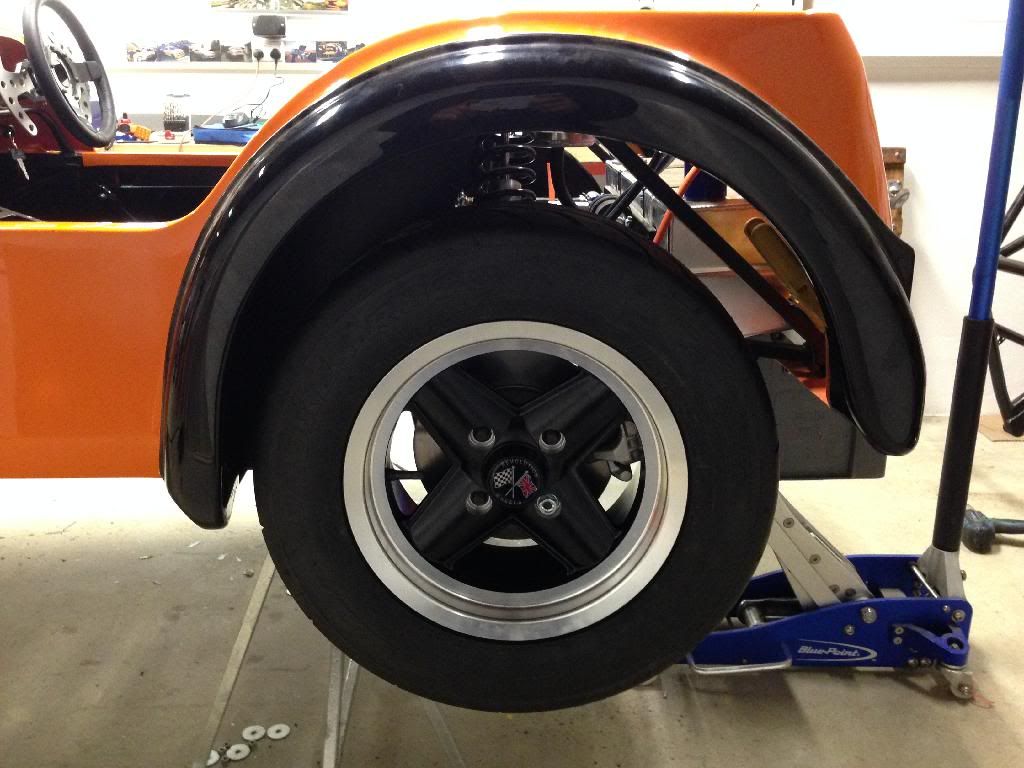
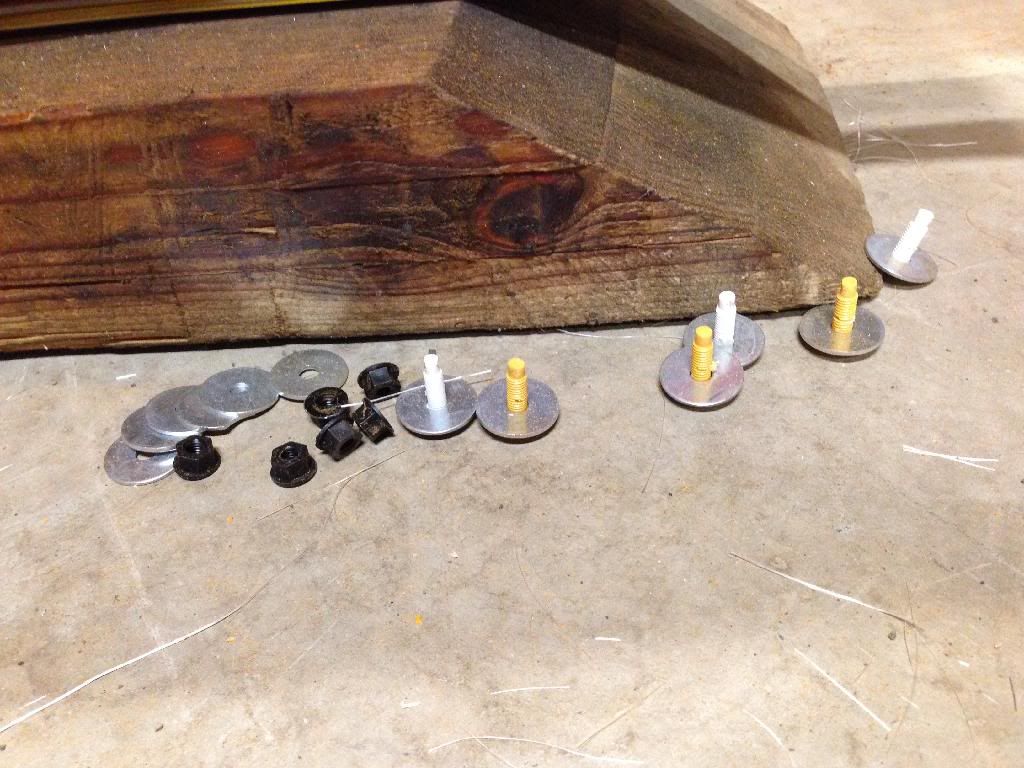
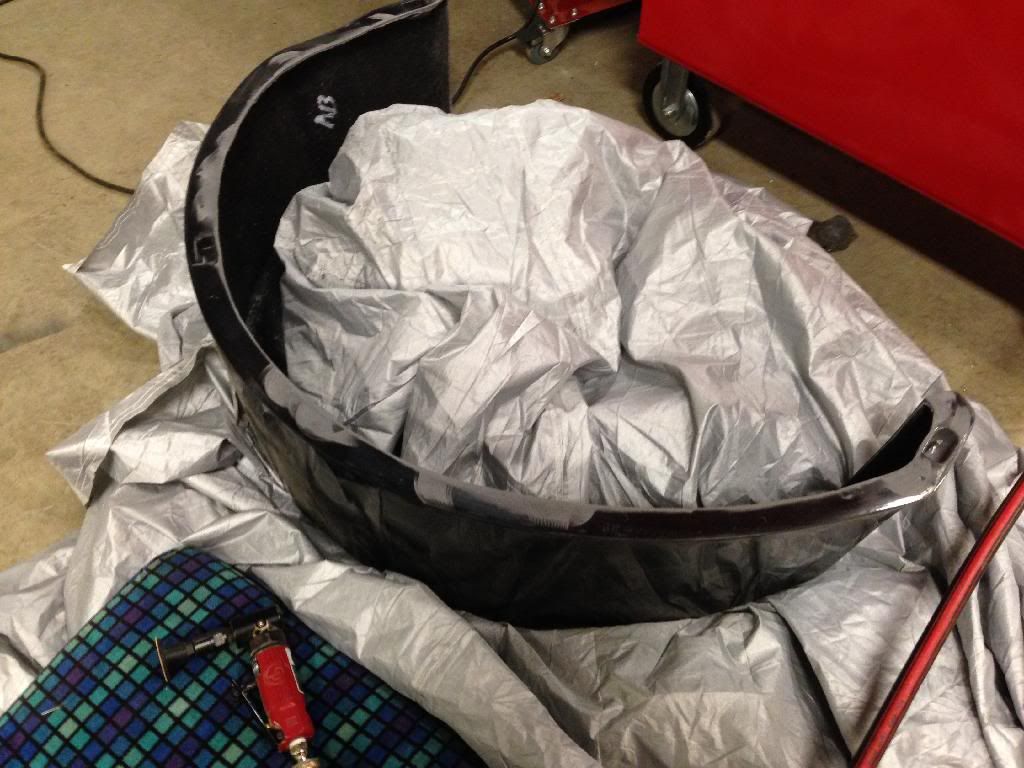
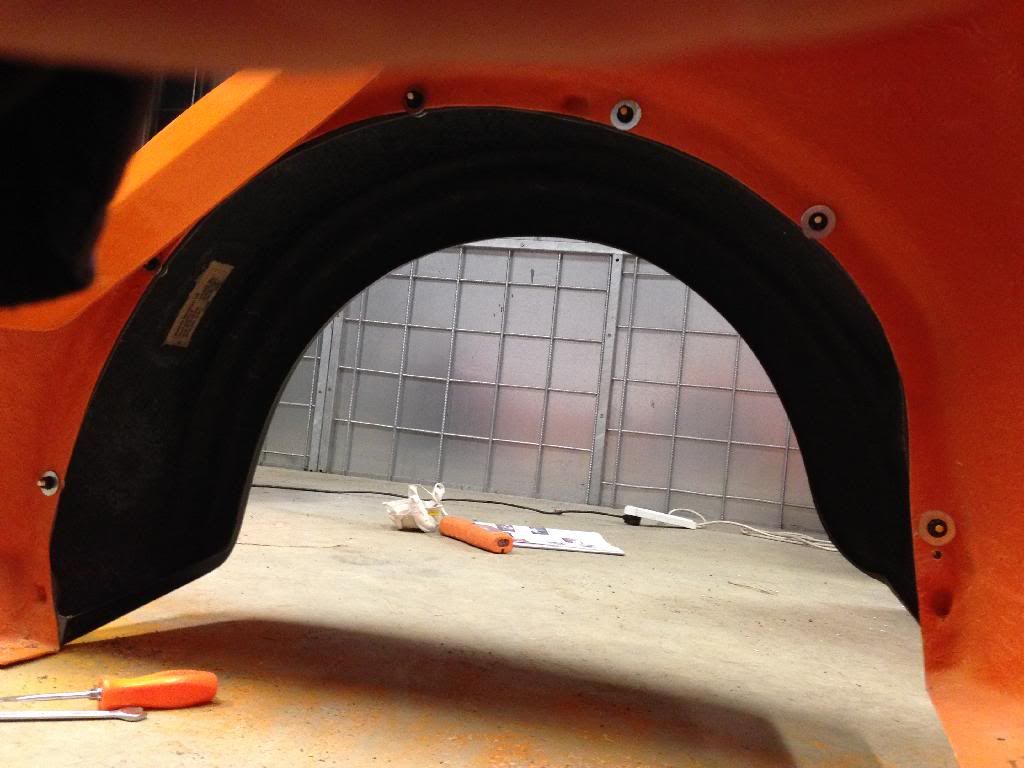
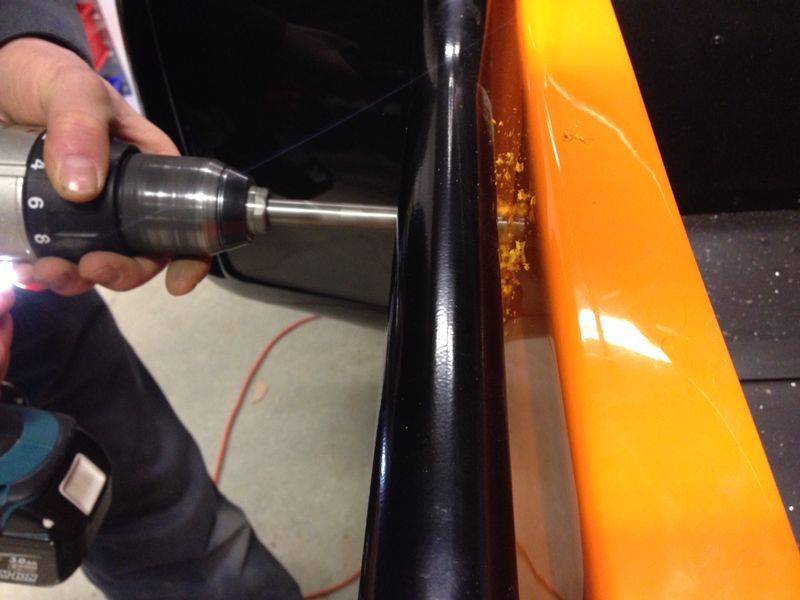
It was also a good time to fit the rear arches, as this needs done off the car. The manual states the use of 12 M6 bolts to hold them on, I opted
instead for 6 plastic number plate bolts with a slice cut into every bolt to provide a means of "give" in case of a bump on track. The
theory being that hopefully the bolts will break rather than causing damage to the tub itself. The actual fitment of the arches probably took close
to an hour of sanding and trial fitting before I could find an acceptable arch gap due to the variances in the gel coat out of the mould. Once again
my die grinder proved an invaluable tool and I am pleased with the final result.
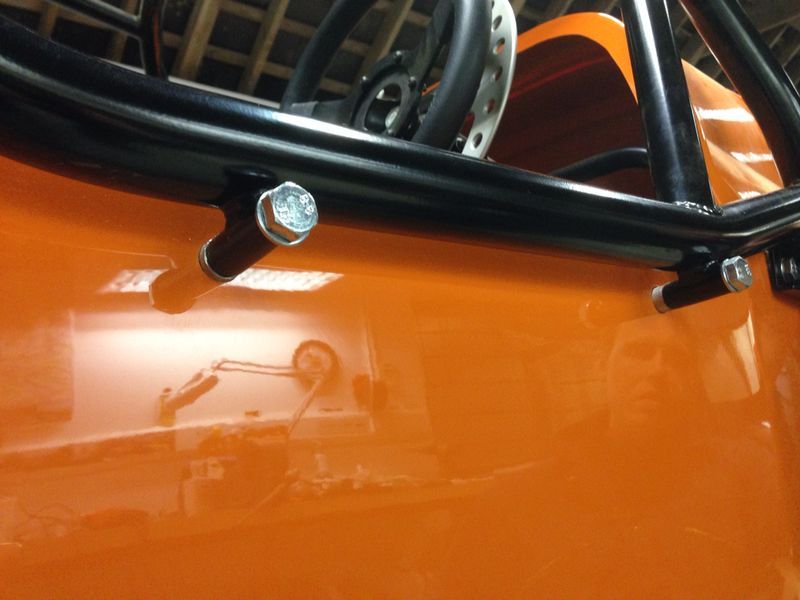
With the tub off, I enlisted the help of @KeithRobinson to fit the roll cage. The manufacturing tolerances between the cage mounting points and the
Westfield chassis are shocking, with the front mounts bolted in place none of the 8 mounting holes at the rear even came close to lining up.

So it was a case of drilling out the chassis to accommodate the cage. This is not a big deal but it did take quite a bit of time to make sure it was
square and was a bit awkward in places due to the vertical bars. Got there in the end though, albeit still disappointed that it didn't just
"fit" considering both the chassis and cage came together with my kit.
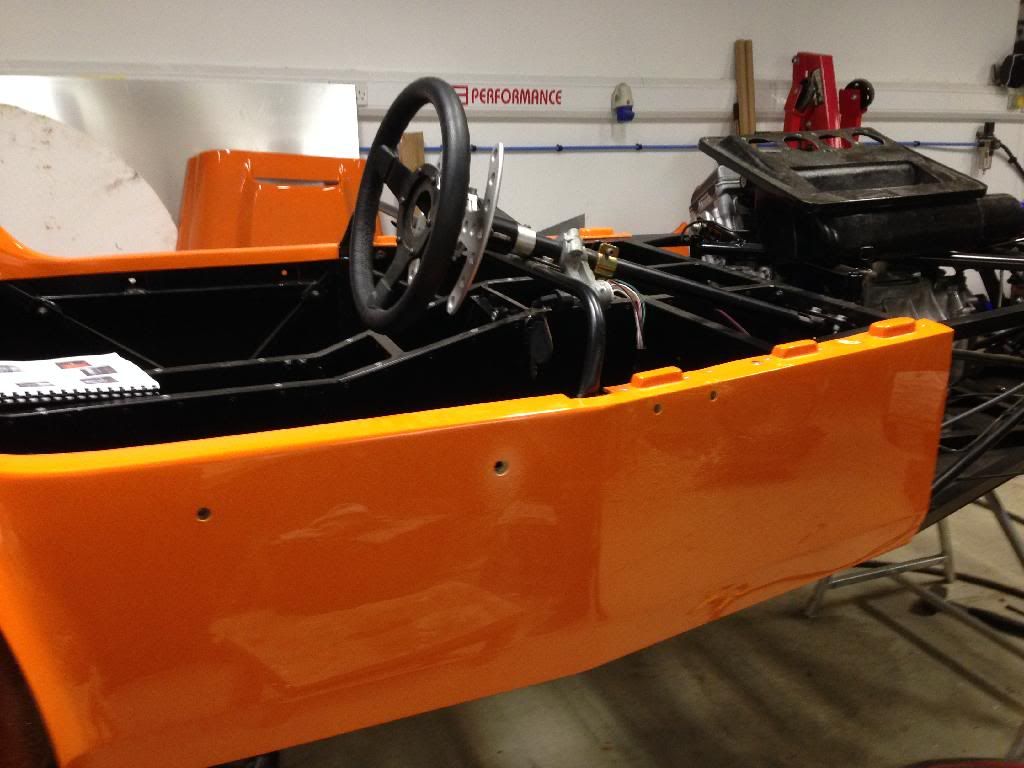
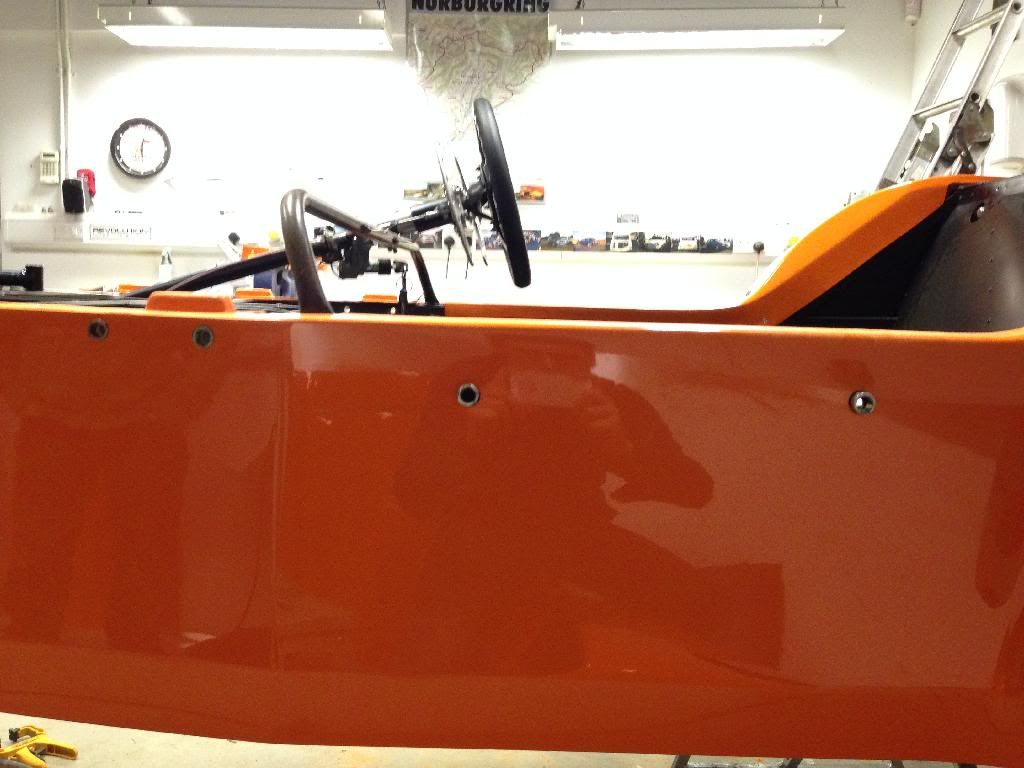
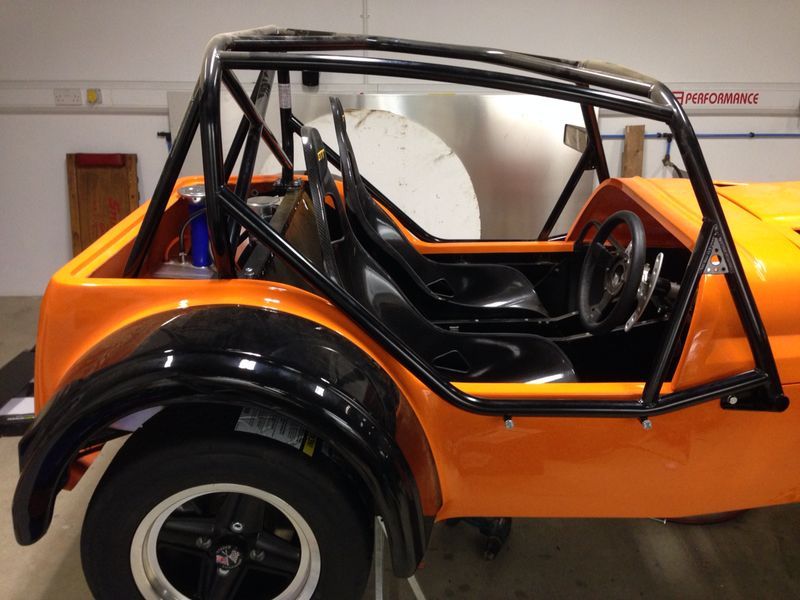
Back to bodywork - tub scuttle bonnet and nose were set on, aligned, rear wheel arches centred, and everything double checked before finally riveting
the tub on for good! #milestone
Next up was drilling out the roll cage mounts and making up little shims to allow the cage bolts pass through the GRP and bolt securely to the
chassis. I had expected this to be much more difficult than it really was, and was very pleased with the end result. The huge amount of time and
effort spent ensuring the tub and cage were properly aligned made this job quite straight forward. @KeithRobinson discovered his new calling in life
was to work with a Dremel, and made a really top job enlarging the holes to just the right size to accept the 16mm OD shims.
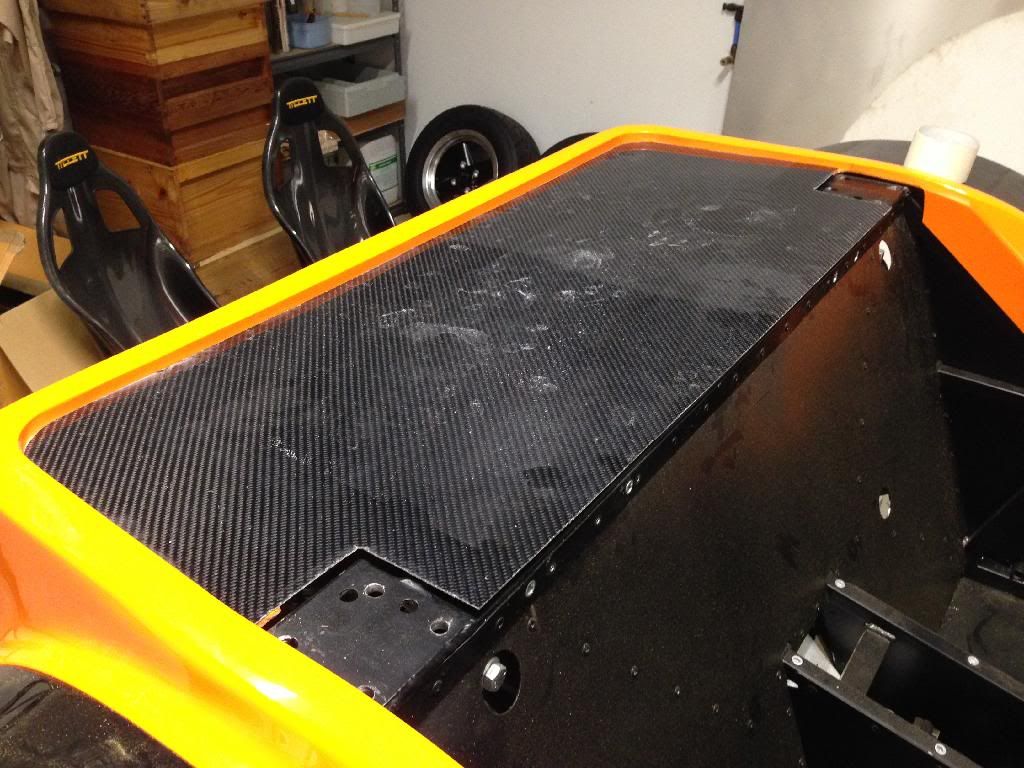
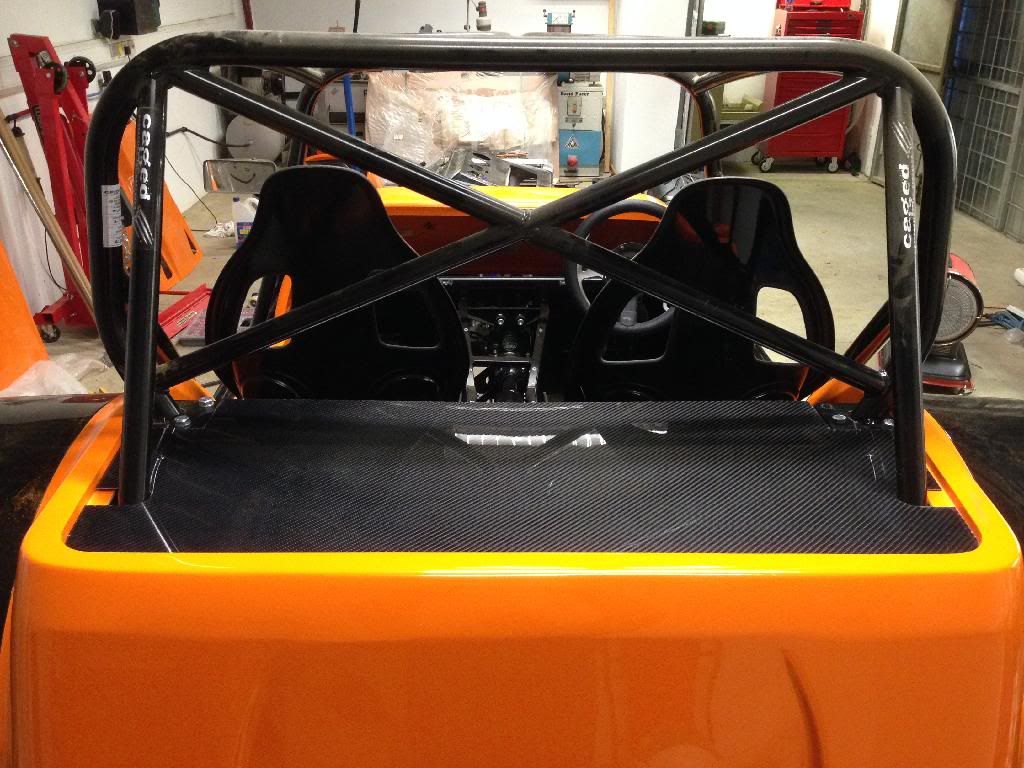
Prior to fitting the cage, I took the opportunity of making a template of the rear section to cut out a carbon fibre back panel cover. The template
was then transferred onto a light 1mm carbon sheet and cut to suit with a perm grit jigsaw blade and then the edge smoothed using a belt sander. The
beauty of the 1mm carbon is that it is very flexible and I should hopefully be able to fit the rear panel in one piece by flexing it around the roll
cage stays, as opposed to fitting it in 2 or 3 sections.
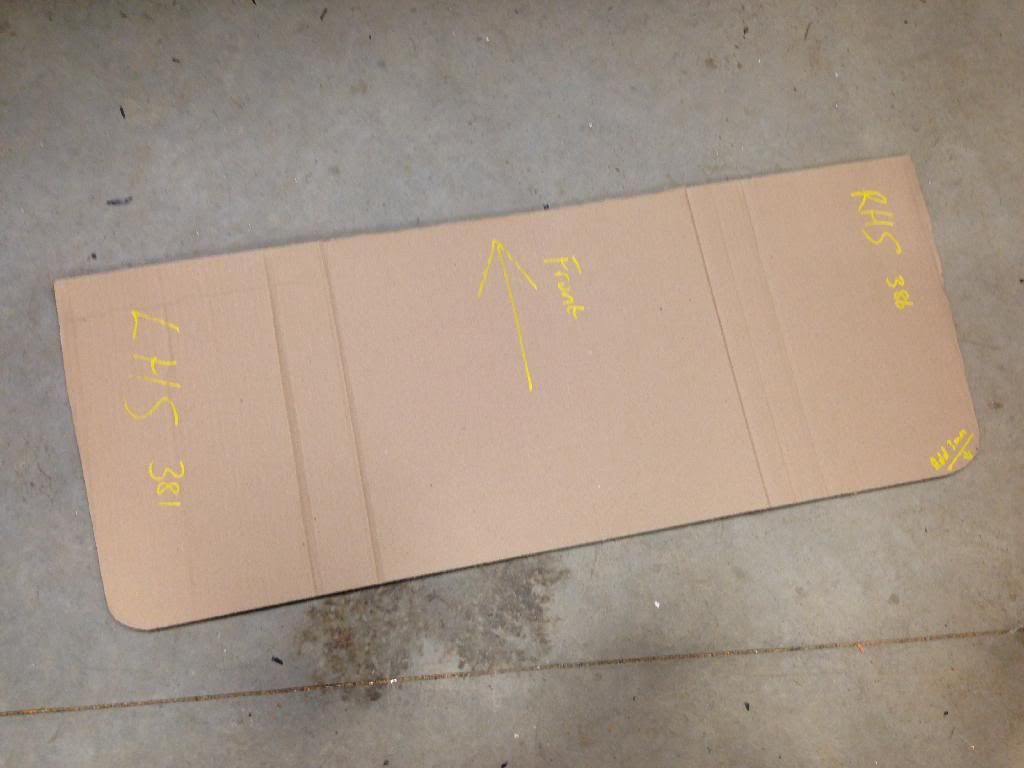
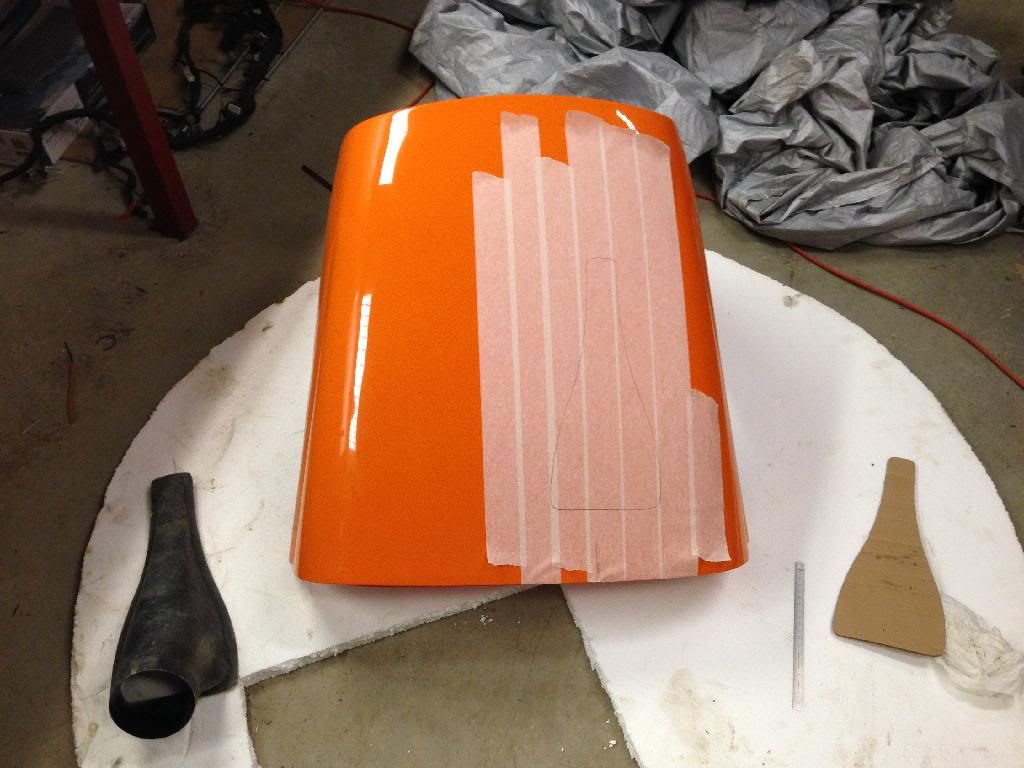
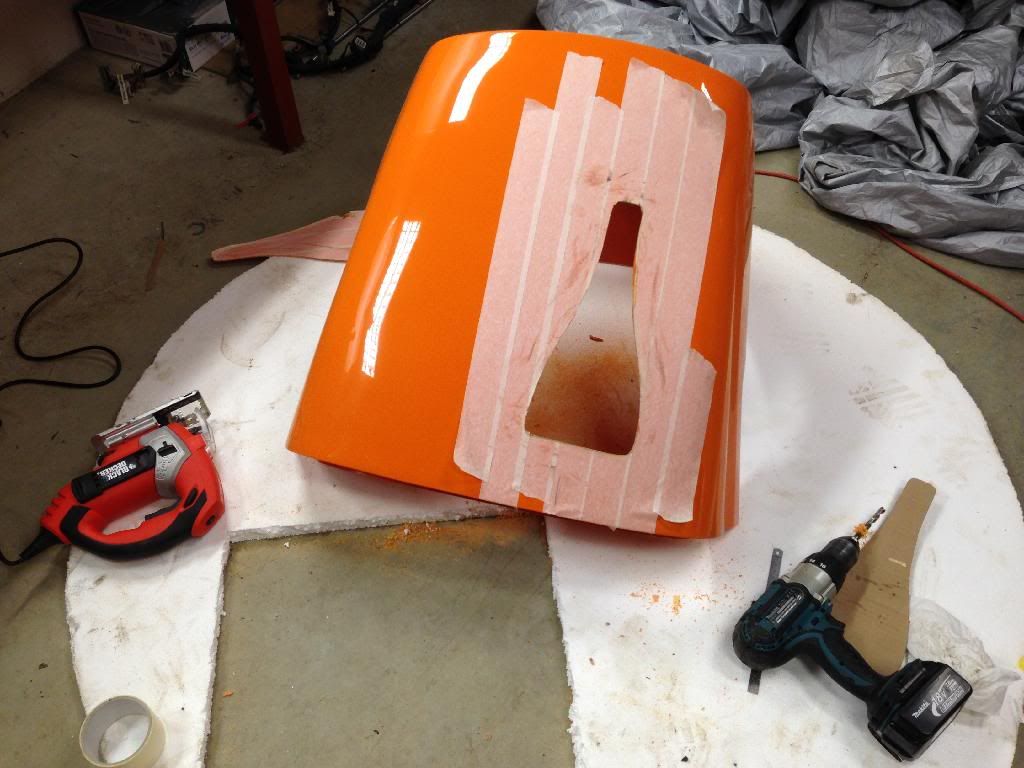
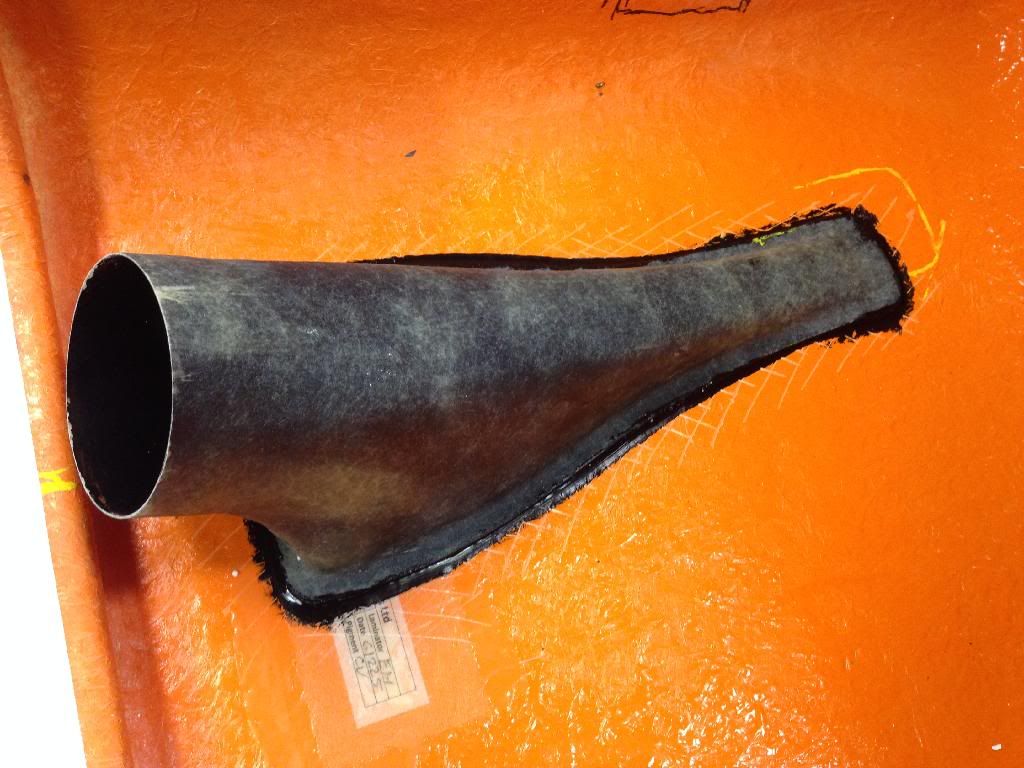
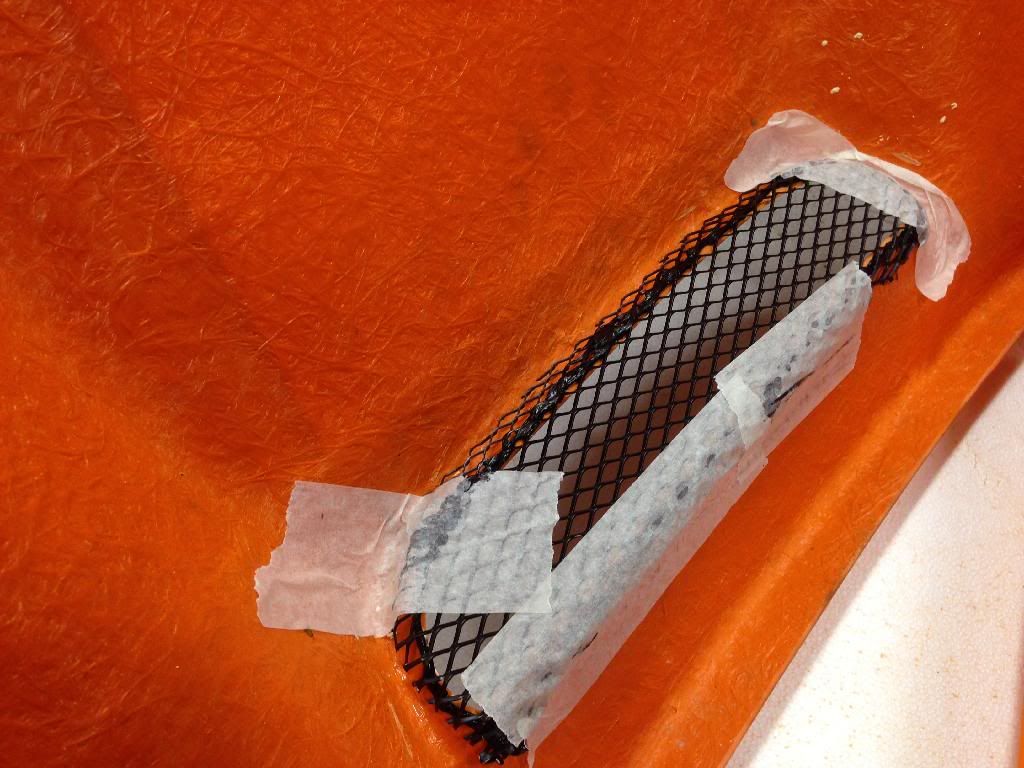
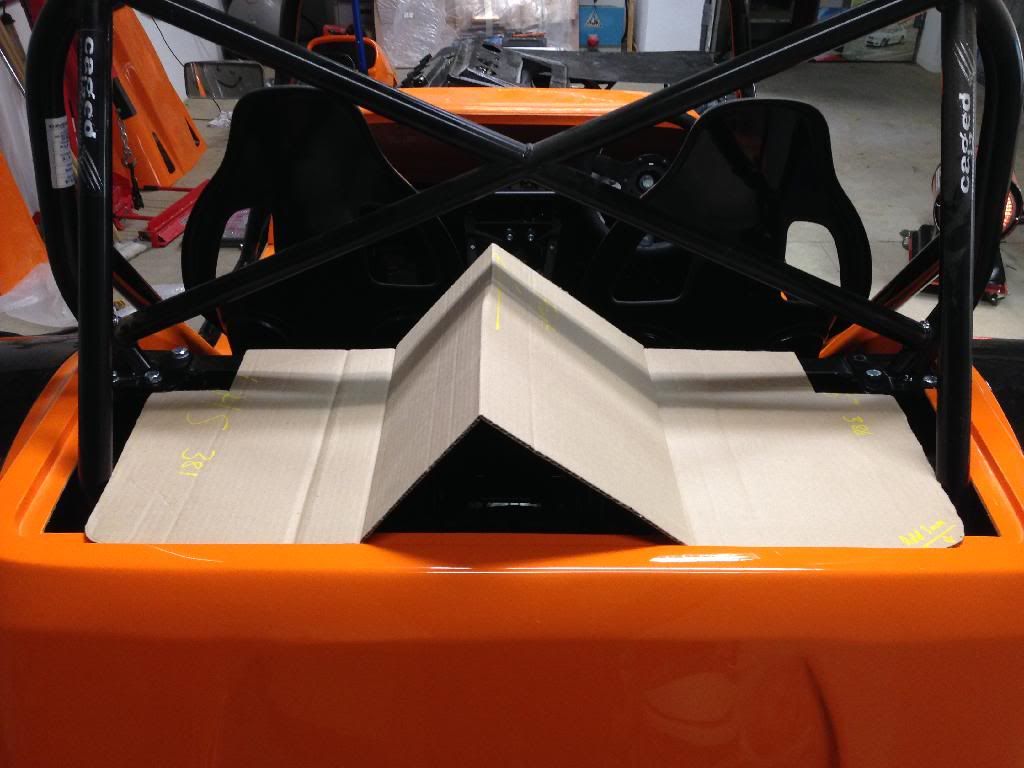
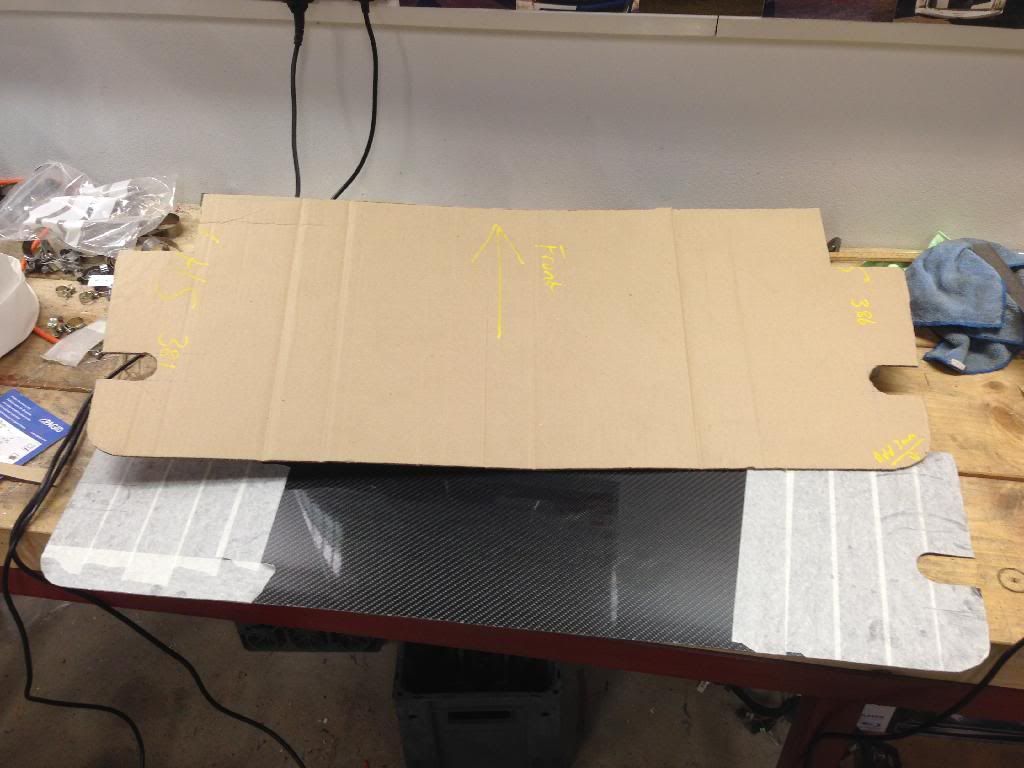
Next up was another job I had been dreading, the Naca Duct. This is connected by a 100mm cold air feed direct from the nose cone to the AB air box.
Again it was out with the cardboard to template and then out with the jigsaw so butcher my brand new nose cone. I opted to bond the duct from
underneath for a nicer finish using Sikaflex. The key here was making an accurate template and I think it really paid off as I am totally chuffed
with the finished job.
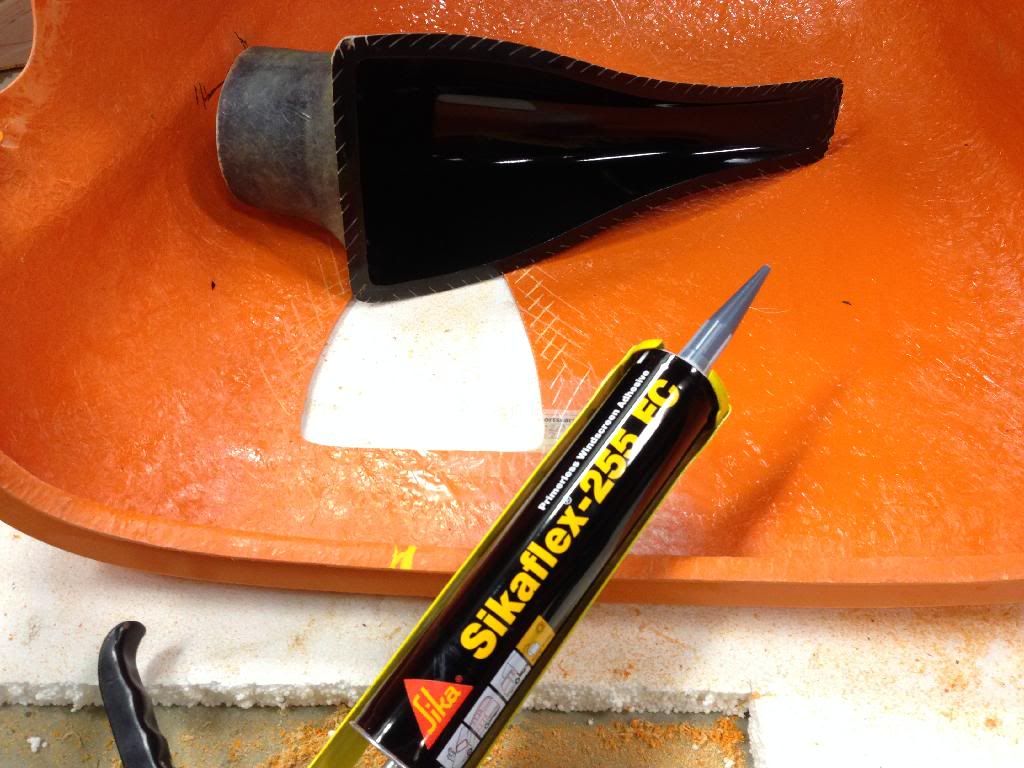
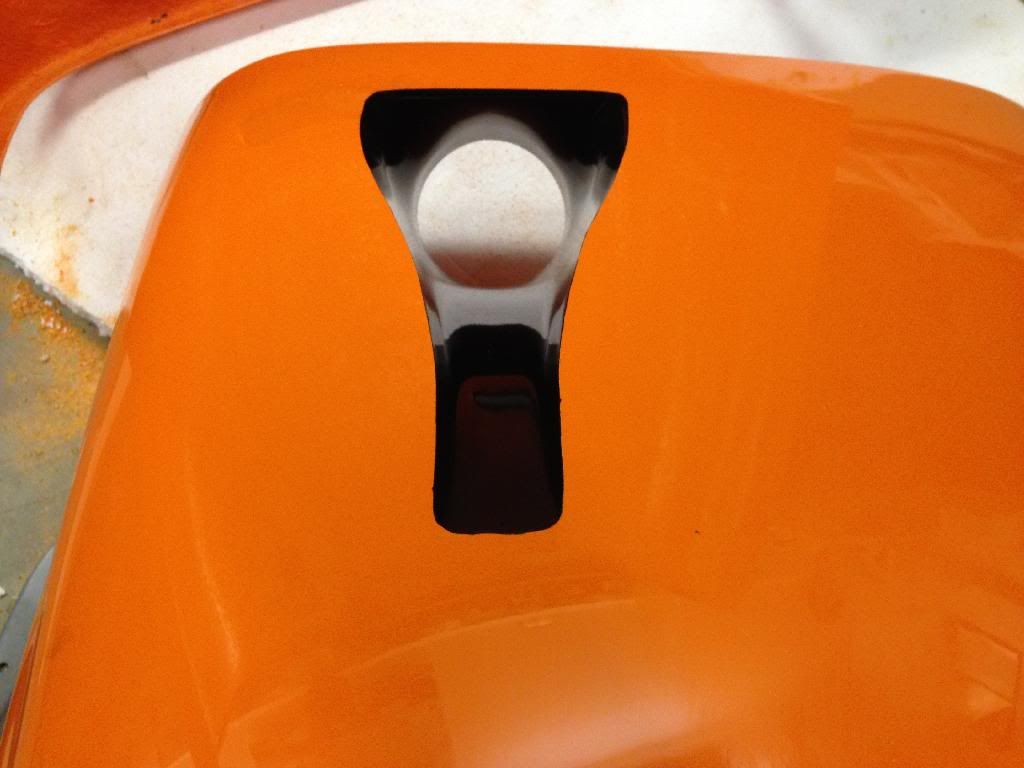
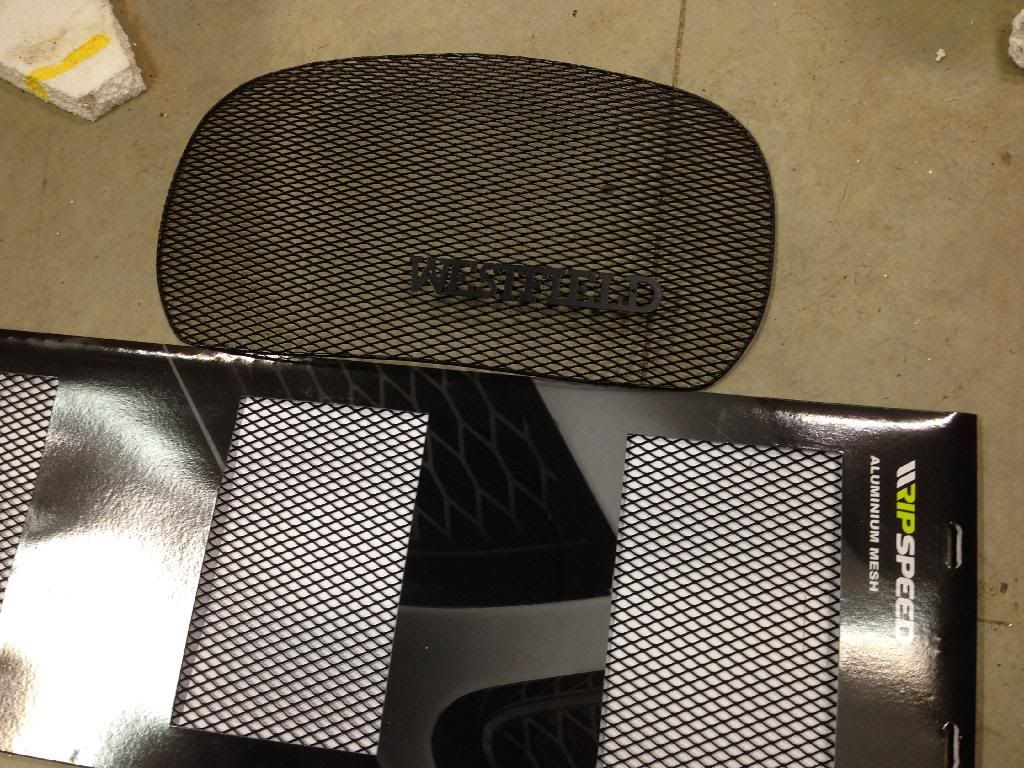
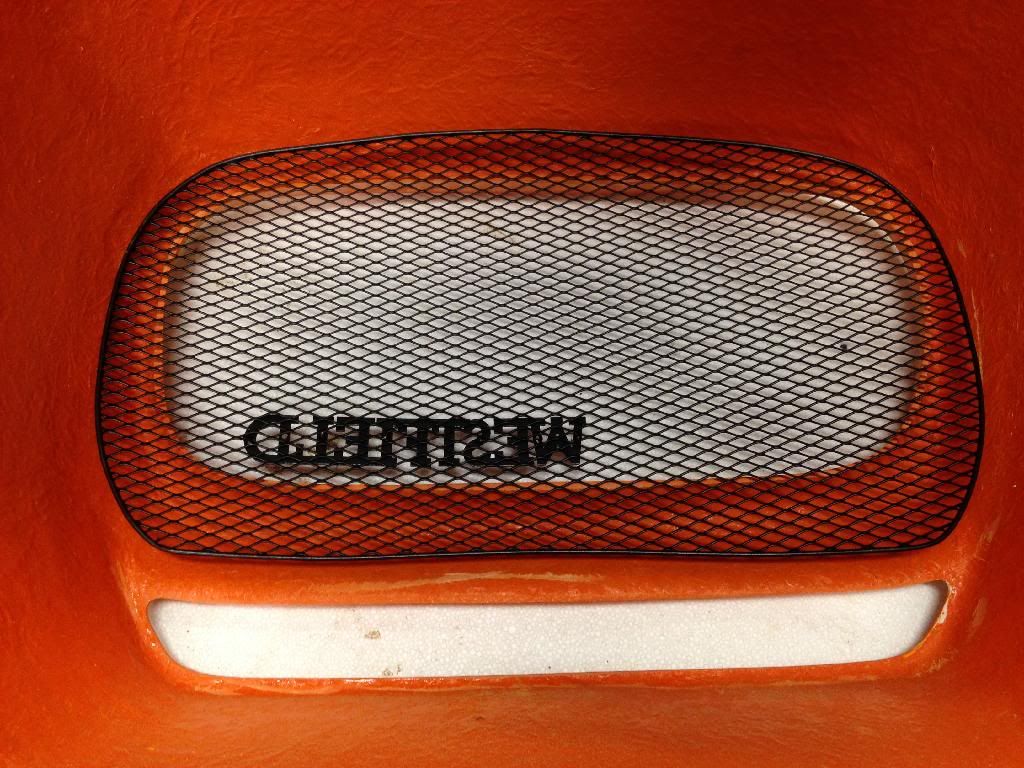
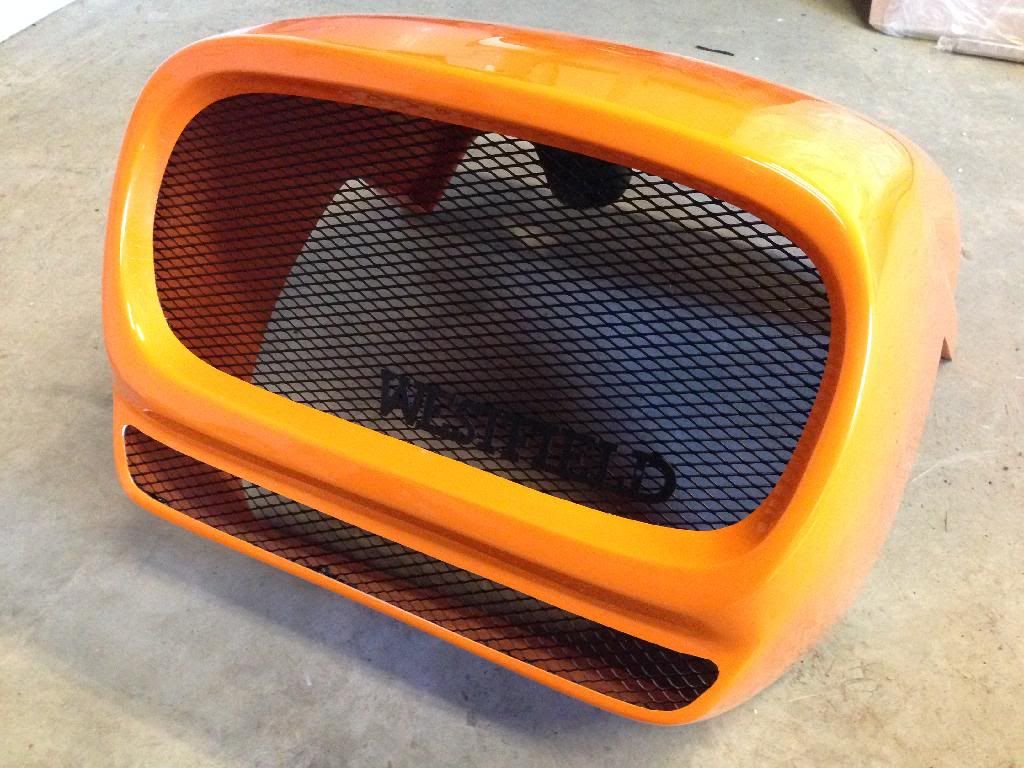
With the Sikaflex tube loaded I moved on to fixing the nose cone grille and mesh for the various bonnet vents. I was not supplied with spare mesh
with my kit so took a trip to Halfords armed with my nose cone grille and found that Ripspeed mesh is almost an exact match, result! So back to
fitting the nose cone grille - this was yet again another part which required to be modified to ensure correct fit. Westfield have 2 different nose
cones and I believe this grille was designed for the one with the large single intake, not mine with the two smaller ones. So out came the angle
grinder and I butchered my brand new grille.. bit of a theme going on today lol
Then it was time to bolt on the cage for good and set on the rest of the panels for some pics.
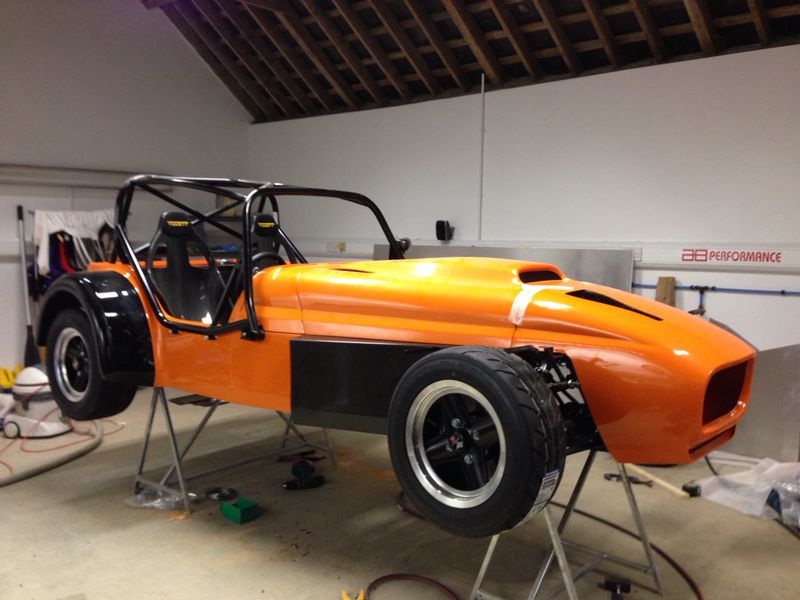

Finally things are starting to really progress, with a self imposed mid January deadline to have the car ready to head off for wiring. Until the next
instalment...
Rob
|
|
|
Rob55
|
| posted on 31/12/13 at 02:27 PM |
|
|
1 piece back panel just needs a little more tidying but has worked out well
|
|
|
waggy
|
| posted on 1/1/14 at 08:06 PM |
|
|
Wow you have been busy! Looking great now.
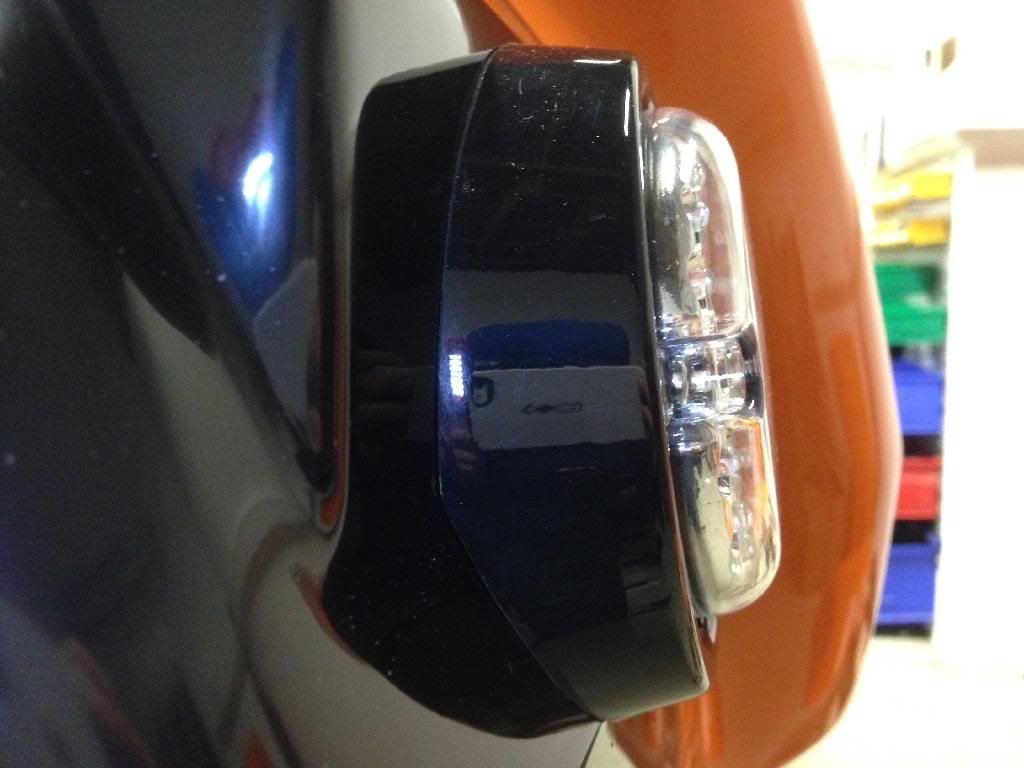
Loving the smilie on the mirror.
|
|
|
theduck
|
| posted on 1/1/14 at 08:54 PM |
|
|
just read from start to finish, awesome quality build!
|
|
|
gavink
|
| posted on 6/1/14 at 04:11 PM |
|
|
Outstanding quality Robert, can't wait to see the finished car-don't be afraid to get a run down to Campsie!
|
|
|
Rob55
|
| posted on 20/1/14 at 09:38 AM |
|
|
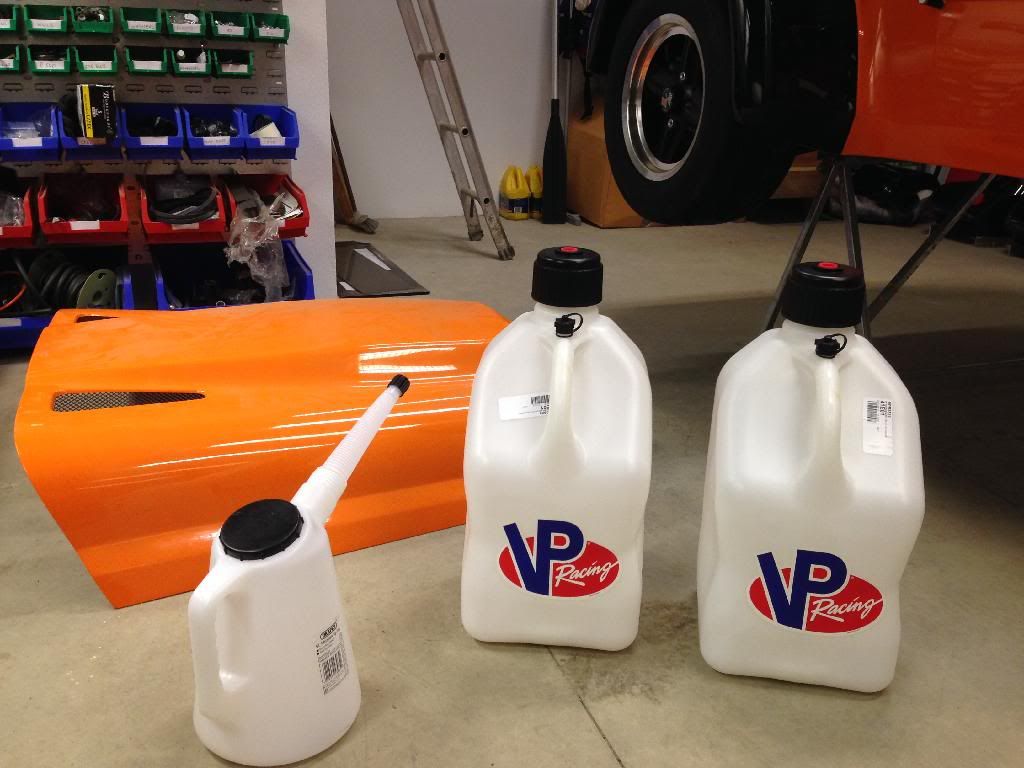
Things are now progressing nicely with the car, some updates from the past couple of weeks..
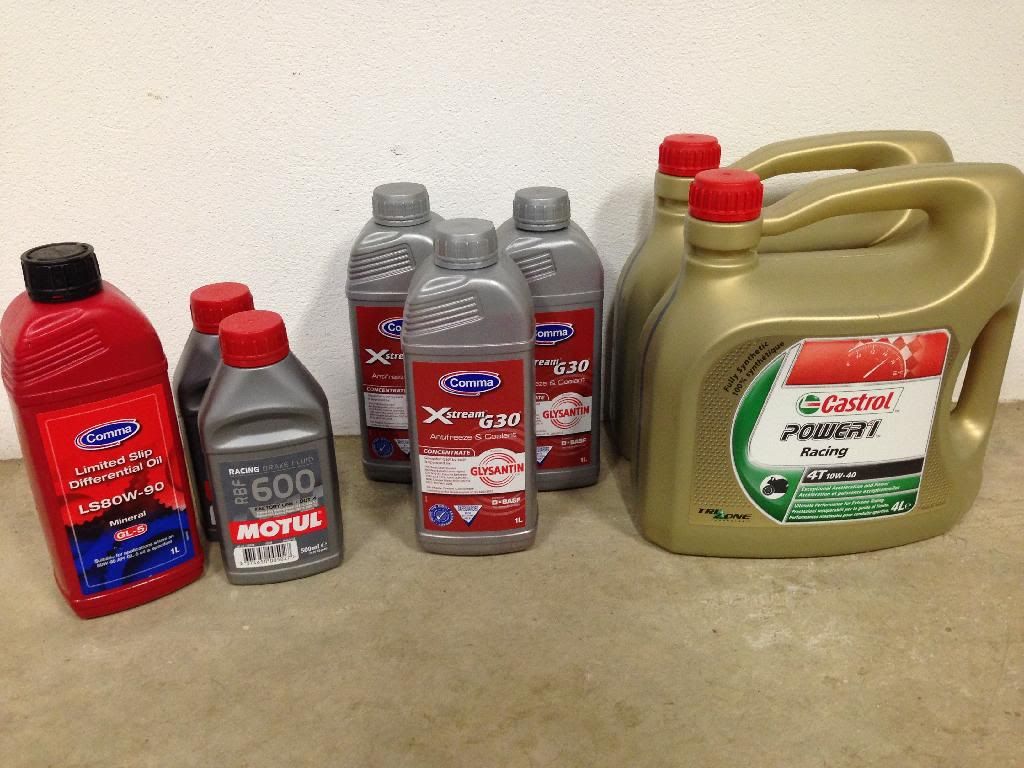
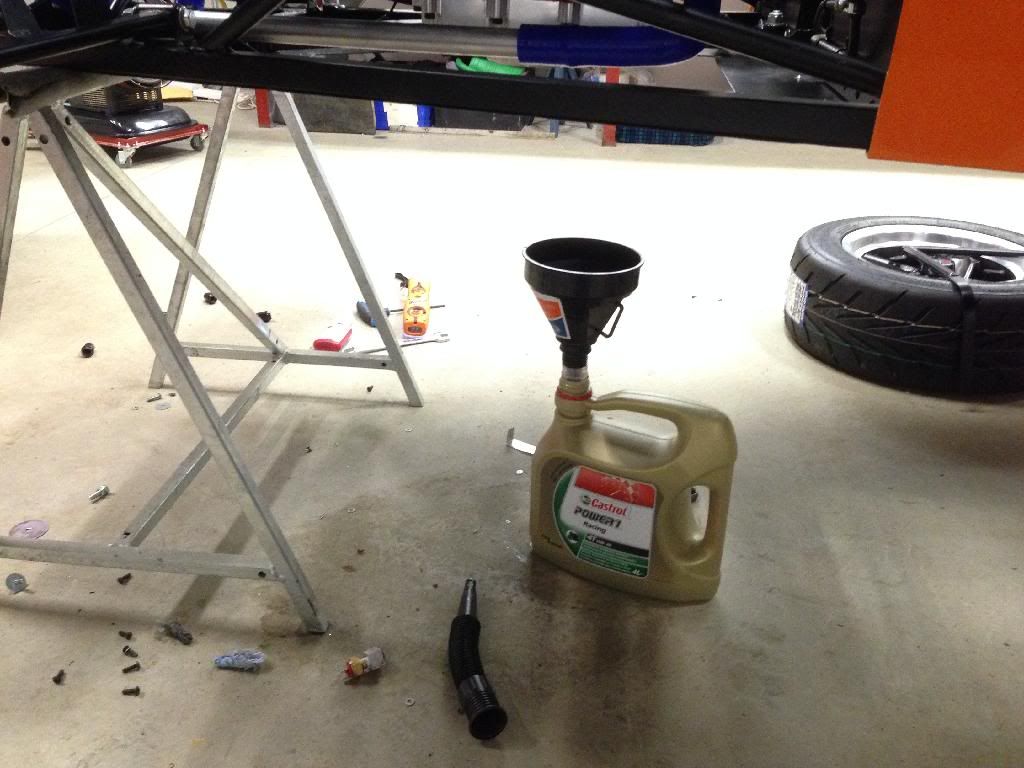
Fluids bought. Only thing I couldn't find locally was the brake fluid, the rest were from Halfords, which means if I get caught short at a
weekend or on race day, I don't have to wait on parts coming mail order.
Filled the diff - coat hanger and an old bit of pipe worked perfect.
Fuel jugs and measuring jug bought
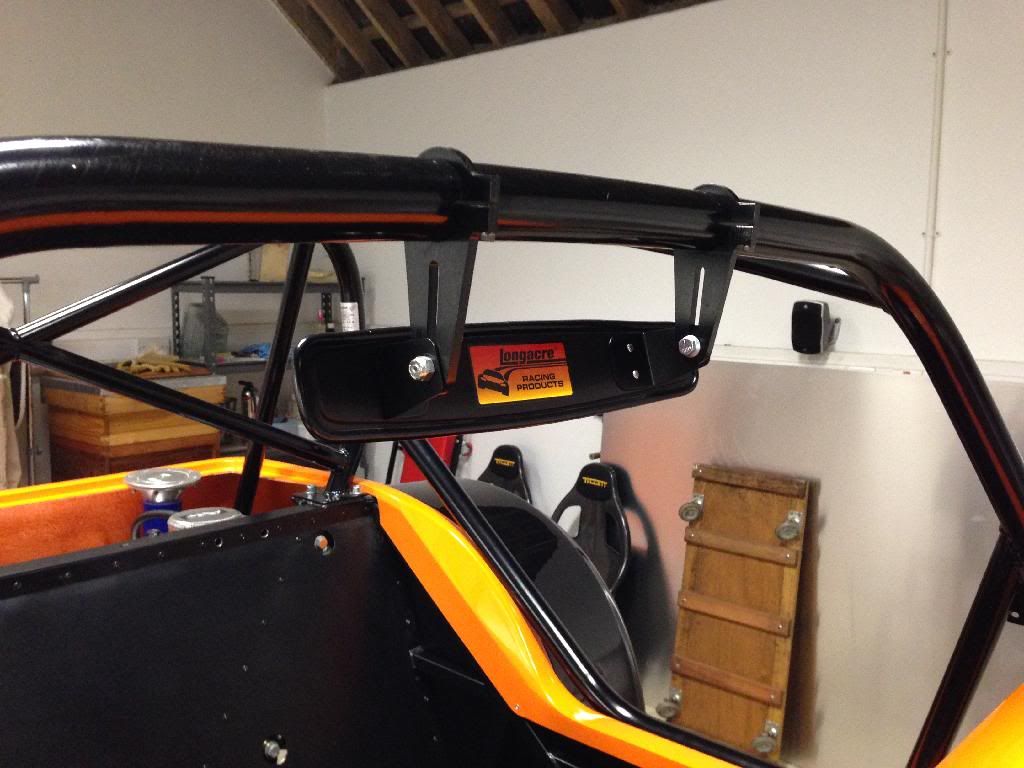
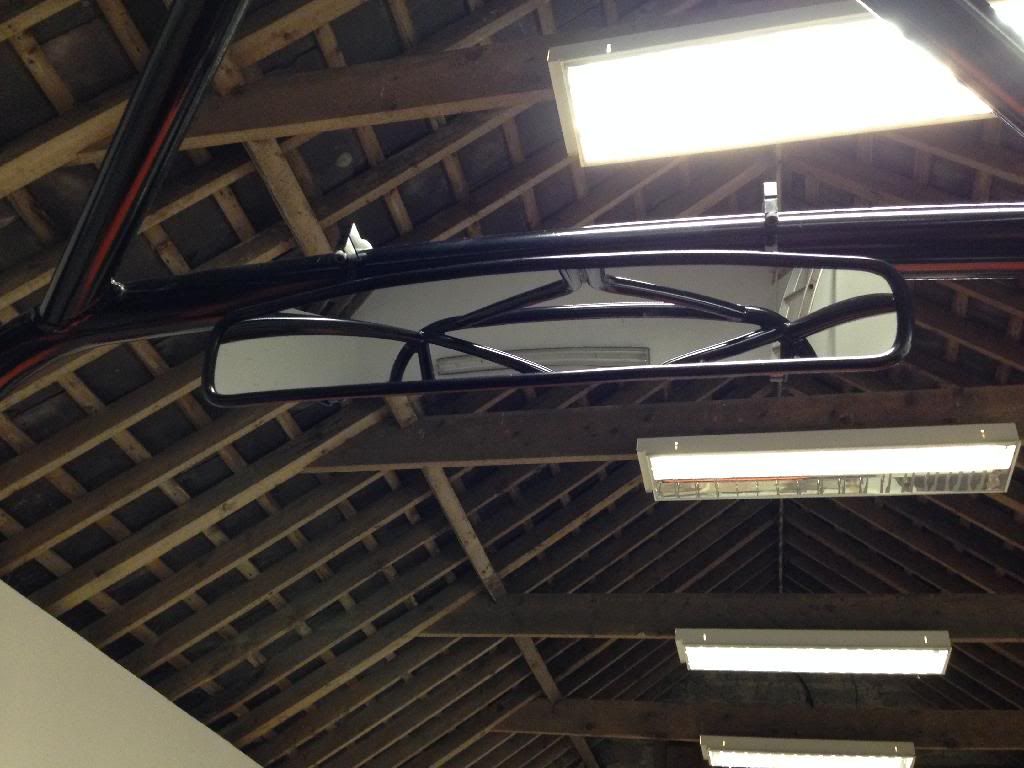
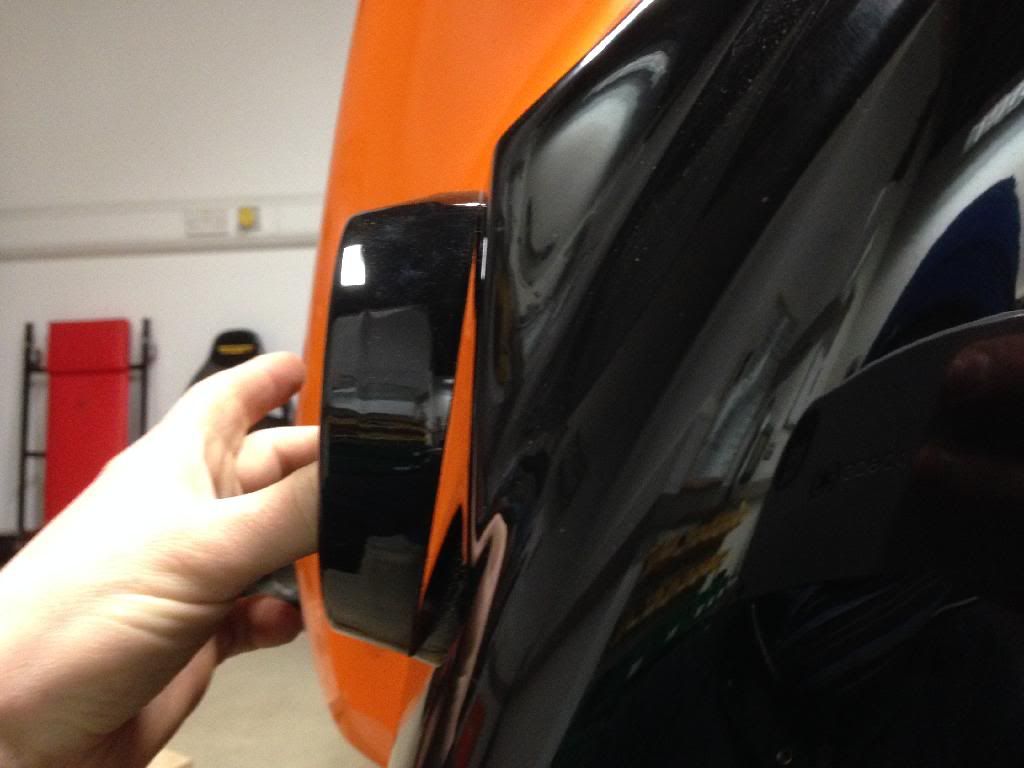
Longacre rear view mirror fitted. Will need some attention to pass IVA to hide the sharp edges of the brackets. Great wide angle vision
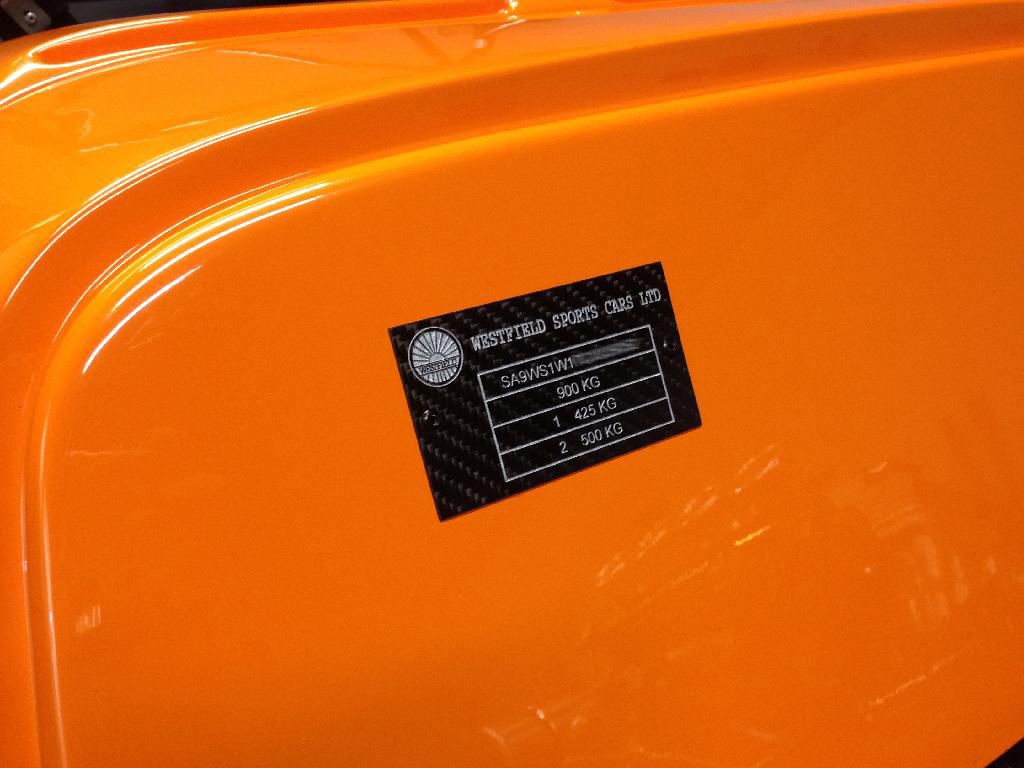
Chassis plate fitted. Picked up this nicely engraved carbon item from an eBay seller
Finished off the water and fuel pipe plumbing
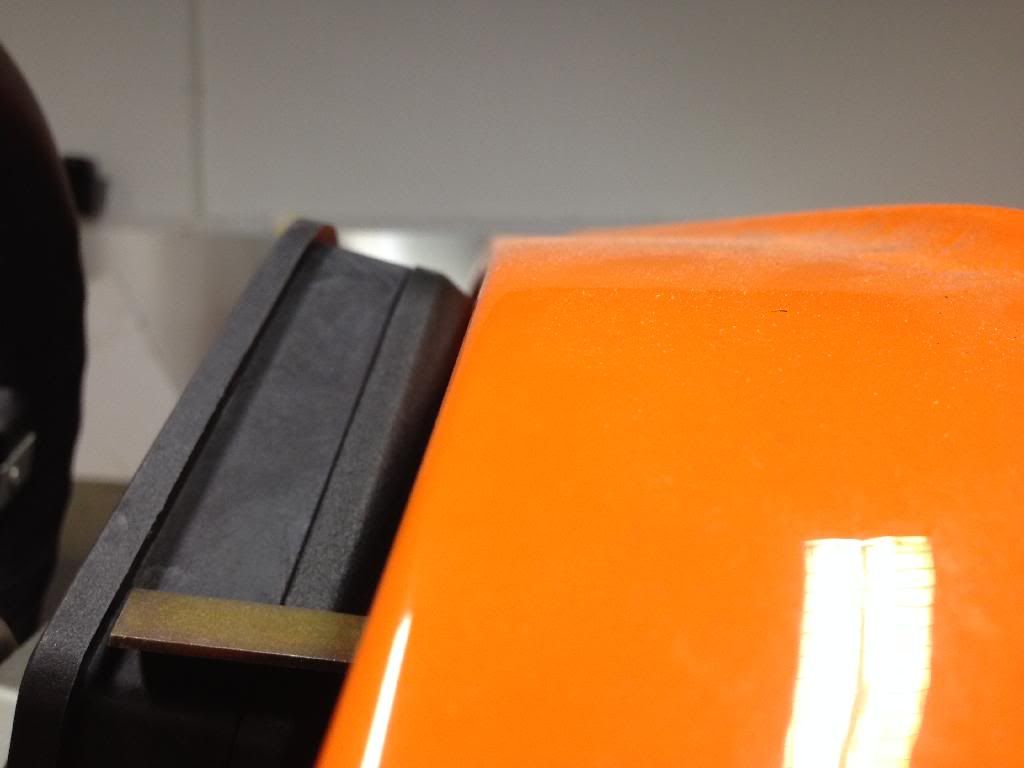
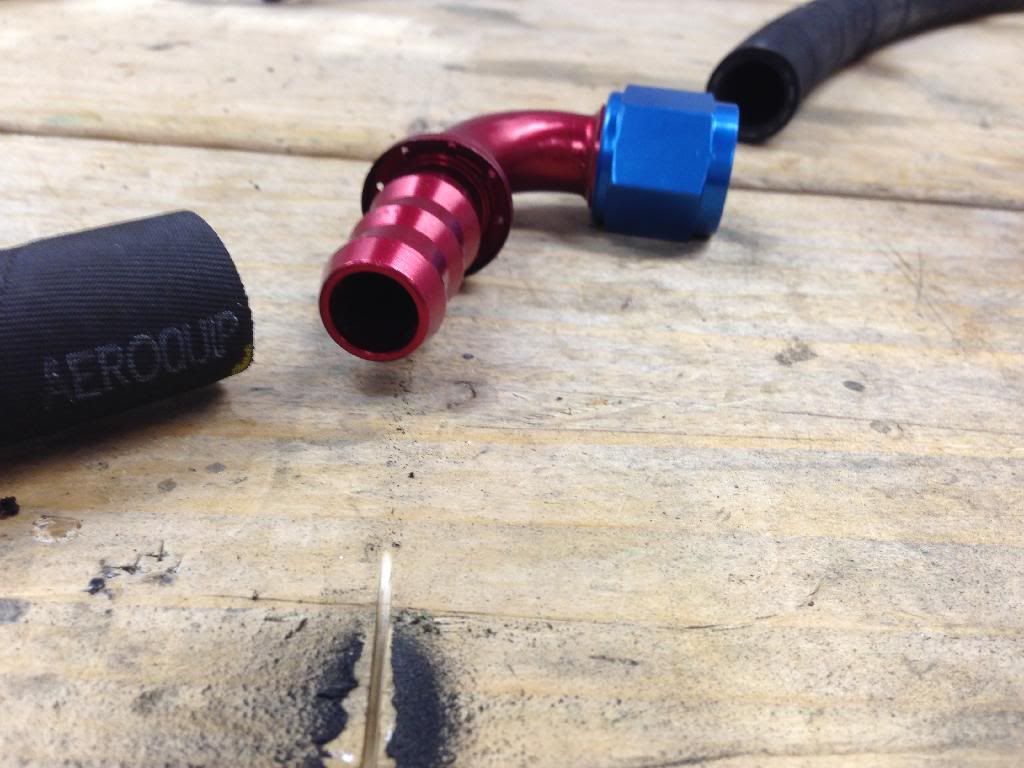
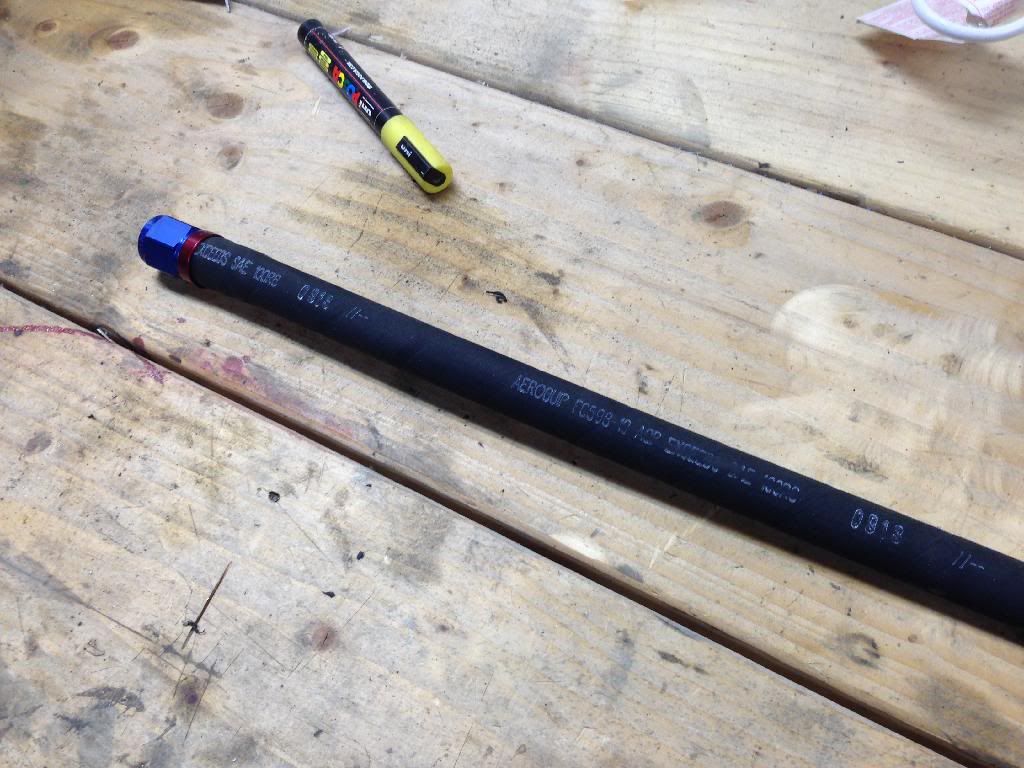
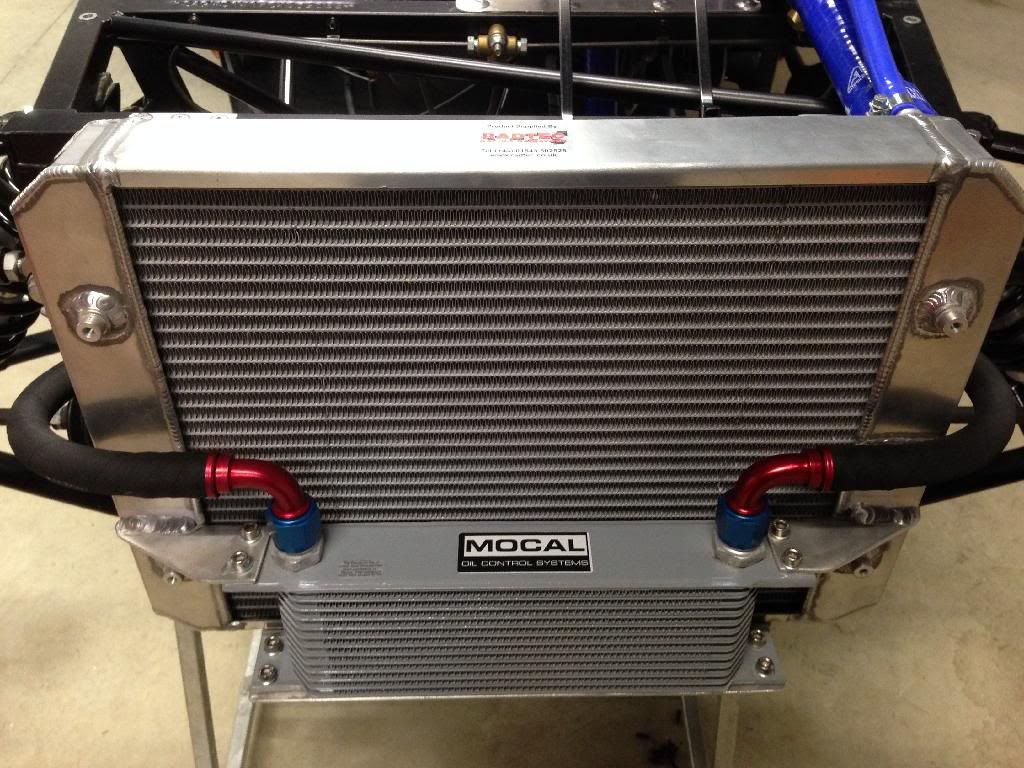
Plumbed in the oil cooler - after much deliberation on cost vs benefit I took the advice from Think Automotive and used aeroquip rubber hoses with
barbed push fittings. Apparently good for 250psi which is a lot more than I will throw at it. Assembly was a doddle, the fittings push easily into
the hose but won't pull out again. Though, from reading some other forums I think I will add a jubilee clip onto each fitting as an extra level
of security.
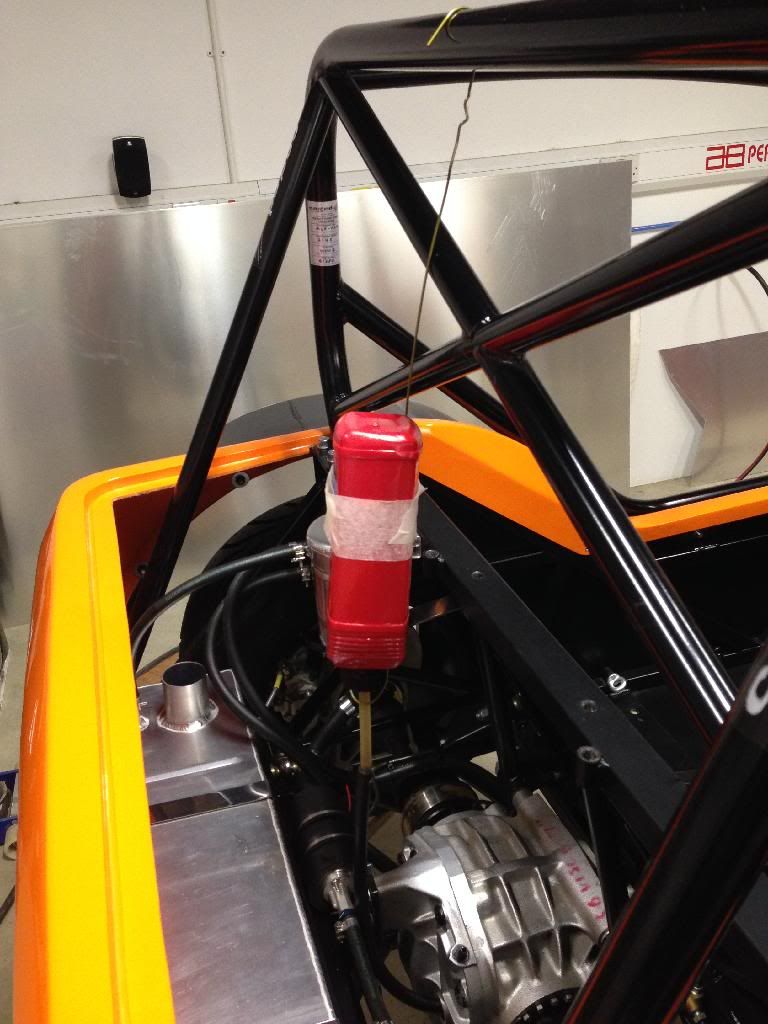
Next up I got a sump plug adapter machined by a local engineering company to accept my Stack temperature sender
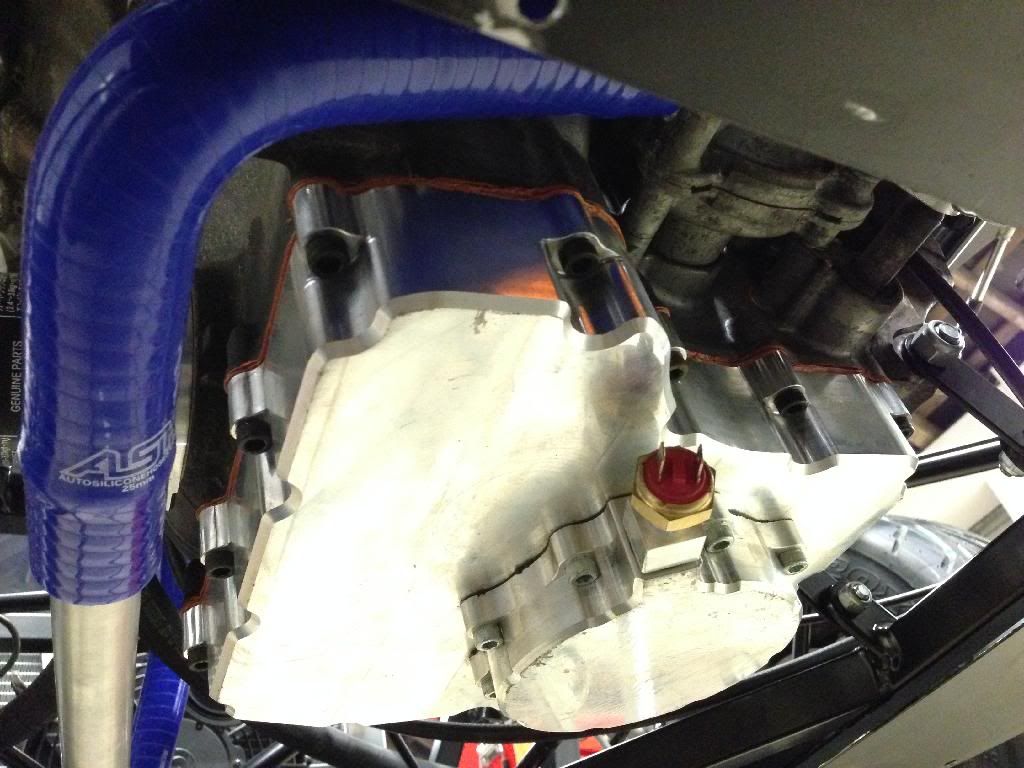
Unfortunately, when I added half a litre of oil to test, it leaked  And worse still, it broke off in the sump when I went to undo it. So today I
will have to remove the sump and have the engineering firm weld the adapter on. Thankfully I managed to recover all of the oil (££), you can just see
the broken adapter on the ground with the temp probe in it. And worse still, it broke off in the sump when I went to undo it. So today I
will have to remove the sump and have the engineering firm weld the adapter on. Thankfully I managed to recover all of the oil (££), you can just see
the broken adapter on the ground with the temp probe in it.
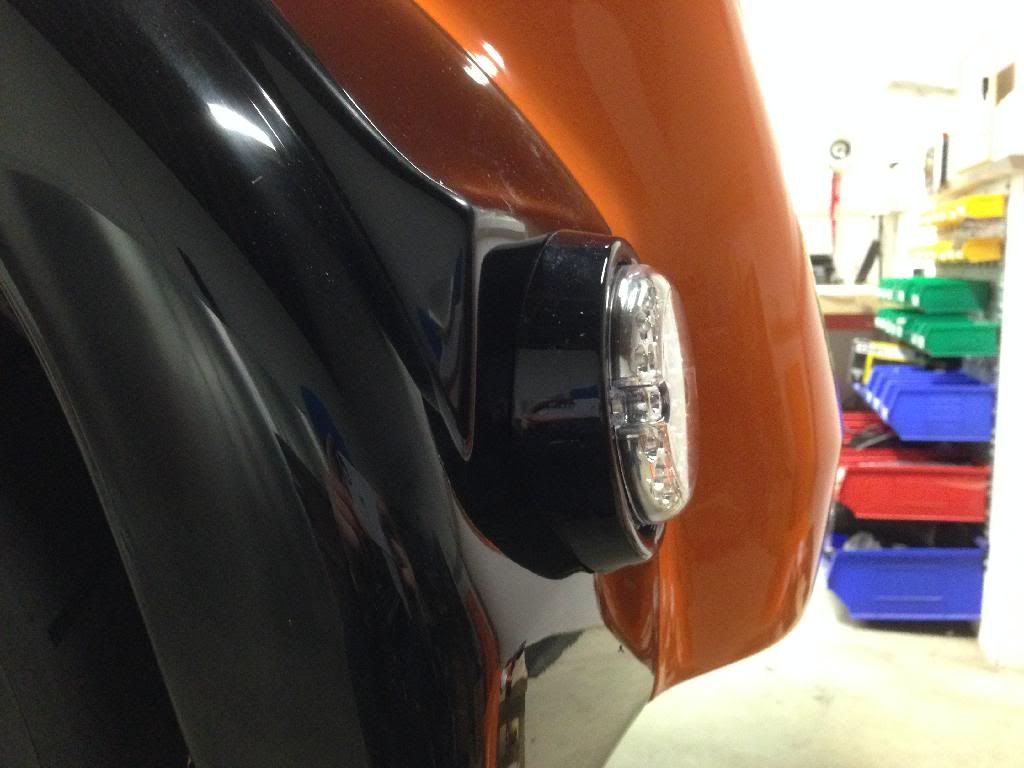
Then it was onto electrics. I picked up some nice multi function single rear lamps off Bolt On Bits, with universal lamp pods.
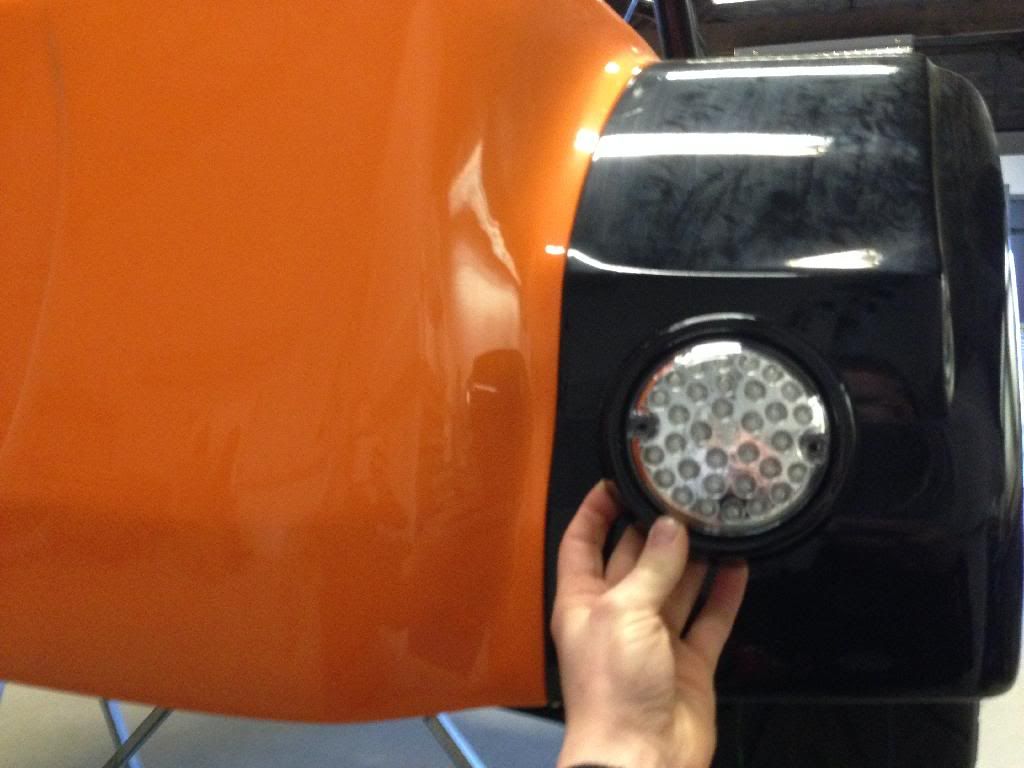
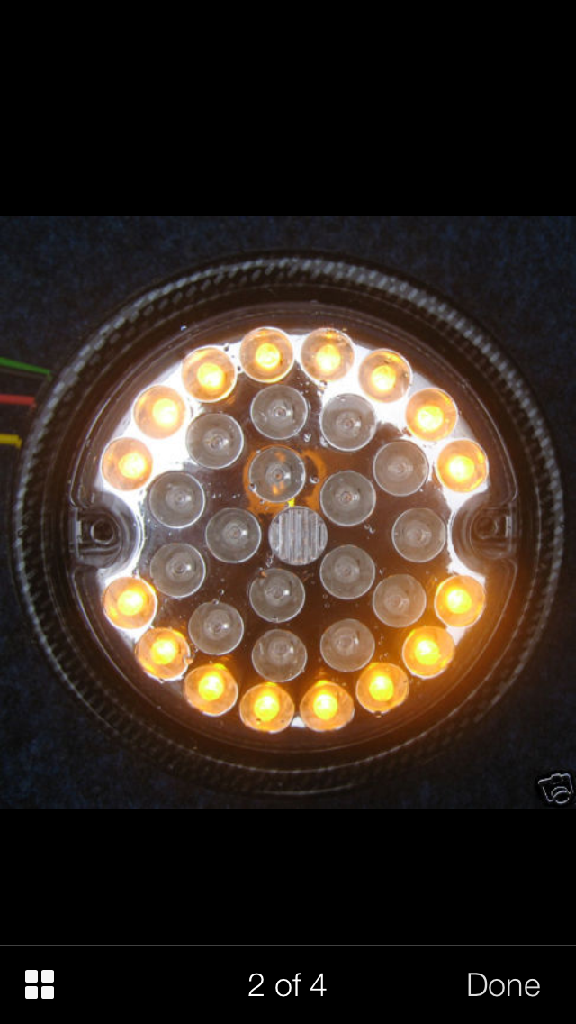
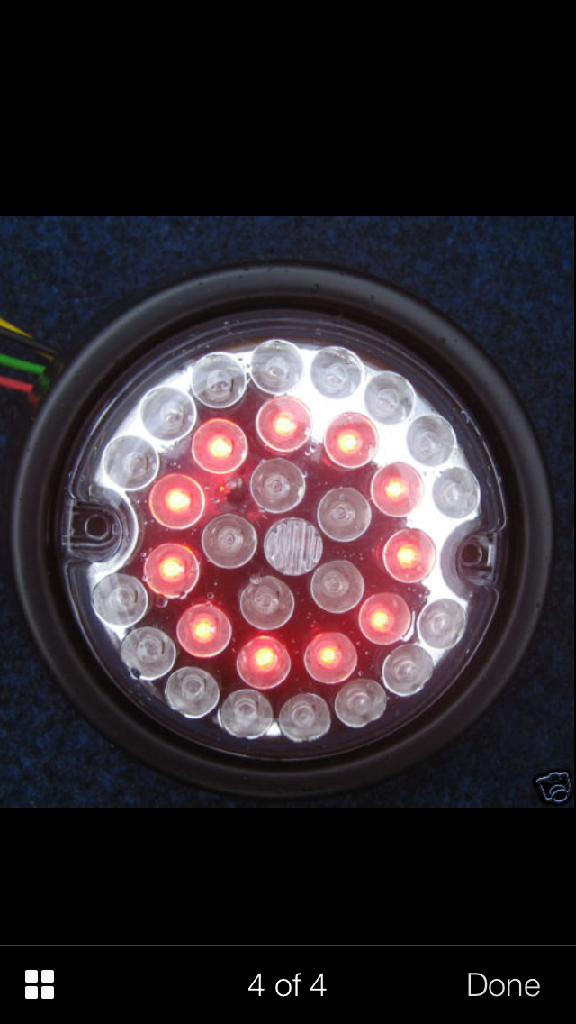
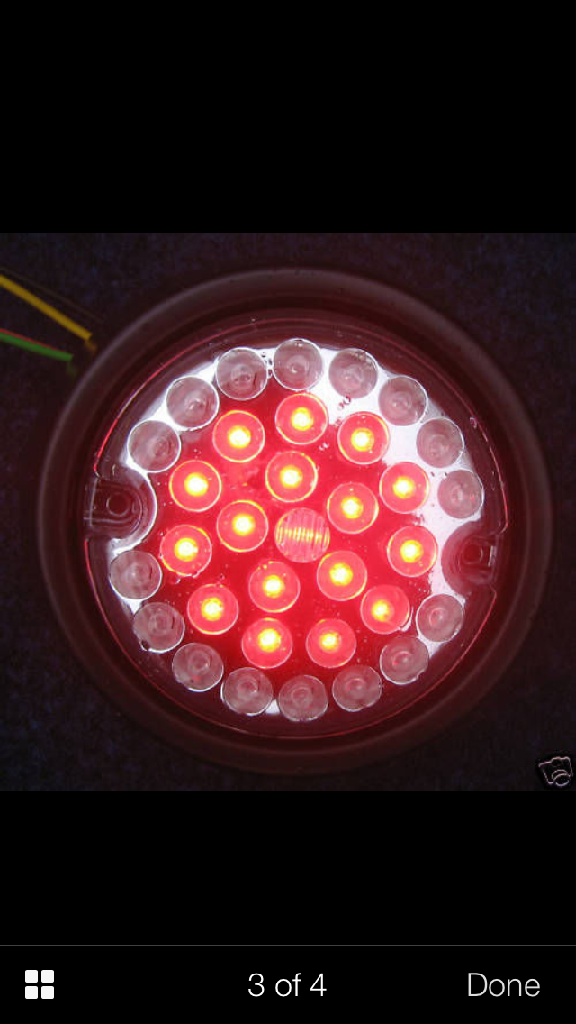
Unfortunately the lamp pods don't fit the standard Westfield location, so required some modification to suit the angle of the rear arch. This
looks worse than it actually is - I used a belt sander to remove an even portion of material and keep it square. The end result is absolutely spot on
perfect.

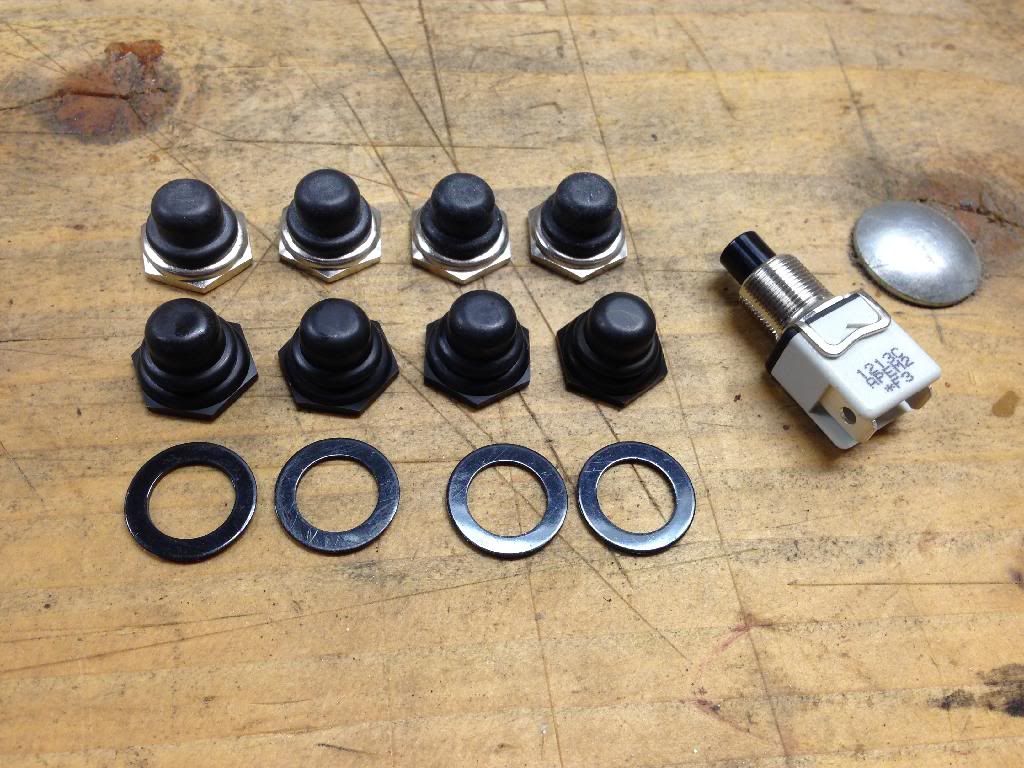
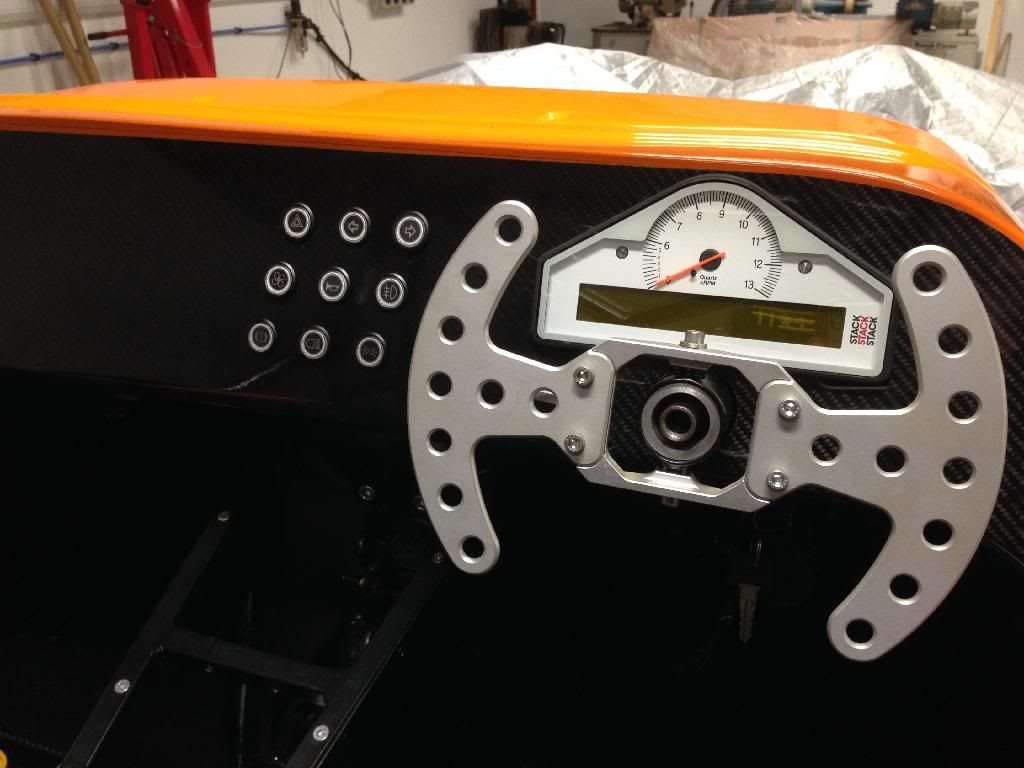
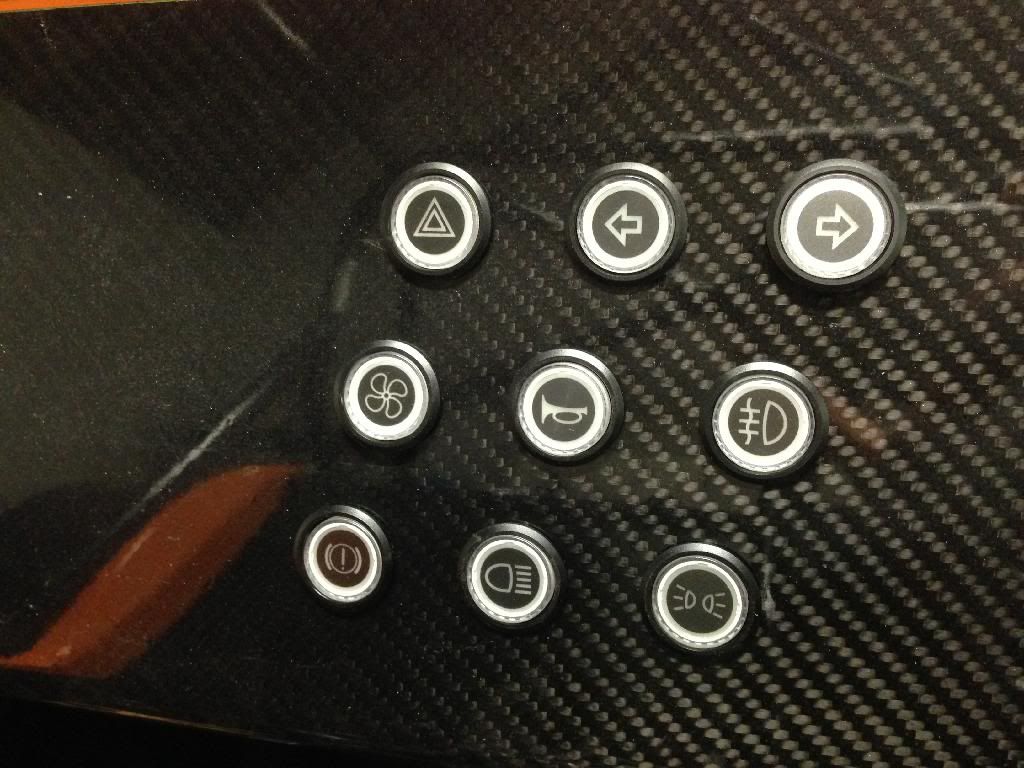
Then it was onto the dash. All in the name of the "finer detail" I sourced some black button boots to replace the standard silver Stack
items, to tie in better with the dash. Switches are made by APEM, boots available from RS Components for anyone interested..
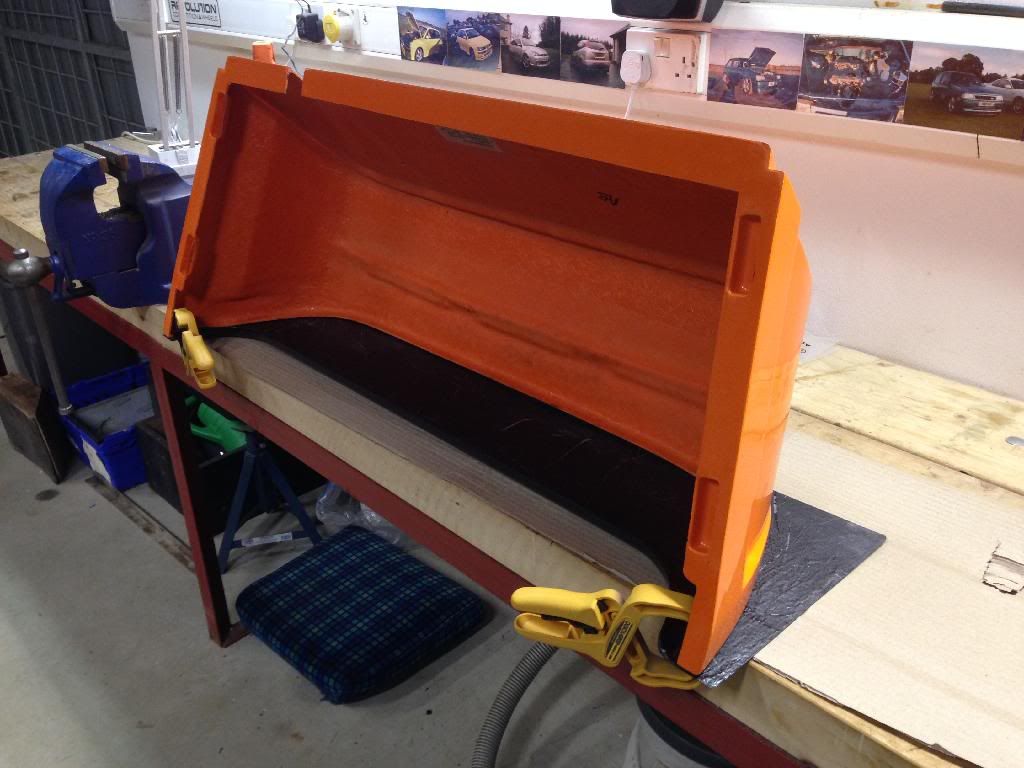
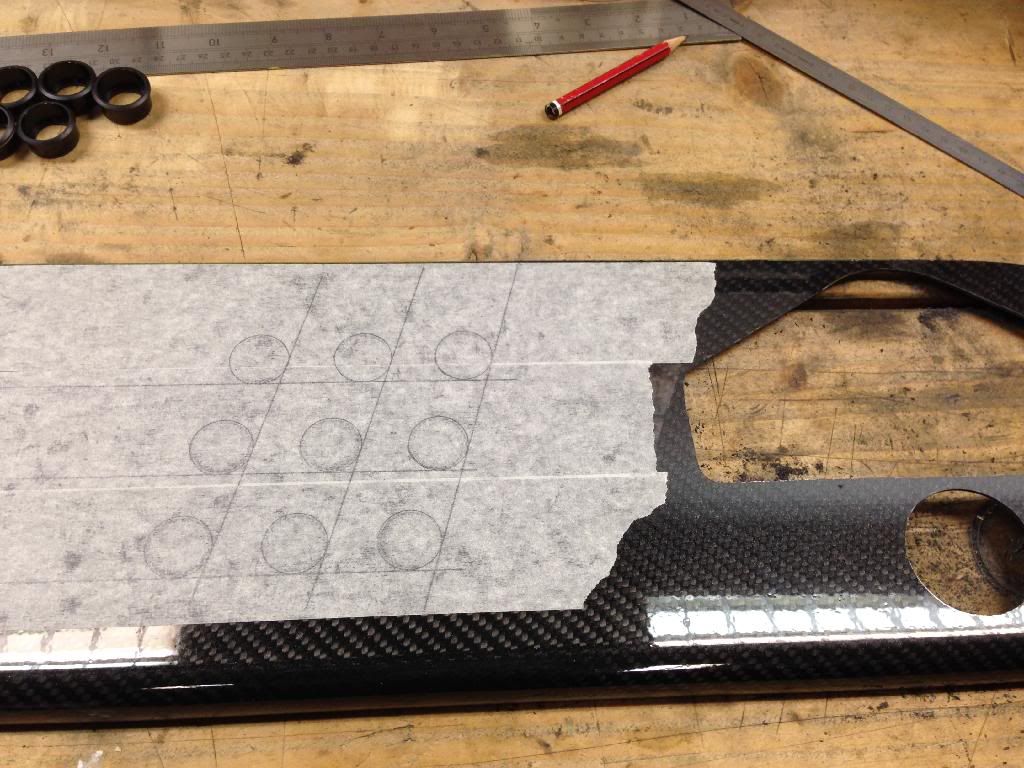
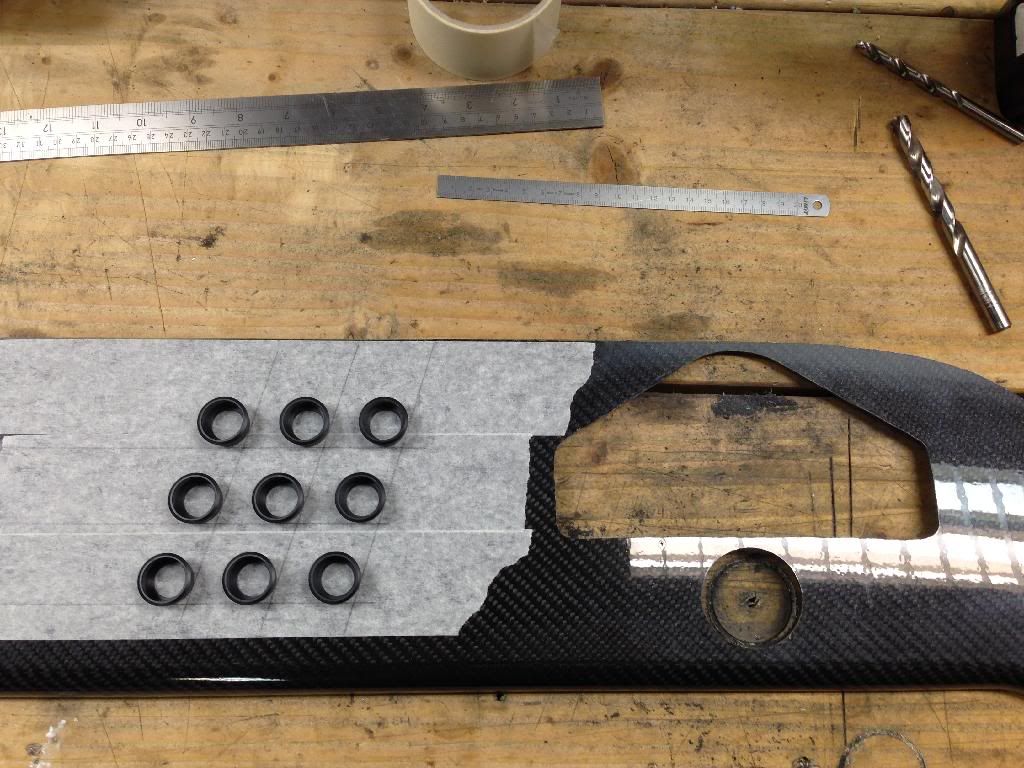
Carbon dash blank by Mickmade was measured and cut to size, then trimmed with the belt sander, great handy tool for this job
And then marked and cut for the steering column and Stack
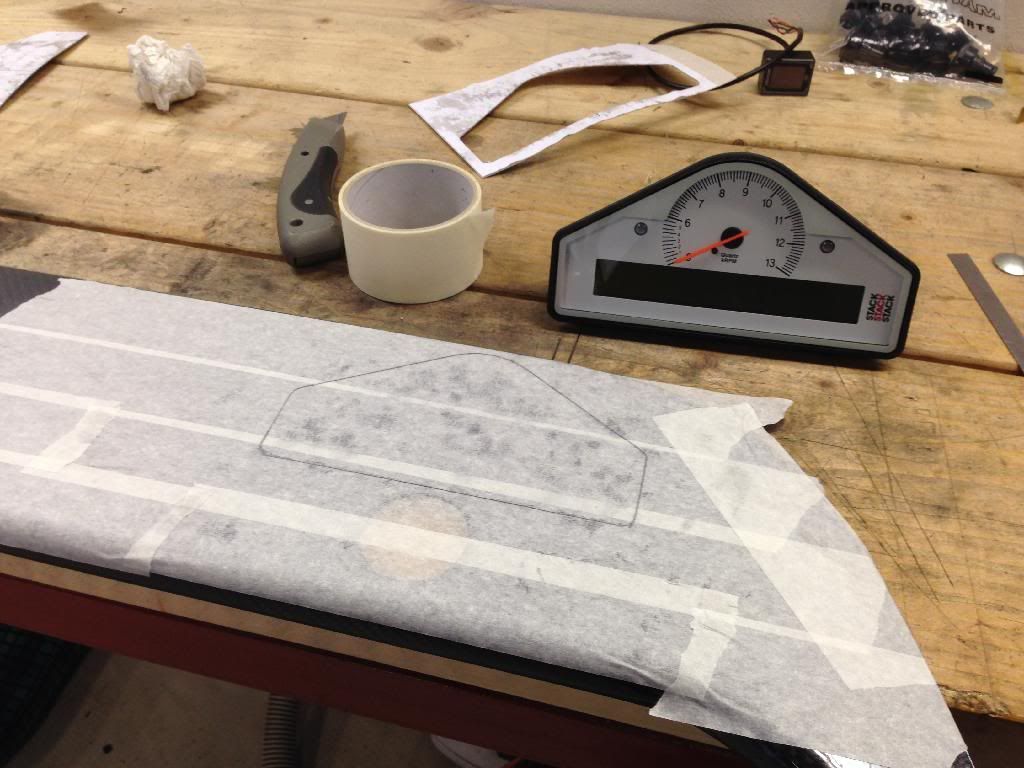
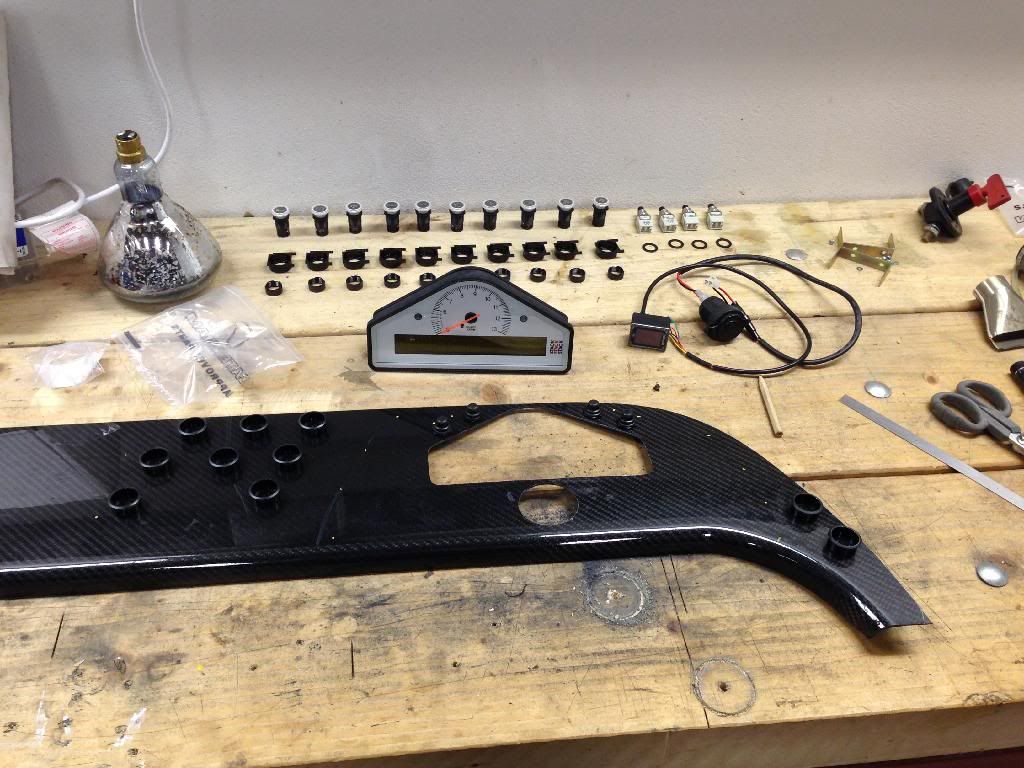
And then marked out and bored for the various switches, which incidentally are direct from Caterham from the R500.
The finished product
[Edited on 20/1/14 by Rob55]
|
|
|
CosKev3
|
| posted on 20/1/14 at 07:10 PM |
|
|
Excellent write up/pics/workmanship
|
|
|
SJL
|
| posted on 20/1/14 at 08:47 PM |
|
|
Blimey its like having deja vu looking at your build
Even the colour is the same! Good job 
I always thought that WF could take a good lesson from Caged on powder coating quality though
|
|
|
HowardB
|
| posted on 20/1/14 at 09:13 PM |
|
|
that is awesome,..
Howard
Fisher Fury was 2000 Zetec - now a 1600 (it Lives again and goes zoom)
|
|
|