Fibreglass mould making advice
corrado vr6 - 6/11/15 at 07:52 PM
Hi there
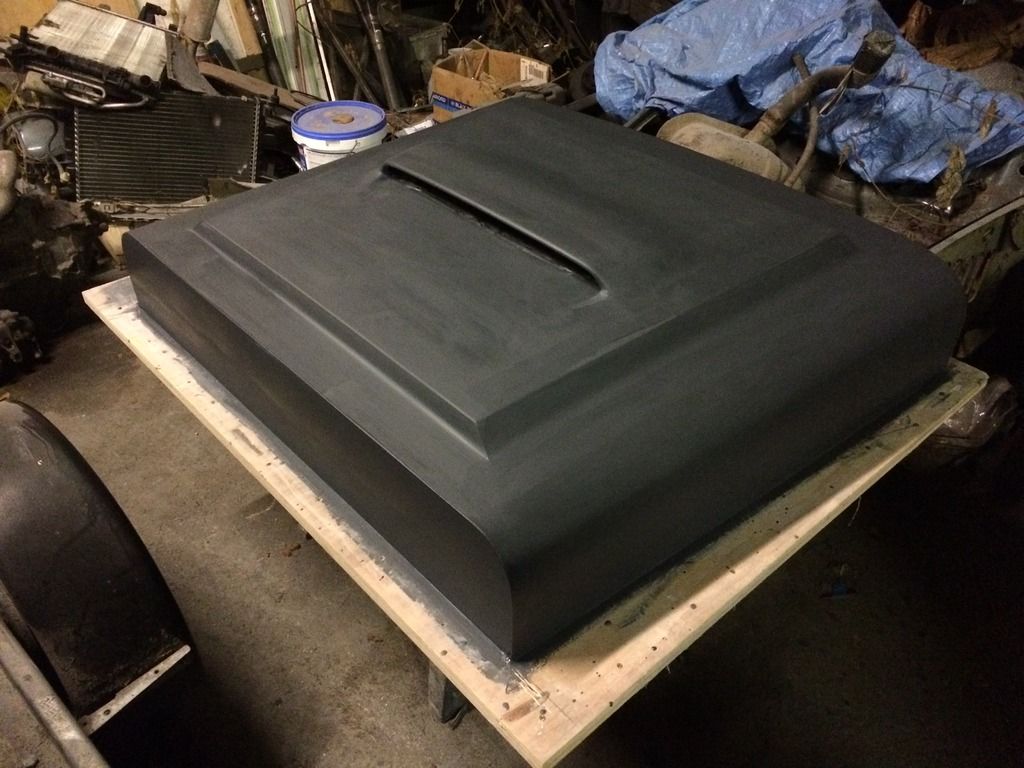
I'm making a new bonnet for my jago geep as for my project I need it longer. I have made a pattern to make my mould from, however I have read
that if the pattern has parallel sides then it's best to split the pattern so the mould doesn't become locked.
From the pic below where would be a good idea to split my mould to make removal simple?
The scoop will be blanked off flat
The sides are tapered too

trextr7monkey - 6/11/15 at 11:33 PM
Hi my only mould making experience is for vac forming and even sides which are apparently vertical have a draft angle to allow removal if you have 2
tapered sides I would have thought it should come off with a bit of encouragement. Give the bloke at East Coast a ring and send the pic through
he's got years of experience and is very helpful
Cal
twybrow - 7/11/15 at 10:26 AM
Tricky to tell from the photos, but is there a direction you could pull the part out of a single piece mould without it getting locked in place? When
you say the sides are tapered, do you mean the bonnet is wider at the rear than at the front (ie the sides are slightly angled in from, rear to
front)? If that is the case. you could make the tool so that you demould along the length of the bonnet (ie stand it vertically, sitting on the front
face, and demould upwards). It looks too simple a shape to require a split line to be added, but photos can be deceiving. Confirm which sides are
parallel and go from there. As a general rule, 3 degrees is typically enough to demould (less if the plug or tool are thin enough to bend slightly).
If you have a to make a pair of splits, it is quote a lot more work, so worth checking what options you have first...
Neville Jones - 7/11/15 at 11:07 AM
If everything is square and straight, the best place to me anyway, to split the mould, would be at that front corner.
It's easy enough then the wet sand the flash and polish.
General rule is to split at a change of shape or contour. At least that's what has been taught for 50 years or so.
Cheers,
Nev.
corrado vr6 - 7/11/15 at 11:59 AM
Ok some ideas there
Just to confirm the sides are tapering in, so the rear is wider than the front
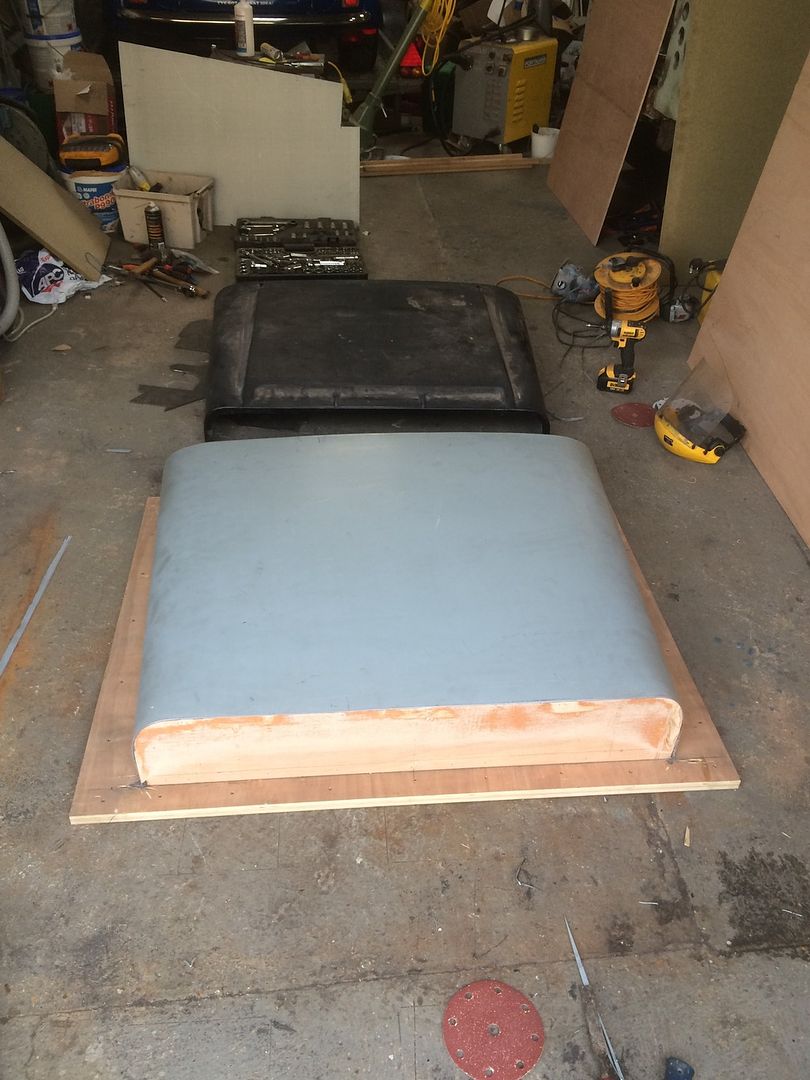
At either end I will be running the fibreglass down the two ends as well to create a 30mm lip (hope this makes sense)
Hopefully you can make out the lip from the original bonnet in this pic

If it could be made without a split that would be great, as you say that will be a lot of extra work!
Neville Jones - 7/11/15 at 02:20 PM
Do the flat ends belong on the bonnet, or are they just shap3 formers?
Otherwise, you don't need a split. The finished bonnet will bend enough to just pop out all by itself, just about.
Get a long edge free with plastic wedges, and it'll drop out. I've done locost bonnets just this way a few times with my mate.
corrado vr6 - 7/11/15 at 02:45 PM
If I have understood you correctly then yes the ends belong to the bonnet as the end is a lip which goes over the front panel when fitted
twybrow - 7/11/15 at 10:15 PM
As above, looking at that and your comments above you don't need a split IMHO.
corrado vr6 - 6/12/15 at 08:25 PM
Hi there, I thought I would give an update on this as to how it's gone.
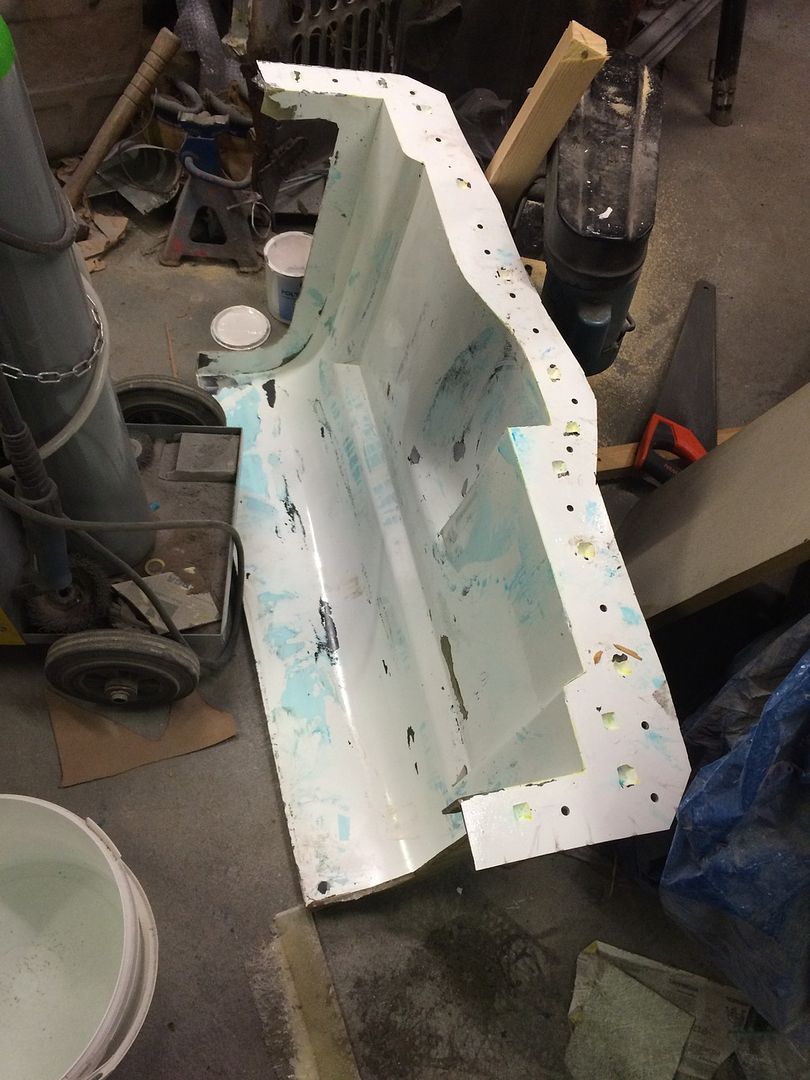
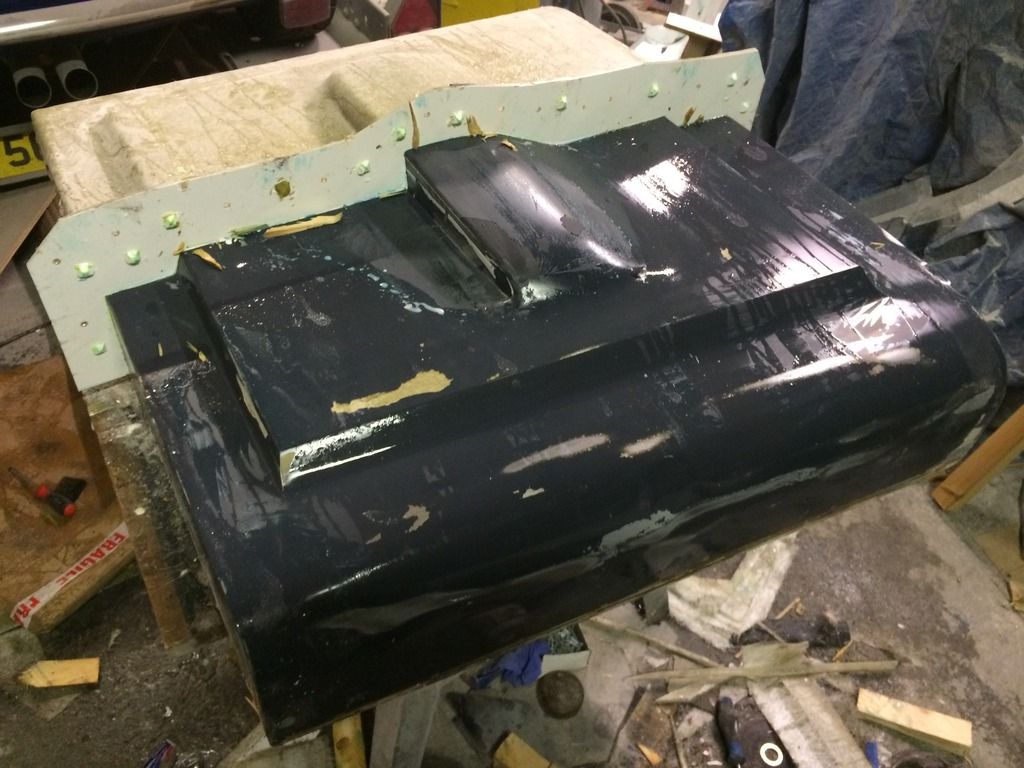
For reasons I thought of after posting on here I decided to do a split mould, the first side released ok however with a bit of the plug sticking to it
but no big deal


The problem I've got with the other side is its stuck! It's started to pull away from the plug however it's taking a lot of the paint
and filler I used with it as if the PVA release hasn't worked at all, which is very frustrating!!
If I do manage to release it would it be possible to remove the filler and paint and repair the gelcoat surface or is it no knackered?
To give you some info, I applied the PVA all over the plug using a foam brush, I let this go off over night then started to gelcoat in the evening
then started the glassing up. When it came to doing the second side I went to apply a further coat of PVA just incase it had been contaminated whilst
I was laying up the first side, however the PVA started to lift the first coat in a couple of places. I decided it would be safer to wash the PVA off
altogether with water allow to dry then I applied a single coat of PVA, I allowed this to dry over night and applied the gelcoat the following evening
then started the laying up process.
Can the gelcoat / mould be rescued?
Vmax1974 - 12/12/15 at 09:37 AM
Hi depending on the severity of the gel damage you should be able to repair the mould without too much problem to remove the plug if your finished
with in then break it out of the mould the mould will need flatting and polishing the hell out of anyway so a little bit of sticking is easy dealt
with
I have a crack to repair in one of my moulds I will start a thread to go through it tep by step if that would help
if you have any problems with the mould send me a load of photos and I will see what advice I can give
[Edited on 12/12/15 by Vmax1974]


