robertst
|
| posted on 24/9/10 at 07:01 PM |

|
|
Bonnet scoop fixing
Good evening...
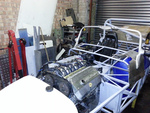
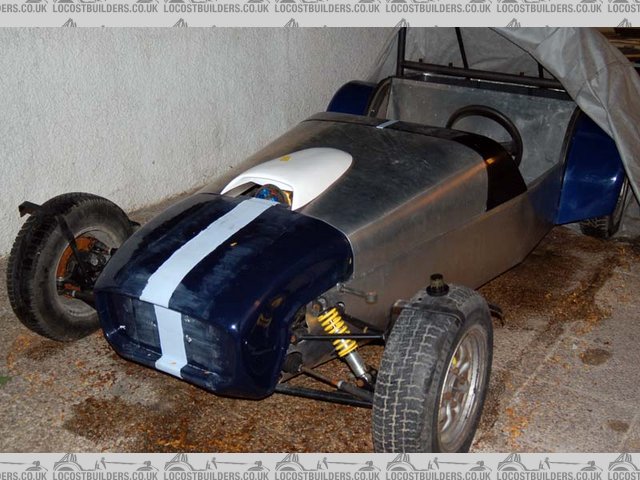
I received this earlier in the post, and offered it up to the bonnet.
can anyone give me any clues how to fix it securely to the bonnet?
i could only come up with sikaflex (which wont do as the whole bonnet will be primed and painted)
any ideas?
Thanks!
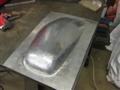
bonnet scoop1
here u can see the edges of the scoop
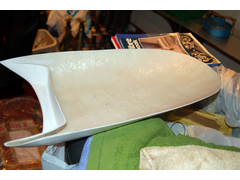 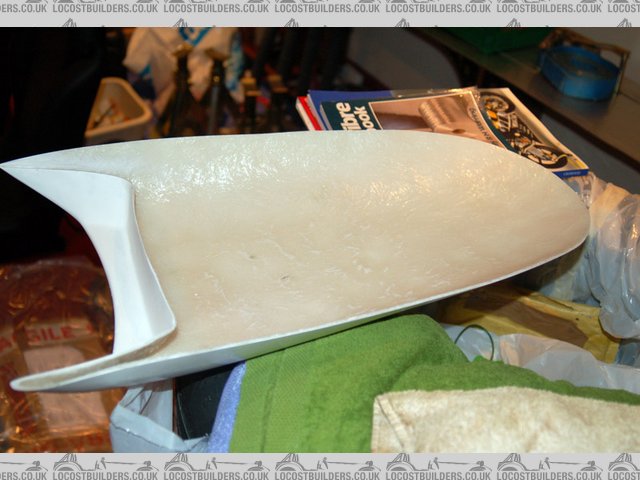
bonnet scoop 2
Tom
|
|
|
|
|
doddy
|
| posted on 24/9/10 at 07:05 PM |
|
|
i would fiberglass some bolts or fixings in to it that you could line up with the bonnet so you can bolt it down
|
|
|
daniel mason
|
| posted on 24/9/10 at 07:20 PM |
|
|
i would probably go for some right angled brackets riv nutted to bonnet, then fasten through the side of the scoop into the bracket
|
|
|
scutter
|
| posted on 24/9/10 at 07:58 PM |
|
|
Sorry for the rough 'paint' drawing, Could you fill/build up the hatched area with resin, my scoop came with this area filled in and I
drilled and ran a self tapping screw into the resin.
Just an idea. Dan.
[img][/img]
The less I worked, the more i liked it.
|
|
|
MakeEverything
|
| posted on 24/9/10 at 09:39 PM |
|
|
Cant you fibreglass it in from underneath?
Kindest Regards,
Richard.
...You can make it foolProof, but youll never make it Idiot Proof!...
|
|
|
Mix
|
| posted on 25/9/10 at 05:21 AM |
|
|
Hi
I would bond on three threaded fixings and drill the bonnet to accept, then trim the edge with 'U' trim.
Regards Mick
|
|
|
GRRR
|
| posted on 25/9/10 at 09:05 AM |
|
|
if you need to make lumps to screw into use David's P40 from Halfords etc, the thick stuff pre-mixed with glass fibres, ideal for this sort of
thing.
|
|
|
RichardK
|
| posted on 25/9/10 at 01:16 PM |
|
|
quote:
Originally posted by GRRR
if you need to make lumps to screw into use David's P40 from Halfords etc, the thick stuff pre-mixed with glass fibres, ideal for this sort of
thing.
I would make some cardboard baffles, that slot into each other so to make small squares around various areas and then flood fill them up with P40 or
even sikaflex with some threaded inserts pushed in (small screw or tape over the lower end to stop it filling up as its pushed in), you know, the
thing that goes into a rivnut tool.
Just a couple of ideas.
Cheers
Rich
[Edited on 25/9/10 by RichardK]
Gallery updated 11/01/2011

|
|
|
clairetoo
|
| posted on 25/9/10 at 01:23 PM |
|
|
How about cutting the hole in the bonnet 25mm smaller all round than the scoop , then bend that surplus metal up to form a mounting flange to match
the profile and shape of the bulge (on the inside) , then countersunk rivets and a bit of filler to finish off ?
Its cuz I is blond , innit
Claire xx
Will weld for food......
|
|
|
suparuss
|
| posted on 25/9/10 at 05:57 PM |
|
|
ive never seen a topic with as many different ideas!
i would do the threaded inserts or captive threads and bolts idea as the alluminimim will expand and contract like mad especially over the engine, so
a permanant bond proabably wont last too long. i certainly wouldnt try to blend it in! the u trim would be a good addition to finish it off i reckon.
|
|
|
robertst
|
| posted on 25/9/10 at 06:23 PM |
|
|
quote:
Originally posted by clairetoo
How about cutting the hole in the bonnet 25mm smaller all round than the scoop , then bend that surplus metal up to form a mounting flange to match
the profile and shape of the bulge (on the inside) , then countersunk rivets and a bit of filler to finish off ?
i thought about doing that, but bending the aluminium well will be very tricky.
i like the profile idea. i'll just make some l-shaped aluminium brackets and then rivet them to both the scoop and the bonnet and just use body
filler to cover the rivets...
thanks for the ideas!
[Edited on 25/9/10 by robertst]
Tom
|
|
|
Barronge
|
| posted on 27/9/10 at 06:32 AM |
|
|
I have absolutly no idea.... i would like to know where you got the scoop from though???
|
|
|
robertst
|
| posted on 28/9/10 at 10:51 AM |
|
|
quote:
Originally posted by Barronge
I have absolutly no idea.... i would like to know where you got the scoop from though???
i got it from the bay of e
(Click me!!!)
its originally supposed to go on a Saxo... but it fits quite nicely on our cars 
Tom
|
|
|
2cv
|
| posted on 28/9/10 at 12:27 PM |
|
|
quote:Originally posted by clairetoo How about cutting the hole in the bonnet 25mm smaller all round than the scoop , then bend that
surplus metal up to form a mounting flange to match the profile and shape of the bulge (on the inside) , then countersunk rivets and a bit of filler
to finish off ?
I think this is a very good idea and if you cut the shape in two pieces of ply and clamp up to sandwich the aluminium, this will protect the bonnet
from damage and you should be able to form the aluminium into an upstand. 25mm might be pushing it but 15mm would be no problem. Make sure the corners
are nice and smooth on the aluminium which will help to prevent splitting when it stretches. Any sign of a split carefully sand it back until it has
disappeared. Gently form the aluminium using a piece of hardwood and hammer and for the curves cut a similar radius in the wood which will help the
aluminium to form evenly.
[Edited on 28/9/10 by 2cv]
|
|
|