Theshed
|
| posted on 21/5/13 at 08:46 AM |

|
|
Kitchen made splitter - big pictures
I have embarked on making an undertray running the whole length of my car. I was just going to use plywood but I got ambitious and found some
cheap(ish) kevlar.... I made a few practice bits using vacuum bagging. It is not as easy as the interweb tends to suggest and I messed up a few parts.
But having just about succeeded with a dashboard I decided to make the front section...pictures below.
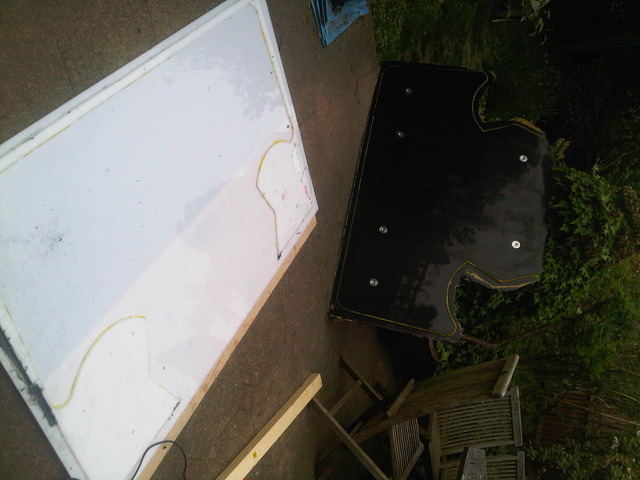
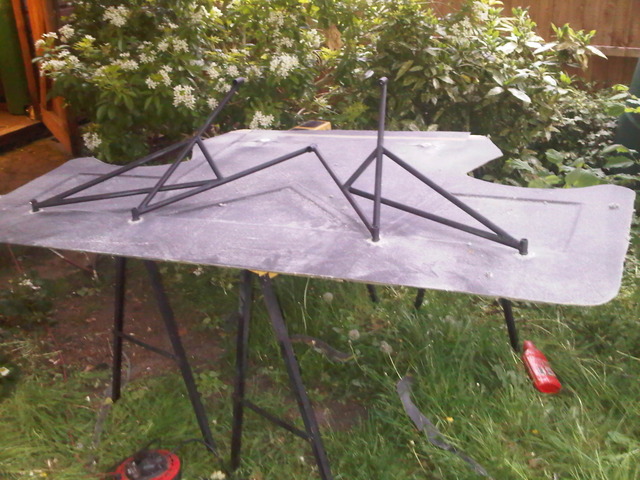
First I used a wooden board to mark out the mounting points. I put aluminium inserts in the board and bolted it to the car to test. I then put a
Polypropelene sheet over that and drilled through. Inserts were turned up out of Aluminium (7075T6 - bar ends from ebay). I used the remainder of the
sheet to form the edges of the mould and then uses wax (the yellow stuff) to make a fillet. This is what the mould looked like once the part was
out.
Description
I then used carbon fibre and Kevlar to laminate. This was by far the biggest thing I have done with composites and it took nearly 2 hours to lay up -
all the time I was paranoid it would start to go off. Between the laminate I used PVC foam to provide reinforcement. This is good stuff - I was able
to sand and shape the edges to match the wax fillet and to make it easier to lay over the fabric by rounding the edges.
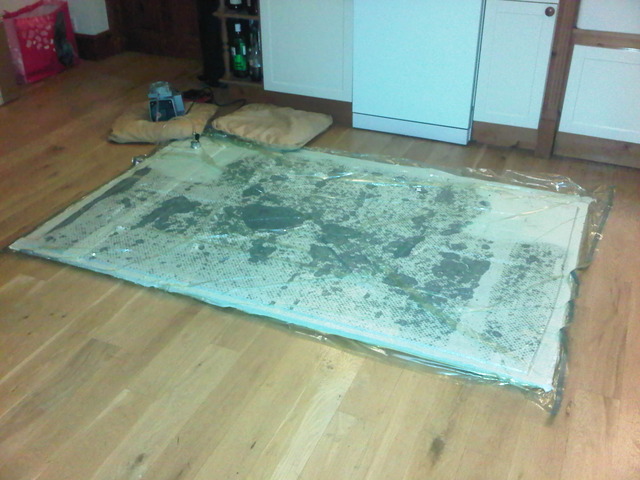
I then stuck the whole thing in a vacuum bag
Front splitter/undertray
It leaked! I had run out of the breather fabric and had not covered all the sharp edges. Much gum tape later and it held a reasonable vacuum. Small
problem was that it was now 10pm - family a little ratty that I refused to turn off the vacuum pump all night - on the bright side the cat did return
today..
The moment of truth last night
First off with the bag and peel ply
Description
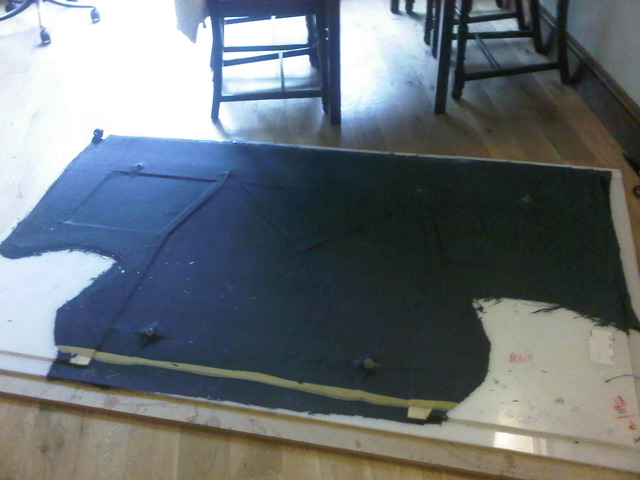
Then out of the mould - small problem whilst the part just fell off the polypropelene (no wax at all) I had bonded the polypropelene with hot melt
glue around the outside. The excess fabric was shall we say very well bonded....I cut it off with a dremmel. After that it just popped out. What
appear to be scratch marks are actually just sticky masking tape that I wrapped around a ruler to prise the part out. It polished off (phew).
Description
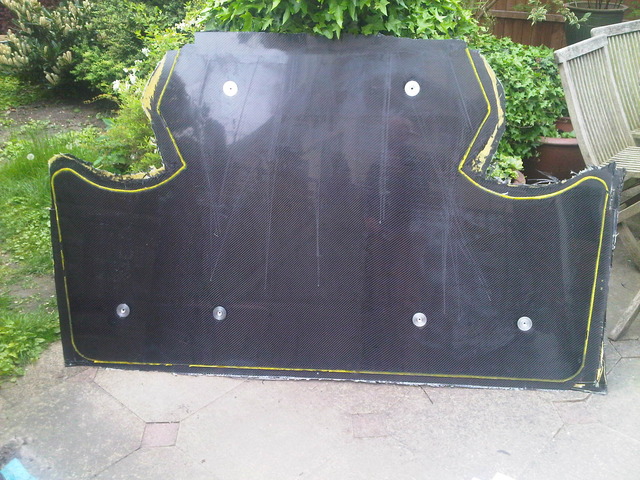
I have done a rough trim so far - I had to use the cutting disc in the angry grinder. I then fitted the support frame just to make sure that it would
fit. It did!
Description
I am really pleased. I know that a front splitter is generally considered a disposable item and so Carbon fibre is a bit OTT but hey so is the rest of
the car. All the materials together were just over one build your own sportscar.
I will bond this section to the next 1m wide section using glass reinforcement so that as and when it gets bashed to bits ripped off etc I can just
saw off the front and make another one. Now I just need to find somewhere to put the mould.
I will put some helicopter tape on the underneath to see how long that lasts..
|
|
|
|
|
mookaloid
|
| posted on 21/5/13 at 08:51 AM |
|
|
Good work 
"That thing you're thinking - it wont be that."

|
|
|
twybrow
|
| posted on 21/5/13 at 08:56 AM |
|
|
Nice effort! That is carbon - not Kevlar (unless you have sandwiched the Kevlar under the carbon?)...
If you make another, I would suggest you try resin infusion - your part will be higher quality (fewer voids) and it is likely to be lighter (less
resin rich than hand laminating/vacuum bag).
Good job!
|
|
|
Theshed
|
| posted on 21/5/13 at 09:00 AM |
|
|
Too scared to try infusion! I get too many leaks. The laminate is carbon x 2/kevlar x 2 /carbonx2. Cutting Kevlar is such fun...
|
|
|
imp paul
|
| posted on 21/5/13 at 10:35 AM |
|
|
nice work very cool 
|
|
|
jossey
|
| posted on 21/5/13 at 10:39 AM |
|
|
Looks great
Thanks
David Johnson
Building my tiger avon slowly but surely.
|
|
|
maccmike
|
| posted on 21/5/13 at 11:19 AM |
|
|
thats awesome, I know who'll Ill be ringing when I need one...
|
|
|
omega0684
|
| posted on 21/5/13 at 12:22 PM |
|
|
@ TIMMY
Could you make one at work? 
I love Pinto's, even if i did get mine from P&O!
|
|
|
FuryRebuild
|
| posted on 21/5/13 at 01:00 PM |
|
|
Nice work - it encourages me to do some bits of my own in carbon.
When all you have is a hammer, everything around you is a nail.
www.furyrebuild.co.uk
|
|
|
twybrow
|
| posted on 21/5/13 at 01:43 PM |
|
|
quote:
Originally posted by omega0684
@ TIMMY
Could you make one at work?
Yes mate - my boss is very receptive to little side projects (he has a kit car himself)... We are moving into our new building (office + workshop)
next month, so the projects will pick up after then!
And I just took an enquiry for us to design and build CF wheels (automotive) - hmmmmm!
|
|
|
omega0684
|
| posted on 21/5/13 at 02:07 PM |
|
|
quote:
Originally posted by twybrow
quote:
Originally posted by omega0684
@ TIMMY
Could you make one at work?
Yes mate - my boss is very receptive to little side projects (he has a kit car himself)... We are moving into our new building (office + workshop)
next month, so the projects will pick up after then!
And I just took an enquiry for us to design and build CF wheels (automotive) - hmmmmm!
Put me down for a set, i can send you dimensions!
I love Pinto's, even if i did get mine from P&O!
|
|
|
coyoteboy
|
| posted on 27/5/13 at 11:33 AM |
|
|
That looks nice! I'd be worried about infusion on such a flat wide piece personally, because I've never done it, any tips add to how to
ensure a complete infusion up to corners etc?
PS hope you are wearing appropriate PPE when cutting/grinding carbon!
[Edited on 27/5/13 by coyoteboy]
|
|
|
Theshed
|
| posted on 27/5/13 at 12:06 PM |
|
|
Errrm cutting in the garden and keeping my mouth closed??? More seriously I must get some masks and glasses - I did get some bifocal safety specs
which are very good for machining (you can read a micrometer) but.....sat on them.
|
|
|
coyoteboy
|
| posted on 27/5/13 at 12:16 PM |
|
|
Carbon fibres, especially those cut with a grinding tool rather than a saw and water, produce fibre dust with similar properties to asbestos.
http://www.aerotherm.co.uk/the-hidden-dangers-of-carbon-fibres
|
|
|
Theshed
|
| posted on 27/5/13 at 12:55 PM |
|
|
Oh dear
That said given that most of my education was in post war portacabins I am probably screwed anyhow. That and I worked in a garage for years blowing
out the brake dust and working alongside the sprayer blasting out 2 pack....... No, I know I will get some masks.
|
|
|
coyoteboy
|
| posted on 27/5/13 at 06:14 PM |
|
|
Don't worry, I've done the same too before it was pointed out to me by a H&S manager at a place of work - there must be millions of
us!
Probably not a problem but worth taking reasonable precautions.
|
|
|


.JPG)