davrus
|
| posted on 29/4/07 at 09:42 PM |

|
|
front indicator extension
Hi
Does anyone have any pics of the standard way to extend the fromt indicators.
many thanks
dave
Check out my website http://www.thedave.co.uk/
Feel free to sign my guest book in the links page.
|
|
|
|
|
graememk
|
| posted on 29/4/07 at 09:43 PM |

|
|
copper pipe, straight through the nose cone.
|
|
|
davrus
|
| posted on 29/4/07 at 09:50 PM |

|
|
How do you secure the copper to the nose cone and your indicators to the copper pipe, do u have any pics at all
Check out my website http://www.thedave.co.uk/
Feel free to sign my guest book in the links page.
|
|
|
graememk
|
| posted on 29/4/07 at 09:53 PM |

|
|
pu is your friend, have a look in jewsons theres loads of fixing for plumbing, drill it put a scew in it and pu it to stop it turning, it falls off
after sva anyway
|
|
|
snippy
|
| posted on 29/4/07 at 10:40 PM |

|
|
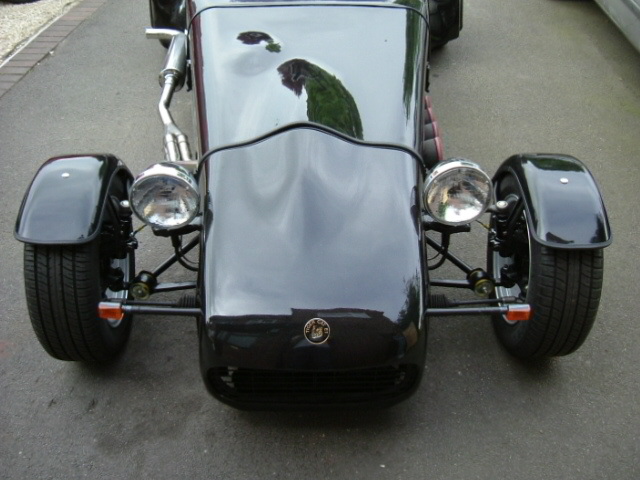
I made these up. Used some 10mm studding, drilled it to thread wires through then slipped a piece of black tubing over. All bits from B&Q. You
then only need to drill a 10mm hole in your nosecone and use a nut & washer on the inside of the nose to secure. Passed SVA no probs. Just make
sure the whole lot is long enough for the SVA measurements (from outside edge of car etc) Once SVA complete, remove the extension bit and simply fit
the indicator in its ready made hole. HTH
Nick
 
Rescued attachment cat front at 280506.JPG
|
|
|
snippy
|
| posted on 29/4/07 at 10:41 PM |

|
|
pics will be in my archive as it appears to have not attached them!
|
|
|
Danozeman
|
| posted on 30/4/07 at 05:25 AM |

|
|
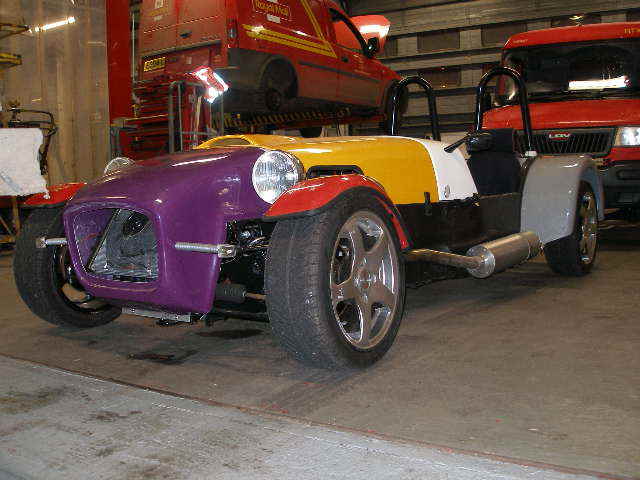
A bit of pipe with a drilled m8 stud fixed in one end and a nut the other. The indicator simply screws in one end and a nut and washer inside the
nose cone. They may fall off after the sva anyhow so doesnt matter if they look crap.
Oooops forgot the piccie.
 
N/s/f
[Edited on 30/4/07 by Danozeman]
Dan
Built the purple peril!! Let the modifications begin!!
http://www.eastangliankitcars.co.uk
|
|
|
02GF74
|
| posted on 30/4/07 at 07:44 AM |

|
|
this is the correct way 
|
|
|
flak monkey
|
| posted on 30/4/07 at 08:05 AM |

|
|
I got 2 bits of nylon, 20mm dia, drilled all the way through (need a long series drill for that). Tapped one end to suit indicators, and the other to
take a 10mm bolt with a hole drilled through. Bolt it all together and job done. Easy to remove if required.
David
 
Sera
http://www.motosera.com
|
|
|
bob
|
| posted on 30/4/07 at 08:10 AM |

|
|
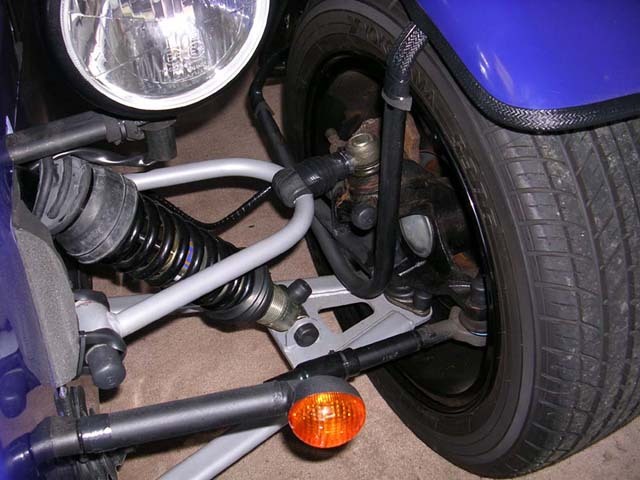
Plastic conduit 
 
Rescued attachment MK Indy build pics 168.jpg
|
|
|
nick205
|
| posted on 30/4/07 at 08:19 AM |

|
|
2 x 100mm lengths of 15mm copper pipe, 2 x M8x20 bolts and 4 x M8 Nylocs.
1. Drill a 4-5 mm hole ritght through the M8 bolts.
2. Use the tapered Nyloc part on the top of the nuts as a lead in and knock them squarely into the ends of the copper pipe - they forma very good
tight fit if you knock them right in using a socket extension and the gently swage the ends of the pipe back over the nut.
3. Fee the wired from your indicators through the nuts and pipe and screw the indicators into the nut. The Nyloc part means it wont shake loose.
4. Drill 8.5mm holed in you nose cone.
5. Pass the indiscator wires through the nose cone and through the drilled bolts.
6. screw the bolts into the Nyloc/pipe and nip up tight.
7. Cover the copper pipe with black cnduit secured with black cable ties.
Total coats = £ pennies
Total time = 1 hr max for both sides.
HTH
Nick
|
|
|
shortie
|
| posted on 30/4/07 at 09:50 AM |

|
|
Alternatively borrow the ones I made that everyone else has borrowed and send back when you've been SVA'd 
|
|
|


