
Steve's MNR build
sdh2903 - 2/10/15 at 03:21 PM
Well I'm a bit slow on the uptake as this process started a while back when i ventured down to MNR and came out a few grand lighter after
ordering a Vortx mazda starter kit, race cage and a few other bits and bobs. This is my second build so hope to learn from some of the mistakes I made
the last time around.
Then the quest for a donor began. There weren't that many around the glasgow area crop up within budget and when they did appear they sold
sharpish. I ended up finding this beauty up in Inverness for the princely sum of £375. 1995 1.8 UK car, 85k and 10 whole days MOT remaining. The owner
had taken a novel approach to sorting the arch rust.

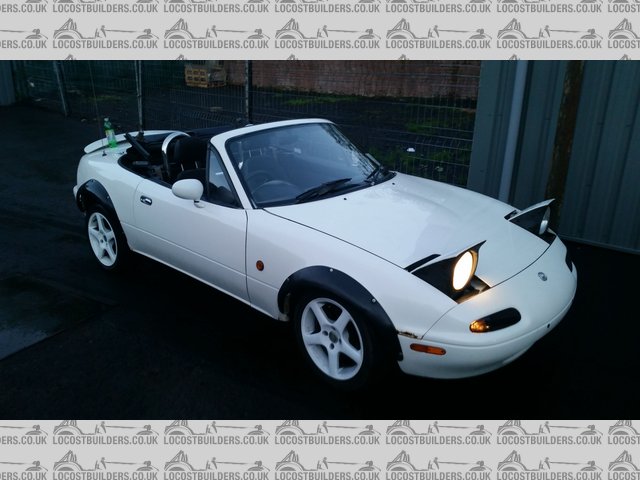
mx5
The drive back down to glasgow was terrible, a loud booming stainless exhaust, a window that wouldnt close and peeing down rain! The car was
incredibly skittish and wouldn't hold a straight line. On stripping the car this was down to the fact that both front springs were in 3 pieces.
The rot underneath was catastrophic, but the engine and box were sweet which was my main concern. A couple of weeks stripping and it ended up like
this

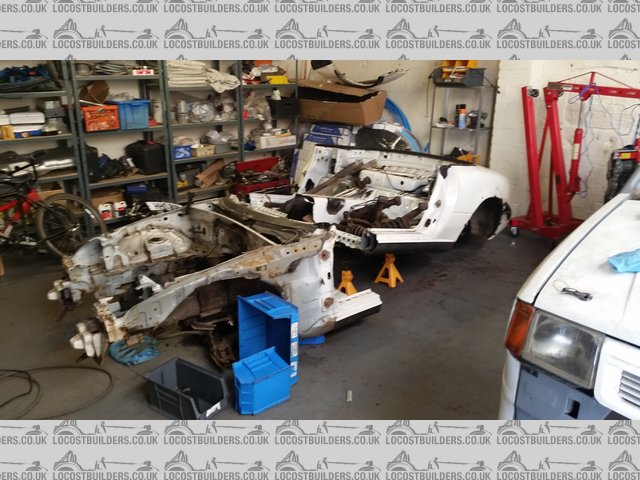
Cutmx5
Now with regards the engine i had originally set on turboing, then back to NA then keep it standard and back to turbo. Ive now settled on getting the
power package from blink motorsport which includes headwork, cams and a megasquirt PNP. Funds will dictate whether this happens pre or post Iva.
The engine was sweet but did have a few weeps, so its had a bit of a refresh with new crank and camshaft oil seals. the sump resealed, new water pump,
timing belt and tensioners and new plugs leads etc. Also had a clean and paint up and had the rocker cover powdercoated.
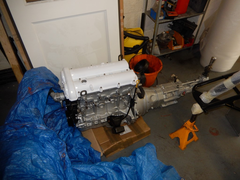

mnr4
I was hoping to drop lucky and unearth a torsen diff, no dice, standard open diff. So a brand new ATB has been swapped in and the exterior cleaned up
and painted. The ATB worked out roughly the same as a second hand torsen and came from Ashcroft transmissions. The guys over at Alpine transmissions
in Hamilton did the honours and swapped it over and replaced a couple of bearings while it was open.

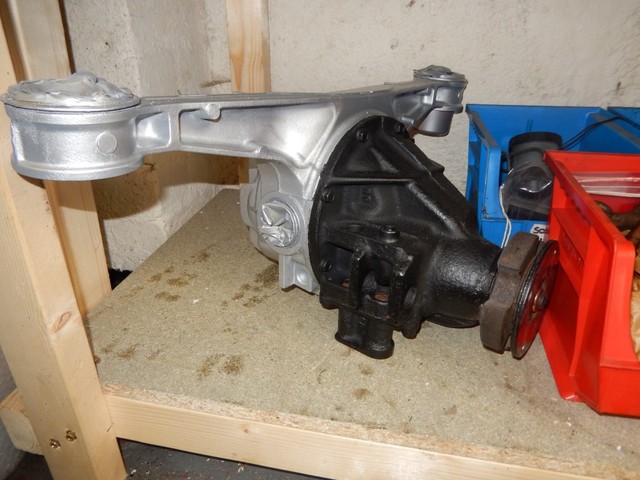
Description
So fast forward to wednesday and im now the proud owner of this (spot the bodywork)


Yep staying well out of the way up in the roof!


Now the objective is to get to IVA without buying too many more trinkets, however ive already splashed out on a racetechnology dash2, some front
wilwoods and a set of Oz ultraleggeras, but they don't count in my mind 
Now my updates maybe a little slow to start as i'm on holiday next week then on a 5 week training course but hope to get cracking in December and
have the Majority completed by March as its the quiet period at work and should be able to dedicate a fair chunk of time to the build.
Thanks for reading
Steve
[Edited on 2/10/15 by sdh2903]
l5tuy - 2/10/15 at 08:40 PM
Looking good mate, what you doing with the Khan style wheels the car came with?
I've spent hours trying to clean up my aluminium, but after seeing yours I want to paint it. Looking really good.
Stuart
sdh2903 - 3/10/15 at 03:55 PM
No matter how well i cleaned it up it still looked grubby so gave up and painted it all!
Wheels were sold once i'd bought the ultraleggeras, they look better on the photos than in real life, bit like the whole car really.
Bulkhead panels on and started on brake lines in the couple of hours I had free this morning.
micksalt - 5/10/15 at 07:35 AM
quote:
Originally posted by sdh2903
however ive already splashed out on a racetechnology dash2, some front wilwoods and a set of Oz ultraleggeras, but they don't count in my mind

Yep, treated myself to a Canems ECU, SPA steering wheel and Works-Bell quick-release boss under the "don't count" part of the budget

Don't forget to change your avatar to say that you're no longer waiting for your Vortx.
[Edited on 5/10/2015 by micksalt]
jim87 - 8/10/15 at 07:38 PM
As you asked, here's a couple of pics of the pipes down my tunnel
Nearly all of the clips are through the ally floor, and on the right I used the same rivet for two clips - one for brake line, one for fuel.
Right where the fuel pipes leave the back of the tunnel, there's a couple of clips into the chassis to hold them firmly in place

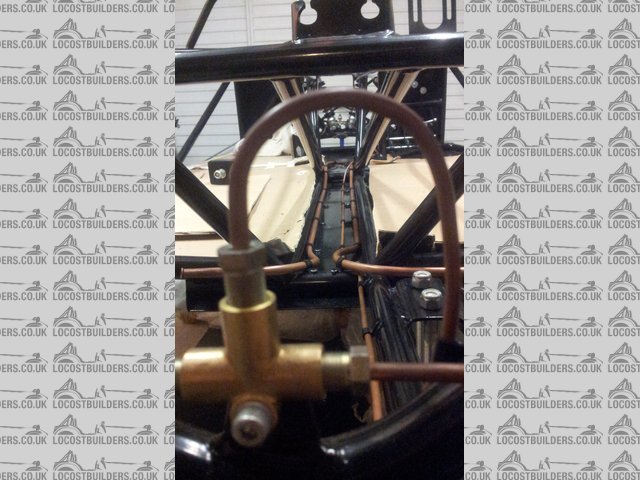
Description
From the engine end. I did clip the top fuel pipe to the chassis, but rear brakes, and other fuel pipe are through the floor

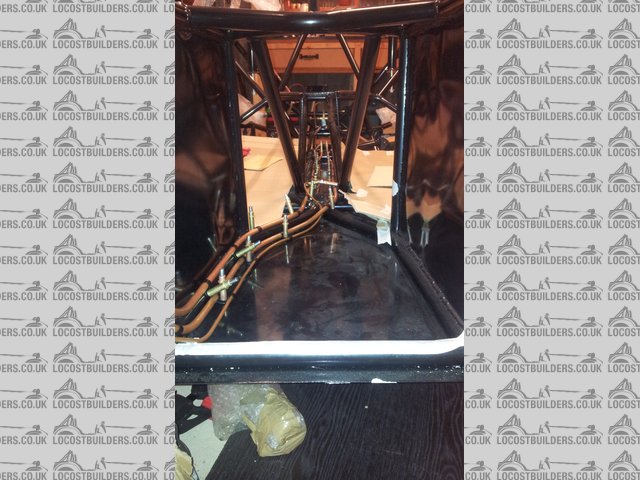
Description
If you do the fuel pipes like this into the engine bay:

Description
You might end up with this problem:
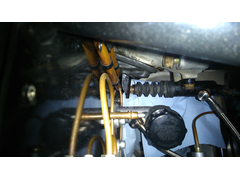

Description
Clutch fork very close to fuel pipes - a bit of engine movement and there could be fuel everywhere 
If I think of any other stupid things like that that I've done, I'll mention it !
Jim
jim87 - 8/10/15 at 07:40 PM
Oh ... almost forgot to mention ...... IVA passed today ......... YEAH BABY !!!!!
sdh2903 - 8/10/15 at 07:56 PM
Jim you're a gent.
And Congratulations!!
jim87 - 9/10/15 at 01:11 PM
Cheers 
See this clip here in red :

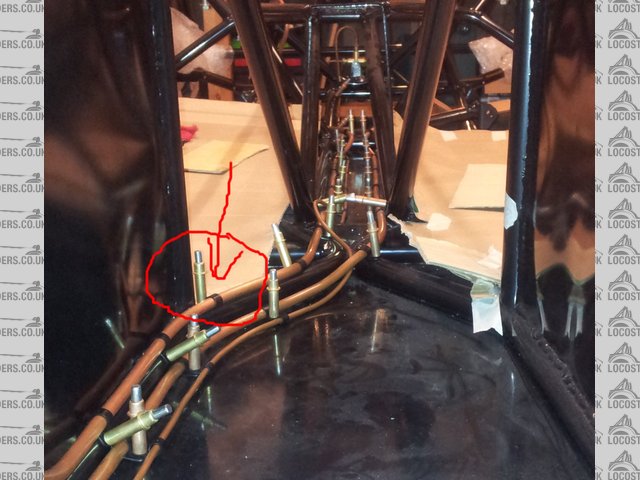
Description
If you can, don't put it there. In fact if you can move the whole fuel pipe a bit closer to the lower fuel pipe at this point then do.
On mine this clip pokes out underneath the centre console, and you can see it. At some point I think I might just drill it out, and put the clip on
the other way around, but I think I'd need to remove the gearbox first, so that 'aint gonna happen for a while.
Oh, by the way, I found those cleco's really useful throughout the whole build. If you haven't got any, I'd recommend them.
Jim
sdh2903 - 9/10/15 at 04:22 PM
Cheers Jim. Great tips. I was contemplating sitting the gearbox in place to make sure nothing fouls. I take it the rubber block with two threads is
the gearbox mount.
I'm an aircraft engineer by trade so have bag fulls of clecos kicking about. In fact the price of them I think I could retire early
I'm away now for 6 weeks or so with a holiday and work so no progress. But I still have Internet so can still accumulate parts
jim87 - 9/10/15 at 04:30 PM
quote:
Originally posted by sdh2903
Cheers Jim. Great tips. I was contemplating sitting the gearbox in place to make sure nothing fouls. I take it the rubber block with two threads is
the gearbox mount.
I'm an aircraft engineer by trade so have bag fulls of clecos kicking about. In fact the price of them I think I could retire early
I'm away now for 6 weeks or so with a holiday and work so no progress. But I still have Internet so can still accumulate parts
Yep, that's the gearbox mount.
Probably not a bad idea to at least put the gearbox in so you get an idea of where it sits.
From memory I think the bottom of the box bell mouth sits about an inch-ish above the chassis rail when the engine is holding it in place.
The gearbox is pretty big in the tunnel, which is why I pushed everything as far over to that side as possible
thepest - 9/10/15 at 05:32 PM
Am doing one, just fitted the engine. Before the gearbox I'd pass the hydraulic lines, fuel lines and the wiring.
Then fit the gearbox.
micksalt - 14/1/16 at 08:59 AM
Since the Uno master cylinder didn't turn out to be retained, which way are you thinking of heading? I presume you have the same problem as me,
the brake pedal now sits directly above the chassis tube diagonal.
I would at least like to see what MNR propose, however, I suspect I'll just pick up a Westfield tandem cylinder, drill the holes top and bottom,
plug the original holes, install the Westy cylinder and be done with it.
sdh2903 - 14/1/16 at 09:36 AM
I'm no longer building the mnr. Due to several issues the whole kit has been returned to Mnr.
I would have used the uno cylinder and just made a retaining plate to keep the rod in. It's for sale if you want it btw 
micksalt - 14/1/16 at 10:17 AM
quote:
Originally posted by sdh2903
I'm no longer building the mnr. Due to several issues the whole kit has been returned to Mnr.
That's a real shame. I assume you've had further issues beyond the non-offet transmission tunnel, this brake pedal issue and the
non-delivered prop-shaft issue. What are you considering instead?
As for the brake cylinder, I'm going to either go Mazda or Westfield on this solution. For the Mazda solution, I've got some tamed lathe
operators I can wave beer tokens at. I cannot help but feel that an internally retained pushrod is the way to go through.
[Edited on 14/1/2016 by micksalt]
sdh2903 - 14/1/16 at 10:26 AM
Yes several more quality issues. The pedal and prop weren't really issues at all to be honest. The prop turned up a week later.
I'm getting my garage built first as I was sharing an industrial unit with a mate during this build. Great for the space but I'd prefer to
build at home.
Car wise I'm not sure. I'm still heavily invested in the mx5 donor kit with digi dash, atb diff, wilwood brakes, wheels etc along with all
the general bearings belts clutch etc so ill prob look at building a westfield later in the year.
l5tuy - 14/1/16 at 10:46 AM
Pretty poo to here about the quality issues, hopefuly its now fully resolved in your favour.
Concerned about the mention of prop shaft delivery, I still don;t have mine and can;t get the engine in untill it arrives. Been chasing a fair bit
but if everyones waiting I can;t see it arriving in a hurry.
In reply to brake pedal, i've just used and modified the MX5 one.
Stu
micksalt - 14/1/16 at 11:21 AM
Stu,
Have you got a build log going on? It'd be interesting to see your master cylinder modification.
Cheers,
Mick
l5tuy - 14/1/16 at 11:50 AM
I've set up my go pro to take videos and been taking pictures periodically. Just have a look back but couldn;t se any image showing the part
directly. I'll take some pics of it and forward. You got an e-mail address?
Basically, where the push rod met the old servo there was a bigger diameter piston type prt (this threaded onto the push rod), I cut the larger
section off and welded the remaining female threaded part onto the MX5 crevis (this allowing the push rod to be threaded onto the crevis). There is a
black tube the pretrudes out from the MX5 cylinder, this actually prevents the peddle falling and pulling the pushrod away from the cylinder, however
i had to cut a section away from the bottom to allow full pedal movement.
As a secondary precuation, i've shaped a bracket to match the angle of the resting peddle and secured this to the floor (where the peddle box is
mounted) to prevent it falling and pulling push road out of pocket (an alternative to the nut and bolt assembly thatís been used in previous
builds).
Finally, There is a wee bit of play between the the pedal resting on the bracket and the push rod hard against piston, to remove this Iím toying with
the idea of mounting a spring from rear of peddle to back of bulkhead plate (maybe using the bolts holding on the brake bias valve), thus keeping the
peddle/crevis/push rod/cylinder in compression (keeping previously mentioned bracket redundant, secondary).
Iíll get pics, make this a bit clearer.
Stu
jim87 - 14/1/16 at 01:00 PM
quote:
Originally posted by l5tuy
Pretty poo to here about the quality issues, hopefuly its now fully resolved in your favour.
Concerned about the mention of prop shaft delivery, I still don;t have mine and can;t get the engine in untill it arrives. Been chasing a fair bit
but if everyones waiting I can;t see it arriving in a hurry.
In reply to brake pedal, i've just used and modified the MX5 one.
Stu
My prop wouldn't actually fit in from the engine end. Had to go in from the diff end, so you'd fine if you wanted to install the engine
without having the prop yet.
I'd be interested to see what you've done with the brake pedal too!
Jim
l5tuy - 14/1/16 at 01:11 PM
quote:
Originally posted by jim87
quote:
Originally posted by l5tuy
Pretty poo to here about the quality issues, hopefuly its now fully resolved in your favour.
Concerned about the mention of prop shaft delivery, I still don;t have mine and can;t get the engine in untill it arrives. Been chasing a fair bit
but if everyones waiting I can;t see it arriving in a hurry.
In reply to brake pedal, i've just used and modified the MX5 one.
Stu
My prop wouldn't actually fit in from the engine end. Had to go in from the diff end, so you'd fine if you wanted to install the engine
without having the prop yet.
I'd be interested to see what you've done with the brake pedal too!
Jim
Jim, it was more to determine the position of the engine/gearbox mounts as these aren't pre-determined. Although that's a pain if the diff
has to come out again, kind of hoped it was all set as i've secured brake and fuel pipes back there, dont want to risk denting them.
Stu
micksalt - 14/1/16 at 01:21 PM
Ah yes, I wondered about engine mount installation. Granted, there is a bit of play in the engine mounts to take up small offsets, but since the diff
is very rigidly held, I figured the best bet would be to install diff, propshaft, gearbox and engine before drilling the chassis for the mounts to
ensure the engine-to-diff distance is correct.
jim87 - 14/1/16 at 01:26 PM
Ah, I see. My engine/gearbox mounts were already drilled. Perhaps due to MNR supplying the engine/gearbox/diff for me.
But yeah, I think you may have to take the diff out again - could be different now, but the flange on the prop wouldn't pass past the tunnel
about where the gearbox mount is.
micksalt - 14/1/16 at 02:35 PM
This is why I bought my engine hoist rather than borrowing or hiring. I can play the engine hokey-cokey game to me heart's content 
sdh2903 - 14/1/16 at 03:14 PM
You can (just) feed the prop in from the rear with the diff installed, its tight but it does pass providing you dont have the tank installed.
l5tuy - 14/1/16 at 03:37 PM
Hopefully i'll have an answer for you next week, just heard back from MNR, my prop should be arriving with them Monday. Need to get my build
moving, want it track ready by April and i forcecast a delay trimming/installing loom.
Stu
l5tuy - 14/1/16 at 10:17 PM
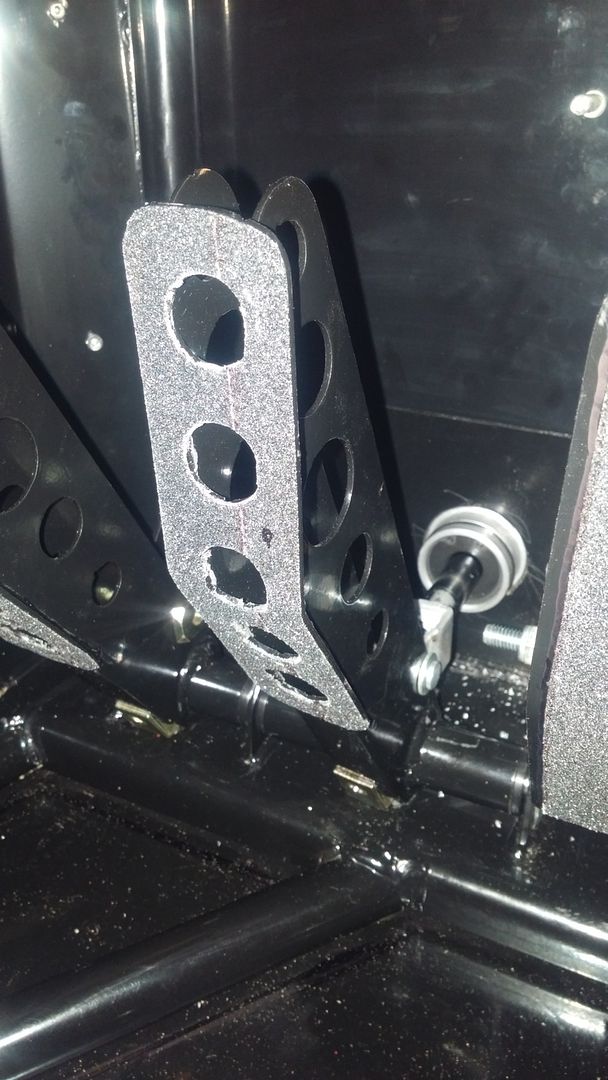
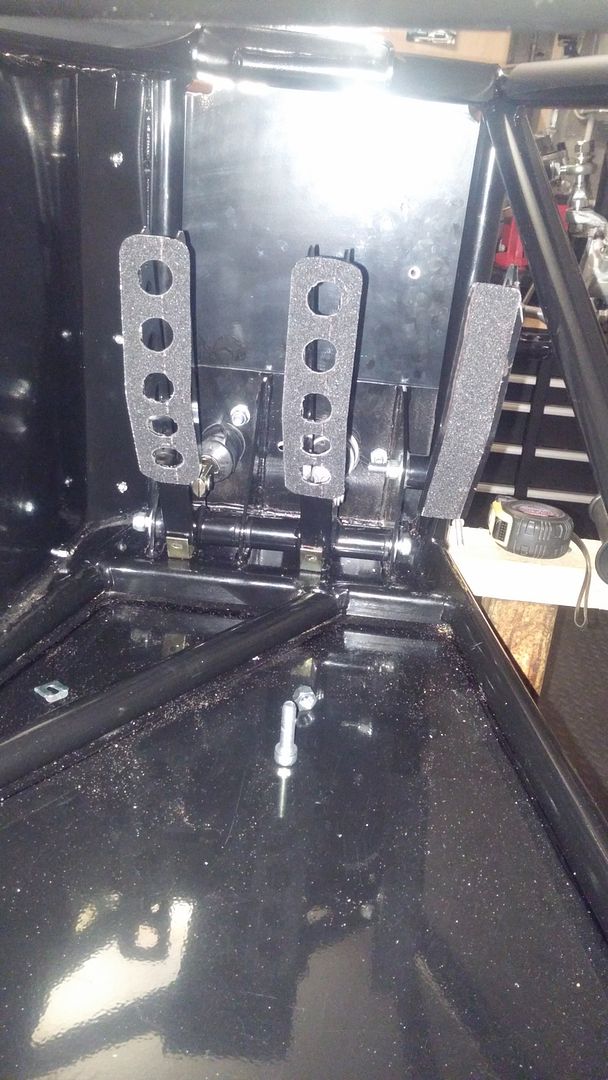
Photo bucket is playing up and this is the only two pics I can currently upload.
Stu
micksalt - 28/7/16 at 12:48 PM
Steve, did you move on to another kit car? Something Ecoboost powered perhaps?
sdh2903 - 28/7/16 at 01:38 PM
How did you guess
Yes I'm building a westfield with a 2.0 ecoboost. Not realy started much yet other can collecting an engine and a few other bits. Get my chassis
next week.
micksalt - 28/7/16 at 02:18 PM
quote:
Originally posted by sdh2903
How did you guess
Yes I'm building a westfield with a 2.0 ecoboost. Not realy started much yet other can collecting an engine and a few other bits. Get my chassis
next week.
Awesome, are you recycling the MX-5 running gear, or going all-Ford? 
sdh2903 - 28/7/16 at 02:24 PM
Nothing recycled from the vortx build unfortunately. Does use the later mx3 mx5 box so there there's a trace of mx5 dna in there!
micksalt - 28/7/16 at 02:51 PM
Glad to hear that you weren't disheartened to the point of giving up on a kit car build. MNR have sorted out nearly all of my issues now,
although I have received part of the exhaust system that has no boss to screw the lambda sensor in and no flange to mate to the catalytic converter.
I've contacted Marc for more details of the rest of the exhaust system to check that I can accommodate both these (very necessary for IVA) items.
dunk3 - 25/2/17 at 10:54 PM
Any updates on your builds .
cheers Dunk
l5tuy - 28/2/17 at 12:22 PM
I'm finished and just awaiting test date for IVA from local station. Will probably create some sort of blog to show progress from start to
finish.
Stu
dunk3 - 28/2/17 at 12:58 PM
Good luck with the IVA , will look forward to reading about your build
Dunk
l5tuy - 3/3/17 at 11:01 PM
Cheers, although applied 3 weeks ago and still waiting for a date. Their new online service appears slower than conventional mail post.
Stu
dunk3 - 3/3/17 at 11:49 PM
Got all that to look forward to. Not


