micksalt
|
| posted on 21/6/17 at 08:32 PM |

|
|
I'm hiding in shame after slightly cracking the body tub when moving it  . On the plus side, it is nowhere visible and it also made me pause
and remember that I needed to fit the scuttle panel first, which could have been an embarrassing mistake. I'll just get a fibreglass repair kit
and reinforce the back of the split to prevent any further damage. . On the plus side, it is nowhere visible and it also made me pause
and remember that I needed to fit the scuttle panel first, which could have been an embarrassing mistake. I'll just get a fibreglass repair kit
and reinforce the back of the split to prevent any further damage.
As for mounting the sender unit. I used these from Screwfix:
http://www.screwfix.com/p/carbon-steel-self-drilling-screws-4-8-x-16mm-100-pack/68505
And I figured out that the rubber seal between the sender unit and the tank doesn't actually prevent vapours from coming up past the screw, so I
put a 5 mm copper washer under each one to seal it against the sender unit body. With them being self-tapping, the screw should seal against the soft
aluminium of the tank, but I wanted to be doubly sure.
|
|
|
|
|
Mash
|
| posted on 21/6/17 at 08:40 PM |
|
|
Thanks Mate, they look just the job 
|
|
|
micksalt
|
| posted on 21/6/17 at 08:43 PM |
|
|
I was worried that those ones were a bit short at first, but they had plenty of bite into the tank.
|
|
|
micksalt
|
| posted on 18/9/17 at 11:17 AM |
|
|
Got the family coming to visit this Saturday to help to mount the body tub. After that, progress should speed up again because most of it is just
bolting things together. I think I am going to wimp out of building my own engine loom and just get Canems to do that for me. By the time I've
purchased all the materials to do it, the difference in cost won't be that different. I will still have to build my body electrical systems loom
though 
|
|
|
super-ron
|
| posted on 18/9/17 at 08:06 PM |
|
|
cant wait to see the body on!
[Edited on 18/9/17 by super-ron]
|
|
|
micksalt
|
| posted on 18/9/17 at 08:55 PM |
|
|
Scuttle panel is now in place, and after a tip from the MNR Owner's Club, I will be gluing the internal carbon effect panels before lifting the
bodywork into place.
BodyToFit
Not a lot I can do until the bodywork is in place, so I just fitted the rockers. Really nice piece of kit these, not just having radial-load needle
rollers, but also axial load needle rollers too!
Rocker
Of course, once the bodywork is on, I can cut the holes for the front suspension, build up the suspension both back and front and get it onto its
wheels. Not before time either, I'll need to evict the car for a day whilst doing a major service on the daily driver, which is due in just
5,000 miles time.
|
|
|
micksalt
|
| posted on 13/12/17 at 09:57 PM |
|
|
Do you know what annoys me?
Incomplete blogs, and I was almost guilty of this myself, so I've decided to put some time aside to get this one up to date
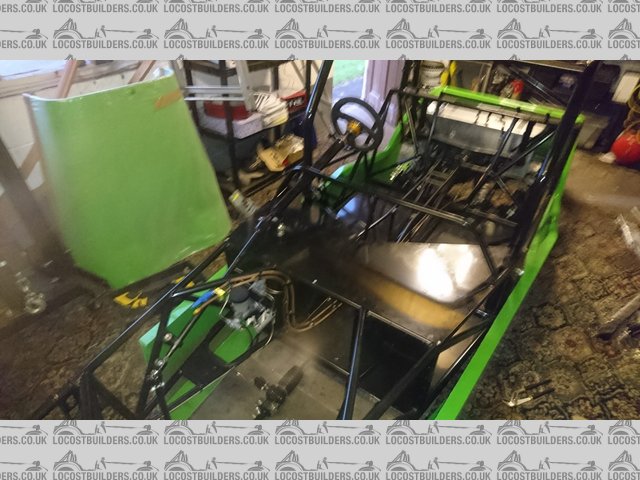
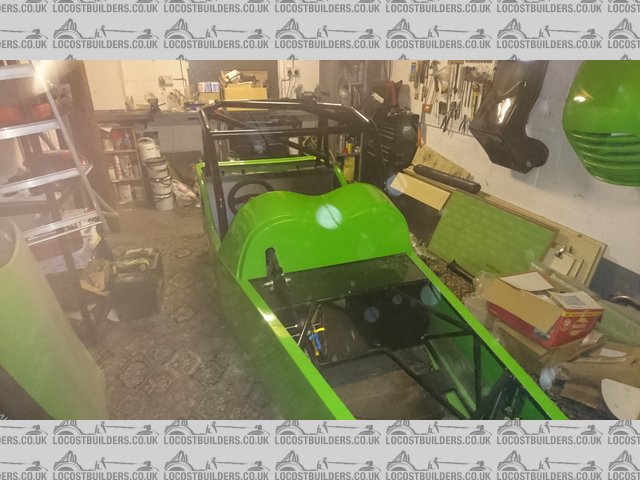
Having had my mishaps with the main bodytub, I decided to wait until I had some help available. Of course, to line everything up, I needed to cut the
scuttle panel for the steering column and cut a little bit off its base where the dash rail joins to the main top chassis rails. I also mounted the
internal panels using Tiger Seal, which were thankfully thin enough to cut with sturdy scissors where adjustment was necessary. If you have the full
cage like me, you need to cut the side panels down the middle and mount separately.
ScuttleCut
After the help of family to mount the main tub, I trial-fit the scuttle into position. It needed a little fettling to one side because I'd
obviously got a slight misalignment whilst trial fitting.
ScuttleTrial
And the rest of the bodywork got a trial fit to ensure the main tub was properly aligned.
FullTrial
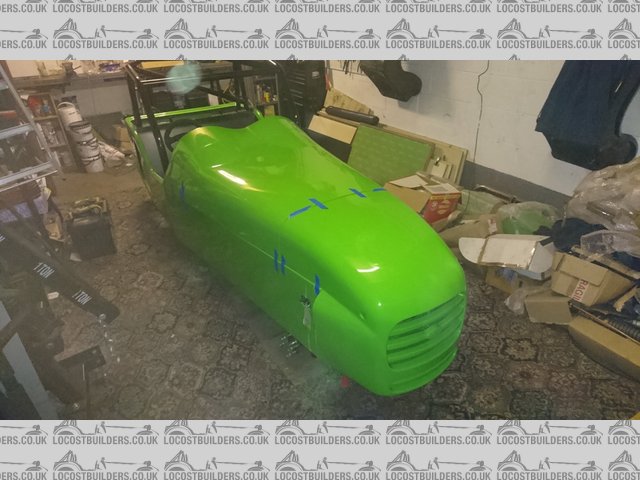
Finally, I could fix the main tub. I took Leon's advice and glued it using Tiger Seal. Bit of a pain to remove if I need to, but it saves
drilling any extra holes in the chassis.
TigerSeal
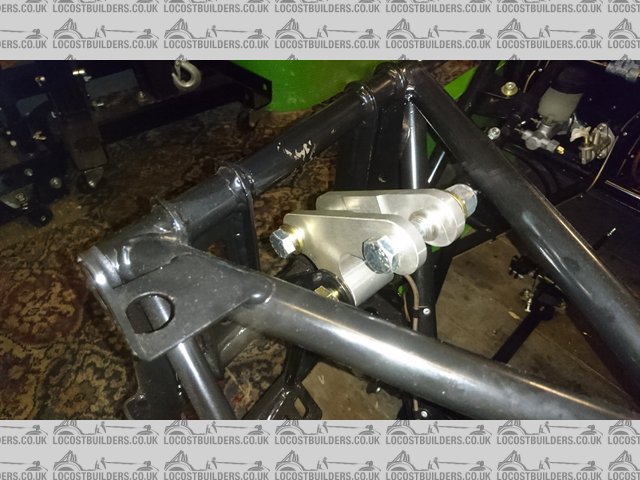
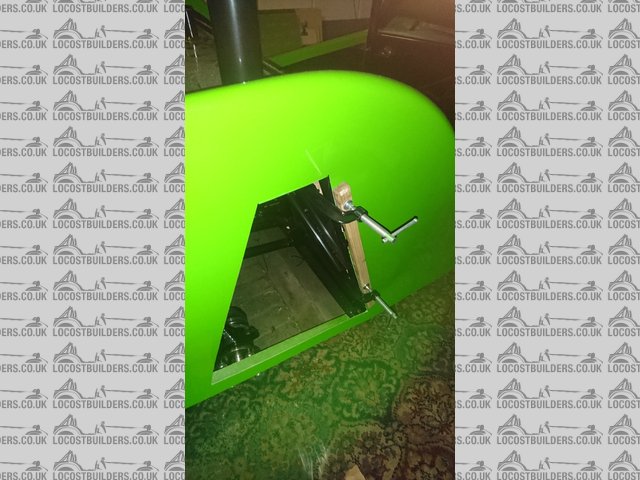
After some discussion and disagreement on the MNR owner's Facebook page as to which way the front top wishbones were to be mounted, I contacted
Marc himself. This resulted in this annotated picture back from him. Notice that the slight angle of the tube that holds the rose joint points upwards
on the outside. Despite knowing this, I did mount the offside one upside down on the first attempt having got distracted looking for a tool.
 
ThisWayUp
To cut the holes, I used a hole saw in the approximate location of the suspension mounts, fettled with a Dremel to get an initial fit of the
suspension arms, fitted the arms, then fettled to give it its full travel. I wouldn't actually recommend this technique since it resulted in
holes being larger than necessary. If I had my time again, I would temporarily mount the suspension before mounting the main tub, create a cardboard
template to give the desired clearances, remove the suspension, mount the main tub, then tape the template to the tub and cut the holes accordingly.
You can always find a new piece of cardboard if you screw up, you cannot uncut a hole in GRP. It's also a very messy, dusty job.
FrontDust
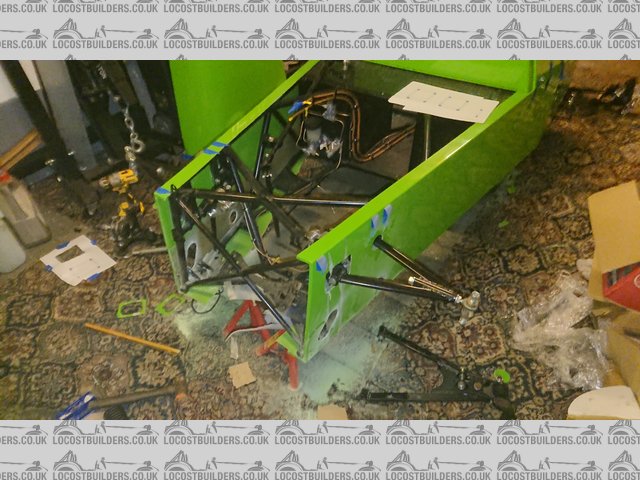
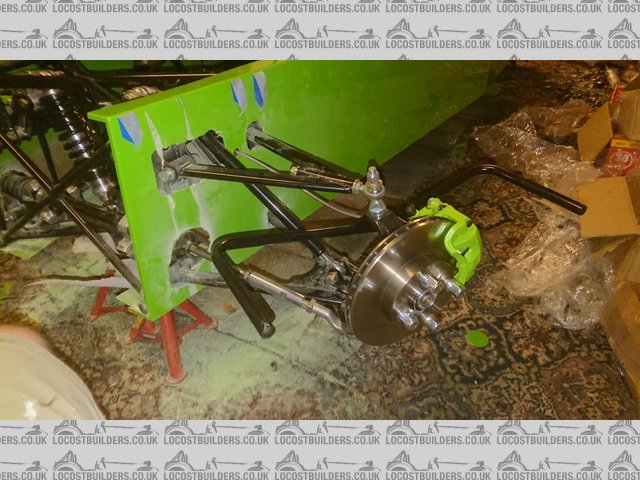
At this point, attention turned to building up the rear suspension. Top-tip, when you push the driveshafts into the diff, do check that you've
not threaded it through the top suspension arm. Cost myself 15 minutes correcting this mistake. You'll see at this point that the lower
suspension arm is not yet fitted. This is because the top-hat spacers supplied with the arms were a tiny bit too big for the MX-5 hub carrier. If I
had a mini lathe, I would have turned them down a bit, but I did not, so I had to resort to a file and elbow grease.
 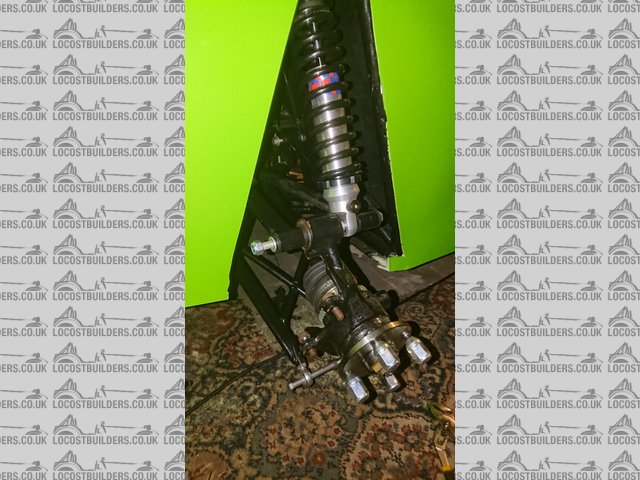
RearSuspensionPartBuilt
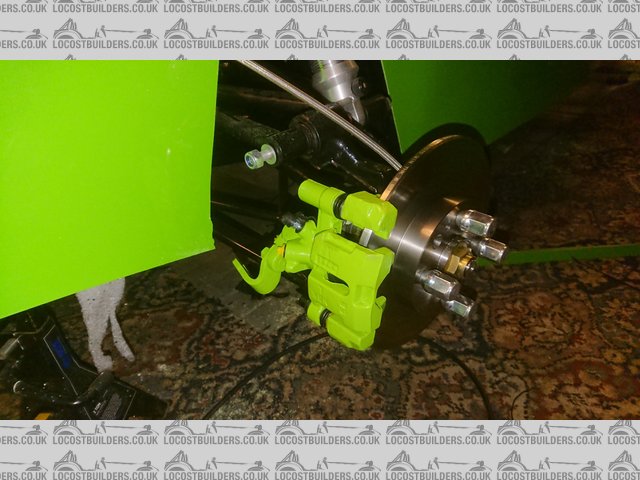
I didn't fancy rebuilding calipers myself, and I wanted a high-quality finish in keeping with the colour scheme, so I had Bigg Red rebuild the
calipers and apply their green polymer paint to them.
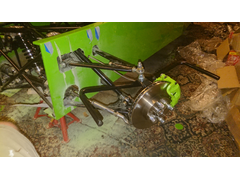 
BiggRedFront
And the rear. To anyone reading this blog, please note that the brake hose routing shown here is wrong. I corrected it just before mounting the
wheels.
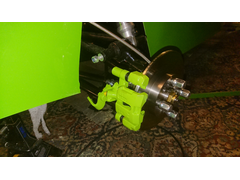 
BiggRedRear
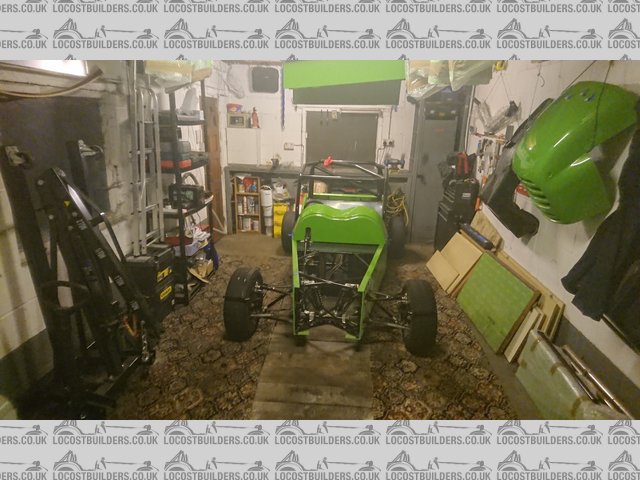
And then.... TOUCHDOWN! She stands on her own four wheels for the very first time, and in that instant transforms from a bag of bits to a car.
 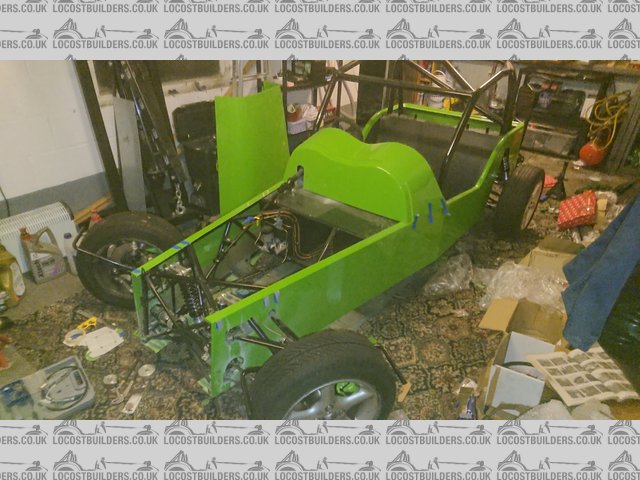
TOUCHDOWN
Having had pretty much every tool out, and with the garage floor covered in fibreglass, I had to have a thorough tidy up. The remaining parts are
either the bits of bodywork hanging up, or limited to just one pile of boxes under my workbench. This is also the first time in two years I have been
able to access my inspection pit.
TouchdownTidyUp
Getting the car on its wheels is an important milestone. I need to temporarily evict her from the garage for a day so I can do a major service on the
daily driver.
[Edited on 13/12/2017 by micksalt]
|
|
|
micksalt
|
| posted on 14/8/18 at 01:22 PM |
|
|
The project hasn't stalled, just on a bit of a slow-down, mainly due to the ridiculous temperatures in the garage. Got back onto it properly
last night with rear wheel arches and rear panel fitted, amazingly, with no mishaps
|
|
|
micksalt
|
| posted on 16/5/19 at 08:12 PM |
|
|
Build blog continued at:
https://www.mnrsportscars.com/forum-1/vortx-mazda-builds/mick-s-mnr-vortx-mazda-build-continued
|
|
|


