bassett
|
| posted on 13/1/09 at 08:26 PM |

|
|
Exhaust Mounting
Hi, I have two brackets that i think are for the exhaust silencer but cant for the life of me work out how they go together. Im thinking of making
something myself but has anyone got any pics maybe from the side or underneath how they have put theres together incase i cant sort anything as were
in a bit of a rush to sva.
Cheers
Adam
My MNR Blog Updated Jan 2010 - Track Day Prep Begins!
|
|
|
|
|
coozer
|
| posted on 13/1/09 at 08:32 PM |
|
|
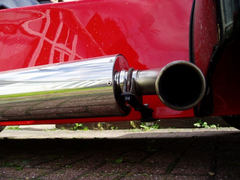
Not sure about your set up Adam but heres mine... its strip bolted under the body through the bottom chassis rail and further in against the floor
with big penny washers.
There's a littel rubber bobbin between the chassis and exhaust brackets. Next plan is to get it all welded up with a neat stainless bracket.
[Edited on 13/1/09 by coozer]
Rescued attachment hanger.jpg
1972 V8 Jago
1980 Z750
|
|
|
coozer
|
| posted on 13/1/09 at 08:33 PM |
|
|
Wrapped a bit of ali with a return on it for SVA...
Rescued attachment SVA cover.jpg
1972 V8 Jago
1980 Z750
|
|
|
dhutch
|
| posted on 13/1/09 at 09:15 PM |
|
|
Mines done almost exactly the same.
- Only down side is the exhast tends to gently settle lower becuase the clamp onto the tube manifold on mine isnt quite good enough to stop it
rotating after time.
Daniel
|
|
|
stuart_g
|
| posted on 13/1/09 at 09:18 PM |
|
|
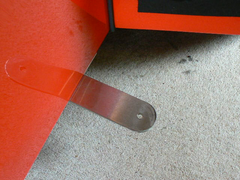
Here is a pic of the bracket on the car. It is a piece of stailess sheet that goes across the car and is held on by the rear seat mountings and one
bolt up through the lower outer chassis rail.
Passed SVA with edge trim on it.
[Edited on 13/1/09 by stuart_g]
Rescued attachment P1010107.JPG
|
|
|
stuart_g
|
| posted on 13/1/09 at 09:19 PM |
|
|
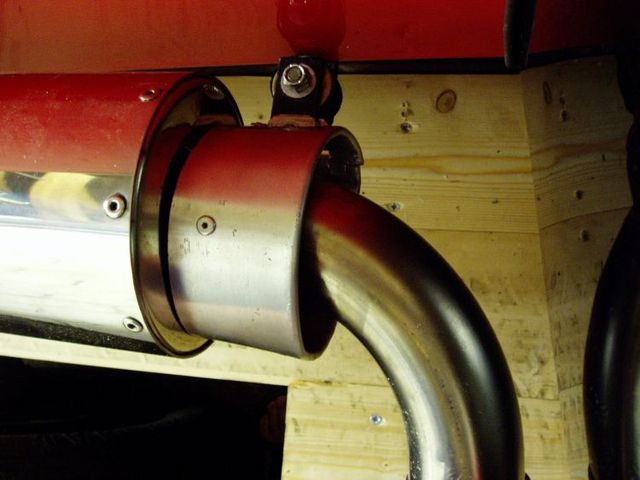
And here is the mounting on the exhaust
Rescued attachment P1010108.JPG
|
|
|
bassett
|
| posted on 13/1/09 at 10:30 PM |
|
|
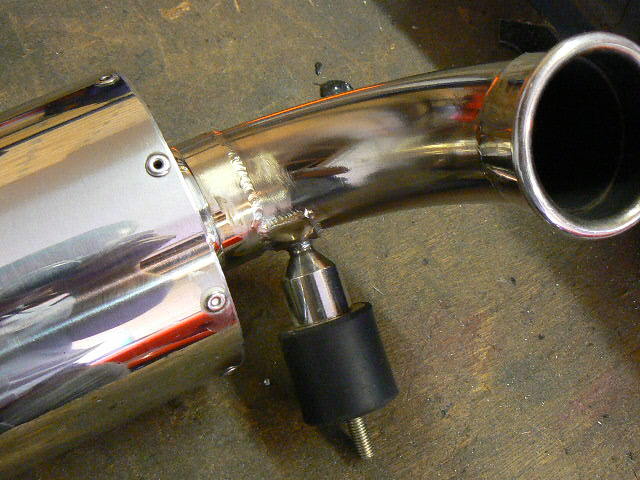
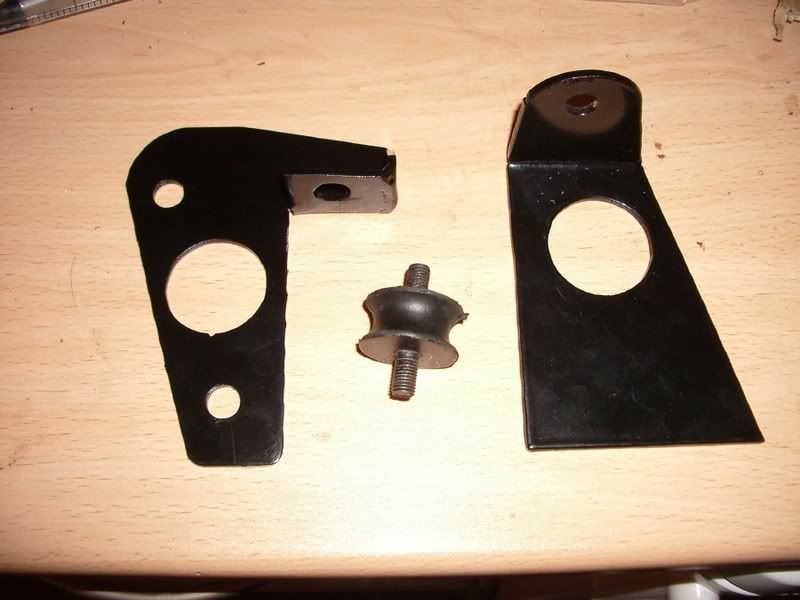
Cheers guys both look nice and good ideas. I have two brackets shown below and assumed they were for the exhaust but maybe there not - have you got
any ideas.
Whilst on exhausts have you used U clamps on the link pipe between the collector and silencer? and have they all got to be radiused for sva?
cheers
Adam
My MNR Blog Updated Jan 2010 - Track Day Prep Begins!
|
|
|
Johneturbo
|
| posted on 13/1/09 at 10:58 PM |
|
|
Adam does the bobbin screw into the plate on the left? with the plate on the right mounted under and the bobbin in between
i've not got that one on the left
i used these for the link pipe joints
got them local for £1.80 so don't pay the rip off £7
http://www.cbsonline.co.uk/stainless-exhaust-clamps-144-c.asp
|
|
|
bassett
|
| posted on 14/1/09 at 01:03 PM |
|
|
The bobbin will go in any hole with a nut and washer. Im thinking it will be easier to make something like the above as the silencer weights quite a
bit.
John id like to find someone local that does them that cheap but i do need a few other bits from CBS anyway lik u trim and fuel clips so might just
take the hit rather than searching
|
|
|
stuart_g
|
| posted on 14/1/09 at 01:18 PM |
|
|
By the look of the photo's i would guess that the exhaust can is secured to the part on the left with an exhaust U clamp. Part on right is
attached to part on left with bobbin between the vertical faces. Part on right needs to be drilled for two holes to bolt it to the bottom chassis
rail.
Edited as I can't tell my left from my right...Doh!
I used proper exhaust clamps supplied by MNR with headers.
example here
[Edited on 14/1/09 by stuart_g]
|
|
|
bassett
|
| posted on 14/1/09 at 05:39 PM |
|
|
Cheers Stuart i think il use them if postage is reasonable
My MNR Blog Updated Jan 2010 - Track Day Prep Begins!
|
|
|
Pdlewis
|
| posted on 14/1/09 at 07:49 PM |
|
|
I have the mount on the right with 2x m8 bolts through the floor then im using an ali strap arround the exhaust onto the bobin

Build Photo Album
Updated 05/02/2009
|
|
|
bassett
|
| posted on 14/1/09 at 09:47 PM |
|
|
Paul have you got a bracket on the exhaust(bout 3/4 of the way down as thats what i thought i was trying to use.
Adam
My MNR Blog Updated Jan 2010 - Track Day Prep Begins!
|
|
|
Pdlewis
|
| posted on 15/1/09 at 12:12 AM |
|
|
No my can is totaly smooth
Build Photo Album
Updated 05/02/2009
|
|
|
GeorgeM
|
| posted on 15/1/09 at 01:15 AM |
|
|
my can was supplied smooth.
Marc welded the bracket on
for me when I asked him.
It seems some people prefer
it to be mounted in different
ways.
GeorgeM
|
|
|
bassett
|
| posted on 15/1/09 at 09:58 PM |
|
|
Chris N updated me with what they are. Right is indeed exhaust mount but ends up a bit to far away from the exhaust so were making something a bit
taller and longer. We have also moved the bracket on the exhaust so the bobbin isnt facing down so is now at the rear of the can on the side closest
the body. The right bracket is the gear change bracket, would have never thought that lol but we have made something nice and really strong so not a
problem.
Thanks for the help anyways guys
Adam
My MNR Blog Updated Jan 2010 - Track Day Prep Begins!
|
|
|