
Karma Dino 3.5 V8 Kit car!
Slutters - 9/4/12 at 09:26 PM
Hi guys
Got a new project! Sold the Saab turbo powered Tiger and now im back with a poor mans ferrari! Lol!
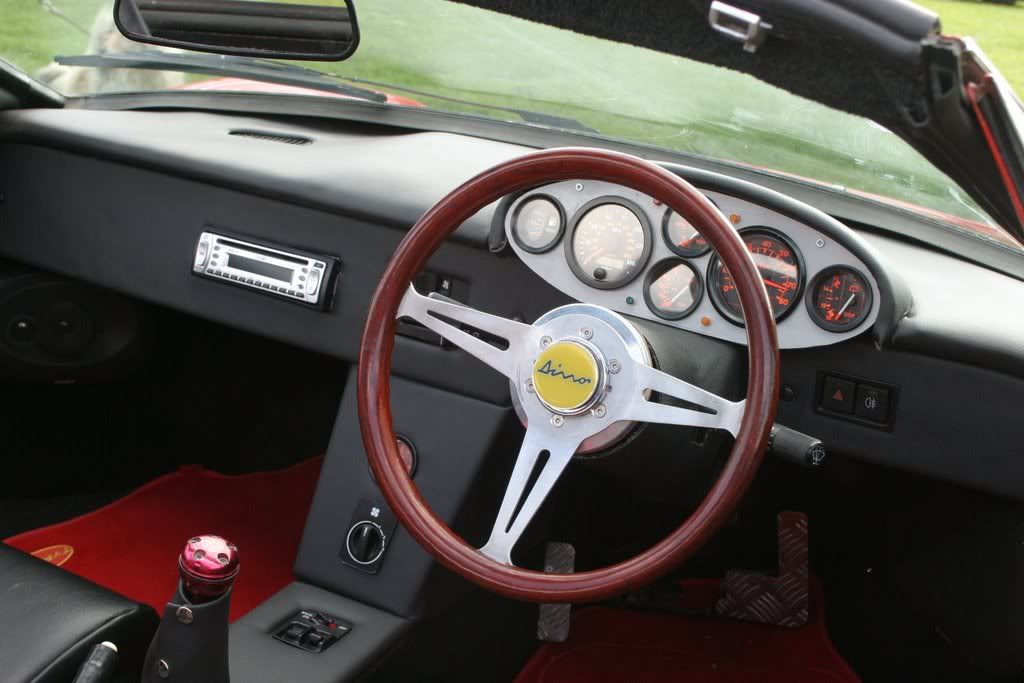
Anyway here is the rebuild project for my Karma Dino.
It is supposed to be a Ferrari replica....but dosnt really look much like one at all...
Anyway the plan is strip the bits down that need doing, rebuild and hopefully turbo charge the 3.5 Rover V8 engine!
So to the pics!
Heres some pics of it when it arrived!


Engine right next to your ears...

Stripping the rear end down

Front end, all Jaguar XJ6 parts all the ball joints and gaiters were rubbish so needed replacing!


Some funky spacers


New bits!

Stripped the front suspension


Built back up with all the gaiters and bearing replaced


Started stripping the rear end and getting the gearbox out

Took out the 5 gallon fuel tank don't think that would last long...


Removed the gearbox as the ratios are crap meaning your at 5500RPM for 80MPH... it also has a steel bellhousing which weighs about 30KG! This combo is
going to be replaced by a UN1 - 14 with better ratios and a alloy bellhousing so should save some weight to!


Old bellhousing


While the drive shafts were out i fitted new boots and replaced the grease

So now were left with:


Removed all the bits and bobs


High qualty gearchange... lol made of 500 UJ's so was like stiring in a bag of spanners lol

Then stripped out the front


Some pics of the taped up wiring lol

Also dont make a header tank from mild steel...

Anyway then came the first nasty supprise... a rusty floor
Seems someone fitted a new steel floor but didnt paint it...so now it needs changing again...


Nice new bits of stainless so i never have to do that rubbish job again lol


Passanger side was the worst


Foot rest


Loads better!


Got a bit board of the floor so repainted the rear wishbones and replaced the rubber bushes with pollybushes


New toy turned up to!

Loads more to do lots of bling bits brought so will be updating each week!
[Edited on 9/4/12 by Slutters]
[Edited on 9/4/12 by Slutters]
Andybarbet - 9/4/12 at 09:29 PM
I love the look of these 
My wife even said, wow thats nice 
austin man - 9/4/12 at 09:35 PM
Good thread and looks like your really getting there, please remember ther are kids on the forum too may want to edit a word or two out
Slutters - 9/4/12 at 09:37 PM
Sorry about that, doing it now...
Dan. - 9/4/12 at 09:39 PM
You also need to update the car you are building on your profile you finished and sold the tiger 
Slutters - 9/4/12 at 09:50 PM
Update already!
Few more welding bits!
Firstly i added a stainless steel tube down the side of the sill between the body and the box section chassis. This is for the 2 x fuel pipes brake
and clutch pipe and the 10mm servo feed! Quite a few then! Pics are a bit rubbish but you get the idea!


Next up was to hide the poor strengthing bits someone had put in the rear suspension mounts...

As you can see the bits where the shocks mount look a bit untidy so i added some stainless to smarten them up a bit


Next up was getting the front end in place so new rad! Cosworth and alloy tank bling! (Sorry Dan....)

And tank!


Making some new brackets for the radiator! (Thanks Dan for the cutting!)


Sorry quite proud of the brackets lol...
And mounted!

Lastly a new bit of bling! Replacing the old mild steel effort...

Slutters - 9/4/12 at 09:52 PM
Also a big thanks to Dan for putting up with me and helping me out! Would struggle without his extra hands! Thanks
Dangle_kt - 9/4/12 at 10:04 PM
lovely build - does it not need a firewall? (I'm sure you will sort this, but didn't it have one?)
Hector.Brocklebank - 9/4/12 at 10:13 PM
That looks very good but i think it would suit the Audi V8 motor sitting in the hole better than the lump of pig iron....
Dan. - 9/4/12 at 10:28 PM
quote:
Originally posted by Slutters
Also a big thanks to Dan for putting up with me and helping me out! Would struggle without his extra hands! Thanks
Any time just kick my backside into getting mine finished some time soon! Lol
As for the rover block it is aluminium not iron, they can be purchased at a very good price and when turbo'd should be more than enough power for
this car, it will also be sporting electronic management once Adam has finished
Beat you to it Adam, ps you are logged in on my account clear your cookies lol
[Edited on 9/4/12 by Dan.]
Dan. - 9/4/12 at 10:29 PM
Whoops!
[Edited on 9/4/12 by Dan.]
Rod Ends - 9/4/12 at 10:44 PM
Those pipes connecting the master cylinder to the brake-fluid reservoir - are they solder-end copper pipe fittings? 
iank - 9/4/12 at 10:50 PM
quote:
Originally posted by Slutters
Anyway here is the rebuild project for my Karma Dino.
It is supposed to be a Ferrari replica....but dosnt really look much like one at all...
What makes you say that? It looks reasonably close to a Ferrari Dino from the pictures
http://en.wikipedia.org/wiki/Dino_(automobile)
Slutters - 9/4/12 at 10:52 PM
quote:
Originally posted by Rod Ends
Those pipes connecting the master cylinder to the brake-fluid reservoir - are they solder-end copper pipe fittings?
Yes i think so! Don't worry someones lock wierd them at some point to.... haha!
Slutters - 9/4/12 at 10:54 PM
quote:
Originally posted by Hector.Brocklebank
That looks very good but i think it would suit the Audi V8 motor sitting in the hole better than the lump of pig iron....
Oh sorry.... did i not mention this?
I will be adding this to my pig iron... lol


jabs - 10/4/12 at 07:10 AM
The is a Karma dino forum but it's a bit dead now, i know because I'm the forum's administrator. Used to have a karma about 5 years
ago, bit regret was selling it but needs must and all that.
there's some nice pictures in the gallery
http://z7.invisionfree.com/Karma_Dino_II/index.php?
here's my Karma as was
[Edited on 10/4/12 by jabs]
[Edited on 10/4/12 by jabs]
[Edited on 10/4/12 by jabs]
scootz - 10/4/12 at 07:17 AM
That has the potential to look very 
MakeEverything - 10/4/12 at 07:42 AM
Love them. Very nearly bought one before. Good luck. What will make it look he part is a good paint job. You never see a Ferrari in gelcoat or
poor paint...
Slutters - 2/7/12 at 08:37 PM
Right guys time for a bit of update action!
So I decided to strip down the engine ready for the new bits!
So, a few boring pics of a clean engine!


Recently rebuilt was not a lie!!
I brought a spare engine for bits and pieces for the megasquirt conversion..
I was going to use the heads of it until I took it apart!!
Will let the pics do the talking! Sold as a good running engine…


WTF o’clock!!!
Anyway put the engine to one side and started work up front..
The car originally had 10 bits of joined rubber that leaked for water pipes so I set to work


Stainless steel and a mitre cutting saw


This was one of the first pipes but redid it due to angles..


Next up was a fuel pump mount, was going to run a swirl tank but no need as I had a foam filled tank!!


Next up was to replace the old worn throttle linkage
So I made a new one on the lathe


So upfront was nearly done so I cleaned up, sealed up the holes and had a paint


Also treated myself to a set of forged pistons!!

So with the front ready for assembely I chucked the heads back on the engine to sort out pipe work for the turbo..

Gave me an idea of space, I wanted to use P38 manifolds but they point down… I needed them to point up!!
So a bit of cutting later..


Flip reveres it!!


And


So next up I remade the rear gearbox mount due to the old one being crap…
Went a bit overboard with 2 v8 engine mounts tho lol…


Next bit is my fav!!!

Making exhaust time!


Next up is intercooling…
Dan. - 2/7/12 at 09:35 PM
I recognise those engine mounts..... And that BOV lol
You should have a bit more company at the unit now sorry I've not been around much been wasting mt time with someone I shouldn't have
bothered with...
Looks like you have managed well in my absence lol, see you Saturday! This car is going to be sideways tastic with the torque of a blown V8
[Edited on 2/7/12 by Dan.]
Slutters - 2/7/12 at 09:46 PM
quote:
Originally posted by Dan.
I recognise those engine mounts..... And that BOV lol
You should have a bit more company at the unit now sorry I've not been around much been wasting mt time with someone I shouldn't have
bothered with...
Looks like you have managed well in my absence lol, see you Saturday! This car is going to be sideways tastic with the torque of a blown V8
[Edited on 2/7/12 by Dan.]
Not to worry mate, i didn't want to moan its upto you what you do with your time. I hope things are less stressfull now...
Anyway, for the record i BROUGHT them mounts! I did however steal your external wastegate...
Dan. - 2/7/12 at 09:52 PM
Oh yeah you stole my engine mounts for your last build my bad...
Slutters - 2/7/12 at 09:54 PM
Thats correct, you are forgiven....
Dan. - 3/7/12 at 11:02 AM
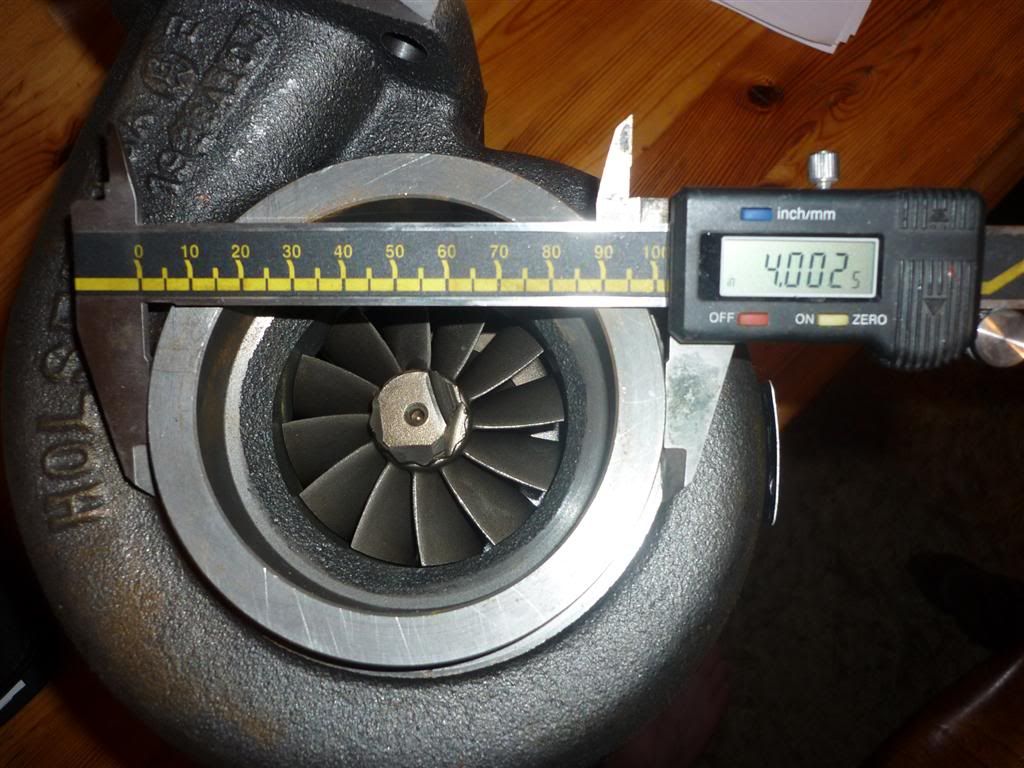
Looks like no one likes the puny little turbo you bolted on lol
Slutters - 24/3/13 at 10:22 AM
Right update time!
Sorry its been a while, got another project on the go!
Anyway!
Started out making my intercooler mounts


Then making the intercooler to throttle pipe work

Next up I removed the engine again, looking a bit of a mess at the mo…


The sides of the engine bay needed blanking of to fit the oil cooler to, and also to make it look neater
Made a few templates


You can just about see them fitted here, and with those in I can make a start painting, you can see the bay in primer


Painted


Wrapped my exhaust Thanks Dan!

And fitted my brake lines


And ran through the car to the front, brake, fuel and vaccum


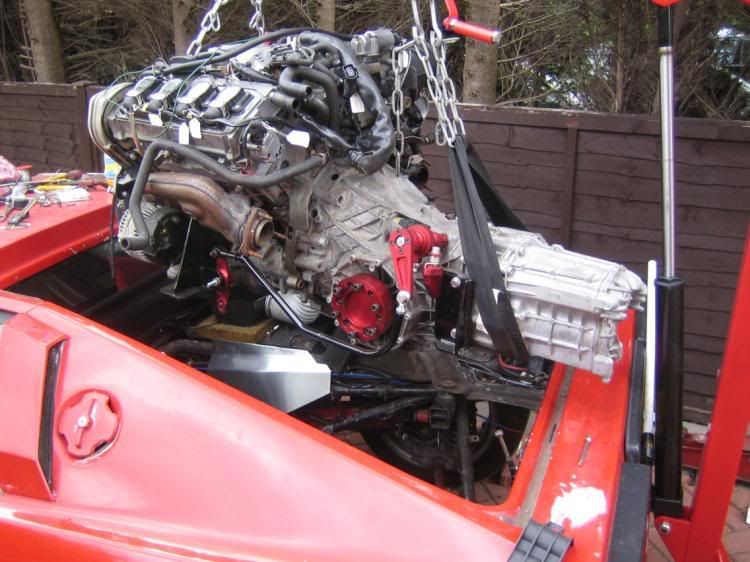
Attached the bell housing to the box

And painted up the manifolds

Installed a new roller spigot bearing and fitted the clutch and flywheel


Also fitted a smaller retainer to the release bearing to stop it falling off!

Engine in for the last time! (Hopefully)
Next up was stripping and cleaning my new throttle/inlet
I am going with this due to running megasquirt

Rather dirty!


Now as you saw earlier the baked on engine oil was very hard to remove….
It came of easier with some fire!


Got the lower inlet fitted

Then spent the day fitting up!!

Moving round the the front, got the top water pipe made

And sent all the pipes away for Tig welding up

I then made myself a new alternator braket! The old one was weak and I didn’t trust it.
The new bracket picks up on the head and through the block and the adjuster fits to the water pump housing
I also used a Punto Mk2 I had as it was a 90A unit


Rather overkill!
Also modified my sump and welded the oil drain for the turbo in

Next up I fitted my new gearbox cables!
Originally it had a soild shifter but it was horrible so now it has cables and it shifs like butter!
Took a long time to get this right, theres a lot of engineering in gear change cables!


Got that done and welded in the lambda and external wastegate into the downpipe

Next up I made a coil pack mount and fitted my crank trigger wheel


That’s it for now, its finally getting there!
maccmike - 24/3/13 at 10:37 AM
great build pictures and some awesome craftsmanship, keep it coming
Slutters - 24/3/13 at 10:45 AM
Thanks!
Dan. - 24/3/13 at 11:42 AM
Love the way when you post it kills my phone every time lol.
Keep up the good work in that cold unit, get that silly supra finished so we can make progress on out kit cars! Lol
Proby - 24/3/13 at 12:14 PM
First time I've seen this thread, read it start to finish in one go, great workmanship and a really nice project. Keep it up.
slingshot2000 - 24/3/13 at 12:22 PM
Looks like some really good work going on there, should be a blast when it is finished.
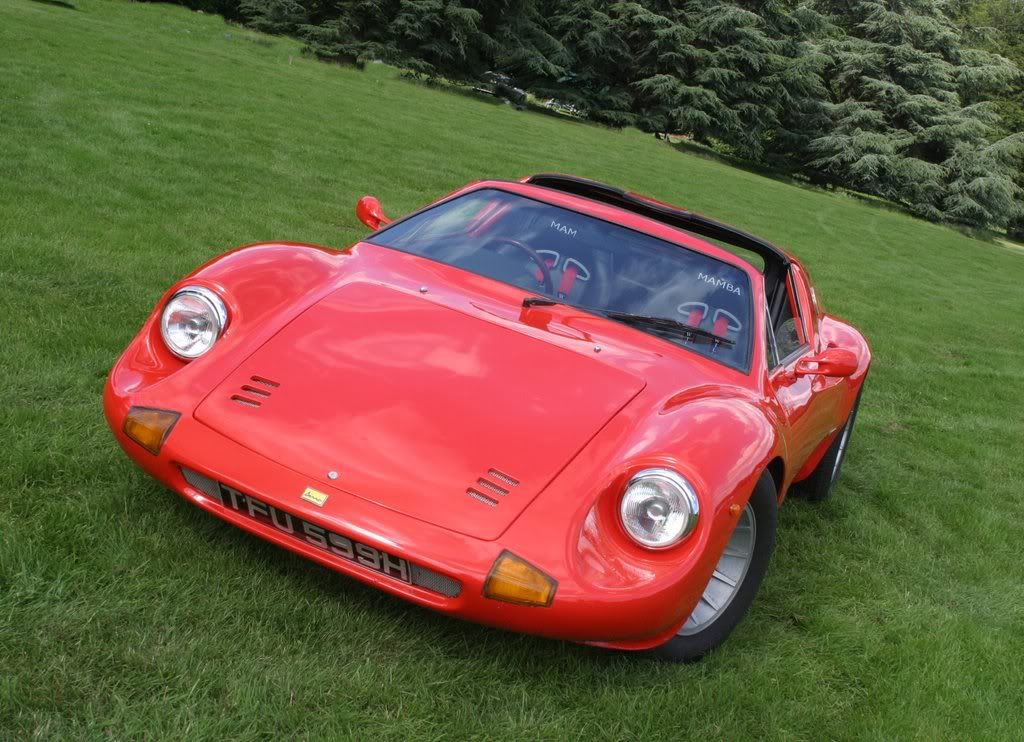
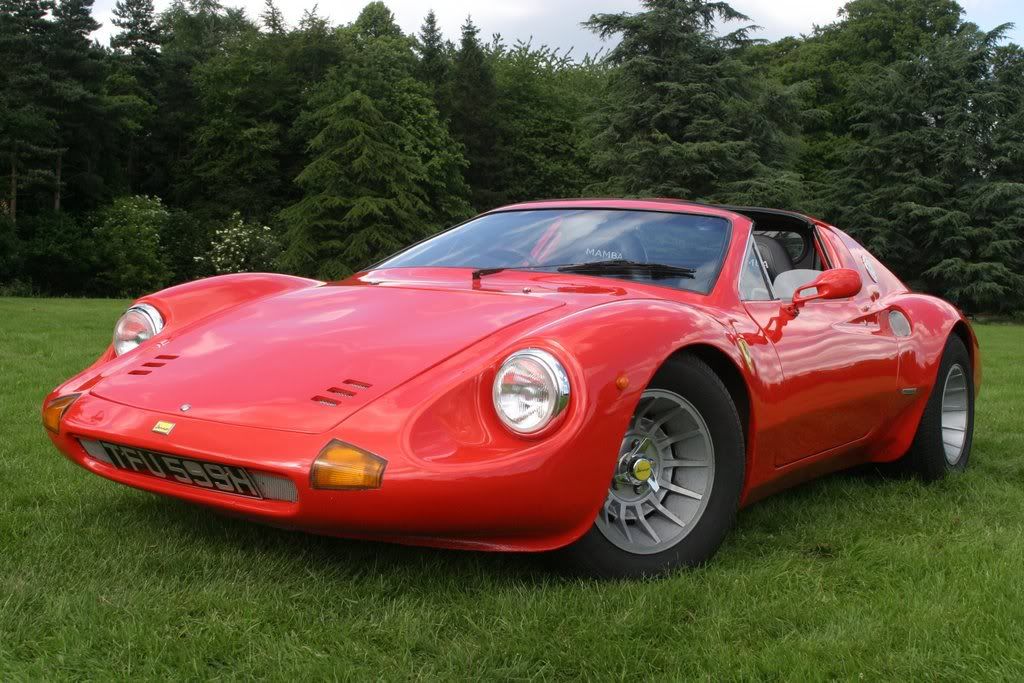
Slightly off topic, but do you mind if I ask; what car the yellow bonnet (in the very first photograph) is off?
Thanks
Jon
Dan. - 24/3/13 at 12:32 PM
A Dutton long gone now