So andy bates did rip off the striker chassis then? i suppose thats a big compliment to striker, he cant come up with a new design


Hi All
I've just bought a Striker that will be used for sprints and hillclimbs (road going class for now). I've not picked it up yet so don't
know the full details.
The car needs a bare chassis rebuild.
When it's stripped, I'm going to take the opportunity to check the chassis for any damage (any obvious cracking points?) and modify if
necessary. I'm new to Strikers although I built a Fury many years ago. I know a front ARB is recommended but are there any other chassis mods
that I should consider. The car is a live axle version with, I think, the modified Escort uprights. The chassis number starts with S90 so I'm
guessing it was a 1990 chassis. It will be running a 1400 K series and Type 9 box. Tyres will be 1A (local race championship requires 1As) or 1Bs. It
may end up on slicks at some point though.
Many thanks in advance.
Wyn
I'm probably not the best person for impartial advice, but I spent on a lot of time on the Striker Yahoo/Google groups so I learned a few things
about them.
The common points for cracking on the Sylva cars are the rear axle mounting brackets on the axle itself. The unusual rear suspension system (a watts
linkage rather than double trailing arms) puts the axle under torsional stress when the body rolls or in one wheel bump. This is why it's
important that the rubber bushes that locate the rear arms are retained and not replaced with spherical joints.
[Edited on 3/1/15 by MikeRJ]
There's a cracking striker/ab arion chassis on piston heads!
Now that is nice!
quote:
Originally posted by daniel mason
There's a cracking striker/ab arion chassis on piston heads!
quote:
Originally posted by daniel mason
There's a cracking striker/ab arion chassis on piston heads!
Thanks Bi22le
http://www.pistonheads.com/classifieds/motorsport/race-cars/spaceframe/rolling-chassis/3230804
any pics of this striker rebuild then?
So andy bates did rip off the striker chassis then? i suppose thats a big compliment to striker, he cant come up with a new design
quote:
The other things i can recommend are a rear suspension tie to go above the fuel tank and join the upper suspension mounts, and roller bearing rocker arms.
quote:
Originally posted by lsdweb
quote:
The other things i can recommend are a rear suspension tie to go above the fuel tank and join the upper suspension mounts, and roller bearing rocker arms.
I'm not sure what you mean by the upper suspension mounts?!
Is yours IRS?
Yes, his is IRS and yours isn't.
quote:
Originally posted by R1_striker
any pics of this striker rebuild then?
So andy bates did rip off the striker chassis then? i suppose thats a big compliment to striker, he cant come up with a new design
Probably worth replacing your lower locating rods for the box section types as you may end up with this after some spirited launching 

Also go through all the rear bushes and check if you have 12mm bolts in 1/2" bushes and resize as necessary
Rich 
Thanks Jeff. That's removed some confusion!
R1_striker - I don't actually have the car yet - picking it up on Wednesday :-)
Rich - I'll drop you an email in the week - would love to pop and see yours and pick your brains if that would be ok?
Ta
Wyn
Hi
Chassis Mods:-
Check the top wishbone pivot mounts.
Reinforce the steering rack mounting as they can flex.
Other than that it's general wear and tear like any other spaceframe.
Front ARB is a must.
Other mods worth looking at
Move the fuel tank - we used a F2 stockcar tank, moved the passenger side firewall (behind the seat) forward about 50mm, slotted the tank in
vertically behind there - So behind the firewall and still accessible from the 'boot' but in front of the back axle, and the base of it is
at floor level.
Gel battery on it's side under front edge of passenger seat.
Access panel in tunnel to get at gearbox oil filler.
Uprate the Type 9 (BGH or similar) and fit a Quaife gear lever kit - do the latter even if you leave the box alone!
Quaife ATB
Make sure the axle ratio is short enough so it'll rev out in 5th just as it hits the aero wall.
If it's not got a full cage go and see Nigel at Cougar Engineering in Redditch.
Set it up right and it'll be right at the sharp end..
[Edited on 4/1/15 by JimSpencer]
[Edited on 4/1/15 by JimSpencer]
Oh and BTW - yes that is still your old rear wing on the back of the Reynard!
quote:
Originally posted by jeffw
quote:
Originally posted by R1_striker
any pics of this striker rebuild then?
So andy bates did rip off the striker chassis then? i suppose thats a big compliment to striker, he cant come up with a new design
He didn't 'rip off' the Striker, my understand is they are actual Striker chassis. There are new, AB, chassis for this year.
Thanks Jim
I looked at moving the fuel tank in a Westfield we rebuilt a few years ago to that position but ended up with it in the passenger footwell (suitably
paneled over). I like the idea of the tank in front of the axle.
Rescued attachment fuel tank finished (1).JPG
Gel battery will be in passenger footwell.
I've got a couple of different CWPs for the axle somewhere in my tip of a garage so hopefully I should have something suitable there.
I thought the wing looked familiar :-)
quote:
Originally posted by JimSpencer
Hi
Chassis Mods:-
Check the top wishbone pivot mounts.
Reinforce the steering rack mounting as they can flex.
Other than that it's general wear and tear like any other spaceframe.
Front ARB is a must.
Other mods worth looking at
Move the fuel tank - we used a F2 stockcar tank, moved the passenger side firewall (behind the seat) forward about 50mm, slotted the tank in vertically behind there - So behind the firewall and still accessible from the 'boot' but in front of the back axle, and the base of it is at floor level.
Gel battery on it's side under front edge of passenger seat.
Access panel in tunnel to get at gearbox oil filler.
Uprate the Type 9 (BGH or similar) and fit a Quaife gear lever kit - do the latter even if you leave the box alone!
Quaife ATB
Make sure the axle ratio is short enough so it'll rev out in 5th just as it hits the aero wall.
If it's not got a full cage go and see Nigel at Cougar Engineering in Redditch.
Set it up right and it'll be right at the sharp end..
[Edited on 4/1/15 by JimSpencer]
[Edited on 4/1/15 by JimSpencer]
I don't actually run a front ARB on mine at the moment.....
If you want some inspiration, this Striker is fairly local to me and was built for sprinting and hill climbing. A few more details in
this thread.
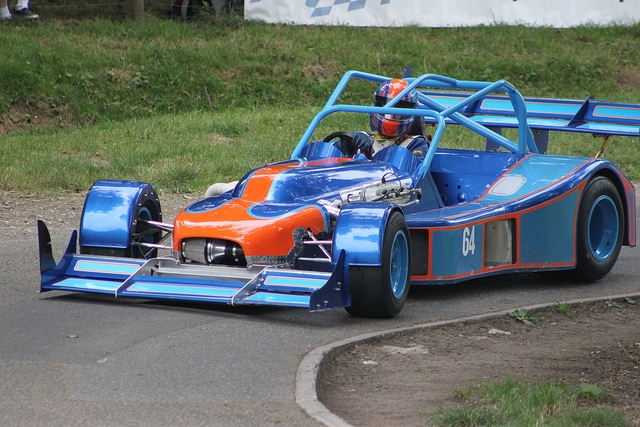
Not a lot of Striker left in that one !
He'd struggle on 1As !
[Edited on 4/1/15 by lsdweb]
quote:
Originally posted by lsdweb
He'd struggle on 1As !
I got to a point today where I realised staring at the Striker wasn't helping. So I got stuck in!
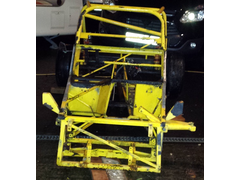

Description


Description
I couldn't remove the nearside rocker as it appears to be seized to the through bolt? Will have another look tomorrow - pretty cold out there
tonight!
I would say that's more than stuck in 
More progress :-)
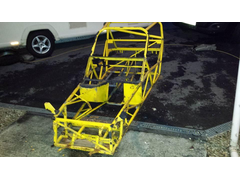

Bare chassis
Looks like you have to odd spot of rust on that  Bet it cleans up fine though
It's not that bad really! The black stuff is where the previous owner has covered where the powder coat had come off.
It's off to be blasted on Monday :-)
quote:
Originally posted by peter030371
Looks like you have to odd spot of rust on thatBet it cleans up fine though

Picked it up form the blasters today.
It's now at (Endaf) Owens Fabrications for some chassis mods, side impact bar and to redo some of the original welding!
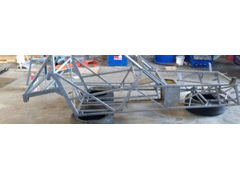

Stripped
That looks better already 
Trying to do as much as I can when the car isn't here!
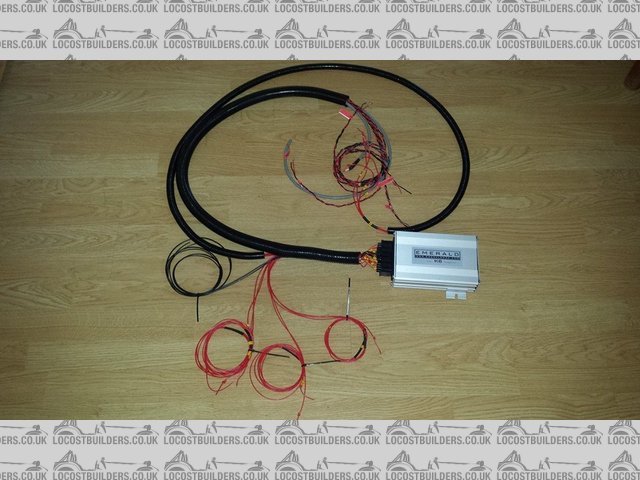
ECU wiring harness finished

Description
Dash all wired and tested (had to make up a new harness as the original had been chopped short

Description
and now galvanizing ...that would be the best and neatest rust-protection.....
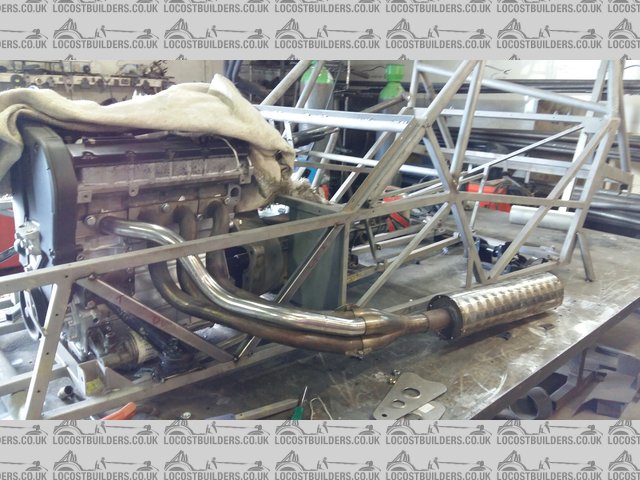
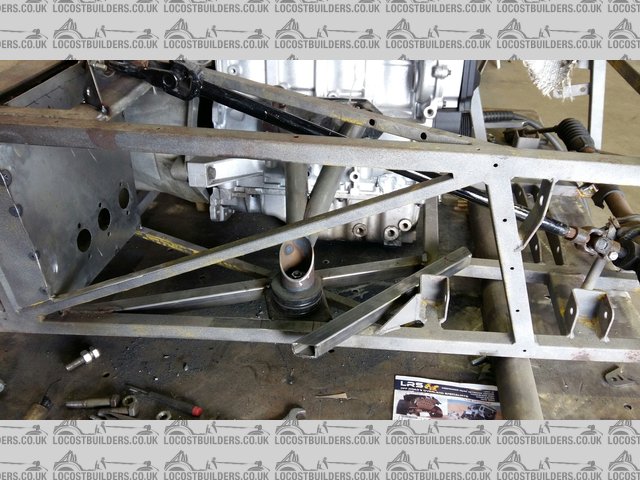
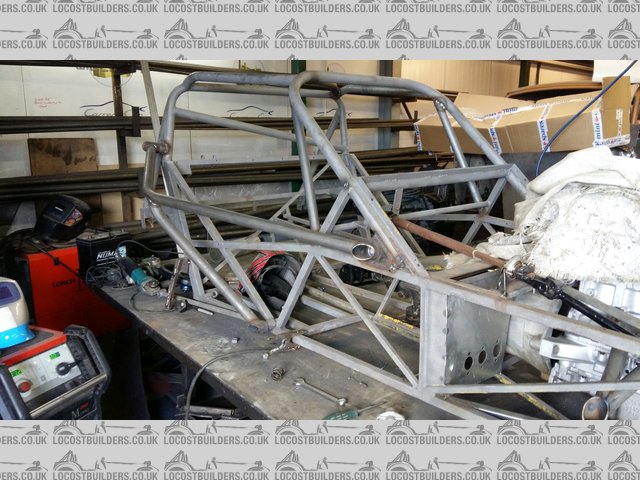
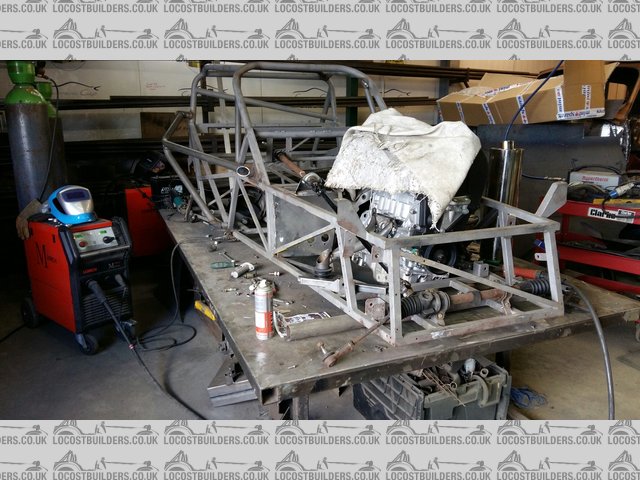
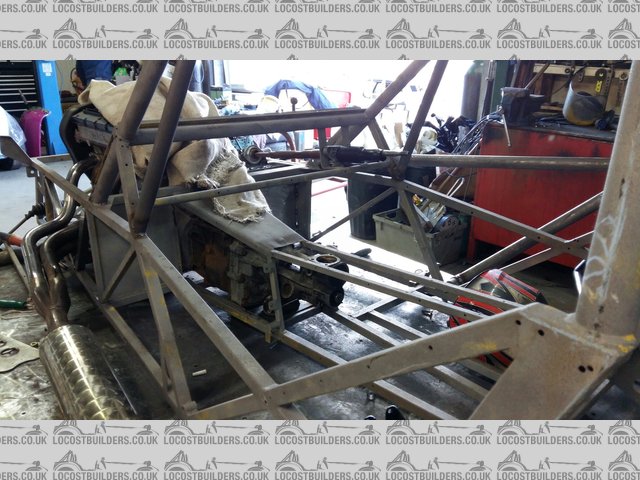
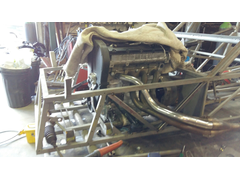
Chassis mods almost finished! Lots of cage enhancements, engine mounts done, new pedal box and exhaust sorted. Some more strengthening to go in at
the front and some of the original welds to be redone.

Description

Description

Description

Description

Description

Description

Description
Wyn
Looks good Wyn  Have you thought about a prop catcher while it's being altered??
Looking good that Wyn
Perhaps I should keep mine
It's on my list of things to do Rich- it'll go back to Endaf's once I've thrown it back together for final brackets, fuel tank etc
so we'll do the prop catcher then. I think the gearbox is further back than it was originally!
quote:
Originally posted by Rich J
Looks good WynHave you thought about a prop catcher while it's being altered??
If you accodently make an extra set of prop catchers while your at it ill take them off of your hands!?!
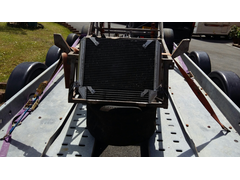
Some more progress at last! Chassis mods are now finished and the chassis is in the powder coaters
Rad mounts finished.

Description
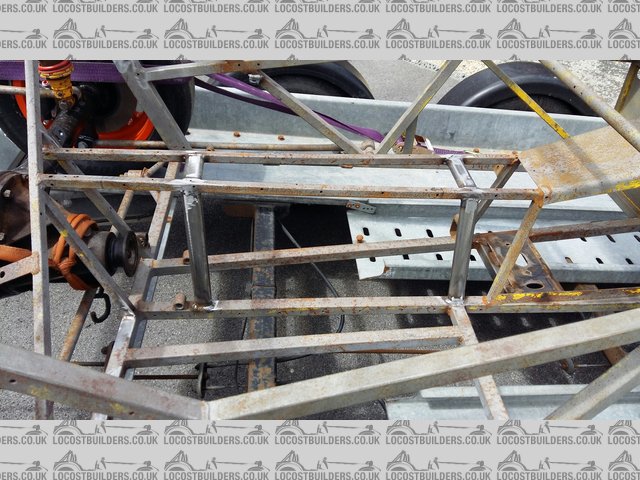
Prop catchers and fuel tank brackets in.

Description
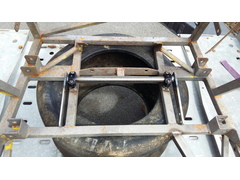
Front ARB fitted

Description
Rad brackets and ARB

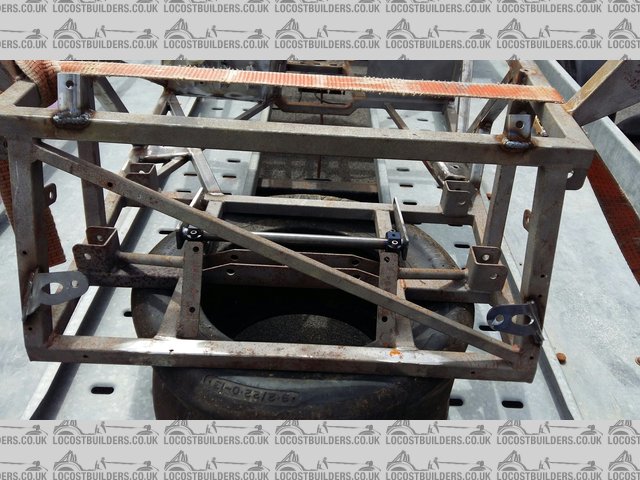
Description
TimC has sort of set me a challenge so I'd better pull my finger out!
Can't wait to see it!
quote:
Originally posted by TimC
Can't wait to see it!
What colour powdercoat are you going with.
Just looking again at your cage - it looks serious! You're obviously planning to roll it! 
[Edited on 7/6/15 by TimC]
Black powder coat - plain and simple!
And yes there's a lot of effort gone into the cage but I'm not planning on testing it!!


Description
Powder coated :-)
Now time to rebuild it !! I've just realised I've not powder coated the floor panels yet so need to get those sorted before doing anything
else really.
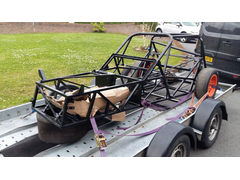

Description
Happy days ahead 
Cheers Rich
If I can find some time away from the business I might get it finished! !
Some progress.
Floor panels ready to go on but my Sikaflex on the shelf was rock hard! I decided to panel the bottom of the tunnel too - these panels aren't
powder coated but they can't be seen anyway.
The gap in the paneling is for access to the gearbox mounting bolts. I may try and find a way to cover this area.

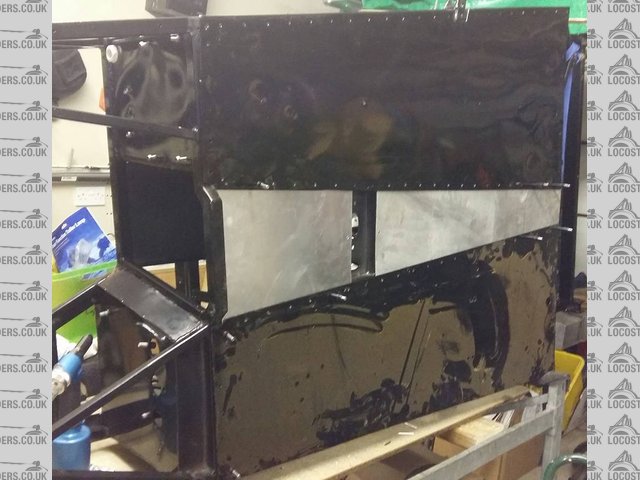
Description
[Edited on 5/8/15 by lsdweb]
It's been a month...
quote:
Originally posted by TimC
It's been a month...