I heard that some of the mountain thicknesses between ball joint and upright . ( Where I took the picture )
Improves grip .
Have you already heard ?
[img]
 [/img]
Hello all,
I introduce myself:
My name is Sam, I live in Cologne, Germany.
For several weeks I own a Fisher Fury year 1993.
My intention is to completely rebuild the car. So I will need of your help.
I have time up to 10.31.2017.
Zetec engine 2000cm and 15 "wheels.........
The main goal is the lowest possible weight.
Welcome and good luck.
I'm doing much the same as you except keeping the 1.3 Xflow.
I've just about stripped, refurbished or replaced every part of the car. One thing you may find is that the early chassis used metric holes on
the chassis for imperial suspension bushes. They may need reaming to take the imperial bolt to tighten things up.
Enjoy!
Hi Sammy,
Glad you have come by, as I said this is a great source of information for your project and the guys and girls should be able to answer your
questions.
Martin
Hi Sam,
I've also got a Fury which I'm building down in Adenau (by the Nurburgring), which is about an hour down the road from you.
I've got a similar goal, but I've got a part built chassis and body, I'm still choosing which engine to put in.
If you ever down this way, we should meet up.
Cheers,
George
Thanks of welcome to all
This week I will try to obtain registration in Germany .
I consider it the most difficult step in my project .
I hope that everything works . ..
Looks really nice Sam - that's a good colour for a Fury
This and the brake body that I want to install .
I heard that some of the mountain thicknesses between ball joint and upright . ( Where I took the picture )
Improves grip .
Have you already heard ?
[img] [/img]
hi,
my i ask why you want to rebuilt it, as it looks very nice on the picture with deep shiny paintwork and a straight body?
is it a live axle or IRS? (iRS is a bit heavier by nature)
front end escort or sierra based?
saving weight on that modell is a bit difficult...as due to its nature being a fury (which has doors & windscreen, side screens, wipers) you
already have the heavier version of the car.
smaller alloys and tyres would save weight
alloy wheel hubs would save weight
alloy brake calipers would save weight
depending on the exhaust fitted you might be able saving weight
alloy coilovers (e.g. protech) instead of the usually used steel spax would save weight
smaller water-expansion tank might save weight
differrent radiator (depending what is already fitted) might save weight
removal of heater (if there is one fitted) saves weight
removal of carpets and any sound deadening saves weight
changing fuel tank from steel to alloy saves weight (or adds weight if you fit a bigger one  )
)
just some ideas.
did the car pass the german TÜV?
[Edited on 24/5/16 by alfas]
The fury of the conditions are not the best.
The rear axle and .
And it 's all based mk2 escort .
I will make use of lightweight materials such as titanium, carbon fiber and aluminum where possible.
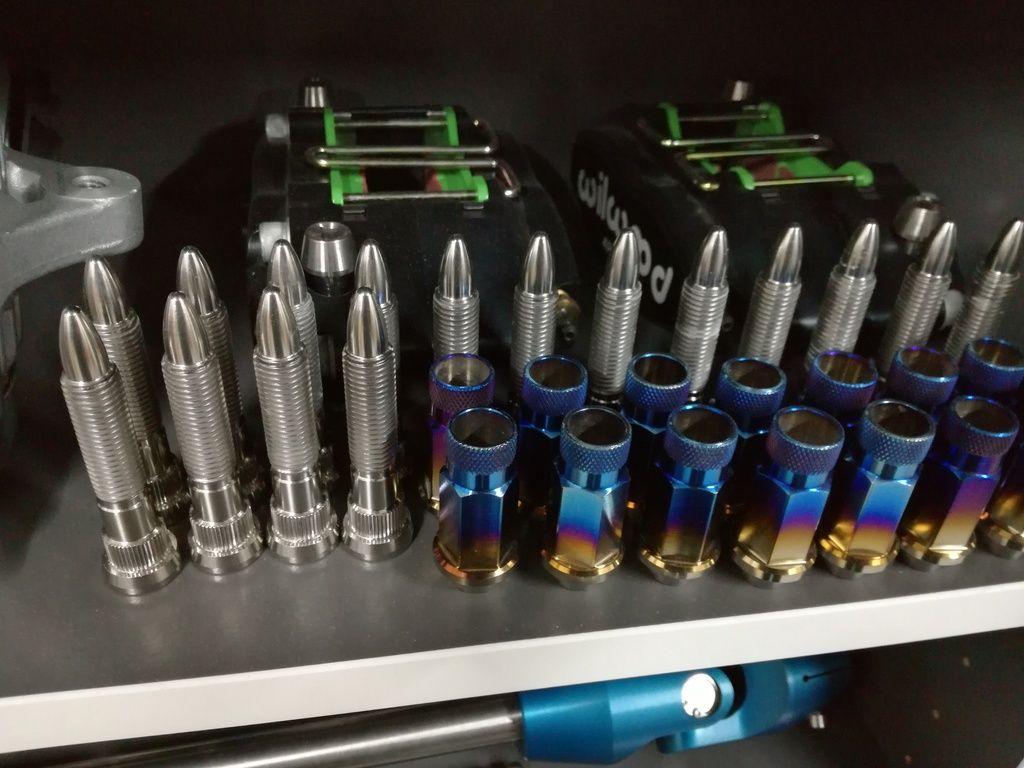
For example, all these parts are made of titanium .
While the German TÜV I have to wait three weeks .
[img] [/img]
[img] [/img]
[img] [/img]
Are you casting your own titanium? If so, that's really impressive.
I decided to make the hubs in order to mount Ford ventilated discs without making some changes have disks.
Now I just hope to receive them by anodizing as soon as possible.
red hubs are for sale if anyone is interested ....
[img] [/img]
[img]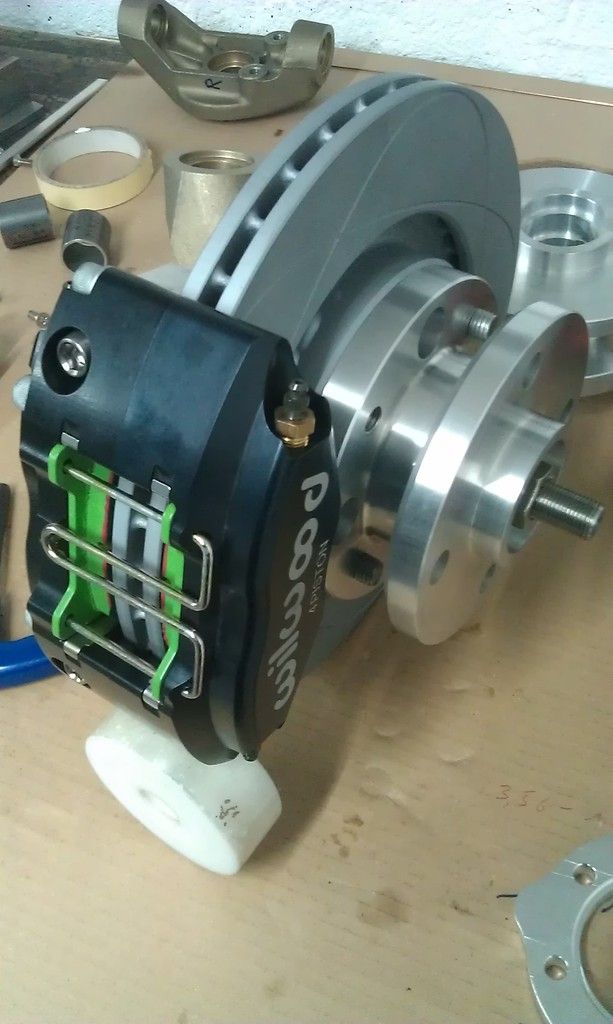 [/img]
[img] [/img]
Bolts, nuts , washers .
All grade 5 titanium .
I hope that lighten the weight of my fury , as has lightened my wallet to me......
[img]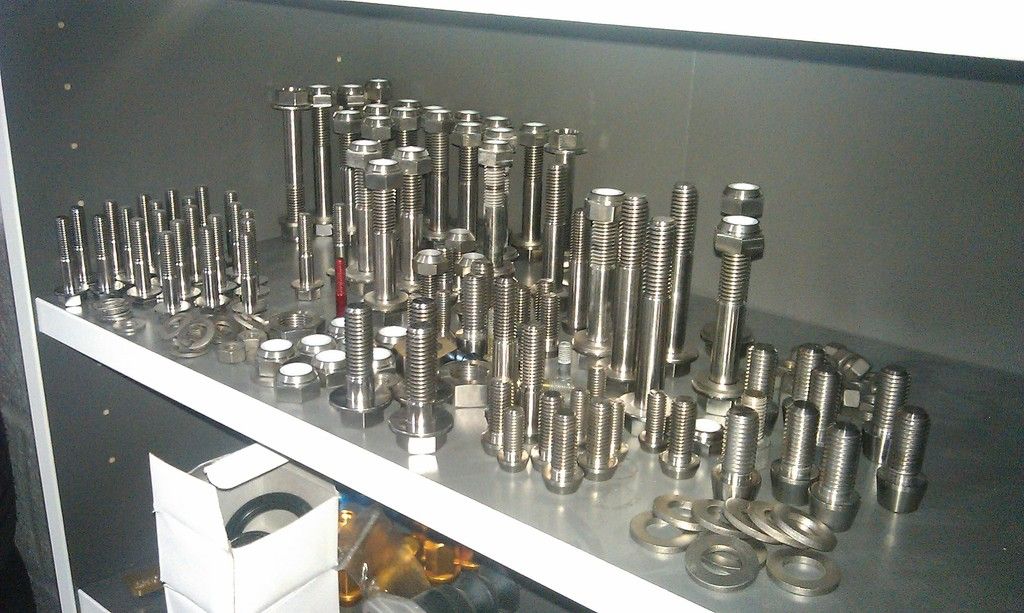 [/img]
With the light weight ethos, why are you using vented discs and not solid? Solid should be good enough especially with ducted air and lighter.
Love the ti bolts. I did consider it up would have had to do it one bolt at a time due to cost. Why o e red bolt?
Do you know what the weight was before you started so you can compare after?
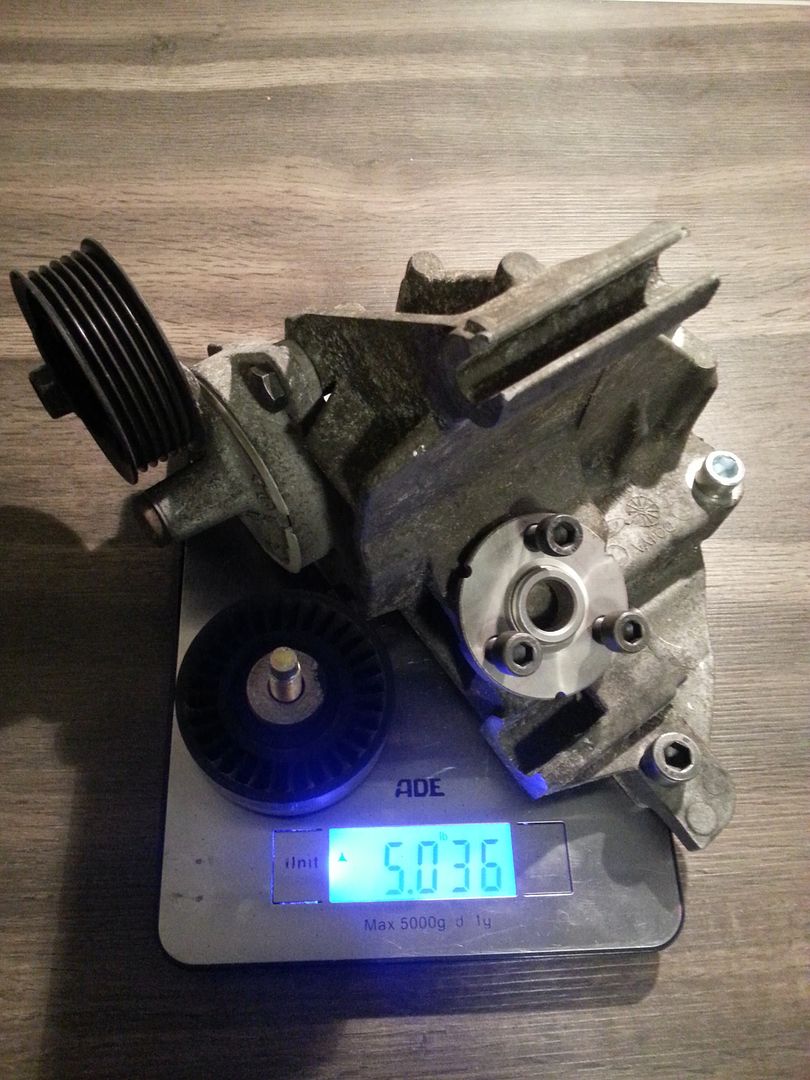
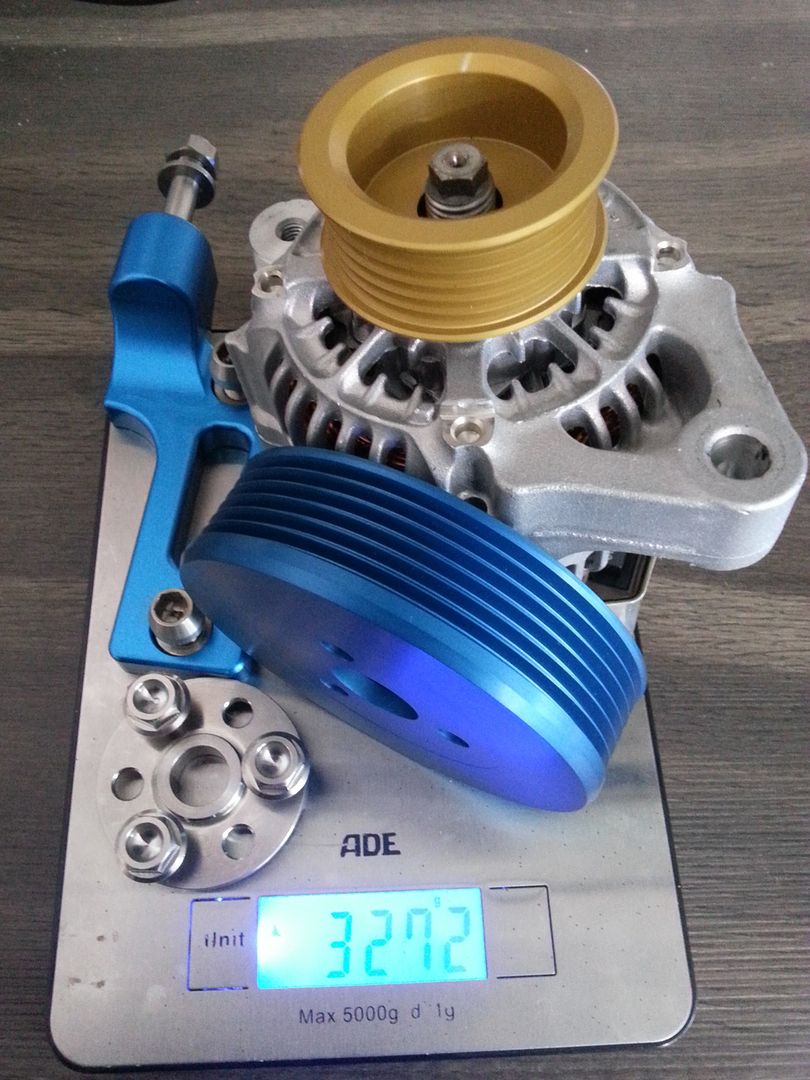
What gearbox and diff are you using? Have you changed the Alternator for something smaller and changed the battery to a Lithium one (both cheaper weight saving than the Titanium bolts/hubs.
quote:
Originally posted by adithorp
With the light weight ethos, why are you using vented discs and not solid? Solid should be good enough especially with ducted air and lighter.
Love the ti bolts. I did consider it up would have had to do it one bolt at a time due to cost. Why o e red bolt?
Do you know what the weight was before you started so you can compare after?
quote:
Originally posted by jeffw
What gearbox and diff are you using? Have you changed the Alternator for something smaller and changed the battery to a Lithium one (both cheaper weight saving than the Titanium bolts/hubs.
 [/img]
  [/img]
  [/img]
Hi Samuele, delighted to hear we have a member from Roesrath. Lived there ( Georgshof and Menzlingen ) for 13 years on and off myself. Good luck with your project, looks like some serious engineering and money going on there!
Rösrath-Menzlingen ~ 2 km
I would be very close....
The weight of my fury is 555 kg with about 5l of petrol.
The rear axle is escort , but all the pieces that were used for the assembly pieces are quite heavy.
Even the frame using iron and not aluminum panels .
The fuel tank , and even in iron.
sheet I hope to achieve a lower weight by using the best materials, Titanium, alloy, carbon and 15CDV6 steel.
Surely it is a question already made ​​by many, but I said I want to mount a 2.0 zetec engine and I have the chance to have a
bellhousing original RS2000 .
I can mount it without problems ? Or discouraged me ? I would be sure not to buy anything wrong. .
Thank you for help
meanwhile the situation of my fury and the next.
I have almost finished to disassemble the whole car.
and in the meantime I started with the production of parts.
[img] [/img]
I always wanted a steering wheel with a quick disassembly, but the quality and I never liked you, so I decided to make one myself.
for the central pin I used titanium Gr5, I expect good security.
in the meantime I got the pieces that I did anodized.I mounted all together and I am happy of the result
[img]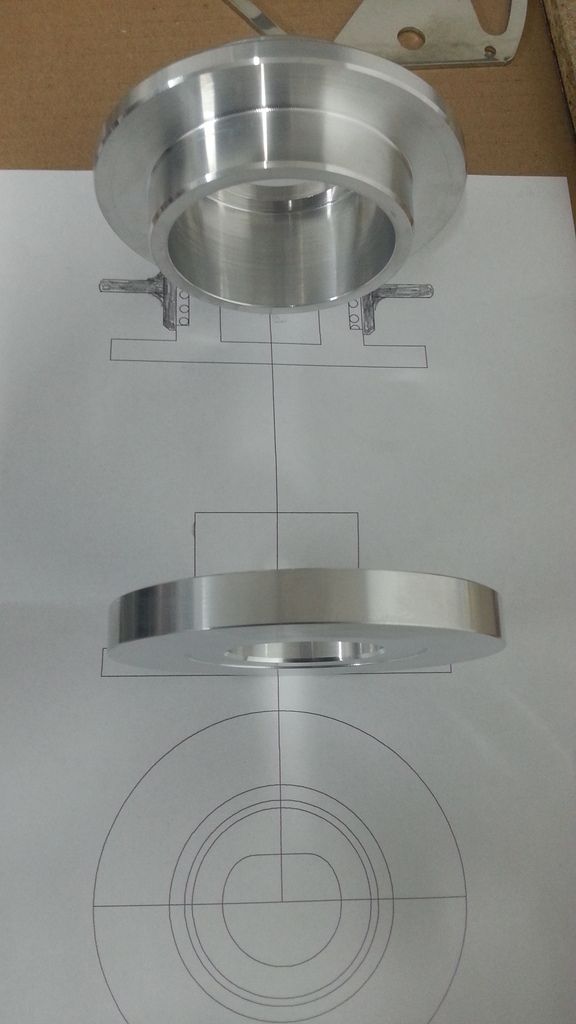 [/img]
[img]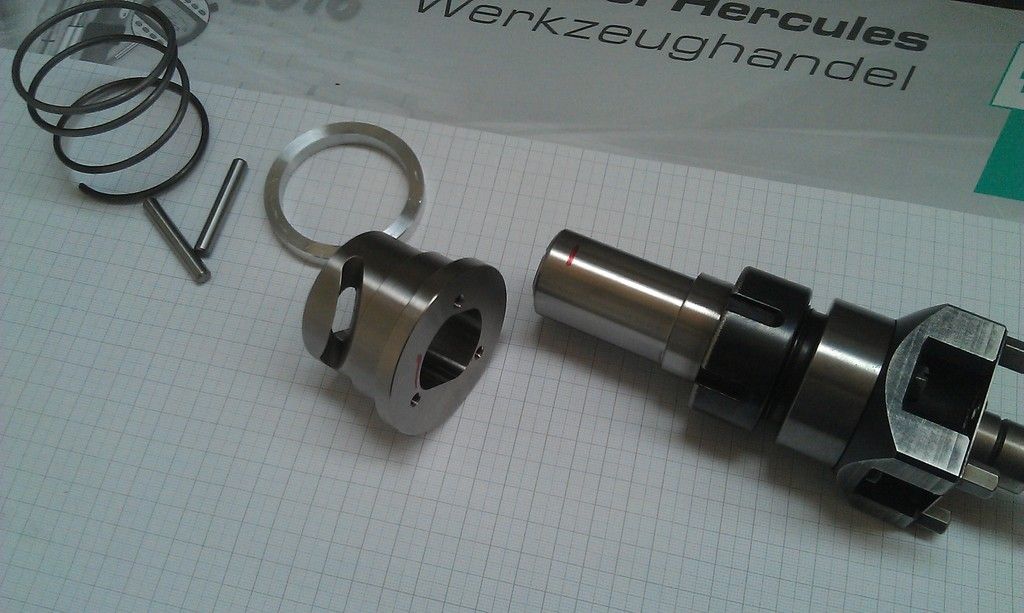 [/img]
[img]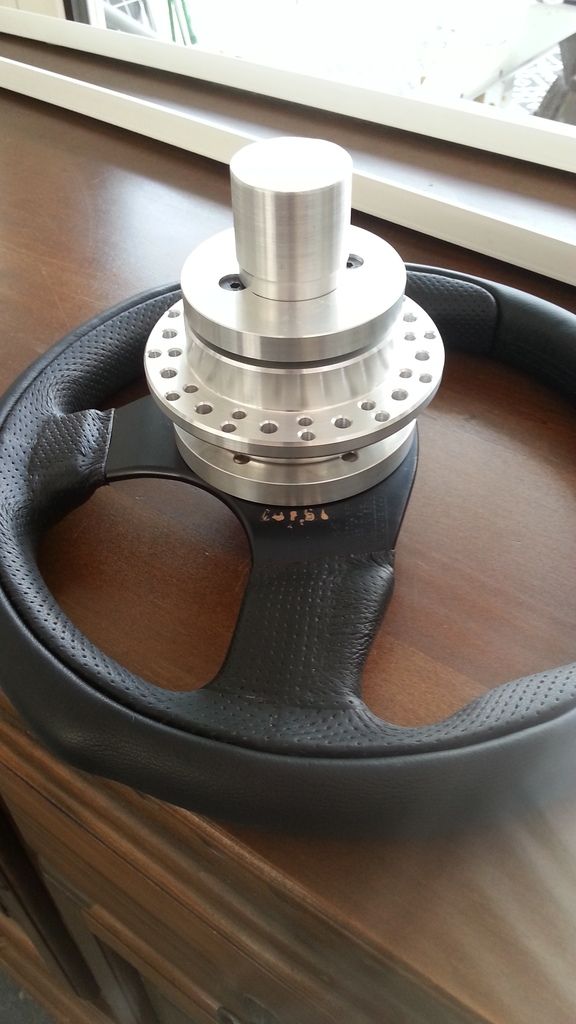 [/img]
[img] [/img]
[img]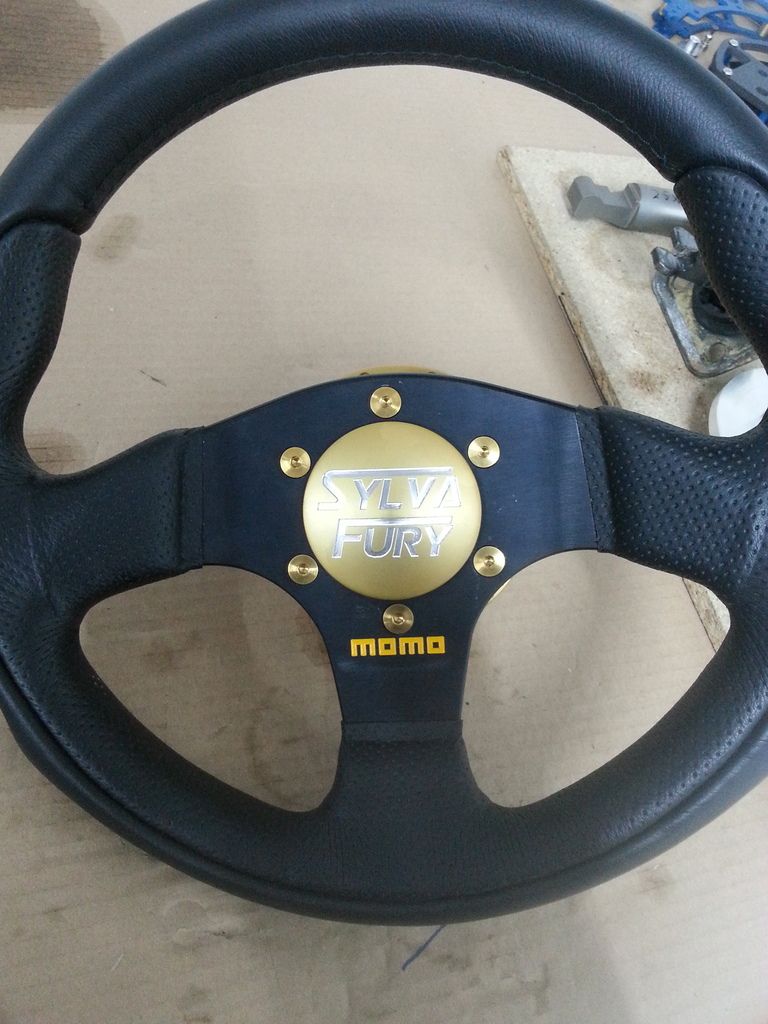 [/img]
I also started to weigh a few things I dismounted from my fury.
such as whells.
They are Compomotive 6x13 et 21 with 195/55/13 tires.
while the whells that I want to mount 6x15 ET18 with 195/50/15 Yokohama Neova tires.
to my surprise and satisfaction I have found that have the same weight: 12,6kg
[img]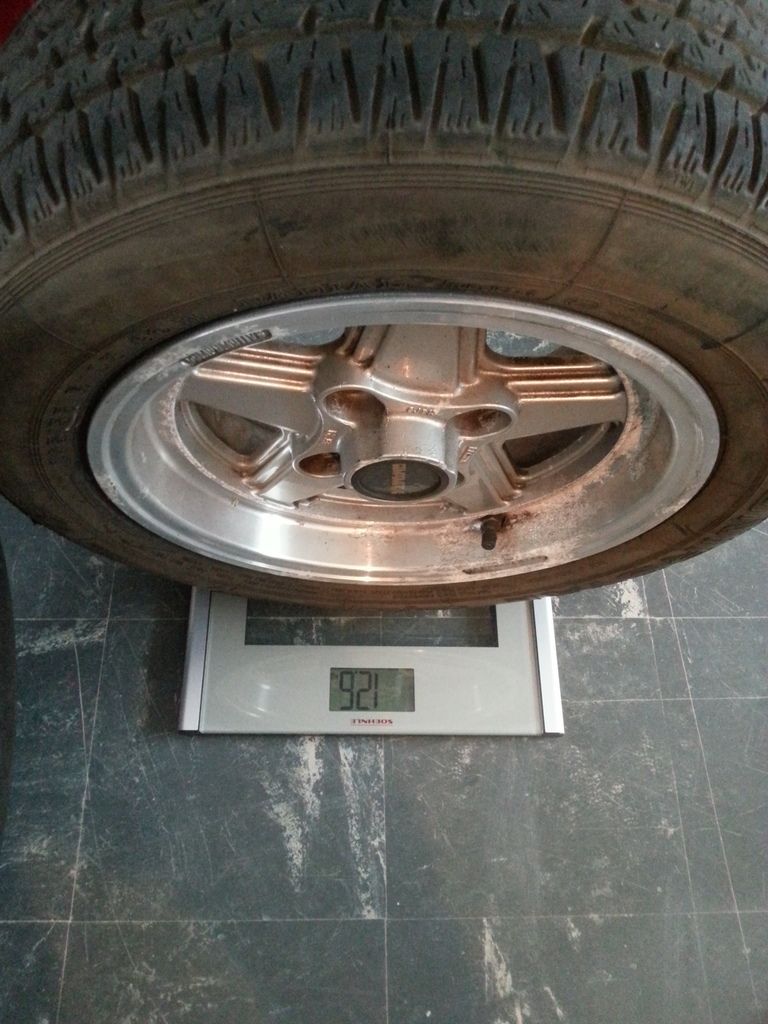 [/img]
[img]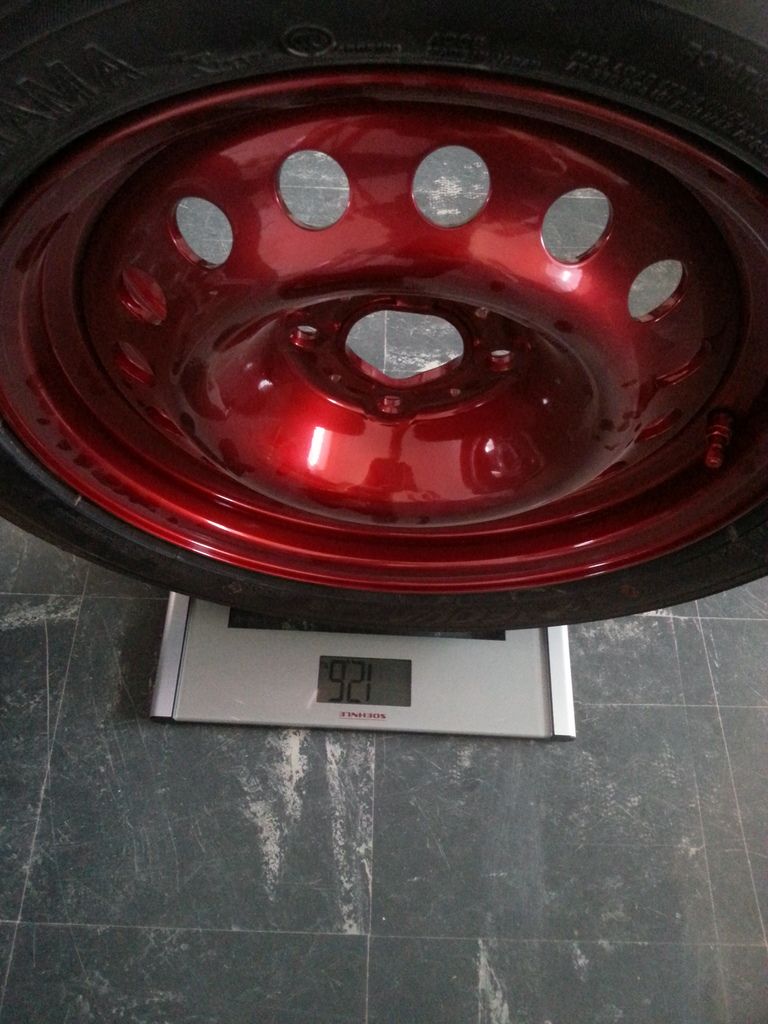 [/img]
RS2000 bell housing is a straight fit I believe, but you need a different release arm. Alternatively, Rally Design sell an alloy bellhousing i
think.
Some beautiful parts you're using/making there. What are the wheels? they look great! 
the handbrake lever and coming very light and sturdy than the original sierra that was mounted on my car. I am still undecided whether to mount it in
the same spot where it was mounted before ...
[img]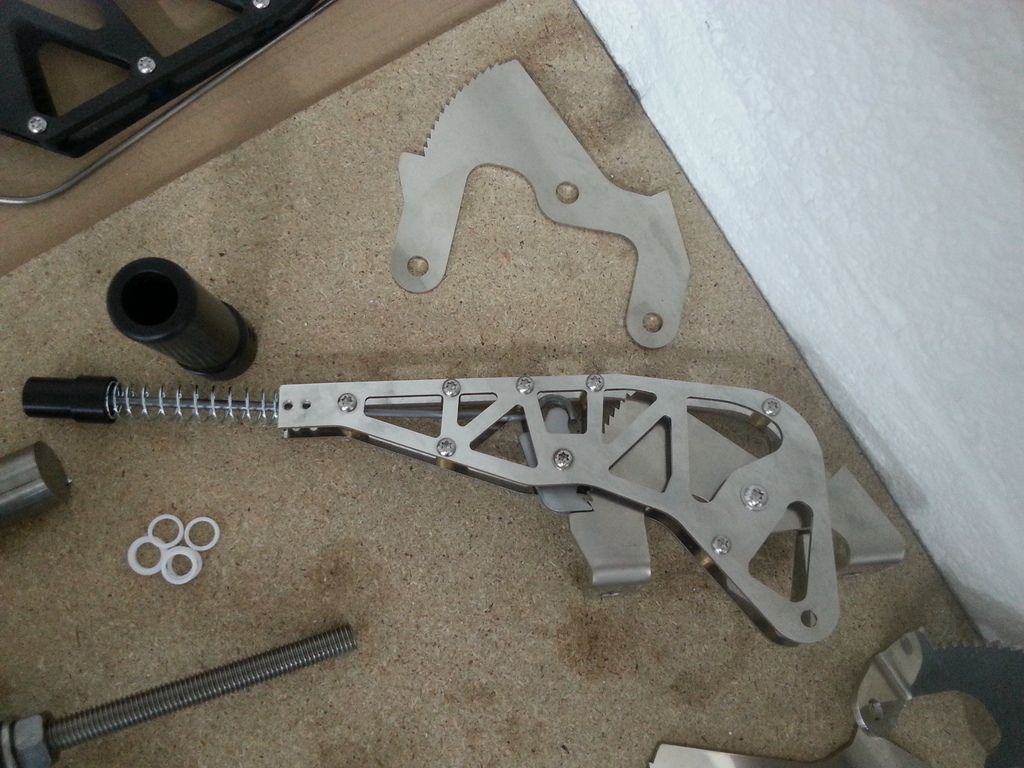 [/img]
I saw that there are also alternatives to the RS2000 and are also made of aluminum.
my question and especially if it goes in the tunnel.
whells are from citroen and they are aluminum 4x10⁸ 6x15 et18.
4,6kg Piece.for this size have an excellent weight.
much less than the super expensive OZ.also why I bought several
[img]http:// [/img]
Great thread, any updates 
I had to change my plan of construction.
so I spent some time in new pieces.
I'll use it for steering as aircraft aluminum metal.
and a bar of 18mm in titanium.
the supports for steering are also of the same aluminum.
[img]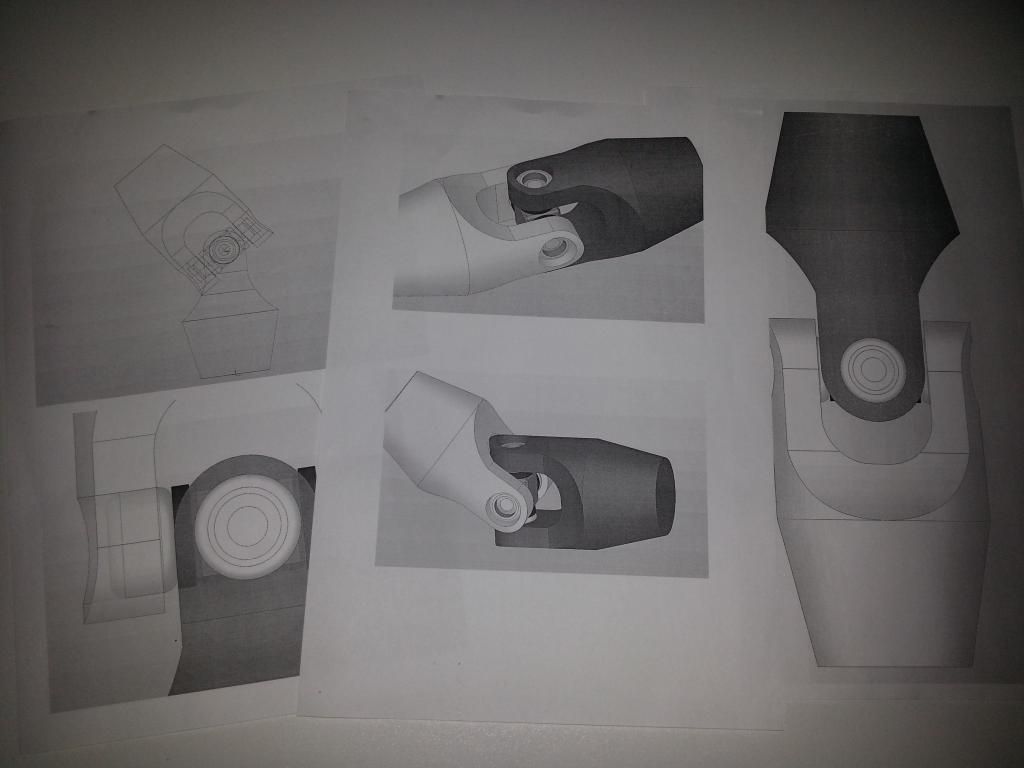 [/img]
[img]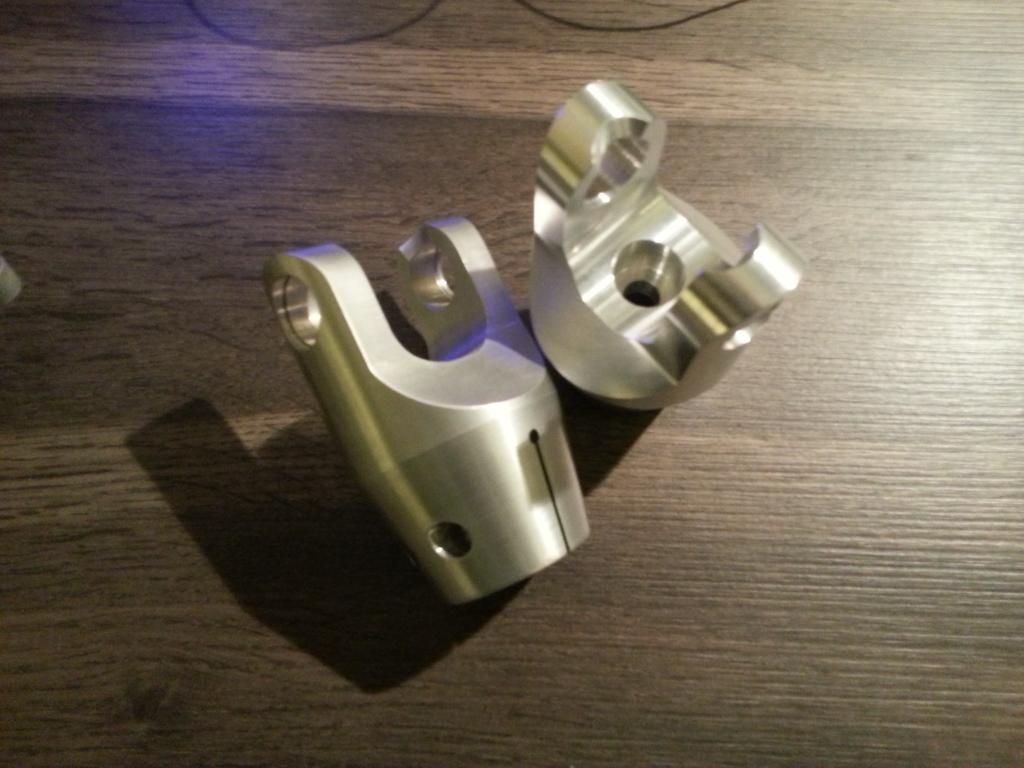 [/img]
[img]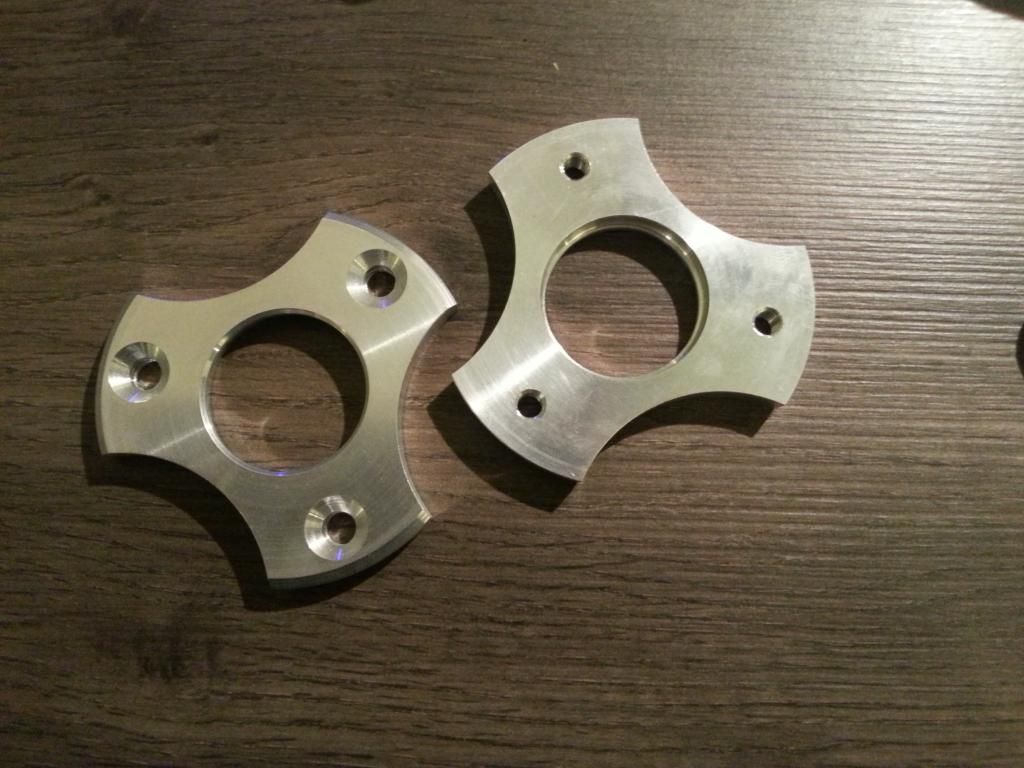 [/img]
[img]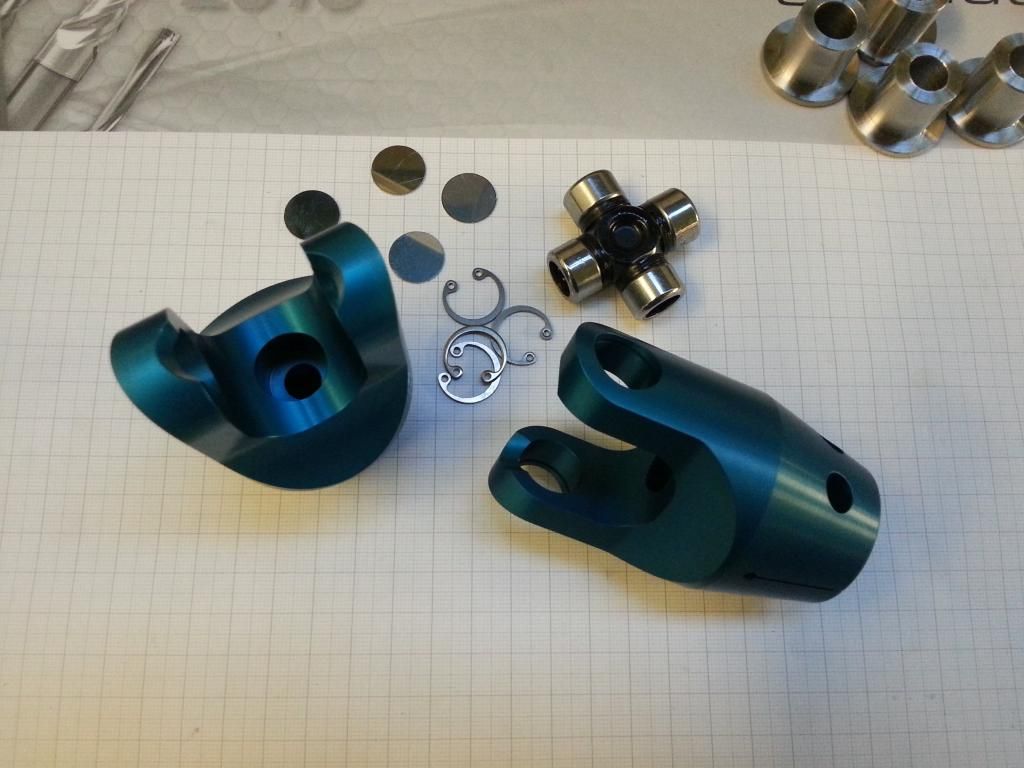 [/img]
[img]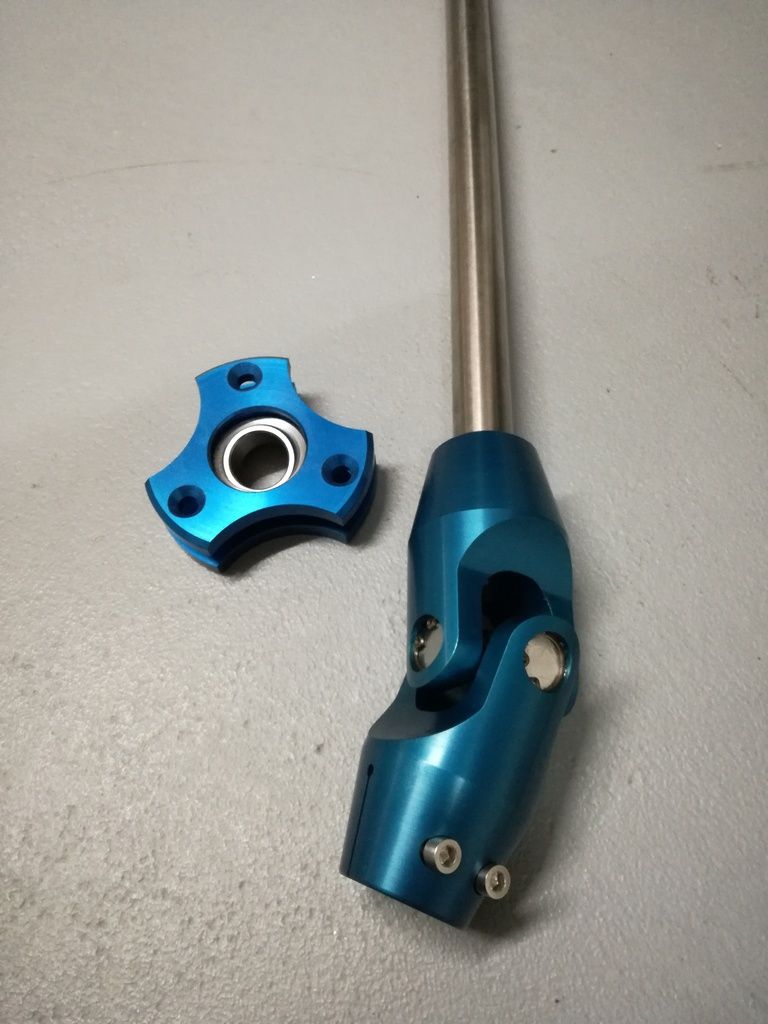 [/img]
[img]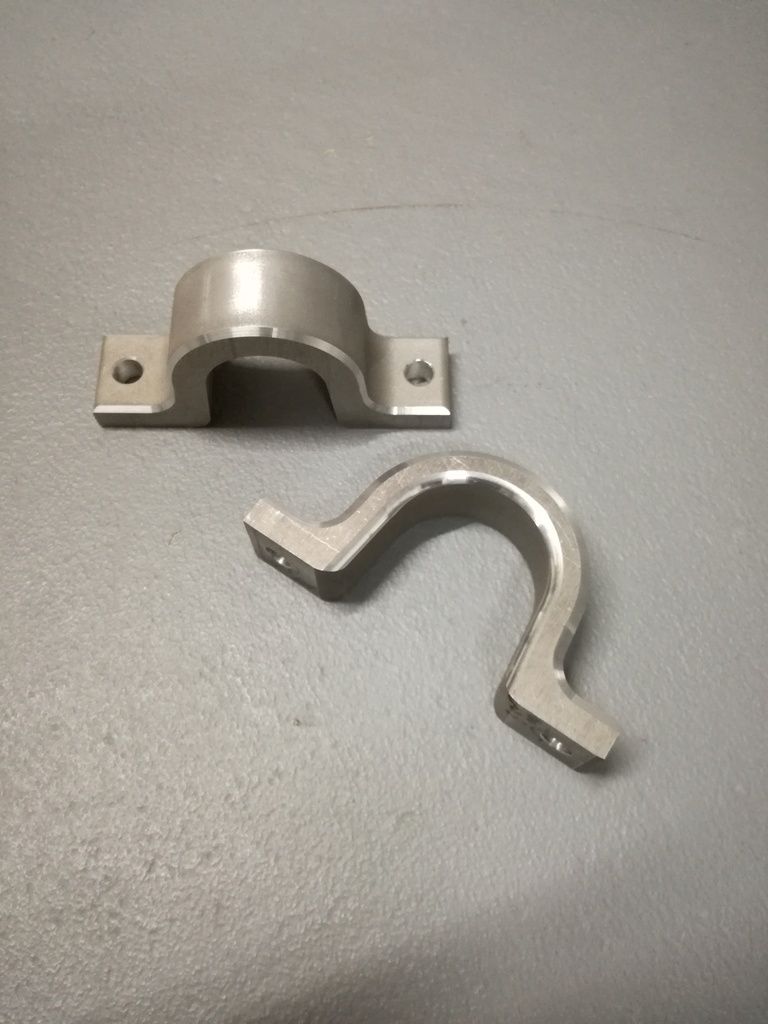 [/img]
in the meantime, after doing some tests on welding aluminum I decided not to buy the petrol tank.
but to build it myself.
They will use aluminum 2mm thick.
a question but I would l:
the fuel pump inside the tank or external to the better?
[img] [/img]
[img]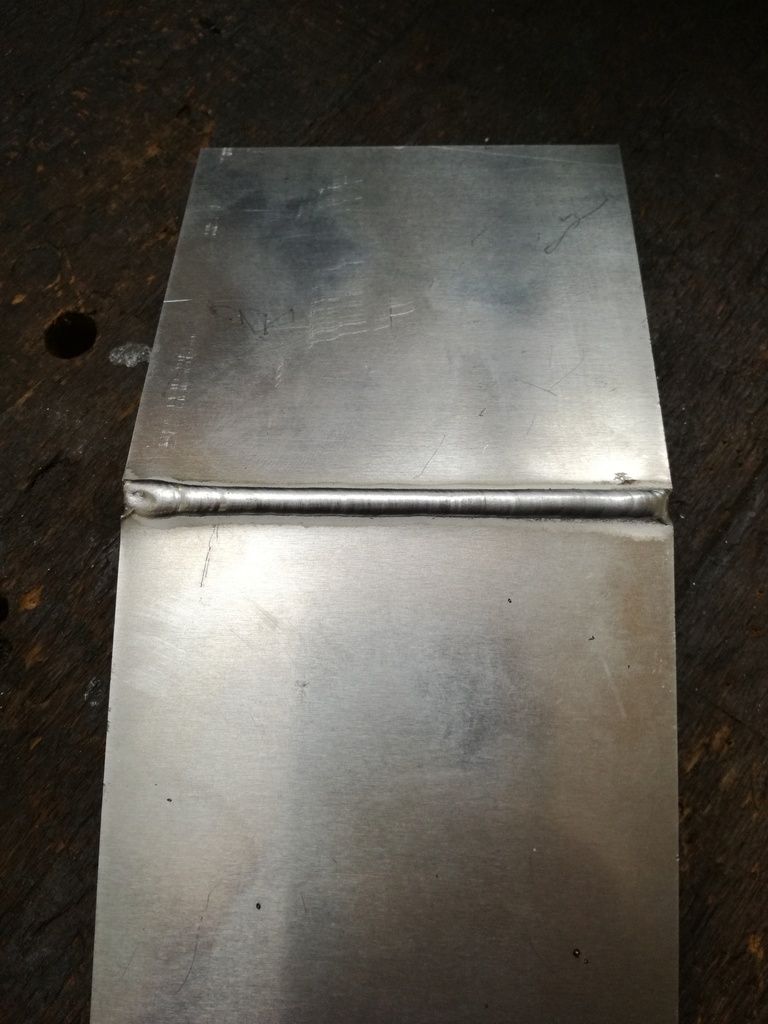 [/img]
Today I received back the pieces anodized for the gear lever.
also in this case I used gr5 titanium and aluminum aircraft to maintain the lowest possible weight.
[img]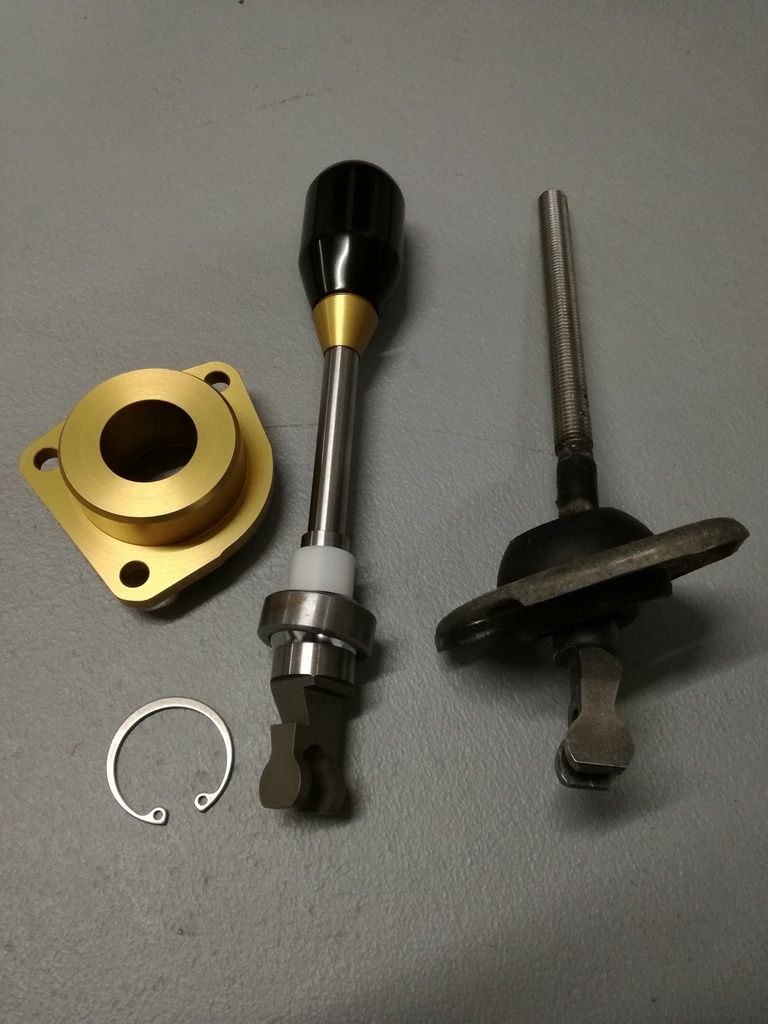 [/img]
These parts you are making look amazing!
Regarding the fuel pump I would make it internal with an integrated swirl pot, just to make packaging easier and neater and in the end cheaper as only
1 fuel pump.
I guess final choice would be down to engine choice. If it's to be BEC then most use the bike pump.
I used one from a Range Rover on my build.
Range Rover Classic 86-92 V8 EFI Fuel Pump PRC8318
It was easy to extend to fit the tank and was easily man enough for 250bhp supercharged engine.
thanks for the reply.
I'll try this option then
After several weeks of measurements, drawings and preparations I finally started the frame.
the result and good up to this point.
Now to move on I need more pieces from England.....
[img]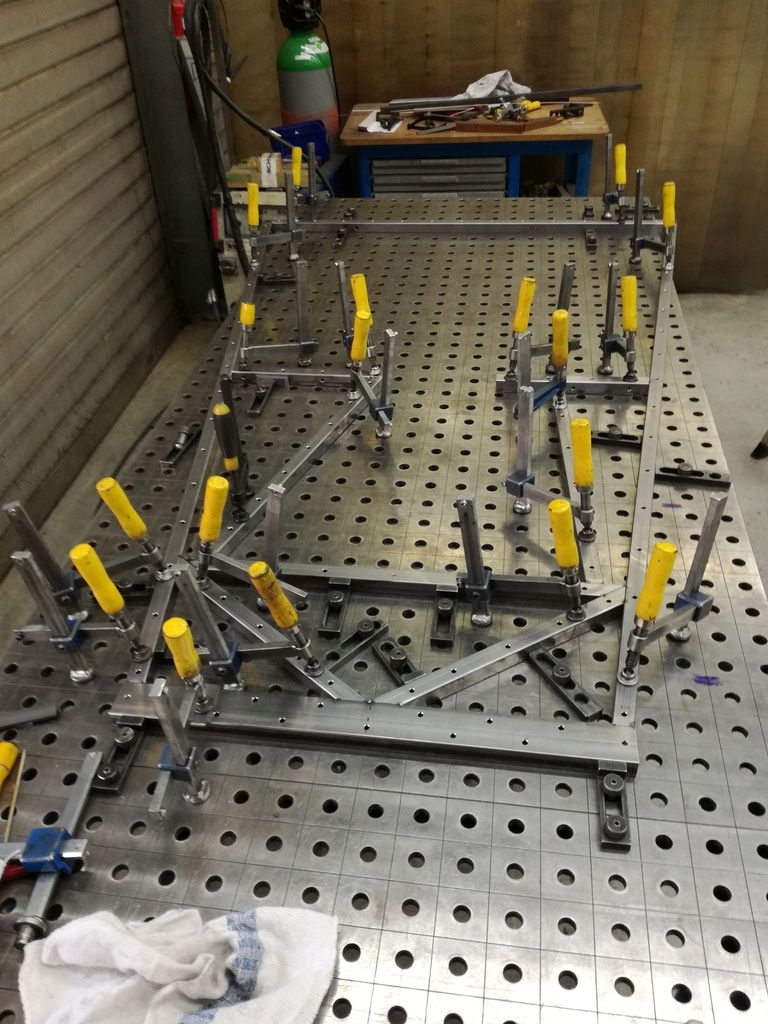 [/img]
[img]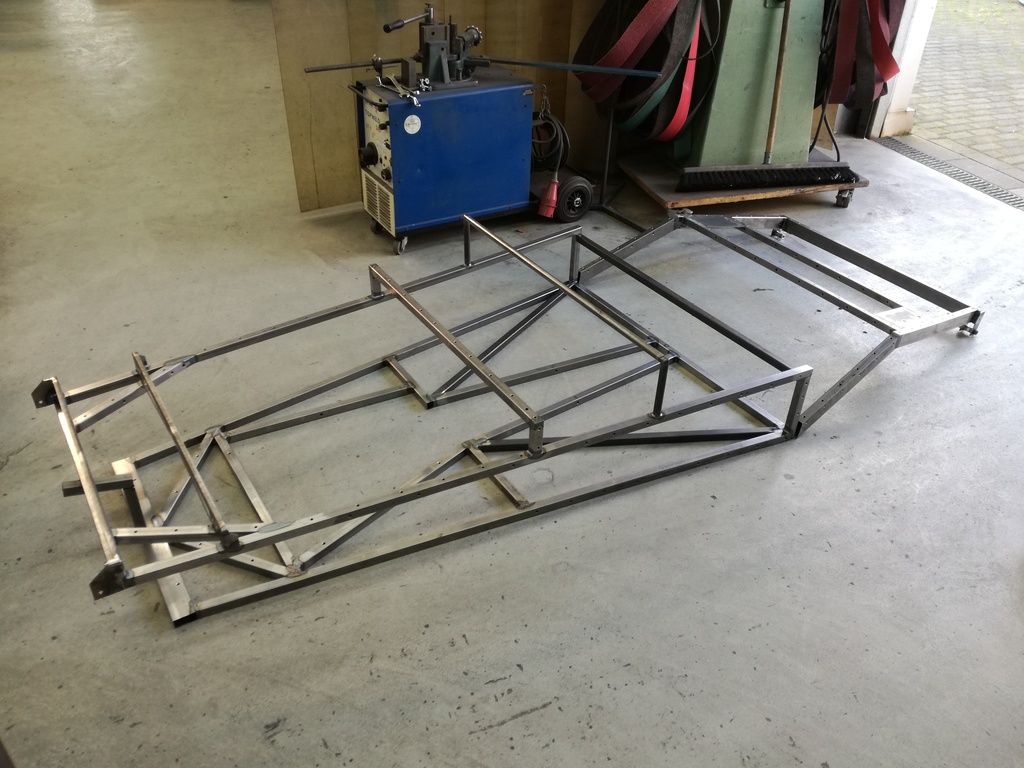 [/img]
Wow, you certainly have access to all the tools!
quote:
Originally posted by peter030371
Wow, you certainly have access to all the tools!
Realy very nice rebuilding. If it could of help, here some photos of my Fury chassis rebuilding from an italian forum with the full story still under
progress:
http://www.llcc.it/YetAnotherForum.NET/default.aspx?g=posts&t=13448&p=18
I decided for a new improved chassis when I found the original one had some cracks and visibile distorsions. Some tubes added to increase the
torsional rigidity and avoid tipical cracks of the standard chassis.
quote:
Originally posted by MadMaxx
Realy very nice rebuilding. If it could of help, here some photos of my Fury chassis rebuilding from an italian forum with the full story still under progress:
http://www.llcc.it/YetAnotherForum.NET/default.aspx?g=posts&t=13448&p=18
I decided for a new improved chassis when I found the original one had some cracks and visibile distorsions. Some tubes added to increase the torsional rigidity and avoid tipical cracks of the standard chassis.
meanwhile other works which proceed temporarily to the construction of the frame.
Yesterday I received the radiator
and the throttle body and ready to be mounted
[img]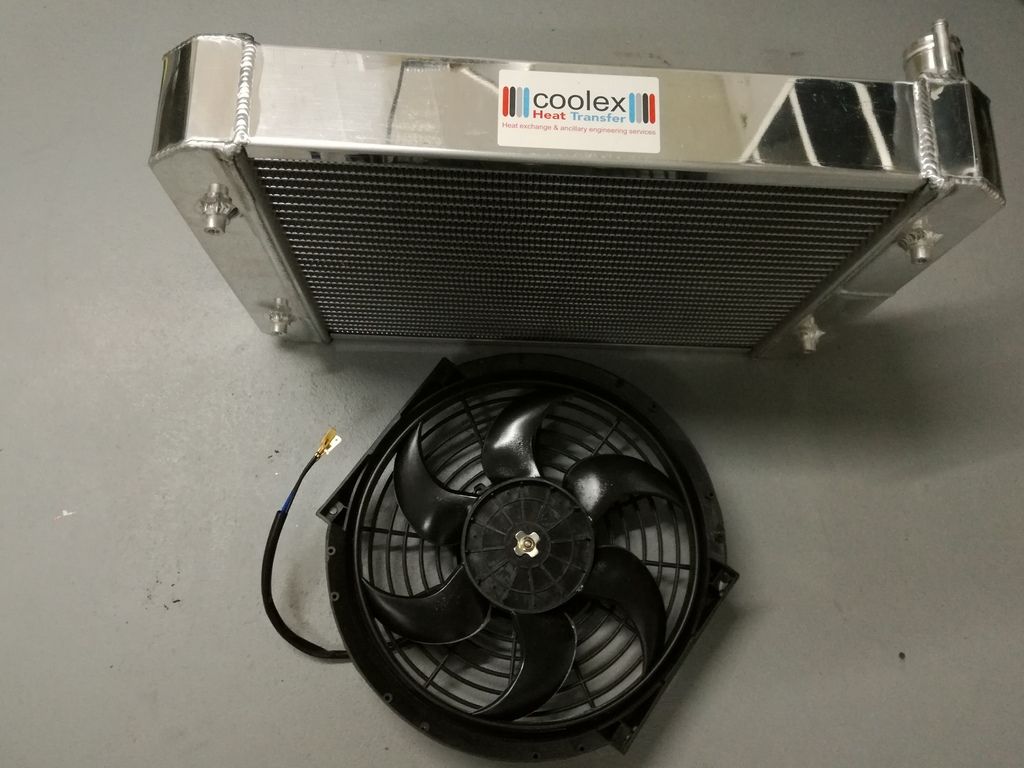 [/img]
[img]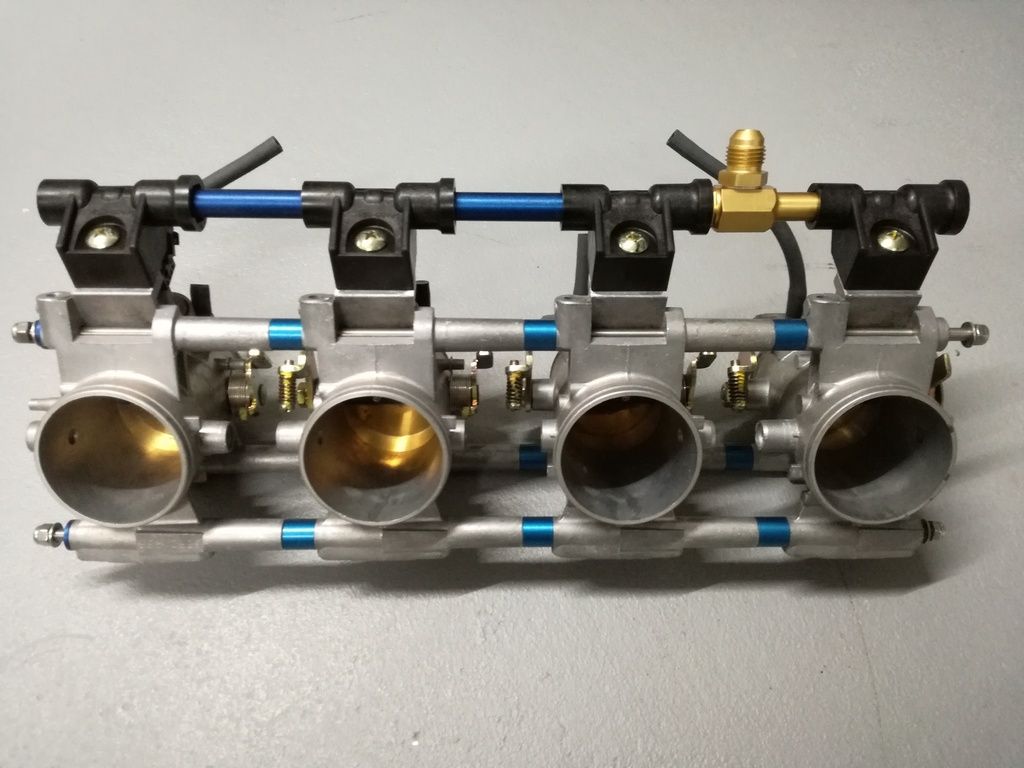 [/img]
A bit of late call, have you still got those red hubs for sale?
Are they for the standard mk2 escort (not rs type hubs) & do they match the dimensions on this diagram?

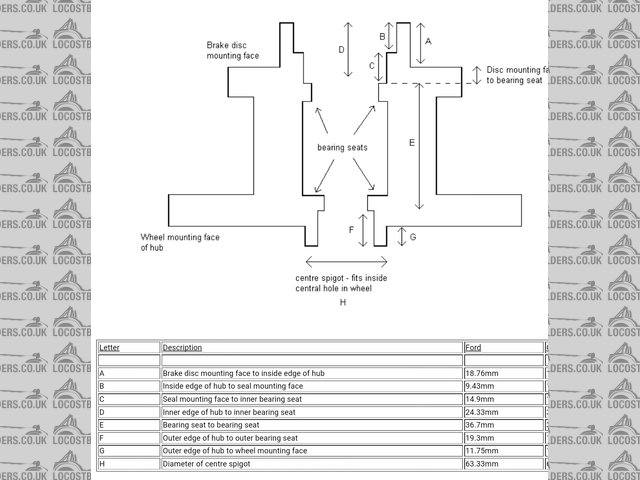
Description
If so, how much do you want for them including shipping?
Dave
quote:
Originally posted by obfripper
A bit of late call, have you still got those red hubs for sale?
Are they for the standard mk2 escort (not rs type hubs) & do they match the dimensions on this diagram?
Description
If so, how much do you want for them including shipping?
Dave
finally start taking the right forms ...
[img]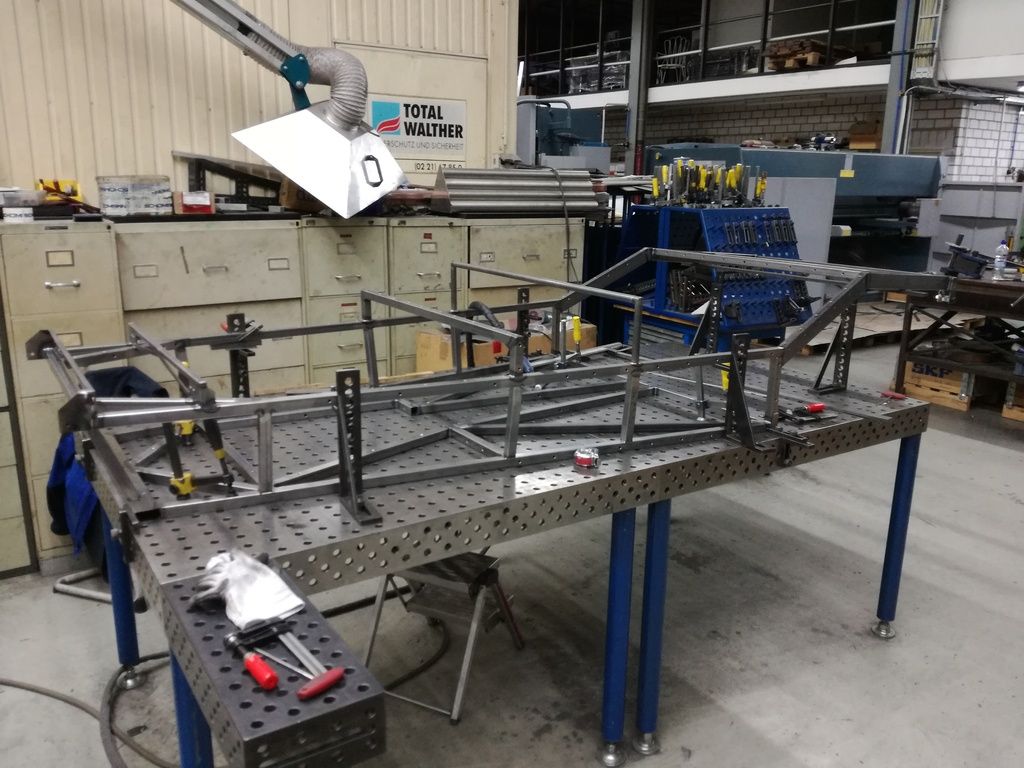 [/img]
[img]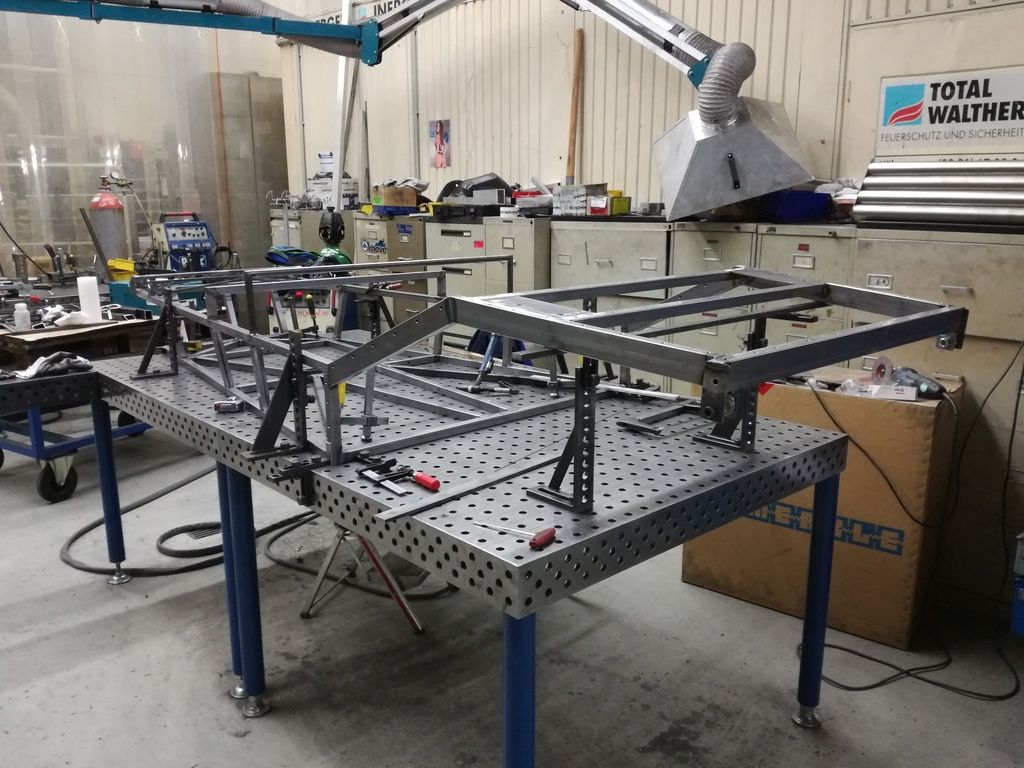 [/img]
[img]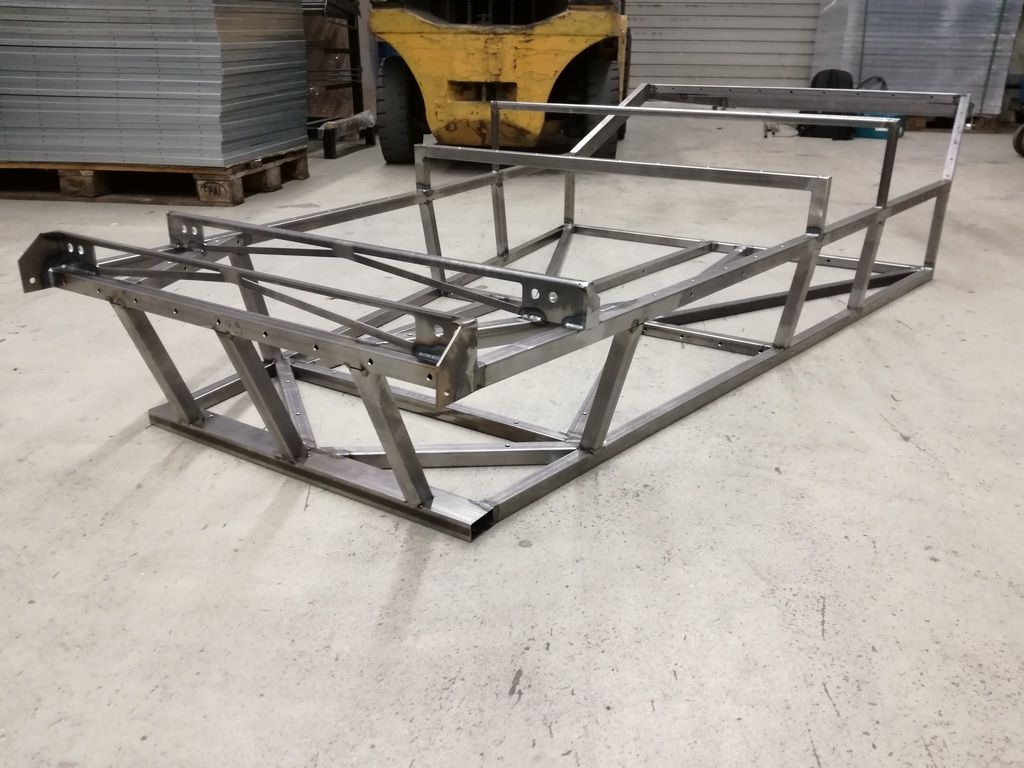 [/img]
Are you getting all the measurements from the old chassis?
I've taken the measurements from the old frame.
Fortunately it seems that the frame that I was done well and was not ever changed.
In fact, the measures are almost symmetrical everywhere.
except for the tunnel and the guide side.
I can try more in the bodywork and the like to be sure that everything is fine.
quote:
Originally posted by MadMaxx
Realy very nice rebuilding. If it could of help, here some photos of my Fury chassis rebuilding from an italian forum with the full story still under progress:
http://www.llcc.it/YetAnotherForum.NET/default.aspx?g=posts&t=13448&p=18
I decided for a new improved chassis when I found the original one had some cracks and visibile distorsions. Some tubes added to increase the torsional rigidity and avoid tipical cracks of the standard chassis.
Replied
quote:
Originally posted by Samuele
I've taken the measurements from the old frame.
Fortunately it seems that the frame that I was done well and was not ever changed.
In fact, the measures are almost symmetrical everywhere.
except for the tunnel and the guide side.
I can try more in the bodywork and the like to be sure that everything is fine.
quote:
Originally posted by yogibear1969
quote:
Originally posted by Samuele
I've taken the measurements from the old frame.
Fortunately it seems that the frame that I was done well and was not ever changed.
In fact, the measures are almost symmetrical everywhere.
except for the tunnel and the guide side.
I can try more in the bodywork and the like to be sure that everything is fine.
The tunnels on Sylva's are not central, be careful.
Edd
Sammi,
Are you still needing the measurements for the gearbox mounting plate, I'll be in the garage tomorrow and will try and get them for you if you
do.
Martin
quote:
Originally posted by tims31
Sammi,
Are you still needing the measurements for the gearbox mounting plate, I'll be in the garage tomorrow and will try and get them for you if you do.
Martin
 [/img]
Sent you an email Sammi with the dimensions, hope they are what you need.
Martin
quote:
Originally posted by tims31
Sent you an email Sammi with the dimensions, hope they are what you need.
Martin
quote:
Originally posted by Samuele
quote:
Originally posted by adithorp
With the light weight ethos, why are you using vented discs and not solid? Solid should be good enough especially with ducted air and lighter.
Love the ti bolts. I did consider it up would have had to do it one bolt at a time due to cost. Why o e red bolt?
Do you know what the weight was before you started so you can compare after?
I live in about 80 km from the Nürburgring , and I intend to use my Fury.
The engine should develop enough about 250ps .
At the Nürburgring I have seen 95% light cars such as Lotus,Westfield,Rush have only with ventilated disks .
Plus the record it weighs 4.6kg and is a 267x20,5 .
While the solid disc was 260x10 and weighs 3.9 kg .
Based on these things , I decided to take this compromise
The bolts do not I made them myself, but I bought them.
The red bolt and red titanium, but they are only painted.
The current weight of my Fury I'll know next week.
quote:
Originally posted by MadMaxx
quote:
Originally posted by Samuele
quote:
Originally posted by adithorp
With the light weight ethos, why are you using vented discs and not solid? Solid should be good enough especially with ducted air and lighter.
Love the ti bolts. I did consider it up would have had to do it one bolt at a time due to cost. Why o e red bolt?
Do you know what the weight was before you started so you can compare after?
I live in about 80 km from the Nürburgring , and I intend to use my Fury.
The engine should develop enough about 250ps .
At the Nürburgring I have seen 95% light cars such as Lotus,Westfield,Rush have only with ventilated disks .
Plus the record it weighs 4.6kg and is a 267x20,5 .
While the solid disc was 260x10 and weighs 3.9 kg .
Based on these things , I decided to take this compromise
The bolts do not I made them myself, but I bought them.
The red bolt and red titanium, but they are only painted.
The current weight of my Fury I'll know next week.
My lightened 260x7 mm solid discs are 2.4 kg each one :-)
[Edited on 5/11/16 by MadMaxx]
 [/img]
Nice nuts (+studs)! We're did you get them?
quote:
Originally posted by adithorp
Nice nuts (+studs)! We're did you get them?
Are they a stock item or custom made for you? Got a link to their web site?
quote:
Originally posted by adithorp
Are they a stock item or custom made for you? Got a link to their web site?

quote:
Originally posted by peter030371
Group buy Adi? I need some longer studs
How much weight saving for all nuts & bolts?
quote:
Originally posted by jeffw
quote:
Originally posted by peter030371
Group buy Adi? I need some longer studs
Tries to resist commenting and fails !
quote:
Originally posted by adithorp
Are they a stock item or custom made for you? Got a link to their web site?
quote:
Originally posted by MadMaxx
How much weight saving for all nuts & bolts?
quote:
Originally posted by Samuele
quote:
Originally posted by adithorp
Are they a stock item or custom made for you? Got a link to their web site?
this and the website.
http://titanwerk.de/epages/2d839dab-8771-43ec-a5a6-f5215233c652.mobile/?ObjectPath=/Shops/2d839dab-8771-43ec-a5a6-f5215233c652
currently the vendor has made the new page,maybe not everything and still listed
quote:
Originally posted by peter030371
quote:
Originally posted by Samuele
quote:
Originally posted by adithorp
Are they a stock item or custom made for you? Got a link to their web site?
this and the website.
http://titanwerk.de/epages/2d839dab-8771-43ec-a5a6-f5215233c652.mobile/?ObjectPath=/Shops/2d839dab-8771-43ec-a5a6-f5215233c652
currently the vendor has made the new page,maybe not everything and still listed
Where they a 'standard' part for them or did you supply the drawings?
I perfected my handbrake especially for the weight
Aircraft Aluminum from the skeleton.
POM black handle,
while everything else and titanium.
I am comforted to know that at least the original brake from which the copied weighs about 850gr.
For the rest it is just a waste of time and money.
But, 500 grams there ....
2 pounds there ...
and maybe I can achieve my goal.
The most light possible.
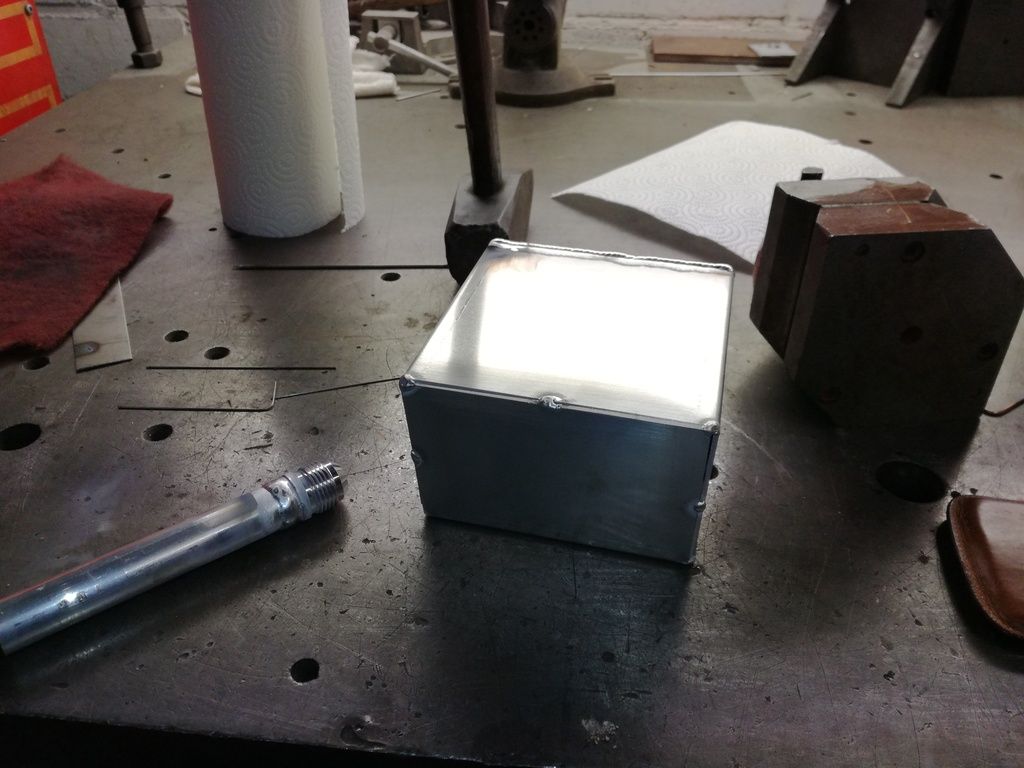
Meantime I took a bit "familiarity" with the TIG welding of aluminum.
I started with a chatch tank.
Follow the petrol tank of about 40 liters.
And I had the courage to build my pedals propia measure.
But still I am not satisfied with some profiles.
Currently too little time for that
 [/img]
[img]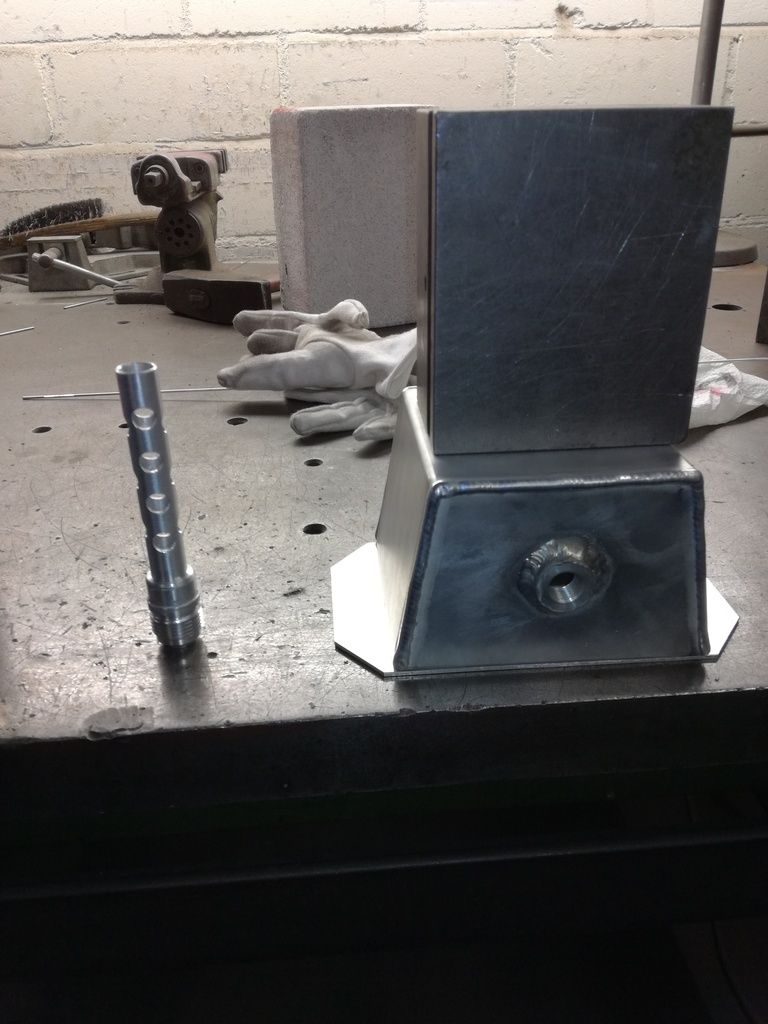 [/img]
[img]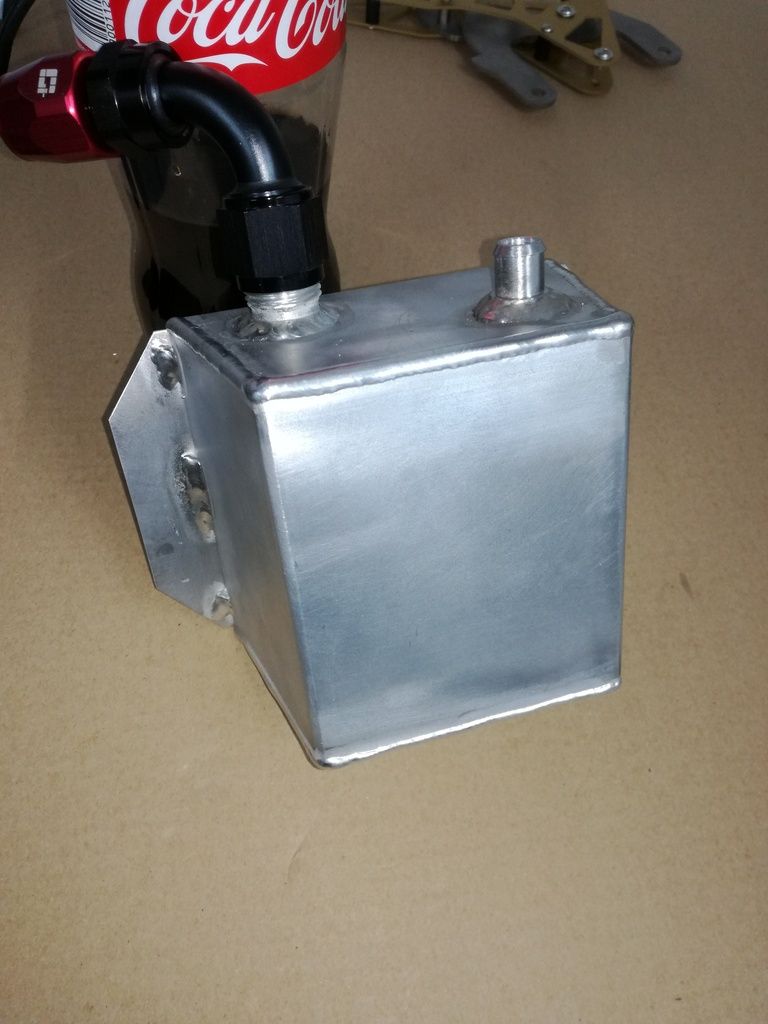 [/img]
[img]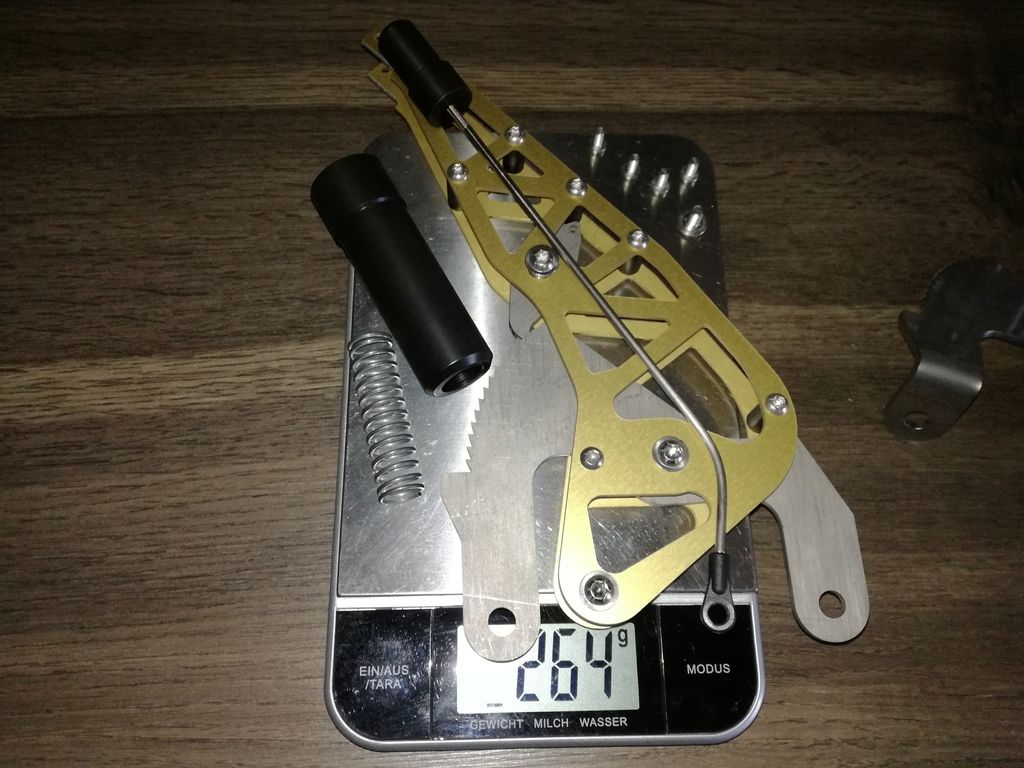 [/img]
[img]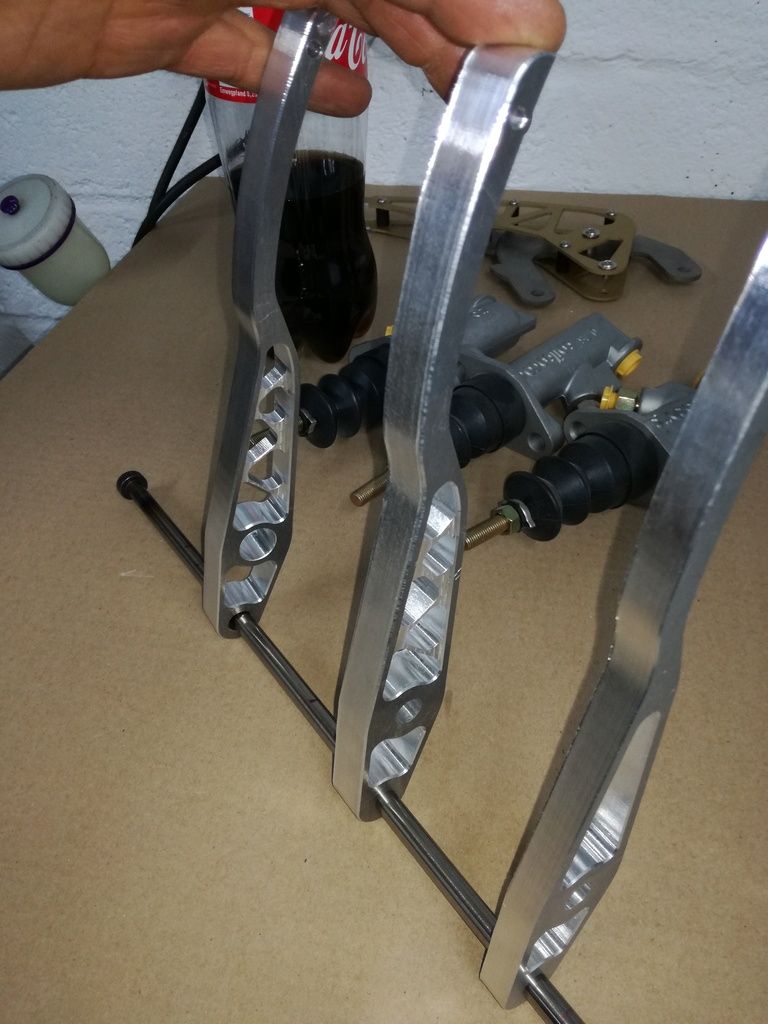 [/img]
[img]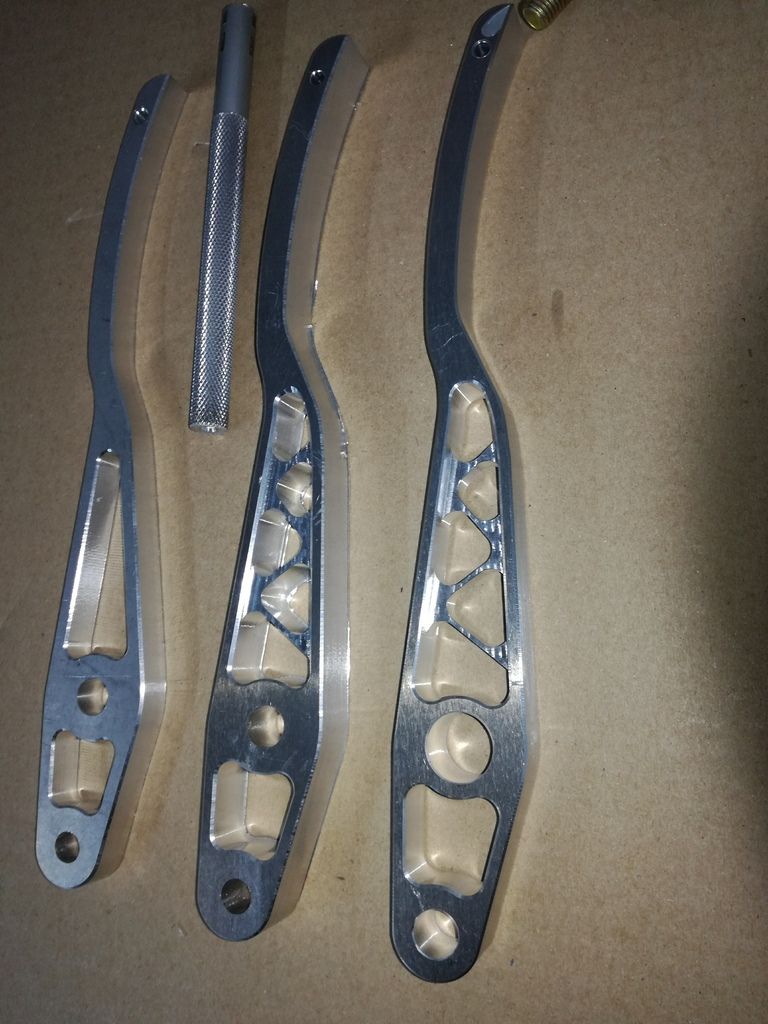 [/img]
Wow! I thought we went "over the top" on our Phoenix but you are taking it to a whole new level.
Some fabulous work here.
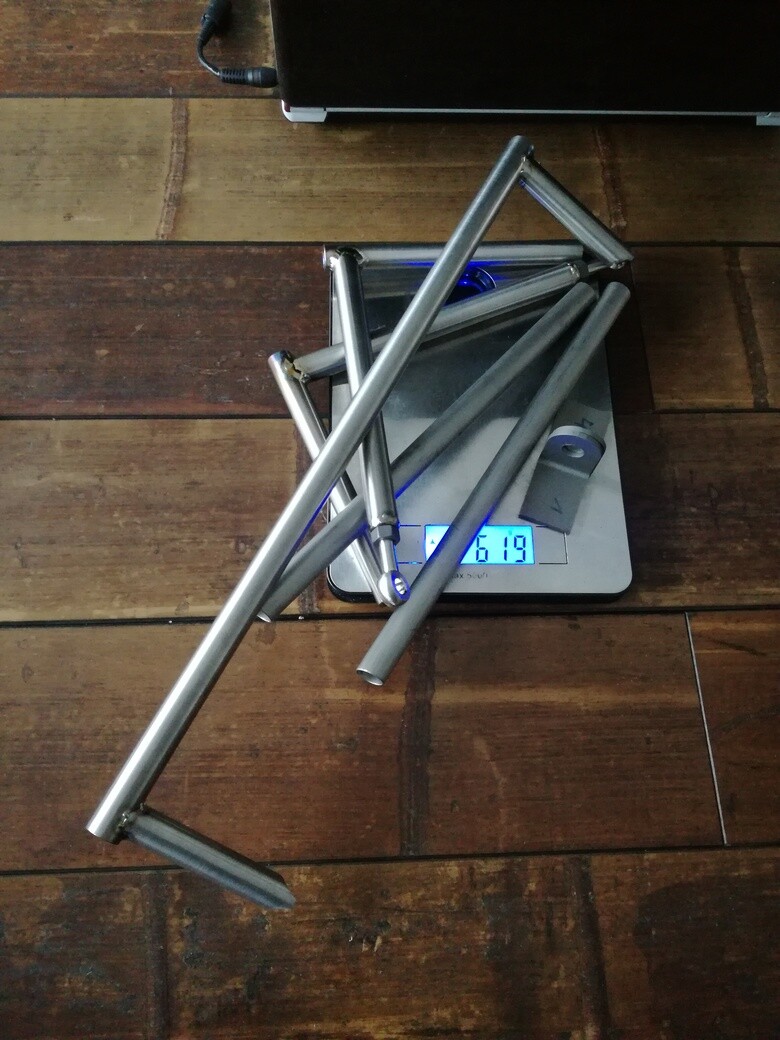
And now some information regarding the weight of some pieces.
I think maybe someone may be interested,as simple information.
With the widespread use of titanium and aluminum, and where possible,
and also the use of a special metal (15CDV6) and is able to save a total of a little less than 11kg.
Using solid brake discs and rims Force Racing you should get a further weight saving of around 7kg.
Then a total of 18kg only for the front
This will be,as soon as I finish the construction of my Fury,
a processing job that will take place in winter
[img]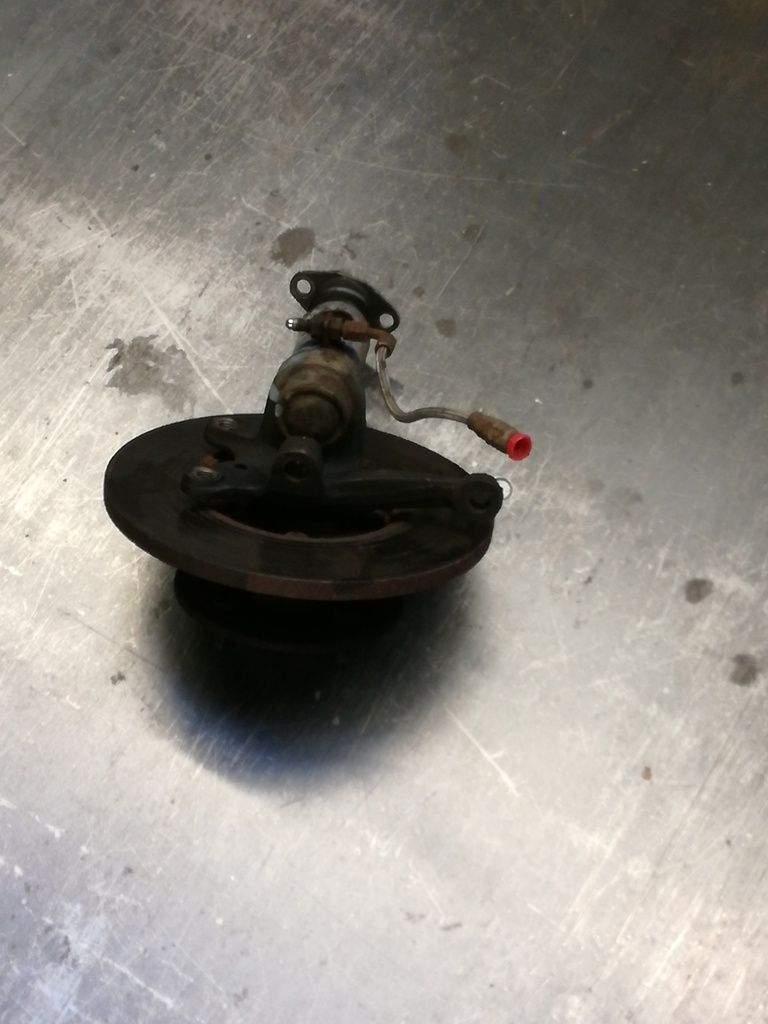 [/img]
[img] [/img]
[img] [/img]
[img]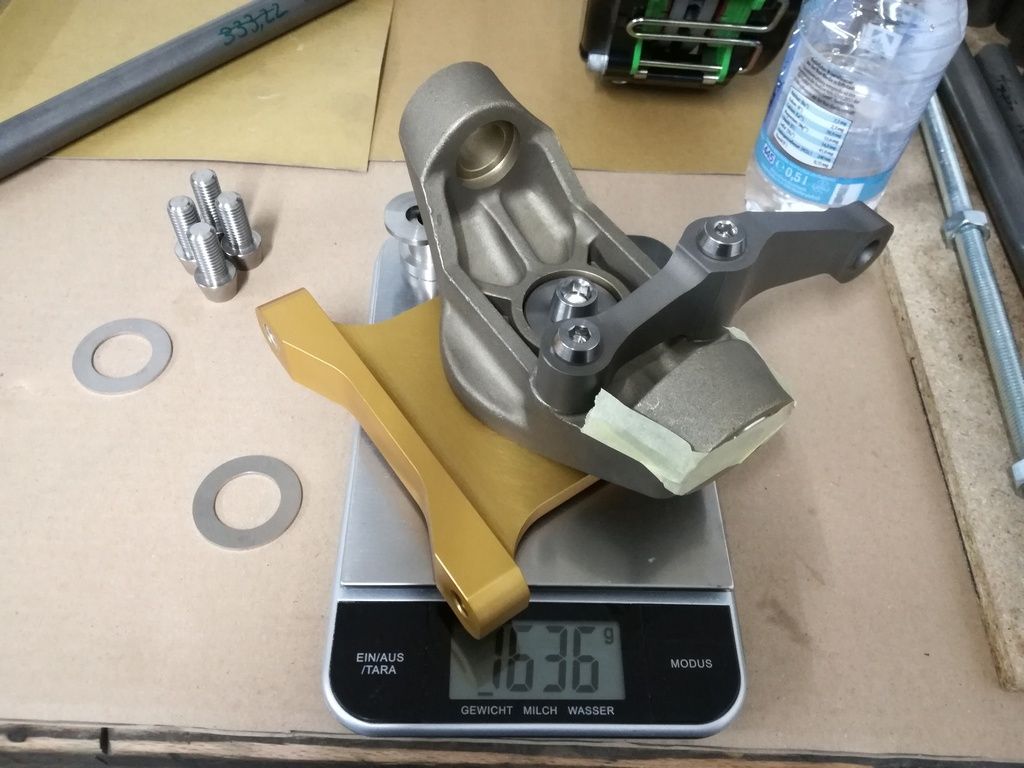 [/img]
[img] [/img]
[img]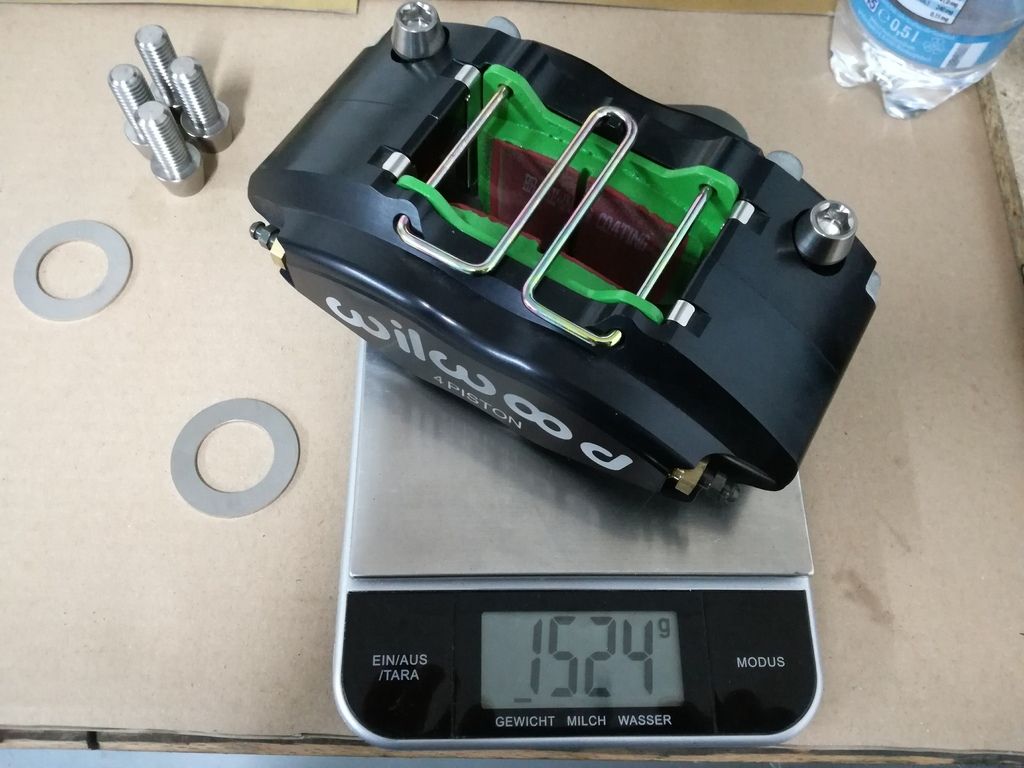 [/img]
[img]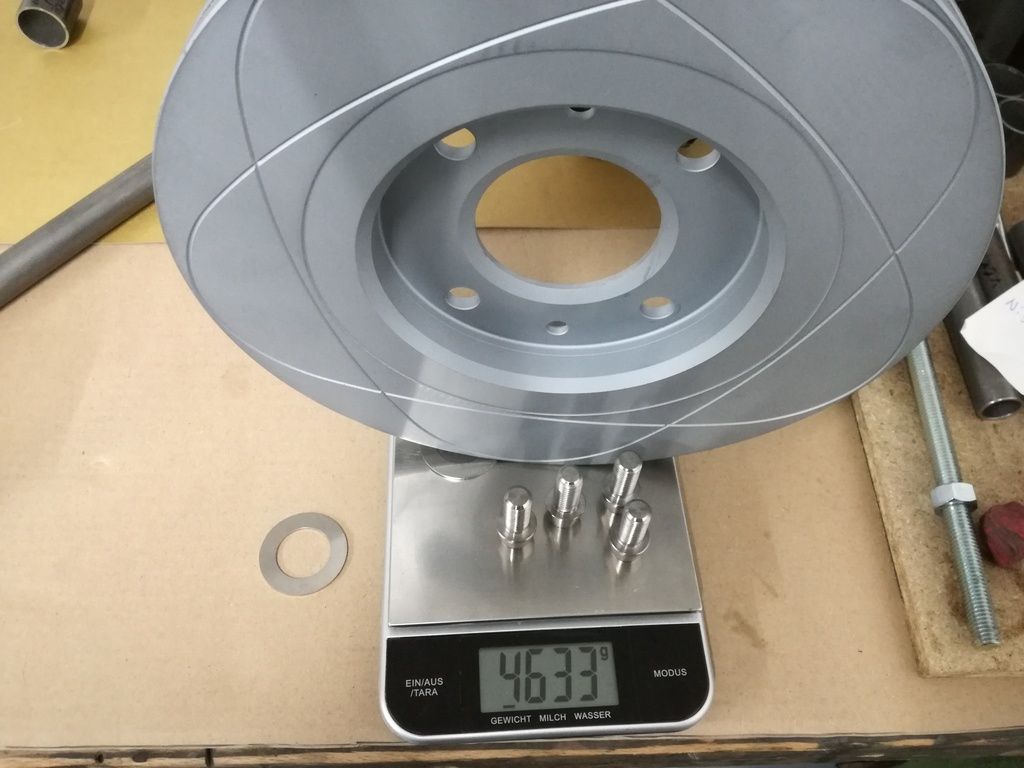 [/img]
[img]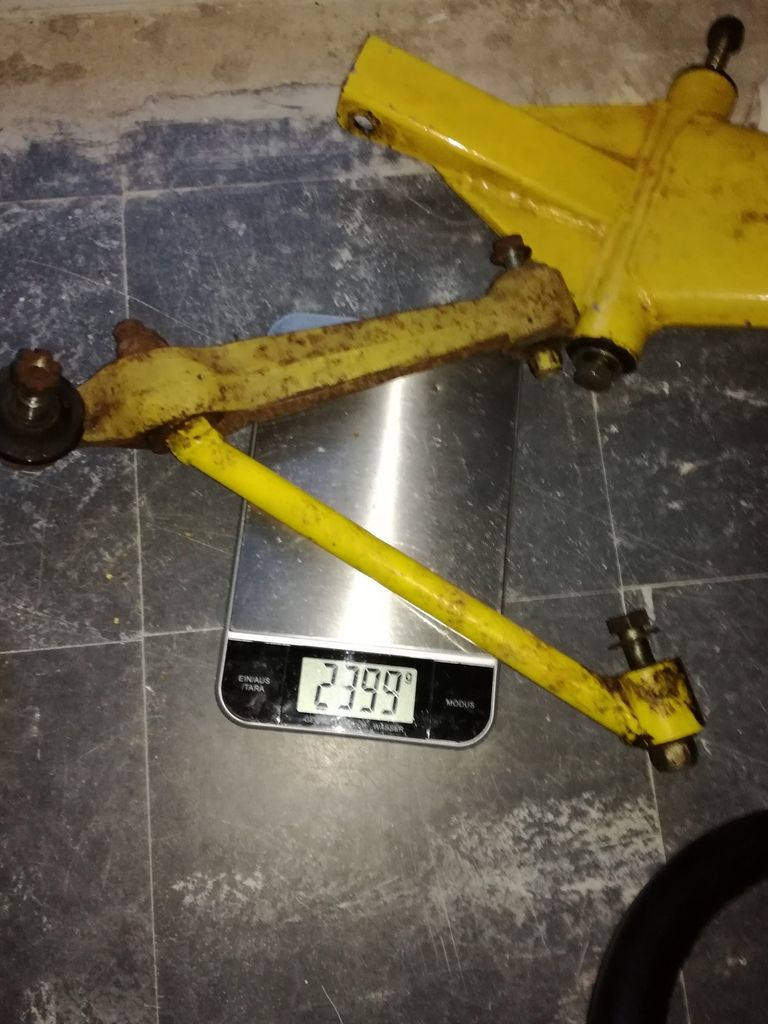 [/img]
[img]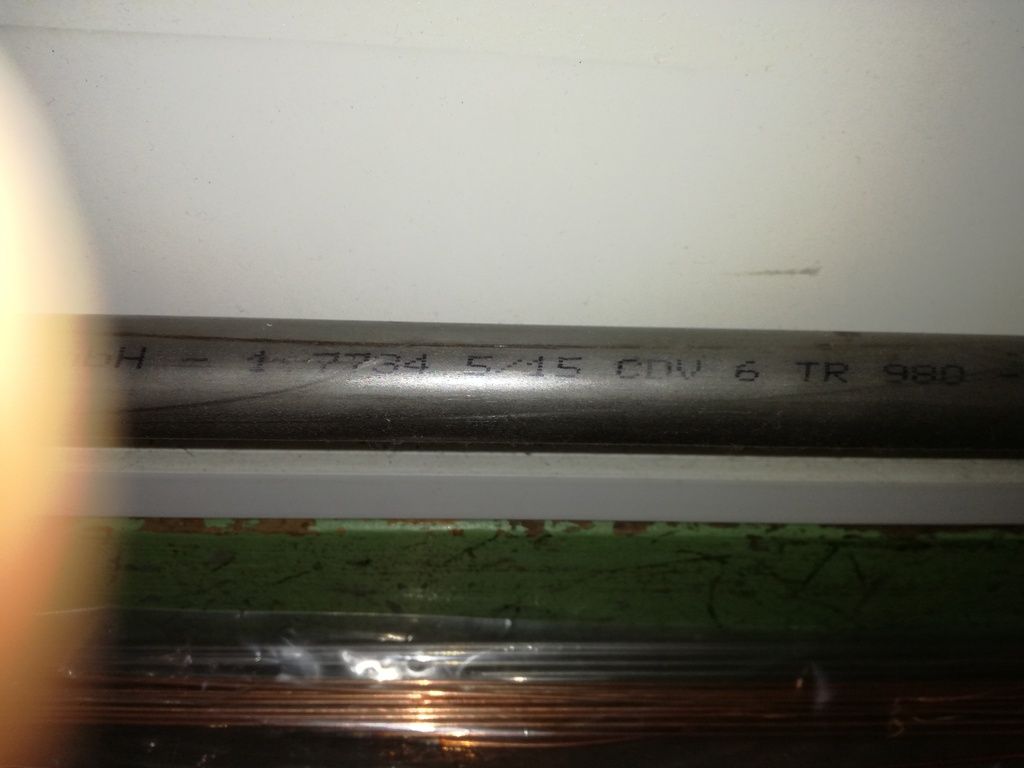 [/img]
[img]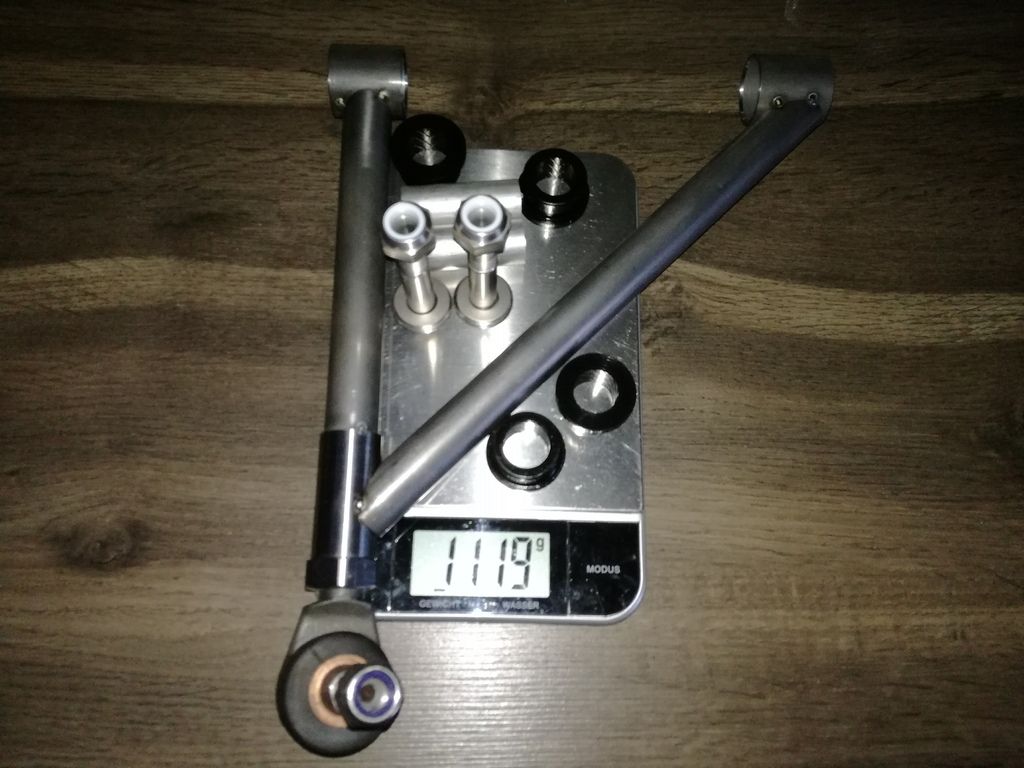 [/img]
Wow, this is an amazing rebuild, very impressive skills 
Thanks to all for the compliments.
They currently have equipment and machinery that make good quality with satisfactory results.
Plus, let's say the car's total weight that I will try to reach and quite ambitious:
Maximum 480 kg dry or less.
So I must try to save wherever possible.
Between not much will start repairing my bodywork,
I would ask a question to all those who have a Fury with Zetec Engine:
I own the front bonnet first model,
so no hump.
Do you need to change it for zetec?
the engine that was first inside (Crossflow) was there without changing it.
Measuring the height of the two motors,
I saw that they were very similar.
quote:
Originally posted by Samuele
Between not much will start repairing my bodywork,
I would ask a question to all those who have a Fury with Zetec Engine:
I own the front bonnet first model,
so no hump.
Do you need to change it for zetec?
the engine that was first inside (Crossflow) was there without changing it.
Measuring the height of the two motors,
I saw that they were very similar.
Just seen this Sami, mine has the bulge and the Zetec clears it fine but not sure what the original bonnet height was or if it would clear it, sorry.
Your bonnet is the same as mine fitted with a Crossflow and twin choke downdraught carb. Even with the oil filler cap cut down it’s very tight with a
Crossflow.
I am going to fit a Duratec from a Fiesta ST150 and have bought a LeMans bonnet with bulge.
I have also bought a narrow DeDion with a view of going independent but using the original leading and trailing links and panard rod.
[Edited on 5/3/18 by snapper]
Yes, it's true,
with the crossflow it was very tight.
I was hoping to hear that with the zetec I did not need a bulge ...
I prefer without.
I had measured both engines,
from the oil pan to the valve cover.
they were both identical.
But probably the problem will be in the fact that the zetec has 2 camshafts,
which makes the valve cover wider.
[Edited on 7/3/18 by Samuele]
Now I just have to find out how to make the photos smaller ...
quote:
Originally posted by Samuele
Now I just have to find out how to make the photos smaller ...

I finally solved the problem with the photos
as already mentioned,
There have been some updates regarding my construction. not missing much to finish the chassis.


after weighing the rear drums,
I decided to switch to discs.
It was not easy because I had nothing to refer to,
but after countless tests and measurements eventually worked


as already mentioned in advance, it will be used where titanium is possible.
for example I made the titanium pins for the rocker arm,
using an EDM machine it was possible to obtain perfect holes throughout the entire length.
a few months ago,
not being able to proceed with the chassis I gave a little to chemistry,it was more like a test
with simple tools it was possible to permanently color all the titanium I have done so far.


The level of engineering you are going to is stunning, you are going to have a very unique Fury when you finish it 
here are some photos where you can see the possible weight savings of the individual pieces.
with a some pieces it is possible to make a direct comparison regarding the saved weight.
titanium exhaust with 160mm diameter.
I hope it's not too noisy ...


you also start to see some colors on the frame,
after seeing the color of a chassis of a member of the orange forum here, I really liked it,
I also decided to use this color. also to highlight possible cracks in the frame,
which I do not hope,but you never know.
both in front of and behind it came quite wide.
bodywork must be done.
I'm not sure yet whether to use simple wheel arch extension or to make the modification directly on the body


quote:
Originally posted by peter030371
The level of engineering you are going to is stunning, you are going to have a very unique Fury when you finish it
Do you have a mechanical handbrake on the rear wheels?
quote:
Originally posted by peter030371
Do you have a mechanical handbrake on the rear wheels?
quote:
Originally posted by Samuele
my intention is not to do it mechanically but use the Sierra style handbrake I did and use a cylinder with a lever,
then a hydraulic handbrake

quote:
Originally posted by peter030371
quote:
Originally posted by Samuele
my intention is not to do it mechanically but use the Sierra style handbrake I did and use a cylinder with a lever,
then a hydraulic handbrake
Are you allowed hydraulic handbrake then? We have to have mechanical (it can be electro-mechanical) and its checked every year over here

in the meantime during my construction,
some extra work has to be done for good friends.
for this series of suspension parts,
25CRMO4 material was used.
A weight saving of around 6kg has thus been achieved.
comparing it to the original weight.
since we are talking about unsprung masses is a good result.
For others, there are stainless steel accelerator pedals.
now I hope I can continue my construction and finish as soon as possible.
The next stage and get a complete pedal board that weighs less than a kilogram.


now some updates regarding the bodywork.
in the beginning my idea was to use the old bodywork.
Of course, having now about 25 years of age,
had in many points cracks is deep scratches.
I started with repairs,
but I realized very early that it would have cost me too much time.
so after a few weeks of reflections I decided to take the hardest path,
but probably safer as a result.
doing everything from the beginning we also tried to improve the symmetry of the pieces.
improving stability is naturally lowering weight.
the form has come rather well.
while the final piece weighs about 8kg instead of 12.8 as the original one.
now you start with the front hood is headlight covers.
[img] [/img]
[img] [/img]
[img] [/img]
[img] [/img]
[img] [/img]
[img] [/img]
[img] [/img]
[img] [/img]
[img] [/img]
[img] [/img]
[img] [/img]
[img] [/img]
[img] [/img]
[img] [/img]
[img] [/img]
[img] [/img]
Just found this thread, and very pleased I did!
The work, and detailing is fantastic, way way more than I could ever achieve, even if I had the right tools and garage
However, on a weight saving exorcise I did on my car, removing redundant bits, cutting bolts down etc,
My Wife commented , that if I was to lose about 25kg that would be far more beneficial 
She is right, but I didn't listen !
steve
Update:
The front engine hood is finished. The weight has decreased from 18.8kg to 13.9kg, I thought less but having reinforced it in several points with the
use of the coremat, especially the front, where the old bonnet had several cracks, it was not I could have done better. In addition we started with
the realization of the headlight covers in plexiglass. I made several tests but I still have not a satisfactory result. If you want to waste time
anyway. I hope it works.


Custom mirrors is water / oil cooler in place.


And finally Pie Cut Titanium for the exhaust manifold construction. There will be a lot to weld .....
And pedal box made from billet aluminum aeronautics not yet anodized is mounted.


I've been following this with out signing up for ages.
So now I've just signed up.
Don't forget to put some form of inner wheel arch in the bonnet.
My current bonnet doesn't have any protection from wheel spray to the engine / air filter.
Keep up the good work
[Edited on 24/2/19 by pigeondave]
The front bonnet will now receive modifications to improve airflow.
the old bonnet had internal fiberglass covers made very badly.
I have seen various roofing solutions.
some in fiberglass,
others in Aluminum.
some mounted fixed to the frame,
others attached to the hood.
I'm working hard to get a lot of different solutions from the original.
some solutions are really bad and it is not very practical.
for example the hinges of the doors ....
However, it is things that take a long time with relative tests
Keep the updates coming Sami, looking forward to seeing this finished but also the progress you are making.
Keep the moulds for the bodywork too as you will be the only person to have ones for the standard body.
I have been working for almost 3 years to finish my fury and I can not wait to drive it.
above all these continuous improvement works never end.
And you know something about it too.
although I have to admit that I did not do much on the car last year for several reasons.
in fact for the bodywork molds I occupied an entire room in my basement.
"above all these continuous improvement works never end."
Don't forget to check the bump steer.
Some suffer quite badly from it. Especially on Sierra uprights.
Adi had massive amounts of tow out under bump, if i recall.
He checked it using a similar method to this.
https://youtu.be/LO07qmJ9zkk
I should have a wide possibility of adjustment to the wheels in all directions.
I'll try to adjust everything as much as possible at the beginning.
I think anyway,
as soon as the car is able to go a long way,
I will make the final adjustments to the AB Performance
there is little to say ...except that I haven't finished yet.
I mounted the whole body about 2cm higher than normal.I had many advantages,but I had to redo several pieces again,such as the front hood support,now
also in very light titanium




I also received the tools with GPS.
while on the door it was possible to save a lot of weight.
The rear diffuser is almost ready and the lights with relative aluminum mounting supports are mounted.
the completely homemade mirrors weigh around 150 grams.
At this time the fury as seen in the photos weighs 358kg.
we will see at the end where we arrive with the weight


Is there anyone who can tell me exactly which starter I need?
If possible, I would like to install an High Torque starter motor.
I mount a Zetec Blacktop 2.0 engine
Hydraulic Pinto clutch with the parts listed below:
https://www.retroford.co.uk/product/zetec-lightweight-rwd-flywheel-3-9kg-z035/
https://www.burtonpower.com/raceline-alloy-wet-sump-pan-kit-ford-zetec-e-rwd-silver-top-fz655.html
https://www.burtonpower.com/bellhousing-rs2000-dual-lhd-rhd-bh3.html
It has been a long time of inactivity on the work of the Fury, but something has ended anyway.
After trying in vain to get the Headlights covers, it was decided to do them by themselves.
After several tests, it finally worked and I made a few more for myself.
The headlights are 7 "and here too I didn't like the original solution very much.
Especially the original metal ring did not match well with the lighthouse, also the measures were too different.
so he made a new fiber ring that fits perfectly and hides bolts etc.
The Hood should soon be finished, too, with high Air Vents for the radiator.
The brackets for mounting the differential are finished and a test for the intake horns with a different shape is in progress.
The idea is to move the airbox down so as not to modify or cut the hood while maintaining the right volume of the airbox.


[img] [/img]


Looking good 