
Project 701
h701 - 4/12/16 at 11:37 PM
I've floated around this website for quite some time. I signed up to ask you all 1 or 2 questions and carried on to lurk on build threads and
posts (often forgetting to sign in)
So now I thought this would be the right place to start my own build thread for you all to enjoy.
I've been planning it for little over 2 years now and I can't go much longer without having something physical in front of me to test and
trial and research further.
So what is the project?
Its a 1990 Nissan Micra. As soon as the word Micra gets mentioned people lose interest, but stick with me. I've had the thing over 10 years now
and if I'm going all the way on a particaular project (within my limited budget anyway) then it will be for this car only
Its common to see 1.2/1.3/1.6/1.8/2.0 engine conversions donked in the front of these engine bays with very little thought or change to the original
flimsy chassis that is the Nissan K-chassis
So I've chosen a 2.5 V6 to start with. A 6A13 from a Mitsubishi Galant. However unlike most of the aforementioned cars there will be a
considerable amount of thought and effort on the chassis side
What sets my project aside from the rest is it's to be a completely unique tube/space frame chassis. Rather than cut and shut in a floor plan in
I wanted to have the car built around my suspension, so in the end, its useable. As I've been told anyone can put a bigger engine in a car not
everyone can make it usable. I've seen a couple of high powered conversions in these cars for example the twin turbo 7M-GTE from a supra in
one... but it retains the stock suspension set up which makes me wonder if it'll work well. I hope so.
I'm using Mazda RX8 subframes and Gearbox for the driveline and suspension components (with no intention of retaining the stock components).
I run my own little business, FURY AutoWorx, where I do the smaller suspension fabrication things for a living so have a good access to a lot of parts
and pieces to aid me along my way. Unfortunately my wages still don't allow me to buy everything at once nor does the workshop allow me much
time/space to build. Slow n steady progress it is
I lack any kind of photos at the moment (I have some, but no way of uploading at the mo) but I just wanted to put this out there for people to have a
read and hear their initial thoughts first. Once I get the photo situation sorted I'll upload a few of my plans/drawings/parts I have ready
etc
Thanks
Andy
ruskino80 - 5/12/16 at 07:39 AM
should be an interesting build, good luck and look forward to seeing it progress.
pekwah1 - 5/12/16 at 04:15 PM
Hi,
Certainly does sound interesting, but let me be the first to try and annoy you!
I know you already own the Micra, but for me i don't think whether i owned it or not, whether i would want to spend significant time and effort,
and money, on a Micra!
Again just my opinion, don't think they're the best looking cars, and as you've already stated, not great chassis...
Personally i would probably find something that i really liked in maybe not so great condition and start from there....
Anyway, just my opinion, and being different is what keeps the world interesting i guess!
Will be interested to see your work in any case....
Cheers,
andy
garyo - 5/12/16 at 05:21 PM
I imagine that the closer you keep the track and wheelbase to that of the RX8, the less suspension fabrication work you'll have. What are your
plans in that respect?
ettore bugatti - 5/12/16 at 09:24 PM
My first car was a K10 Micra, 1.0 with 4 speed manual. Not quick, but ran very sweet. Steered quite well, after some mods (lowering, 14" alloys,
strutbar, steering wheel).
Also had a ride in a K10 with a grasstrack tuned engine and some bike carbs, which went very quickly with a lovely sound.
If I would do a build as mad as that, I would go midengine and stick a Nissan VQ30 in it. A little bit more Group B theme, which is actually period
correct (bodywise). Same that most VQ30 came with an autobox.
Cut everything from the shell, replace with a spaceframe from 40x40x3mm and CDS 45x2.5mm, put suspension and brakes from a TVR Cerbera (or later TVRs)
and put some Jap style alloys (5x114.3).
Job Done!
Like this K11

/Ambiance/04.%20Moteur%20Micra%20de%20JACQUINET%20(D3).jpg)
h701 - 5/12/16 at 10:33 PM
Evening all
Thanks for the replies thus far 
pekwah1 - I should have added it is the earlier K10 variant from the 80's not the more modern ones (and in my opinion the downhill trend of the
micra since). I wouldn't so much as bother on my part with a K11 variant.
The K10 I've owned over 10 years. It has great personal meaning to me and if I was to put any effort in. It'll be this one.
I've already nye on completed a Subaru transplant and running gear into one of these. I haven't completed it as I kept switching projects
which was compromising quality. So I'm sticking with this one until complete and I'll finish the Subaru one in due course.
The Micra chassis isn't great no. Hence I say I'm building a tube/spaceframe chassis to suit the running gear and the Micra will simply be
decoration in the end like an RC car body shell
Plus as everyone says "It's just a Micra" even more reason to make it so. It'll change the opinion of a few I'm sure
garyo - I can chop n change every component of the RX8 suspension if necessary. I've got all the gadgetry to check what's necessary as I go
along. I need a physical piece in front of me to start measuring that. The wheelbase will remain fixed at the Micra's size to suit the shell.
Suspension is my forte if you will. So spending time here will be as enjoyable as it may be tedious
ettore bugatti - This Micra I have is also a K10 which once upon a time had a 1.0 4 speed gearbox. I had a 1.6 engine in for quite some time. That was
turbocharged but was very shortly lived.. and even went as far as twincharging it but again shortly lived. So I inted on making sure it's all for
good this time, not 5 minutes just to prove a point
[Edited on 6/12/16 by h701]
h701 - 5/12/16 at 10:44 PM
Here's the Micra in question
The Micra
Its been in my posession since March 26th 2006
It's seen its fair share of changes. Some good, Some bad and some ugly but they were all a part of my learning curve. It's been my test
pilot for everything. Up until a few years ago where I seem to have ditched it
It hasnt been on the road since November 2nd 2014 and even that was a 1 day track day. Before then I've lost count of the amount of time its
spent off road. Spending more time as a jig piece than anything else
After making many plans I created a 1/8 scale model (still going in fact) to trial out the design, see how it goes together, see what can be improved
upon etc.
Model 1
Model 2
I'm glad I built the model. Whenever I build a model or prototype I do it without great thought or checking plans. To see if I make any natural
errors. Here I made the bulkhead protrude away from the body, in my drawings it doesn't do this. Simple and cheap to fix. On the full scale this
could've been a right pain, but this is why we test
I've had this tube frame idea for some years now and meeting such a car a couple years ago named "LaSupra" (I love a Lancia Delta I was
drawn to it). I did a little research on it. Saw how it was made and it was at that point I decided to go ahead
Here is essentially what I wish to end up with. This is LaSupra with owner Peter Pentell
LaSupra
And a couple of build pictures
LaSupra Build 1
LaSupra Build 2
Peter was interested in my Subaru 4WD K10 but I've yet to mention this to him so I hope he approves of my work
The design for me is very LaSupra like but then my ideas have always been this way LaSupra just confirmed to me they'd look alright in the
process. Not to mention the can-do attitude seeing something like this in person gives you
[Edited on 6/12/16 by h701]
[Edited on 6/12/16 by h701]
h701 - 6/12/16 at 07:22 PM
I appear to not quite got the hang of this photo posting lark
obfripper - 6/12/16 at 08:14 PM
Dropbox no longer support embedding stored pics in html, you can change them to clickable links by removing the [img] and [/img] from each link and
make a full size direct link by changing dl=0 to raw=1 .
Eg: https://www.dropbox.com/s/fw1esdni1udtfyo/DSC01919.JPG?raw=1 .
If you use the create link button you can add a description, the description will become the clickable part of the link and the url will become
hidden.
Eg: First pic
You can upload pics to this site, but you'll need to resize so the file is less than 2mb and jpg format, and all uploads across the site require
unique filenames, all of which is easy with a pc but alot more tricky with a phone/tablet.
Dave
h701 - 6/12/16 at 10:48 PM
obfripper - Most helpful thank you very much. Shame about the dropbox not supporting the pictures. I'll edit the post now
Chris_Xtreme - 7/12/16 at 02:24 PM
quote:
Originally posted by h701
obfripper - Most helpful thank you very much. Shame about the dropbox not supporting the pictures. I'll edit the post now
it can be done, i found this trick with google photos too
https://dl.dropboxusercontent.com/content_link/fZSZOCLPHRBuvYdd8MviGliccX5z1vayOLcyeyoeEvmSb5GsPnRA7mohrkjVO841/file
add to the end ?.jpg
then use the new link to insert a pic ( as you can see the size in dropbox matters!)
https://dl.dropboxusercontent.com/content_link/fZSZOCLPHRBuvYdd8MviGliccX5z1vayOLcyeyoeEvmSb5GsPnRA7mohrkjVO841/file?.jpg

h701 - 7/12/16 at 09:01 PM
I'll give it a go

It was difficult!
- I had to "enable dropbox public folder"
- Once I'd enabled that I could copy images into that folder
- Click on the photo you wish to use
- Up top you'll see "copy public link"
- Drop that link directly into the Image upload
- Done
[Edited on 7/12/16 by h701]
h701 - 13/12/16 at 05:41 PM
So I've started
Apologies for the lack of photos and progress but I only had 3 hours to work in today. Measure, Check level, Measure, Check level the other way,
adjust, measure, magnets everywhere, clamps, measure, tighten clamps, check level, tack weld... check, measure.. you get the idea
This is what I ended up with. I was going to change the 50mm box for 45mm CDS, but A) I already had the box, B) its easier to build off and C) My car
is known as H701 or simply "H" so a big box section H in the centre of the chassis is fitting (no pun intended)

I scaled the gearbox 1:1 on the cardboard. I stuck that to the floor so it didnt move and marked out the tunnel section and before you know it my 3
hours was up

h701 - 15/5/19 at 08:50 AM
Super quick post. The projects still alive. I'm waiting for dropbox to upload all my photos and I'll get to sharing them
The chassis' spine is complete
I have a partially mounted gearbox and diff
I have begun my prototype wishbones/arms for the front also
Watch this space
h701 - 16/5/19 at 10:48 PM
The project finally began. I plucked up the courage to crack on with what I had planned for years prior
I wanted to tie is your traditional 6 point rollcage together, keep that in mind as you see the large H section as part of the chassis
The outer shape to begin with

Triangulation going in

I got my calculations wrong at first getting too giddy and it wasn't square. Easy fix

1..2.. Miss a few (I'm awful at remembering to take photos. Got the central tubes in to define the tunnel

With the 2D view of the floorpan done, its time to go 3D and start with the tunnel
Front first


Centre to Rear uprights


Longitudinal bars


Couple lateral bars


Overview at this point

That's it for update 1
Going back through those photos seems like such a long time ago. It was 2 and a half years ago now. It took so long constantly checking everything was
level and square as it was shimmed to level on the floor. So as you can imagine a jig bed was next on the list to get done, and so it was.
I'll compile update 2 soon
[Edited on 16/5/19 by h701]
Angel Acevedo - 17/5/19 at 01:04 AM
Hi H701.
IMHO some welds look like lacking penetration.
Have you done some Welds destructive testing to check for suitability?
Not to criticise, but to point out potential problems once you are on the road.
Regards
AA
h701 - 17/5/19 at 06:43 AM
quote:
Originally posted by Angel Acevedo
Hi H701.
IMHO some welds look like lacking penetration.
Have you done some Welds destructive testing to check for suitability?
Not to criticise, but to point out potential problems once you are on the road.
Regards
AA
I'm not worried by any of the welding side of it other than its aesthetically unpleasant in places. Noone to blame there but my stubbornness and
lack of care for my machine. I'd serviced it further down the line ans its much happier as you'll see
The tube tears before the weld fails. I tried snapping some tacked on tabs after they'd done their job and I was left with nice holes in the
tube. Thankfully not on the chassis itself
snapper - 17/5/19 at 09:03 PM
The essence of Locost builders is that you can do what you want and in my opinion you sound like you have the skill and dedication to do this.
As always I will be humbled by the skill of so many on this forum and the ethos of thatíll be a laugh
h701 - 19/5/19 at 09:41 AM
I've got a Sunday spare to sit and update this a little more. I've got hundreds of photos I've taken along the way
Firstly the Jig bed. Keep things nice n flat
Rear bars to triangulate the back of the tunnel
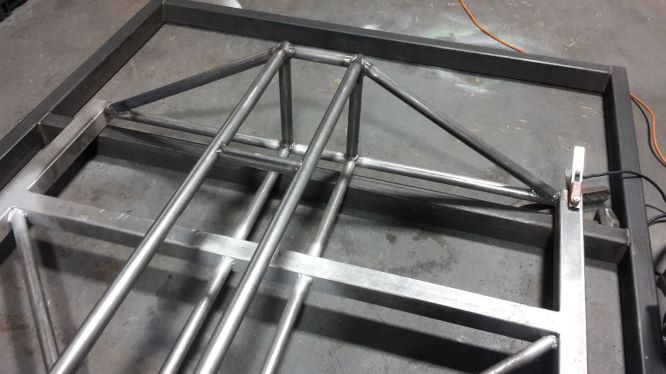

Now to triangulate the rear of the floorpan
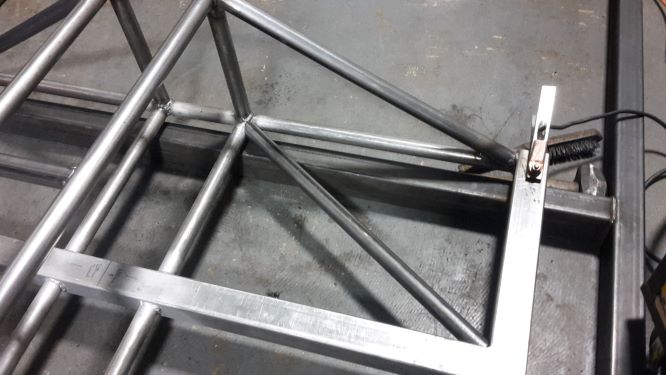
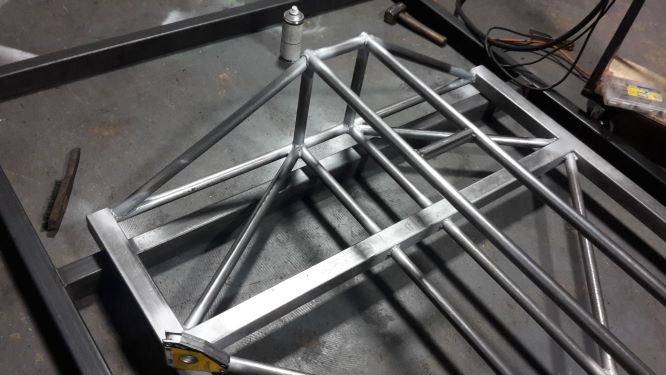
Couple pictures of some of the notches needed to make these tubes fit. I've a crude tube notcher, but most are done by hand
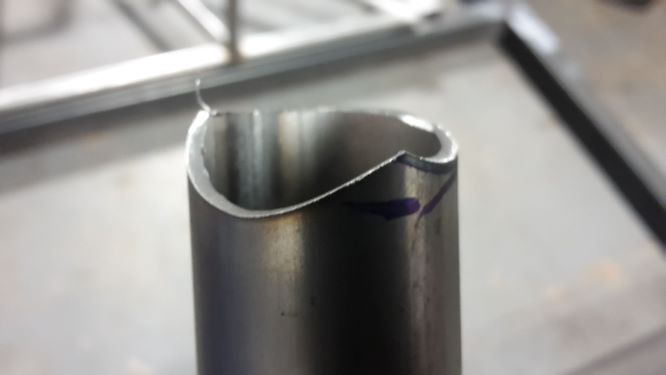
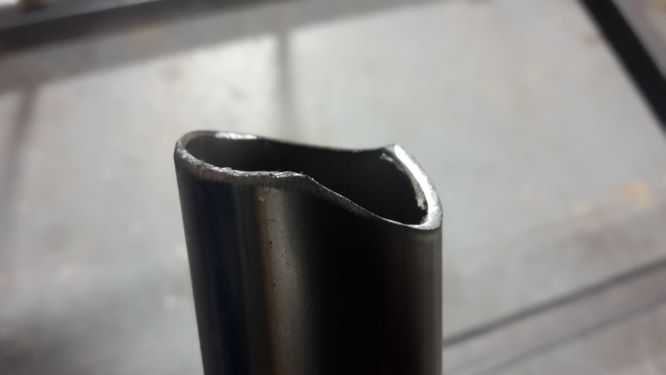
Time to tie the front to the tunnel itself
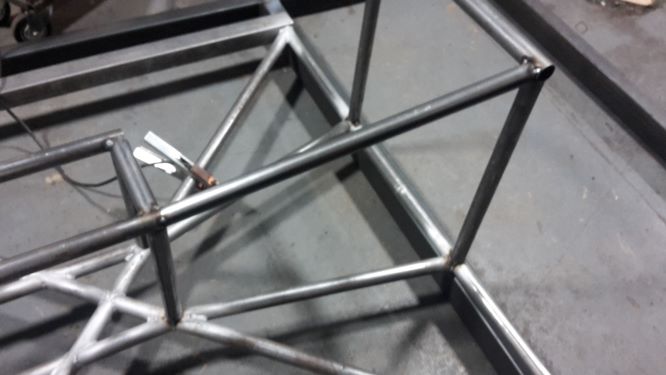
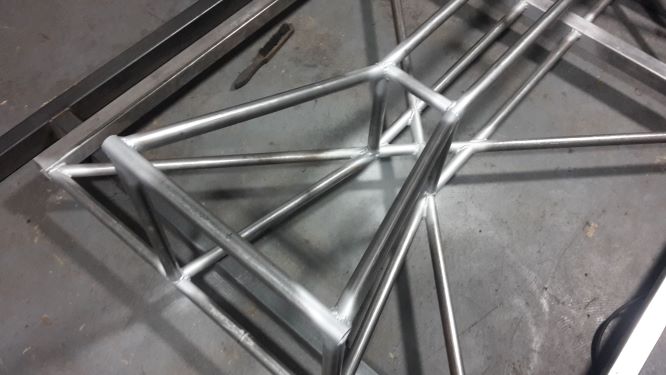
That leaves the chassis looking like this
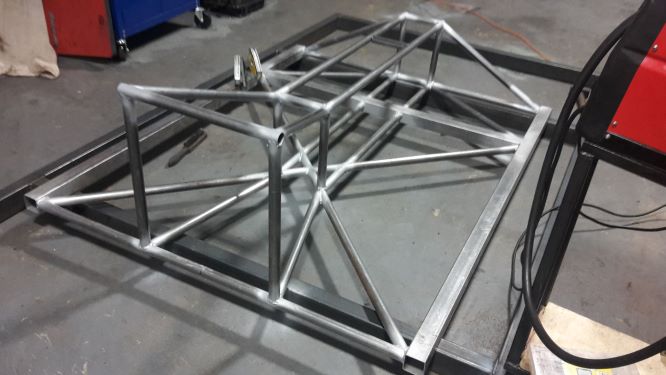
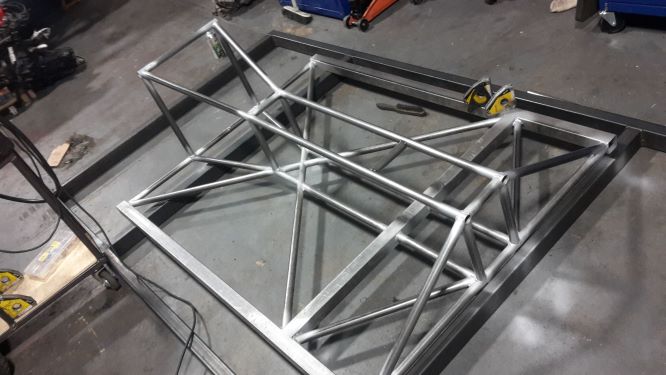
[Edited on 19/5/19 by h701]
h701 - 19/5/19 at 11:00 AM
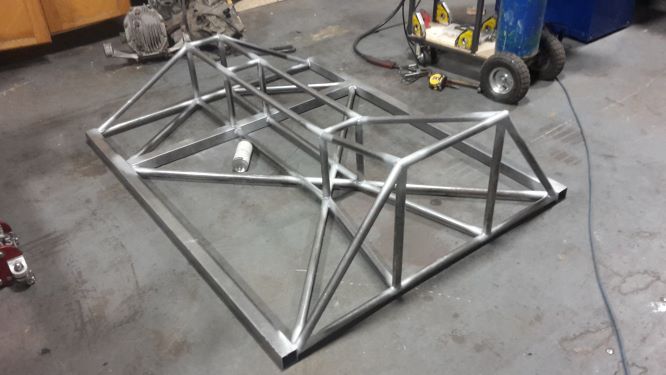
The main floorpan of the chassis is complete.. for now. There's some diagonal members I've left out for now pending the gearbox mount, side
panel and prop centre bearing (if there is one)
Front triangulation
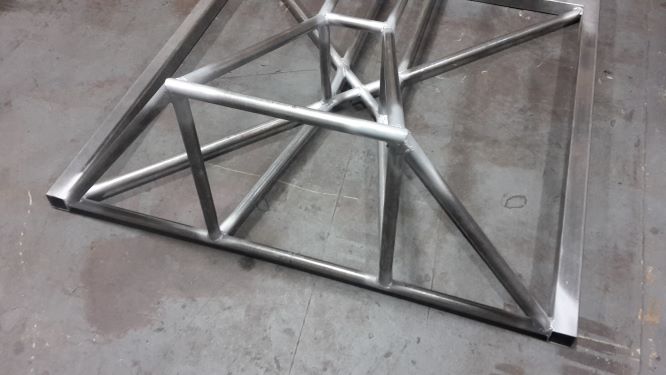
More uprights tying the lateral B-pillar beam to the tunnel
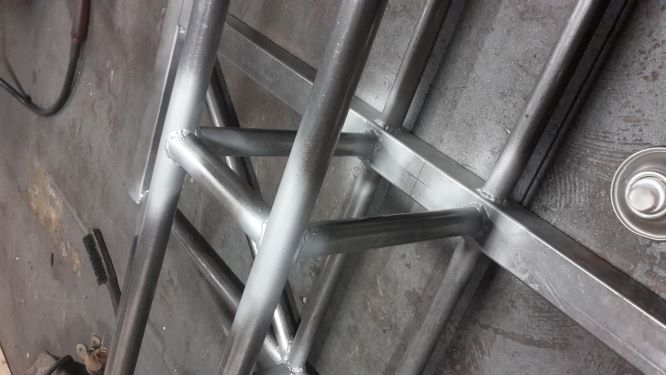
Quick overview to now
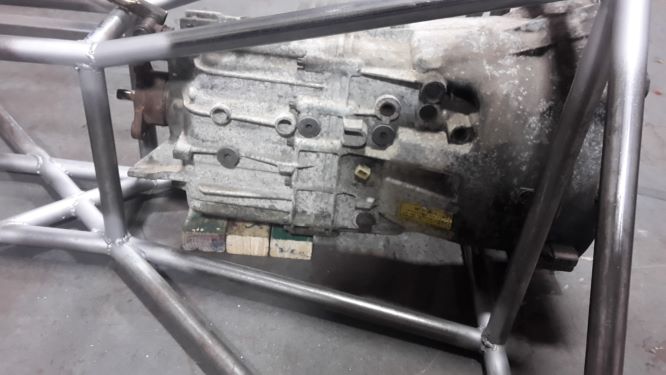
Put the gearbox back into the chassis and crudely spaced it to get an idea of space. and its tight! Hindsight is a wonderful thing, but I never said I
woulnd't make another. Although this would be a rather elaborate "test"
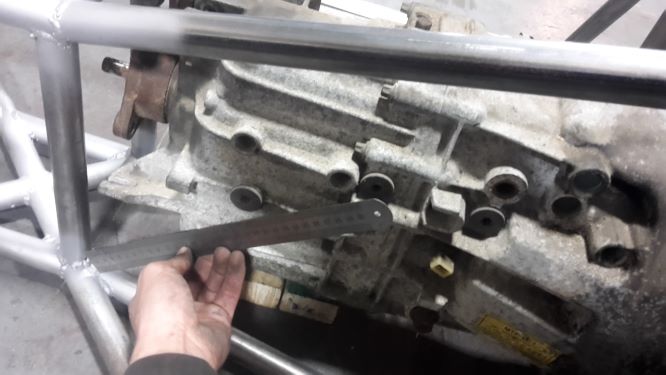
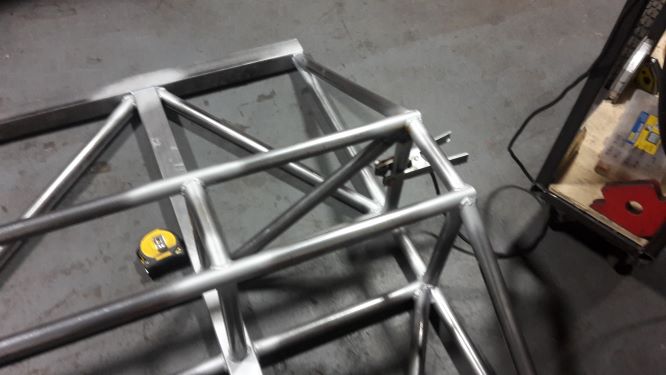
Stuck the ruler to give a view of where I'd initially planned the next triangulation bar, but after planning the gearbox moun to utilise that
corner and leave an open ended tube for a mounting bung for the seats, I'll have to go the other way, how I'm not sure just yet so I've
left it
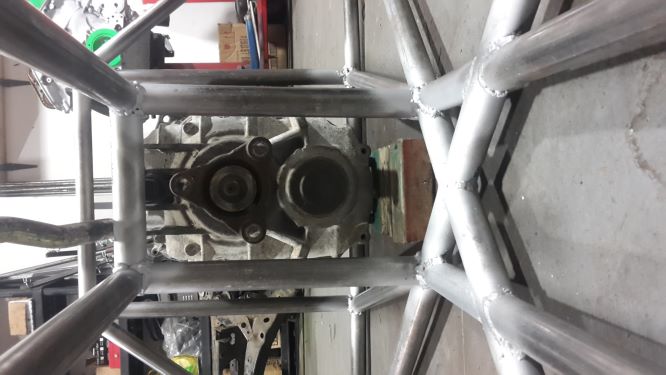
You know when you see something and go into panic thinking you've messed it up. Only to later realise that it's not a problem at all. That
was the kind of moment I had here, I want to create my own shifter for the gearbox, and to do that I have to build above it so I can mount my bearing
inline (it will all make sense when I put it together)

Gearbox clearance check. Snug is one word for it
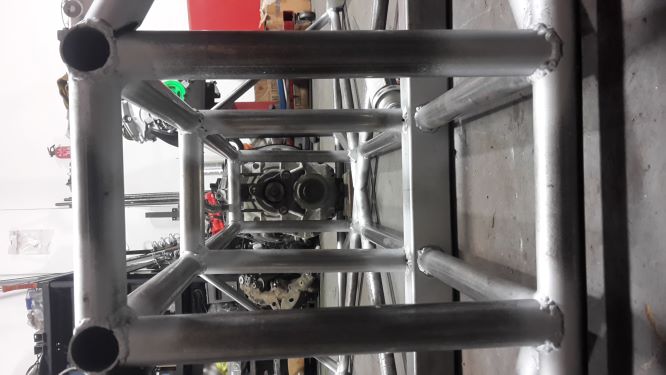
More triangulation up front after roughing out various pieces, like shifter mount, prop clearance etc
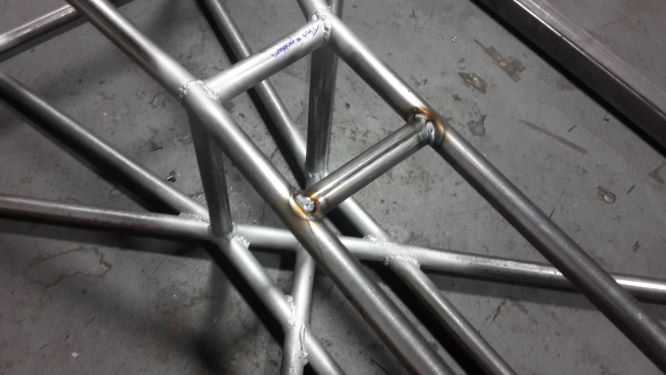
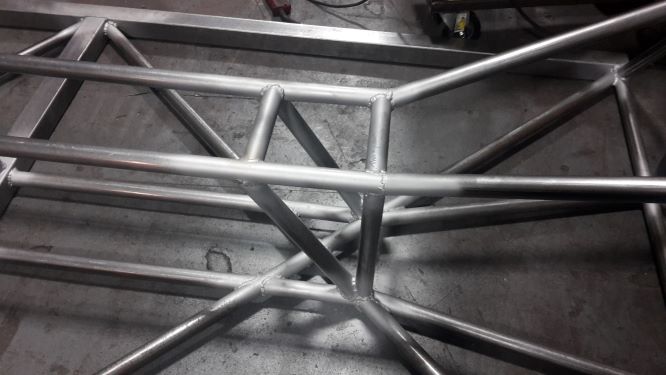
Compulsory notch picture
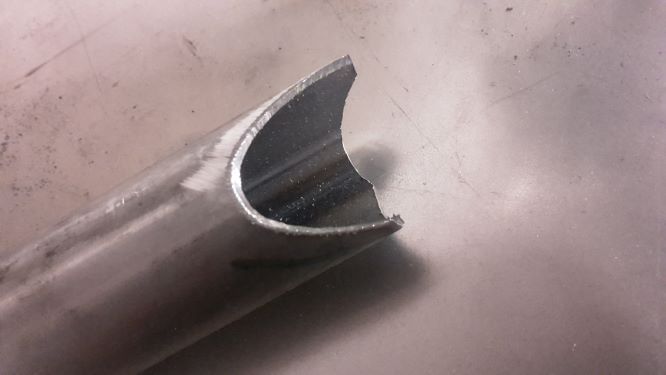
Rear triangulation to finish off this end

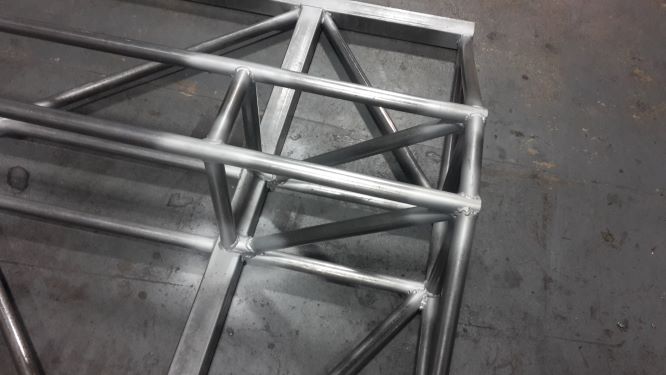
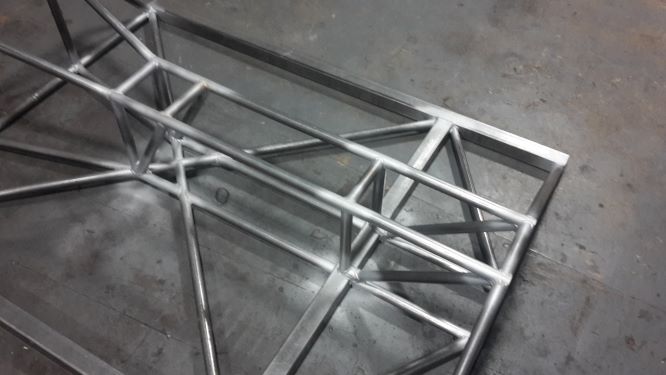
Last photo of this update. The overview of how the floorpan will now stay until the driveline is in
h701 - 19/5/19 at 11:41 AM
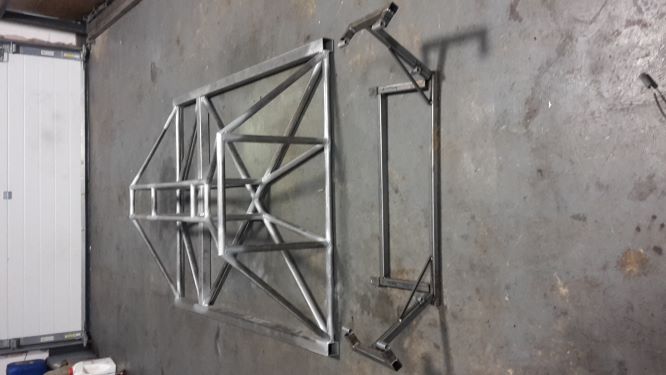
I cheated somewhat on the front end of this car for geometry by using the RX8 subframe as a basis and its related components to get my measurements
from. This is the complete opposite to the rear end as you'll see.
Hindsight again kicked in and if I were to do this again I simply wouldn't bother using another cars subframe as the basis for my geometry and
suspension. It actually made the job harder in designing the arms to get what I wanted out of the car. Simple A-arms of the right length would've
been far simpler. Live n Learn.
Subframe negative jig to pick up the suspension mounting points
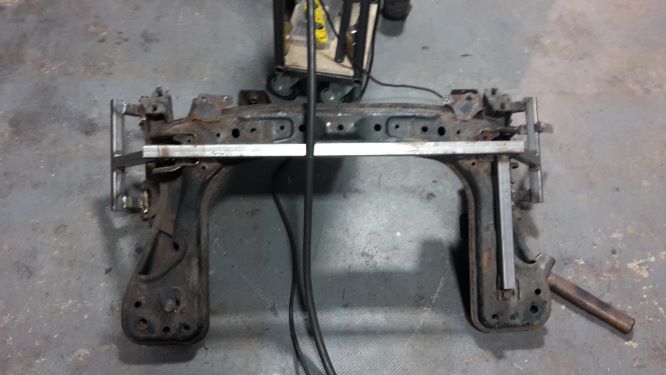
Negative jig laid infront of the chassis to get a bearing on its width as opposed the Micra's chassis
Onto the jig to get all this straight and level
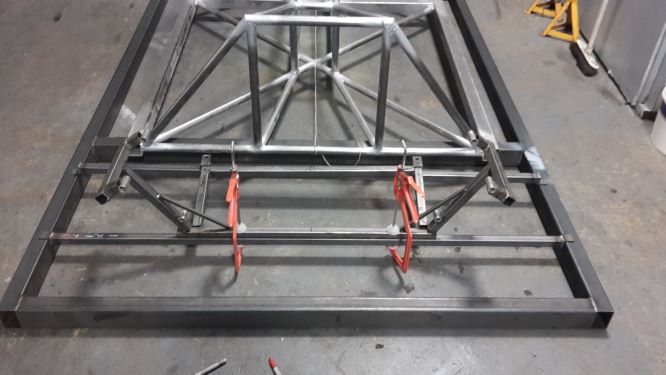
Its worth noting at this point that the Jig represents the floor as if the chassis was laid directly on the floor. But it also represents the height I
want the chassis off the ground (75mm). So as the fronts end is built the suspension points may seem low, but the wheel will sit 75mm lower than the
lowest point of the chassis. This will give the arms the right angle to operate at with no odd geometry changes through their range
Time to get building. First the lower part of the frame, which is as wide as the front of the gearbox tunnel, minus the extra added for the starter,
slave cylinder
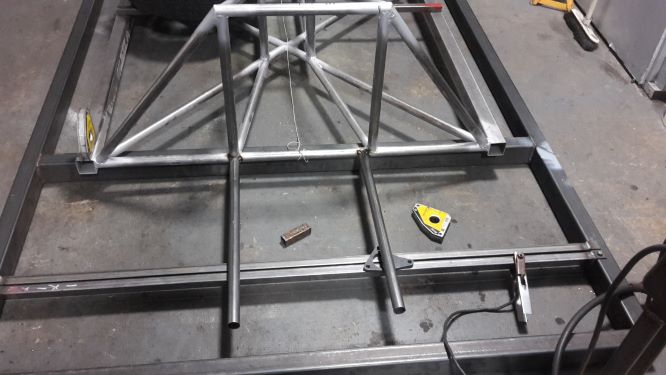
This photo is the point I had another "panic" moment as it didnt look square at all. In between each tube added to the car there must be at
least 2 hours of measuring, noting, checking, measuring again, checking again, changing the ruler/tape measure for a different one just incase. So to
see this not square had me worried. Only to spot the obvious, the chassis was skating on the jig and it had been knocked, so I welded tabs directly to
the chassis to lock it in place from now on
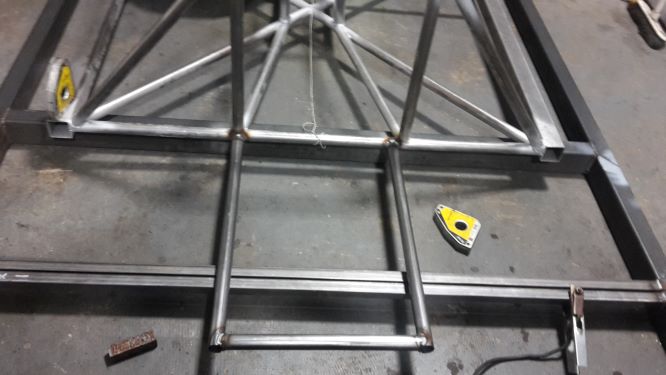
This is the lengths I go to, to make sure one tube is straight and where I want it to be. This is the next tube up which is the home for the lower arm
mounts

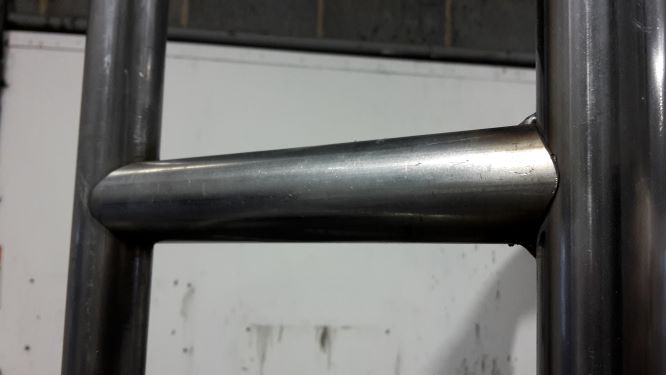
How well do those notches fit? Not too bad
Here it is welded up with uprights

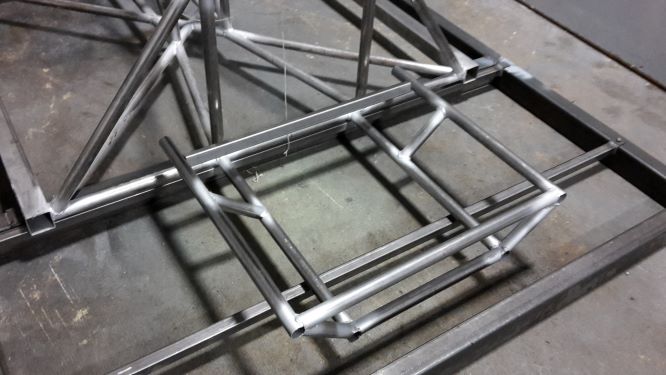
Now I've to tie the leftover tube into the existing front triangulation..
h701 - 19/5/19 at 01:32 PM
quote:
Originally posted by pekwah1
Hi,
Certainly does sound interesting, but let me be the first to try and annoy you!
I know you already own the Micra, but for me i don't think whether i owned it or not, whether i would want to spend significant time and effort,
and money, on a Micra!
Again just my opinion, don't think they're the best looking cars, and as you've already stated, not great chassis...
Personally i would probably find something that i really liked in maybe not so great condition and start from there....
Anyway, just my opinion, and being different is what keeps the world interesting i guess!
Will be interested to see your work in any case....
Cheers,
andy
Hi Andy,
Hopefully the above updates show you my take on the chassis side of the Micra project 
Although I can't do nothing about its sharp line looks (aka a Box)
Cheers,
Also Andy
R1MINI - 12/12/19 at 04:55 AM
Brilliant tube work, looking forward to seeing how this works out.

/Ambiance/04.%20Moteur%20Micra%20de%20JACQUINET%20(D3).jpg)


