
A steep learning curve...
ralphy - 18/12/16 at 02:26 PM
Thought I'd introduce myself ;-)
I get involved in owning a kit car in a rather unusual way. A friend of mine suggested I might be interested in a Westfield that he knew of and which
needed 'rebuilding'. It was part of the estate of a deceased neighbour of his, who had stripped it down almost completely and then it seems
he'd lost interest so it sat in one of his sheds for a number of years.
I'd never thought about owning a kit car, tbh but I did quite fancy the idea of having a project to play with and also to learn more about cars
as I'd spent most of my life in company vehicles and so had missed out on having my own car to maintain and keep running. So I went along to see
it and sure enough there were boxes and boxes of parts plus body panels all piled up in the shed.
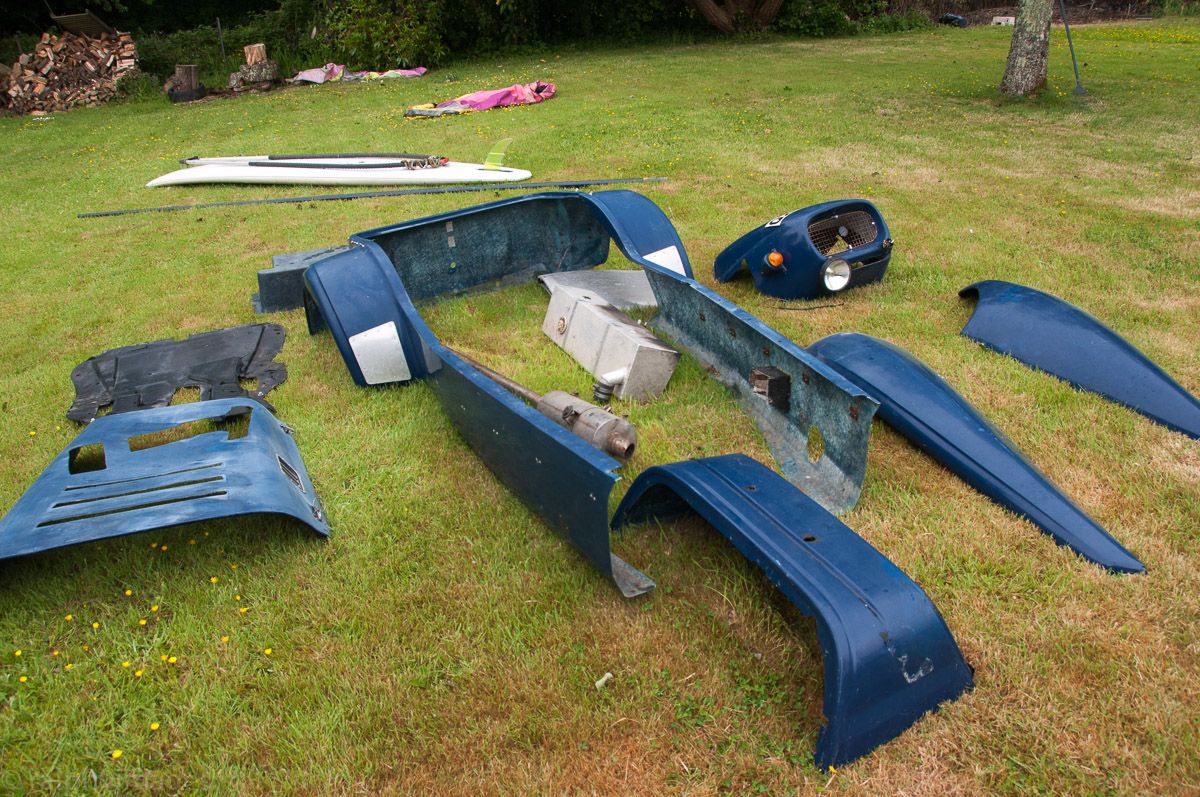
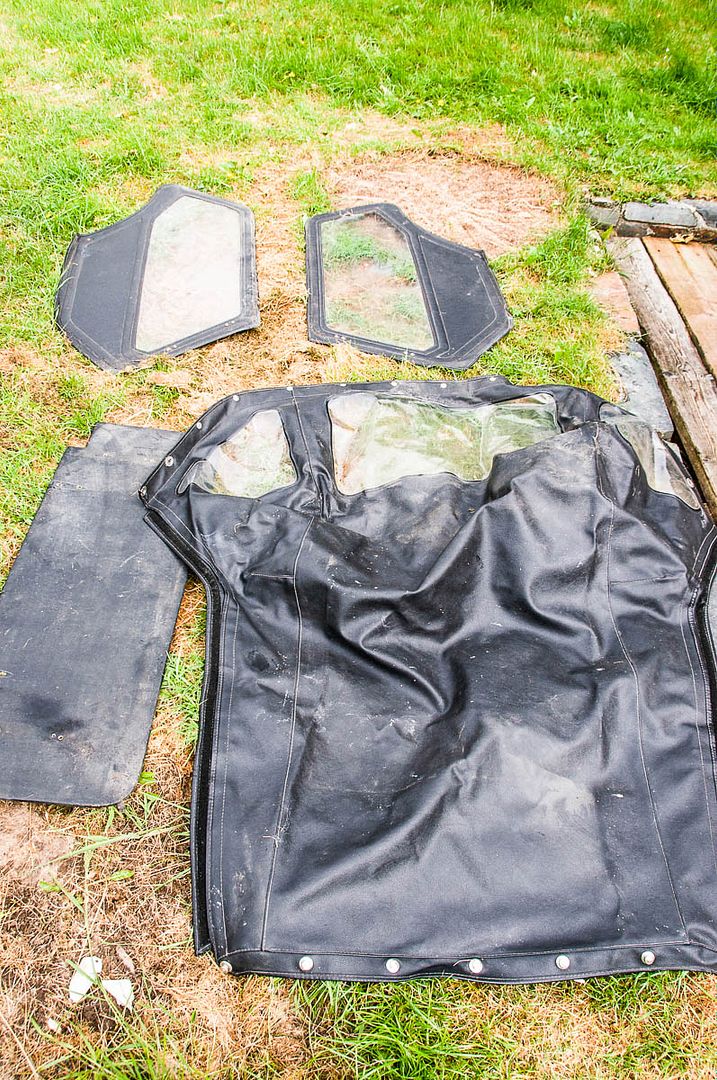
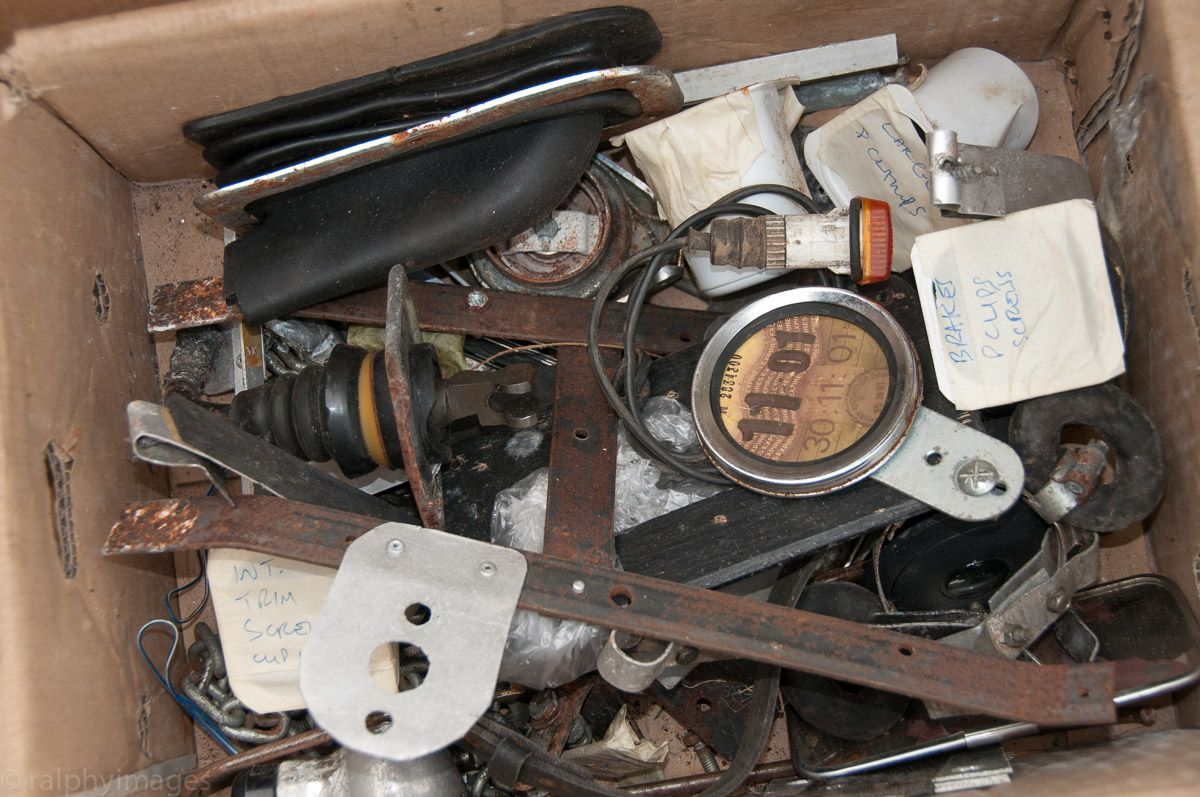
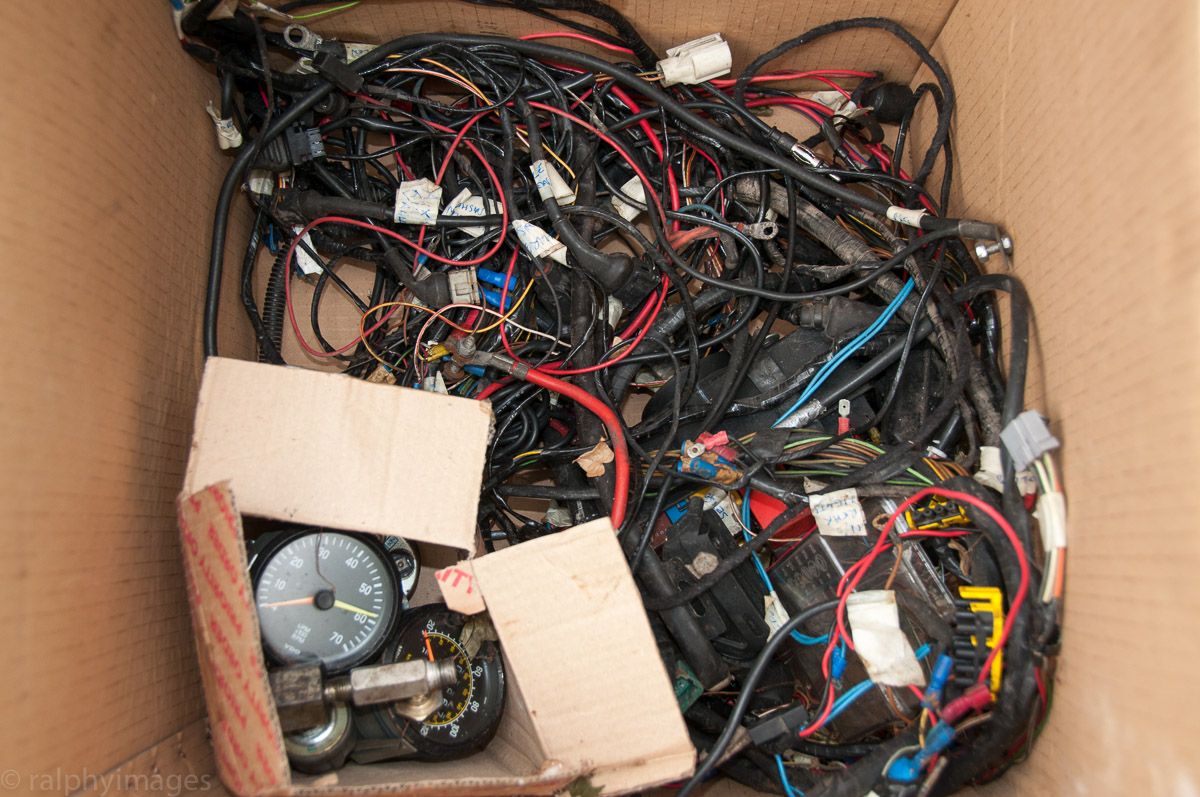
The chassis was inaccessible though, it was located outside the back of the shed behind lots of other stuff but I was assured it was fine as it had
been under a tarpaulin. The widow wanted it gone straight away and so I agreed to buy it there and then and collect it a week later when the other
stuff was being removed.
On the day I arrived to collect it the access was clear and so off I went round the back of the shed. I discovered that it had indeed been stored
under a tarp, but that must have been a number of years ago as it had literally rotted away and fallen in pieces.
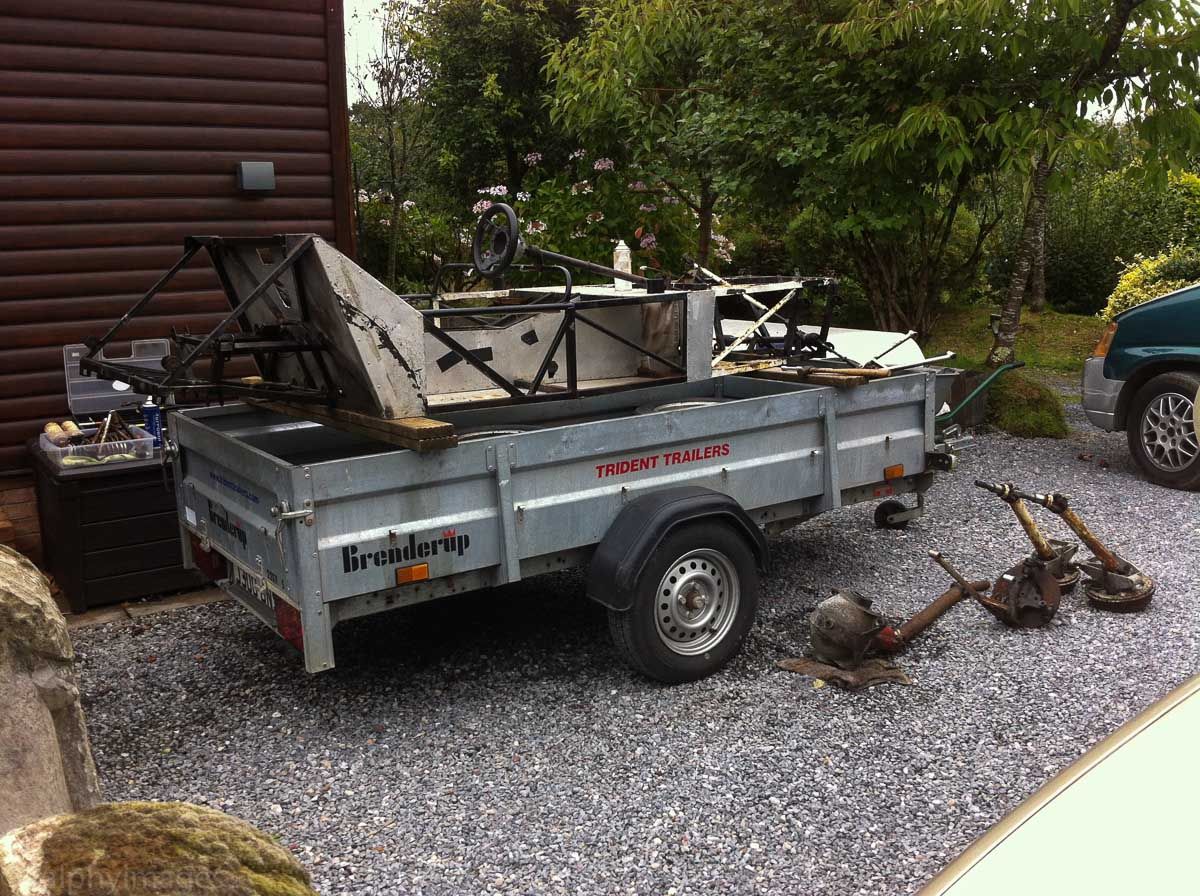
This is what I found:
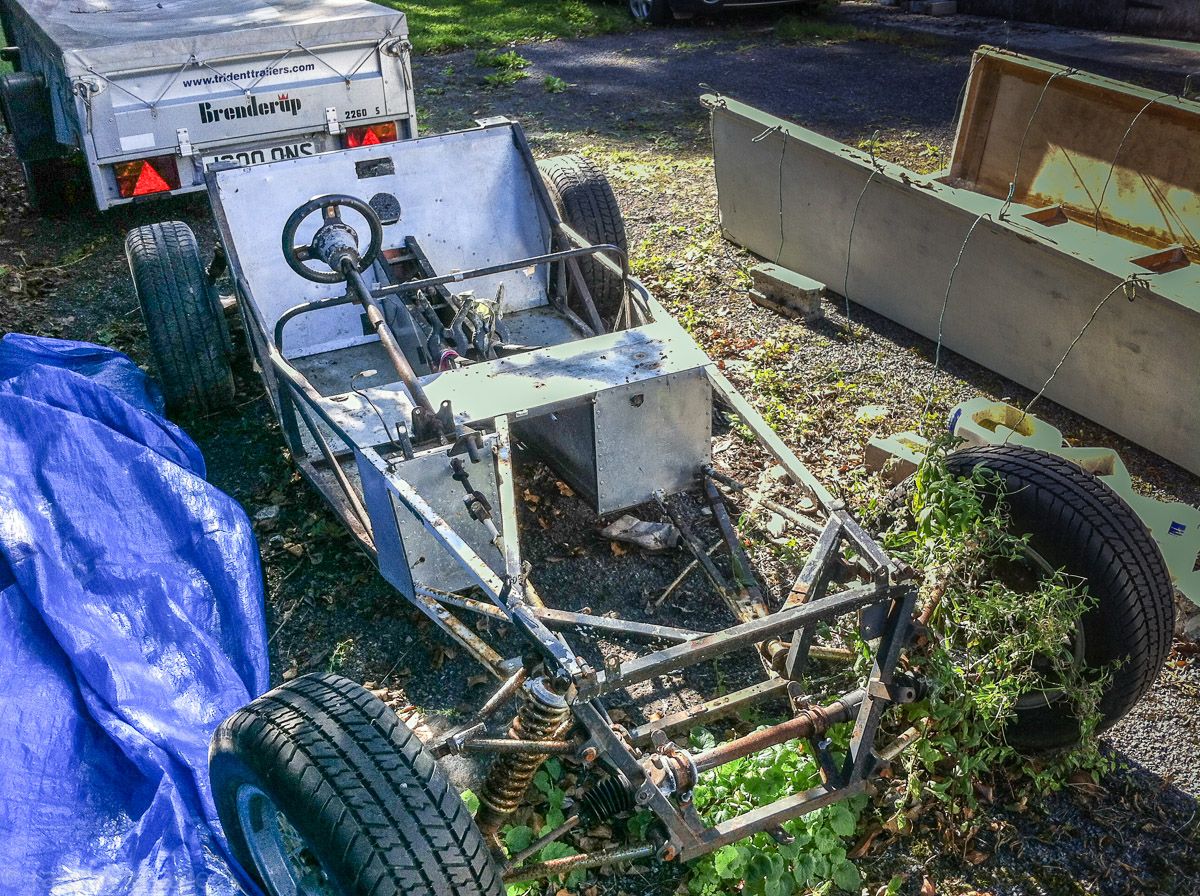
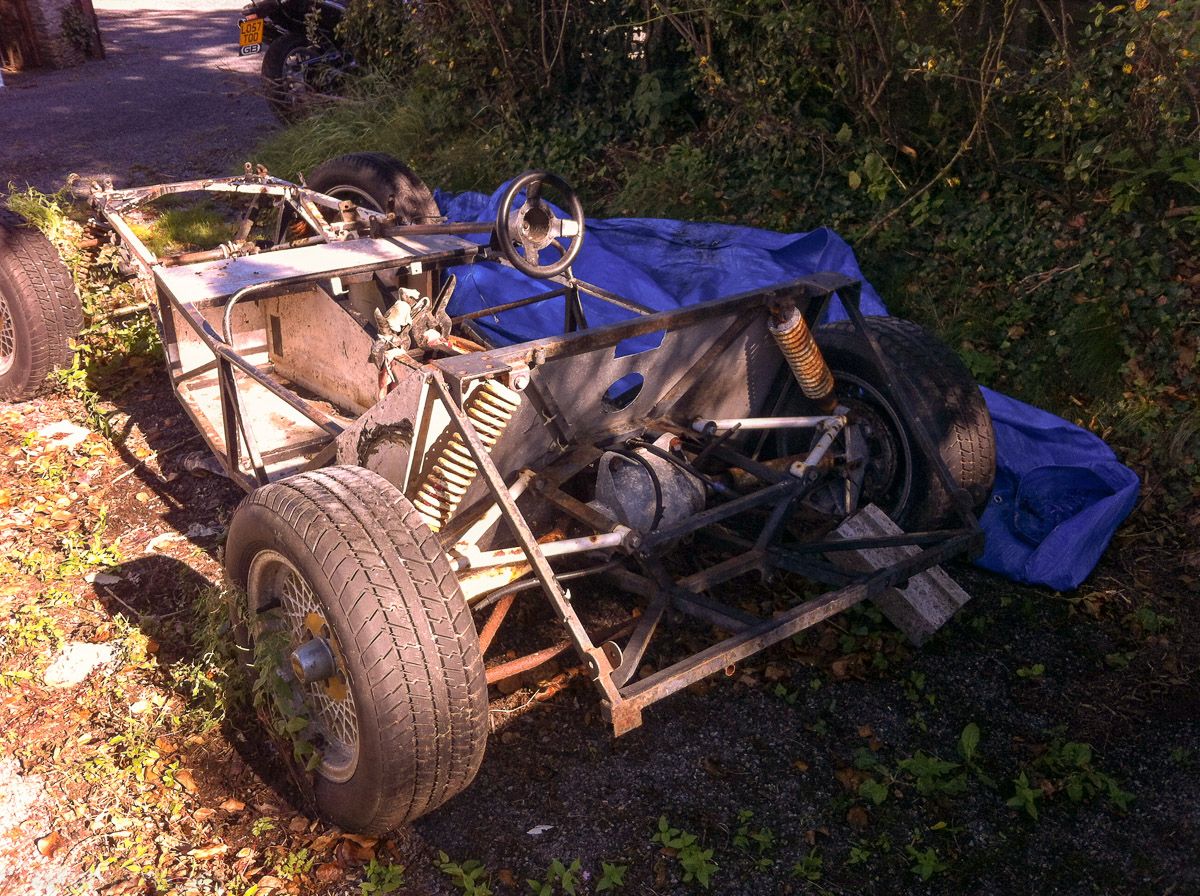
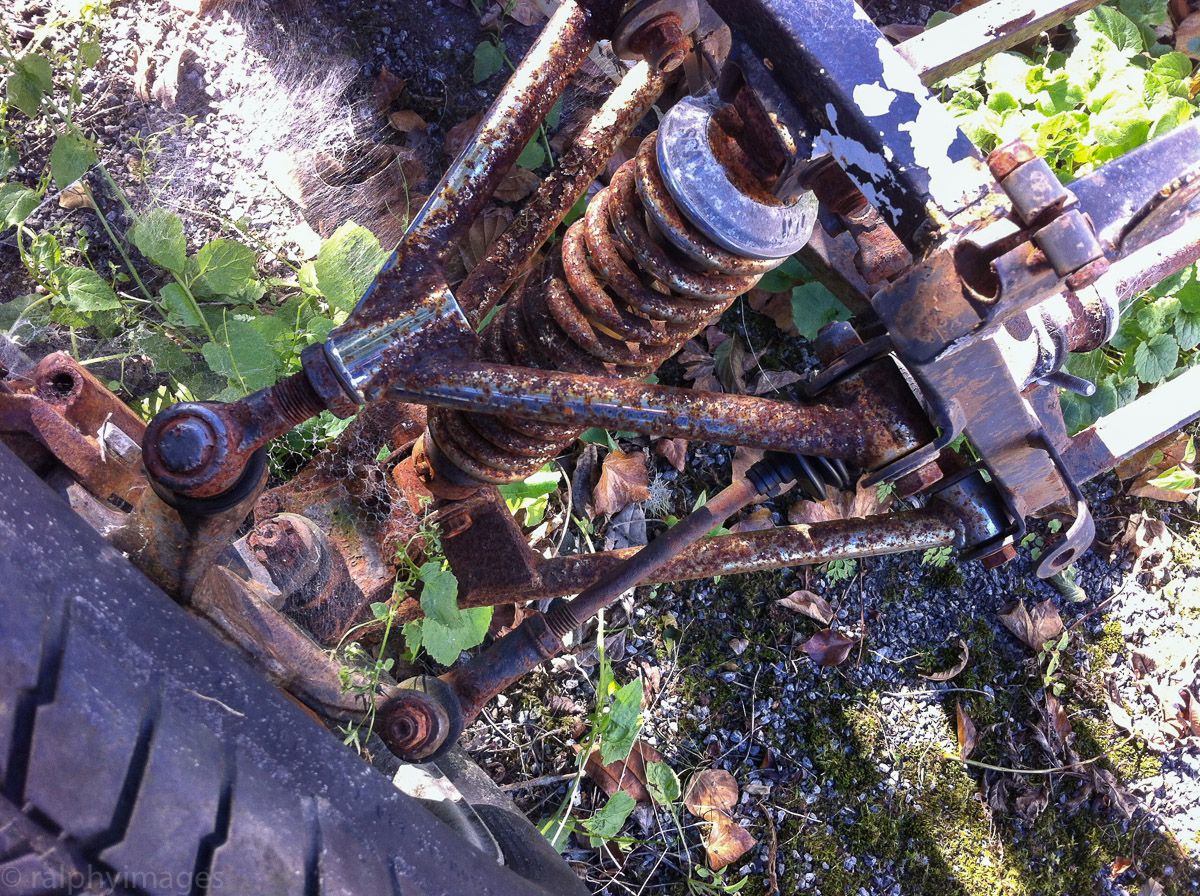
With the naivety of someone who'd never attempted to do any work on a car before I thought it'd be interesting to get it up and running, so
I loaded everything onto a trailer and set off home. That was the beginning of a rather steep learning curve... 
R
jollygreengiant - 18/12/16 at 02:46 PM
Chin up. It's ONLY nuts and bolts, just like ANY car.
Just be methodical. Finish the strip. Start the cleaning and refinishing with the last thing you have left, i.e. the chassis, and then clean, refinish
in the reverse order, until all you have left are the bits that were already off. By that time you will have a better understanding of the car and
what should fit where. If you have any doubts from that time on, then that's where the rest of this collective comes in.
Also seek out local clubs/groups in your area, putting your location in your details will be helpful to others who want to help (this detail c be
added by going into "control panel/options" top right of the page, doesn't need to be exact, just local area/major town/county).
Hope this helps.
JGG. 
Ugg10 - 18/12/16 at 03:08 PM
As said already, do it methodically, keep pics as you take stuff apart and then build up after refurb. Looks like you have one of the original
Westfield IRS diff, iirc it is an English diff in their own housing, take care of that bit.
The other thing it to see it was ever road registered, if so, get the log book and check it is registered correctly as a Westfield (and not on the
donor), if it is not registered it will need an IVA test so worth downloading the IVA manual making sure you put it back together so it is compliant.
I suspect this may have been registered as it ptprobabe built in the late 80's or early 90's.
As for the chromed wishbones, I would be tempted to replace rather than refurb but the cassis looks like it just needs a clean and paint.
Antpy thoughts on engine ? Does it have one?
CosKev3 - 18/12/16 at 03:16 PM
Was it a bargain? 
If you didn't get the V5/logbook with it I would be applying to the DVLA for that pretty sharpish, as that will make a massive difference to how
you build it up.
Ugg10 - 18/12/16 at 03:31 PM
Just seen the bonnet, got some interesting cutouts, looks like it could be for either a cvh or possible a zetec with original plenum.
This looks incredibly similar from 2013, even the pictures are the same ?
http://forum.tz-uk.com/showthread.php?276877-The-Westfield-restoration-June-2015-update!
gremlin1234 - 18/12/16 at 04:24 PM
quote:
Originally posted by Ugg10
Just seen the bonnet, got some interesting cutouts, looks like it could be for either a cvh or possible a zetec with original plenum.
This looks incredibly similar from 2013, even the pictures are the same ?
http://forum.tz-uk.com/showthread.php?276877-The-Westfield-restoration-June-2015-update!
and very similar to this thread from 2013 too
http://forum.wscc.co.uk/forum/topic/104514-new-member-complete-with-a-westfield/
Mash - 18/12/16 at 05:45 PM
Even working at my speed, it should be nearly done by now then, let's see some up to date piccys then 
Ugg10 - 18/12/16 at 05:54 PM
quote:
Originally posted by CosKev3
Was it a bargain? 
If you didn't get the V5/logbook with it I would be applying to the DVLA for that pretty sharpish, as that will make a massive difference to how
you build it up.
Just spotted in the box of bits an old tax disc dated 2001 so,looks like it has been on the road, big plus point, just need to make sure it is
registered properly and then just needs an mot after build to get back on the road.
rusty nuts - 18/12/16 at 07:08 PM
The chassis looks pretty solid albeit rusty. As said strip it down methodically taking loads of photos , label everything then get the chassis and
suspension components shot lasted (quickest and more thorough) or spend a load of time with an angle grinder with a wire brush attachment to remove
the rust . Treat with a decent rust treatment and paint. It doesn't look much worse than my Luego chassis was , from getting the chassis back
from the shotblasters to back on the road took me 6 weeks in a rented lockup with no power but I did strip it myself
gremlin1234 - 18/12/16 at 07:38 PM
EDIT: note I checked the incorrect vrn!!! see later posts
gremlin
heres a little more of what was apparently done 3 years ago
http://forum.wscc.co.uk/forum/topic/104823-chassis-restoration/
no idea why its now posted as new on here... - though looking at the original post, it is in the past tense.
also if I look up the reg, 'Q234 ABL ' (the one on the nose-cone) it shows it as a 'pligrim'
Vehicle details
Vehicle make
PILGRIM
Date of first registration
August 1996
Year of manufacture
1996
Cylinder capacity (cc)
2300 cc
CO₂Emissions
Not available
Fuel type
PETROL
Export marker
No
Vehicle status
SORN in place
Vehicle colour
BLUE
Vehicle type approval
Not available
Wheelplan
2 AXLE RIGID BODY
Revenue weight
Not available
with an mot in 2011
Check the MOT history of a vehicle
Registration number: Q234ABL
Vehicle make
PILGRIM
Date first used
1 January 1971
Fuel type
Petrol
Colour
Blue
MOT history of this vehicle
Test date
5 August 2011
Expiry date
4 August 2012
Test Result
Pass
Odometer reading
13 miles
MOT test number
6570 2791 1295
Test date
5 August 2011
Test Result
Fail
Odometer reading
13 miles
MOT test number
7578 0701 1228
Reason(s) for failure
Nearside Headlamp aim too low (1.8)
Offside Headlamp aim too low (1.8)
[Edited on 19/12/16 by gremlin1234]
ralphy - 18/12/16 at 07:56 PM
Thanks for the replies, all.
I have persevered over the time I've had it and it's come on a long way, not finished yet but I'm pleased with the progress. The lack
of a garage has been a challenge, but the biggest obstacle for me has been the lack of time it's taken due to all the other 'stuff' in
life (at one stage there was a period of 12 months in which I never laid a hand on her). To answer a couple of comments, it does have a V5 now, the
cutouts represent the RS turbo it had been fitted with and I have taken lots of photos too.
Working on her has been a real mixture of emotions, from frustration to pleasure and there's been times that I could've easily given up.
With the benefit of hindsight I really should have either bought a new kit or a running vehicle, but for sure I've learnt a heck of a lot and my
interest and appreciation in kit-cars has grown and grown. I don't know if it's appropriate to make this a running build thread on here, is
that sort of thing allowed or even of interest to others?
R
ianhurley20 - 18/12/16 at 08:06 PM
Must say Ralphy I don't understand you posting here. You seem to have posted on other forums since 2013 and progressed your project so when I
read your first post that was not obvious. It seemed to be a new project. But it isn't - and it is posted on the Westfield sites where you will
get most useful information.
Why post here as though its a new project?
gremlin1234 - 18/12/16 at 08:08 PM
quote:
Originally posted by ralphy
Thanks for the replies, all.
I have persevered over the time I've had it and it's come on a long way, not finished yet but I'm pleased with the progress. The lack
of a garage has been a challenge, but the biggest obstacle for me has been the lack of time it's taken due to all the other 'stuff' in
life (at one stage there was a period of 12 months in which I never laid a hand on her). To answer a couple of comments, it does have a V5 now, the
cutouts represent the RS turbo it had been fitted with and I have taken lots of photos too.
Working on her has been a real mixture of emotions, from frustration to pleasure and there's been times that I could've easily given up.
With the benefit of hindsight I really should have either bought a new kit or a running vehicle, but for sure I've learnt a heck of a lot and my
interest and appreciation in kit-cars has grown and grown. I don't know if it's appropriate to make this a running build thread on here, is
that sort of thing allowed or even of interest to others?
R
Welcome
I for one like running build threads so go for it, (especially having seen some of the progress 3 years ago!)
Gremlin
bonzoronnie - 18/12/16 at 08:27 PM
A huge welcome Ralphy
I have read up on your past progress. 
Not a project for the faint hearted, admire your resolve & what you have achieved thus far.
I very much look forward to viewing future progress on this forum. 
TBH
I don't understand why some members are being soooo offish, very bah humbug indeed 
Ralphy has decided to continue with his build progress on this forum, what's the problem with that ? 
[Edited on 18/12/16 by bonzoronnie]
ralphy - 18/12/16 at 09:06 PM
quote:
Originally posted by ianhurley20
Must say Ralphy I don't understand you posting here. You seem to have posted on other forums since 2013 and progressed your project so when I
read your first post that was not obvious. It seemed to be a new project. But it isn't - and it is posted on the Westfield sites where you will
get most useful information.
Why post here as though its a new project?
I didn't intend to make it appear as a new project, sorry if you thought it was. I was going
to make my post in the New Members section here ('The place for new members to introduce themselves and their projects' as a matter of
courtesy having recently joined, but it's locked.
I made three posts on the Westfield site about this project and again they were by way of an introduction. In fact, it was members there who
recommended I have a look here as I'm after some items to complete my build - and I'm in touch with a member who responded to my
'Wanted' post - but I'm also interested in learning more about other kit-cars than just Westfields and have been happily reading up on
some of those here. BTW, I've only posted about it on one other forum and that's a watch enthusiasts site, watches (particularly dive
watches) being a hobby of mine.
R
ralphy - 18/12/16 at 09:16 PM
quote:
also if I look up the reg, 'Q234 ABL ' (the one on the nose-cone) it shows it as a 'pligrim'
Vehicle details
Vehicle make
.
Date first used
1 January 1971
.
PILGRIM
Date of first registration
August 1996
.
Test date
5 August 2011
Test Result
Fail
Thanks very much for that info!
I've no idea what a PILGRIM model is, all I know is mine is an SEi and the two dates are confusing: my chassis number dates it to 1989 and it was
registered (according to the V5c) on 01/10/1996. That MOT is a complete mystery to me, as I understood it the car hadn't been 'out' in
years - and looked it - in 2013 when I first picked it up. Weird.
R
CosKev3 - 18/12/16 at 09:31 PM
If that is the correct registration on the car it's pretty obvious someone has used a pilgrims identity to avoid IVA/SVA testing there Westfield
kit 
ianhurley20 - 18/12/16 at 09:36 PM
Sorry Ralphy your maths seems to be an issue 29,477 posts on the one forum and 262 on the westfield forum. I have no issue with you joining this forum
but I do think you have misrepresented yourself. Given that your project is already 3 years old I would have expected a different approach indicating
what you started with and where you had got to. If not for some others who spotted your posts elsewhere I wonder when you would have revealed - or not
- this information.
I have no issues with you joining this group with your project but wish you had declared the previous 3 years progress in your first post not after
others had revealed it`
ralphy - 18/12/16 at 09:59 PM
quote:
Originally posted by ianhurley20
Sorry Ralphy your maths seems to be an issue 29,477 posts on the one forum and 262 on the westfield forum. I have no issue with you joining this forum
but I do think you have misrepresented yourself. Given that your project is already 3 years old I would have expected a different approach indicating
what you started with and where you had got to. If not for some others who spotted your posts elsewhere I wonder when you would have revealed - or not
- this information.
I have no issues with you joining this group with your project but wish you had declared the previous 3 years progress in your first post not after
others had revealed it`
Nothing wrong with my maths. As I have already said, there was one thread on the watch forum detailing my Westy - and it sure as heck
wasn't 29,477 posts about it!
I have no intention of 'misrepresenting' myself at all, why on earth would I want to do that???
As I'm the same username 'ralphy' on all three forums it's hardly some elaborate cloak and dagger scheme, or a spectacularly poor
one.
My post was simply an introduction and as I said in it, it was 'the beginning of a rather steep learning curve' - which it has been.
But thanks for not having an issue with me joining here and here's a pic of the current state of play:
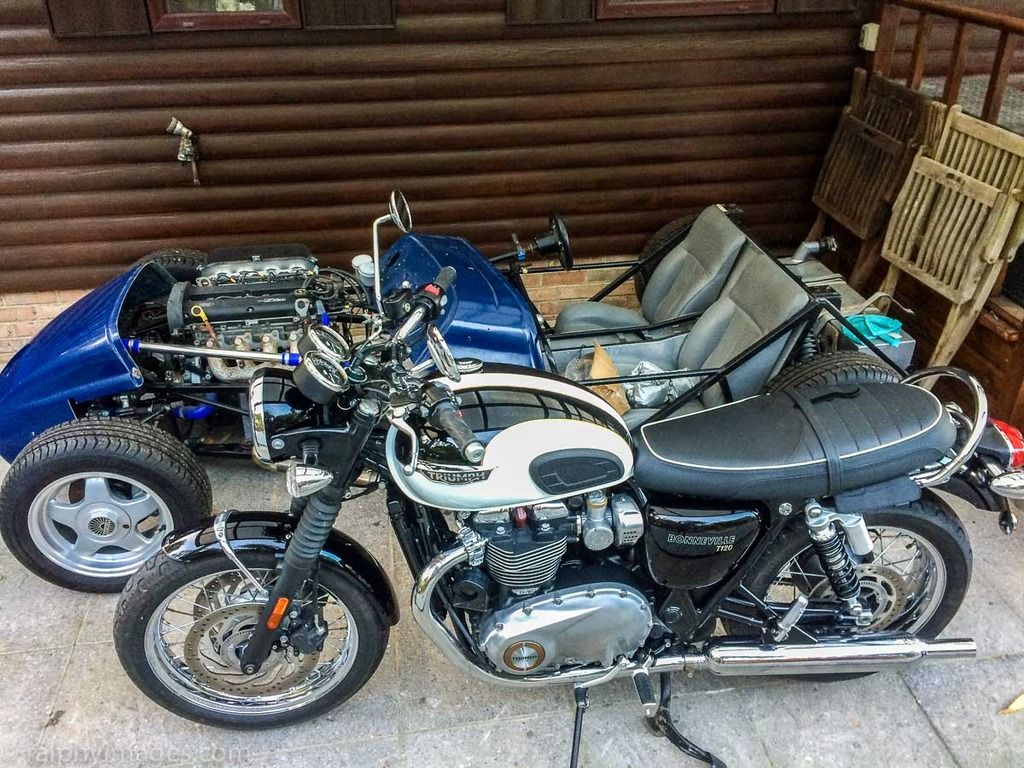
And no, it's not hidden behind my motorbike in an attempt to misrepresent it. 
R
gremlin1234 - 18/12/16 at 10:24 PM
quote:
Originally posted by ralphy
quote:
also if I look up the reg, 'Q234 ABL ' (the one on the nose-cone)
Date first used
1 January 1971
Thanks very much for that info!... and the two dates are confusing:
1 Jan '71 is a default date used by dvla, especially for Q reg
gremlin1234 - 19/12/16 at 11:01 AM
quote:
Originally posted by ralphy
Thanks very much for that info!
I've no idea what a PILGRIM model is, all I know is mine is an SEi and the two dates are confusing: my chassis number dates it to 1989 and it was
registered (according to the V5c) on 01/10/1996. That MOT is a complete mystery to me, as I understood it the car hadn't been 'out' in
years - and looked it - in 2013 when I first picked it up. Weird.
R
I think I must have misread the number plate
I now think it says Q248 ABL though difficult to read, hopefully Ralphy can check...
and that does make it a westfield ;-)
Registration number: Q248 ABL
✓ SORN
MOT
No details held by DVLA
If you have just purchased this vehicle, you must tax it even if it shows as taxed above. Vehicle tax cannot be transferred from keeper to keeper.
If you have taxed, made a SORN or had an MOT it can take up to 5 days for these details to be shown above.
You can check with your bank/building society to confirm your payment was successful.
Vehicle details
Vehicle make
WESTFIELD SEI
Date of first registration
October 1996
Year of manufacture
1996
Cylinder capacity (cc)
1600 cc
CO₂Emissions
Not available
Fuel type
PETROL
Export marker
No
Vehicle status
SORN in place
Vehicle colour
BLUE
Vehicle type approval
Not available
Wheelplan
2 AXLE RIGID BODY
Revenue weight
Not available
SJ - 19/12/16 at 01:21 PM
It looks a lot better than it did in your first post!
Also looks like it should be on the road soon, which will be a lot easier if it is properly registered as a Westy.
Stu
wylliezx9r - 19/12/16 at 01:36 PM
There doesn't seem to be a lot of new project threads on this site anymore which I find disappointing as I find them interesting. But judging by
certain members reaction to this thread I can fully understand why. What's the matter with people ?????
[Edited on 19/12/16 by wylliezx9r]
bonzoronnie - 19/12/16 at 02:12 PM
quote:
Originally posted by wylliezx9r
There doesn't seem to be a lot of new project threads on this site anymore which I find disappointing as I find them interesting. But judging by
certain members reaction to this thread I can fully understand why. What's the matter with people ?????
[Edited on 19/12/16 by wylliezx9r]
My sentiments exactly.
Poor chap just wants to share his build.
Ends up being accused of being deceitful.
Then to make matters worse, the *ringer* police chip in. 
I hugely enjoyed reading Ralphys build diary. 
ralphy - 19/12/16 at 02:33 PM
quote:
Originally posted by gremlin1234
I think I must have misread the number plate
I now think it says Q248 ABL though difficult to read, hopefully Ralphy can check...
and that does make it a westfield ;-)
And confirmed.
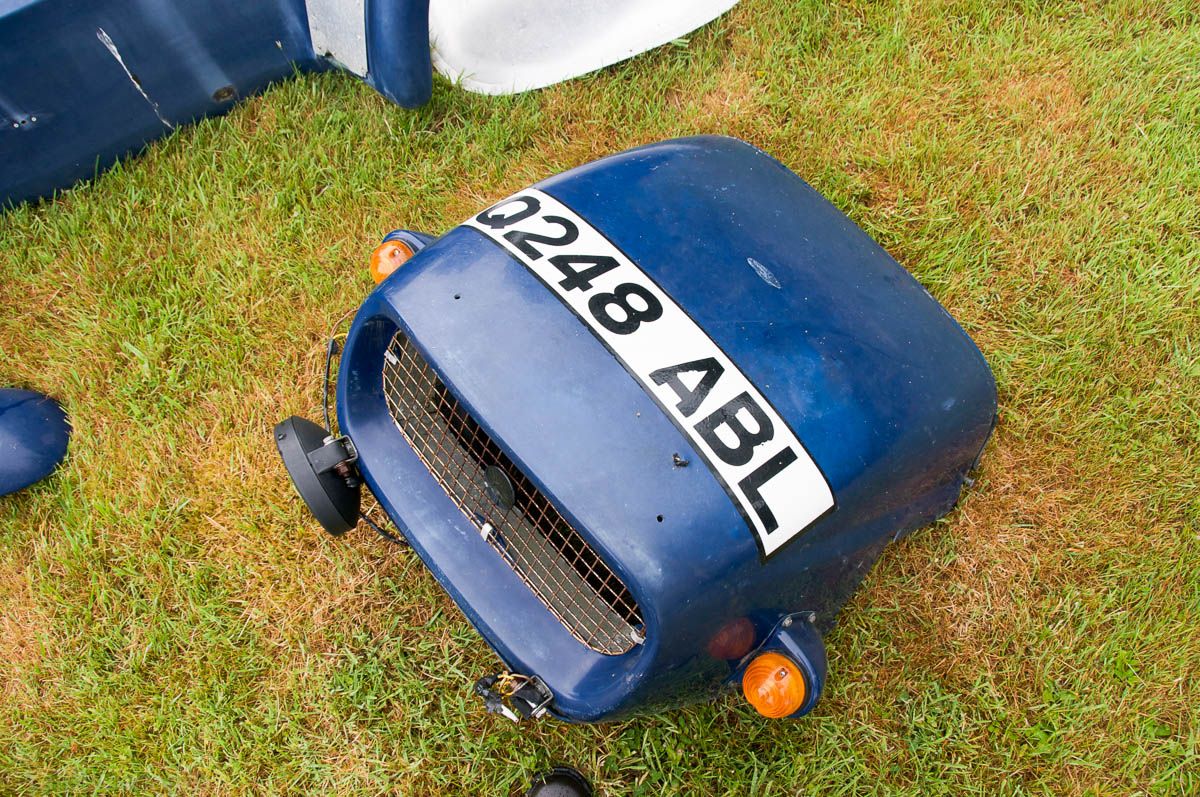
But here's a funny thing, I looked up Pilgrim and discovered they make Cobra replicas, this sparked a vague memory in my mind & so I called
the friend who'd put me onto the Westie - and he confirmed that the original owner of my car had owned a Cobra replica - before he got the
Westfield!
But any thought I had of there having been a reg transfer were dashed when I found out you can't transfer 'Q' plates.
R
[Edited on 19/12/16 by ralphy]
ralphy - 19/12/16 at 02:43 PM
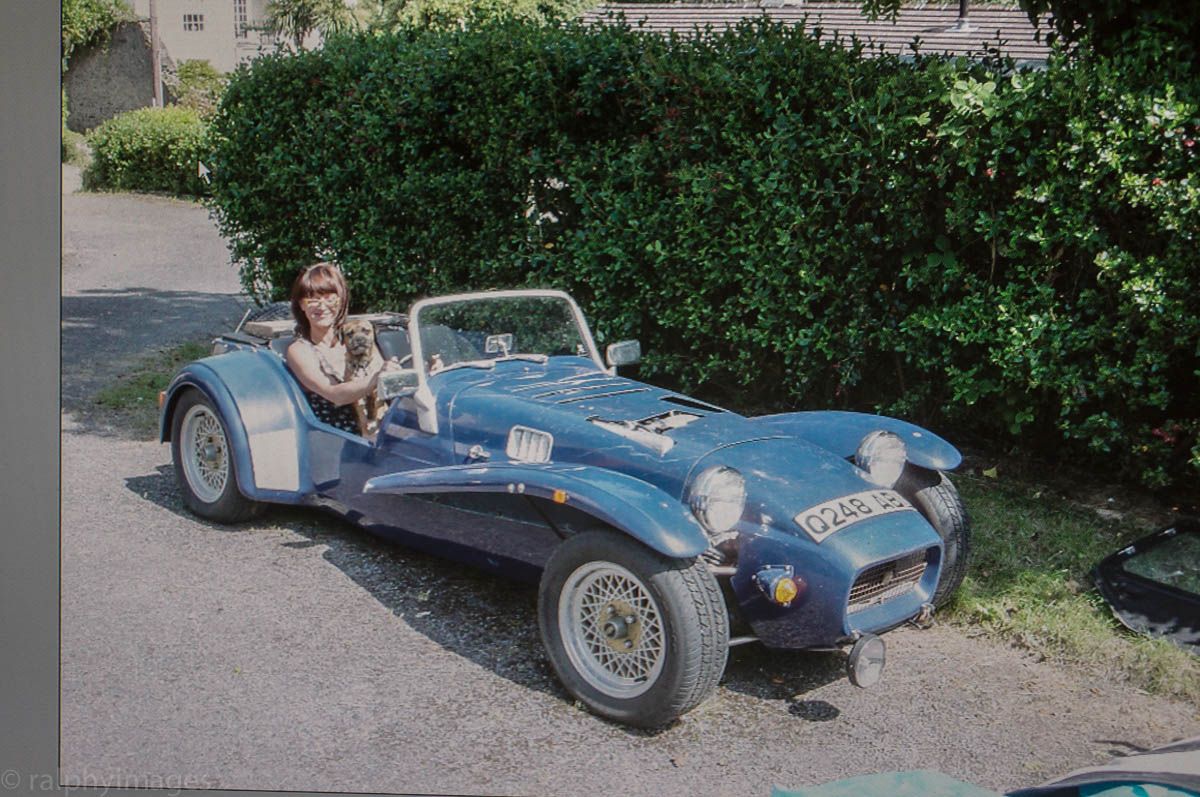
A pic of her before the owner started stripping it down:
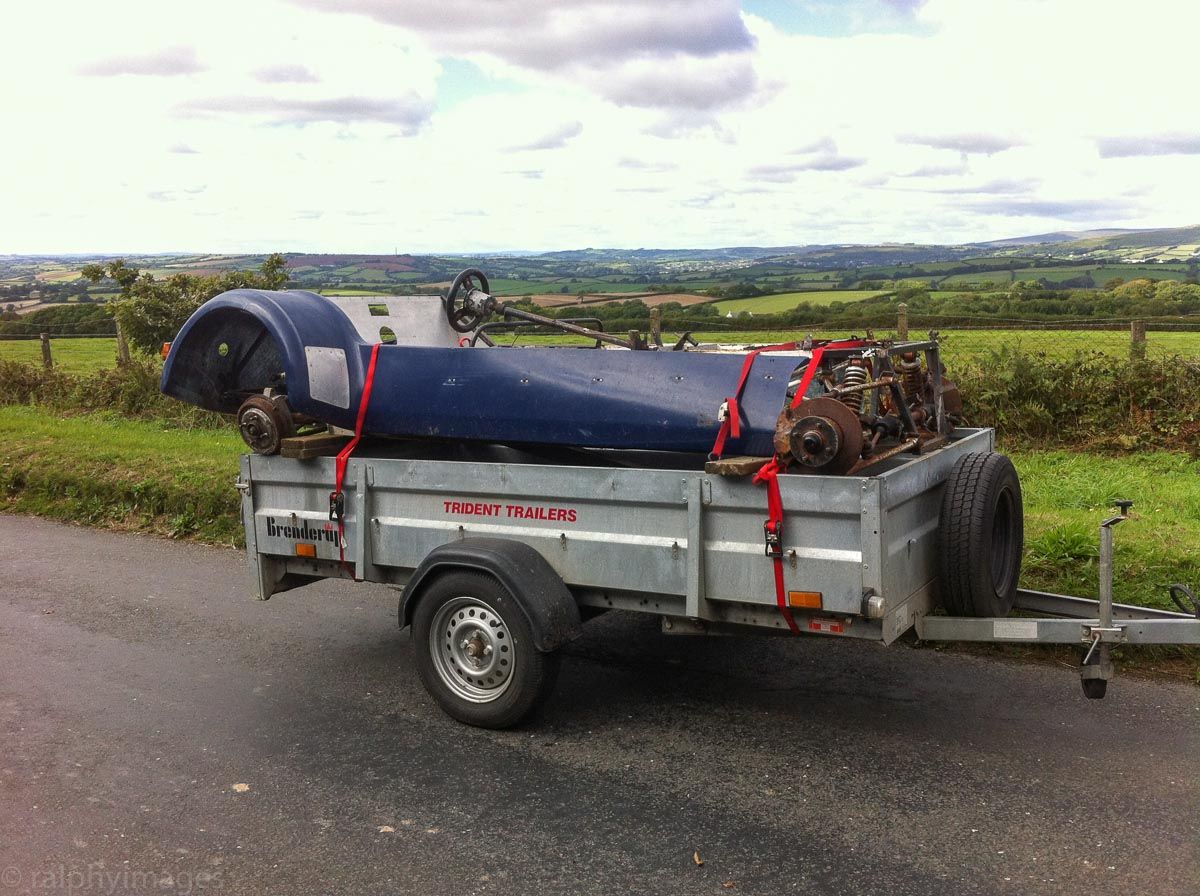
And here she is on the way back to my home:
One of our pooches has forever been very defensive of whatever car she's in - and she's figured out the Westie is actually another car:
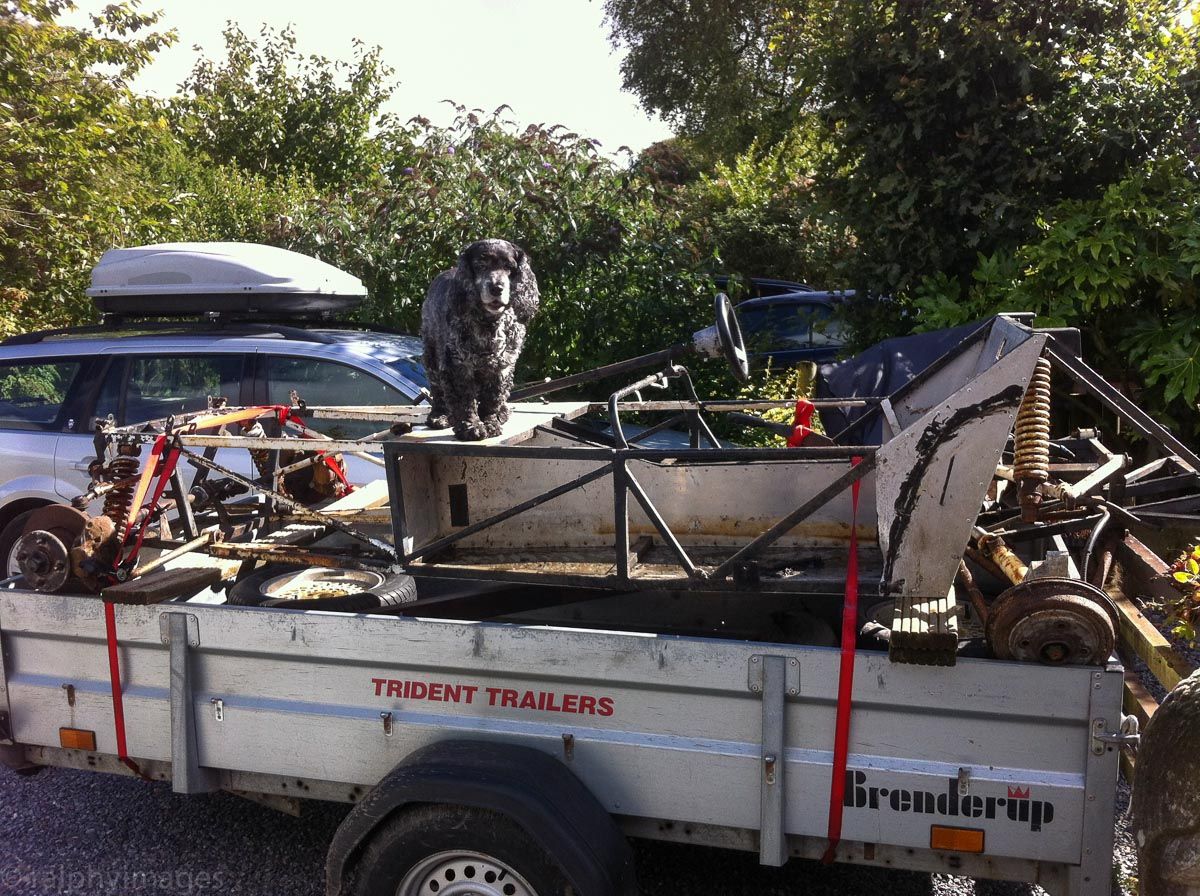
The disassembly began straight away, it was late summer and I wanted to get onto the chassis refurbish asap:
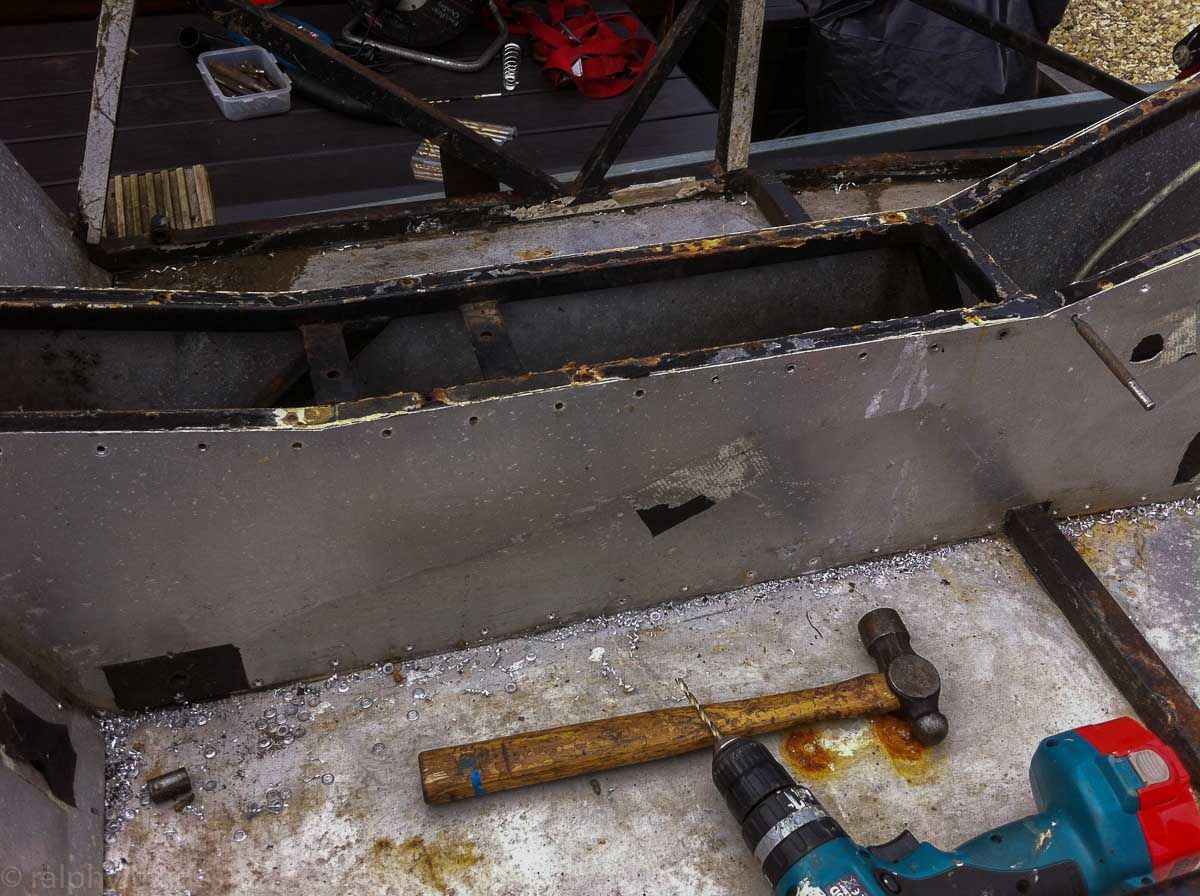
R
gremlin1234 - 19/12/16 at 03:29 PM
quote:
Originally posted by ralphy
quote:
Originally posted by gremlin1234
I think I must have misread the number plate
I now think it says Q248 ABL though difficult to read, hopefully Ralphy can check...
and that does make it a westfield ;-)
And confirmed.
But here's a funny thing, I looked up Pilgrim and discovered they make Cobra replicas, this sparked a vague memory in my mind & so I called
the friend who'd put me onto the Westie - and he confirmed that the original owner of my car had owned a Cobra replica - before he got the
Westfield!
But any thought I had of there having been a reg transfer were dashed when I found out you can't transfer 'Q' plates.
R
[Edited on 19/12/16 by ralphy]
thats good
sincere apologies for the confusion caused!
ralphy - 26/12/16 at 08:43 PM
All the panels off and stored for future reference:
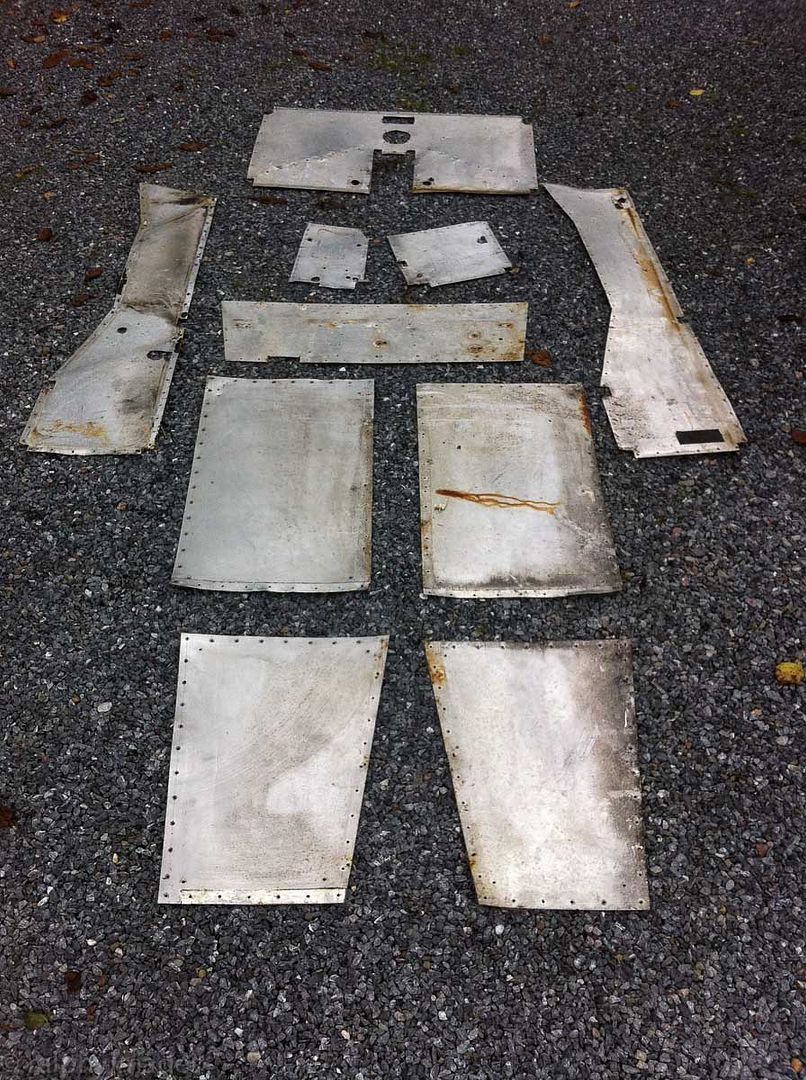
And the chassis ready for some treatment:
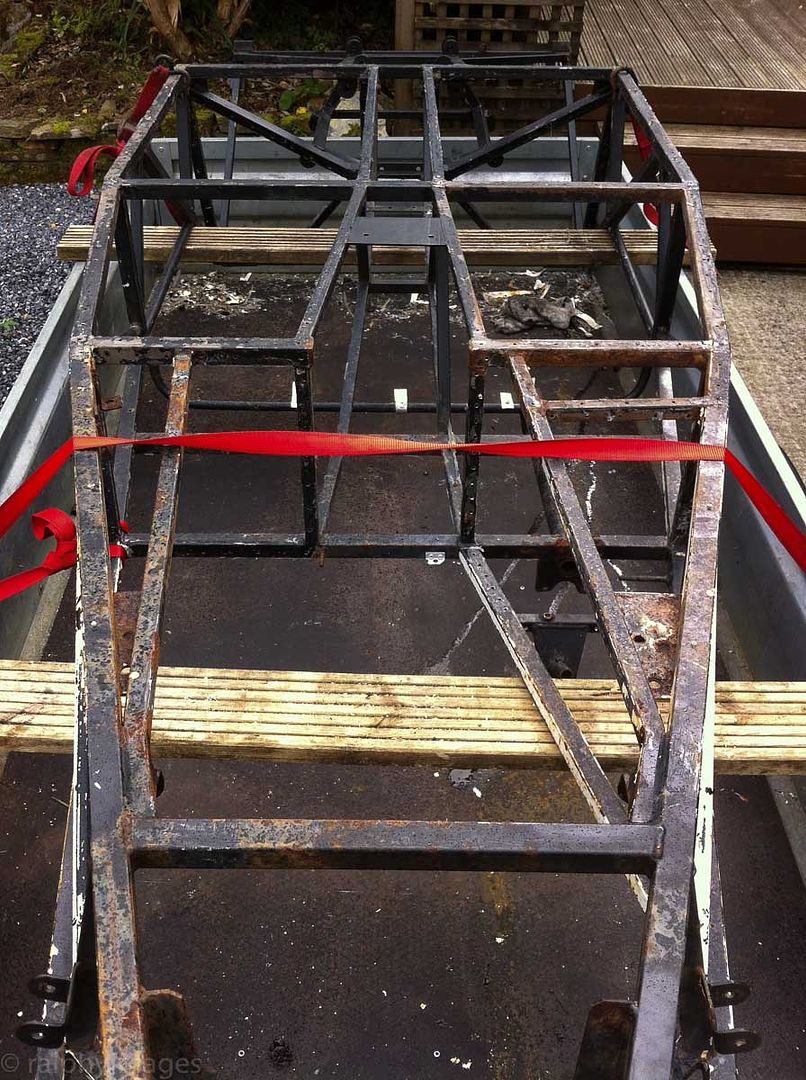
My initial concern of rust inside the frame was allayed by the use of a borescope: there was a bit, but not too much.
Gearbox getting a spruce-up:
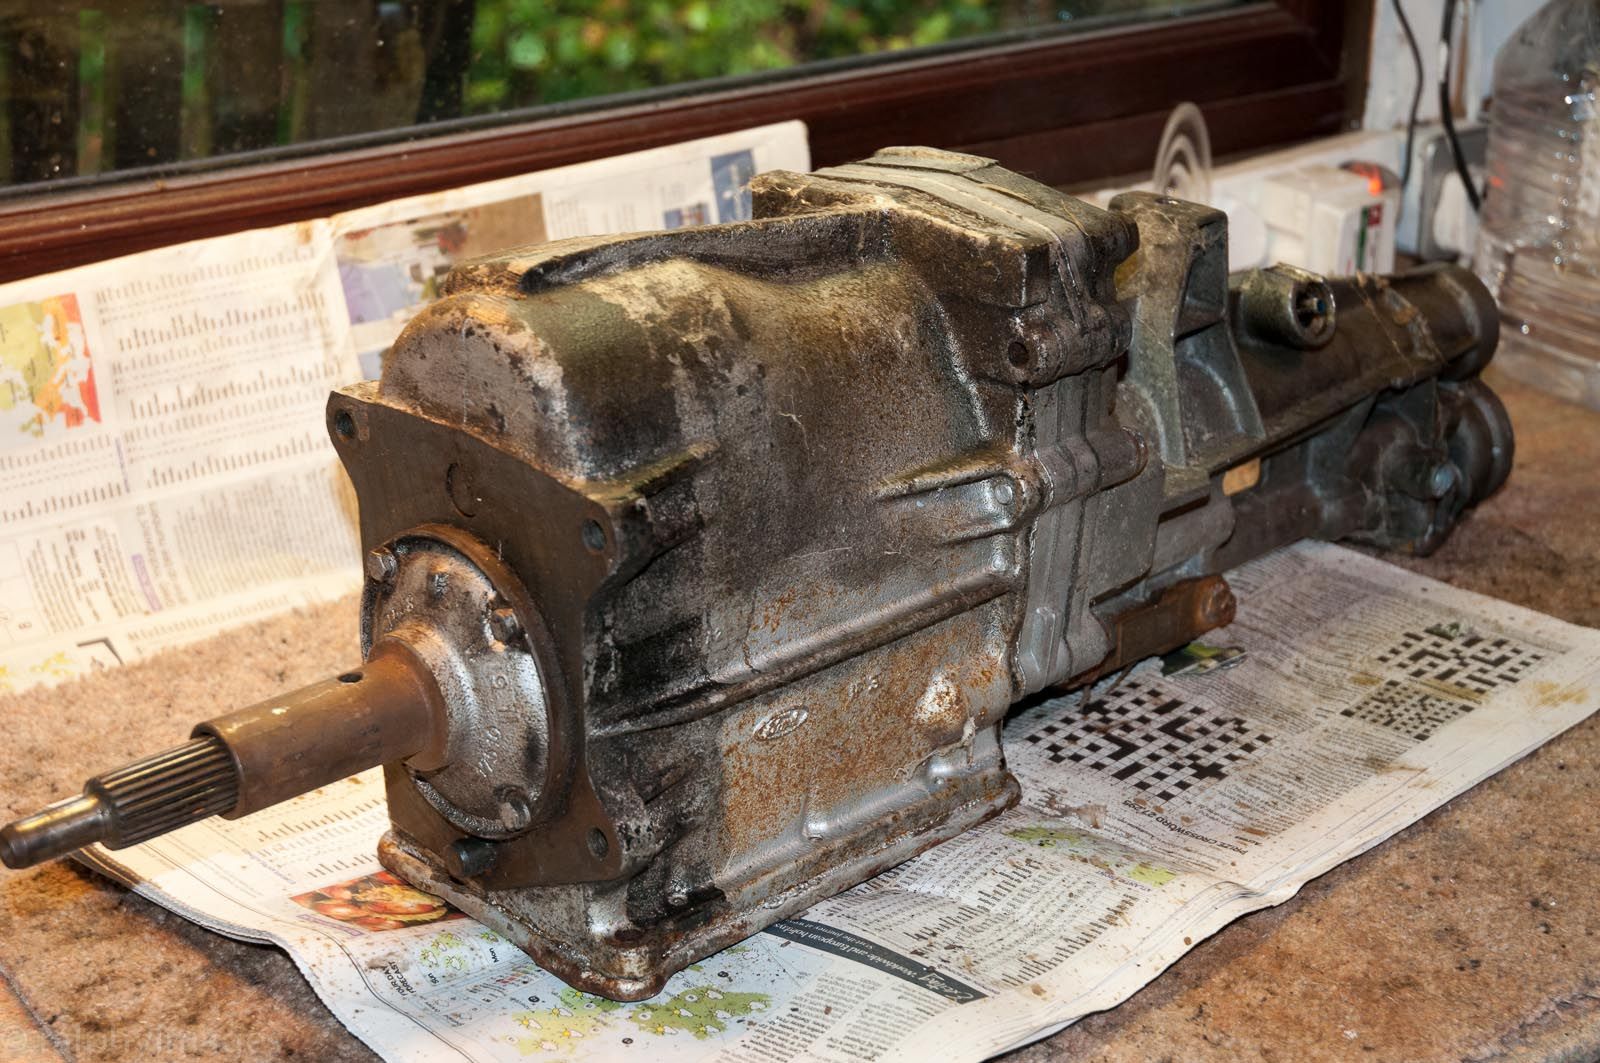
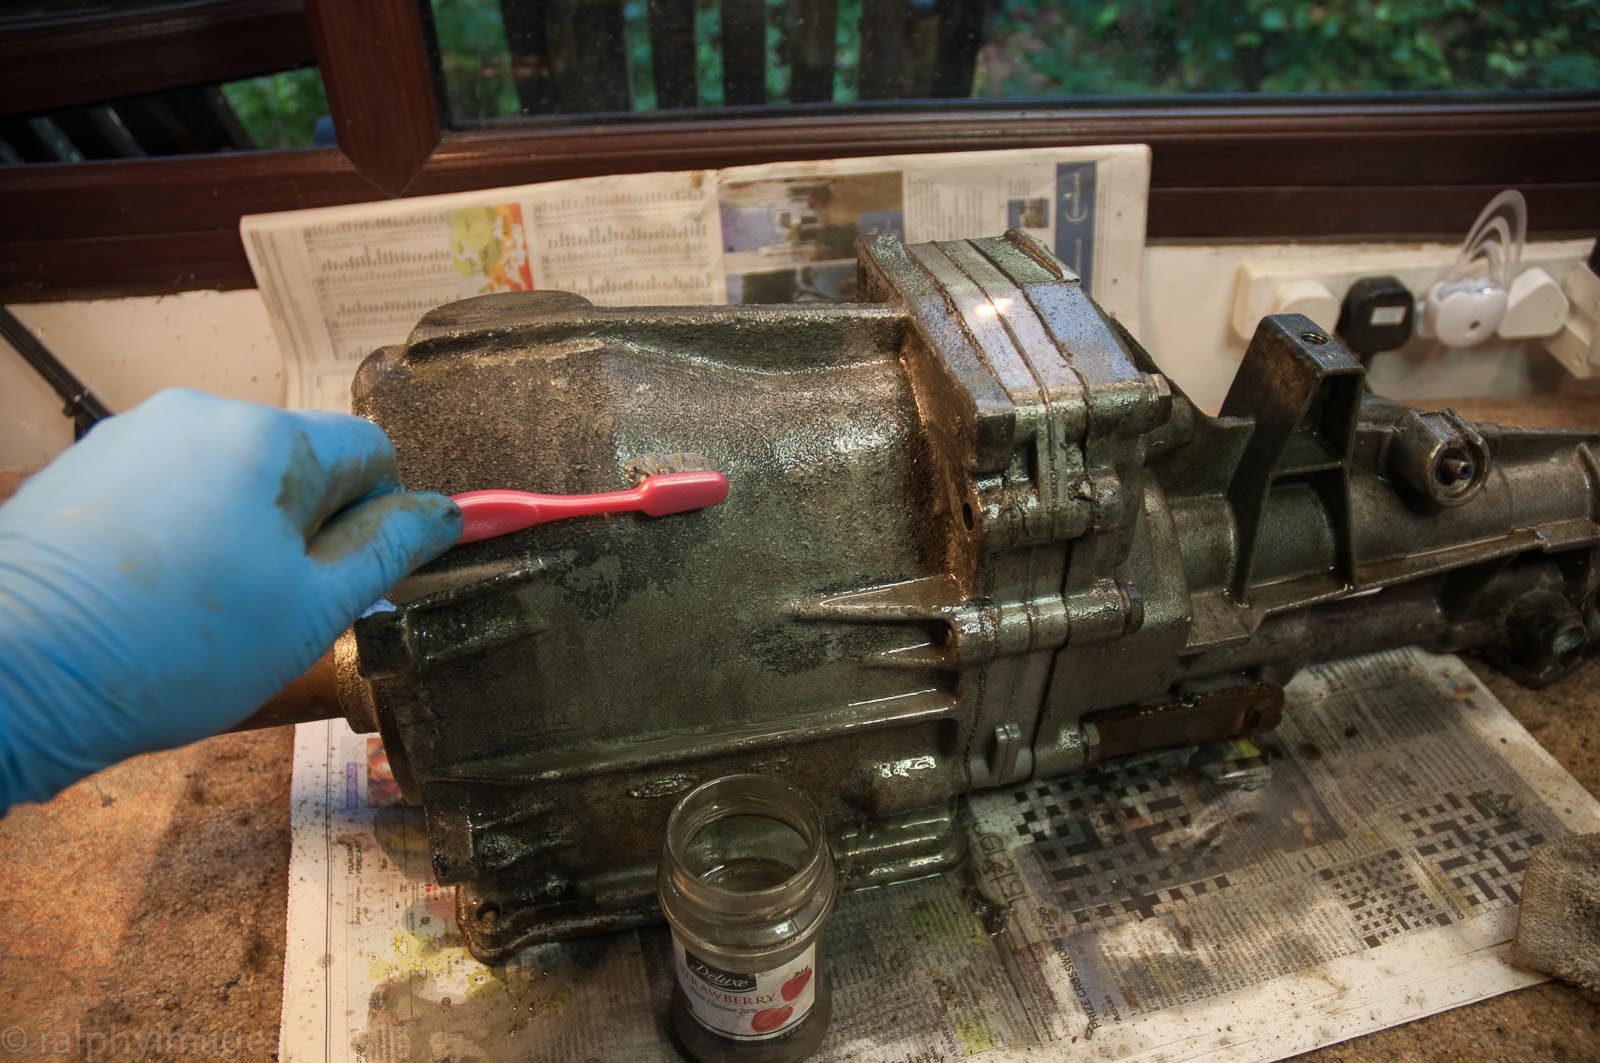
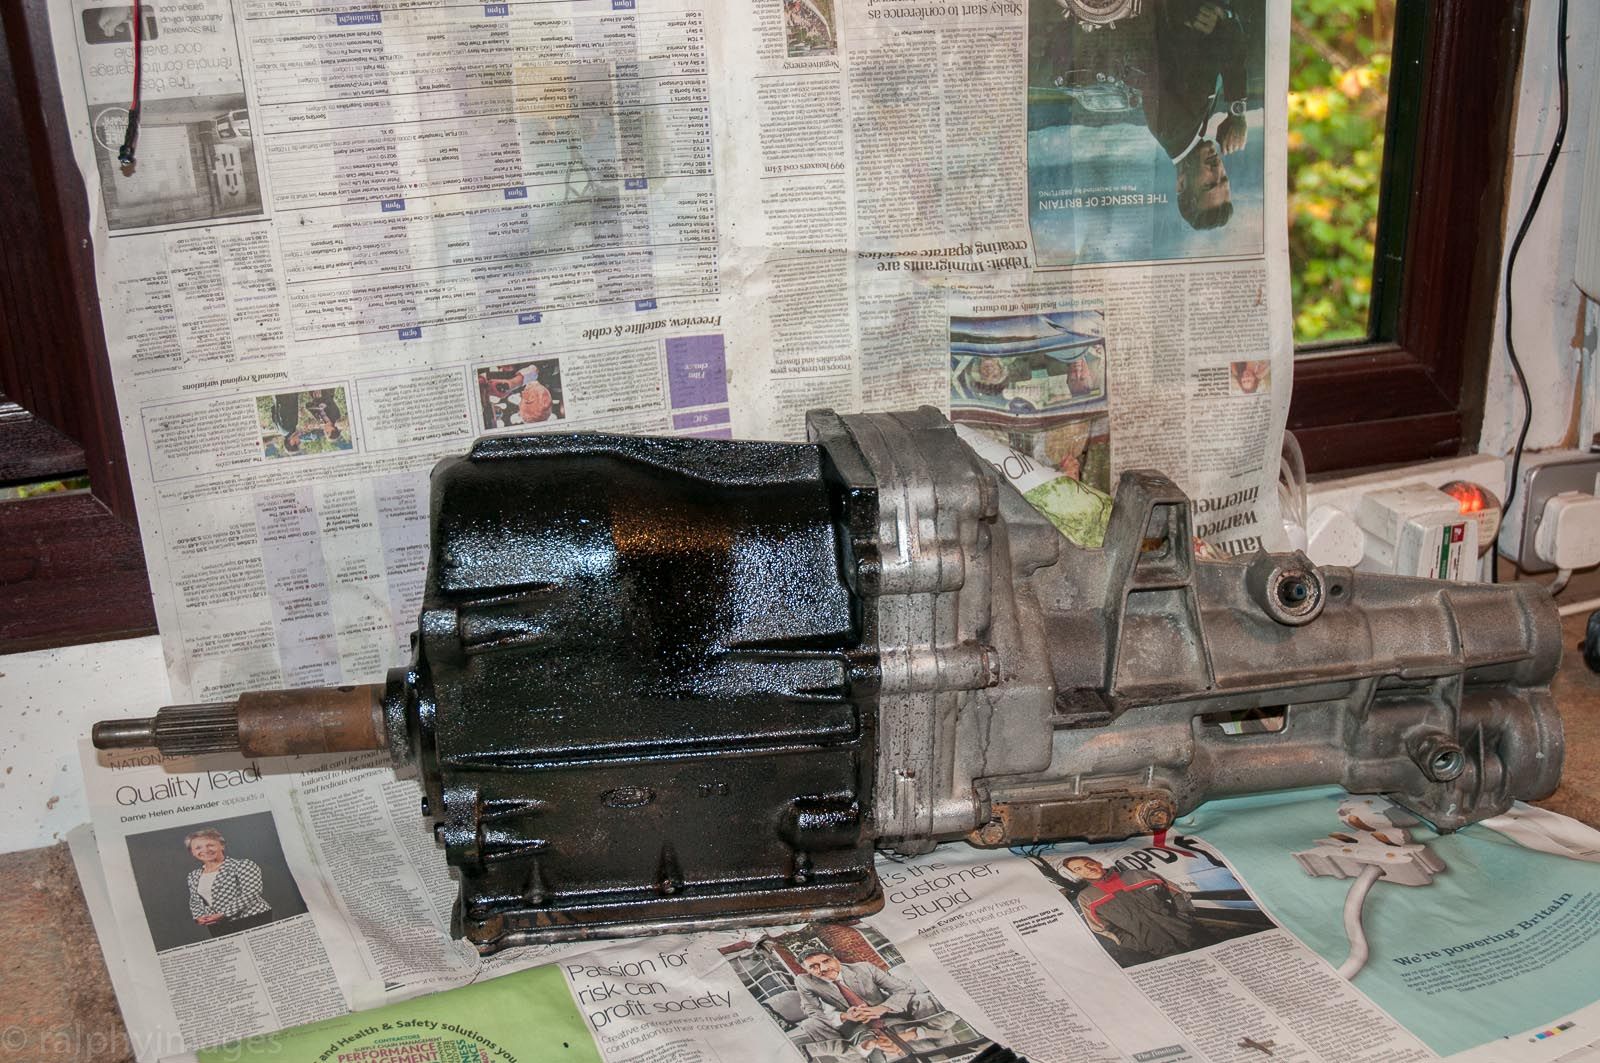
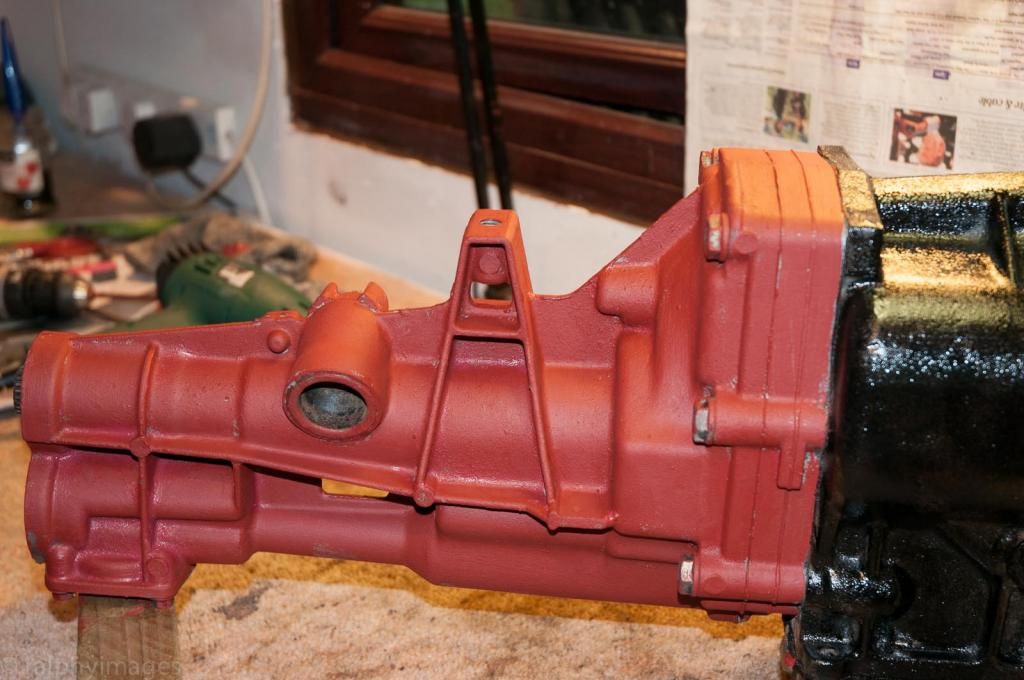
R
ralphy - 2/1/17 at 09:01 PM
Chassis work.
All panels removed and some basic preparation to remove the panel bonding and surface rust:
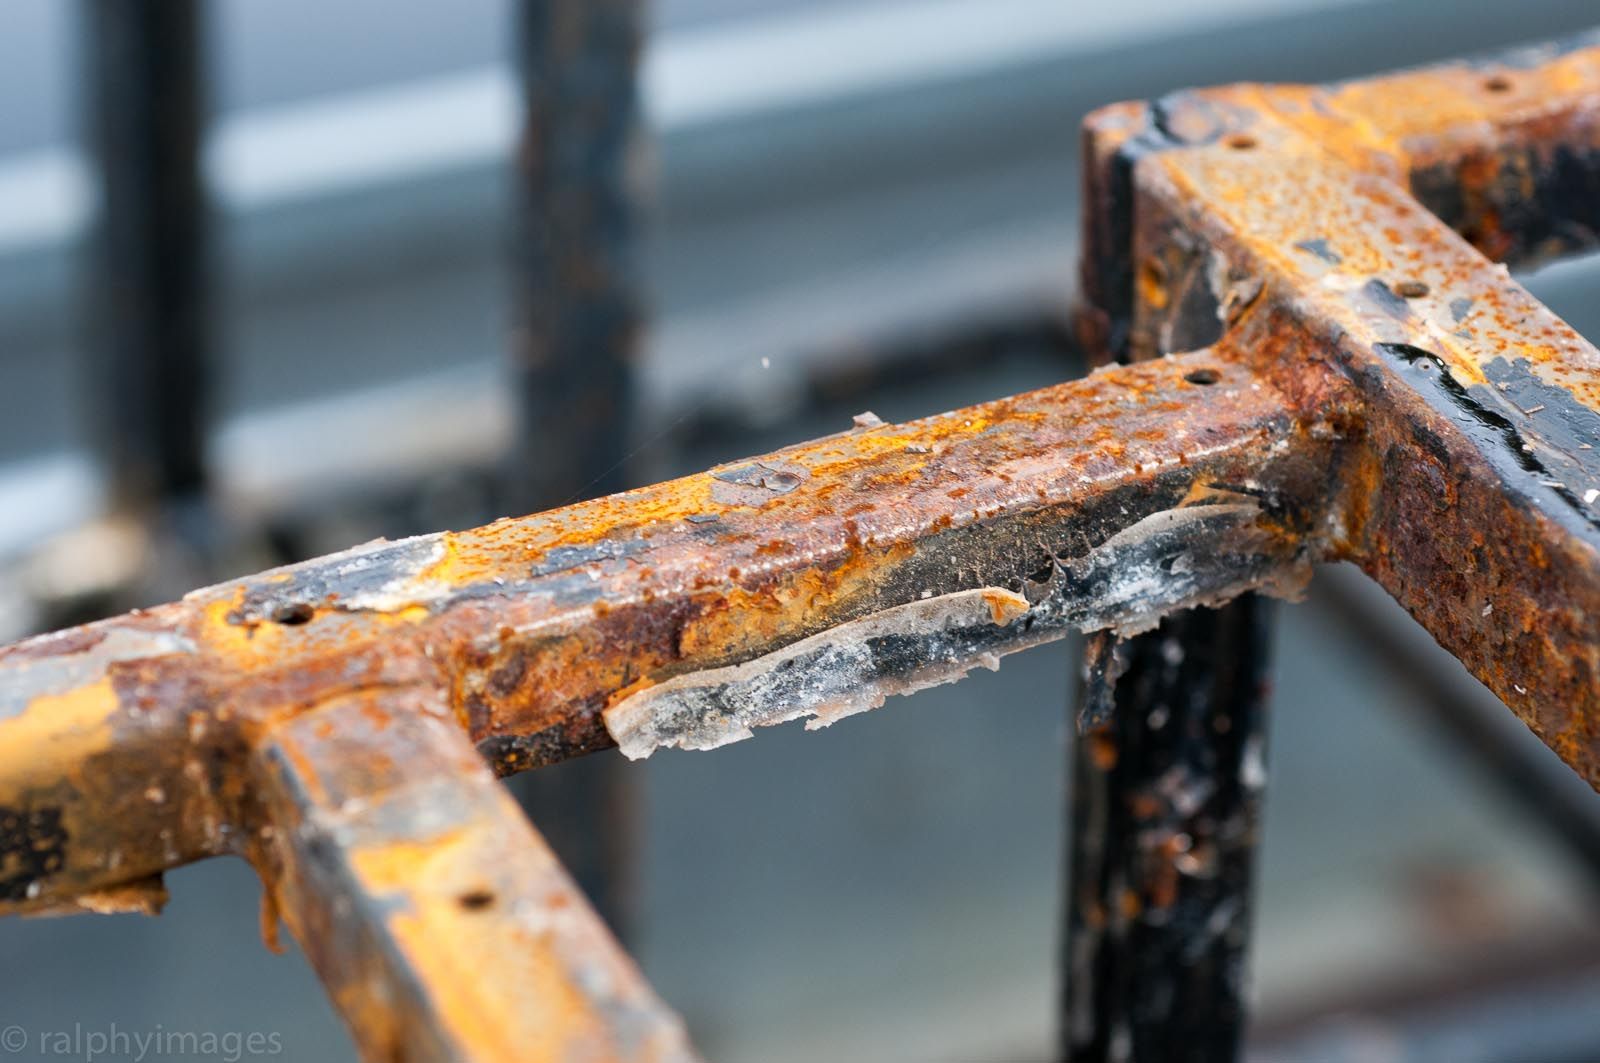
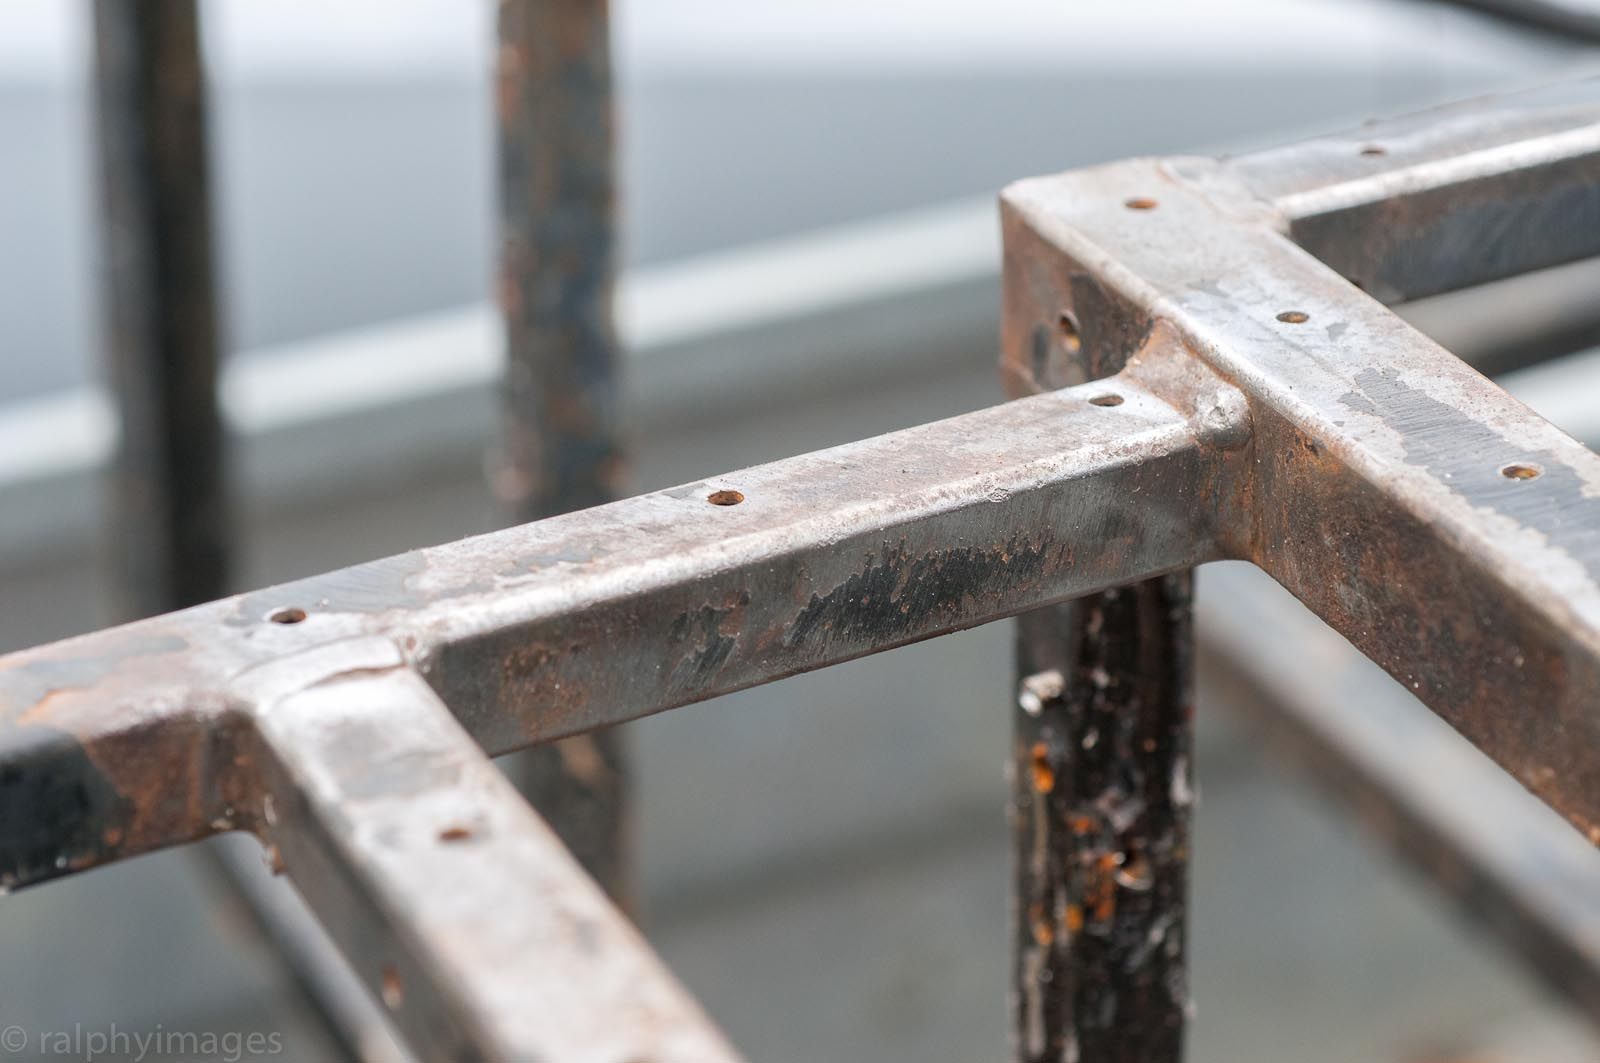
Then off it went to be blasted clean:
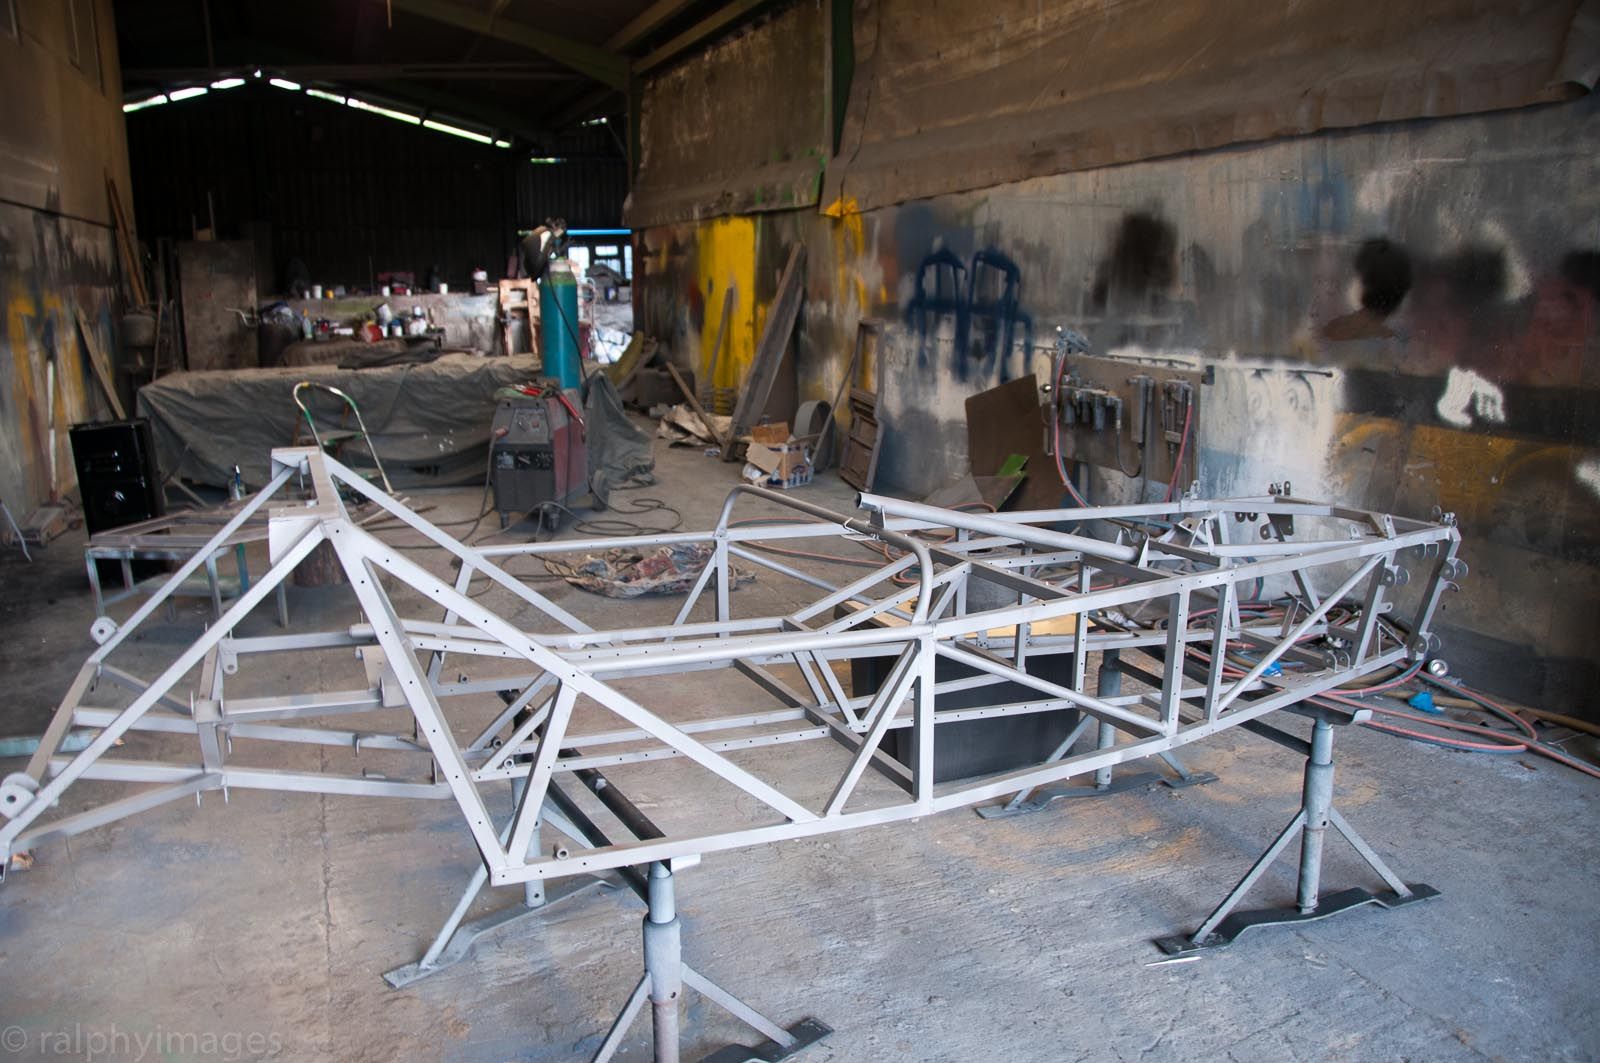
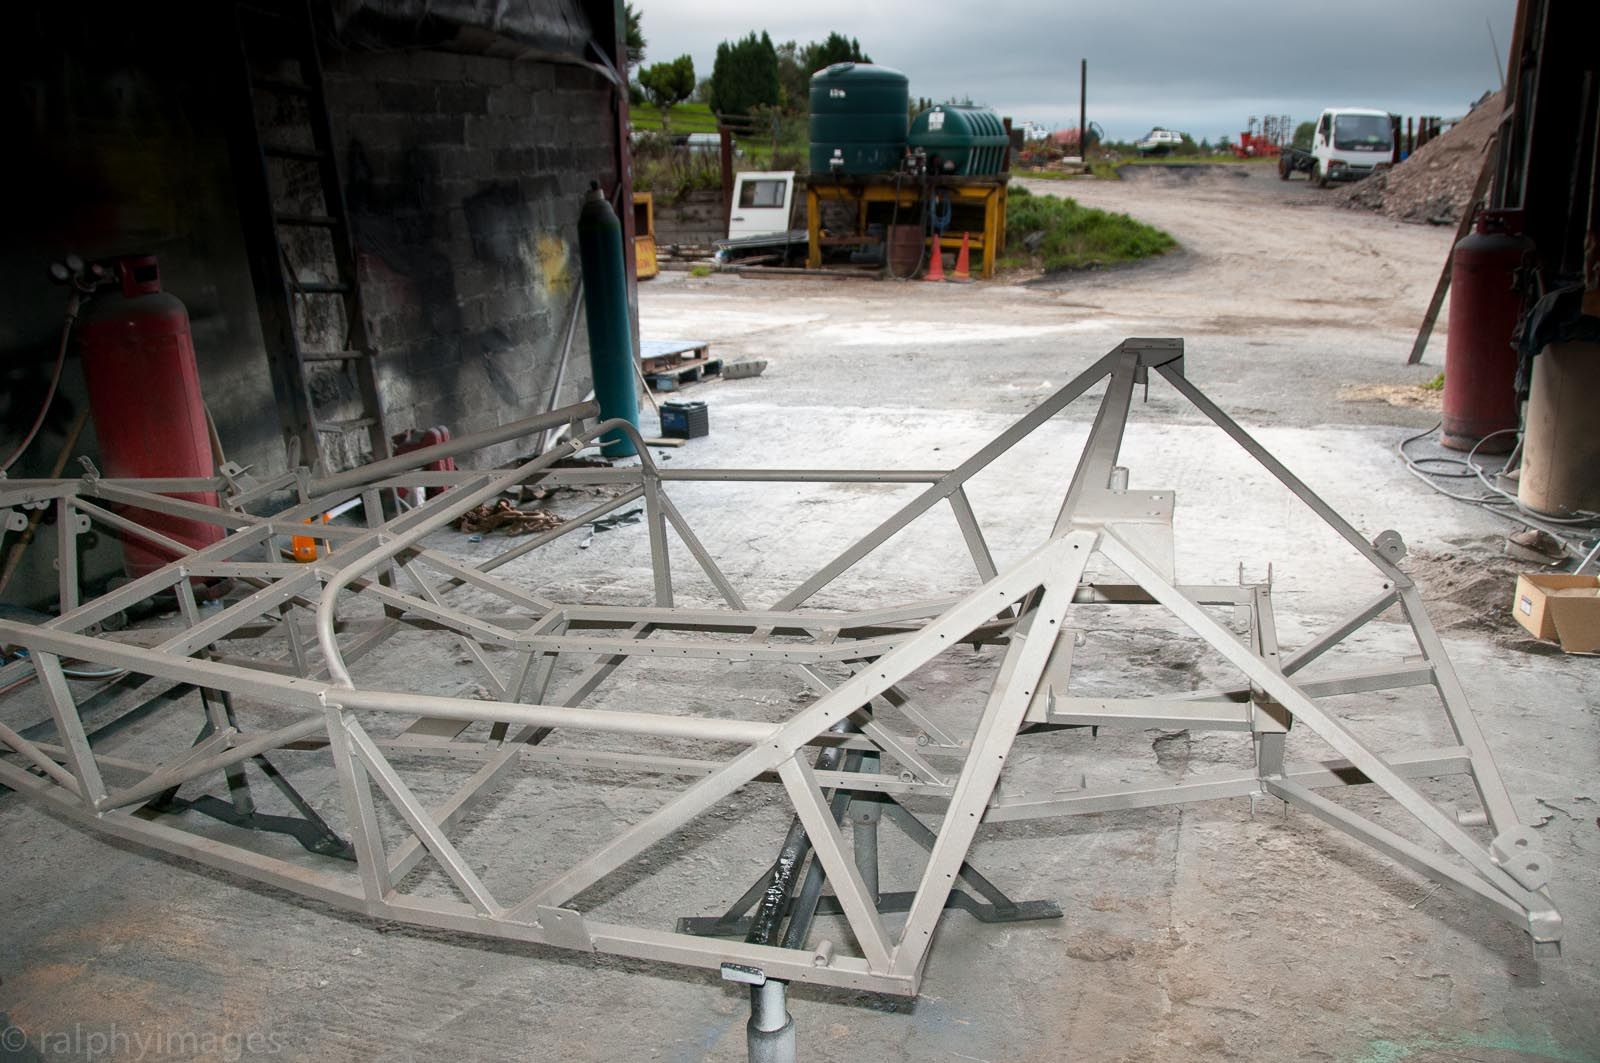
Along with various other components:
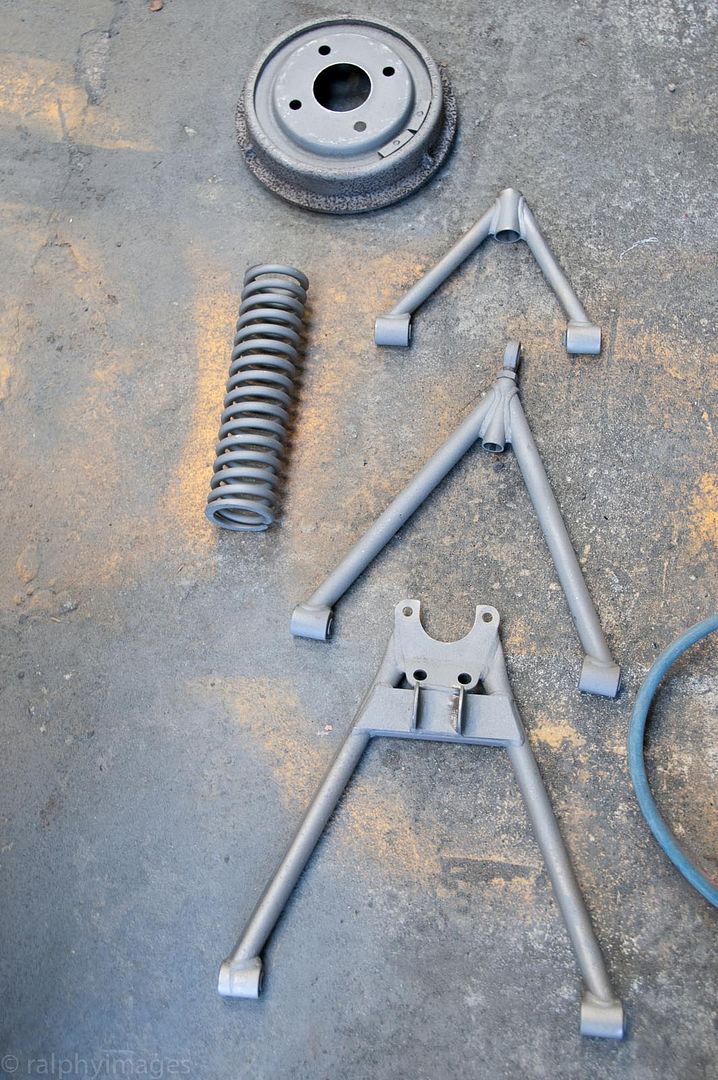
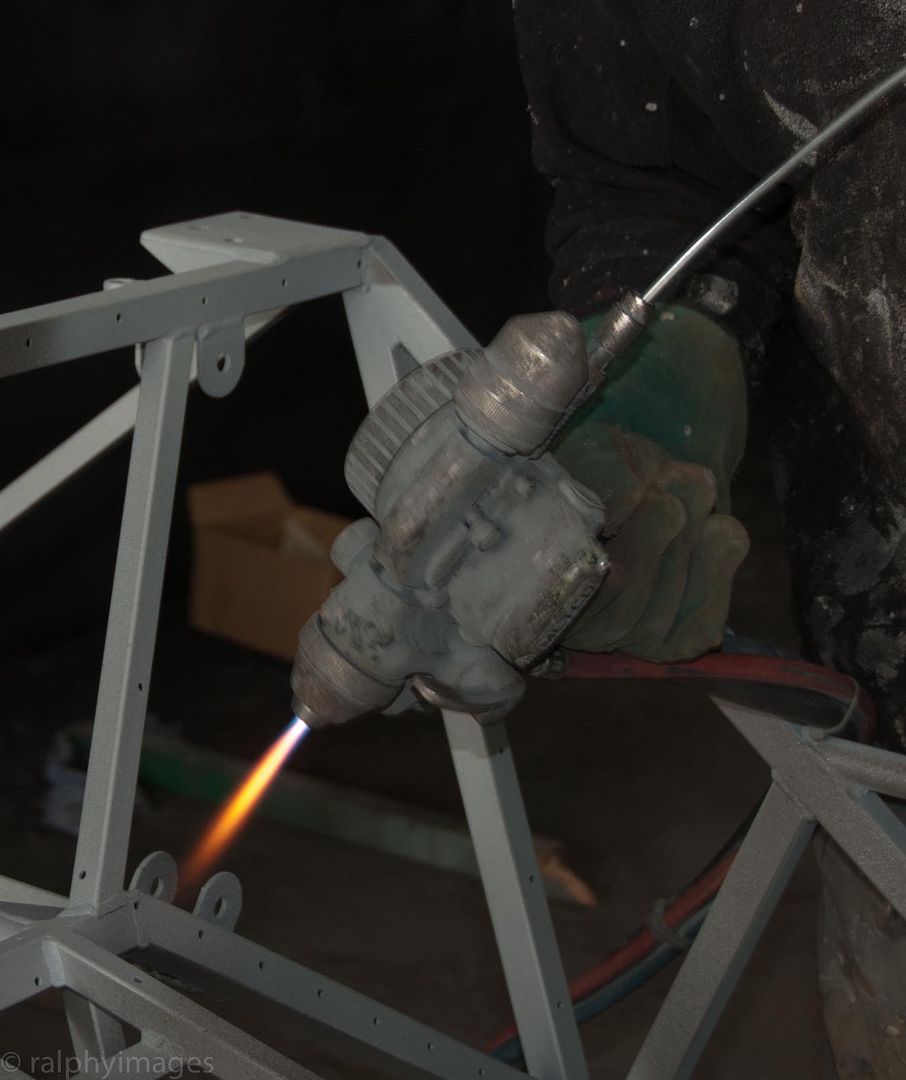
Then it was time for the coating, hot-sprayed zinc:
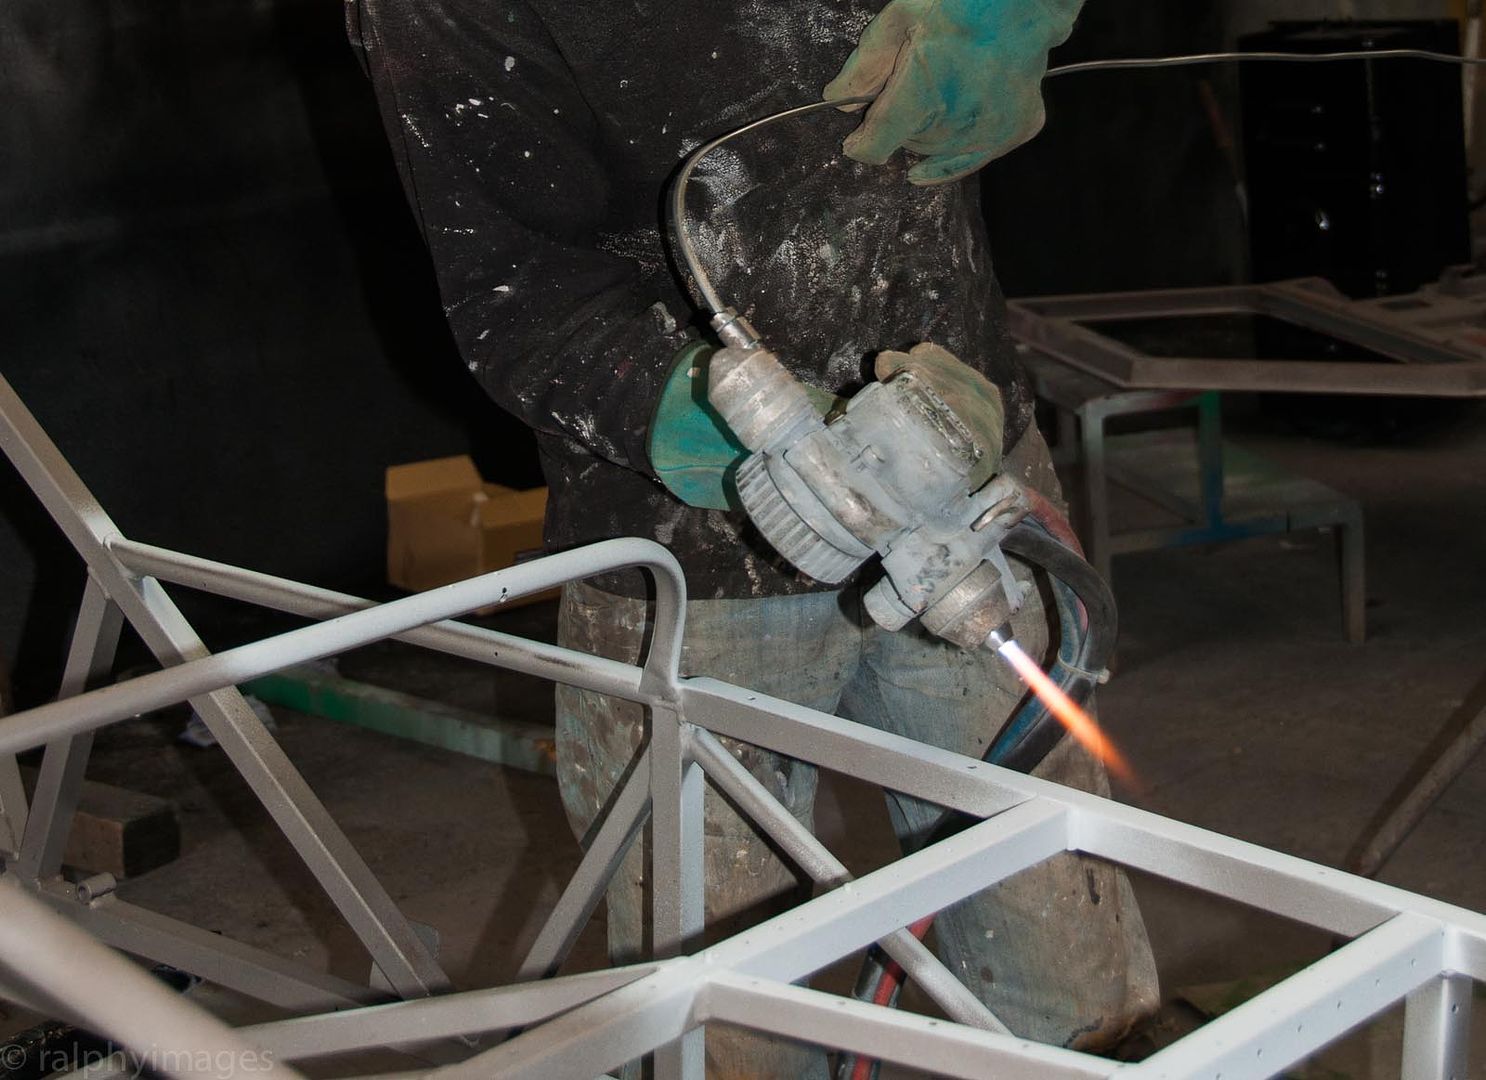
Zinc wire is fed into the torch and sprayed out:
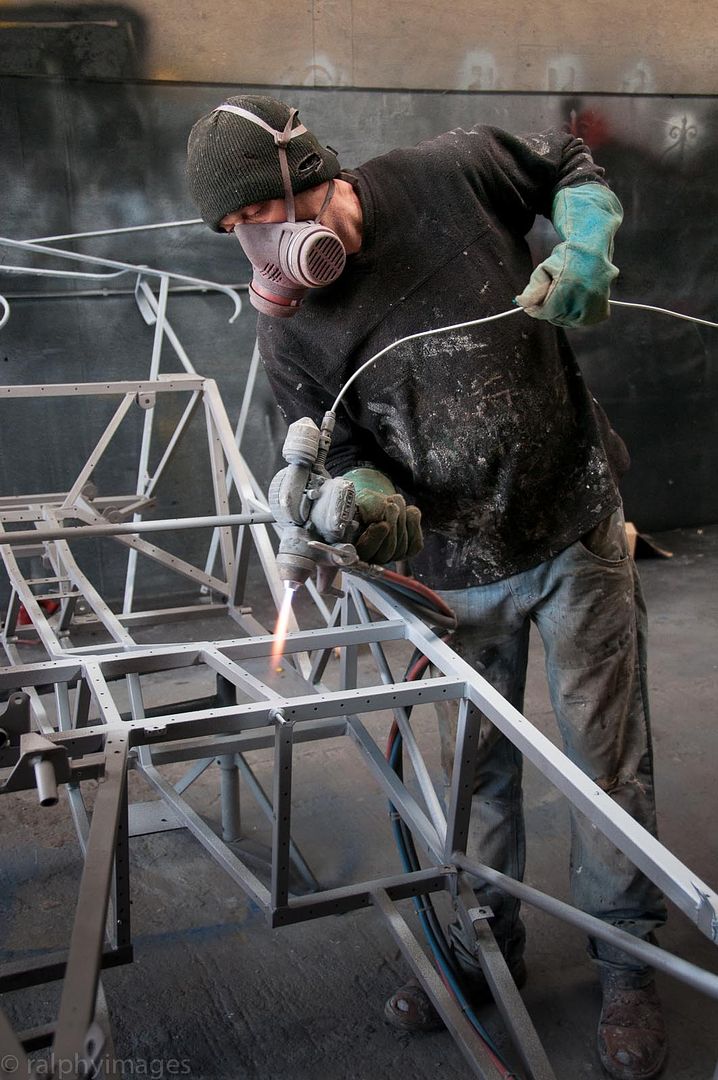
This method allows coats to be built up and avoids the distortion risk of heat dipping:
Then off for painting:
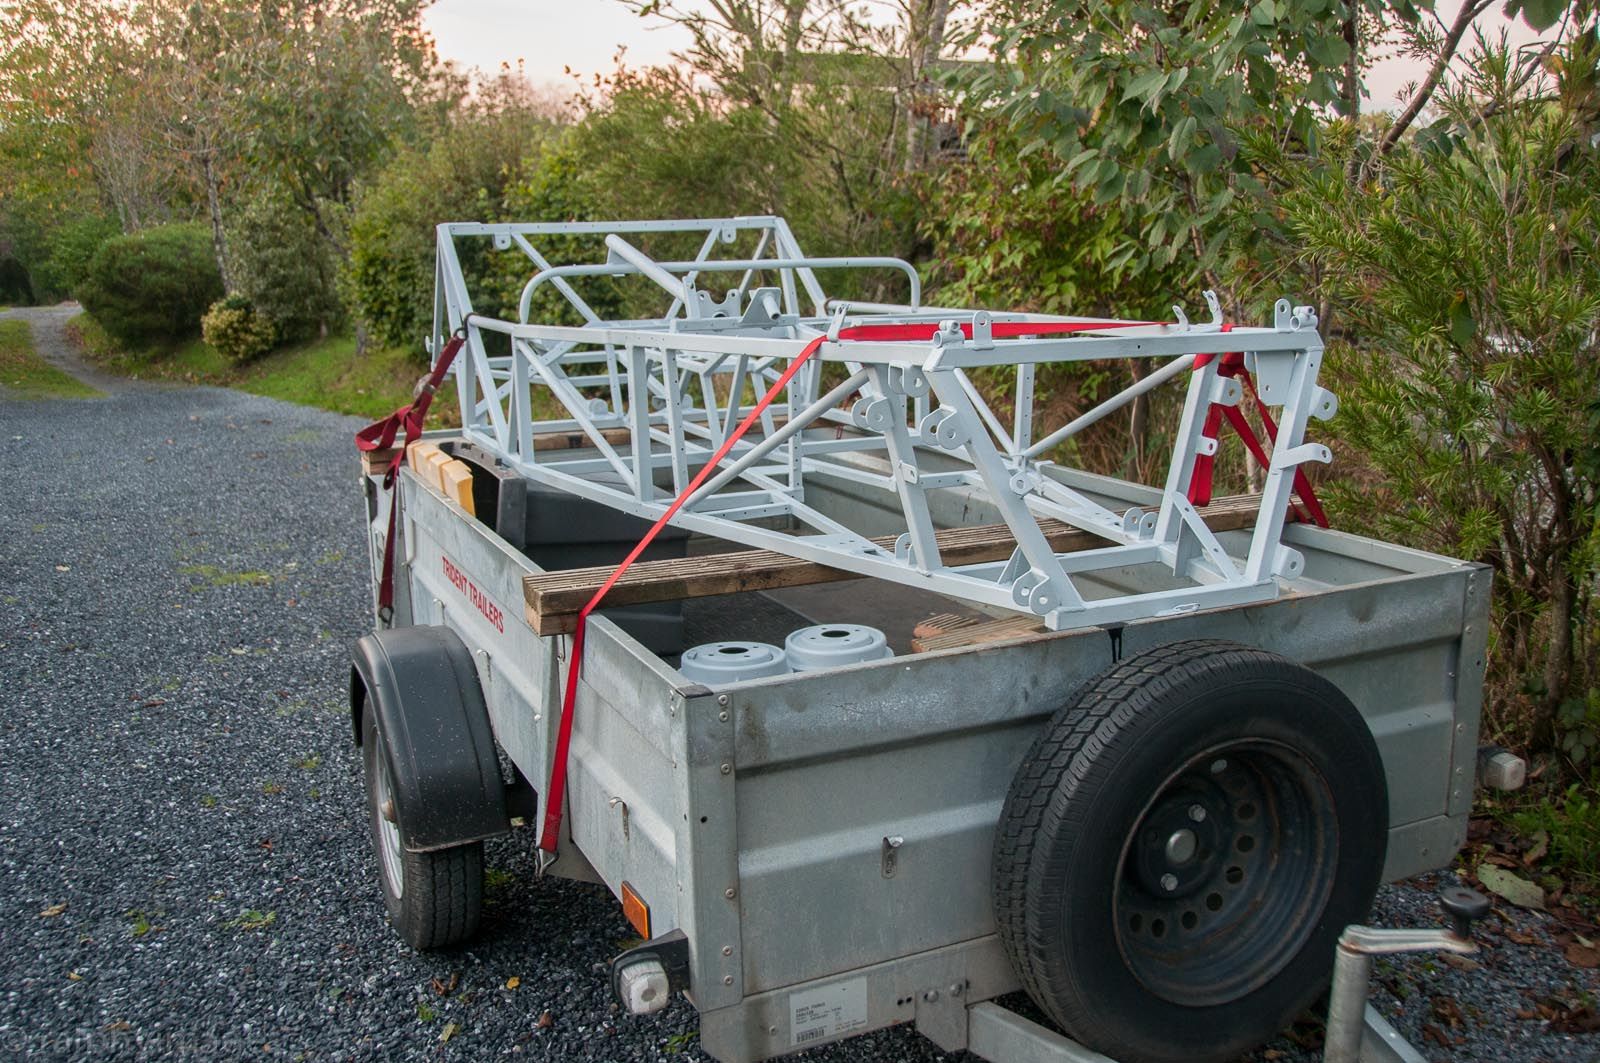
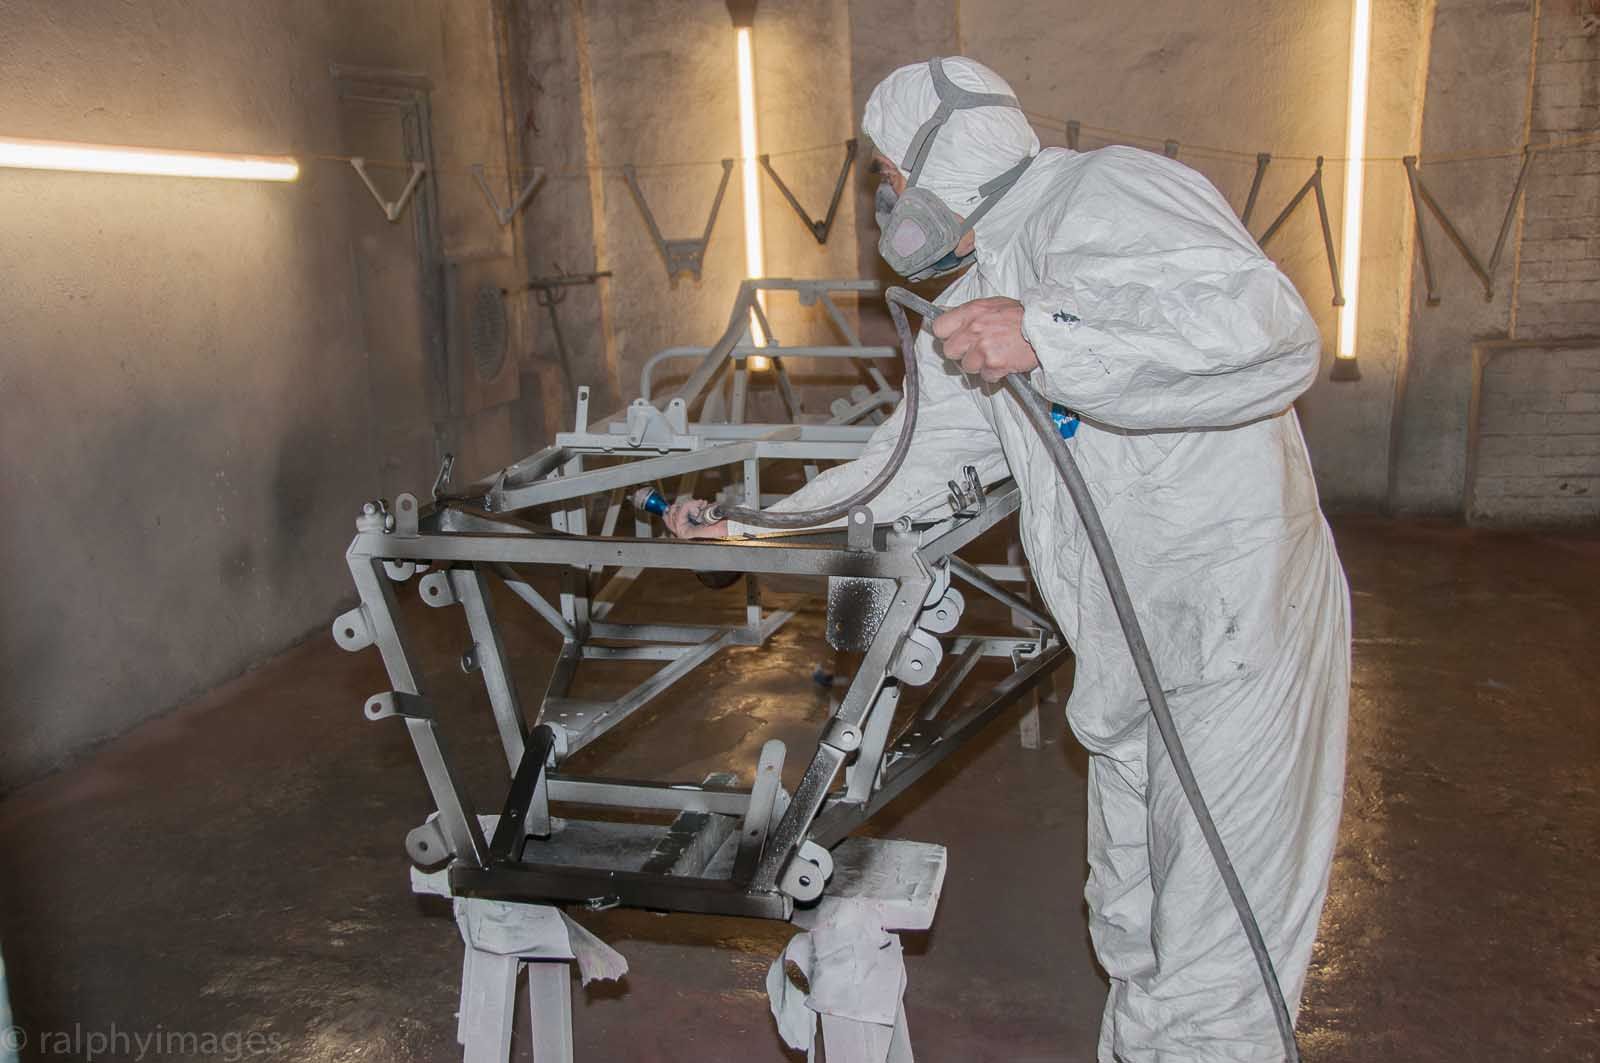
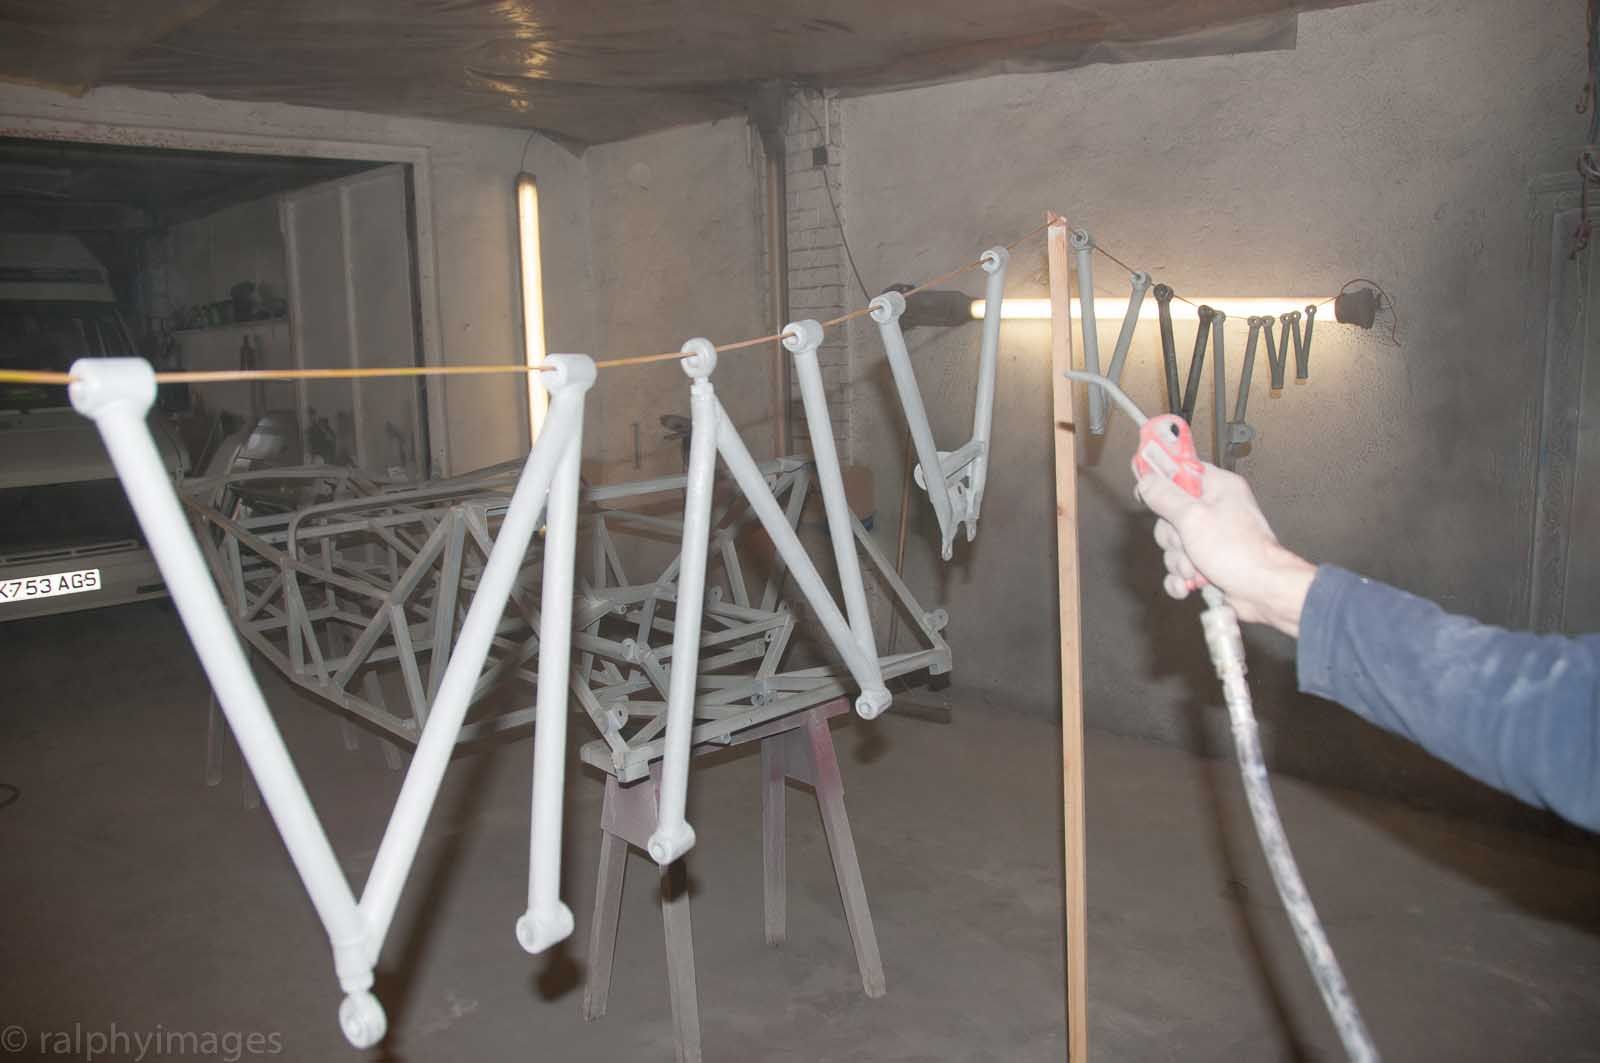
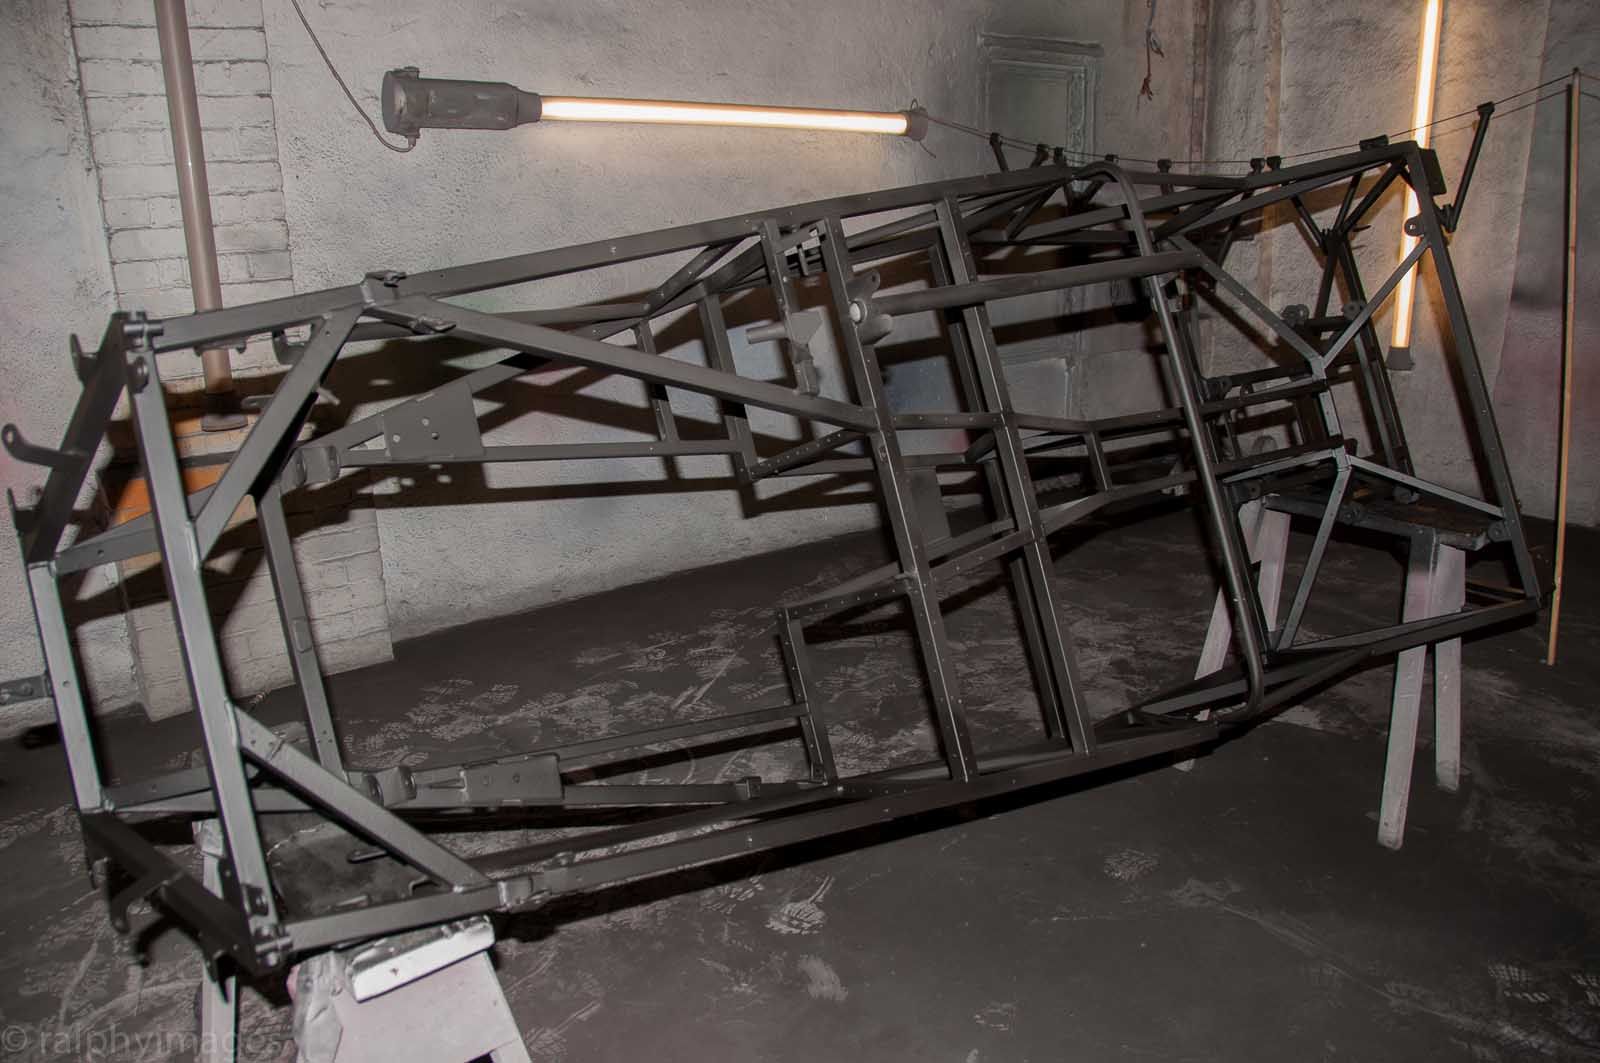
It was kept in the heated spray booth over a weekend and then back home:
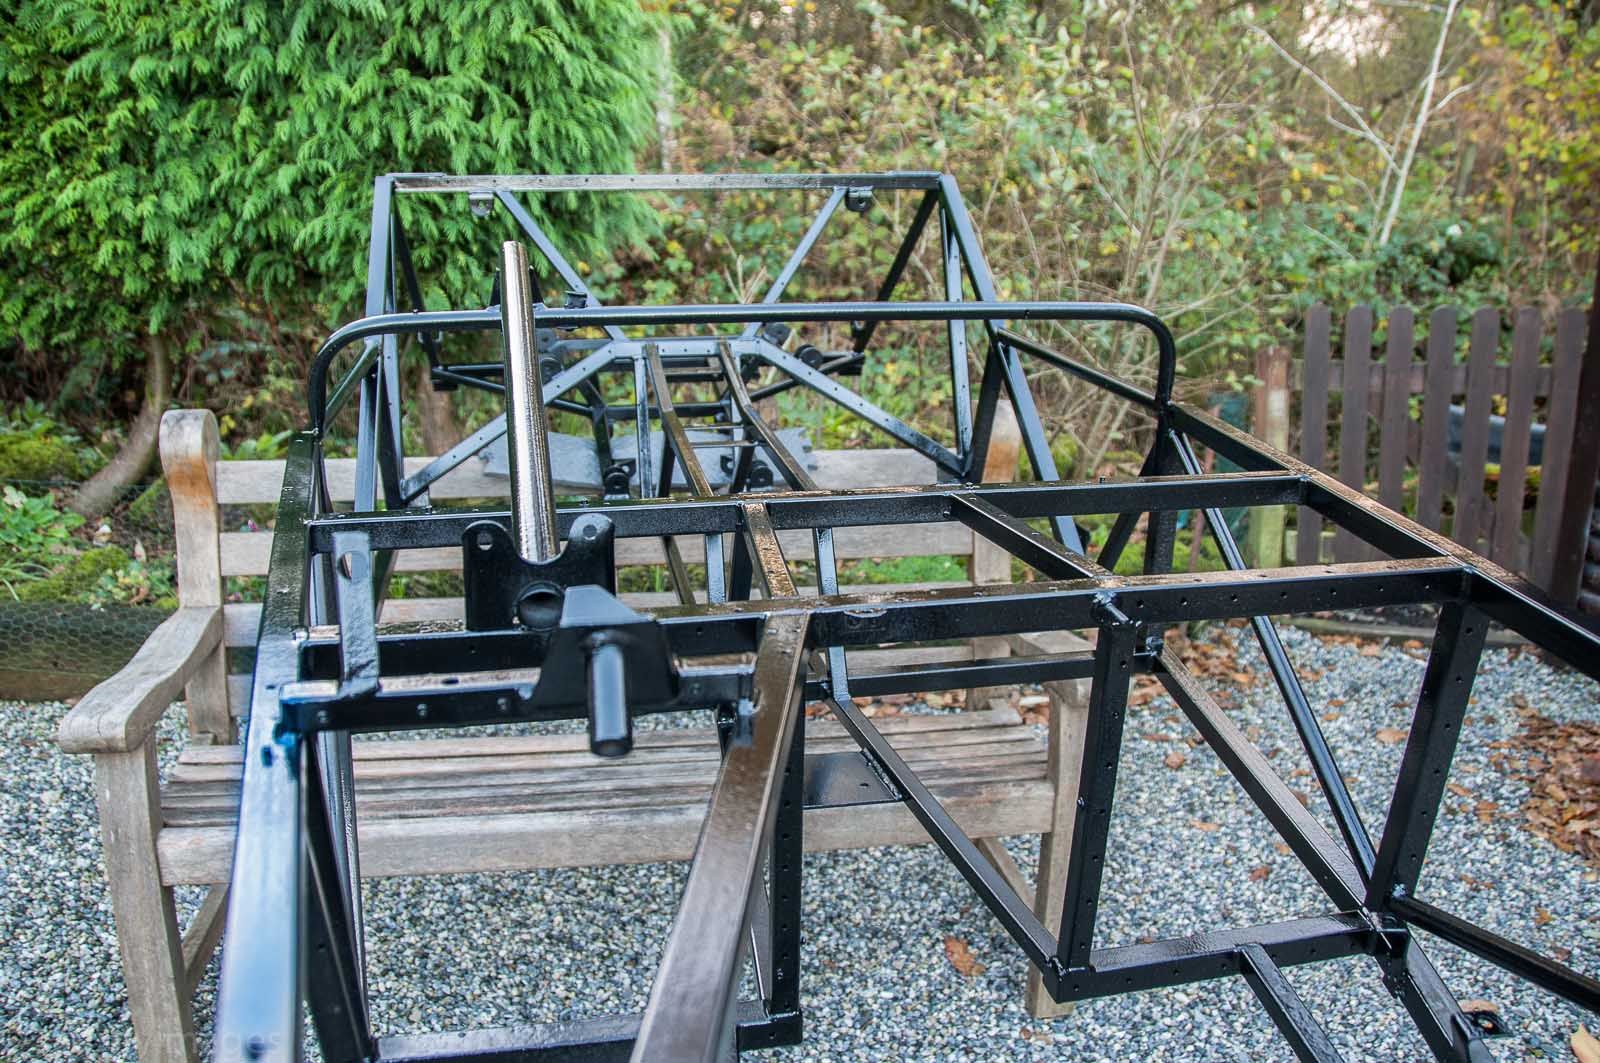
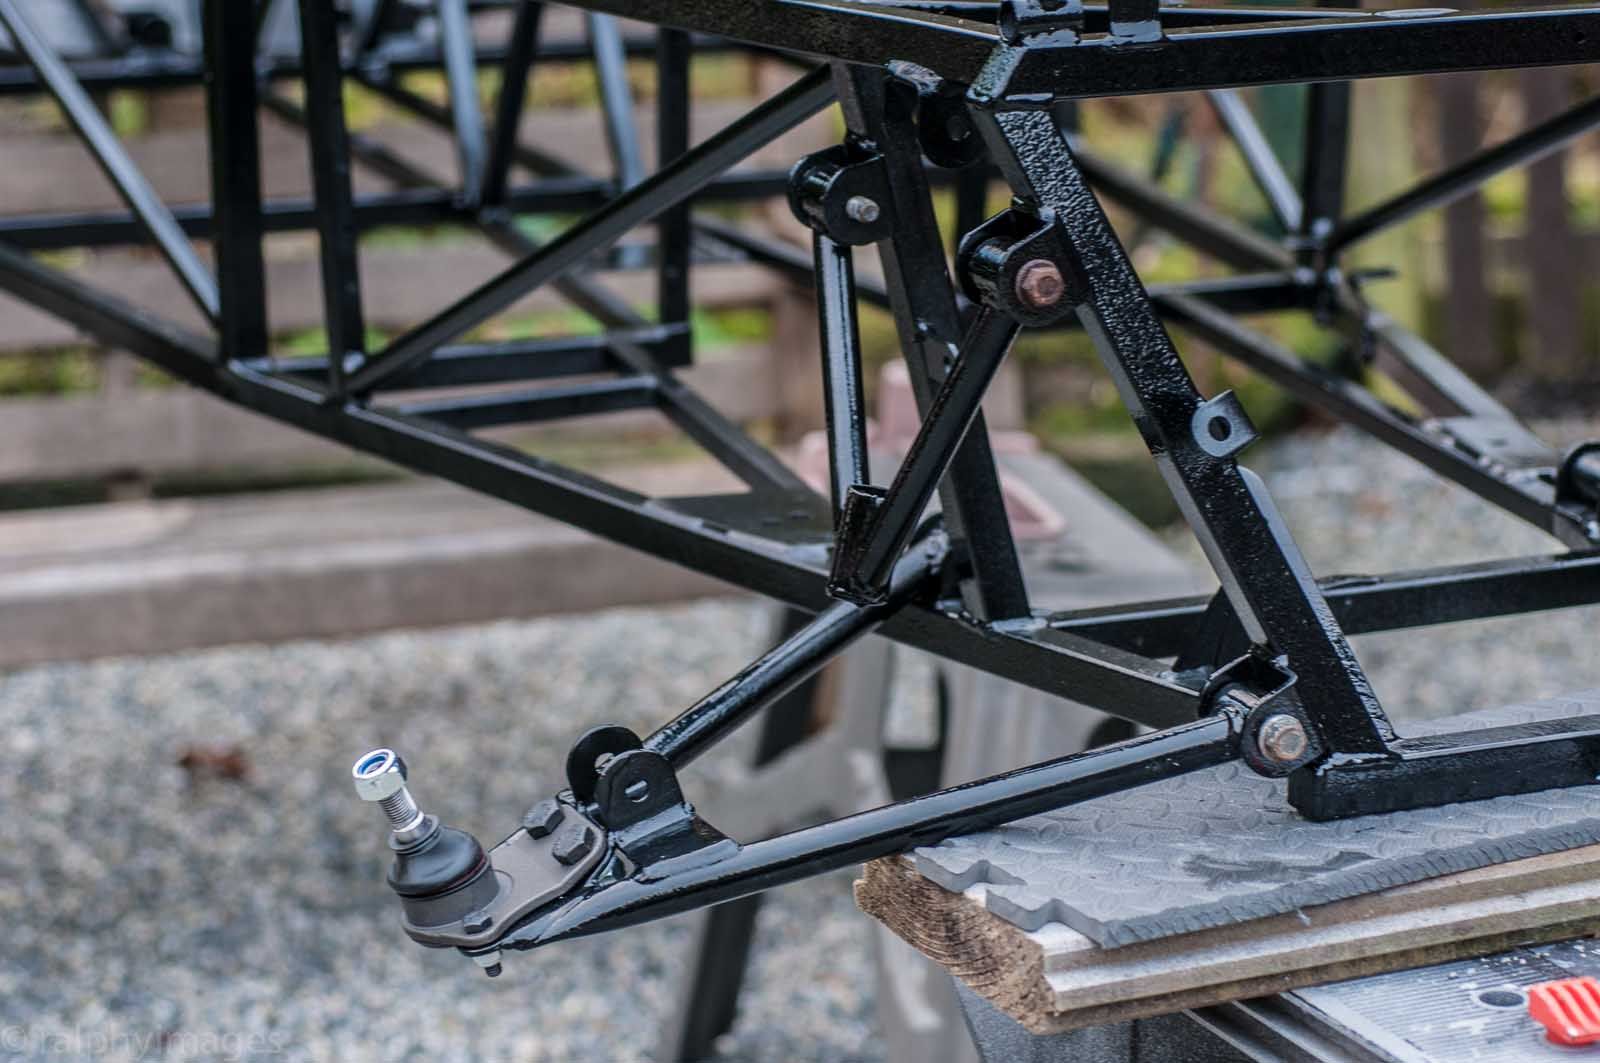
Some of the suspension was test-fitted (hence the old nuts & bolts) and all the internals was treated with Dynax S-50:
R
bi22le - 2/1/17 at 10:22 PM
This is really interesting.
Are you going to try and use the same holes to rivet new panels on? What have you done with rivnuts that have been used on the chassis? They create
huge holes when drilled out.
ralphy - 3/1/17 at 09:15 AM
quote:
Originally posted by bi22le
This is really interesting.
Are you going to try and use the same holes to rivet new panels on? What have you done with rivnuts that have been used on the chassis? They create
huge holes when drilled out.
I did indeed use the existing holes.
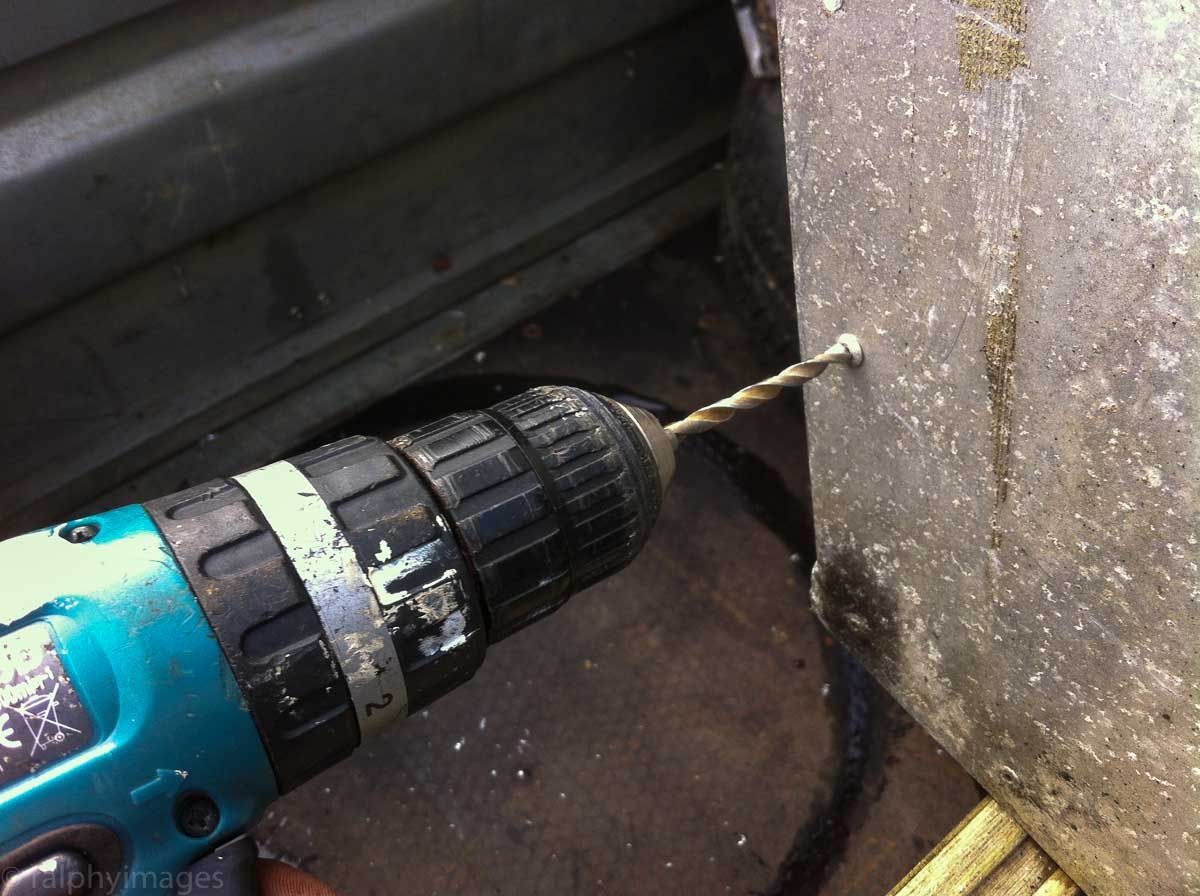
Once I'd cut my new panels to size I made up a tool to locate the existing holes, using two hacksaw blades. Into the end of one I drilled out
the existing hole and Araldited a cut-off drill bit into it and with the other blade I drilled out the correct size to act as the drill guide.
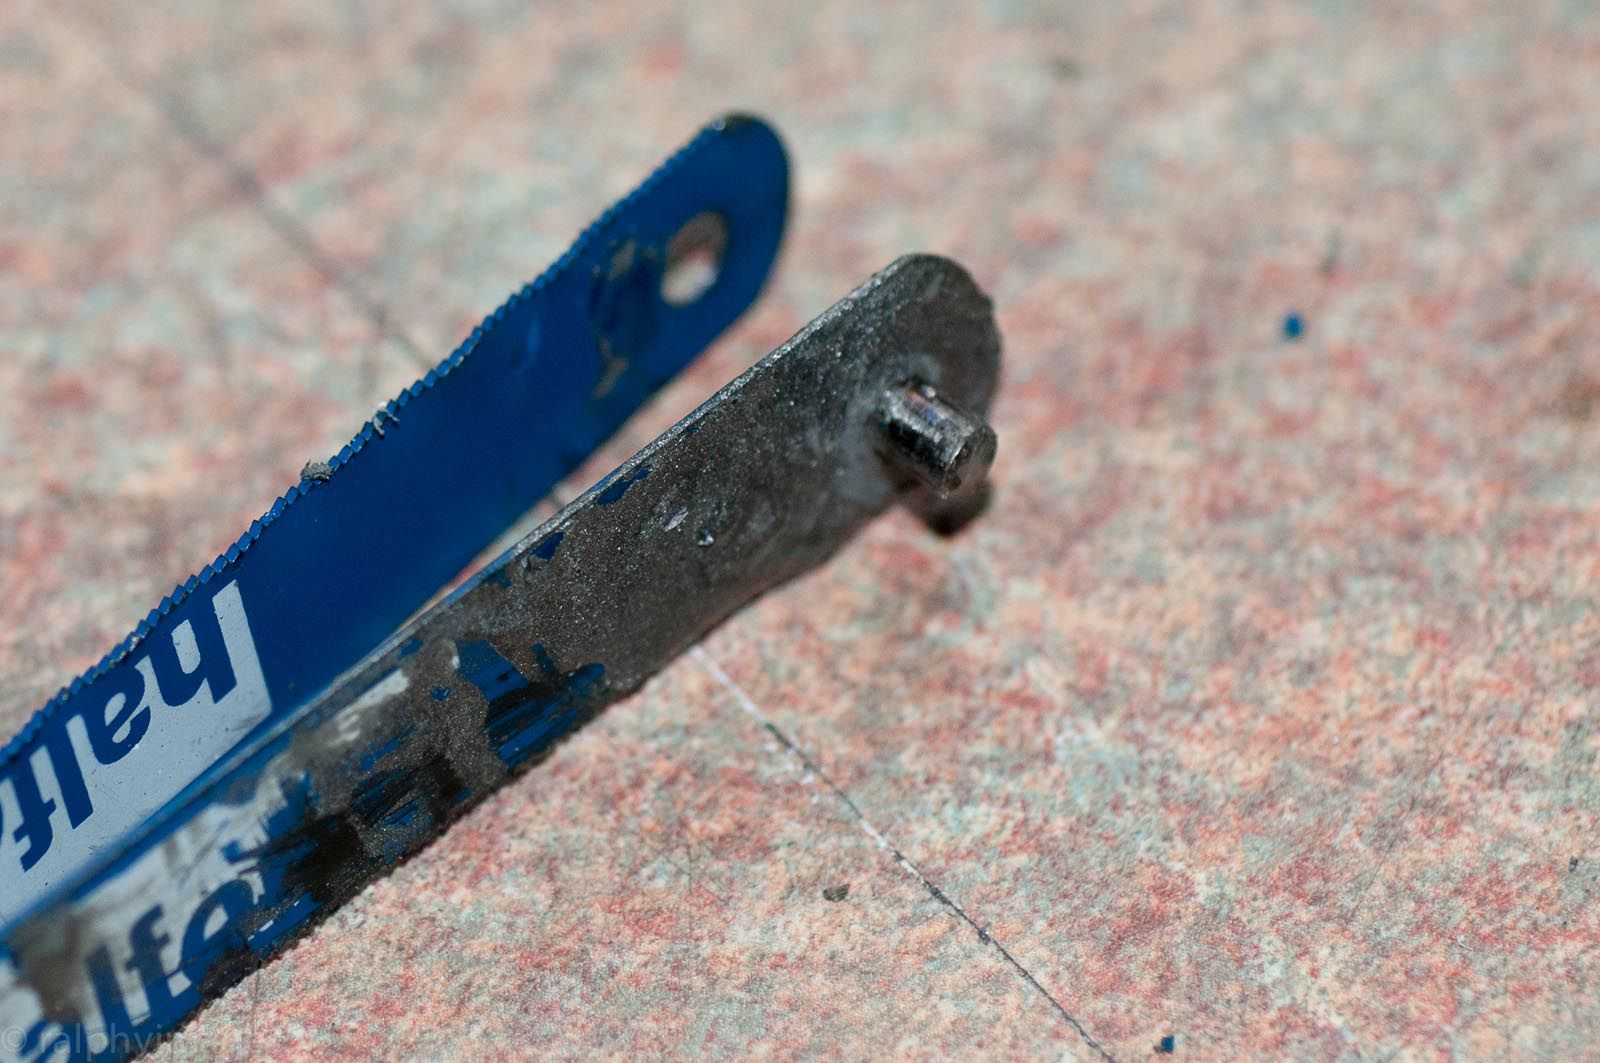
I joined both of the blades at the other end:
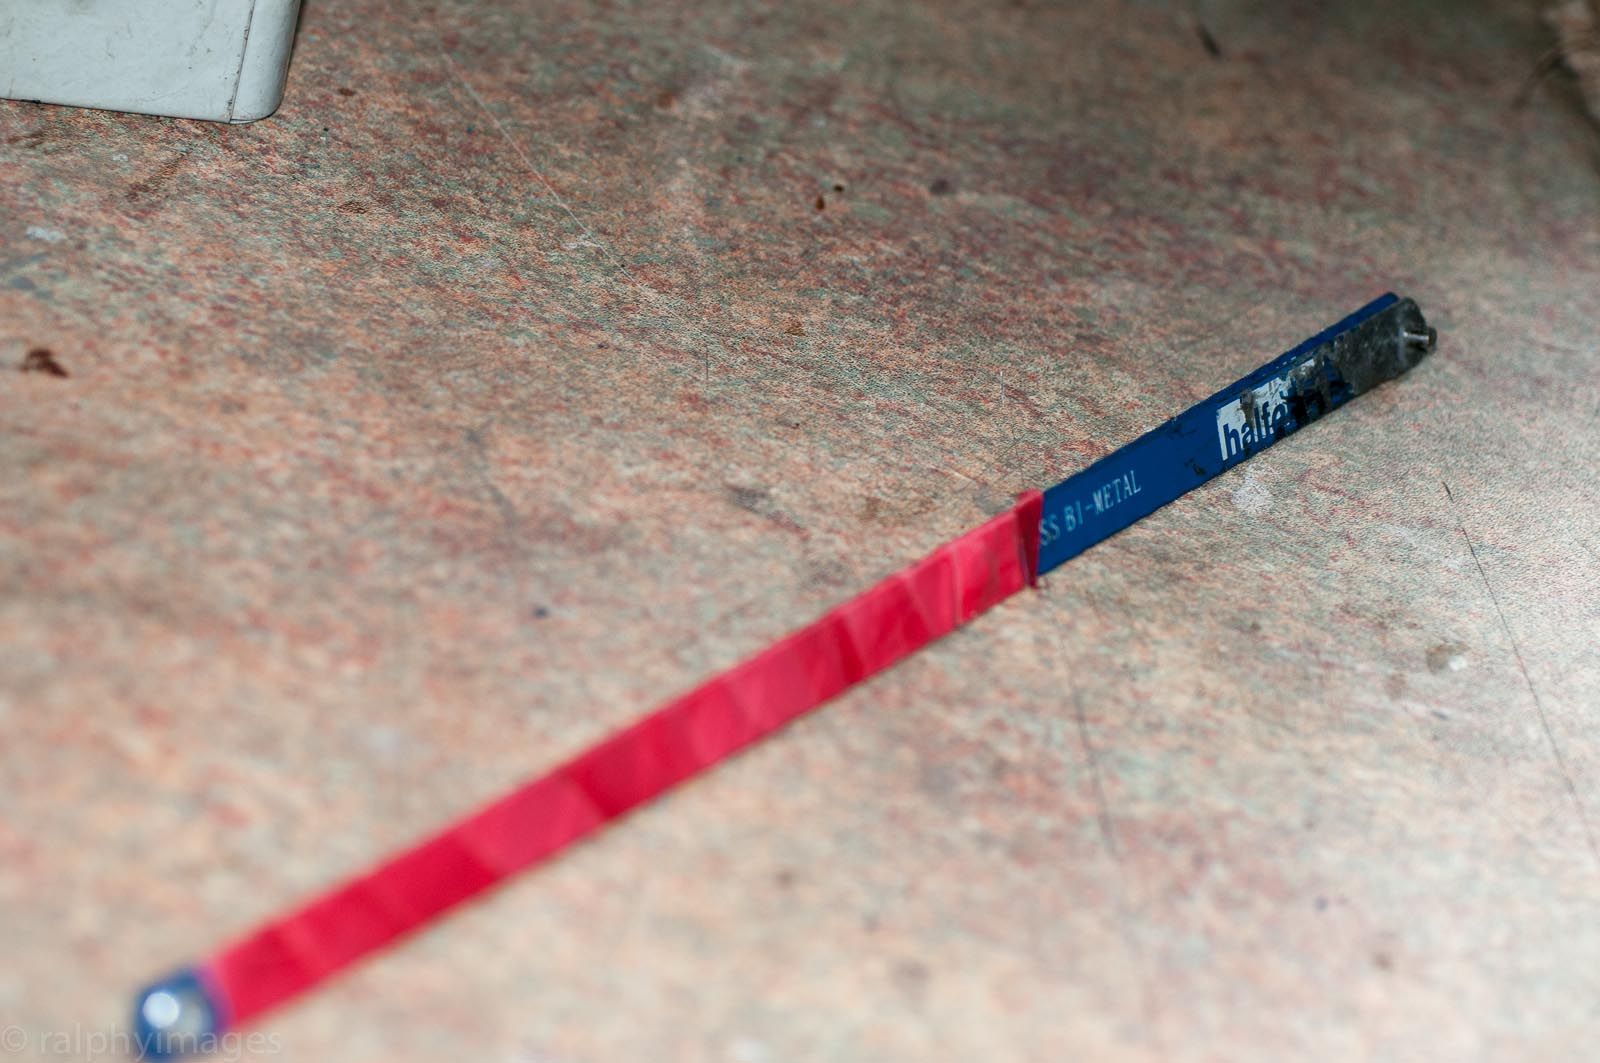
Then it was a case of putting the bit into the existing hole and drilling through the guide:
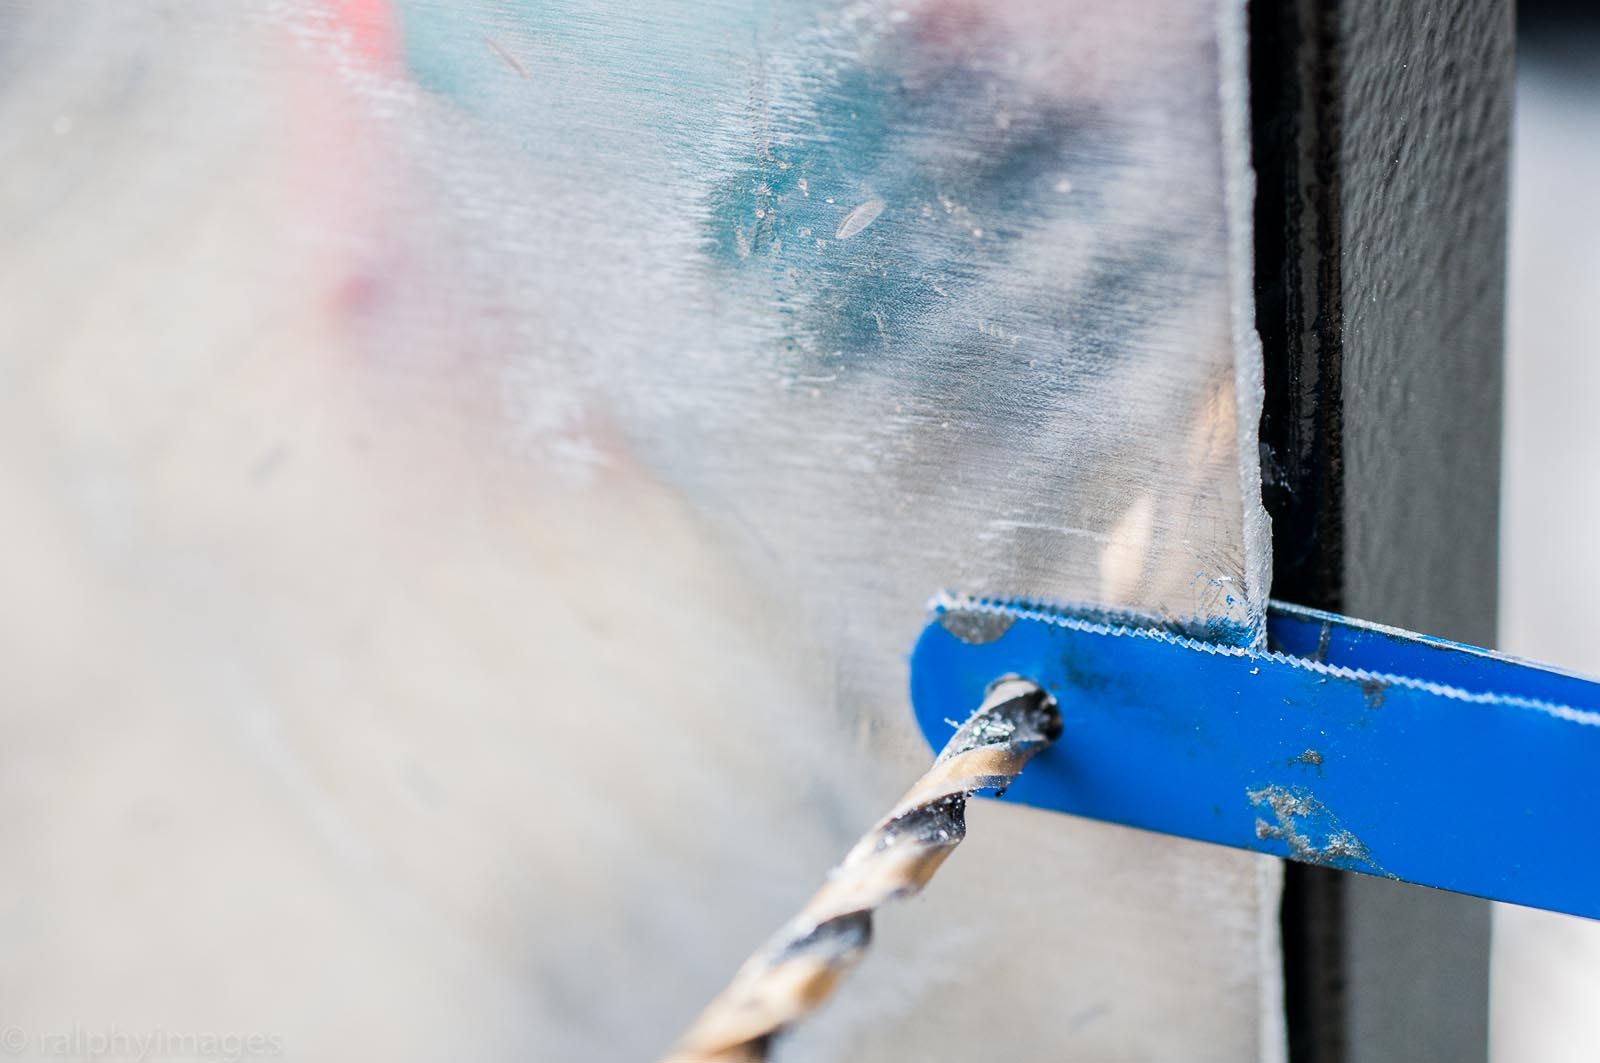
Once I'd got one done in the corner of each panel I'd fit a loose rivet in and then work my way around the rest of the panel. Once all the
holes were drilled I took off the panel and applied zinc paint to each hole to protect the bare metal of the cuts. Once that'd dried I applied a
generous bead of Sikaflex over the chassis, then replaced the panel and applied pressure along the edges to ensure a good seal. This forced the
Sikaflex both into the chassis and out through the panels:
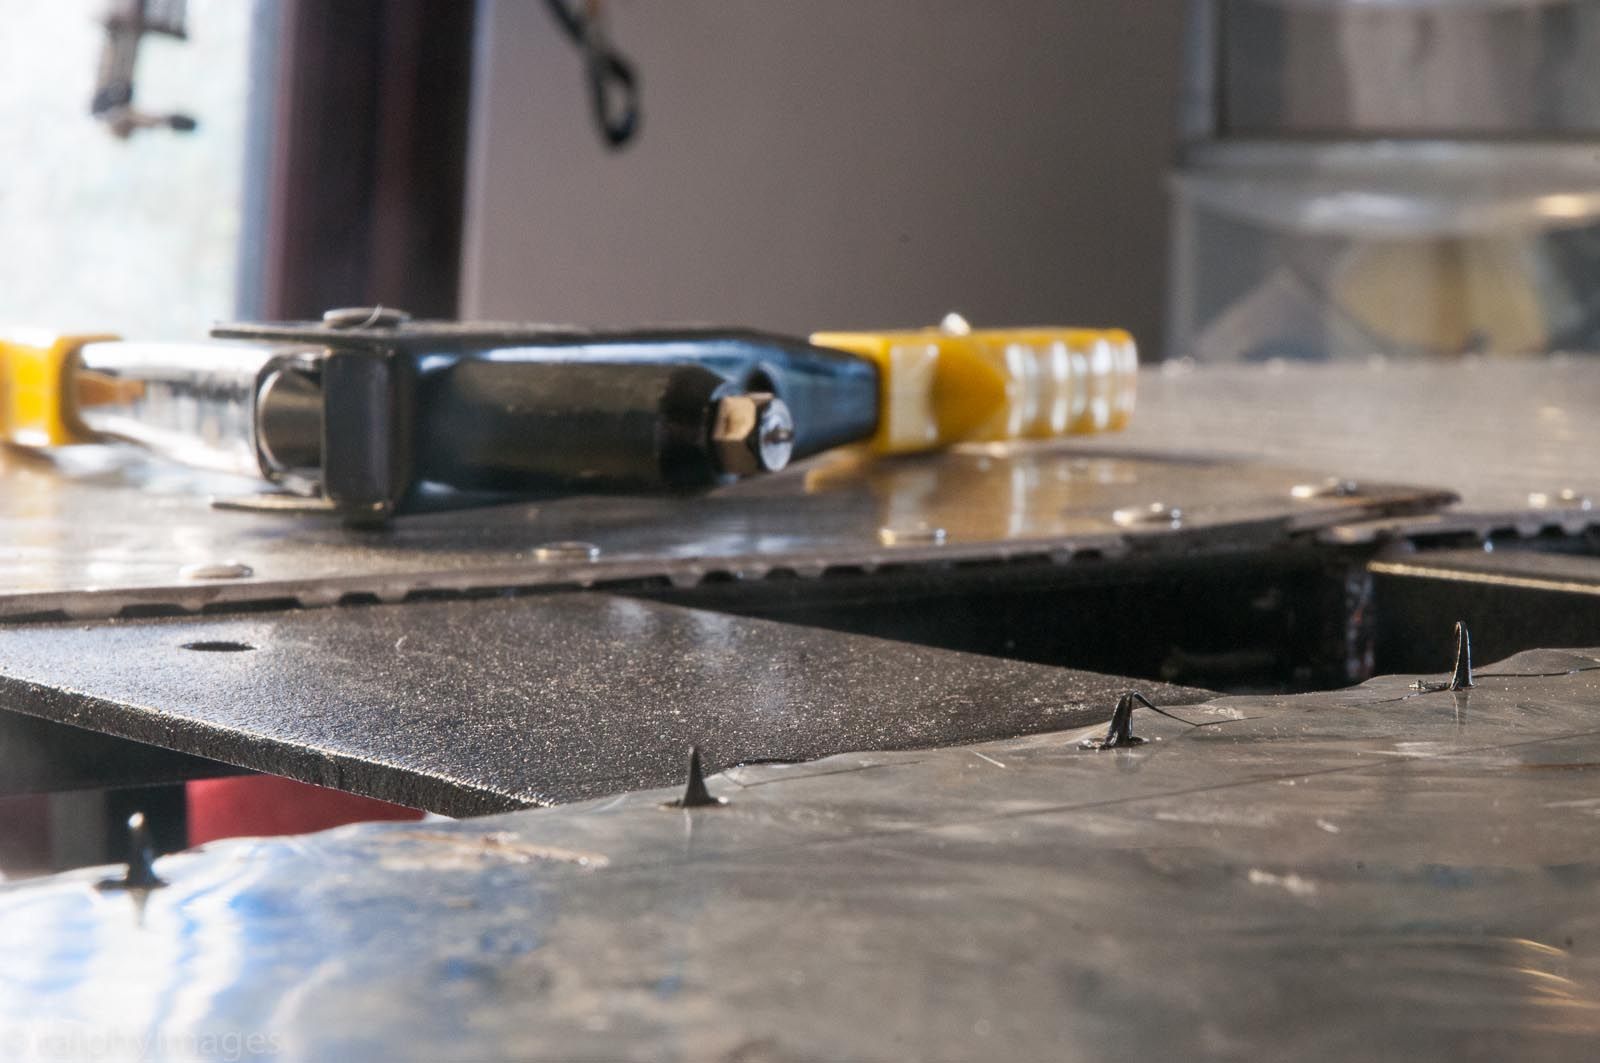
Then it was riveting up time:
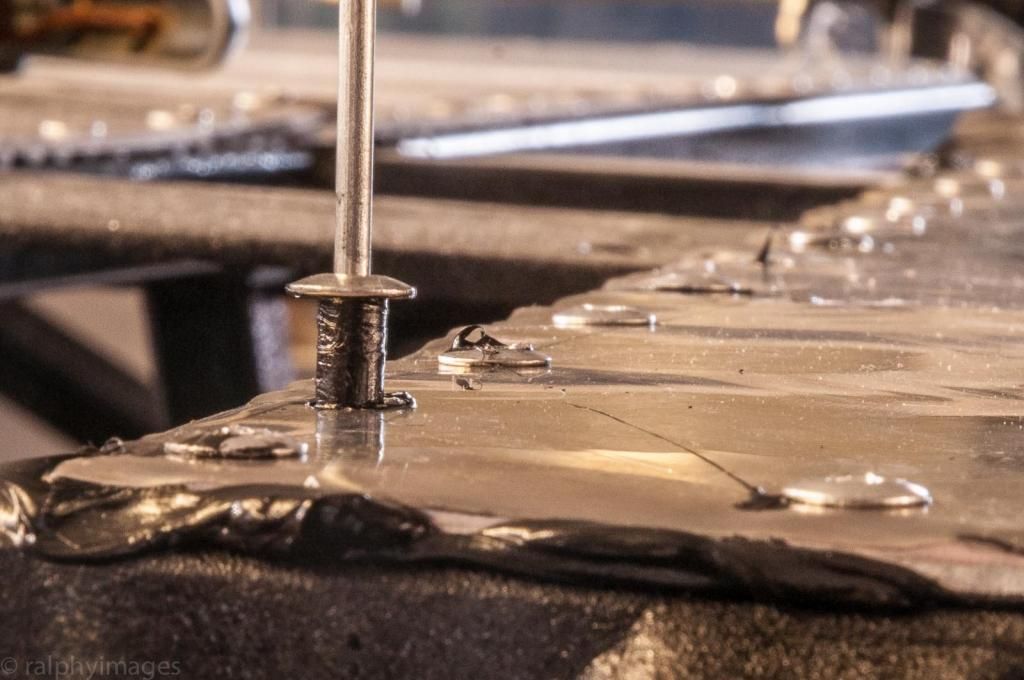
If there wasn't enough sealant extruded through the panel hole to my satisfaction I'd dip the rivet head into some and then fit:
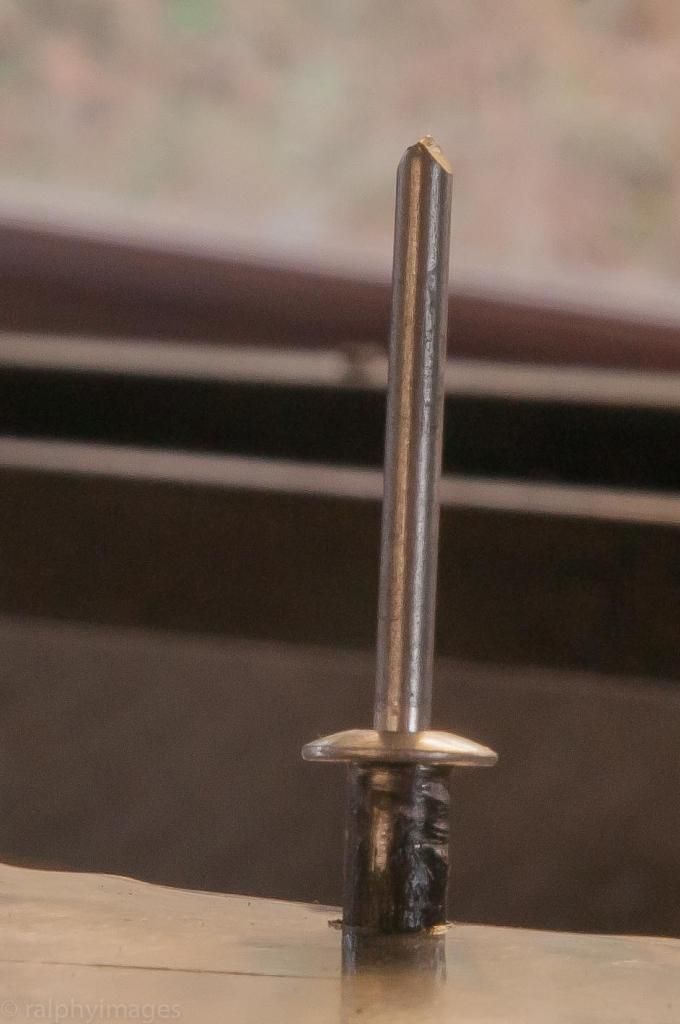
I kept the heat up in my shed overnight and then the next day I'd wipe off the excess Sikaflex.
And if only I'd known about airline riveting tools... doing them all by hand was bloody hard: but boy, have I got a firm handshake now!!!
R
ReMan - 3/1/17 at 10:40 AM
hey that's a cracking little tool!
Good thinking
And great pics/progress
jps - 3/1/17 at 12:33 PM
Really interesting to see your 'action' pics of Sikaflexing the floor on. I'm hopefully going to fit a floor and some internal panels
in the next few weeks (although the temperatures are perhaps a bit low at the moment...!)
How thick would you say the Sikaflex was between the chassis rails and the panels?
And how flush were the panels against the chassis rails?
The reason I am asking is that i'm finding gaps between rail and panel due to some slight variations in the surface of the rails - nothing more
than 1mm - but enough to see a line of light through in a few places... Not sure whether it matters or not given the thickness of the PU though!
ReMan - 3/1/17 at 01:24 PM
Seeing the OP is using treadplate, which is going to mean 2-3 mm? thick in some places and 0 in others, where the point hists the chassis.
Others, self included us plain flat sheet for the floor and then bond tread plate inside the footwalls separately.
Sikflex iis pretty resilient stuff though, so a good layer to fill your gaps will not hurt!
jps - 3/1/17 at 02:06 PM
quote:
Originally posted by ReMan
Seeing the OP is using treadplate,
Doh!!! Yeah - really good point - I had not thought of that! I guess that would actually make a fairly meaningful difference to the grip length of the
rivets compared to a plain sheet too (depending whether a treadplate thickness is considered to the peak or the trough - so to speak...)
OK - so general message is, a bit of a gap (1-2mm) between a rail and a panel is not going to matter for the Sikaflex.
Cheers!
Matt21 - 3/1/17 at 08:49 PM
what an absolutely ingenious way to locate holes behind sheet metal! :O


 as a matter of
courtesy having recently joined, but it's locked.


