CosKev3
|
| posted on 13/6/22 at 09:08 AM |

|
|
Yeah you've chopped the mount way too far back, even if you could weld that AN fitting on you would never be able to screw the fitting onto it!
|
|
|
|
|
Dockie
|
| posted on 21/6/22 at 11:07 PM |
|
|
quote:
Originally posted by CosKev3
Yeah you've chopped the mount way too far back, even if you could weld that AN fitting on you would never be able to screw the fitting onto it!
The way i did it, you would JUST get the connector on. I've ordered a second mount for the worse case scenario regardless, but i found these:

I've not got them welded yet, instead I'm going to try those threaded bushes. Ill try tapping them both out to 1/2 inch and see what
happens. If they work, great! If not, I've got a second mount to use and it didn't cost too much. (the reason they are so short to begin
with, is to clear the exhaust, but i have an idea inspired by David's build)
Also decided (going back on my previous change of mind, again) to go with the RX8 sub-frame after all, i noticed some more differences in the shape of
it which will help massively, so after a day trip to Leicester, i picked up this:
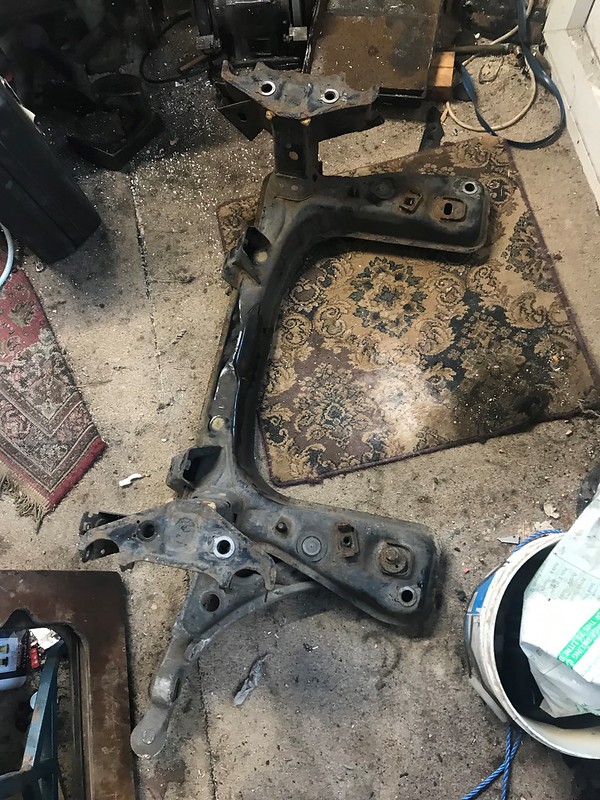
Shame my car is so small, as the guy was going to give me it as it was taken off the car! would have been near complete (wishbones, steering rack,
hubs and brakes) but no way would it have fit. They aren't the best pics, but you can see the big differences in shape compared to the stock one
here:

And finally, I made a start on sorting the head. It's skimmed, and i had a couple hours removing old shims and setting the gaps on the cams (the
2 heads i bought had all the buckets in with the old shims, which we managed to reuse them and haven't needed to buy any):
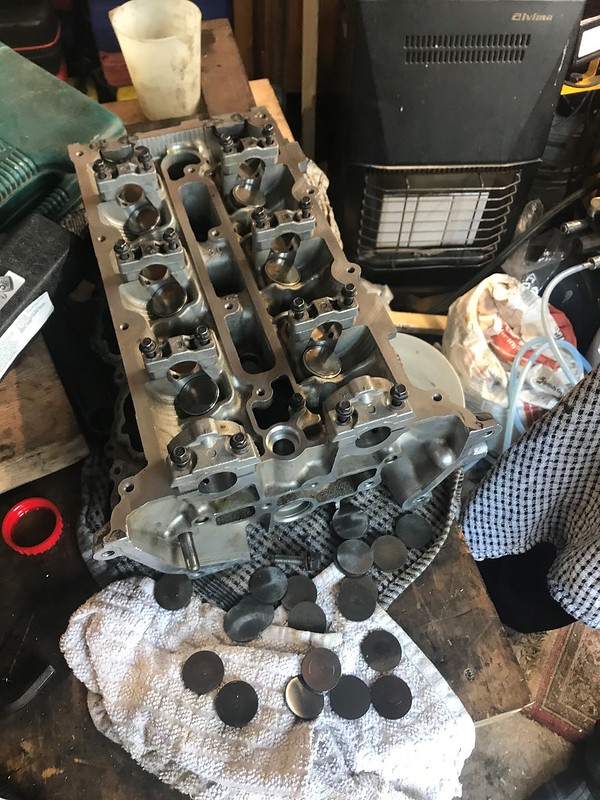

Going to recheck the gaps once the head is bolted in, but on the bench, everything is good 
|
|
|
Dockie
|
| posted on 13/7/22 at 12:10 AM |
|
|
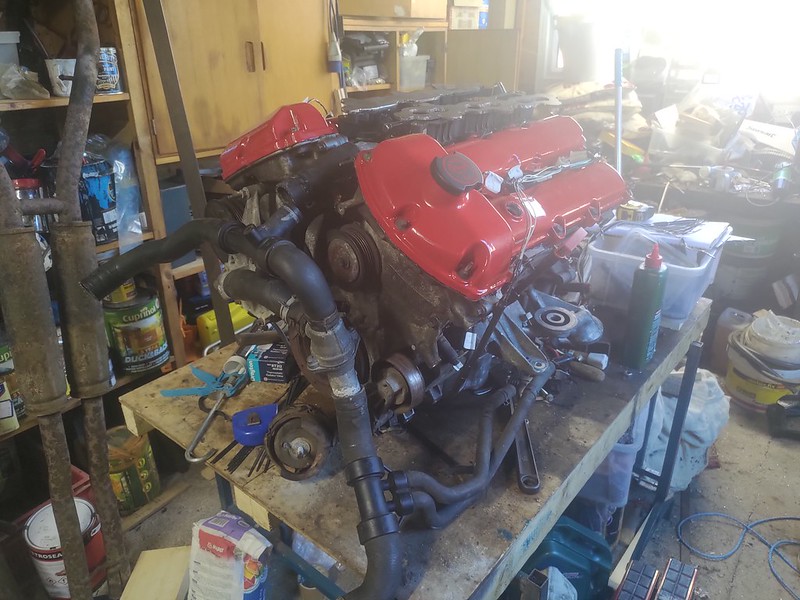
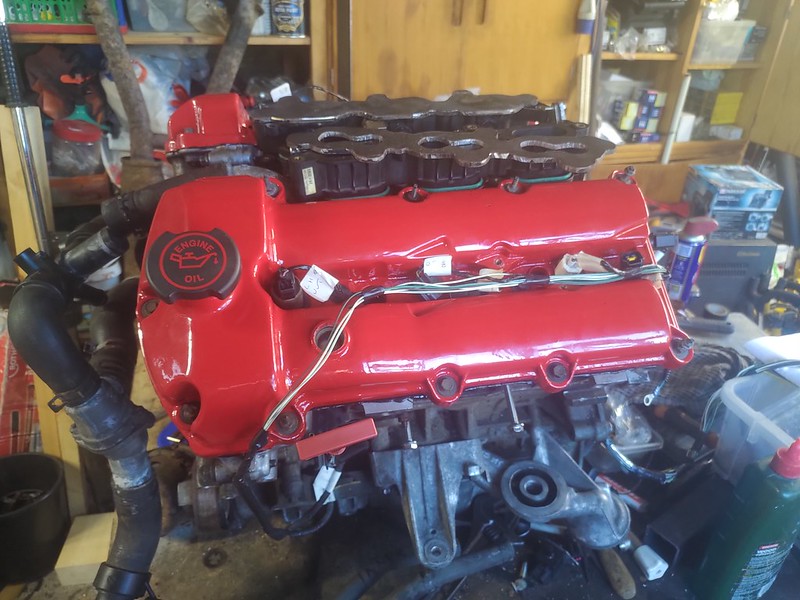
Bit more done over the last few weeks.
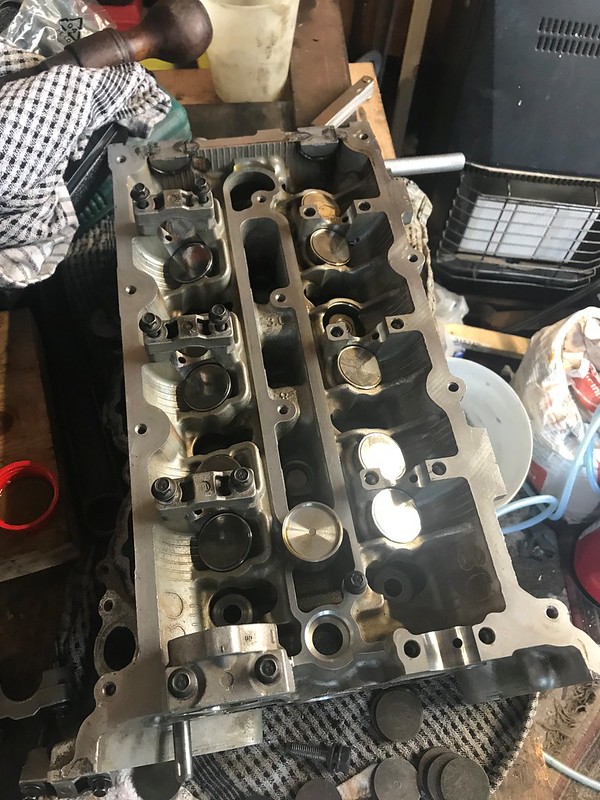
head is built back up:

Done everything as the manual stated, but a bit concerned about compression on the rebuilt bank. Not going to do anymore to the engine until I've
done a compression test. I have started to tackle the wiring and the inlet again though:

Drew up a couple schematics in paint of my custom wiring, but my paint skills are terrible, so i wont be posting them yet 
Finally, started to make a stand to be able to work on it properly, test on, take up a bit less space than the make-shift table, and actually move
it:

[Edited on 13/7/22 by Dockie]
|
|
|
Dockie
|
| posted on 26/7/22 at 08:52 PM |
|
|
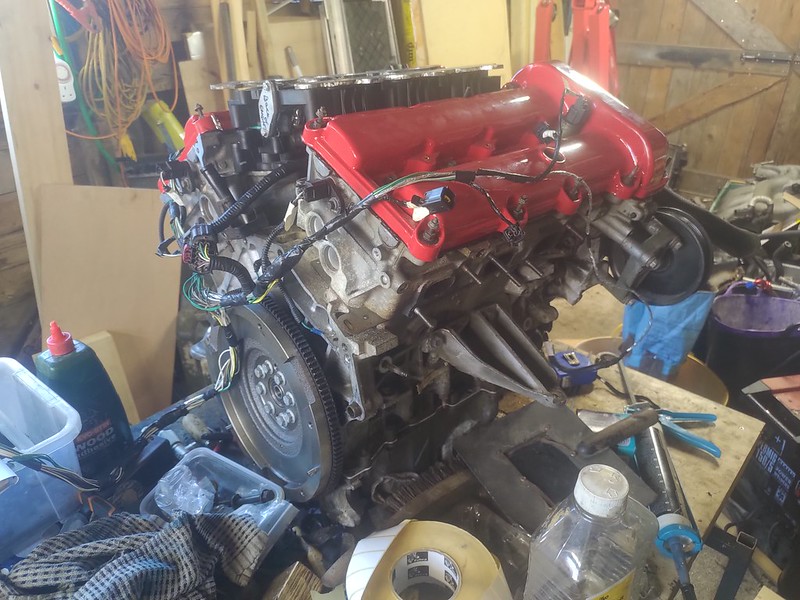
UPDATE:
not much to report really, but things are progressing slowly.
Engine is in its new home:


The stand isn't quite finished, i need to add somewhere to mount the radiator yet.
Also, just about got the engine harness finished, maybe one or two more things to add into the connector but this is mainly it:

I've kept all sensors on the smaller connector and fuel + spark on the bigger one.
Compression tester has arrived, but not managed to get round to doing that yet.
[Edited on 26/7/22 by Dockie]
|
|
|
big_wasa
|
| posted on 1/8/22 at 02:13 PM |
|
|
Was timing it up a challenge ? I haven't looked at mine yet.
|
|
|
CosKev3
|
| posted on 1/8/22 at 03:17 PM |
|
|
quote:
Originally posted by big_wasa
Was timing it up a challenge ? I haven't looked at mine yet.
If the coloured links are still visible on the chains it's really easy,if they've gone it's still not hard👍
|
|
|
Dockie
|
| posted on 1/8/22 at 09:29 PM |
|
|
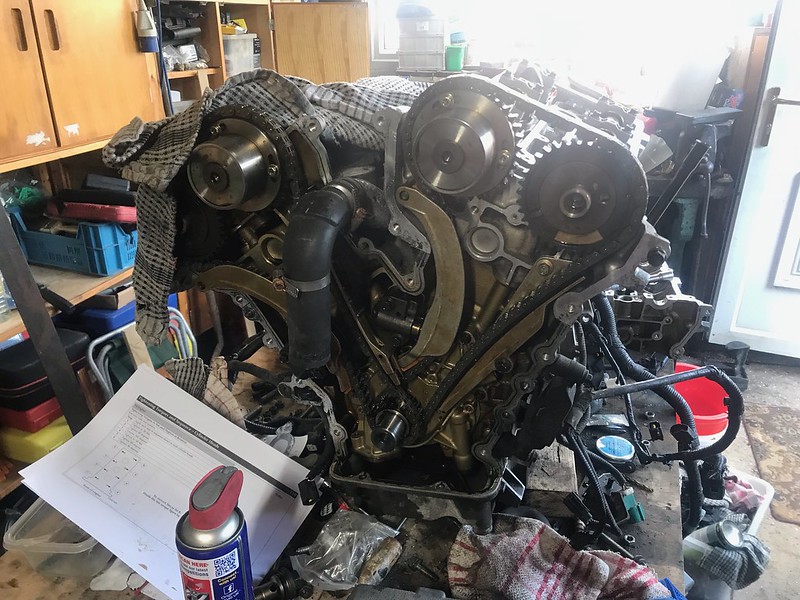
As Kev said really, its not difficult at all. My chain marks were gone so i just set the cams correctly then marked the corresponding links to the cam
and crank markers with engineers blue before taking anything apart.
|
|
|
Dockie
|
| posted on 13/11/22 at 12:13 AM |
|
|
3 months on, i'm sure its time for an update 
Head is sorted. After the first replacement i had a compression test and found that there was no compression on the rear cylinder. took it back apart
to see that there was daylight coming through one of the valve seats, so had to reseat it (and did the other 11 while i was at it). building it back
up i've put in new stem seals and also had to order some shims (i had alot of them already but a couple were smaller than i had. as an aside, if
anyone is looking for some shims, i have quite a few left over)
The wiring is pretty much done bar a few earths, VVT, Fuel pump, controls (start button and an ignition switch), WB02 and a fusebox. (sounds alot but
really isnt, can be sorted in a day)
One of the inlet adapters is just about done too, still got the other to make.
[Edited on 13/11/22 by Dockie]
|
|
|
big_wasa
|
| posted on 13/11/22 at 09:21 PM |
|
|
Great to see progress
|
|
|
Dockie
|
| posted on 15/12/22 at 05:23 PM |
|
|
Time for another update 
inlet adapters are done, just need a coat of lacquer

not pretty, but hey, if it works...
wiring is done bar the o2 sensor, needs some cable tidy on and some insulation on the solder joints once its done.

coolant tank has arrived, so i can get to doing all the piping for that
waiting on a connector for the fuel rail, wasn't going to bother with a regulator but since i have one anyway, i am going to use it now just to
be on the safe side.
we have a working crank sensor, coolant sensor and throttle sensor. IAT sensor is wired in, just got to load the measurements into tunerstudio.
fwiw, i've used the stock nc coolant sensor and a gm iat sensor, measurements are:
coolant:
100c = 2.8k
23.5c = 32.7k
1.1c = 95k
iat:
53c = 330 ohm
22.5c = 2.95k
9.6c = 5.8k
-12c = 40k
(you only need 3 measurements, however i'm yet to load them in so have taken 4 to check accuracy)
(its also the same gm sensor diyautotune stock, yet mine had different resistances to what they posted so took these myself)
most importantly though, we have a spark
still to do is:
wbo2
get the inlet finished and put together
do the cooling
finish the fuel rail off
get the exhausts done
shouldn't take long to knock most of that off once the parts arrive, then i can look at starting it up for the first time 
[Edited on 15/12/22 by Dockie]
|
|
|
CosKev3
|
| posted on 21/12/22 at 11:31 AM |
|
|
quote:
Originally posted by Dockie
Time for another update
inlet adapters are done, just need a coat of lacquer
not pretty, but hey, if it works...
[Edited on 15/12/22 by Dockie]
They look very thin?
Have you tried them on engine?
The minimum I could get mine down to were circa 15mm as the ST200 inlet touches the cam covers otherwise?
|
|
|
Dockie
|
| posted on 21/12/22 at 11:56 AM |
|
|
It's painted steel, so alot stronger than they look. I'm also doubling up on the lower inlets (2 stacked). Once I have it all bolted down
I'll get some clear pics of my setup
|
|
|
CosKev3
|
| posted on 21/12/22 at 12:49 PM |
|
|
quote:
Originally posted by Dockie
It's painted steel, so alot stronger than they look. I'm also doubling up on the lower inlets (2 stacked). Once I have it all bolted down
I'll get some clear pics of my setup
Sounds like you are over complicating the job!
Two lower inlets stacked will raise the ST200 inlet quite high?
|
|
|