Kaino
|
| posted on 15/1/14 at 08:16 PM |

|
|
1600 xFlow 224 Kent Cam, do I need to Machine the pistons?
Hi guys,
I have been informed by Engine Services in Roslin that I would not need to machine the pistons on my 1600 xflow if I fitted a 224 Kent Cam. BUT...
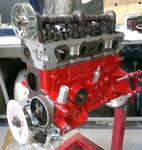
Looking online some people say they have to and others do not. Is this only if you have solid pistons? Mine are chambered and look like these but are
standard size:
http://www.ebay.co.uk/itm/Ford-1-6-X-Flow-OHV-Kent-AE-Piston-Set-0-030-Escort-Mk1-2-Capri-Cortina-/151148273538
which i thought were the standard 1600 711M block pistons. As they already have space for valve clearances do they need more (as I would presume) or
are they ok?
I have a flat cylinder head to fit to it. I presume the type with the chamber around the valves maybe a better option for this?
Any help greatly appreciated.
|
|
|
|
|
Nickp
|
| posted on 15/1/14 at 08:46 PM |
|
|
I don't know any specifics about the xflow with this cam but I do know that the only way to be sure is to do a dry build with modelling clay on
the piston tops. If the engine rotates freely (slowly) by hand then carefully remove the clay and measure the valve-piston clearance with a vernier.
|
|
|
mark chandler
|
| posted on 15/1/14 at 08:47 PM |
|
|
Assemble the bottom end, drop on the head without a gasket and gently turn by hand, if it does not catch then you will be fine with a gasket.
Better way of doing this is put plasticine on the pistons, oil the top then drop on the head with gasket and turn over slowly, the valves will then
push the plasticine out the way, whip the head off and cut the plasticine carefully across where the valve has pressed it and measure the thickness
left.
You will need to google on clearance allowed, if it's enough you are away, cheaper than having pistons machined needlessly.
Regards Mark
|
|
|
rusty nuts
|
| posted on 15/1/14 at 08:54 PM |
|
|
The only way you will know for sure is to do a dummy build and put plaster cine on to of each of the pistons,rotate engine a few times then strip and
measure the plaster cine thickness. Or do as I did build the engine and feed thick solder wire through each plug hole so it is under the valve ,
rotate the engine a few times, then measure the wire. It worked for me but I accept no responsibility if it ends in tears
|
|
|
mcerd1
|
| posted on 15/1/14 at 10:01 PM |
|
|
as above - it never hurts to check before running it..
but I'd think Alec is probably right, he knows his stuff 
-
|
|
|
Kaino
|
| posted on 16/1/14 at 07:07 PM |
|
|
Thanks guys! Very helpful. I was wondering if anyone on here had fitted the same cam and had extra work done, but as you all say, best to be safe
than sorry and have the knowledge that they definitely wont hit!
Has anyone every tried milling their pistons to re-profile? I access to both cnc and manual, but never tried milling a piston...yet...
[Edited on 16/1/14 by Kaino]
|
|
|
mark chandler
|
| posted on 16/1/14 at 07:40 PM |
|
|
I did some rover v8 pistons once, took an inlet valve and ground a cutting edge on it, loosely assemble the engine, piston at TDC then ran the
'cutting tool' in each head exhaust port a measured distance down. For the inlet I welded on a cutting edge, it's now a little
bigger than the inlet valve so repeated.
You get pockets in the perfect place 
Found out I may have wasted my time in the end as the engine still bound up, it as the valve springs binding..... Basics check the obvious first 
[Edited on 16/1/14 by mark chandler]
|
|
|


.jpg)