Both appear to have been made as one piece parts, i.e. single mouldings in continuous cloth, no joins, presumable because of the structural nature of them, yet are hollow. Not sure how to go about it - any hints?


I've been asked if I can re-create a couple of things in CF / GF for a friend - problem is the same with both items...
Both appear to have been made as one piece parts, i.e. single mouldings in continuous cloth, no joins, presumable because of the structural nature of
them, yet are hollow. Not sure how to go about it - any hints?
my suggestion would be to use some material that can be melted away e.g. wax or that moulding plastic you get rom halfords as a former, then wrap you
cloth over.
dunno how to ensure you get a nice smooth outer surface though.
You could vacuum bag around a polystyrene buck.
Use epoxy for the casting and then dissolve polystyrene with accetone.
quote:
Originally posted by 02GF74
dunno how to ensure you get a nice smooth outer surface though.
Not that it helps you, but I think that sort of thing is done professionally using the Vacuum Assisted Resin Transfer Process.
VARTP needs a male and female mold, that are fixed together at the required distance apart, with the fibre installed in the gap. A vacuum is than
pulled in the cavity, and resin allowed to flow into the space.
Cheers
Fred W B
The first is easy; have a female mould (two parts), get an inflatable plastic bag (bicycle inner tire), wrap your impregnated GF or CF around the
inflatable thingy, but everything in the mould, close the mould, pressurise the bag, let cure. After cure, open mould, remove bag.
This is how they produce bicycle-frames.
For the second one my guess would indeed be RTM (resin transfer moulding), with completely closed moulds, with dry fibres in between. Resin is pushed
through, or pulled through (vacuum assist).
Fred, Mave, many thanks 
Resin Transfer is something I've been intending to try out sooner or later anyway, just not really had a real need before. Might as well try on
something that isn't mine!! I have most of the vacuum hardware, I'm sure I can adapt with a couple of buckets and some tubes.
Loving the bicycle inner tube idea Mave - often wondered how they made bike frames!
Ah, I'm too late (again )
)
I use RTM quite a bit (resin transfer moulding) which is what has now become the VARTM. With normal RTM you need two V Strong moulds, but with VARTM
you have a much lighter 'inner'. So thats defintily the way to go for a batch of mouldings.
As for a hollow pattern, yes, another vote for the inflatable inner. This is a tried and tested method. Inner finish will not be 100% great though.
If the outer is split in 2 part then watch for flash lines.
Or another way, you can still use a sacrificial inner made out of wax or the mouldable meltable plastic, but if you cast this in a mould too then you
can still have a rigid inner and still make all the parts the same.
[Edited on 9/1/08 by balidey]
You have options on how to make the mandrel/former. At work, we have played with several parts that require exactly waht you are after. It really
depends on how much money and time you are prepared to invest and the quality you are after.
Look for the following:
Low Melt Point Alloys (LMPA) - used in model making. Can be melted at 60-120C. Reusable. Quite cheap.
'Aquacore' or 'Aquapour' - made by Advanced Ceramics Group i think. A washable ceramic core. Dissolves when wet. Can be difficult
to use.
Form it out of foam, then use a blasting process to remove foam (Although some composite damage possible)
Polystyrene/acetone is a good locost method, but you will probably find the resin also attacks the polysyrene.
Sand - can be made to work, but fiddly..
Bladder bags (as said, tried and tested, but can be a pain to get them to work well)
For the outside to have a gloss finish, you will need tooling. You could make this as a 2 piece split mould (ensuring you have sufficient draught
angles on the edges of the part to demould) using grp/gelcoat. Mock up the shape you want first, then make a mould around it once you have added
flanges etc for the split line.
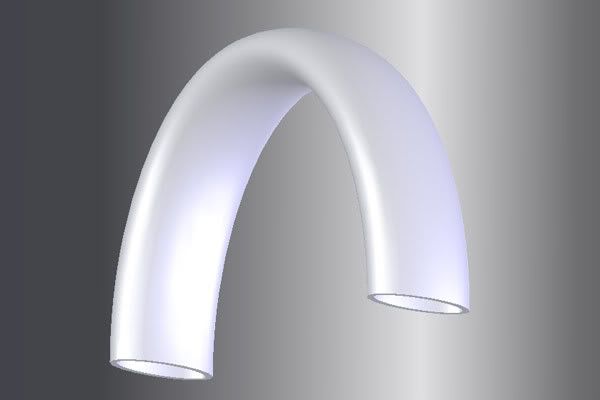
Just looked at the pics again, the bottom one you could just make a 3-piece former, from say ali, wood, just about anything. Have a piece against each curved face, then a wedge shape in the middle, which can be pulled out afterwards to allow the other bits back out. Hope this makes sense.
Cheers guys, giving me plenty of options to think on here
Twybrow - my only concern with the removable mandrel is the draft on the piece. The top and bottom are what I would consider easily safe, but the 2
sides only have about 1.5deg draft near the end, if that - Too close or do you think that is sufficient?
One further question... If I were to use a disposable former of some description, that would give another option... I don't like the fact that
the hole is simply drilled through the walls of the piece. I think an improvement would be to thicken and radius the piece at this point to form a
structually superior mounting point - which I've seen on carbon bike frames before.
If I were to look at that route, any hints on material layup? would you just add several small circles of cloth in, or build up with tows wrapped
around then just have the last couple of layers cover the tows for appearance? (if that makes sense?!)
On the second one you could use a two/three peice male former if the angles are tight like this
|/|
Normal draft angle would be 3degress. You might get away with less if well released, but it could be a bit of a bugger.
For a structural mounting point, You could just use a steel insert that yuo laminate over? Or bond a 'big-head' on after moulding? You
could just locally bulk up the lay-up as you guggested. Without knowing the load, it is hard to recommend a ly-up. but it sounds like you have done
are doing your homework!
quote:
Originally posted by twybrow
Normal draft angle would be 3degress. You might get away with less if well released, but it could be a bit of a bugger.
For a structural mounting point, You could just use a steel insert that yuo laminate over? Or bond a 'big-head' on after moulding? You could just locally bulk up the lay-up as you guggested. Without knowing the load, it is hard to recommend a ly-up. but it sounds like you have done are doing your homework!