GAZ


Rescued attachment 1.jpg

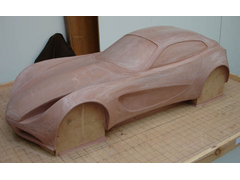
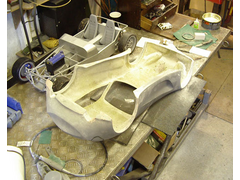
The clay model is finished and ready for molding, i have backfilled as many undercuts as possible and built the bottom of the model down to the base
to leave a nice surface for the fibreglass.
GAZ


Rescued attachment 1.jpg
BLOODY HELL!!!! that is awesome
What the hell is it?
Will it fit a locost chassis...
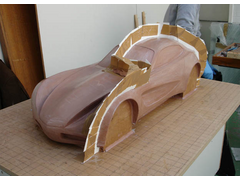
I decided that it would be necessary to make a four part mold and inserted thin plastic sheet into the model so i would be able to produce a
flange.
The mo;d material is called 'Polydur' its a bit like a cross between fibreglass and plaster. It comes in a kit form with most things you
need.
GAZ

Rescued attachment 2.jpg
That looks fabulous. Are the gaps between the front wheel arches and bonnet for the lights or are they vents?
Here we have one side of the mold layed up. Thanks to Rob for giving me a hand.

Rescued attachment 3.jpg
Thanks for the comments chaps , they are comming quicker then i can put the pics up.
They are vents by the way, this thred is a continuation from (locost exterior design)
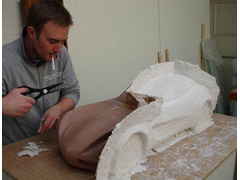
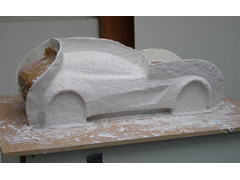
Now got both sides layed up. i have the front and back to do tomorow. And fibreglass on monday.
any questions feel free to ask.
Thanks
GAZ

Rescued attachment 4.jpg
I like it... but i think at 6ft2 its too small for me 
its too small to be a peddle car for you.
I will make a full size one
GAZ
For me... thats kind... certain wouldnt say no!
not a problem. give me a week or so.
Is this mould designed to save the clay buck or will it have to be damaged? Are you sure that front will draw in one piece?
Hope it all works and survives, would be a shame to see it damaged.
Out of curiosity did you do anything to dry the clay?
On a serious note... (and thats rare from me!). You planning on making a short run to pull back costs of manufacture/ insaurance?
When i say clay, thats a bit of a fib. In the car industry it is known as clay but it is more like plastercine. When you warm it, it goes soft, as
it cools it goes hard.
As for the model being damaged, it most likely will get a good beating.
I have filled the front vents in a little and have covered the thing in release agent so with a bit of luck the mold will come off. The worse thing
that can happen is the clay will be damaged. The condition of the mold is the important thing.
Thanks
GAZ
sorry jam i was just replying to ems, i cant keep up with you guys.
as for production, i would love to find an interested company to take the design on. if a cant i will build it myself but the prolem with this is it
will take alot longer.
I will be inviting as many kit companies as poss to my degree show, and i might well take the model down to stoneleigh to see if i can drum up some
interest there.
Any ideas?
Whatever happens... liscence the design for 5/8 years. dont sell it 
To be honnest, i,m not sure what the best thing to is,
It would be nice to be in a situation when that is a problem. If you know what i mean.
GAZ
quote:
Originally posted by andrews_45
BLOODY HELL!!!! that is awesome
What the hell is it?
Will it fit a locost chassis...

 sorry but you've got to laugh, where have you guys been? this model is the second longest running thread
i got the other two parts of the mold done today
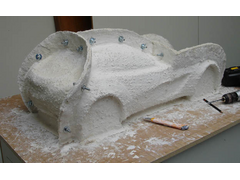

Rescued attachment 1.jpg
It took a while, alot of sweat, a few harsh words but the mold came off.
I just need to clean the mold and polish it and it will be ready for fibreglass.
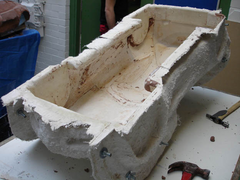

Rescued attachment 2.jpg
as for the clay model it had a bit of an accident...........A BIG ONE..
Thanks for the comments
GAZ
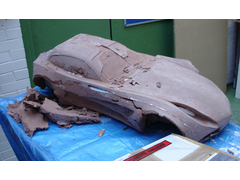

Rescued attachment 3.jpg
Oh bugger, the above image reminds me of the episode of Knight Rider when kitt gets dipped in acid.
"Help me Michael, help me..."
*ahem*
Nice work on the mould. I didn't realise quite how big they were until you posted the pics with your course mates posing with their models. Most
impressive. I'd like to see a full size version of that someday.
You will get the old invite to the degree show in London, Down Brick Lane......
hmmmmmmmm Cuuuurrrrrrryyyyyyyy.
we will see if we can get everyone together for maybe an orange juice....
GAZ
OH MY GOD!! 

ok, so I hope you didn't need that for passing the course...sigh.
Oh well at least you have the moulds now.
You may have been better cutting the clay model with a fret saw then taking a vacuum forming off it instead. But what's done is done. Keep going
we're all behind you on this.
the damage was expected. As for vac forming, i am not sure if i have mentioned it but the clay is like plastercine it melts with heat.
GAZ
your threads are fascinating. Giving us all a good insight into the world of car design. Many thanks for that.
Shame about the clay - i was gutted when i saw what happened to it.
Looking at the size of the model it looks like it would lend itself nicely to being the body for a RC car - maybe an interesting twist for the design
show????
Maybe you could do a scale model of a Locost chassis or similar and power it up with electric motor. Have a few bodies in various liveries as part of
the display.
Keep up the god work.
What are others in your class doing?
quote:
Originally posted by Gaz 1977
You will get the old invite to the degree show in London, Down Brick Lane......
hmmmmmmmm Cuuuurrrrrrryyyyyyyy.
we will see if we can get everyone together for maybe an orange juice....
thanks Darren,
Thanks for the comments, there are a few pics of other peoples stuff in the original thread. When all the models are comming together i will post a
few more pics on here.
As for the radio controlled model, no, this thing has cost far to much cash to drive it into a wall. I think i will stick to a static model.
The mold is now finished and is off to the fibreglassers on monday, so i will soon have it fitted to the chassis and then i will have to start on the
interior.
Thanks again
Gaz.
ps. you will have to drive up and have a look at the thing in the flesh.
I certainly hope you properly evaluated your plug for negative drafts before laying out your part lines! The slightest negative draft will ensure that your fiberglass remains in the mold.... until something breaks or is stress fractured.
Thanks Steve, The damage to the model was caused but the clay sticking to the gel coat even though the model had tonnes of release agent on it, I
think i was sold the wrong stuff. It should release ok but i will find out in a few days time. I have to send the mold off for fibreglassing because
due to the wonderful world of health and safety i am not allowed to use fibreglass at the university.
Thanks
GAZ
quote:
Originally posted by Gaz 1977
Thanks Steve, The damage to the model was caused but the clay sticking to the gel coat even though the model had tonnes of release agent on it, I think i was sold the wrong stuff. It should release ok but i will find out in a few days time. I have to send the mold off for fibreglassing because due to the wonderful world of health and safety i am not allowed to use fibreglass at the university.
Thanks
GAZ
Brick lane? not to far from me!
Last time I was up that way was for the Bodyworks exhibit a good few years ago now.
I'll pop along if it's free to spectators 
Tralfaz, My mate in the photo works at the uni but the fag was not lit, he did not inhale etc.
When i have the final dates for the degree show i will post them on here. the more the better.
The building where the show will be held is the old brewery which i think is where the bodyworks thing was held
GAZ
I have now finished the mold, I filled the gaps inbetween the different sections with milliput and given the mold 8 coats of mirrorglaze.
I will drop it off tomorow and pray
GAZ
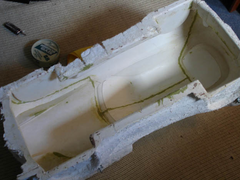

Rescued attachment mold fin.jpg
Fingers Crossed.
Best of luck, it seems to me that you deserve it to work out. Your work has been an insperation to sort out the bodywork for mine.
Dale
Thanks for that dale, I have been keeping an eye on your posts and its looking really good so best of luck with the remainder of your project.
Thanks to everyone who has commented so far. I hope to have some good images to put on here in the next couple of weeks as the model progresses.
GAZ 
Yeah, good luck dude.
When you have the celebratory party at the end of the course you can pour jelly in for some treats 
Anyway I'm sure you'll soon have a very nice body shell, how many are they making? You really should fit some R/C gear, pound stretcher up
here is selling giant hummerís for about £30 that can be modified. 
This model will have taken me eight months to design and will have cost me over £1000 to build, taking into account rubber molds, fibreglass molds,
plastics, paint and tools. I am not fitting radio gear in the thing that will result in it being damaged
GAZ
And the worlds "End of..." were not even muttered in terms of radio control.
hehe 
quote:
Originally posted by Gaz 1977
This model will have taken me eight months to design and will have cost me over £1000 to build, taking into account rubber molds, fibreglass molds, plastics, paint and tools. I am not fitting radio gear in the thing that will result in it being damaged
GAZ

quote:
Originally posted by Gaz 1977
This model will have taken me eight months to design and will have cost me over £1000 to build, taking into account rubber molds, fibreglass molds, plastics, paint and tools. I am not fitting radio gear in the thing that will result in it being damaged
GAZ
 good point

well its quarter scale. 
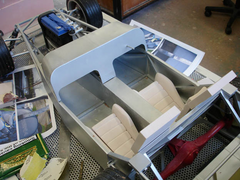
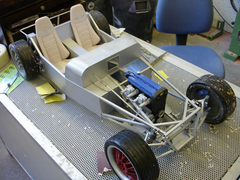
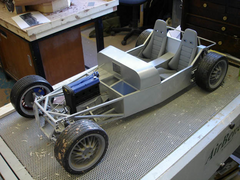
While the body is away it thought i would spend a few days building the seats.
Should be finished tomorow

Rescued attachment SEATS.jpg
quote:
Originally posted by Mr Whippy
quote:
Originally posted by Gaz 1977
This model will have taken me eight months to design and will have cost me over £1000 to build, taking into account rubber molds, fibreglass molds, plastics, paint and tools. I am not fitting radio gear in the thing that will result in it being damaged
GAZ
good point
I have noticed the amounts that others also spend developing their cars and they too seem to have occurred huge costs, so that seems the norm. I wonder how much the full size version will cost? I dread to think.
Are the others making moulds of their cars or are you the only one? I donít recall you saying what you had to achieve for your course, whether it was just the design or also the production side. If it wasnít for the fact that Iím tied up here Iíll have liked to have done course as Iíve always been designing cars but never made anything of it
Keep up the good work
[Edited on 3/4/07 by Mr Whippy]

you may have to make quite a few shells then...
I love the chassis and the new seats. How'd you make all the parts are they cast resin? Finished off as a complete 7 it would be worth a few bob.
quote:
Originally posted by Gaz 1977
well its quarter scale.
While the body is away it thought i would spend a few days building the seats.
Should be finished tomorow
the seats look like the Cobra Roadsters I have.
That was my thinking about the R/C version aswell.
Being a student of a different design medium I make models too. Nothing that good but we only get a few days to make ours!
Although we do put motors and lights on at times it often just detracts from the design and the concepts that you, as a designer, are pushing.
At most I would put working lights on, but this can look very twee in the wrong situation, which I hink this will be.
yup they are cobras, ish.
You are not wrong Darren I certainly have my hands full, I will see how the fibreglass comes out tomorow
As far as the model being worth a few bob if it had a seven body, it would be a model of a locost, therefore worth less then a locost. It would be
alot of work to change it, it would destroy the model i have and I have no interest in selling it.
so thats a no no.
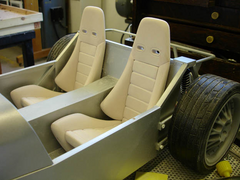
Here are the finished seats, minus a bit of piping.
Thanks GAZ

Rescued attachment SEAT 3.jpg
Thanks for the comment JamJah, you have a good point. The same point was discussed with the exturnal examiner. My argument to defend it was along
the line of.
The people who i would be selling the design to would not be desingers and i wanted there to be recognisable componants to show that it is a fesible
project grounded in the real world. (hence the scale chassis etc)
The model its self has to be a compromise between appealing to the designer and the public. Although the model will have opening doors, bonnet etc,
when the model is displayed all these will be closed and there will be a little tint to the glass.
Thanks again for the comment because it is a cracker.
GAZ 

Rescued attachment SEAT2.jpg
Hi Gaz
The seats look good. 
Watching each new bit being added is like a full size build.... quite exciting.
Good luck with the body shell tomorrow.
I for one will be eagerly awaiting a progress post.
Cheers
Paul G
aka Dad
Dad
there might well be a few padded triangles droped in the chassis tomorow

quote:
Originally posted by Gaz 1977
Dad
there might well be a few padded triangles droped in the chassis tomorow


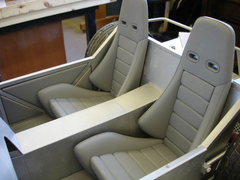
The fibreglass shell is not ready to be piced up until tuesday so i have done a bit more on the interior.

Rescued attachment SEAT 5.jpg
all comments gratefully received

Rescued attachment SEAT 6.jpg
Piping the seats is just showing off 

Very nice work, can't wait to see the fibreglass.
Thanks iank,
You can come and have a look if you want.
I have been thinking about colours again, i think that the exterior will be a metalic blue, not dissimular to what David Jenkins surgested. Maybe
Yamaha R1 blue?
What do people think the inside should be? seats, dash, carpets etc.
Just look at those seats!!
As a fellow model builder, although with planes. I want to know just what materials you are using to make these parts cos they are very good indeed. I
have just noticed that there rivets on the back panel 
Don't know why it never occurred to me but that chassis I suppose is going under the chassis so you will have to sort out the scale body fixings
anyway. This will be one spectacular model, I hope your going to make a display case to keep it safe.
How are you going to scale it up? or are you modelling it on computer at the same time as I wondered how you had the earlier pictures.
No!! it should be red  with cream and black interior like a Ferrari
  or at worst yellow with a black interior
[Edited on 5/4/07 by Mr Whippy]
Hi Gaz
I would have thought that if the model is to be displayed with the doors closed etc,
and you spoke of using a slight tint on the glass, then the interior should be light in colour,
otherwise a lot of the detail will be lost.
Just my 2p
Paul G
No!!!! it just has the one chassis.
Most of the chassis model is built from Ureal and Plastruct. If you are talking about RC planes Ureal will be far too heavy and i am not too sure what
the fuel would do to the plastruct.
I have never been a fan of display cases mainly because it stops you from playing with the model.
As for scaling the model up i could make templates from the model or get it digitally scaned. or i could build it in cad. Not too sure yet. I would
like to have built it in cad at the same time as the physical model but i just dont have the time at the moment. The wheels were built/designed in
Alias before i made the real ones.
As far as colour there is no way i would finish the model in a Ferrari colour sceme because people would assume that it is suppose to be a Farrari,
which it is not. On a similar vain if i were to paint it yellow people would think TVR. colour is a really tricky thing to get right, i would like
the car to have its own identity.
I have been told that motorcycle paints are good to use on this scale because the bike paints are designed to work well on vehicles that have alot of
intercepting surfaces.
I dont think that i need to put a light interior in the model just so it shows up. (sorry dad) because i can not allow the model to effect the design
if you know what im saying.
Thanks chaps
GAZ
Here is a pic of the early wheel design
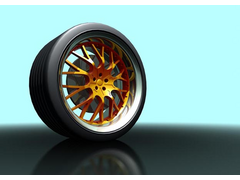

Rescued attachment Alias Locost wheel.jpg
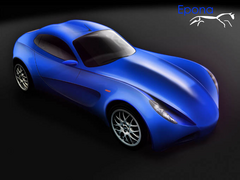
finished off the photoshop pic i started weeks ago.
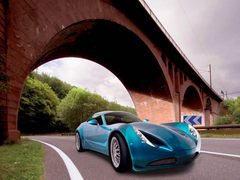
It has a name now.
Thanks for looking
GAZ 

Rescued attachment mag pic smalll lb.jpg
The protector of horses... Give it twenty five years and no car runs to its potential... mind you the fiberglass will have crazed by then! hehe 
Still looking; still thinking; still admiring!
protector of horses that escorts the soul on its final journey.
with the added bonus, goddess of abundance.
thanks. GAZ
PS i am a bit dim today, i don't get the 25 year bit
Take a 25 year old engine and it never has all its braked horses left in there. A few escape somewhere.
Probably good cos the smell in the engine bay would be termendous.
[Edited on 6/404/0707 by JamJah]
your too sharp for me. Nice....
hehe. Because the model is so smooth so far I would suggest getting the fibreglass 3d scanned. Instead of modeling it from scratch in CAD.
Theres probably a contact in the uni somewhere particular if they have a cam dept or someone will know of a friendly company whod let you scan it
after hours!
Must find out if mine (portsmouth) have a 3d scanner to go with the CAM stuff... could be quite handy! 
I will do some digging, and find out.
That will show up all my cock ups.
Best get one side done and mirror it.
What course do you do?
GAZ
Architecture. So nothing as near as exciting... But I like it!
In the old days architects tended to design chairs too. Aparently the trend is car shells now...!
I think I can speak on behalf of the majority when I say we are proud of your work so far. Things looking extremely smart. Am I correct to assume this
is 3rd year 'disertation' material? You got any ideas of direction post grad?
Architecture, very nice too.
This is my final project in the fourth year. my dissertation was on crash testing and perceived car safety. (euro NCAP etc, with some SVA thrown
in)
Thanks for the comments and best of luck with the rest of your course.
GAZ
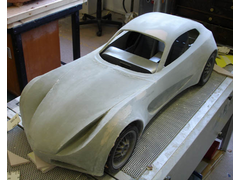
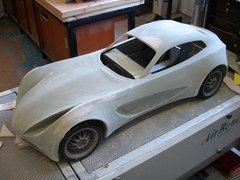
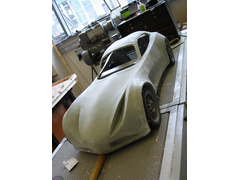
I got the fibreglass back this morning, and with a little swearing got it out the mold. I have started to tidy it up.

Rescued attachment 1.jpg
I need to do a little work to get the body sitting in the right place but it is close, It need to drop about 5 mm all around

Rescued attachment 2.jpg
Looking nice. Looking very nice.
You going to supply clean underwear at the exhibition!!! hehe
Well done. I really like that!  First order for a full size please!
Thanks to everyone that has followed this project and all the comments so far..

GAZ

Rescued attachment 3.jpg
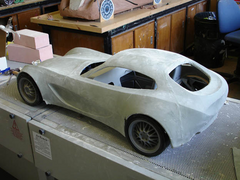
What did you do with the derier in the end? Got an pics of the rear 3/4?
What a plumb i am, i only took one and its not great, it looks odd without lights (as does the front) I had better take some tomorow.
GAZ

Rescued attachment 4.jpg
Looking good.
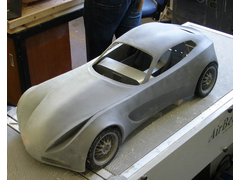
Started rubbing down the fibreglass today, i didn't realise how bad bit of it was, i needed to finish the clay a bit better me thinks.
There are some strange dips in the body shell that dont appear to be in the mould, is it possible that the gel coat lifted away from the mould?
Thanks
GAZ

Rescued attachment 5.jpg
I say no, it may have been taken of the mould a tad to early as it takes a couple of weeks for it to harden, a common problem. If the gel coat
separated it would look dreadful (really) and the gel coat takes stays softer for even longer than the mat. Don't put to much pressure on it when
sanding and best to use lightweight filler like red devil (model shop). It's not so bad as remember that although the model may be 1/4 scale all
the blemishes and flash lines are full size 
I think it turned out fine. Now you have to sort out the windows, I'd vacuum form those along with the light covers. I you need it I can give you
a drawing for a very simple one I use for my plane models.
Keep going I want to see it painted. 
and look how far back you sit! Your heads practically in the boot 
[Edited on 12/4/07 by Mr Whippy]
It's coming along nicely. Just an observation....... those windscreen pillars look particularly weak. Would they not also interfere with the
opening of the doors?
Phil
Thanks for the offer whippy but i have a vac former at the uni, well 5. one of them might work. (serviceing machines is not a strong point of the
uni.) good point about the scale model full size seems, that makes me feel better.
As for the ft piller, i probably should have said that what you can see at the moment is the part that would be painted and visible from the outside.
There would be a lip that the screen would be attached to, so, it will be bigger then it appears at the moment. I hope that makes sense, i am not too
sure it does.
Thanks for the comments chaps.
For anybody who is interested and able to go, I have today received confirmation of a space at Stoneleigh to display my model/design.
It will be on the Complete Kit Car Magazine stand on Sunday and Monday.
Thanks,
Gaz 


i have to admit, i could really imagine it (or wasn't really sure it would work with a 7 chassis tbh) but that looks AMAZING on the model
chassis!
nice one!
 Looks like I've lost the use of my garage
I don't mind really 
Paul G

Rescued attachment epona-s.jpg
Gaz
Well done great to hear that it will be at stoneleigh. Most of us are having troble just keeping up with the posts let alone progressing the build as
you are.
Thanks for all the photos
Thanks to everyone who has commented so far. I cant wait to see it finished on the stand at the show.
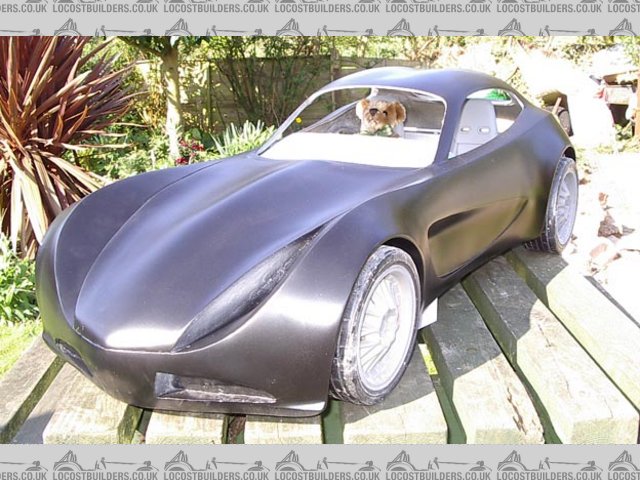
I gave it a quick coat of satin black just to show up all my cock ups. (the joy of rubbing down)

Test pilot ted has made a comeback, but only for ergonomic data, I need to move the seats forward as his legs don't reach the peddles. (come to
think of it I still need to make them.)
Thanks again to everyone.
GAZ...


Rescued attachment epona ted 005 small.jpg
Damnit, that's some nice work there.
"There are some strange dips in the body shell that dont appear to be in the mould, is it possible that the gel coat lifted away from the mould?"GAZ
I don't know looking at that pic with teddy in it that finish is really nice.
Just a thought, the design rights or copyright for it, that is your property and not the universityís right? I would check that out just to be sure so
that you never have a lawyer knock on your door when the shell goes into production.
Technically it will be co owned by the student and the university. Often though the university will not claim their full enitilment and will claim a
nominal figure. I know my university will take 40-50% in return for offices, support and contacts.
However I know people who have left and the university werent too interested in the products and only take 5% (or a cheque!)
thanks for the fibreglass answers, i will spead the word tomorow. One of the other chaps has just got his fibreglass back and it is far worse then
mine.
As far as the rights on the design, the uni will protect my design for a time. I then need to protect it my self. it is still my design so i cant get
in trouble. but good point.
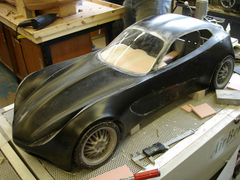
Today i ran a test vac form of the windows and all went ok ish. The finish is crap but that, i think is down the fact i used the wrong plastic. we
had none in stock. But it fits ok.
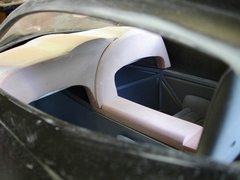
Also started on the interior the dash is rough and needs alot taken off. You should get the idea.

Rescued attachment 6.jpg
and here is the dash

Rescued attachment 7.jpg
and from the back...
Thanks again for all the comments and look forward to putting some faces to the names at the show.
GAZ

Rescued attachment 8.jpg
Gaz
Car is looking great! Have you given much thought as to how to display it at Stoneleigh?
I have a few tiles left over from my garage floor if you want something for it to sit on, rather than just a table cloth.
Tiles are a matt grey rubber, with raised dots on them, 600x600mm.
As seen underneath my car
Back Right]
Just let me know if they would be any use to you.
Cheers
Mike
thanks mike,
I'm ok thanks, Ive got the use of some glass display stands from the uni.
Nice Tyres by the way, what are they?
And dad if you read this, no they are not going on the A2, Thats the car not the road.
GAZ
R888's
You know they make sense!

Mike
It's bizarre, I still can't get my head around the scale of this thing. Your shots of the interior got me all confused. I thought I was
looking at a full sized model for a moment. Looking forward to seeing the finished piece in the flesh.
On a completely unrelated note, who's the foxy chick snuck in on the left of one your images there?
thanks mate.
What can i say.... work is hard.
You will meet her at the show.......and.....em........her.........girlfriend
ps. can you send me your number, lost it.
GAZ

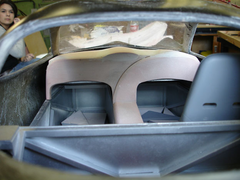
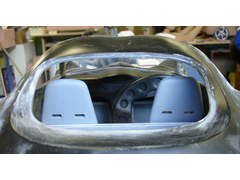
got the dash fairly well there, I need to spend some time on the body ready for painting

Rescued attachment 9.jpg
there is no good view to photo it from so sorry for the pics
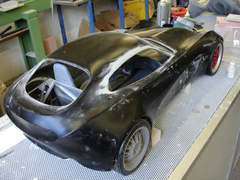

Rescued attachment 10.jpg
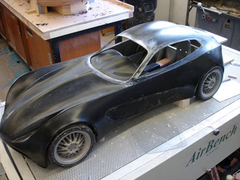
and the front.
Thanks chaps
GAZ

Rescued attachment 11.jpg
I have not posted along with others on this thread, because I felt that I didn't need to add to all the praise you had received so far as it
would be like repition, although I have been constantly stunned, viewing your progress!
I have changed my mind however and you deserve all the praise that most can/have/will give, the model looks awesome, and I am sure it will look even
more stunning when finished/painted etc.
I am going to Stoneleigh and I am looking forward to seeing it there!
Regard the colour of it - I know you will go with your own choice in the end, but how about something different to what most people use on
models/prototypes etc - how about a really nice Pearl White - I only suggest it since your ref to Motorbike colour reminded me of a a Yamaha colour
that used to be on slightly older bikes (sort of FZR600 age) - it's a really subtle un-complex colour that flows smoothly on a bike, but also (as
it's a pearl) shows some stunning colours through it if lit correctly (and I am sure that along with your glass display case you could get some
decent lighting!)
All the best,
Steve.
thanks Steve,
It's a good thought on the paint, white like a 1989 VFR. But sorry bought the paint last week. I am looking forward to putting faces to the names
at the show and with a bit of luck get some feedback from the kit companies.
I have just done a list of what is left to do it might be Stoneleigh 2020
thanks
GAZ
Yep thats the colour that I meant - that one you won't be using! LOL
I just thought it would make a nice change! I once painted an Ali framed (really chunky tubes) mountain bike in that colour and it really was quality
(all IMO of course)!
With re. your list of "to-do" I never thought I was going to make Stoneleigh either, as I picked up my kit in December, but I've been
on the road now a few weeks (nearly?), and even though mine and your experiences are totally different I am sure you will get it there as you just
won't be able to help yourself in getting it prepared in time!!!
I will introduce myself and give you a big congratulatory handshake if you are there however!!!
Cheers,
Steve.
ps - I wouldn't be that keen to be putting names to faces if everyone looked like me! LOL -
http://www.locostbuilders.co.uk/viewthread.php?tid=63878
it wil be done it will be done it will be dooonnnneeeee
I will be the one with the twitch, red eyes and slumped in a corner

thanks
GAZ
Epona.....I had been trying to figure out why it sounded familiar....It is the horse in my girlfriends Nintendo Game (Zelda). LOL
T
Well i didnt get the name from Zelda. Nice to know though.
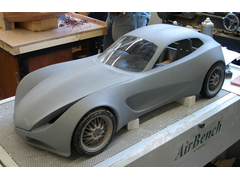
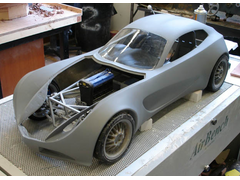
Been working on the body today, cut the bonnet out and got that fitted. I still need to sort air vents and fixing to the chassis but i'm getting
there.
One with

Rescued attachment 13.jpg
One without.
Thanks chaps
GAZ

Rescued attachment 12.jpg
That car just keeps on getting better and better! Astounding piece of work there that man/team!
(insert a we are not worthy smiley here) 
Hi Gaz
been watchin the topic for a while now and i have to say im impressed,
I love the way we've been able to follow the develptment of the car right from the computer stage to this.
it looks to be goin pretty well too 
Im currently studying architecture and for a while i was seriously considering changing to automotive design cos i think id enjoy it more being a
petrol head and all.
but because there doesnt seem to be any courses in scotland i decided to stick with architecture...plus the fact that im half way thru and at the end
of 4th year (placement)
watchin your car develop has given me serious thoughts for change tho.
im thinkin i myt finish architecture and then look at goin into automotive design later on.....wat do u think?....a viable option or not?
keep up the good work
patrick
if i were you i would finish the architecture. then think about a masters in trans design. Far more money in architecture though. 
Thanks to everyone for the comments.
GAZ
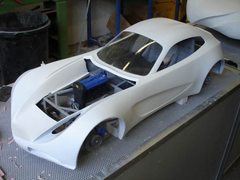
Finally room for a big radiator
Looking great, as usual. I like everything so far and would personally prefer the shell to extend down onto the chassis in the engine bay like this
Hey Gaz,
sorry to see the demise of the model! you could probably rebuild it slow time for posterity.
The car looks wicked - it's funny that a lot of people have "designed" kit cars in the past where the front or the back is great but
the opposite end looks like a shed. Because you have designed every aspect of you car based on form and function it's great from every angle.
Oddly enough the later foty's could be a "real" full sized car. The perspective from any angle is just right.

It's good to see that you are still thinking of the future as Stoneleigh could very easily cause you to get swept up by a bigger company and lose
control of your project while they see pound signs.
As for the blue - It will look great. Dark blue on a sportscar looks great - but then, I have an orange Minari!!!
keep smiling
regards
Steve
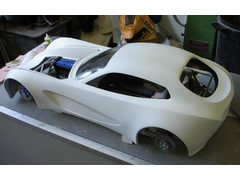
mr whippy, You meen like this. 
I will get the back of the engine bay done on monday.

Rescued attachment 14.jpg
Gottabedone, thanks for the comments. I would love a company to take the project on as long as i still had imput on the developing design and the deal
was right.
We shall see.
Thanks
GAZ.
ps. Just a thought does your name read
gotta be done or gotta bed one?????
Sorry about that.

Rescued attachment 15.jpg
quote:
Originally posted by Gaz 1977
mr whippy, You meen like this.
I will get the back of the engine bay done on monday.

quote:
Originally posted by Gaz 1977
mr whippy, You meen like this.
I will get the back of the engine bay done on monday.
 just worried you were going to do it wrong he he

 with tiny gas struts
I got around to finishing off the wheels of the model today, all painted up and ready for fitting.
All comments welcome
Gaz
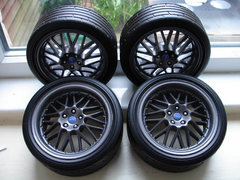

Rescued attachment finished wheels.jpg
my only question would be how the fook did you do that?! 
quote:
Originally posted by Gaz 1977
I got around to finishing off the wheels of the model today, all painted up and ready for fitting.
All comments welcome
Gaz


joelp, There's not many of us old craftsmen left.....
David, they/we are under alot of pressure, almost solid
Sorry i missed your edit david. God you have good eyes.
Slight cock up. but it would have ment twice as many rubber molds and i dont have the time or money
[Edited on 22/4/07 by Gaz 1977]
I know you all like rubber
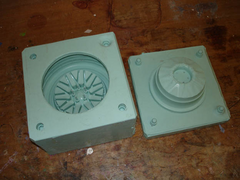

Rescued attachment molds small.jpg
quote:
Originally posted by Gaz 1977
Sorry i missed your edit david. God you have good eyes.

quote:
Slight cock up. but it would have ment twice as many rubber molds and i dont have the time or money
Hey Gaz,
thanks for the anagram!
As you are a pukka designer and all that, is this the forefront in crash protection-jelly moulding bodywork!?!?

Do you eat in when you get bored with it?
Steve
If you are in a serious crash, there is no need to be cut out by firemen. you can eat your own way out. Or if you are really lucky you will have
crashed in a field of hungry cows.
GAZ
ads a new meaning to "it's nice I think that I'll take the roof off today"!
He made the wheels...I assumed they were off the shelf items, good grief
Forget car design you should do professional engineering modeling, have you seen how much they cost? Easily start up your own company.
Can't wait to see it in the grp at Stoneleigh.
Excellent job.
ZOMG! Only now discovered this project!
This thread makes me wish that Gaz were a woman. And I weren't married. Damn it, Gaz, I would SO ask you out for a date!
quote:
Originally posted by akumabito
ZOMG! Only now discovered this project!
This thread makes me wish that Gaz were a woman. And I weren't married. Damn it, Gaz, I would SO ask you out for a date!
 I was getting worried there might be a bit of a scene...
 akumabito, I do have man boobs, and a girlfriend. Thanks anyway.
I got the body fitted to the chassis today, so no need for the wooden blocks under it.
I finished under the bonnet. i would like to do more detailing but i'm a bit short of time.
I got the radiator build today.
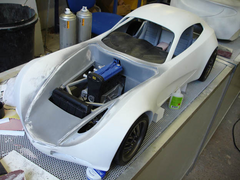

Rescued attachment 16.jpg
Tomorow i am going to try to get the glass house sorted and if i get time, start working on the lights.
Thanks for all the comments.
GAZ
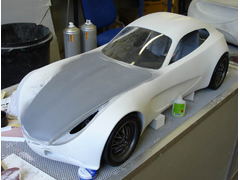

Rescued attachment 17.jpg
 wish I was doing that instead of sitting here working (known to happen)
More impressive work Gaz. I too assumed that the wheels were off-the-shelf, not moulded by your fair hand.
You're going to need to place your car behind some plexi-glass at the exhibition. There'll be spunk flying everywhere at this rate.
PS I sent you a U2U with number on a while back, did you get it?
quote:
Originally posted by the_parson
You're going to need to place your car behind some plexi-glass at the exhibition. There'll be spunk flying everywhere at this rate.
 sick dude
Better on glass than in the cone! Ewww.
Its looking really good Gaz. I'm still following it with interest. I agree with the above... ever considered modelling for a career?? (cue
jokes!)
i have done i bit of modlling in the past, at the mo its a hobby.
I got the glass area started, i will finish it tomorow. cut some vents out, had alot of coffee.
I would like to get the model ready for painting by the early part of next week.
Thanks.
GAZ
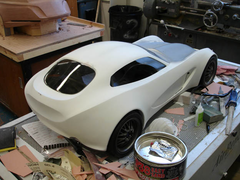

Rescued attachment 18.jpg
the rear glass almost fits.
GAZ
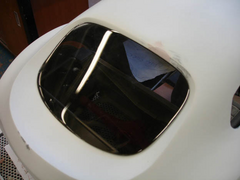

Rescued attachment 19.jpg
almost as in can't see anything wrong in the pic  what's he on about?...
I would take the model to a bike paintshop to get sprayed as they'll do a really nice job, think fuel tanks.
I will paint it myself. I'm a bit out of practice but i used to work in a spray shop. The only problem that i might have is that the spray
booth at uni is next to the band saw and all the sanding gear. You are normally just about finished when someone cuts some wood and the extractor
sucks it on the model. 
I will have to do it bloody early or silly late.
Thanks, Gaz
hmm I might just be going to the Stoneleigh show for a break so I'll say hi.
look forward to it.
I got the glass area finished today, not a nice job....
lights tomorow.
Thanks,
GAZ
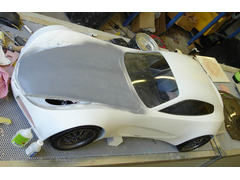

Rescued attachment 20.jpg
Just a quick catch up.
perspex front and rear light covers sorted.
I was always concerned about the rear of the car, now it think it is better then the front.
I will post some pic tomorow.
Interior now painted, with a bit of luck the body will be painted tues/wed so its dry for Stoneleigh.
GAZ
Hi Gaz,
Good luck at Stonleigh. Epona will attract a lot of interest up there, hope it all goes well
regards
Steve
got lots done today, it should be primed tomorow and painted wednesday
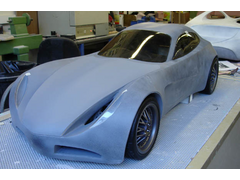

Rescued attachment 23.jpg
just got the lights front and rear to do, steering wheel and gear knob.
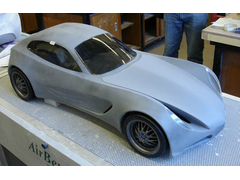

Rescued attachment 21.jpg
looking forward to meeting some of you at the show this weekend.
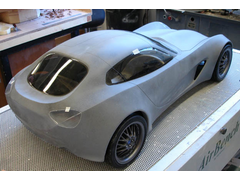

Rescued attachment 24.jpg
and finally the side view.
Thanks for all the comments chaps.
keep them comming.
GAZ
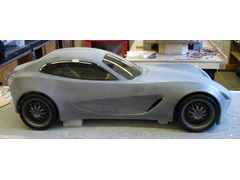

Rescued attachment 22.jpg
I haven't commented so far, although I have been watching with interest, and while I am sure I will be doubly impressed when the paint is done, I
have to say that it is absolutely stunning so far 
Keep up the good work and I hope it gets the interest it deserves at the show.
Cheers
Alex
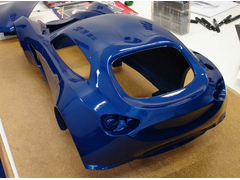
just got the thing painted
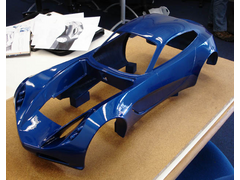

Rescued attachment 26.jpg
I am not too sure about the colour, it will stay like it is for Stoneleigh, i might respray it for the degree show.
i will flat and polish it tomorow.
Thanks chaps
GAZ

Rescued attachment 25.jpg
Polish it???? hehe As Homer Jay Simpson would say "Mmmm Shiney"
I like the car body, just personally am a black or silver guy! Just a shame I can't get to stoneleigh. I have 18 days left of uni before the
summer, but a slog to get there! 
Keep up the momentum Gaz, shes looking b eautiful!
Ok, i know its a chavy idea, but here me out. That blue makes me think it looks more racey. You thought of a white circle on the doors and bonnet? I
know someone will say GT double stripes but thats too much of a cliche or pestiche.
Probably a silly idea, but its one for the melting pot.
So when do you think you'll have a full sized one ready for the market? Need a distributor on this side of the pond?
Words fail me at a time like this, I cannot get to Stoneleigh this year because the slave drivers wont let me have the time off for it and they know
about it.
I would love at some point to see what to me looks more than just a labour of love. To me it looks like a superlative peice of engineering that would
not be out of place in Italy (Modena) Pehaps you might be able to show them how to make a car look.
Good luck and all the best at Stoneleigh and all the best for the future. I have followed this thread from the beginning to the present and I am just
amazed at what has evolved, it is nothing short of stunning to say the least.
Wel done mate
ATB
Bob
I love the idea of the circles, jam. i might have to save that for when i have a full sized one.
Violent blue, I will what interest i get at the show at the weekend, you never know someone might take the project on. if they dont i will have to
build it my self.
Blakey, Thanks for the comments mate, it has been a mad few weeks (15 hr days etc) to get this far and i am greatful for all the comments that i
recieve on here.
It should be finished on friday so i will put some pics up.

Well, I like the colour...
David
thanks Dave.
See you at the weekend.
Well smart Gaz
Look even better when the lights etc. are added.
how about a carbon fibre bonnet?
have you got one that will fit?
how about one of those flip paint jobs? not cheap, but woould look vey nice imo.
take a look at www.chromepaint.com
thanks chaps, i will have a good think about colour after the show.
Its growing on me since it has had a bit of a polish
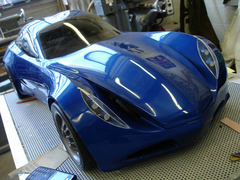

Rescued attachment 27.jpg
I just have the lights to paint. exhausts to make, gear stick to make and the odd little bit of brush painting
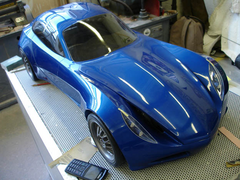

Rescued attachment 28.jpg
and fit the mesh grills. 

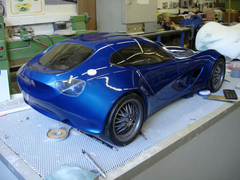
All comments, good and bad welcome.
i need to include some comments on the finished (ish) model in the written part of my project so if you want to comment that would be great. I stress
that it doen't have to be good. It all helps.
many thanks
GAZ

Rescued attachment 29.jpg
I am impressed... 
I hope to see it on Sunday, all being well.
Just a thought - would dummy number plates give it a sense of 'real-ness' and scale? It's rather late in the day now, with Stoneleigh
just a few days away, but it could emphasise that this is a practical design based on a commonly-available chassis.
See you there,
David
quote:
Originally posted by David Jenkins
I am impressed...
I hope to see it on Sunday, all being well.
Just a thought - would dummy number plates give it a sense of 'real-ness' and scale? It's rather late in the day now, with Stoneleigh just a few days away, but it could emphasise that this is a practical design based on a commonly-available chassis.
See you there,
David
I can't see you getting (m)any bad comments from anyone on here!! Looks better and better each day. It's good to see such a well thought out
project with realistic goals, instead of starting completely from scratch with the chassis and everything else that entails. Updating an old design
rather than jumping in at the deep end, although I bet you'd make something even sexier if you did!! It also means that Joe Blogs starts half a
chance of being able to afford it when it comes into production, as I'm sure it will!
Are there any ideas as for running gear for a completed car? IE basing it on something available on a longer term than the sierra, such as BMW, MX-5
etc?
Hi Gaz, been watching the whole project from start to now. You've certainly put the time and effort into it excellent work. Hope you get what you want from your efforts can't wait til the weekend to catch up with you and your dad and to see the model in the flesh. ATB Trev
Wow, looking truly stunning now.
Feel free to use any comments I have posted.
Thinking about it, you can use any legally as being on the internet without any security they are in the 'public domain'.
don't forget number plates on front and back and a little tax disc on the screen.
looks nice ... when can I buy the real thing?  and is there a convertible model?
quote:
Originally posted by 02GF74
don't forget number plates on front and back and a little tax disc on the screen.
looks nice ... when can I buy the real thing?and is there a convertible model?

Hey Gaz,
You're going to have fun at Stoneleigh as Epona will draw a crowd wherever you are.
Won't be ther unfortunately as the other half is working but good luck.
regards
Steve
thanks for the comments chaps.
there might be a soft top one day, it would be nice.
I will do the number plates if i get time in the morning. Does anyone know the size of a standard bike plate?
I will post some pics of the show monday night if i get back in time..
thanks again
GAZ
Gaz,
Just done a google for you...
http://www.bike-plate.com/motorcycle-plate/size_detail.php?page=sywa
Relates to plate sizes (manufacture but gives dimensions)
http://www.dvla.gov.uk/media/pdf/leaflets/v796.pdf
Regards the letter sizes etc.
Hope it helps :@)
...and I am still very impressed!
(I'd be a bit nervous about leaving that model so exposed though  )
)
David
Having just gotten back from the show, anyone that missed Epona missed out on an absolutely stunning model! The pics on here don't even come close to doing it justice. Was good to meet the man behind the model and have a chat. I'm still struggling to find much in the way of criticism, but will have a think, as he needs both good and bad comments for the final report!
Ditto the above, very very nice model and design.
Criticism? On the model I have none, on the design, well the nose is very long (longer even than a seven) which is going to make getting out of some
junctions that have poor visibility tricky, also where do you put your luggage?. But to be honest that's about the size of it.
Picture 1
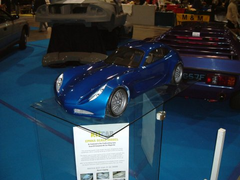

Rescued attachment epona1.jpg
Picture 2
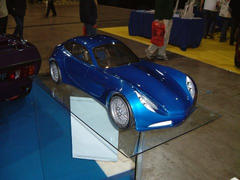

Rescued attachment epona2.jpg
Picture 3
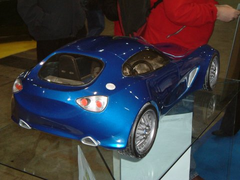

Rescued attachment epona3.jpg
STUNNING.
I realy hope you have had some positive feedback from manufacturers at the show?
STUNNING.
I realy hope you have had some positive feedback from manufacturers at the show?
Well Done, from one proud dad.
Looking forward to seeing the article in the mag.
Paul G
thanks chaps,
I had a great show, a great turn out. Its been good to meet a few of you.
The car looks better and better every time I see it... 
Would it be possible to have the rear window open as to give some access to a boot? Or maybe a hatchback deal... if you really MUST have some
criticism of the project, I guess that would be it... or maybe engine access? The hood is not the full width of the car, so I suppose that if
you'd need to do some engine work, you'd have to be careful about damaging the wings...
I bet it would take a fortune to build full-scale molds to make the bodywork. Also custom glass is not cheap at all. And by that time it'd be far
from locost... have you looked into the possibility of producing it yourself at all?
I wish I were rich.. I'd send off a big wad of cash in your direction.. 
thats looking very smart now with the paint on. love the exhausts and the side vents.
adam
the feed back from the show was very promicing, I think i might just have to build one full size.
I am sure that there is a big gap in the market for a cheaper coupe.
I will post the cunning plan on later as i need to get the written work for the project finished and handed in this afternoon.
Thanks
GAZ
did you have hang over yesterday bet your mate did he could just about walk nice chap though plenty prays for your idear and the locost sorry sevens in all
quote:
Originally posted by Gaz 1977
the feed back from the show was very promicing, I think i might just have to build one full size.
I am sure that there is a big gap in the market for a cheaper coupe.
I will post the cunning plan on later as i need to get the written work for the project finished and handed in this afternoon.
Thanks
GAZ


I felt fresh as a daisy. Ish
Beetroot head felt like he had been hit by a truck. 
akumabito, I dont see why not, It might be a while until i get it back though.
whys that?
Gaz,
I missed you at the show but did have a good look at the model.
I was talking to a guy who showed an interest and he was gobsmacked when I explained the background. His comment, and one that had=s been posted
earlier was that it could do with an opening rear glass or tailgate. Obviously not a Seven driver 
Shame I missed you as I was very impressed. It did look like you had spent too much time polishing it with bad cloth as it had lots of swirl marks. I
guess it had fingers all over it most of the weekend.
Fantastic effort and one that you should be rightly proud of.
I only painted it on friday, it was a bit of a rush. polishing wet paint it no fun.
As for the tailgate, i was thinking of the hingeing the rear glass and having boot space under it. As normal, no time to do it.
Thats why you could still see through to the axel from the top.
Thanks
GAZ
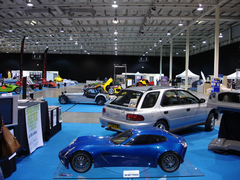

Rescued attachment shoe view 1.jpg
I'm a bit worried cos of its size.... its at least half the size bigger than the 7esque behind it!
Silly question but if ou make one full size whats stopping you making 10, 20 100?
the plan at the moment is to do a bit of research into chassis engine ect and start getting some bits together over the summer. I need to get to
rolling chassis stage before building the body.
I suppose once i have a working prototype i can take molds from it and produce a few shells 
It would be nice if a company wanted to take the project on. The design has had as much publisity as i could possibly hope for and there is more to
come when the magazine artical comes out in a couple of weeks.
I have to say - hats off to you its really a very impressive piece of work. I have toy'd with the idea of building a locost or renovating a
sports car.
If you can make this design an affordable reality, you will have made my mind up for me!
I'm interested to see how this would connect to the chassis though and remain stable, light, simple and again affordable.
Good luck to you...
That is a mighty fine effort
I wish I had half of your skills.
Just a thought... if you'd do a full-scale version, what would you do for glass and lights? I don't recall the car being built around
readily available windscreens and the like, and having CE approved items custom-made is not a cheap undertaking. Especially if only one or a limited
number is produced, the glass may end up costing the same (or more!) than the bodyshell.. 
I believe the glass design was taken from conventional road cars. I think the Smart roadster windscreen.
Gaz will confirm wether or not he stuck with this im sure.
I believe the glass design was taken from conventional road cars. I think the Smart roadster windscreen.
Gaz will confirm wether or not he stuck with this im sure.
quote:
Originally posted by akumabito
Just a thought... if you'd do a full-scale version, what would you do for glass and lights? I don't recall the car being built around readily available windscreens and the like, and having CE approved items custom-made is not a cheap undertaking. Especially if only one or a limited number is produced, the glass may end up costing the same (or more!) than the bodyshell..
IIRC the individal light units would be mounted within a seperate unit.
Front glass is smart roadster.
Took some pics of the thing today,
here you go
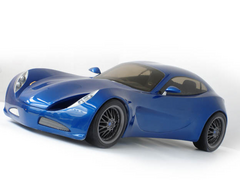

Rescued attachment dave.jpg
and here is another
Thanks for all the comments chaps
gaz
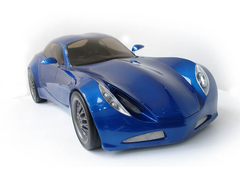

Rescued attachment grol.jpg
If you get time Gaz can you make me a couple of those mirrors? 
Paul G
not a problem, but they will be made of plastic, and i know you hate plastic
Mmmmm, I knew there'd be a catch.


[Edited on 15/5/07 by 907]
Paul
You could always form some alli round them 

probably been asked before, but i don't fancy reading through 200 replies, how will the doors open? normal hinged, or gull wing? would look even
more amazing with gull wing doors
no worries, the same as the AEON, (like Rasman's)
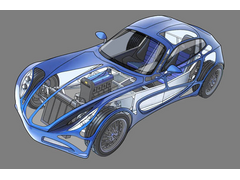
here is my attempt at a cut-a-way pic
Thanks
GAZ

Rescued attachment BREAK DOWN small.jpg
Looks good that, but you really do need to sort that bigger engine out! That little zetec looks lost in there.
I hate you! Master designer, model maker, master draughtsman.
Jack of all trades and master of them all!

jamjar, dont get carried away.
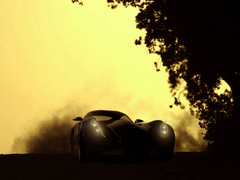
DIY, i am gonna try and contact MK, and hopefully pop down to see them next weekend to have a chat about chassis and engines etc. I will see what i
can sort out.

Rescued attachment moody yellow 1.jpg
And master at modesty too!
now thats just creepy
Something i'm not sure if it would make a difference....
when full sized would air forced under the car be ok with the bodywork? or would you need to work out a way of forcing air movement so it wasnt
pushing too much pressure onto the fiberglass?
Probably, i need to look how other companies have delt with the problem. I know very little about this sort of thing. I would think that as long as
you are able to let the air out, pressure will be reduced.
I am not an expert but IMHO air pressure under the car is unlikelly to be a major issue below 150mph with your body design.....
The place to look out for is the front wheel arches as this could be where you get some lift.... but it looks like you have put an exit behind the
front wheels so again I don't think that will be an issue.
thats good to here
Nothing new there then. 
just a quick update,
went to visit MK on friday, they seemed to like the project. Their new indy chassis looks just the thing to build the car on.
Has anyone had a play in the new chassis? What do you think of it? and what is everyones feelings about using the MK chassis

Rescued attachment small.jpg
Gaz as somebody going the locost route all I can say about MK is that from the comments on here they seem with one of the companies who attract the
most compliments. The guys in charge even comment on here so hey they must be in touch with the market.
I hope something comes of it!
I sincerely do hope it becomes commercially available - I want one!
BTW, if you "alter the body" on a car, any testing required (like SVA again??) I would have thought not, anyone know for sure?
Fingers crossed
Bob
You don't need a SVA for a bodywork kit! Think Chavs in Vauxhall Novas.
However if someone was building normal kit stylee they would need one, but thats nothing shockingly new or suprising.
Yes radii and light positions would have to be checked that they conformed during development of a full sized version (as would everything else in the
SVA Manual) otherwise people would have to rip it to shreds to make it road legal, but I think that would have been expected as part of the design
process Bob.
[Edited on 29/505/0707 by JamJah]
[Edited on 29/505/0707 by JamJah]
The plan at the moment is to buy the chassis and get it rolling as soon as is possible, I think that i will go zetec with throttle bodies, i hope this
should be an easy ish installation and then start on the body.
As i will be building the first one i will have to get it through SVA so subsequent shells should not be any problem to pass. I am sure that i will
have missed something regarding SVA during the model process but i cant See it being too far off.
On the bright side, i presume that if you build a full bodied car you don't have to mess about covering nuts and bolts on the wishbones etc.
Yep - the only real concern is external radii, and whether the tyres/wheels are covered by the bodywork.
My only concern with going the MK route would be whether the body could still be fitted to a 'book' chassis. It would be a shame to tie
yourself up with just one chassis, however popular.
Bets of luck with the venture, though!
David
Was it MK who sold paper plans of their kits? Or was that GTS...? or someone else....? someone has. I'm sure someone will pipe up with who!
Continuing to love this project! Big respect Gaz. 
For chassis options, I think you need to decide on the track width and wheelbase and keep the bodywork mounts separate from the body itself so that
people can fab their own to fit whatever they have. Assuming you go Sierra track - which seems to be most common these days - the body should fit MK,
MNR, GTS, +4 Locosts, wide-bodied Westies etc with little modification.
The wider your market, the more you'll sell!
quote:
Originally posted by JamJah
Was it MK who sold paper plans of their kits? Or was that GTS...? or someone else....? someone has. I'm sure someone will pipe up with who!
I will be going sierra track because that seem to be the way they are all going, with the added bonus that i could make the glass area a bit wider and
not have to cut a screen down.
Track can be adjusted to an extent by using different wheels/spacers etc.
I need to find out if the wheel base is the same on the different models as i think this could be the biggest problem as far as fitting the shell to
different cars.
I had a thought yesterday (dangerous) that it might be possible to use the original rear wings as inner arches.
The thing is i have to build the epona on an existing chassis so it makes sense to use a popular one (MK).
I hope that, as the body drops over the top of the chassis, there should be a little room to spare and with a small amount of modification it should
fit most things. just need to try it.
thanks chaps.
any thoughts give me a shout.
GAZ
How does the MK chassis compare in term sof size with the other major manufacturers? Ideally, you'd want to go for the largest chassis you can, that way all the smaller ones will fit happily under the shell. Which dimension are the most different? IE height, width length, as this may alter/affect some of the mounting points. EG, if they are nearly all the same width, then that could tie one dimension in place, making there less to mess about with.
Read the whole thread, and can only say congrats, and please add me to the production body "waitlist". How much is the deposit? 
One question (may be answered in the other thread), how does the exhaust route? Are you planning for some type of "flat" style tubes to go
underneath? I actually would prefer out the side...is it possible, w/ the design?
IIRC the exhausts are one bit that require final planning. When I meet him and his old man at Stoneleigh, there were still a few possible options. One was running it down the sills and then up and over the rear suspension, and then split at the back. There were other ideas, but I can't remeber what they are!
Less of the "old " Si.
For your information, Epona will require a very complicated handcrafted system,
that will cost oodles of dosh, most of which will end up in my wallet.


Paul G
I call everyone's Dad Old Man, so don't take it to heart!  And besides, you aren't that young! You're son's got 10 years on
me as it is!


I was a child bride. 
Paul G
quote:
Originally posted by scotmac
Read the whole thread, and can only say congrats, and please add me to the production body "waitlist". How much is the deposit?
One question (may be answered in the other thread), how does the exhaust route? Are you planning for some type of "flat" style tubes to go underneath? I actually would prefer out the side...is it possible, w/ the design?

If anyone is interested and fancies a laugh,
The Northumbria University Transportation Design Degree Show starts tomorow night from 6pm.
In Newcastle (it might be an idea to mention that)
There are twenty odd displays to look at and i am sure we will be going for a few beers afterwards.
I am going to look at a doner car tonight for the epona, so fingers crossed..
u2u me if anyone wants a look at the show.
Thanks
GAZ
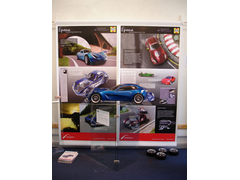

Rescued attachment SHOW BDS.jpg
I'll have the one in red from the top right please!!! 


Hey Gaz,
Still looking good!
If you use the widest chassis that you can, then you can get some tasty seats in there. The car gets quite narrow at window/waist height so this
might not leave much elbow/shoulder room if the car is scaled for a smaller chassis.
regards
Steve
quote:
Originally posted by Gaz 1977
I will be going sierra track because that seem to be the way they are all going, with the added bonus that i could make the glass area a bit wider and not have to cut a screen down.
Track can be adjusted to an extent by using different wheels/spacers etc.
I need to find out if the wheel base is the same on the different models as i think this could be the biggest problem as far as fitting the shell to different cars.
I had a thought yesterday (dangerous) that it might be possible to use the original rear wings as inner arches.
The thing is i have to build the epona on an existing chassis so it makes sense to use a popular one (MK).
I hope that, as the body drops over the top of the chassis, there should be a little room to spare and with a small amount of modification it should fit most things. just need to try it.
thanks chaps.
any thoughts give me a shout.
GAZ
Thanks andy, that could well be useful,
I think i might do a quick mk2 model with the adjustments for the wider chassis, I have the molds for the original model so it wont take too long.
There are a few bits and bobs that i am not too happy with that need sorting before the full size one can be built.
as for elbow room, i hope it will be ok, all of the body is wider then a normal seven, i thinks its going to be one of those suck it and see
things.
Thanks chaps,
GAZ
Better do a poll Gaz - I'll be wanting book standard chassis & 60" outside wheel to outside wheel...... ;^)
Go for the standard chassis & you have a big retrofit market as well as a large proportion of new builds - Go for the new MK chassis & the
market is much more limited.
Or maybe you can make it fit anything?????
Bob
If the hope is to sell shell for retrofits to existing cars, a very usefull measurment to record, if any one is measuring their cars, is Width Over
Wheels (WOW), overall width from the outside of LHS wheel to outside of RHS wheel, front and rear.
This can then be compared with the outside width of the body, to see if the wheels will sit in the arches nicely, without changing wheel offsets
dramaticallly
Cheers
Fred W B
[Edited on 12/6/07 by Fred W B]
Aha - Width over wheels (WOW)
I knew there'd be a proper name for it!
And we'll do it in metric yeah?
It's clearly a tricky one - everyone will have a different combination of axle/wheels/pacers etc. and there's probably 50mm or so acceptable
range, maybe even less
Bob
quote:
Aha - Width over wheels (WOW)
OK width over wheels for mine is 1540mm rear, a touch less at the front
Bob
Sorry i haven't replied lately, its been a bit on the busy side.
The WOW measurements and wheelbase will be really useful,
I am planning a second model at the mo with a few mods to fit a MK chassis, so all help is much appreciated.
Gaz
Hey Gaz,
What allowance did you make for the roll bar width and height? There are a lot of variations here and most are vertical from the mounts and ovbiously
pretty square. Some drivers (espcially the racers) have set it at the head height +50mm for safety.
have fun
Steve
Hi steve, I based the roof height on 907's car, the roof (the mock up) if i remember correctly worked out 70mm above my headand the roll bar
fitted under it.
It would be possible to gain another 40 or 50 mm if the seats were fitted directly to the floor.
Gaz
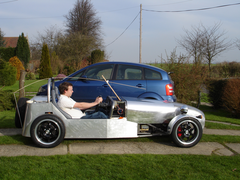

Rescued attachment side pic.jpg
Hi All
From the floor to the top of the roll bar is 1000mm, give or take a thickness of carpet. 
The seats are indeed 50mm above the floor.
Atb
Paul G
If you braced on the roll bar, it would add a lot of rigidity to the upper body - especially where you need the extra strength and rigidity to support
your door arrangement.
907 - nice car by the way!!
Thanks Steve.
With a little engineuity I'm sure the roll bar could be incorporated in the mounting of the body, and indeed the doors.
As for my upper body rigidity, or rather lack of it, I blame my lifelong search for the perfect pint. 
Actually, the thought of it being used as a roll bar makes the hair on the back of my neck stand on end.
I prefer to think of it as a high level brake light mounting bracket. 
Atb
Paul G
Gaz
Excellent design and project for the locost chassis, and have been following your design thread, for quite awhile.
You've hit into a very interesting niche, the locost coupe, and I 'm looking forward in seeing you driving , your Epona coupe
soon......
Keep it up,
Ciao
Italo
[Edited on 25/6/07 by FUORISERIE]
The lads from Newcastle Uni are at their degree show for the next few days.
I hope to go on Saturday, just to show a fatherly interest.
For anyone that's interested the web site's
http://northumbria.ac.uk/sd/academic/scd/news/622605
Top r/h side click "OpenFolio Transportation" for his and his mates work.
Atb
Paul G
Sorry but I can't do multiple pics. (9 to follow)

Rescued attachment uni-show-009-s.jpg
2
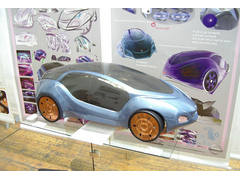

Rescued attachment uni-show-010-s.jpg
3
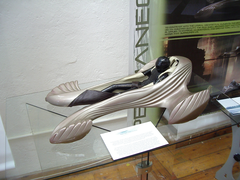

Rescued attachment uni show 011.jpg
4
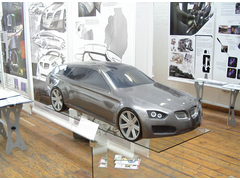

Rescued attachment uni-show-012-s.jpg
5
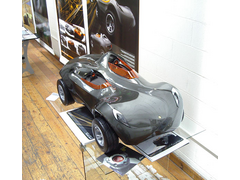

Rescued attachment uni-show-013-s.jpg
6

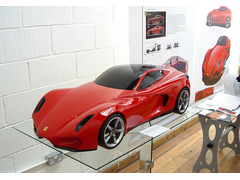
Rescued attachment uni-show-015-s.jpg
7

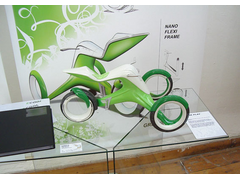
Rescued attachment uni-show-014-s.jpg
8

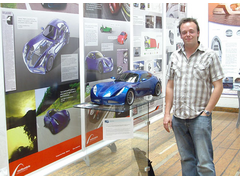
Rescued attachment uni-show-016-s.jpg
I really, REALLY wouldn't want to collide with a lamppost in car number 3... 
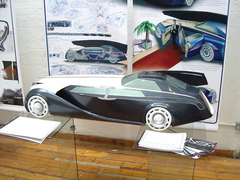
And last of all Epona.
I was just sooooo impressed with all their work.
Sorry I couldn't show the cad exhibits. They were also top notch.
Well done, and congrats on obtaining your degrees.
Credit must also go to your tutors, Mataeo, Acer, and Rob
(sorry if speelt rong)
Paul G

Rescued attachment uni-show-004-s.jpg
Can't see No 3 being popular with blokes! 
thanks for the pics dad.
as for number 3, imagine comming of on a corner and going though a field of oil seed rape.....


I will get the model back in the next few days, Time to start modding it i think ready for the big one.
Thanks for all the comments on the project, i hope to move it on a bit soon...
Gaz
Anyone else see a more than passing resemblance between no 6 and the new Ferrari Dino renderings? MMmmmmm, fezza nicking designs? 
Gaz, do you know what grade you got yet?
quote:
Originally posted by Gaz 1977
as for number 3, imagine coming off on a corner and going though a field of oil seed rape.....


thanks Dave, always good to have a translator handy.
Si have you got any links to the dino renderings, i fancy a wind up comming on,
I got a 2.1 by the way. The beer drinker's degree.
Sorry Gaz, I meant to say thanks for the invite to the show. Some cracking work on display.
Lots of use of erm, interesting Technology  by some people.
Epona Looks even better in the flesh (so to speak)
How is the car progressing now?
quote:
Originally posted by Schrodinger
How is the car progressing now?


Jolly damn fine work indeedly
Hi GAZ, what a great work! If only I were in England... but I'm in Italy
Do you know if your university accepts people from outside England? (me)
Show us some updates, when you can!
Thanks for the continued interest chaps.
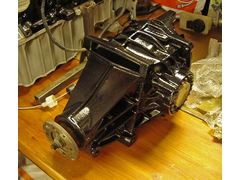
I am mostly painting the diff this week, and working on some revised designs. I will put some pics up as soon as possible.
As for the Uni, all are welcome, If you want more information u2u me and i will give you the contact details of Rob the boss.
Gaz
well i've been painting this week, I used plastic coat zink primer and plastic coat metal protect top coat. I was pleased with the way it went
on, and it has a really good drying time (about 40 mins)
Reconmended!
I got hold of some ZX9R carbs and have sent them off to Bogg Bros to have the manifold sorted, I have know idea when i will get them back, If they
look as good as the pics on their website i will be well happy.
I started grovelling to farter, and with a bit of luck there might be the beginings of an exhaust manifold soon.
I will stick some pics of the revised design on here in the week.
Gaz

Rescued attachment dif-001-s.jpg
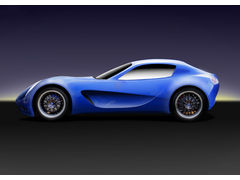
I have finally got some new stuff to show on here.
I am part way through a revised side view of the design, its hard to spot the differences but feel free to have a go.
all comments are very welcome
Gaz

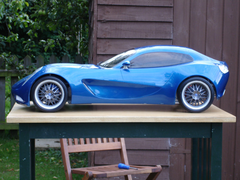
Rescued attachment FLAT UNFINISHED.jpg
and heres the one to compare.
I need some good ideas on which wheels to use, i cant make my mind up.
Thanks
Gaz

Rescued attachment DSC01446 S.jpg
I think I'd like to keep the rear 'quarterlight' behind the door, as visibility is difficult in that direction on my open locost -
blocking it off would be a nightmare on slip-roads!
I appreciate that it would be a pig to produce, though.
David
It would appear that you have shortened the front over hang personally I prefer the old view. where do I apply for the prize
this is looking really good now  i would put somthing like OZ Canova wheels or lenso granso on this you need some that will stand out as i
think that the wheels make the car.
[Edited on 9/9/07 by oadamo]
No. You make the car. Gaz makes the body.
The wheels just make it look smart.  hehe
hehe
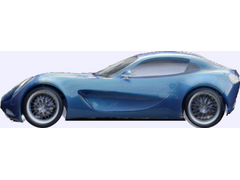

EPONA - model on top
Model 50% transparent on top of rendering.
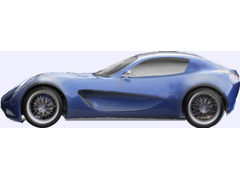

EPONA - render on top
Render 50% transparent on top of model.
Differences i saw...
Half window, already mentioned
Wheel arches?
Loss of wing mirror.
[Edited on 10/909/0707 by JamJah]
[Edited on 10/909/0707 by JamJah]
[Edited on 10/909/0707 by JamJah]
Steeper rear window?
thanks chaps.
Sorry forgot to put the mirror on,
well spotted everyone,
the front over hang is one of the few part that i havent touched, it is funny how when you change different parts other parts seem more apparant or
seem to change .
any chance of a few pics of those wheels
Hi All.
Gaz has had "the call of the curry" so I'm posting this on his behalf.
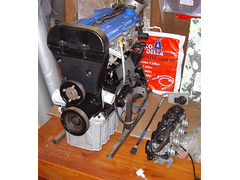
The inlet manifold & carbs came back from Bog Bros yesterday so we've hung them on the Zetec
and thought you might like a pic or two.
We are well impressed. 
Paul G
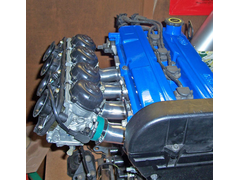

Rescued attachment Bog-carbs-008-s.jpg
A mouses view.
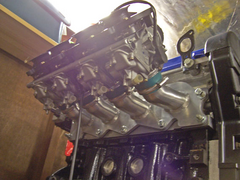

Rescued attachment Bog-carbs-011-s.jpg
The internals are also finished well.
Paul G
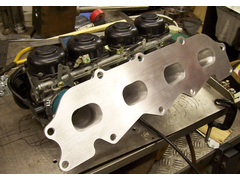

Rescued attachment Bog-carbs-001-s.jpg
finally i have finished the revised side view of the Epona.
the changes are as follows.
Front arch enlarged
wider wheel arches
narrower side vent
additional side skirt
larger door
simpler glass area
slightly higher roof
larger lips on arches
All comments greatfully recieved
Thanks
GAZ
Looking really good Gary. 

One observation - have you allowed enough clearance for the headlights when the steering is on full lock & bump? I mention that because I had the
same clearance 'challenge' when I designed my front section, which required a little rethink quite late in the buck production.
I am not sure which lights you are planning to use but it might be a good idea to get the tape measure out 
[Edited on 3-1-08 by RazMan]
thanks for the idea Mike.
Consider it done
Gaz


Rescued attachment side revised 2.jpg
well i think this thread is long enough
Continued on new Aeon Epona thread
thanks
Gaz 

Looks Awsome, is it just for the regular type 7 with a body?
quote:
Originally posted by mudbugracer
Looks Awsome, is it just for the regular type 7 with a body?