sooty
|
| posted on 16/2/13 at 09:40 PM |

|
|
2.0 Silvertop Zetec timing belt replacing.
I am about to change the timing belt on my 2.0L silvertop zetec.
A flat bar/plate for positioning the cams and a pin/bolt is screwed/pushed into the block to locate/position the crank as required.
Has anyone details of the pin/bolt regarding its length from shoulder to tip for the 2.0 Silvertop, I made one for a Ford 1.6 diesel years ago in my
works machine shop with details given in the Haynes manual at the time.
Thanks
|
|
|
|
|
will121
|
| posted on 16/2/13 at 09:58 PM |

|
|
I previously made one but did end up buying a kit, if knowone beats me to it I will measure it in morning
|
|
|
austin man
|
| posted on 16/2/13 at 10:09 PM |

|
|
Only ever locked the cams and never had a problem just scheck the crank timing mark hasn't moved
Life is like a bowl of fruit, funny how all the weird looking ones are left alone
|
|
|
zetec
|
| posted on 17/2/13 at 05:25 AM |

|
|
Never locked the crank, just the cam bar.
" I only registered to look at the pictures, now I'm stuck with this username for the rest of my life!"
|
|
|
will121
|
| posted on 17/2/13 at 03:12 PM |

|
|
Just measured mine in the laser 3096 kit its 63.7mm
|
|
|
sooty
|
| posted on 17/2/13 at 04:03 PM |

|
|
thanks,
The dimension of 63.7, that is from the underside (seating against block surface) of the head to the tip end and this is for a Silvertop 2.0 Zetec.
?
thanks again.
|
|
|
will121
|
| posted on 17/2/13 at 06:15 PM |

|
|
quote:
Originally posted by sooty
thanks,
The dimension of 63.7, that is from the underside (seating against block surface) of the head to the tip end and this is for a Silvertop 2.0 Zetec.
?
thanks again.
Yes to all. I made one first then ended up buying a kit with the pin and 5mm plate locally for £9.99
|
|
|
redturner
|
| posted on 23/2/13 at 07:31 PM |

|
|
I am still trying to work out where the locking pin fits, to lock the crank.....
|
|
|
will121
|
| posted on 23/2/13 at 07:58 PM |

|
|
Some good info and pictures here, it mentions in places blacktop but from memory silvertop in same place
link
|
|
|
sooty
|
| posted on 11/3/13 at 04:28 PM |

|
|
OK,
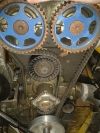
Done the Timing Belt.
This was a Silver Top 2.0ltr Zetec from a 95yr Mondeo.
Purchased a kit from Camskill, a Gates PowerGrip. This included 1 Belt, 2 lower idle pulleys, 1 Tensioner pulley, 1 Tensioner spring, 3 Torx screws
and 1 spring anchor pin, complete with instructions.
Purchased a Laser Timing kit, 1 Cam timing plate, 2 Crank TDC pins.
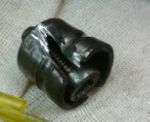
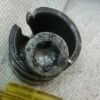
Everything was straight forward, apart have a problem with the torx screw in the right hand lower idle pulley. May be they were not replaced by
previous owner, but the stars bits rounded off and could not undo. Now the problem of removing the worn torx screw, normally these would be removed by
drilling and using an easy out/extractor. But this mean't removing the Radiator and Oil cooler to do so, so having a Dremel kit I attempted to
grind the Idler into bits with a cutter wheel. Cutting the outer plastic wheel, then the outer ball race and then cutting the inner carrier as much as
I could in opposite sides to hopefully split it in two. As this a bearing part, very hard and shatters when abused. So care must be taken, when I used
a small chisel to split/crack the carrier to possibly loosen enough to undo using Mole grips. Normally Mole grips would not grip as the carrier is a
bearing part, but as its been cut in two and split the grips gripped and with Joy the torx screw and carrier turned to be undone easily.
On fitting, the new kit was straight forward apart from having to find a way of locking/holding the camshaft belt wheels in position while tightening
to the required torque as instructed. I found that although the cams were locked with the plate at the rear, while tightening the torx screws in the
wheels, the wheels would turn slightly leaving slack in the belt. Albeit this may equal only a few degree's if any and may not mean alot, but
why have pins and plates to accurately set the crank and cams in position and then have slack in the belt slightly throwing the timing out.
Once the installation procedure was carried out by rotating the engine two times and then tightening the main tensioner torx screw, checking the twist
of the belt this was ok.


thought these maybe better..
[Edited on 11/3/13 by sooty]
Sylva Striker
2.0ltr Silvertop Zetec on 45 Webers with Megajolt V3
|
|
|
r1_pete
|
| posted on 11/3/13 at 06:26 PM |

|
|
quote:
Originally posted by redturner
I am still trying to work out where the locking pin fits, to lock the crank.....
It doesn't, it interferes with the crank lobe and stops it turning clockwise when viewed from the pulley end, crank will still turn anti clock a
little, until it hits and bends the locking pin.
[Edited on 11/3/13 by r1_pete]
|
|
|
redturner
|
| posted on 11/3/13 at 06:40 PM |

|
|
Thanks for that. I was looking for an accurately drilled hole in the crank. Even the pictures which have been posted look like it enters the crank.
Will have a proper look next time engine is out.
|
|
|
sooty
|
| posted on 11/3/13 at 06:52 PM |

|
|
quote:
Originally posted by r1_pete
quote:
Originally posted by redturner
I am still trying to work out where the locking pin fits, to lock the crank.....
It doesn't, it interferes with the crank lobe and stops it turning clockwise when viewed from the pulley end, crank will still turn anti clock a
little, until it hits and bends the locking pin.
[Edited on 11/3/13 by r1_pete]
If you want to be picky in wording, that is what is mean't to be said.
It stops the Cranks web against the Timing pin to be sure of TDC, these which have been in use for many years by ford before the Zetec's
arrived.
|
|
|
redturner
|
| posted on 11/3/13 at 07:04 PM |

|
|
Sorry if you thought I was being picky, there was certainly no intention. I had no idea where the pin went and as I said else where, I always use the
dial gauge to find tdc and dial the cams in. In fact to be accurate.
|
|
|
rusty nuts
|
| posted on 11/3/13 at 07:50 PM |

|
|
If you used the cam timing bar to hold the cams while undoing the sprocket bolts your lucky you didn't break the cams, the trick is to use a cam
sprocket holding tool!
|
|
|
r1_pete
|
| posted on 11/3/13 at 07:51 PM |

|
|
I didn't read anything picky into it, I thought the same as you, but had the advantage of the sump being off so I could see how it worked.
|
|
|
redturner
|
| posted on 11/3/13 at 07:57 PM |

|
|
quote:
Originally posted by rusty nuts
If you used the cam timing bar to hold the cams while undoing the sprocket bolts your lucky you didn't break the cams, the trick is to use a cam
sprocket holding tool!
Nowhere did I state that I used the cam bar to secure the cams whilst loosening/securing the cam pulley bolts. I fit
it once to see what the tollerances are then set the cam up with the dial gauge.....
|
|
|
Paul Turner
|
| posted on 12/3/13 at 07:35 AM |

|
|
No need to loosen the cam belt sprockets when doing a belt change. Done probably 4 on Zetecs and after fitting the new belt and checking with the TDC
crank tool and cam bar the timing was spot on every time.
On cars with dowels or keys in the cams it is not possible to adjust the cam timing without different offset keys or dowels, on production engines at
cam belt change time its just not necessary.
If you want to be picky as the cam belt stretches the cam timing will change slightly but not enough to make any noticeable difference. If it did it
would be a service item.
|
|
|
sooty
|
| posted on 12/3/13 at 09:42 PM |

|
|
quote:
Originally posted by Paul Turner
No need to loosen the cam belt sprockets when doing a belt change. Done probably 4 on Zetecs and after fitting the new belt and checking with the TDC
crank tool and cam bar the timing was spot on every time.
On cars with dowels or keys in the cams it is not possible to adjust the cam timing without different offset keys or dowels, on production engines at
cam belt change time its just not necessary.
If you want to be picky as the cam belt stretches the cam timing will change slightly but not enough to make any noticeable difference. If it did it
would be a service item.
I had to undo the Cam wheels as the Inlet cam was about 5degs advanced against the plate and then tension side of the new belt down to the crank was
pretty slack, even tried to jump a tooth to take up the slack with no joy.
|
|
|
Paul Turner
|
| posted on 13/3/13 at 09:33 AM |

|
|
quote:
Originally posted by sooty
I had to undo the Cam wheels as the Inlet cam was about 5degs advanced against the plate and then tension side of the new belt down to the crank was
pretty slack, even tried to jump a tooth to take up the slack with no joy.
Clearly the cam wheels had been moved on your engine during a previous cam belt change unless they were badly timed at the factory.
|
|
|
sooty
|
| posted on 13/3/13 at 04:17 PM |

|
|
I think more like, during an engine rebuild by the previous owner of the car, ie: rebore, crank regrind and valve seat recut etc etc.
|
|
|


