splitrivet
|
| posted on 2/5/04 at 08:13 PM |

|
|
Making a bonnet episode 67
Look I know loads of you guys have made your bonnets with ratchet straps but it just dont work for me, cut out the bonnet slightly oversize off of a
cardboard template marked out a datum, strapped it up but as soon as I release the straps all I get is a bit of Alu with a slight bend in it,which
just looks like a bit of Alu that some soft pratts strapped up with a ratchet strap.
Been on it most of the day and now I'm well and truly ready for getting shite faced.
I honestly cant see how it would work as the alu has to be bent past the curve you need to retain the shape.
Yours frustraitingly,
Bob 
[Edited on 2/5/04 by splitrivet]
I used to be a Werewolf but I'm alright nowwoooooooooooooo
|
|
|
|
|
Mark Allanson
|
| posted on 2/5/04 at 09:07 PM |
|
|
I am thinking of doing mine tomorrow, using the same technique.
I will strap it down, mark it out, trim it front and rear,make the double folds on the chassis. I plan to strap it down again then to fit the catches
and leave in place for a week - it will eventually get used to being in that position!
If you can keep you head, whilst all others around you are losing theirs, you are not fully aware of the situation
|
|
|
Dave Ashurst
|
| posted on 2/5/04 at 09:11 PM |
|
|
I can't imagine ratchet straps doing a proper job either. You have my sympathy. Of course you have to bend it beyond the final curve to let it
spring back to it's permanent shape.
I made mine by bending it over my knee. Well, across my thigh. In fact I just made another one the same way. It takes a bit of effort but
it's acheivable and you willl get a good curve if you take care and have marked the curves start and end points properly. Just spread the
pressure and avoid localised force - practice first?
Easy peasy (ish). 
|
|
|
Jon Ison
|
| posted on 2/5/04 at 09:26 PM |
|
|
Ray, just down the road from me made passers by on the busy A617 wonder what the eck he was doing as he made is useing the lamp post just outside his
house..........
Apparantley this is the lamp post to use around this neck of the woods as all the others arn't the correct Dia.....
Want the postcode ??? so you can look it up on multimap ??? 
|
|
|
Mark Allanson
|
| posted on 2/5/04 at 09:36 PM |
|
|
I used the ratchet strap idea for my front side panels (way off book) and it worked a treat. If the bonnet wont retain its position, I don't
think it will be a problem, it will just add to the tension on the bonnet catches - probably be proved wrong, but I also have a 8' sewer pipe in
reserve for emergencies!!
 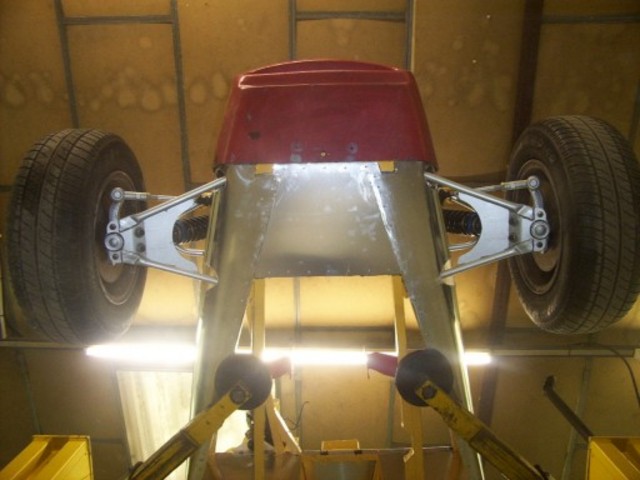
Rescued attachment Underside Front.jpg
If you can keep you head, whilst all others around you are losing theirs, you are not fully aware of the situation
|
|
|
stephen_gusterson
|
| posted on 2/5/04 at 10:27 PM |
|
|
try annealing the alu.
I have typed this up a few times, and cant be arsed to do it in full. Try a search on my name using annealing as a word.
In short, mark the alu with soap, heat soap until brown with a blow torch. Then allow to cool. The alu will be softer and easier to bend.
I have done this on loads of my parts with 2mm alu (yes 2mm) and it works well.
atb
steve
|
|
|
mangogrooveworkshop
|
| posted on 2/5/04 at 10:31 PM |
|
|
Once you have got the position of the bends its upside down on a clean carpet with soil pipe or your argon weldmix bottle. bit at a time keep working
the bends till you get them to stay upright.
Keep trying it on the car as you go......one other thing you cannot make a mistake!!!! 25 quid a time or live with it for a long time. Mark I like
the job you did on your ali there. (remember the drain holes in the undertray) The word is relax and dont hurry!!!! Balls ups made while you wait.
|
|
|
Mark Allanson
|
| posted on 3/5/04 at 09:21 AM |
|
|
I hadn't thought of drain holes at the front! Thanks
If you can keep you head, whilst all others around you are losing theirs, you are not fully aware of the situation
|
|
|
splitrivet
|
| posted on 3/5/04 at 09:33 AM |
|
|
Thanks for the input guys.
Its not that it wont retain its shape slightly Mark it retains hardly any shape whatsoever.
In two minds now plan a;lampost/argon bottle/sewer pipe method or ta tala da da daaaa plan b; make up an inner frame and PU the varmint to that.
Plan b would allow me to go for plan c which Ive been thinking of, a hinged opening bonnet,keep you posted.
Cheers,
Bob
I used to be a Werewolf but I'm alright nowwoooooooooooooo
|
|
|
pbura
|
| posted on 3/5/04 at 02:20 PM |
|
|
Mark,
The way you have those bottom front edges of the side panels rolled looks FANTASTIC! 
Did you pre-bend those at all, or did the tratchet straps do the whole job?
Pete
Pete
|
|
|
Mark Allanson
|
| posted on 3/5/04 at 07:08 PM |
|
|
quote:
Originally posted by pbura
Mark,
The way you have those bottom front edges of the side panels rolled looks FANTASTIC!
Did you pre-bend those at all, or did the tratchet straps do the whole job?
Pete
Gee Shucks...
Yes I used ratchet straps, a slight bend by hand intiallly, just to let the ally know which way to bend, then progressive tightening with 3 straps,
one side at a time until the lower edge got to within 1" of the chassis (straps never tension the last bit, unless you release and reposition
the pull). I put a 3' length of soft wood on a trolley jack and applied Tigerseal and jacked it up (I had predrilled the rivet holes). I put
rivets in one at a time, repositioning the jack/wood every time.
If you can keep you head, whilst all others around you are losing theirs, you are not fully aware of the situation
|
|
|
Mark Allanson
|
| posted on 3/5/04 at 07:14 PM |
|
|
Found a photo to make it a little clearer, note the gaffer tape protecting the upper edges
 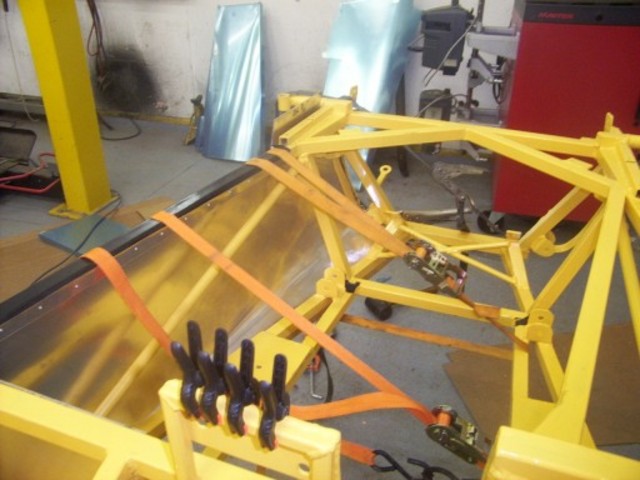
Rescued attachment RatchetFrontEnd.jpg
If you can keep you head, whilst all others around you are losing theirs, you are not fully aware of the situation
|
|
|
Peteff
|
| posted on 3/5/04 at 08:41 PM |
|
|
the alu has to be bent past the curve you need to retain the shape.
When you put the clips on to hold your bonnet in place it will pull into the channels on your scuttle and nosecone automatically if it's cut to
size. If you bend it past where it needs to go it will pull back out easily enough. When it's fastened down it will follow the shape of the car.
Don't trim too much off at a time when finishing it as the ends are like / not straight because of the slope forwards.
yours, Pete
I went into the RSPCA office the other day. It was so small you could hardly swing a cat in there.
|
|
|
Mark Allanson
|
| posted on 3/5/04 at 09:14 PM |
|
|
Has anyone used guide pins on their bonnets, I am considering steel hooks on the chassis top and holes in the bonnet return edge, If I have a front
ender, the bonnet will not come adrift and cut my head off!!
Most of the main manufacturers use something similar, Saab have engaged hooks that actually pull the bonnet down in a smack
If you can keep you head, whilst all others around you are losing theirs, you are not fully aware of the situation
|
|
|
JohnN
|
| posted on 13/5/04 at 10:16 PM |
|
|
Mark,
Ref your photo of yellow chassis..... did you cut the holes for the front suspension with the panel rivetted in place?? did you use a nibbler or
something??
JohnN
|
|
|
Mark Allanson
|
| posted on 13/5/04 at 10:34 PM |
|
|
Yes, the holes were cut in place with a rotary rasp, it was the only way to get them in exactly the right place.
I used a steel rod sharpened at one end, lined up the brackets and jabbed the ally, then drilled fron the outside enough to get the rasp in - crude
but effective!
If you can keep you head, whilst all others around you are losing theirs, you are not fully aware of the situation
|
|
|
mangogrooveworkshop
|
| posted on 13/5/04 at 11:20 PM |
|
|
quote:
Originally posted by JohnN
Mark,
Ref your photo of yellow chassis..... did you cut the holes for the front suspension with the panel rivetted in place?? did you use a nibbler or
something??
JohnN
The other way is to cardboard template the front end and use a nibbler when u are cutting the panel. Harder than the other method but only one tool
|
|
|
timf
|
| posted on 14/5/04 at 07:44 AM |
|
|
quote:
Originally posted by mangogrooveworkshop
[
The other way is to cardboard template the front end and use a nibbler when u are cutting the panel. Harder than the other method but only one tool
2 tools a drill to put a hole in to start the nibbler in
|
|
|
jonti
|
| posted on 14/5/04 at 08:32 AM |
|
|
Ehup Bob
If you want a piece of pipe to bend it over then you can have the one that I used.
Also, have access to a tin bashing brother who might come and assit for a beer or two. He only lives in Bradley and made a crackin' job of
mine.
 
Rescued attachment Bonnet-fitted-front-view-lr.JPG
OFROK
|
|
|
splitrivet
|
| posted on 14/5/04 at 04:41 PM |
|
|
Might take you up on that offer John boy,remind me on though to keep me speed down when I leave your place that camera by the junction got me last
time. I'll give yer a bell.
Cheers,
Bob
I used to be a Werewolf but I'm alright nowwoooooooooooooo
|
|
|
Peteff
|
| posted on 14/5/04 at 05:16 PM |
|
|
I used the ratchet strap to do mine before I put the engine in.
 
Rescued attachment bonnetside.JPG
yours, Pete
I went into the RSPCA office the other day. It was so small you could hardly swing a cat in there.
|
|
|
Peteff
|
| posted on 14/5/04 at 05:18 PM |
|
|
I trimmed the ends with green beading.
I didn't bother with returns and the bonnet pulls flush with the case clips. I put R clips through the front ones to stop them
releasing.
 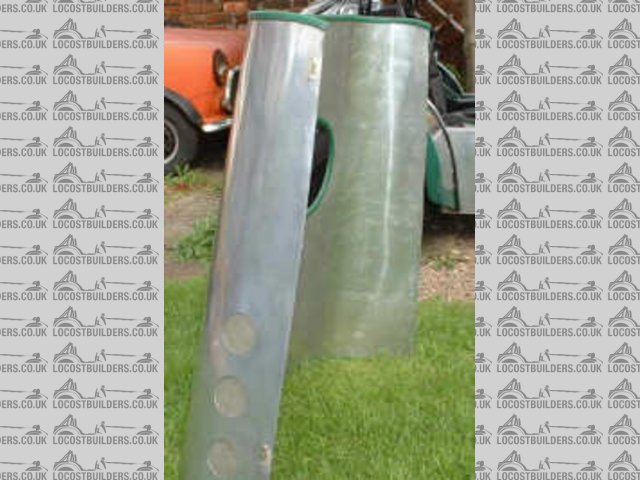
Rescued attachment bonnetupright.JPG
yours, Pete
I went into the RSPCA office the other day. It was so small you could hardly swing a cat in there.
|
|
|