omega0684
|
| posted on 8/4/09 at 04:28 PM |

|
|
pinto rebuild continues........part 6: Sump Cleaning
well i continued on with the task of rebuilding and reconditioning the pinto i was given and taking the state of it into consideration i decided to
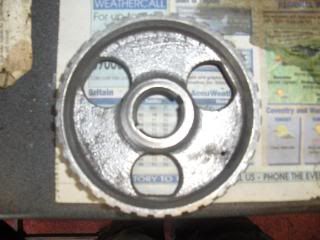
state doing some electrolysis, i left the cam pulley in a washing up bowl for 4 hours today for the electrolysis to take effect and the results were
to say the least spectacular, i spent 5 minutes with wire brush on the drill after to remove any left over paint AND LOOK!
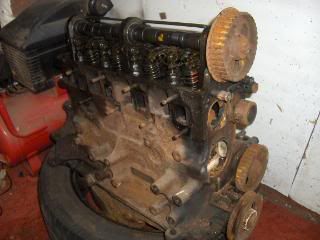 
you can also see the state of the block in the above picture as well so guess what i did! Yep you guessed it i made a massive elctrolysis bin and
stuck it in!
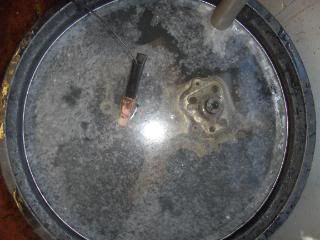 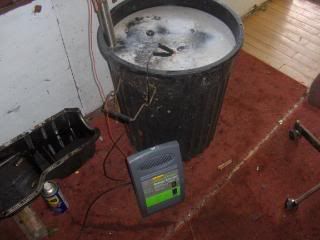
hopefully it will come out like the cam pulley but im going to leave it over night so it has longer to work on the deep rust.
a managed to clean up the rest of the pistons and crank as well as most of the bottom end. long and exhausting day but im sure it will be worth it.
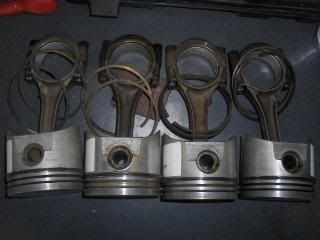 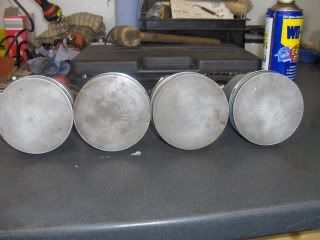
tomorrow will be drying out the block (in the oven) and then i might have a look at starting to take the head apart, not sure yet.
hope your day has been a productive one,
All the best
Alex
[Edited on 18/5/09 by omega0684]
|
|
|
|
|
blakep82
|
| posted on 8/4/09 at 04:30 PM |

|
|
will the electrolysis have any effect on the cylinders? 
i think maybe not, since they should be good solid metal, bet i don't know...
hydrogen embrittlement is what i'm thinking of
[Edited on 8/4/09 by blakep82]
________________________
IVA manual link http://www.businesslink.gov.uk/bdotg/action/detail?type=RESOURCES&itemId=1081997083
don't write OT on a new thread title, you're creating the topic, everything you write is very much ON topic!
|
|
|
omega0684
|
| posted on 8/4/09 at 04:40 PM |

|
|
personally i don't think that it will have an effect, the water temperature isn't hot enough and the concentration gradient of free
floating hydrogen irons is too low to cause any major damage. its only a '20' block so im not to bothered.
|
|
|
blakep82
|
| posted on 8/4/09 at 05:15 PM |

|
|
but the bubbles given off are hydrogen. i don't know... i thought u'd heard of people on here mention it before.
________________________
IVA manual link http://www.businesslink.gov.uk/bdotg/action/detail?type=RESOURCES&itemId=1081997083
don't write OT on a new thread title, you're creating the topic, everything you write is very much ON topic!
|
|
|
prawnabie
|
| posted on 8/4/09 at 05:30 PM |

|
|
Hydrogen making eh? Whats the terrorist hotline number lol
|
|
|
vindicator
|
| posted on 8/4/09 at 05:33 PM |

|
|
hope he hasn't blown his bloody roof off his garage with all that hydrogen in the air......
timr.spaces.live.com---build blog
|
|
|
omega0684
|
| posted on 8/4/09 at 07:36 PM |

|
|
shhhhhhhhhhhhh im secretly making a new form of hydrogen bomb! 
|
|
|
hellbent345
|
| posted on 8/4/09 at 08:50 PM |

|
|
lol and now this thread is being monitored by the goverment!! 
|
|
|
omega0684
|
| posted on 8/4/09 at 09:23 PM |

|
|
quote:
Originally posted by hellbent345
lol and now this thread is being monitored by the goverment!! 
they can pop round for a cuppa tea and a bacon butty if they want! i will be happy to say hi.
|
|
|
vindicator
|
| posted on 9/4/09 at 08:30 AM |

|
|
come on get out of bed and take a snap of that engine....how clean did it come up......
TimR
timr.spaces.live.com---build blog
|
|
|
02GF74
|
| posted on 9/4/09 at 08:52 AM |

|
|
quote:
Originally posted by vindicator
come on get out of bed and take a snap of that engine....how clean did it come up......
TimR
it came out very shiny but shrunk just a bit  .... ....

|
|
|
omega0684
|
| posted on 9/4/09 at 01:38 PM |

|
|
ok tim calm down, clam down, here are some photo's of the block after electrolysis, i had to spray it off with a power jet and then 10 minutes
with the wire brush on the stubborn bits
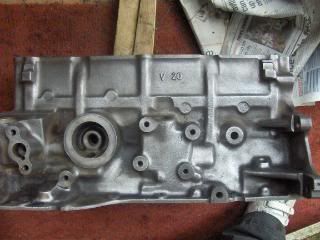 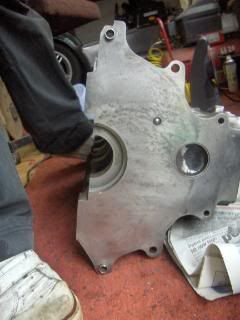
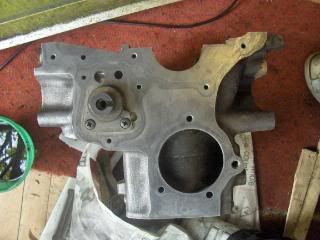
i have had to put it back in to do the other side of the engine as electrolysis only like to work on a face to face basis, what i should of done it
put another anode in on the other side of the engine and then the whole engine would have been done in one go.
just need to paint it next, i think i will just do it black, it will hide the dirt better! 
[Edited on 9/4/09 by omega0684]
|
|
|
cd.thomson
|
| posted on 9/4/09 at 01:42 PM |

|
|
wow, thats awesome!
Craig
|
|
|
vindicator
|
| posted on 9/4/09 at 01:49 PM |

|
|
That looks so smart.......are you going to paint it now........(had to ask the question!!!)
That is something I would like to do, but to strip down the whole engine........and get it back together again would be my nightmare......
Her in doors would not be happy if she opened the oven door and there was my engine block just warming up!!!..
Nice Job.....
TimR
timr.spaces.live.com---build blog
|
|
|
omega0684
|
| posted on 9/4/09 at 01:53 PM |

|
|
im going to paint it black after its had its second blast of electrolysis to do the other side.
its not that hard to do tim, this is only my first time doing a strip down, i have only done the bottom end at the moment, i guessing the head will be
a little more complicated but its an easy way of learning. i still have loads of other stuff to electrolyse as well.
|
|
|
vindicator
|
| posted on 9/4/09 at 01:57 PM |

|
|
Ok, I thought you were a seasoned mechanic with all your problems........
I would be worried about all the gaskets, shims, o rings etc.....and after putting it all back together having oil dripping out the bottom (like mine
does at the moment....can't seem to get the sump gasket sealed and have done it twice!!)
timr.spaces.live.com---build blog
|
|
|
omega0684
|
| posted on 9/4/09 at 02:03 PM |

|
|
i am a young pinto mechanic enthusiast, i know feck all about engines really! (just kiddin) 
i always work with the sierra manual by my side.
have you tried using a gasket sealant with a new gasket, you have to make sure both surfaces are totally oil free otherwise there is no point you will
always get leaks (sorry if it sounds like im teaching you how to suck eggs etc etc)
|
|
|
vindicator
|
| posted on 9/4/09 at 02:12 PM |

|
|
yep...made sure every surface was clean and dry and used sealant on both sides of gasket and then pinched it up and left over night. Next morning gave
it another 1/4 turn on all bolts.
Still it drips a tea spoon over night after a drive. Good job I have a plastic sheet and metal drip tray on my carpet in the garage to catch
anything!!!!
timr.spaces.live.com---build blog
|
|
|
omega0684
|
| posted on 9/4/09 at 02:31 PM |

|
|
where about is it coming out , is it towards the front by the crank bearing seal or the rear seal or the sides?
|
|
|
:{THC}:YosamiteSam
|
| posted on 9/4/09 at 05:03 PM |

|
|
it will be coming out where the rubber cup seals join the side seals - they are hard to seal - it took me a few attempts to get it right
in the end i fitted the gasket on the sump - the corner joins i used liquid gasket plastered on but keeping it towards the outer edge to stop it
falling in - then put the sump on the jack and gently raised it to the block - the jack makes the big difference - stops your arms dropping off
getting tired - then using a small torch and a small mirror checked the aignment before fitting the small bolts right round very careful..
|
|
|
omega0684
|
| posted on 10/4/09 at 07:41 PM |

|
|
bit of painting done today and managed to get the block ready for the re-insertion for the pistons, have been cleaning the front end bearing housing
today which is taking ages cuz there is lots of nooks and crannies!
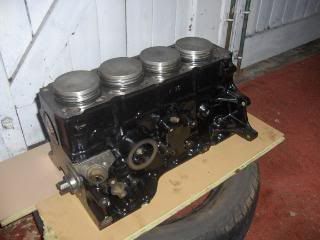 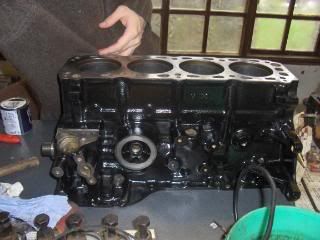
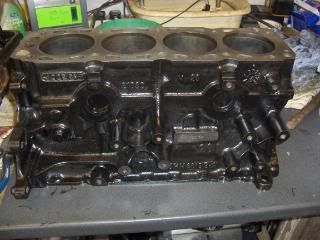
will keep you posted as things progress.
|
|
|
flak monkey
|
| posted on 14/4/09 at 06:15 AM |

|
|
I hope after all this effort you are fitting new rings and bearings and honing the cylinders while you are at it?
Looking good BTW
Sera
http://www.motosera.com
|
|
|
vindicator
|
| posted on 14/4/09 at 09:02 AM |

|
|
Hi Alex,
Sorry for the delay in replying but went up to skye for the easter break. The answer to your last question to me is... Yes. Don't really know
where it is coming out as I could not be bothered to get underneath and check it out as it has been a bit cold. Will wait until the weather has warmed
up a bit.
As for your engine it is looking very good. Just need to buy some replacment parts to make sure it all works ok......
Just a quick question .....how are you going to test that it works.....
TimR
timr.spaces.live.com---build blog
|
|
|
02GF74
|
| posted on 14/4/09 at 09:39 AM |

|
|
quote:
Originally posted by omega0684 
this is the interesting photo - as it shows the outisde fo the bore - this and the internals of blocks usually get rusted up;
I presume the rust was removed inside the block (i..e. the water jacket).
?
Not ever done this, is the rust dissolved or crumbles off ? i.e. is the water jacket full of crud or nice and clean?
pity I have painted my crossflow block ....
|
|
|
omega0684
|
| posted on 15/4/09 at 07:33 PM |

|
|
the internals of the water jacket have come up cleaner but not entirely rust free, i managed to get a screw driver in the to break alot of it up, the
electrolysis doesn't dissolve the rust but does separate it from the iron very efficiently. i power jetted the block afterwards to get rid of
any crud that was left on the side.
i have now dismantled the head and im working my way through cleaning up the valves and, i have managed to polish two of the inlet valves at the
moment and i will post up more photo's as i get through them all, more than likely tomorrow night.
i also have to re-seat the valves.
i will keep you posted
Tim: with regards to getting it to work, im not sure yet, im debating making a standing engine testing bay in the garage, should be fun.
|
|
|


