Prof_Cook
|
| posted on 1/5/22 at 05:14 PM |

|
|
End April 2022
Project as at end April 2022 - too cold to work in the garage today.
End of April 2022
|
|
|
|
|
Prof_Cook
|
| posted on 4/7/22 at 07:45 PM |
|
|
Back into the garage
Challenging retirement project has been delayed a little due to contracting COVID-19. Luckily (!) only extreme tiredness. Have managed to get back
into the garage and back to cutting and shaping steel tube.
Got the engine mounts cut out of the old front sub-frame and offered up to a cross-tube ready for future welding. Took a week to get the cross tube
into the right location to ensure the engine is in correct location.
Now I have a growing pile of off-cuts it has been time to get the arc-welder, gauntlets, overalls, steel toe capped boots and welding helmet out and
start practising welding. Another delay as the battery in my helmet had died so had to wait till a certain on-line supplier got a pack of 5 batteries
out to me.
Today was first time trying to weld for over 40 years. Managed to strike arcs and place a few tack welds onto the test piece seen in the bottom of the
below photo, set current low to start off with. Top of the test piece was 45 amps with pre-heating from a Bosch hot air gun and this cant be broken
even with heavy hammering. Bottom of test piece was 55 amps without pre-heating, broke when cleaning off the crusty bits. Got a lot more
self-training on welding to do before I start welding the frame.
 
Starting to practice welding
[Edited on 4/7/22 by Prof_Cook]
|
|
|
Prof_Cook
|
| posted on 10/8/22 at 12:59 PM |
|
|
Lower frame rails almost ready
Progress is still being made but slower than I would hope, but still posting updates monthly!
Good news : No more money spent.
Bad news : "Tack" welding of lower frame rails still only almost complete due to need to reweld quite a few of the welds as not good enough,
also hand cutting and filing ends of tubes with fish-mouths and fitting the tubes together takes longer than planned. So still got to complete lower
rails asap so I can lift them off the build table and start welding upper frame rails, and then tack together with uprights. Then to seam weld and
start welding major brackets (radiator) etc onto frame.
[Edited on 10/8/22 by Prof_Cook]
|
|
|
Prof_Cook
|
| posted on 10/8/22 at 01:04 PM |
|
|
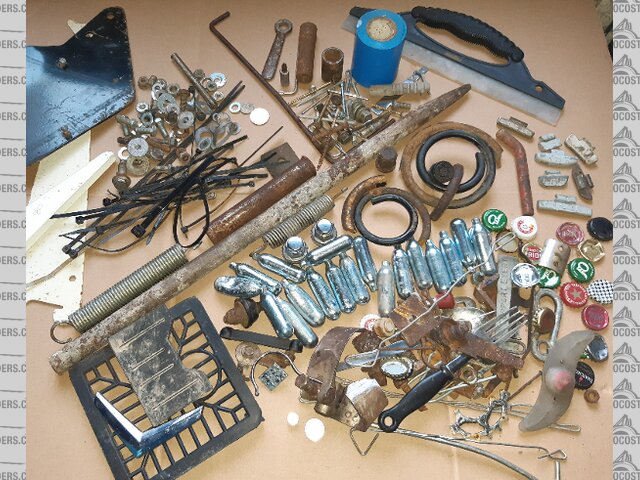
Stuff found at side of road while walking dogs.
Top left for parts bin. Top right for toolbox. Bottom stuff for local recycling bin.
 
Stuff
|
|
|
indykid
|
| posted on 10/8/22 at 01:43 PM |
|
|
I wonder who lost the morse taper drill sleeve?
It's an unusual thing to find at the side of the road...it'd make a mess of your windscreen if it bounced!
|
|
|
Prof_Cook
|
| posted on 6/9/22 at 02:10 PM |
|
|
Lower frame rails tack welded together
Retirement project continues to progress:
Good News
1. No money spent.
2. My welds continue to improve.
3. Lower frame rails tack welded together and didn't fall apart when removed from the jig.
4. Lower frame rails weigh only 14.3Kg
5. Started to cut and file the tubes for the much simpler top rails and then it be the uprights
Bad News
1. Progress still not as fast as originally planned but at least progress is being made.
|
|
|
Prof_Cook
|
| posted on 6/9/22 at 02:18 PM |
|
|
Weight
Target car weighed 560Kg and with an engine power of 172BHP the driver enjoyed performance of some 307BHP/Tonne.
My donor car engine BHP was 105BHP so using that figure I need my car to weigh some 350Kg:
Engine BHP 105
Weight (Kg) 350
BHP/Tonne 300
So Target is 350 Kg
The following is my current weight allocation for each component:
Frame 50 (simpler than original design)
Engine 123 (no a/c or power steering)
Gearbox 36
Differential 26
ECU and Loom 5
Radiator 10
Steering Rack 10
Steering Wheel 10
Seats 15
Fuel Tank 10 (would limit range to ~60miles so would prefer 20Kg)
Hubs, wheels 55
350Kg
This is my first pass and I am sure I have forgotten something which will mean weight reduction will be needed, or the BHP/Tonne will drop. Loom
still to be rewired, radiator, Hubs/wheels still to be weighed, above figures are guess at this time....
[Edited on 6/9/22 by Prof_Cook]
|
|
|
pigeondave
|
| posted on 6/9/22 at 02:32 PM |
|
|
How much do the lights weigh?
If you're looking to build to a weight, start counting the grams from the start.
|
|
|
Prof_Cook
|
| posted on 6/9/22 at 02:35 PM |
|
|
Lights
Many thanks pigeondave
I overlooked lights which now need to be added to weight budget. Have ditched donor lights. Am keeping eye on certified lights on certain on-line
store to get smallest/lightest possible.
[Edited on 6/9/22 by Prof_Cook]
|
|
|
Badger_McLetcher
|
| posted on 6/9/22 at 10:06 PM |
|
|
Nice project! On the power to weight ratio side, the MX5 lump is quite tuneable which should help if you go over your weight budget. Or turbo it and
get well over the 170hp you mentioned 
I'm also in Brizzle BTW, so yell if you ever need a hand. Can't guarantee I'll be able to, but the offer's there!
If disfunction is a function, then I must be some kind of genius.
|
|
|
scudderfish
|
| posted on 7/9/22 at 06:18 AM |
|
|
quote:
Originally posted by pigeondave
How much do the lights weigh?
If you're looking to build to a weight, start counting the grams from the start.
Also have a poo and drive naked.
|
|
|
Prof_Cook
|
| posted on 2/10/22 at 12:43 PM |
|
|
Workbench
End of September Update
Good News
1. No more money spent, but need to get some more 25mm 2mm wall tubing so watch this space..
2. Folding work bench was showing signs of strain so now I have built a workbench which now sits between front of build table and chest freezer at
back of garage. Workbench has been built of "skip" wood (4in by 2in lumber) and some 25mm square 3 mm think walled tubing.
 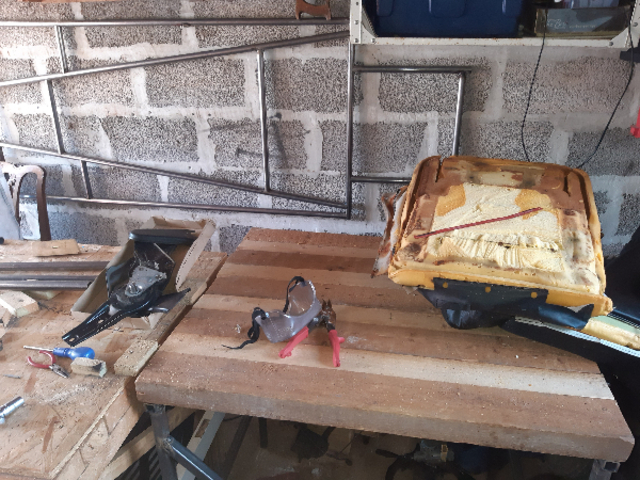
Workbench
3. Neighbour having garage clearout before building an extension so I was lucky to pick up some tools which were out on their drive for anyone to
take away, including the red handled compound action cutters you can see in the workbench photo. While picking these up the neighbour came out with
another cardboard box full of stuff and got a metal tin with about 60 different sized metal drill bits.
4. Compound action cutters made it an easy job to cut the steel rings which fixed the seat covers to the seat pan and back. Only took 5 minutes (wore
safety glasses, gloves and covered the rings with cloth while cutting) and now modifying seat pan to reduce depth of seat pan which should enable seat
to be fitted lower in the car while still clearing the prop shaft and associated restraint cage.
Bad News
1. Getting distracted from frame build to construct the workbench but had to do it as folding workbench was on its last legs.
Hi Indykid, Yes the morse sleeve was a strange thing to find in the road (on white hatchings between 2 pedestrian refuges, but just goes to show the
danger of driving onto the hatchings as you risk hitting something like this.
Hi Badger_McLetcher, many thanks for your interest. Turbo will not be an option due to cost. But as you say, the MX5 lump is quite tunable, I recall
reading something somewhere about skimming the head can give some 10BHP but probably not an option due to cost.
Hi Scudderfish, I wont be going to the extremes you mention, but have lost some weight (14Kg) since first thinking about building this car and am
applying weight reduction to all car components. Now where can I get a lightweight and cheap steering rack....
[Edited on 2/10/22 by Prof_Cook]
|
|
|
Prof_Cook
|
| posted on 2/10/22 at 01:17 PM |
|
|
Car and Equipment Budget
Balsa cement GBP £3.49
Balsa wood for model GBP £6.90
Build table screws and long drill bits GBP £9.25
Steel GBP £165.16
Welding electrodes GBP £7.00
Total to Date GBP £191.80
Reduction since last report as 3.5mm wall think tubing was too heavy for car and used to build workbench.
Equipment
Build own sportscar and race it GBP £17.93
Power drill GBP £24.79
Drill Bits GBP £10.00
Welding gloves GBP £6.05
Hacksaw blades GBP £9.80
Safety goggles GBP £11.07
Files GBP £10.99
6in square GBP £10.75
Build Avon Sportscar book GBP £17.19
Auto darkening welding helmet GBP £22.99
Welding magnets GBP £20.60
Cordless drill GBP £26.58
Metal cutting discs GBP £6.00
Angle grinder GBP £33.95
Steel tubing for workbench GBP £54.80
Safety impact goggles GBP £3.00
Arc welder GBP £56.75
Total GBP £343.24
|
|
|
Prof_Cook
|
| posted on 17/10/22 at 09:26 AM |
|
|
Drilling
Good News:
Seat dismantled, removed head rest speakers, wiring and associated mounts. Seat rake adjustment hinge spring and associated metalwork removed.
Drilling took place over weekend of the hinge to remove excess metal and hence lighten the seat. Now completing re-profile of seat pan and drilling
same to reduce weight:
 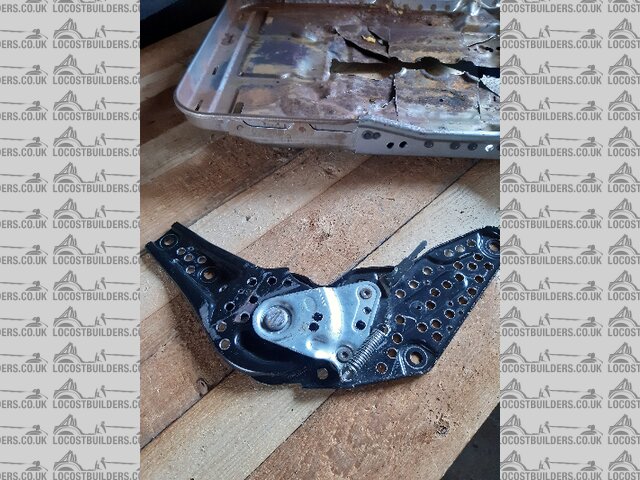
Lightening the seat
Bad News:
Waiting for 6m of 25mm tube to complete top rail layout of frame.
Spent £5 on branded batteries for welding helmet as generic batteries only seem to last a few days.
[Edited on 17/10/22 by Prof_Cook]
|
|
|
Neville Jones
|
| posted on 20/10/22 at 08:06 PM |
|
|
Hi, An ambitious project that should look great when complete.
I notice you are using an arc welder. I had the same intention 35 years ago and soldiered on.
Then a mate loaned me a mig to try out.
Why had I not discovered this machine earlier!!!
Used the mig ever since.Better welds and much easier. That mig has now built many chassis.
Maybe you could find a cheap mig on ebay, and then find your nearest Adams Gas agent. ( make sure you use a proper slug/ball flow meter, it will save
you a fortune over the round dial gauges.)
I just got a back payment on the pension, bought an R-Tec ac-dc 200amp Tig, so now to learn and do ali and SS welding.
|
|
|
Prof_Cook
|
| posted on 21/10/22 at 03:15 PM |
|
|
In case of fire
Cheers Neville, many thanks for the comments. Yes a MIG would be good but given I am retired, my only unlimited resource is time, funds (as for all of
us) given the cost of living crisis are limited and I am trying to build the car for minimum funds.
For example, I was reading another car builders web page and found out his car was burnt out in last stages of build so I had started to
"budget" for a fire extinguisher for the garage. But luckily a house across the village had the below extinguisher sitting outside on the
pavement along with some other items and when I asked the homeowner about it he said "if you can use it then please take it as otherwise it would
go to the skip".
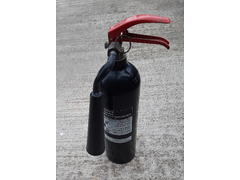 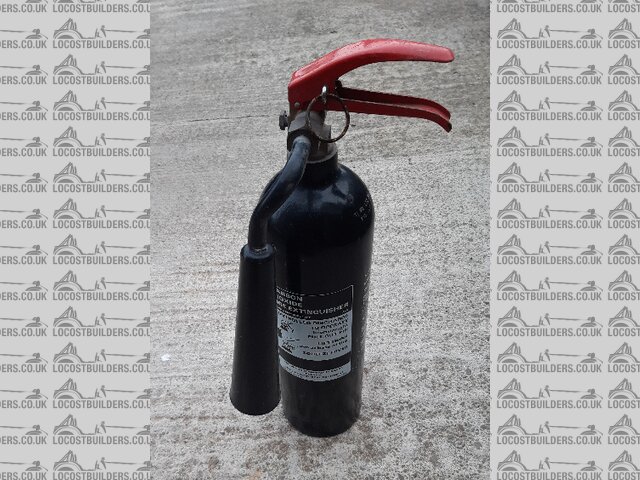
Extinguisher
Has cleaned up nicely, appears to be at charge weight and the lead seal on the pin is still wired in place.
|
|
|
Prof_Cook
|
| posted on 26/10/22 at 05:38 PM |
|
|
11.3Kg Seat
Stock seat was dismantled. Seat pan contoured section removed and replaced with some marine plywood left over from another project. Seat back
adjustment hinge spring removed, hinge drilled for lightness. Seat Pan drilled for lightness. Seat pad foam cut with hacksaw blade to reflect loss of
seat pan contour. and accommodate the thickness of the plywood sheet. Seat cover refixed to seat pan and back using plastic zip ties recovered from
roadside.
Seat now sits level on my workbench and the seat will sit a little lower (~20mm) in the final car and I will sit a little lower in the seat than
before, and even better there was no cost involved in this work:
 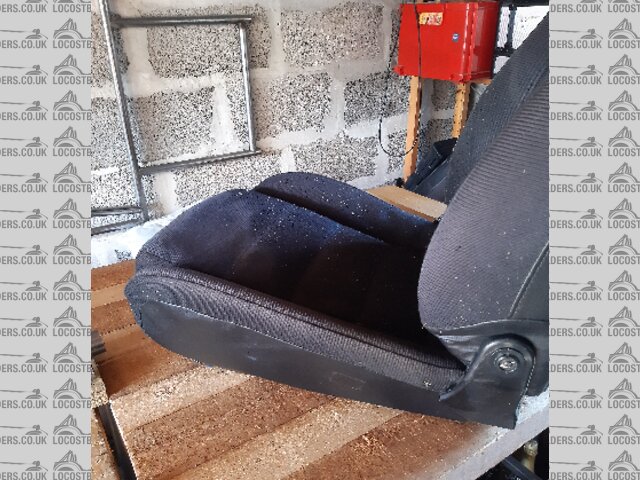
SEAT
Modified seat weighs 11.3Kg including its 4 mounting bolts.
Seat covering will need to be replaced, but that (recovering) will be done after car is constructed and on the road.
[Edited on 26/10/22 by Prof_Cook]
|
|
|
Prof_Cook
|
| posted on 13/11/22 at 09:59 PM |
|
|
Steel delivered
So back in the garage finishing top rail lay up and then back to welding...
Car component expenditure is now = £285.80
Equipment expenditure = £348.24
|
|
|
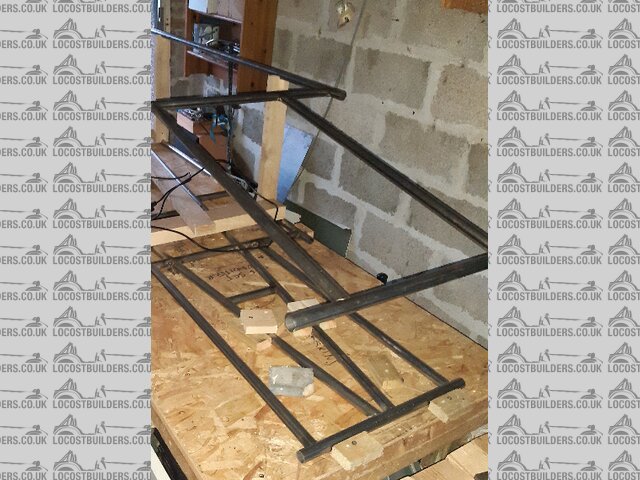
Prof_Cook
|
| posted on 15/11/22 at 01:25 PM |
|
|
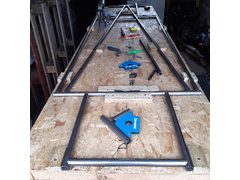
Test fitting radiator
Back in garage for 1 hour today, just finishing top rail lay up for welding. Top rails being jigged upside down on bottom rail layout. Offered
radiator (upside down) onto top rails and there is clearance between radiator cap and top rails, and between hose connection points and cross rails.
Radiator will be offset in car and gap on right (left when rails are right way up) will be route for air intake plumbing. Photo shows view from front
cross member of top rails which is 4ins higher than longitudinal rails and thus become 4ins lower when turned right way up.
 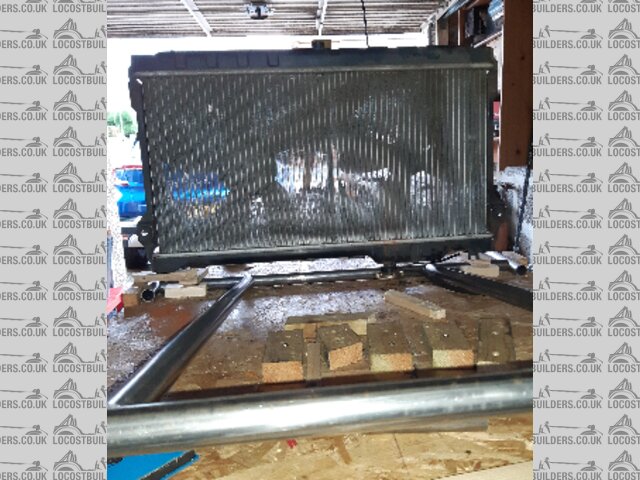
Test fitting radiator
[Edited on 15/11/22 by Prof_Cook]
|
|
|
Prof_Cook
|
| posted on 28/11/22 at 05:08 PM |
|
|
Floating the Top Rails
Progress continues.......
Good News:
1. Welds continue to improve.
2. Top rails tack welded together.
3. Top rails "floated" over bottom rails using "skip" pallet wood lengths.
4. No more money spent.
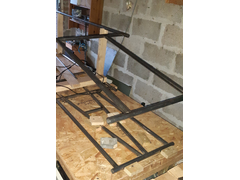 
Floating Rails
Bad News:
1. Nothing project related, just the problem with the site over the weekend.
Next Steps.
1. As cant afford new radiator I am reusing the MX-5 radiator so now to test fit radiator and reduce length of the wooden "legs" holding up
the top rails until the radiator cant be fitted (cardboard tubing will be used to represent the forward suspension mounts uprights, then add 5mm onto
the "legs" and cut the tube uprights to that length and tack weld them into place.
2. Once uprights tack welded into place then start planning the layout of the triangulation pieces.
3. Other activity over winter will be for cold days to slim down the wiring loom...
[Edited on 29/11/22 by Prof_Cook]
|
|
|
Prof_Cook
|
| posted on 2/1/23 at 07:08 PM |
|
|
End of 2022
Carpentry again in December, setting up the jigs to hold the top rails exactly above the bottom rails and holding them in place ready for tack welding
the uprights. Sub-zero temperatures delayed work.
 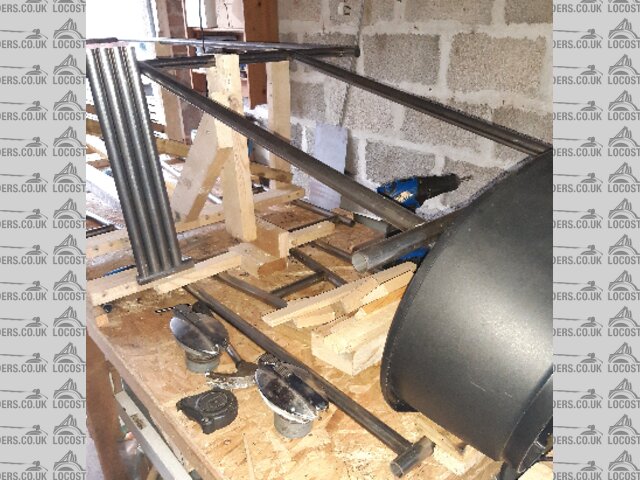
End of 2022
Steel for final uprights purchased and delivered this week. Steel tubes are being cut to length required and then fish-mouthed using a hand file.
"Pan-pipes" at left of picture are some completed. There will be 16 uprights between the top and bottom rails. Total cost of components for
the car is now £357.80
Kind person donated two lockable jaguar petrol caps (at bottom of picture), but will only need one.
Candidate nose cone sourced for free - very close to dimensions required, may be possible to adjust using hot air gun but that will be a future
experiment.
[Edited on 2/1/23 by Prof_Cook]
|
|
|
Prof_Cook
|
| posted on 4/1/23 at 07:55 PM |
|
|
Finds Table
Top left stuff for components bin. Top right for Toolboxes. Rest of stuff for the local recycling bins.
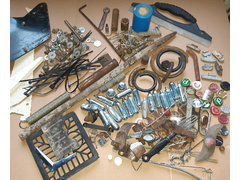 
Finds Table
All found on road within 1.5 miles of my house.
|
|
|
Prof_Cook
|
| posted on 20/1/23 at 08:05 PM |
|
|
Setting Up "New" MIG welder
Update and seeking information:
Good News:
More 1in 2mm thick wall tube received.
MIG Welder (flux cored) obtained and now put the "arc" welder to one side and started to practice welding with this "new" welder.
Trying different wire speeds and amp settings on pieces of off-cut, did a few good welds but on most attempts lots of spatter to so patience and
persistence needed to get used to this type of machine (could be earth clamp so stripping twin and earth mains cable to make large copper
"pads" to help with earthing) also will try a different roll of flux cored "wire", so will be a while till I get back to welding
frame components. I would be interested to hear of others experience with such welders or a pointer to any other forum/posts/sites detailing their
use?
 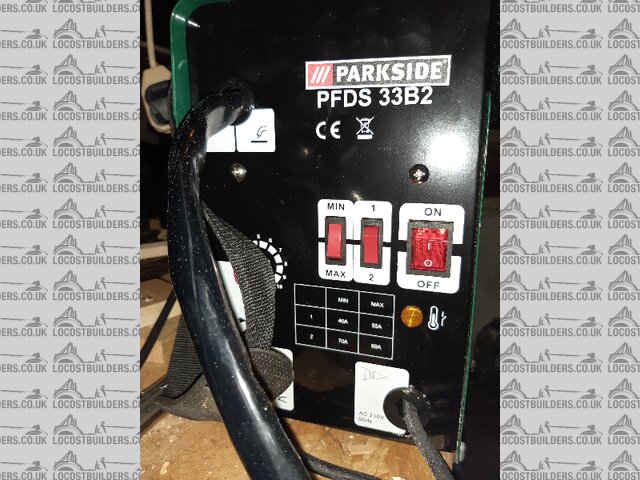
Flux cored MIG welder
Bad News:
Total spend on components for the car is now £398.80
[Edited on 20/1/23 by Prof_Cook]
|
|
|
Prof_Cook
|
| posted on 11/2/23 at 09:09 PM |
|
|
£14
Spent £14 on a new roll of branded quality flux cored mig wire - result - now welding with the "new" welder.
[Edited on 11/2/23 by Prof_Cook]
|
|
|
Prof_Cook
|
| posted on 16/2/23 at 01:56 PM |
|
|
Free components
Being thinking for a while as to how to make bended pieces of steel to enable rounded bodywork to be "built" over the squarish frame...
Driving home recently noticed a semicicular piece of plastic lodged at the bottom of an embankment. Popped back when walking the dogs one afternoon
and turned out to be sizeable piece of roadkill debris in the left hand side photo below.
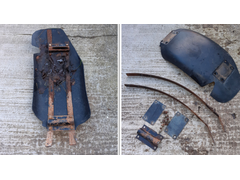 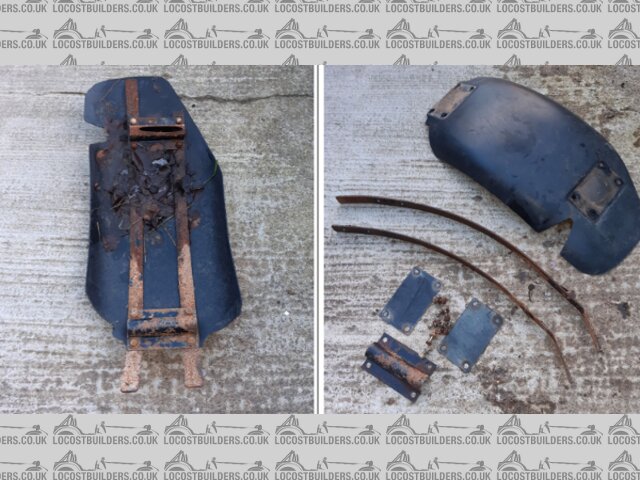
Free components
Once cleaned up and dismantled, ended up with 2 nice gently bent pieces of some 3mm thick steel (should be able to derust with angle grinder etc), and
two drilled plates which will be cut up for frame mounting brackets for various engine bay components.
[Edited on 16/2/23 by Prof_Cook]
|
|
|