 .
.
OK...I've got most of the structure in place for a buck for my bulge.
*However* I don't have a clue what I should be using to finish it off so I can sand and sculpt it.
Help!!
[img][/img]
Body filler?
That's what I was thinking, but where do I get huge amounts (preferably locally) without it costing the earth?
i did a bonnet ages ago and bought a offcut of rigid roof insulation ,its 2" thick and you can shape it with a surform and then put a light skim of body filler over it. you can stick it together with pva if you need to but it does give you a flat surface to start with.
Best way is to put one layer of fibreglass over it, that will stop it moving then a thin layer of filler....filler straight on top of what looks like
paper mache won't be very stable and might crack.
Autopaint do 3kgs tins of filler for about £12 a pop...in Halfrauds you are looking at £20
Easy sand in a big yellow tin for about £10. If you ever use a full tin on one job you're putting it on too thick  .
.
Thin plastic sheet over the paper and than one layer plaster of Paris about 1/2" thick.Tape some pieces of cardboard-foam whatever you
have,around the area you want to cover to keep the plasterform in some kind of a box.
Weight till it's dry and than take a piece of fine mesh chickenwire and form it over the plastermold and put another 1/2" of plaster over
it.The chickenwire is just reinforcement when you take the mold off.
Wait till it's completele dry and than you can sand the inside of the mold and finish it off with a layer of bodyfiller.
It will cost you close to nothing and you wont need any sanding when the fiberglass part is released from the mold.
Cheers Cita
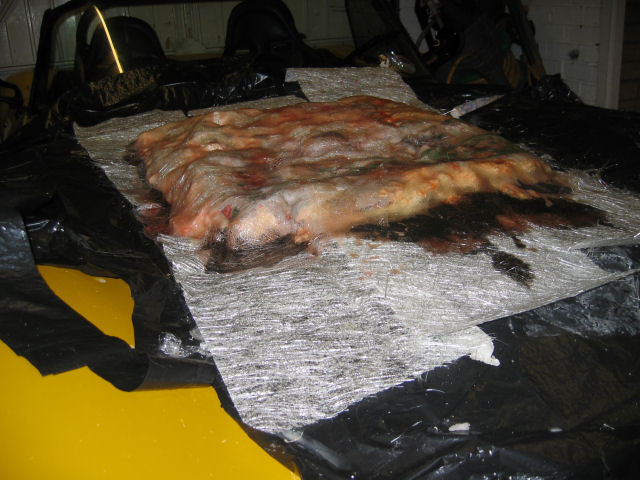
OK..removed the Mache and Put on a layer of FastGlass for strength...


Mache Removed + Fibre Laid
As you can see, it's far from level
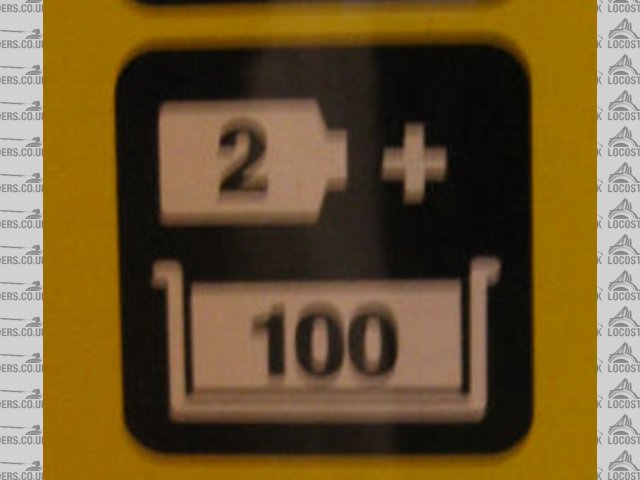
Question I have now is how do I mix the filler? I've a 3 litre tin of U-Pol Easy Sanding Body Filler which has the following sign on the
side..


Filler Mixture
What exactly does this mean? 2 packets of hardener per 100ml?
TIA
Stephen
quote:
Originally posted by Cita
Thin plastic sheet over the paper and than one layer plaster of Paris about 1/2" thick.Tape some pieces of cardboard-foam whatever you have,around the area you want to cover to keep the plasterform in some kind of a box.
Weight till it's dry and than take a piece of fine mesh chickenwire and form it over the plastermold and put another 1/2" of plaster over it.The chickenwire is just reinforcement when you take the mold off.
Wait till it's completele dry and than you can sand the inside of the mold and finish it off with a layer of bodyfiller.
It will cost you close to nothing and you wont need any sanding when the fiberglass part is released from the mold.
Cheers Cita
quote:
Originally posted by stevebubs
Filler Mixture
What exactly does this mean? 2 packets of hardener per 100ml?
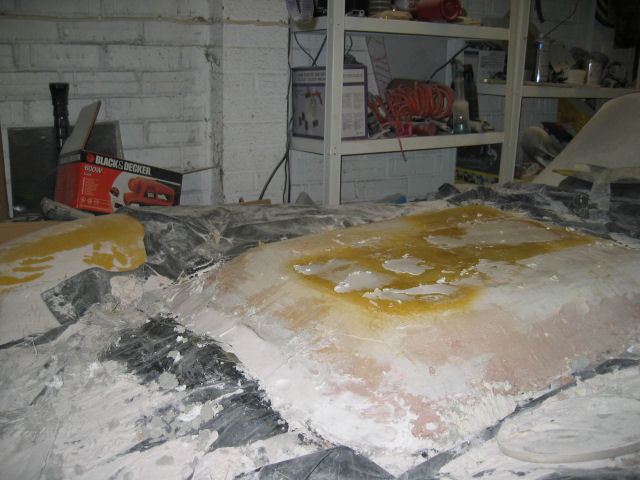
3 kilos of filler later....it starts to take shape....sort of....need to wait for Halfrauds to re-open and buy some more 
[img][/img]
I'm sure that I read somewhere that you can use plaster for building a buck , possibly in an old Hot Car mag. Thats the type that builders use on walls . As for how much hardener to use was once told by a body repairer to use a walnut to a pea in ratio size wize. Hope that makes sense.
What size shovel did you put the filler on with?  . You are in for a lot of rubbing there Steve. Get some 40 grit production paper, a cheap sander
and a good mask
quote:
Originally posted by Peteff
What size shovel did you put the filler on with?. You are in for a lot of rubbing there Steve. Get some 40 grit production paper, a cheap sander and a good mask
PS Yes - a good mask is on the list with more filler...
If you have a Hobbycraft nearby they sell plaster of paris - its where i got mine when i did my phoenix bulge.
There's a Hobbycraft 200yards or so from the office...
Oh well...have to plug on with this monstrocity (sp?) for now. 1 more tub of filler should see it though to completion.
Am going to see this one through to at least mould stage (first time at glassing etc so am not too worried if I make mistakes first time around), but
may make another smaller buck if Plaster of Paris is cheap as chips.
Stephen
Starting to come together now...


Hey this is starting to look like its supposed to


First fit removed from bin liners
[Edited on 10/12/05 by stevebubs]
quote:
Originally posted by Peteff
Easy sand in a big yellow tin for about £10. If you ever use a full tin on one job you're putting it on too thick.

Fecking hell 3 tins I use one tin of that when im fairing the plug for a 20ft boat
Shug.
And look at the colour of your windscreen!
Pat...
should have used some foam first to take up as much of the space as poss then filler to get final shape
quote:
Originally posted by Avoneer
And look at the colour of your windscreen!
Pat...

quote:
Originally posted by Triton
should have used some foam first to take up as much of the space as poss then filler to get final shape
Now that's a bulge!!!!
Make one plywood template-go to yard and start scraping-fill the hole with plaster and chickenwire-wait a few days-take buck out of hole-use ONE tin
of filler-et voila-MOULDA PERFECTA.


You'll get there mate no worries!
It's gonna be fine!
Cheers Cita
I rebuilt the front of bro in laws Fiesta van (employee related accident) and he got me a tin of Upol for filling bits before I painted it. That was 3
years ago and I've used it for loads of other bits and there's still more than 3/4 of the tin left. You could render a house with 3 tins  .
.
quote:
Originally posted by Peteff
I rebuilt the front of bro in laws Fiesta van (employee related accident) and he got me a tin of Upol for filling bits before I painted it. That was 3 years ago and I've used it for loads of other bits and there's still more than 3/4 of the tin left. You could render a house with 3 tins.
quote:
Originally posted by Cita
You'll get there mate no worries!
It's gonna be fine!
Cheers Cita
just a suggestion dont use to fine a paper on filler 200 max or youll knock it out of shape to much looks like youre somwhere near using filler primer!
For finishing, use the plastic spreader supplied with the body filler and not a metal one.
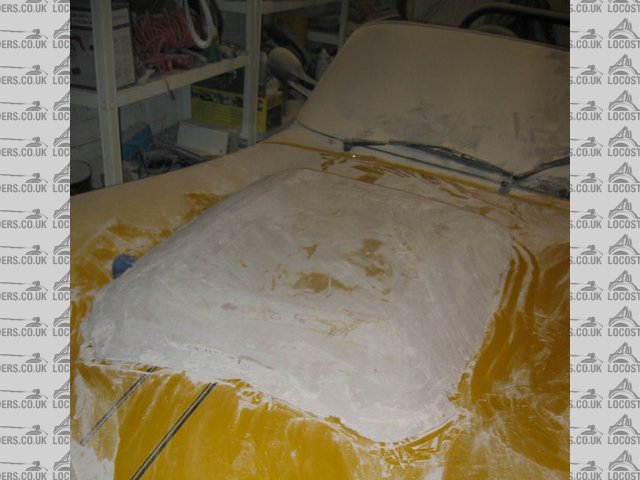
Gettting closer - just final finish now...took this after I spent 6 hours cleaning the dust out the garage....
[img][/img]
What u going to use to get a "smooth" curve where it bonds on the original bonnet??
Shug.
Take a mould from the buck above (which is oversize) and then make a cast of the bulge.
Trim down to the size required and contours of the bonnet.
Was then going to glass it on from underneath with 3/4 layeres of matting
Then fill any gaps with flowcoat...
From your post (and previous comments) I sense a "but" or "bunch of problems" comment coming - any help/hints gratefully received.
Hows about this
Fair the bulge when u have it cooking to the original bonnet by a fillet of plasticene with a wee bit of release wax mixed in it To make it "more
pliable" You can radius it to the correct diameter by using a suitable sized ball bearing. Indeed u can get em from most GRP supplers as a wee
tool on a stick just for the job. Polish the lot with 4-5 coats of good quality release wax and take a pull ( new mould), of the whole lot.. bonnet
complete with new bulge then get a new bonnet from that. Feck this glue the addition on crap trust me unless u do it day in and out it will look
like a pound of mince. If you cant do it for £50 or less your buying your GRP from the wrong place....to recover your outlay get laminating and flog
em on e-bay. If u make a good job of it I might even be able to offer u a job on something more exotic in a couple of weeks!! Only problem with that u
have to learn Jockaneese Im in Glasgow
Shug.
quote:
Originally posted by Hugh Paterson
Hows about this
Fair the bulge when u have it cooking to the original bonnet by a fillet of plasticene with a wee bit of release wax mixed in it To make it "more pliable" You can radius it to the correct diameter by using a suitable sized ball bearing. Indeed u can get em from most GRP supplers as a wee tool on a stick just for the job. Polish the lot with 4-5 coats of good quality release wax and take a pull ( new mould), of the whole lot.. bonnet complete with new bulge then get a new bonnet from that. Feck this glue the addition on craptrust me unless u do it day in and out it will look like a pound of mince. If you cant do it for £50 or less your buying your GRP from the wrong place....to recover your outlay get laminating and flog em on e-bay. If u make a good job of it I might even be able to offer u a job on something more exotic in a couple of weeks!! Only problem with that u have to learn Jockaneese Im in Glasgow
Shug.
Aye get triton or me to do it for your har har  you have u2u
Shug
[img][/img]