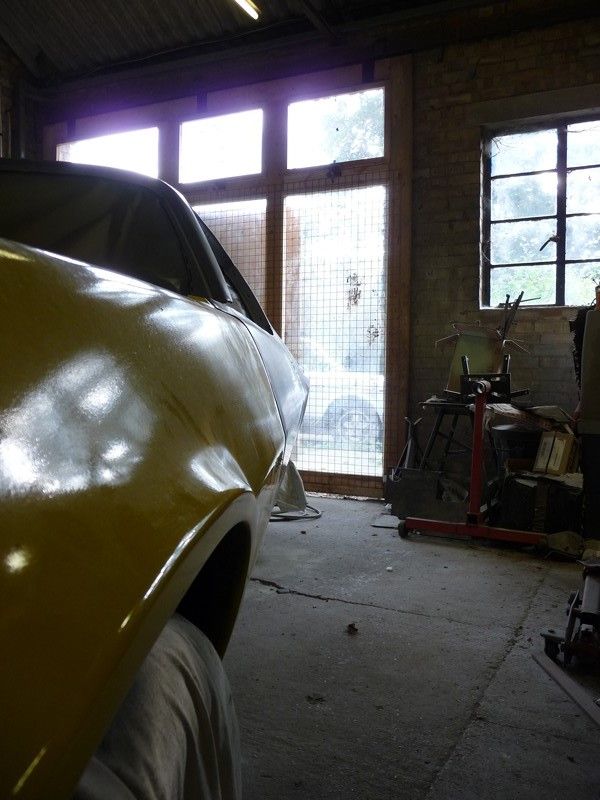
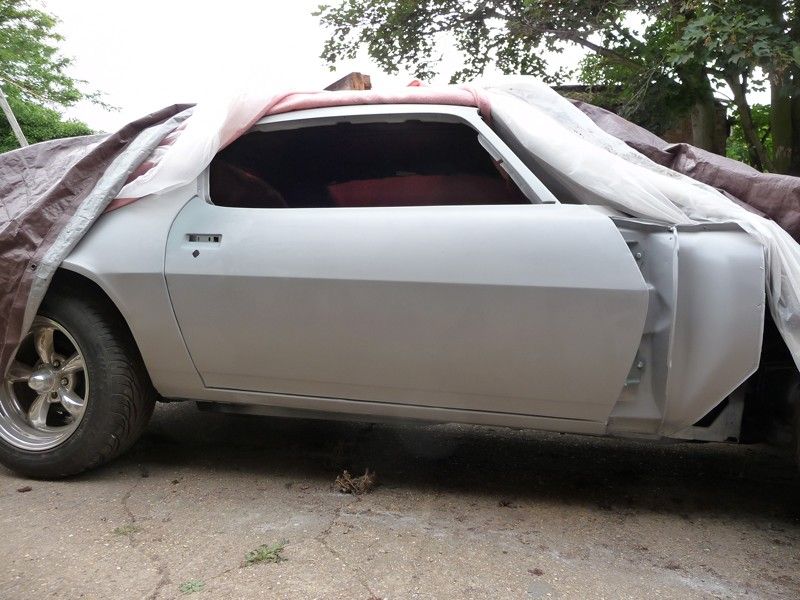
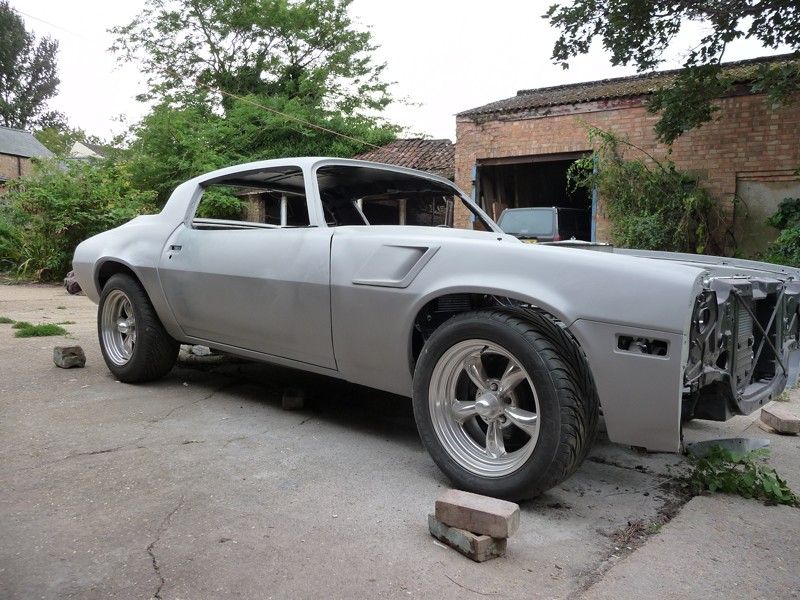
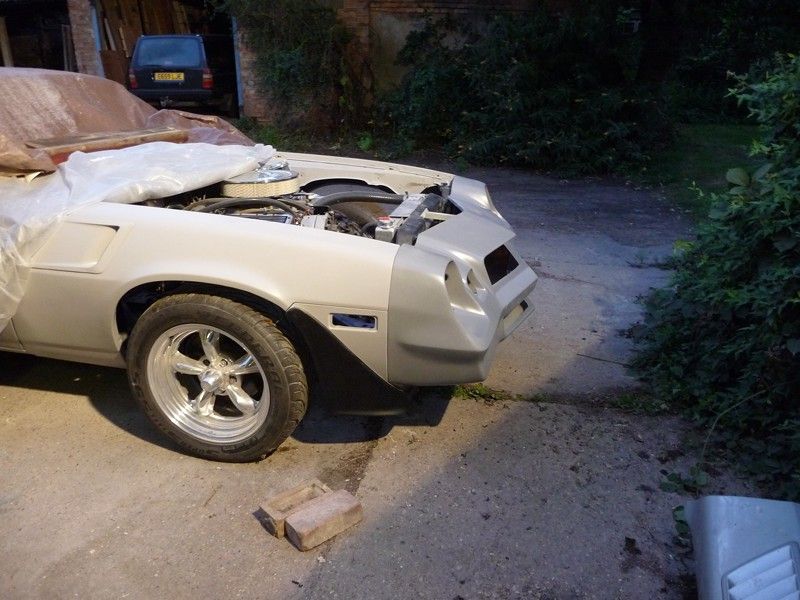
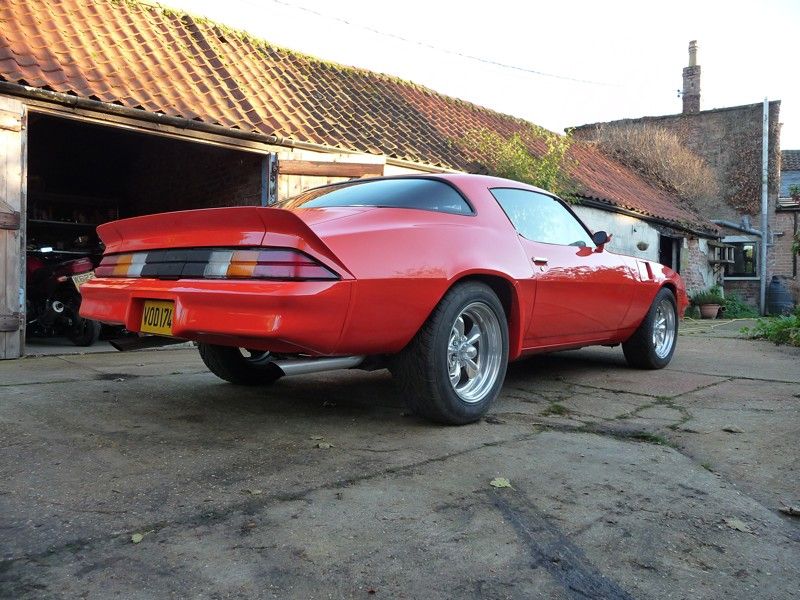
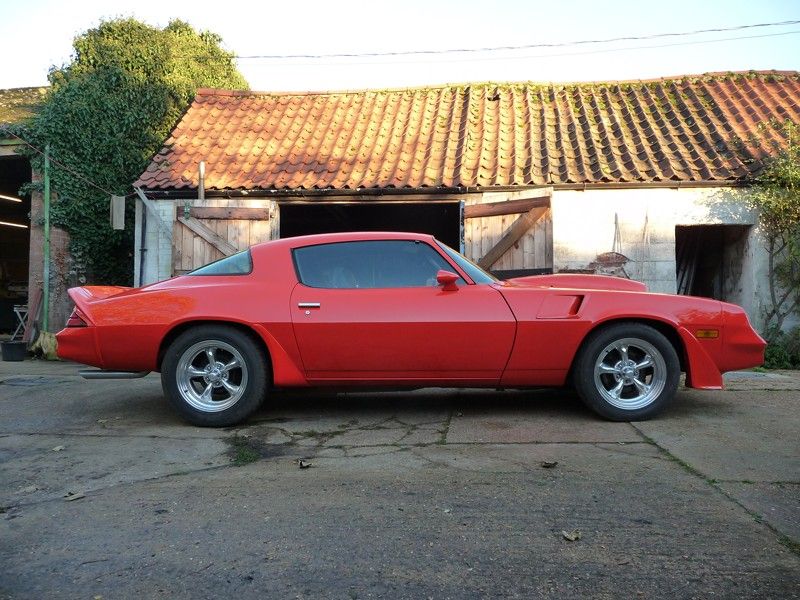
I know there are a few people here who like old yank cars, so thought I would post up some progress on my project car.
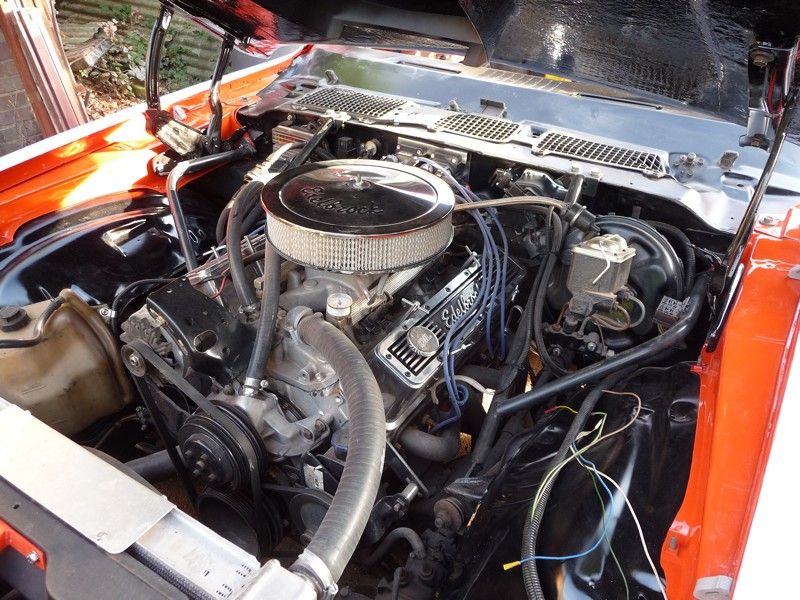
This is the underbonnet wiring that was awaiting me
Nicely roasted and mostly connected with chocolate blocks
So it was all pulled out and completely redone
And rerun well out of the way
Ok its not hidden away now, but I would rather know it isn't going to be melted and short out
Also fixed the headlights, found a wire 'repaired' with a scotchlock which seemed to have a bad connection. Spliced in a new piece of cable
and it seems ok for the moment. Its all part of the drivers side engine bay wiring that will be getting tidied up and redone fairly soon anyway.
--------------------
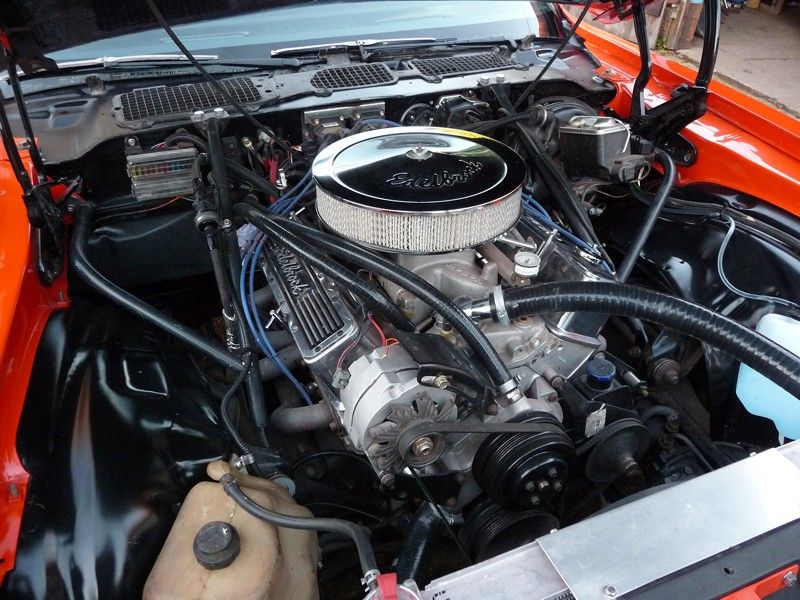
Fitted a new Holley 600 CFM carb and Edelbrock filter which fits under the bonnet a bit better then the old one. The car that was on it was a Cater
mechanical secondary 750CFM which was way too big for the engine and causing bogging and lots of fuel guzzling.
Seems to start and idle much better now. First run up the road it was misfiring like a goodun under part throttle acceleration and low speed. Pulled
the vac secondary diaphragm out and reseated it and it seems better now. Time will tell. The carb allegedly came from a 350. Runs a lot better anyway
even if its still a little out. Will see how it goes longer term.
This is the old one
Really bodged as everything else is. M8 studs rammed into 5/16UNC threads, leaking vacuum connections and dripping fuel everywhere. No kickdown cable
attached either.
And this is what I have ended up with, no manual choke cable fitted, but starts well anyway.
Just need to reconnect the vac advance on the dizzy when I am happy its running OK as it is at the moment.
New drivers side front brake disc fitted and new pads to both sides.
Actually a reasonably easy job, looks like it will need new calipers at some point as the dust shields have fallen apart and the bleed nipples are
broken on both sides.
The disc I removed is one of the worst grooved I have seen...quite how anyone lets them get this bad is beyond me. The outside is no better either.
The grooves are about 4mm deep...!
----------------------
I also re-bushed the door hinges as they had worn out which let the doors drop a lot when opened. Not too bad, worst part was lining the door back up
as it was a mile out before I started and had been shimmed etc.
My method for getting the 150lb door off...
Then undo the bolts holding the hinge to the door and just balance the door on the jacks. Then shout for help to lift it down and place on a cushion
or 2.
Body isn't in bad shape under the hinges, just some light surface rust which is now sorted. The car was originally dark metallic grey by the
looks of the paint on the hinges and under the hinges. The cracks in the paint are just from a reaction when the car was sprayed, its all solid
underneath.
Hardest parts of the job was reinstalling the detent spring, but a small gear puller had it sorted fairly quickly and realigning the door after
refitting.
Door doesn't drop at all now and lines up much better after a lot of swearing. Needs new rubber buffers fitting and the wether strip after I do
the panel work which will be next spring...
Drivers door hinges were in a much worse state than the passenger side as I expected. Someone had welded the pins into the hole where the bush should
be so the pins had been turning in the other part of the hinge for some time. So the holes in the non-bushed halves were elongated quite badly
So I welded each one up and re-drilled them properly.
The bush fits were a little loose this side as well so I stuck the bushes into the hinges with Loctite 642 Retainer so they aren't going anywhere
soon.
And that was that
I'll get around to painting them when I do the bodywork/cosmetics on the car next year. For now, they function properly and the doors open and
close as they should now.
I did have to adjust the window on the drivers side as well, and the door alignment isn't perfect but I will revisit it another day as I need to
drop the doors off the hinges again anyway to do some repairs to the bottom edges.
Also got the proper wiper arms fitted up, so I now have wipers that function properly. Aside from the relay playing up a bit so I will have to have a
look at the motor at some point.
---------------------
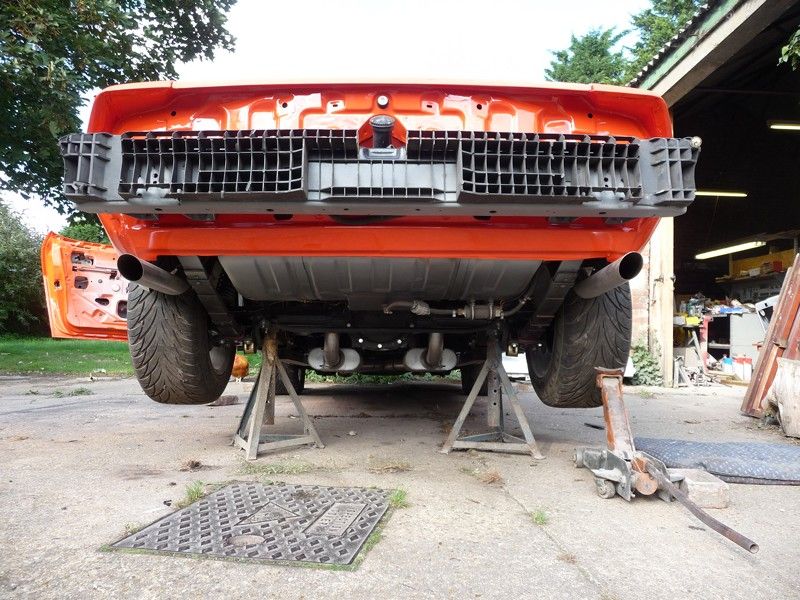
Jacked the rear of the car up to have a good look underneath. First time I had and I was expecting worse to be honest.
All in all looks reasonably sound. Some welding has been done in the past and the underseal was put on over loose road muck so I scraped some of it
off to get a better idea of the condition of the rear frame rails. All in order to know the extent of the welding required underneath before I make a
start.
Also the shocks seem to have weak springs fitted, no idea what they are other than orange...
Anyway drivers side first...
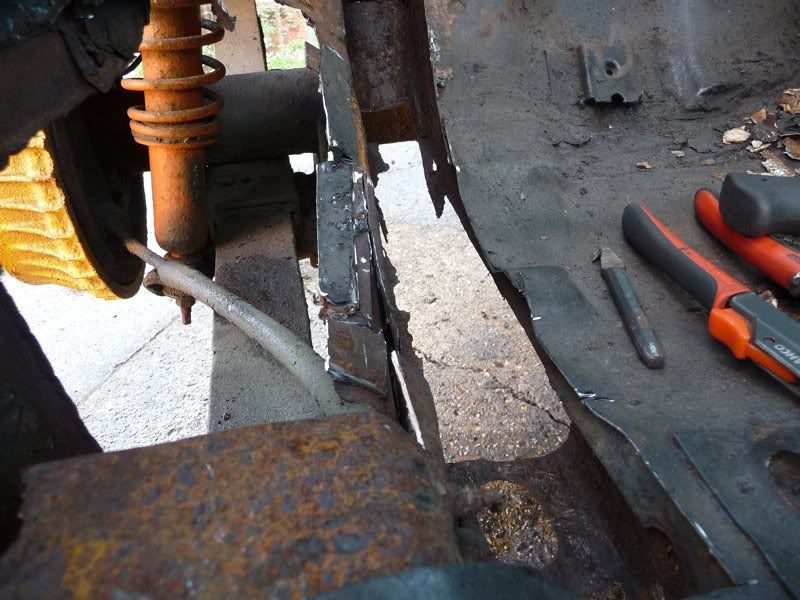
Rusty seam between inner arch and trunk floor. Accessible from both sides, so should be a straight forward repair
Small hole in rear frame rail near spring mount. Will be fun to weld a patch on... (anyone know what the bracket is for??)
Hole at rail mount to boot floor. Again easy access from both sides
The same holes from above
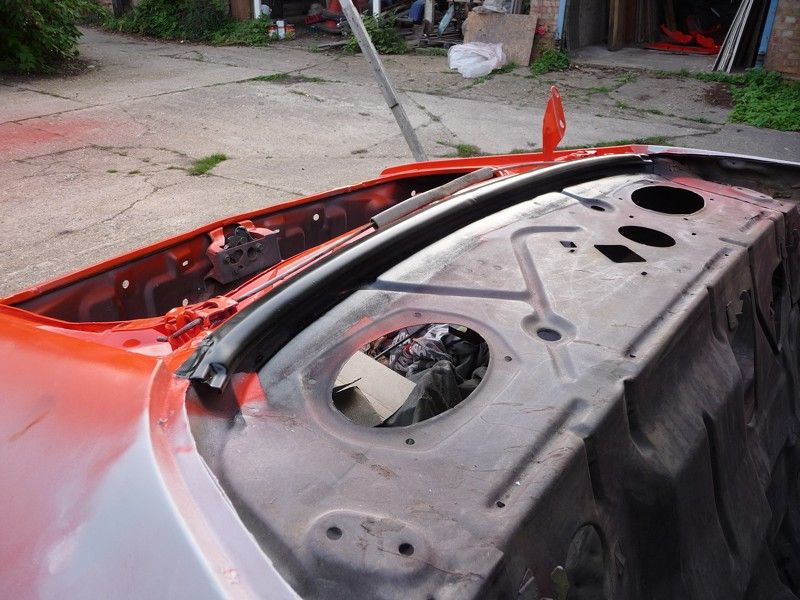
And rust under the trunk hinge mounts
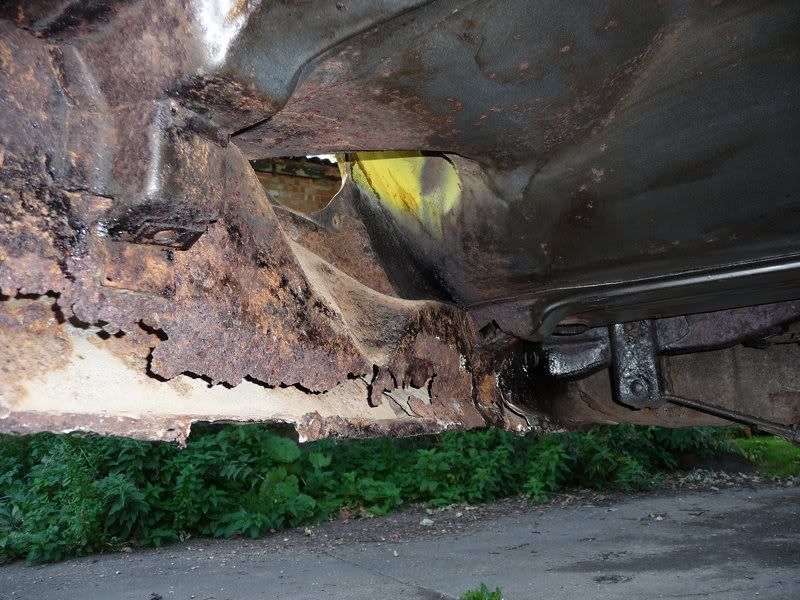
Passenger side is much the same story, hole at rail mount
Other than that some light surface rust
And a patchwork rail at the front, although it seems to have been done reasonably well, but not how I would have done it
Other than that it seems fairly solid with a few old patches here and there. (Again anyone know what the 2 brackets are for?? One is on the top right
hand side of the pic below in the extreme foreground and another in the same place the other side)
In trying to find out where the tank breather/vapour return was I found a few things dropped down between the inner wing and firewall...aren't
magnetic pick up tools wonderful?
Well saves some weight and a couple of rattles I guess
------------
Picked up my new radiator and trans cooler along with a few other bits. Only changing it because it's leaking and its a bit of a bodge, end tanks
have been hammered to fit.
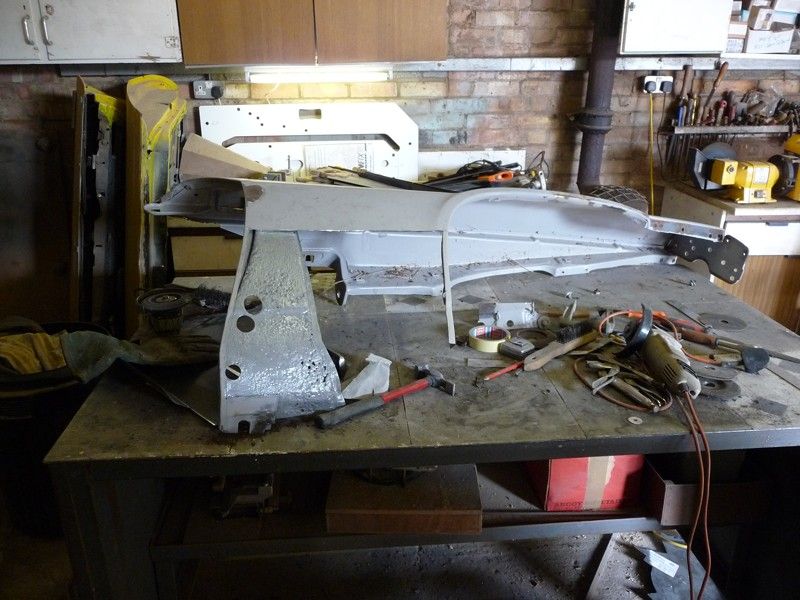
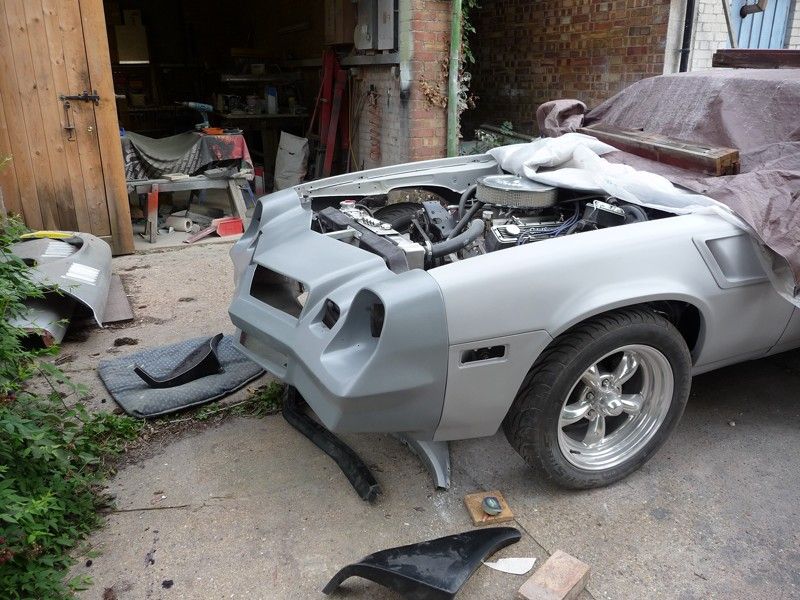
Thought I would make a start on changing the radiator, only to uncover a nicely rotten core support. No major problem as I was planning on stripping
the front end of the car to do any repair work necessary. I just wasn't planning on doing it so soon. Here's what was fitted to start
with.
Some sort of GM radiator, with about a 31" wide core and integrated trans cooler.
Drained the coolant and pulled the rad and uncovered this
There isnt much left to hold the radiator up to be honest, its also got plenty of rust under the battery tray, but I havent removed it yet to survey
the damage.
More bits stripped off tonight, just the core support itself to come off, but tried all the bolts and they all come undone OK except 1, which shouldnt
be a problem anyway.
Some more photos of the damage
Cue some happy hours with the welder and grinder
I will be changing the core support bushes for poly bushes while it is off as they are much easier to get to now than when it is all back together!
Not bad for 3 weeks work I don't suppose. Lots more to do and I'll update as I go along...
r1_pete - 1/9/11 at 07:04 PM
Nice one, some familiar sights there, reminds me why I went for replacing the back wings and boot floor on my Jag, then kept going that bit
further.
Good luck with the rest of it.
liam.mccaffrey - 1/9/11 at 07:08 PM
so jealous, i fell in love with muscle cars and pickups when i lived over there. I want a chevelle or a Nova though
Good work mate its going to be a cracking car if your previous work is anything to go by.
steve m - 1/9/11 at 07:09 PM
Looks like youve bought a lemon ?
I bet the body has got more filler than jordan, so dont scape the yellow paint off !
steve
flak monkey - 1/9/11 at 07:51 PM
The rust i have found is all pretty minor and nothing unusual for F body cars. It's actually about as solid as you could wish for. No filler in
the arches. All the rear structure is solid, just cosmetic stuff more than anything.
There are certain places if you find rust its time to worry, but there's none of that on this car.
Normal places are boot floor, rear window, core support, main floor and around the screen.
The cosmetic/body will wait until next year, now its getting mechanically sorted while the weather is ok.
flak monkey - 3/9/11 at 09:04 PM
Got the core support off yesterday afternoon, rust about what I expected. Gave it a quick wire brush with the angle grinder.
Passenger side mount was completely shot, as was quite a lot of the lower sheet metal
And these were the bushes
Nice...
Cut all of the rot out completely. No point messing about. The painted all the insides with POR15
It took all day today to repair it all, and it now looks a bit like a Franken core support
Fixed passenger side mount
Paint tomorrow and fixing the inner wings
[Edited on 3/9/11 by flak monkey]
big_wasa - 3/9/11 at 09:24 PM
allways wanted a 50's 60's early 70's yank tank. hmmmm keep up the good work
flak monkey - 4/9/11 at 04:21 PM
Today has mostly been a painting day. Painted up the core support, impact beam and a few other bits with POR15
Decided to dismantle the impact beam which wasn't too bad, wire brushed it and scuffed it up with a soft pad.
And 2 coats of paint
Same with the battery tray
Also swapped a rear wheel over to see what 225 tyres would be like on the front. The sidewall sits about 2mm outside the arch.
Would prefer them to be better tucked in, but lack of money precludes buying new rims for the forseeable future. If these 225 from the rear will be OK
then I will just get some widers tyres fitted to the current front rims as the tyres are perished that are on there anyway. Probably go for
255's in the back, need to have a measure up when it stops raining....
flak monkey - 9/9/11 at 07:36 PM
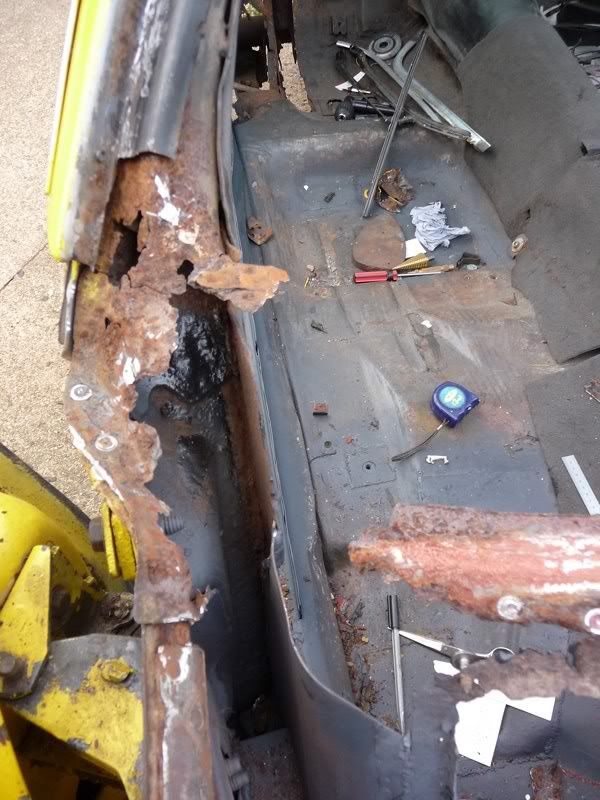
Lots of grinding and dismantling today.
Pulled out the whole interior, so I could lift the carpet out. Hadn't had a look under the drivers side until now and I was plesantly suprised by
it being quite solid.
Some previous bad repairs, some fibreglass under the rear seat. All of which will be coming out and being done properly.
Also cut out the previous patches on the passenger side as they had just been put on the inside of the floor and the rot hadn't been cut out
properly.
Seems to a lot worse than the drivers side. But I put that down to what I assume to be a water leak up at the base of the screen as there is some rust
visible if you look up under the dash. So I will be taking the fender off after I have sorted the floor out and have a good look at the
cowl/firewall.
I won't be fitting new floor pans, just patching the ones that are there properly as its all pretty straight forward stuff.
Whats less simple is sorting this mess out
matt_gsxr - 9/9/11 at 08:33 PM
MegaSquirt was pretty much designed for that.
I bet it would even run on the default settings
Looks like a nice project.
flak monkey - 10/9/11 at 07:09 PM
I thought about switching it to injection, but shan't bother for the forseeable. Too much other stuff to do at the moment I am going to be
fitting a wideband lambda gauge when I do the instruments though. So it'll make setting it up a bit easier anyway
More cutting today. Cut out the rot from the floor and set about patching. Just the toe board to finish off tomorrow if the weather isn't too
bad.
Ended up cutting a big chunk of the floor out, and in hindsight it would have probably been better to replace the whole passenger side floor. But if
it needs any more work in the future that would be the plan. I managed to replace the front section of floor with one piece of plate, which although
time consuming should be better in the long run.
The plus side is the rear subframe looked pretty solid from the top, as does the box where the rear front subframe bolt is.
Once the passenger side is done I will move on to the drivers side, which seems to be in a lot better condition. So hopefully won't take any
where near as long.
I'll seam sealer all the welds top and bottom as well, then pull the shifter out and give the whole floor a coat of POR15 inside. That will be
the main floor area sorted for another few years hopefully.
Then I just need to decide what to do with the poorly repaired floor under the rear seats. I don't think anyone makes those floor sections. Am I
right? If not then It will be another big job for another day.
While poking around underneath I found a couple of small holes near the forward passenger side spring perch. If it all comes undone fairly easily it
won't be a bad job.
As an aside, I would like to meet whoever invented underseal and punch them, right in the face....
flak monkey - 11/9/11 at 04:43 PM
Finished off the major work on the passenger floor today. Then set about scraping the underseal off the car. Thankfully most of it seems to come off
very easily as its been put on without cleaning the floor. Hopefully I will get it all scraped off by the end of next weekend then I can get the
underside steam cleaned and give it a proper coat of paint. I'll be leaving the front subframe for the time being as I will pull that off when
the engine is out and will deal with that then.
There was a little more work lurking under the passenger toe board but nothing major
Gave it a coat of anti-rust paint inside for good measure as well while I was there...
The other side of the repair metal is already nice and clean, just need to wire brush the whole passenger floor then its ready for a coat of paint.
And the underside is pretty sound under the loose underseal. Most of it still has the original paint on it and is actually in really nice
condition.
Once its steam cleaned I will give it a good coat of paint, though I am not sure whether to use POR15 or not yet.
[Edited on 11/9/11 by flak monkey]
bj928 - 11/9/11 at 05:38 PM
nice project, here is mine i'll be shipping to the uk later this year.
460 v8
flak monkey - 15/9/11 at 07:10 PM
Thats a lot of engine in there!
Removed the inner fenders tonight. Wasn't actually too bad only had to cut a couple of bolts through.
Slowly pulling the whole front end off so I can get a good look at the cowl as there is some rust visible from inside the car. The plan being to make
some temporary repairs for now, then get the screen pulled out and have the cowl/dash panel off to get inside properly. Plus there is some rust around
the screen that needs seeing to anyway.
From what I can see so far it doesn't look to be too bad. Couple of little holes on the drivers side and just some surface rust on the passenger
side to deal with once the fenders are off.
Tomorrow I'll get the fenders off and have a better look around. I know the passenger fender has been badly repaired along the bottom, so I may
get a repair patch for that rather than messing around.
Lot more welding this weekend if the weather is good...! I just want to get a really solid shell as a basis before going too far with anything
else.
I also have my poly bush kit for the body mounts too, so that will be going in before it all goes back together.
flak monkey - 16/9/11 at 07:30 PM
Well curiosity got the better of me and I thought I would do some more welding on the floor while the weather is OK. Though I am suffering with a
damaged back at the moment, so progress is slow
Thought I would have a look under the filler under the rear passenger seat....and look what I found...
Who the hell covers that with filler?! Just filler, no fibre glass....
Cut the floor pan away to uncover the frame rail near the spring pocket
Getting better...
Then cut out the rusty parts of the rail and part of the inner wing that was rotten and started welding in new metal. Used 16swg for everything to
match up with this part of the frame rail.
Cut out some card templates and started repairing the rail. Did it in 2 parts just to make it easier
Thats it for this afternoon, gave it a quick coat of paint ready for welding in a new piece of floor over the weekend.
The good news is the rest of the rail looks to be in good condition, and I will be dropping the spring at some point when I change the bushes to have
a more thorough inspection.
Going to get the passenger side to the same state tomorrow before welding in the patches on the floor.
flak monkey - 17/9/11 at 05:28 PM
Thought as the repairs to the driver side weren't too bad I would tackle the passenger side. And didnt actually get all that far before having to
stop and think about the best method to continue.
Started off looking like this, patches over the top of rusty metal
To be fair it was well welded together, but it wasn't really achieving much other than providing a place for water to collect and the rot to
spread.
Took an age with the grinder to carefully peel off the plates to find out what was salvageable underneath. Turns out I should have just hacked it out
as there wasnt really much left after removing the rusty metal anyway.
Much worse than the driver side. Notice the nice rotten torque box and frame rail...?
The rail has been patched up from outside before with 18g metal. It looks like I am going to have to drop the leaf spring this side so I can get to
the rail properly to cut off the previous patches and repair it properly. Not sure what thickness the rails themselves are, somewhere between 16g and
14g from measurements, but it seems to vary quite a lot.
I think its getting serious enough to break out the plasma cutter tomorrow.... But first I'll be making up some sort of brace to hold
the frame somewhere near right while I repair it.
Its a real shame no one makes repair sections for the front of the frame rails would save a lot of grief.
Oh well, more cutting and welding tomorrow by the looks of it.
big_wasa - 17/9/11 at 06:03 PM
You really have got some work there
Davegtst - 17/9/11 at 07:30 PM
Jesus, is that a car or the titanic?
T66 - 17/9/11 at 07:42 PM
My Lada project had less tinworm than your tackling, something warming about cutting rot out and throwing it in a pile, then replacing it with new
metal.
Very rewarding garage play...
keep on posting the pics
DixieTheKid - 17/9/11 at 07:58 PM
Lots of work there, but cars like that deserve to be put back on the road in there former glory! Keep up the good work.
r1_pete - 17/9/11 at 07:58 PM
I've tackled similar on many occasions, it always amazes me how they got through their last MOT, there's more than 12 months deterioration
there.
It's worse than I was hoping. Nothing is impossible to fix though Just going to take a lot longer than planned. Might end up taking it off the
road properly for a few months while I fix all the rust.
I am looking to see if I can find a section of rear subframe to cut out of a less rotten shell before I start putting any new metal in there. Will be
a better way to go if I can
Its got MOT until the end of next Jan...its only done about 800miles since its last MOT as well A lot of this stuff was covered up, but not very
well.
flak monkey - 26/9/11 at 02:46 PM
I spent another 5 hours scraping underseal off the bottom of the car. Its now pretty much there, other than the inner arches at the rear. Most of the
rust you see is only light surface rust, looks worse due to the camera flash.
Just needs steam cleaning once I have stripped everything else off the car.
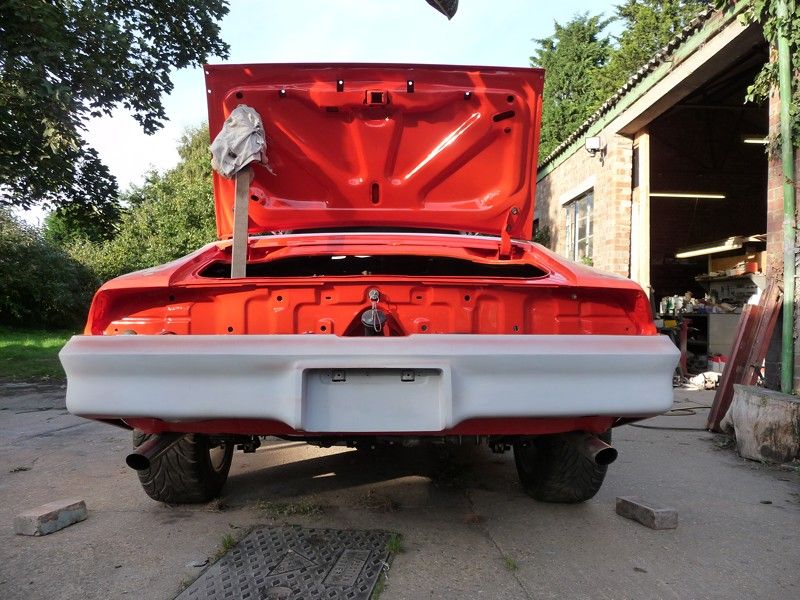
Pulled off the fibreglass patch on the valance as well, no suprise at what was underneath
Also pulled the rear bumper and lights to get a look at the rear panel. Been bodged up in the past, so I'll be tackling that at some point
While I wait for some patch panels to arrive I might as well crack on with everything else.
Finished off patching the floors. They are now all done and ready for paint when the time comes. The driver side wasn't really too bad compared
to the passenger side. Still removed plenty of metal though.
This is what it looked like after the existing patches had been cut off. Not too bad.
Lots of little bits, and it took quite a while to cut all the old rot out properly.
I decided to do away with the drain holes as well as one cover was missing anyway and the floor was rotten around where they fitted.
Now its all etch primered ready for a top coat of epoxy eventually.
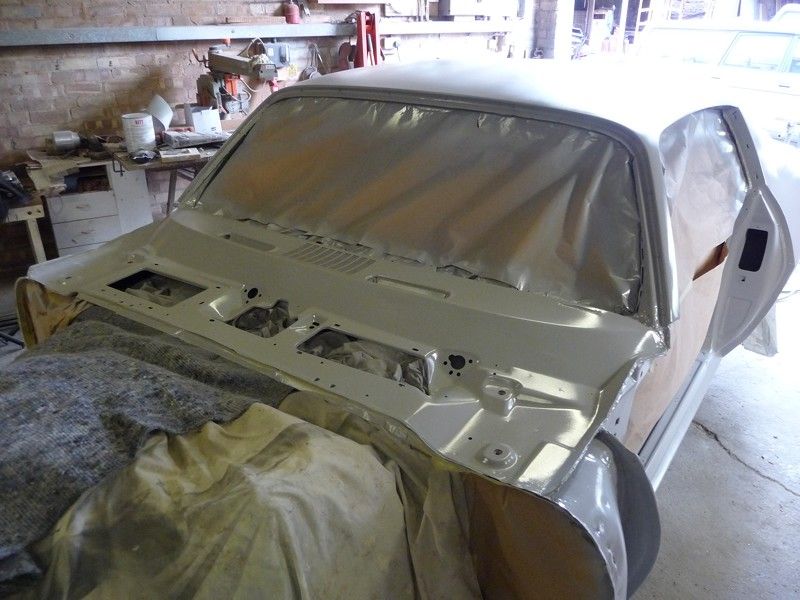
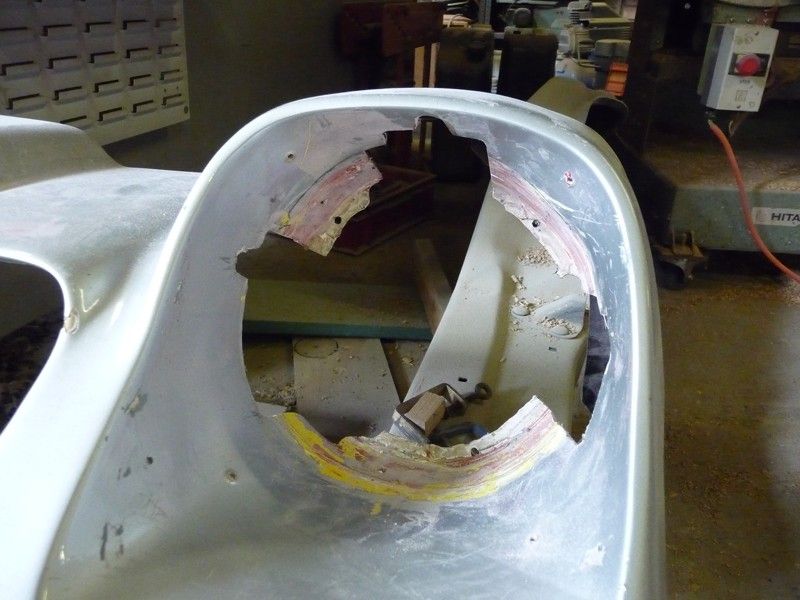
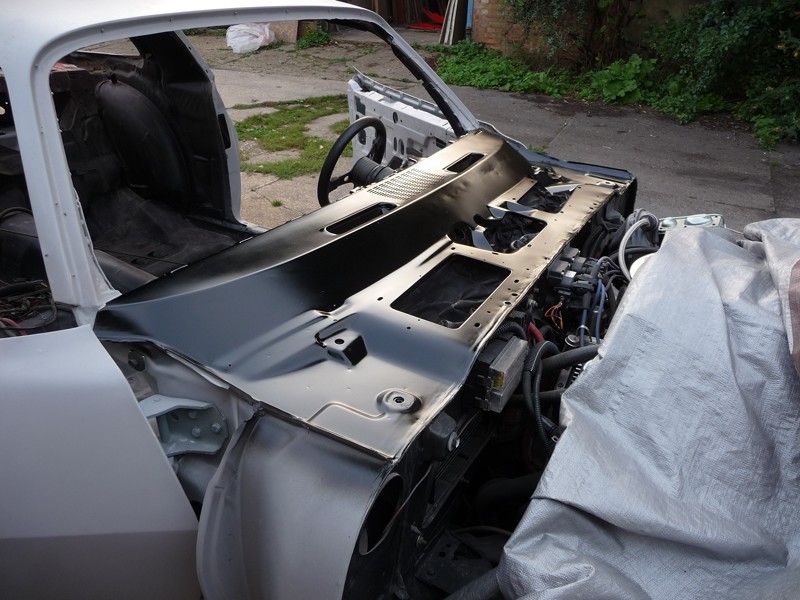
Pulled the dash out then removed the heater matrix and kick panels to get a look at the damage. The firewall is solid. The driver side cowl panels
arent too bad, just a small hole at the top which will be easy enough to get to. The passenger side is completely gone though... ever wondered what a
few years of a leaking cowl does? Here you go...
And a few holes in the cowl panel
Nothing that can't be fixed with a happy day with the welder.... Before I get too far I will have to pull the screen out and take the cowl vent
panel off so I can get inside the cowl area and fix it properly and give it a damn good coat of epoxy.
I also started pulling out a load of superfluous wiring. Lots of things the car has been fitted with in the past that are no longer there, retractable
aerial, clutch converter lock up, and a rubbish stereo. So the wiring has more or less got back to whats needed. Still a bit to come out when I
actually do the electrical system though.
Just as an example, this was the masterpiece that made up the stereo wiring...
Definately not fitting a stereo when I put it back together. In two minds whether to bother even putting the heater back. I guess I ought to really...
[Edited on 26/9/11 by flak monkey]
David Jenkins - 26/9/11 at 03:59 PM
I just wouldn't have the patience to do that sort of work... I would have been shipping it to the scrap merchants long ago!
Astonishing persistence...
Benzine - 26/9/11 at 04:38 PM
Nice project dude ^_^ Good progress on the welding, I'm facing a similar level of rot on my amazon at the mo, feels good when new metal starts
getting welded in!
flak monkey - 26/9/11 at 08:16 PM
I considered giving up...but nothing is impossible! Personal challenge now and determined to rescue the car rather than scrapping it. Its only bad in
a few places, and then its bad due to small problems not being resolved then turning into bigger ones!
Once all the rust is gone it'll be a good car
l0rd - 27/9/11 at 06:43 AM
I would say
Scrap the chassis. Keep the body panels and start building a new chassis NASCAR like
flak monkey - 27/9/11 at 07:01 AM
quote:Originally posted by l0rd
I would say
Scrap the chassis. Keep the body panels and start building a new chassis NASCAR like
Er....yeah, righto... flak monkey - 2/10/11 at 07:29 PM
Haven't managed to get much done this weekend, dont really know whats happened.... Nonetheless managed to start patching up the kick panel area
in between helping change the cambelt on the other car. Oh and a mate popped over, which was a nice break from laying in the footwell of the Camaro
Wirebrushed and painted inside with Jotamastic epoxy as recommended. Seems like good stuff. Other than it don't half burn well when you weld near
it Smells good too After that started repairing the hinge support plates, inner sill, the pinch weld area at the door opening and a few other
time consuming bits
Then welded in a new piece at the bottom, plug welded to all the inner structures and seam welded to the sill.
The rust in the background is the back of the cowl shoulder panel thats coming out soon. Everything thats staying has a good coat of paint.
Just the top pieces to do now, might start on it this week one evening.
[Edited on 2/10/11 by flak monkey]
matt.c - 24/11/11 at 10:00 PM
Any updates mate?
l0rd - 24/11/11 at 10:27 PM
can't believe i nearly went through all the posts and looking on the pictures to remind me the progress and look at this
quote:Originally posted by matt.c
Any updates mate?
flak monkey - 4/12/11 at 06:32 PM
Some tardy updates me thinks. Been spending every dry day at the weekends working on this thing. Now at the point where most of the welding at the
front end is complete. Warning...this post has lot of photos!
Still loads to do, probably about halfway ther with the shell repairs. Once all the topside stuff is finished I'll be flipping it over on a
rotisserie to do the underside properly. Looks bad, but nothing time and patience can't fix. Hopefully its going to be worth it!
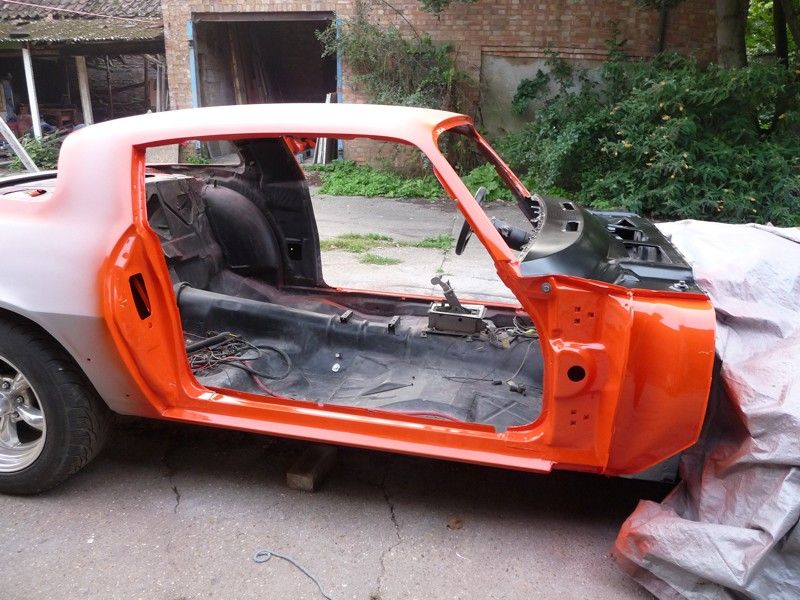
Stripped out the interior completely
Took the front end off
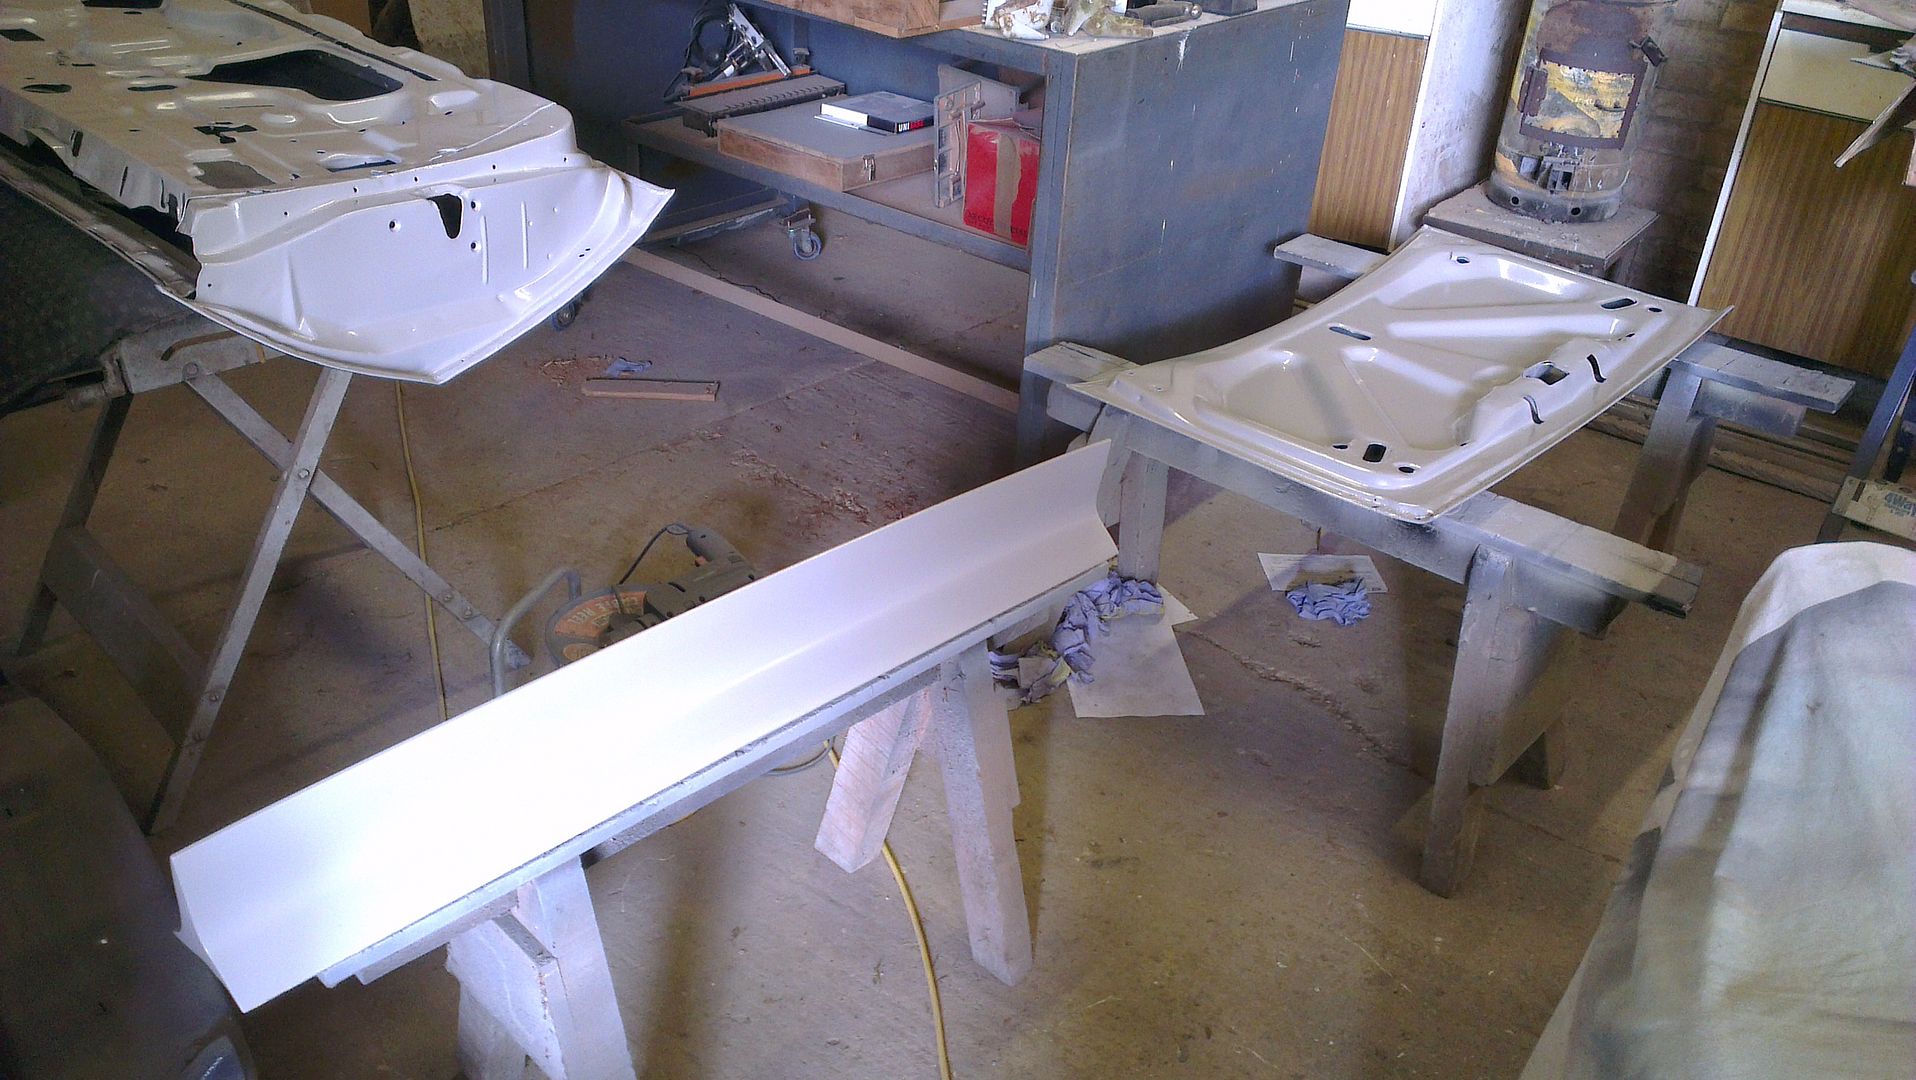
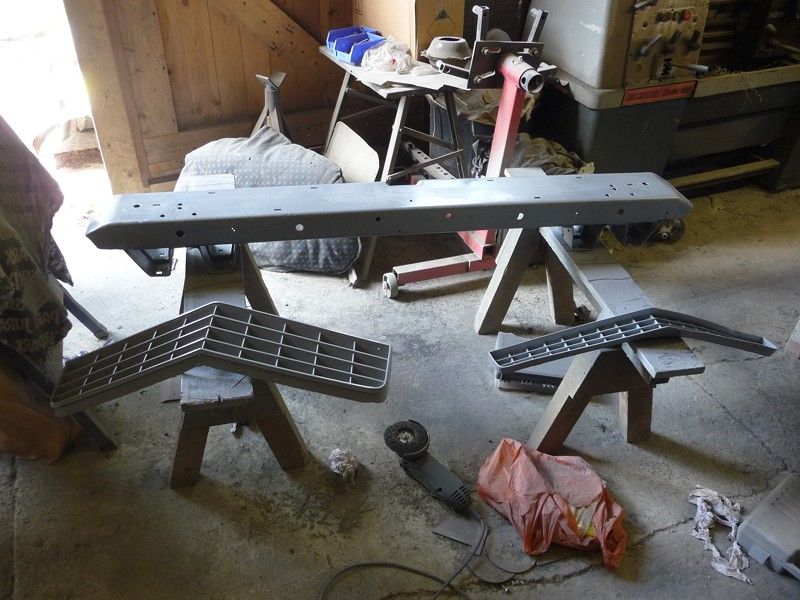
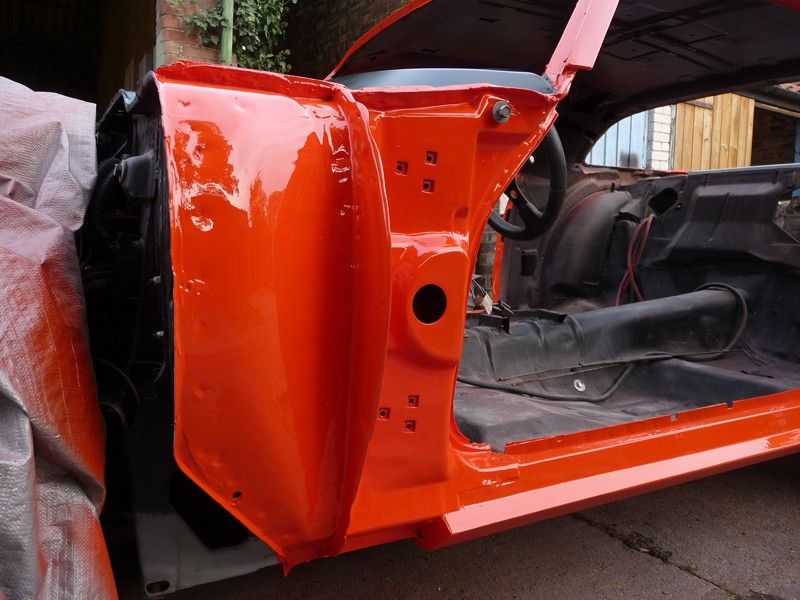
Rust repairs to the front of the drivers side sill/cowl area
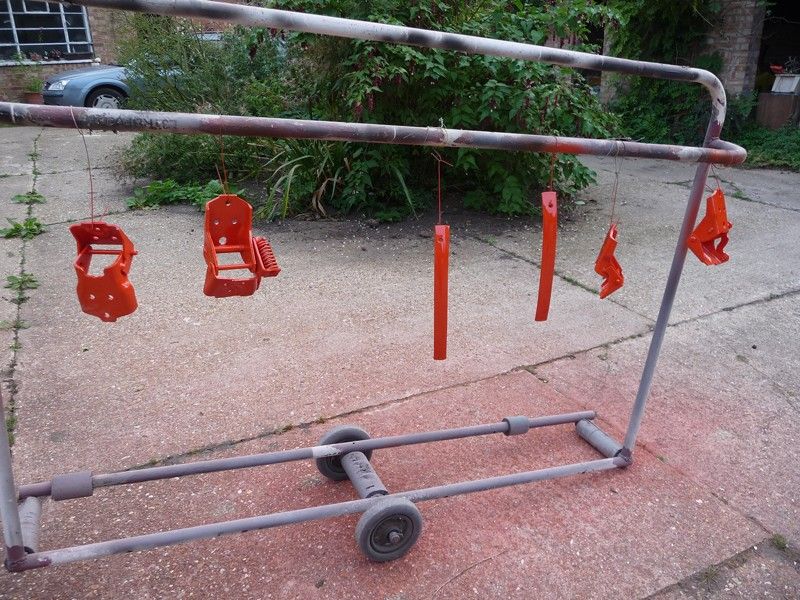
Picked up a complete GRP and Carbon/Kevlar front end. And yes it has a stupid bonnet scoop and front spoiler The wings and bumper are GRP and the bonnet and splitter are carbon/kevlar. Cheap as chips
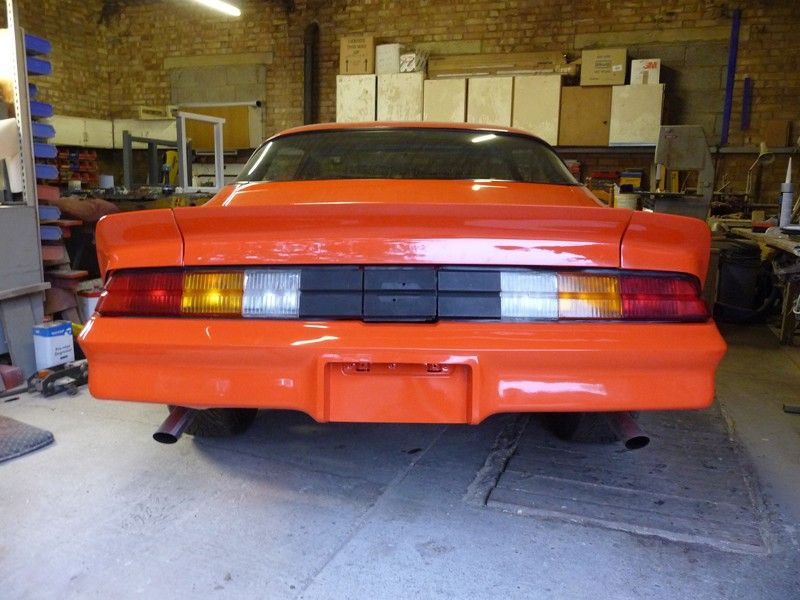
Had some decent rear lights shipped in from Canada. Set about restoring them to their shiney glory. Need to polish the lenses up to finish them
off.
New and old
Got some new sheet metal
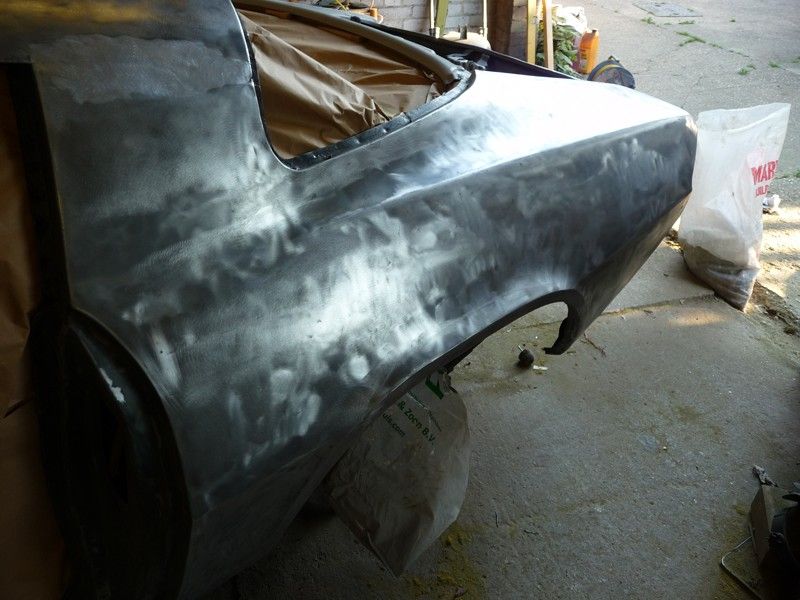
Found a load of filler and damaged quarter panel
Cut the passenger side sill off to replace complete thing. Thankfully they do factory thickness full replacements
Nice and solid inside, coated it liberally with 2k epoxy paint
New sill ready to go on, also epoxied inside
Just like new
Hoiked out the engine, and stripped the useful bits off before flogging it on...
The joys of working outside in the winter
Pulled out the screen so I could work on the cowl area. Knowing it needed lots of work
Easy to see why it was leaking into the interior. The sad thing is if it had been stopped quickly the damage wouldn't be so major. Nevermind!
The worst bit was the passenger side pillar... yes this has another 6 months MOT left yet!
And thats where I am with the bodywork. Most of the front end is finished now, just need to prep the inside of the cowl for 2k epoxy and seam sealer
before fitting the new vent/dash panel.
Oh I got some goodies as well...
Monroe Sensa-trac shocks, Competition Engineering sub frame connectors and some new front calipers
scootz - 4/12/11 at 07:03 PM
You're nuts... but I like it!
flak monkey - 4/12/11 at 07:06 PM
quote:Originally posted by scootz
You're nuts... but I like it!
Thanks on both counts l0rd - 4/12/11 at 07:13 PM
Sometimes you must love the friendly MOT testers
flak monkey - 4/12/11 at 07:21 PM
Yeah sometime they are handy. Most of the serious stuff wasn't visible to be fair, but its scary what can lurk beneath.
I have a new section of rear frame rail somewhere on a plane over the atlantic at the moment as well....
Xtreme Kermit - 4/12/11 at 08:10 PM
Awesome work there flak. Not seen this thread before.
JoelP - 4/12/11 at 08:23 PM
Hats off, i can only imagine where you get the determination to bother with a project that big. I'd have burnt it in a rage long ago
ReMan - 4/12/11 at 08:26 PM
Hats off to your perseverence!
I'm sure you keep telling yourself it will be worth it, most would have either scrapped or bodged it by now, which is exctly what you've
found so far
Good luck, look forward to seeing it finished.
My bro had one 20 years ago ands that was wors than this one then
locoR1 - 4/12/11 at 08:57 PM
Im going to echo scootz comment You're nuts
Being serious that's a lot of work but looks your getting on top of it, keep up the good work sure it will be a stunner when its finished!
PSpirine - 4/12/11 at 10:05 PM
I'm in complete awe of your dedication. Looks like you're doing a top job of all the fixes! Will be so worth it in the end.
However, I can't help but chuckle thinking back to your post when you just got it when I'm sure you said something along the lines of
"pretty solid, no major rust, just a few small bits to sort out!"
flak monkey - 5/12/11 at 08:23 PM
I did say that. Lol. Nevermind, it did look solid on initial inspection. 2 people looked all over it before I bought it. But there we go.
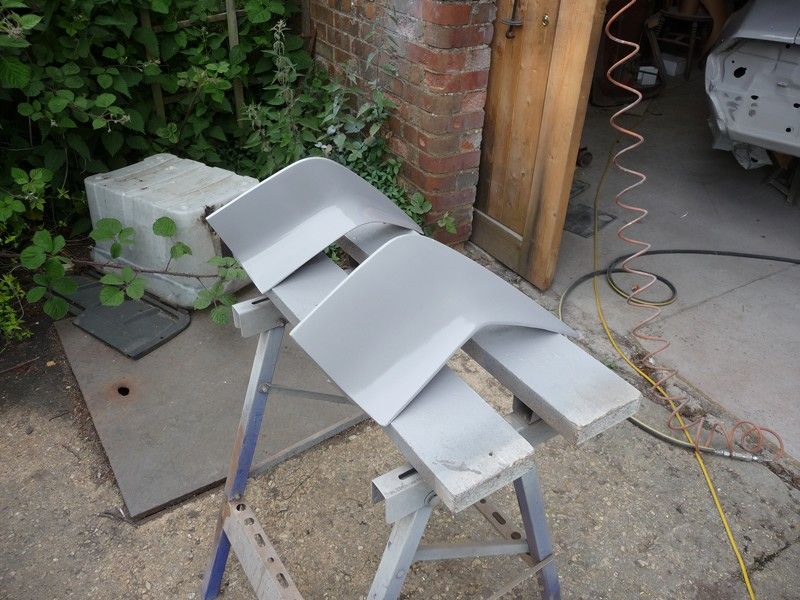
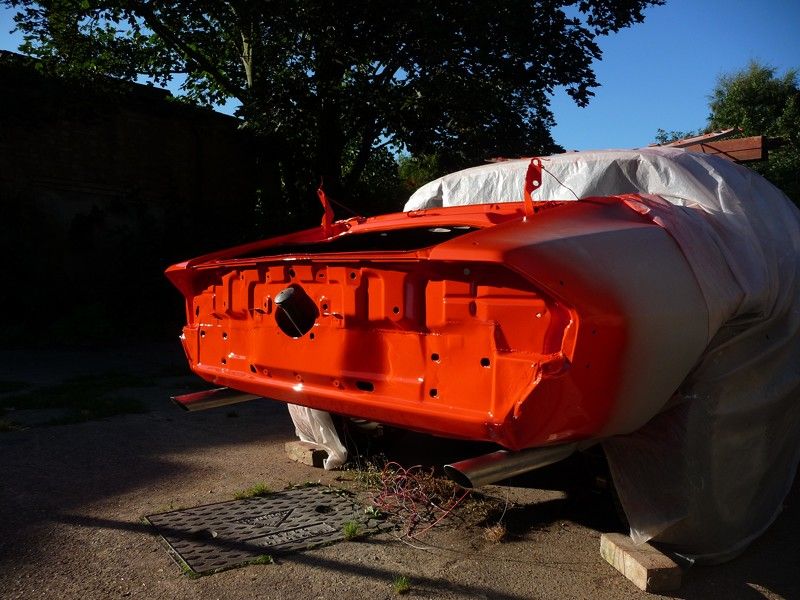
Been painting today
2k Jotun Jotamastic, marine grade epoxy mastic paint. Should hold up as its designed for submersion in salt water
jacko - 5/12/11 at 08:30 PM
Hi David fantastic work you are a hero taking that on
Have you thought about putting this on Retro Riders they would love this on there
Graham
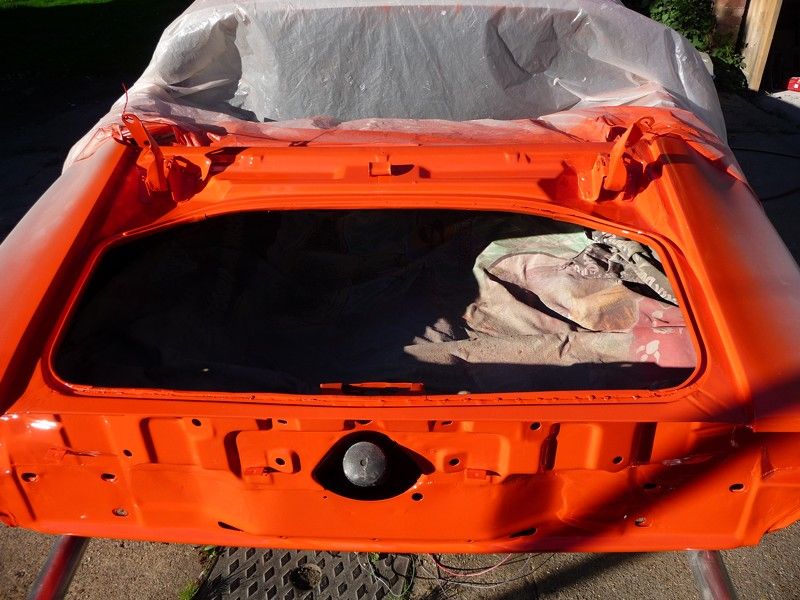
Today I went around the cowl area with seam sealer. Hopefully I havent missed anywhere, I dont want this thing leaking when I have finished! Then gave
it another couple of spray coats of epoxy inside and out. Spraying let me get right into the hinge areas of the cowl as well. So hopefully thats got
as much as possible coated.
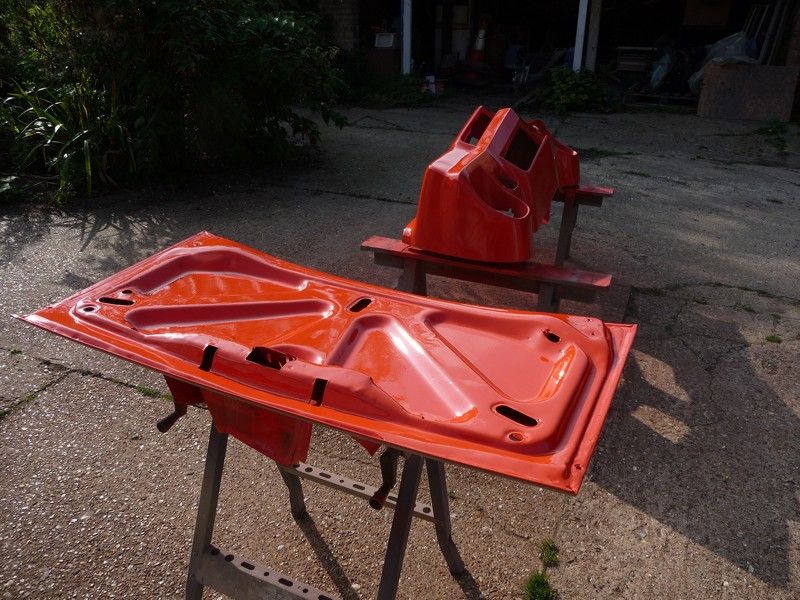
Also scuffed and sprayed the new cowl panels.
Then started to remove the rear axle. To my suprise everthing came loose without many problems. One clip nut broke, but I had the floor cut away above
that anyway.
And the drivers side torque box looks good. Bar needing a coat of paint where I did the repairs a couple of months ago.
Passenger side is good towards the front, which means it will be a little easier to replace the frame rail as I will have a good datum to work to.
Thats all for today. Can't get a lot done in 7 hours of daylight
flak monkey - 7/12/11 at 05:10 PM
Very cold and windy here today. Started off chancing welding the cowl shoulder panel on, but gave up after 10 minutes.
Instead decided to do some work in the garage with the doors firmly shut!
Herb Adams mod on the leaf spring mounts.
The old mounts were a bit manky, covered in the usual 30 years worth of filth and underseal. That said one of the 5/8" bolts holding the mount to
the front bush was so loose it came undone with a ratchet and no force at all. The mounts also have about 1/4" sideways play on the crush tubes
of the bushes. Will have to make some spacers up to go in there when I reassemble everything.
Just marked out the new holes, and where to cut the top of the mount away to clear the spring eye then sliced it with the trusty angle grinder.
Welded some 1/8" plate over the new holes to add a bit more strength to the bracket. Then gave them a coat of POR15.
Another job done.
This is the gap between the bushing and mount. They were like this fitted to the car...no wonder it handled a bit funny, and it wasnt just down to it
having cart springs on the back
flak monkey - 9/12/11 at 04:42 PM
It was 4deg C here today But the weather held out so...
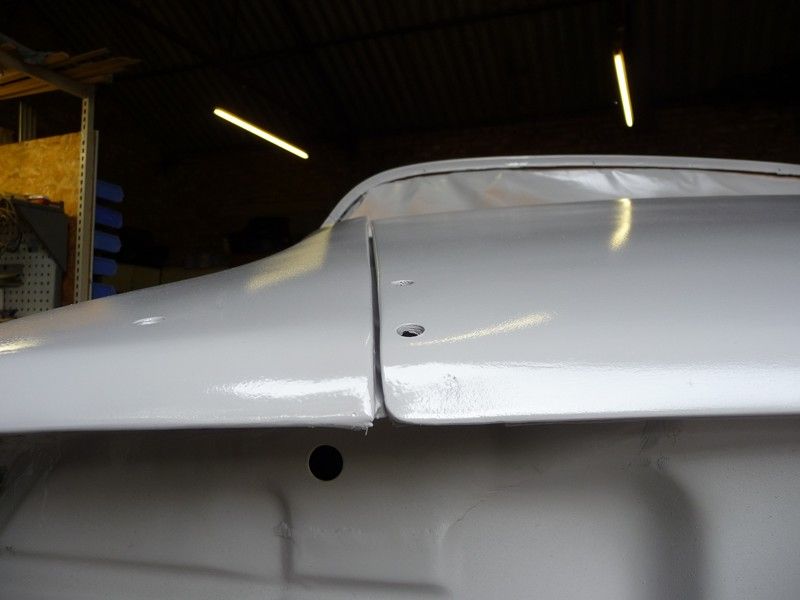
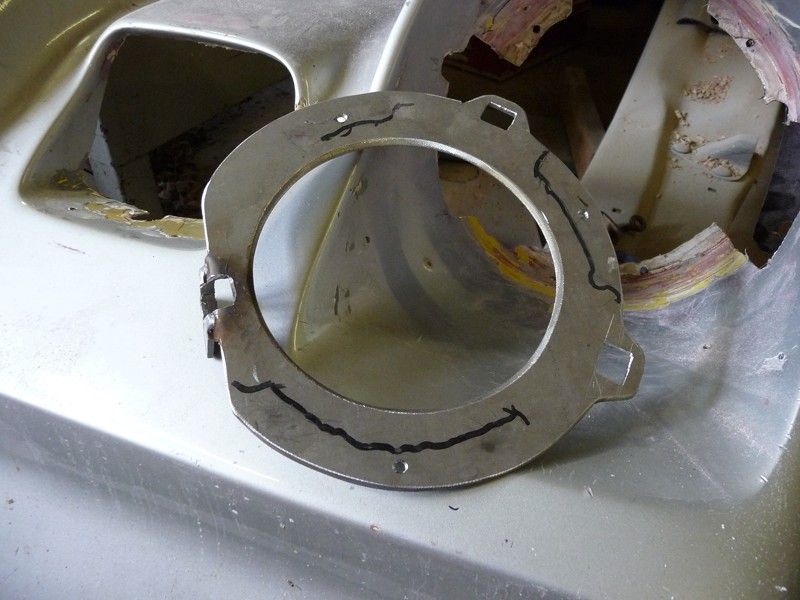
Fitted the new cowl shoulder panel
Painted all the seams inside the cowl again with epoxy (plus I had some mixed up from something else, so figured it can't hurt!)
Then test fitted the cowl panel and marked out the positions for the spot welds. Also checked the fit of the screen and it fits nicely. Then drilled
lots of holes in a nice new panel
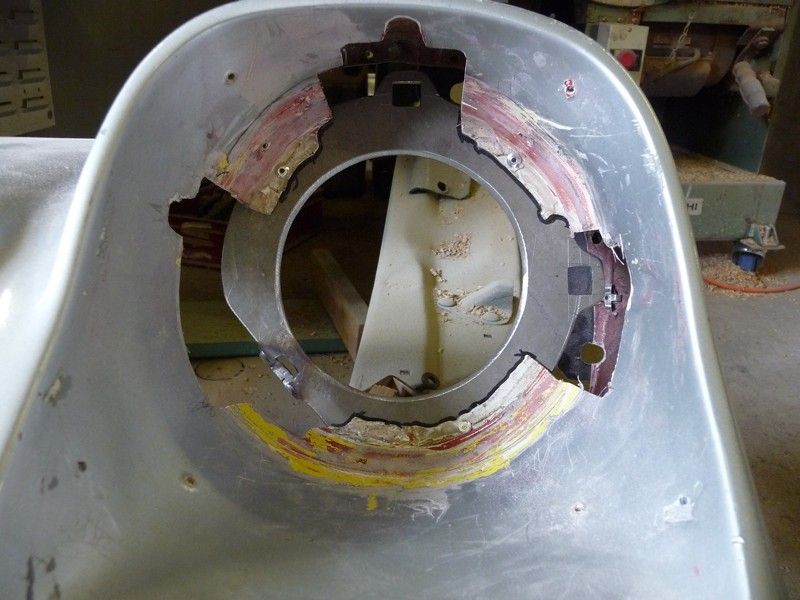
Then after lots of welding, grinding and swearing (mostly at the welder as it kept unravelling the wire today, I swear it's possessed !) the cowl
panel was fitted, seams/joints coated with epoxy and the bare metal etch primed. Tomorrow I'll be going around all the seams with seam sealer so
its ready for a top coat. Not sure what I am going to paint it with yet though.
And these are the new heads I picked up yesterday
A quick clean up, and check over then they should be ready to use.
Confused but excited. - 9/12/11 at 05:01 PM
That's going to be one mean machine.
jeffw - 9/12/11 at 05:48 PM
Looks good....but shouldn't you be busy with my Plenum
flak monkey - 11/12/11 at 05:57 PM
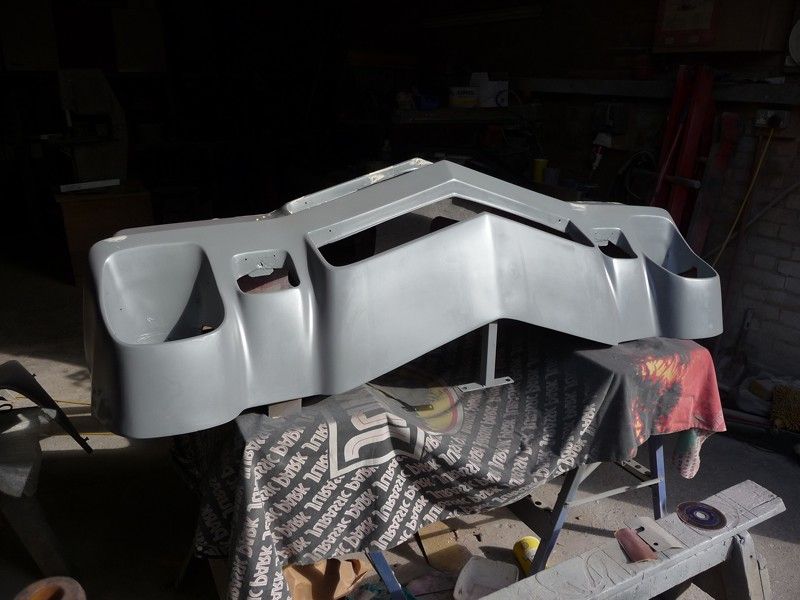
Seam sealed the cowl panel yesterday, so its ready for top coat when the weather warms up (so that will be next year then!)
Then started cleaning up the plastic vent panel which had quite a few badly done coats of paint on it. Took ages, but its now bare plastic again.
Might give it a light coat of satin black paint when I do the cowl, as its not in the best condition on close inspection. I know repro's are
available, but then this isn't a show car.
As it was so cold, I decided to do some work inside, which mean making a start on the heads. Stripped the valves out, they all seem to be in good
condition and are lightweight stainless items from what I can make out. Not sure what the springs are, they look like stock ones to me, so I'll
probably change them for beehives while I am there.
Took a wire brush to the ports to see what had been done to them. Looks like they have just had most of the casting marks cut out with a carbide burr.
No major reshaping that I can see.
Started off with cleaning up the combustion chambers, deshrouding the valves and removing all the sharp edges. I am not going to the extent of
polishing them, as there's bigger benefits to be had in some port and valve reshaping...
Heres a comparison shot
There is plenty of material to come out of the valve throats, this is the narrowest part of the port anyway, so the biggest gains are in opening that
area out and blending into the valve seats, over any work closer to the manifold areas of the ports.
All the material was removed in the valve throat directly under the valve seat itself. Basically took it out to around 1mm under the diameter of the
valve seat, then blended into the seat with a radius. The poor mans 3 angle seat. Then just blended the short turn back in again as best possible.
Finished off with a 60 grit roll.
Annoyingly I seem to have misplaced my 8mm carbide ball burr, so didn't get as far as slimming down the valve guides. But I'll get another
one this week so I can do that next weekend.
Cleaned up the valves, one of the many uses for a lathe I guess. Some of the inlet valves are quite pitted, not sure whether to replace them or
not.
After that, lapped in the exhaust valves, a job made quicker with a cordless drill. Next thing to do is put the valves back up in the lathe and put a
nice chamfer on the back face behind the seat and radius the front face.
flak monkey - 16/12/11 at 06:04 PM
Continued on the heads this afternoon. Nearly finished the grinding now. 3 more inlet ports to do. Then just finishing with emery rolls.
The last bits I wanted to tidy up were the valve guide bosses. And as my new burr arrived yesterday I was able to crack on with it. I can't
really feel my hands now though and my compressor has been running flat out trying to keep up
The exhaust guide bosses are pretty chunky
Slimmed them down a bit. Not removed anything off the lengths of these at all.
The exhaust ports only took a couple of hours.
Then moved on to the inlets, these are taking quite a long time as there is a fair bit of metal around the guides that just needs blending in.
Again they start off pretty chunky
And the finished shape
Hopefully that will pay off a bit
Ordered some new inlet valves and a set of rods this week. Though they won't be here until after Christmas now I expect.
NS Dev - 23/12/11 at 09:48 AM
Just flicked through your thread! Interesting as we're doing a camaro of the same vintage at the mo. Its been stripped to a bare shell/tub and
blasted. Much the same rot as yours, except on this one the boot floor is a bit sketchy as are the 1/4 panels. They all looked fine until blasted,
then the very nice filler work was uncovered!!
The joke with the scuttle/cowl area (as no doubt you have found) is that they filled it with bloody foam!!! No wonder they rotted so badly!!
We're getting a '69 camaro in early spring, which should be a hell of a project, its going LS3 power, with a LOT of metalwork mods on the
body, broadly similar to THIS one at Detroit Speed..........
flak monkey - 23/12/11 at 11:50 AM
Cheers Nat.
Yeah the design is pretty poor. However they weren't filled with any type of foam from the factory. Its a well known bodge though.
flak monkey - 25/2/12 at 05:55 PM
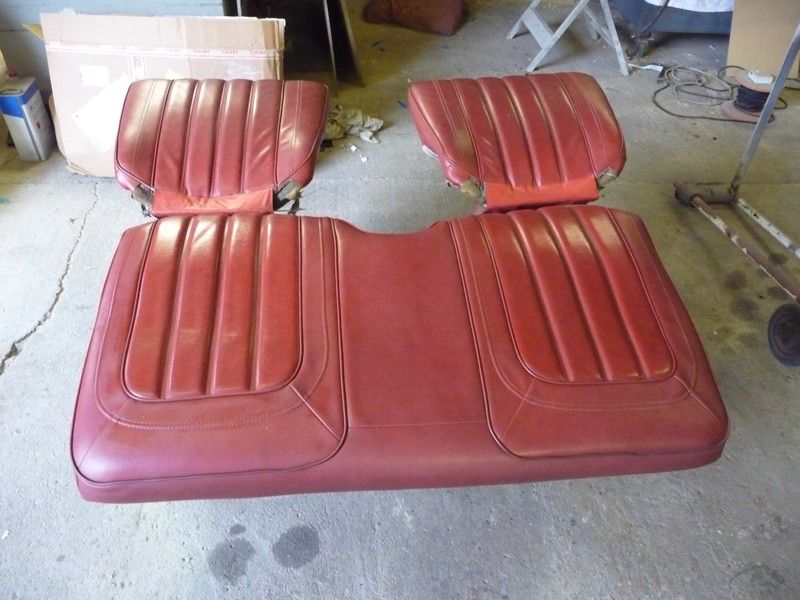
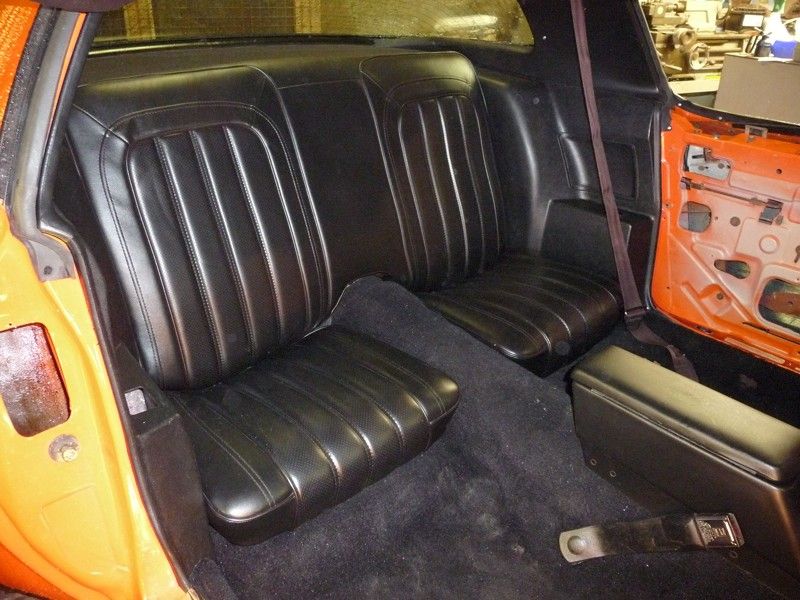
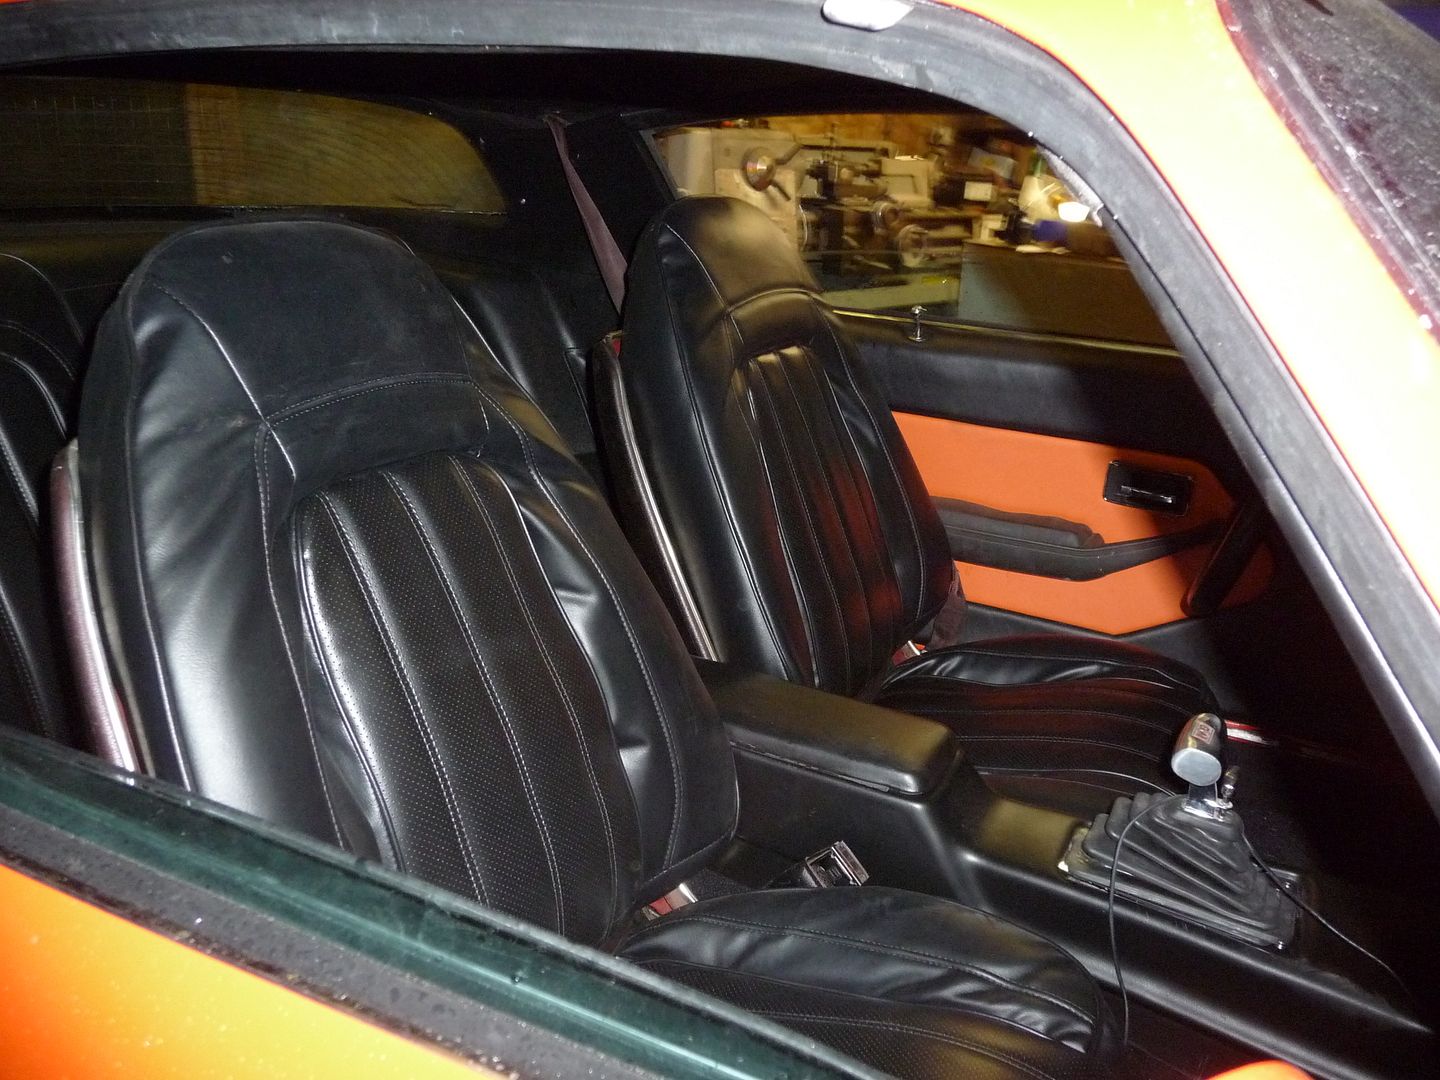
Been and picked up a 3.42 LSD back axle today, along with a big front ARB and a complete set of seats. Front seats need recovering, but at least they
are original ones so I can plug up the drilled holes in the floor! Still need a new set of door cards really, but they are pretty cheap even new.
Not done much else. Keep plugging away at buying parts I need as I can afford them, or not as the case may be sometimes
To be honest I'll be pleased when I don't have projects eating all my cash to be honest! Time for a break from it all apart from minor jobs.
scootz - 26/2/12 at 11:39 AM
quote:Originally posted by flak monkey
To be honest I'll be pleased when I don't have projects eating all my cash to be honest! Time for a break from it all apart from minor jobs.
I've been saying the same thing for years now David! Doesn't stop me from the odd impulse-buy here and there though flak monkey - 13/3/12 at 08:39 PM
Turned out the LSD in the axle is buggered, so thats more expense I just dont need
I got the front section of frame rail back from being grit blasted. Came up really nice, no bad rust on it anywhere. Just threw some epoxy primer on
it to stop it going rusty again
Then spent a couple of hours cutting the rear sections out from my other replcement rails which had just been hacked out of another car. I'll be
getting them blasted too next time I pass the blasting place... So now I have all the parts to fix up the rear frame rails properly, once the weather
gets better anyway...
Spent yesterday afternoon cutting out that rotten frame rail. Not as bad as I thought it would be, took about 3 hours and came out in 2 decent sized
chunks. Now all I need to do it cut the original rail through in exactly the right place for the new one to butt up to it properly.
Now you see it
Now you dont
The job was made easier by there being so little of the original left :lol:
Got to tidy a few details up, then give it a good coat of paint where the new rail is going to fit, then more welding...
scootz - 13/3/12 at 09:00 PM
Where do you find the time!!!???
flak monkey - 13/3/12 at 09:04 PM
Dunno... lol
I need to get these projects done...really!
alistairolsen - 15/3/12 at 07:15 PM
So much for buying it an using it! Some serious work going into it now!
flak monkey - 15/4/12 at 08:19 PM
Built up the short block today.
Had 0.020" skimmed off each deck face to bring the pistons flush, should help squish a bit and bring CR up to 10.5:1 with the flat top pistons.
Got it honed as well while it was in.
Made up a tool to change the cam bearings, time consuming, but the old ones were knackered.
Spent the rest of the day swearing at my poo piston ring compressor, and generally battling getting the pistons fitted. But job done... Rotating
assembly done, all new bearings, Eagle steel rods and hypereutectic pistons.
flak monkey - 24/4/12 at 08:24 PM
Decided I really ought to sort an oil pump drive out. Going with fuel injection, I don't need the distributor so thought I'd grab an old
points one and modify it.
Stripped the gubbins
Put it in the lathe and turned the top end down and gave it a quick polish up as well
Also had to remove the advance mechanism from the top of the shaft
Made a press fit cap to cover the end up out of a bit of ally bar stock
And a couple of hours later, job done
That should do it
flak monkey - 4/5/12 at 06:12 PM
Got the cam in and timed up, heads on. Just need to get some hardened pushrods now. I had some stock length rods kicking around, so tried them to get
an idea if they are the right length.
Just waiting for a sump and a few other bits, then I can get it finished off.
Finished work at 1 today, and it had stopped raining for the first time in about 4 weeks so I got a chance to do some more work on the rust bucket.
Cleaned the floor up, gave it a quick coat of paint and trimmed the old and new frame rails to fit nicely. I was quite pleased with how simple it was
really.
Got it welded in, also went smoothly. Obviously on a roll today...made easier by doing a lot of it from above, other than the part that fits to the
inner rocker. I added a few extra welds that were either missing or they didnt bother from the factory as well. Can't hurt. Once finished I
painted it with epoxy to keep it all protected.
Now thats done I can finish the repairs to the floor inside. Which will be a major step forward.
[Edited on 4/5/12 by flak monkey]
flak monkey - 6/5/12 at 06:32 PM
Repaired the bulk of the floor yesterday...
OK it aint pretty, but its better than it was....
Spent all morning today cleaning off underseal, then wirebrushing and sanding the floor down ready for paint. Used the good old Jotun 87 again.
Thinned about 30%, not only is it easier to brush on, but it also runs into all the nooks and crannies much better. Just needs another coat tomorrow
and thats the floor done, finally!
Things always look better when they are one colour eh? Paint was still wet when I took the pics.
Ivan - 6/5/12 at 08:00 PM
Hi David - I am also looking at Fuel Injection for my 383 - what system are you planning on going for?
flak monkey - 6/5/12 at 08:03 PM
Holley inlet manifold and throttle body, with megasquirt controlling it... well hopefully anyway!
flak monkey - 8/5/12 at 09:09 PM
Mostly finished the engine assembly off tonight as my pushrods arrived so got them in, adjusted the rockers, fitted the inlet manifold and popped the
rocker covers on just to keep the crap out of it. Last thing to do it the sump, which also arrived today, but I need to paint it. A job for
tomorrow.
flak monkey - 18/5/12 at 09:43 PM
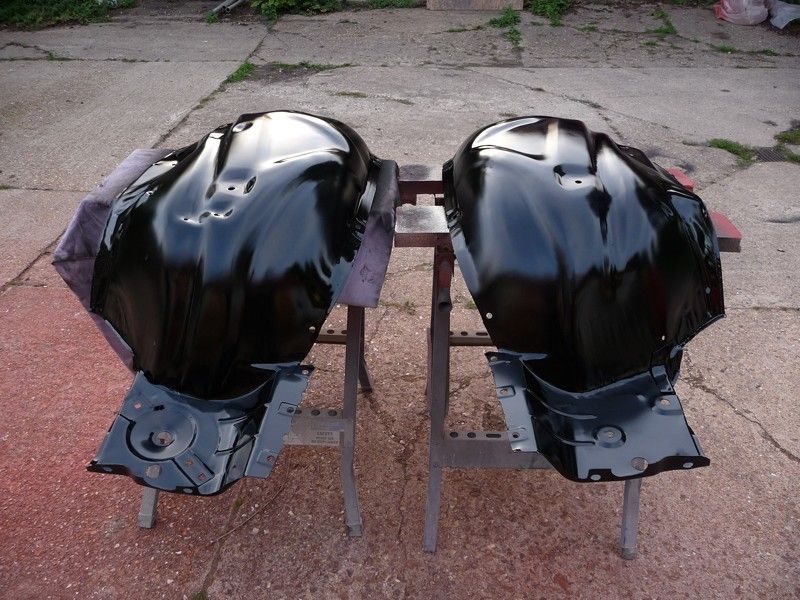
I was actually plesantly suprised how good the inner quarters were underneath the factory undercoating. Nice shiny new paint other than a couple
of small patches. It'll be getting scuffed up and a coat of epoxy over it then recovered with modern stonechip paint.
I finished off the repairs to the boot floor today, along with some patches on the rear shock towers. All a bit of a pain to get to, either curled up
in the boot or welding blind under the car. Done now though...
Tomorrow I am going to be prepping and painting both the underside and inside the boot. If the weather is good anyway!
In cleaner news, I decided to start building the ECU for the EFI. Decided to use megasquirt, and instead of buying a built unit then having to modify
it anyway, I thought I'd get a kit and build and mod it myself. Modifications include installing USB comms and doing away with the rather old
skool serial/RS232 and 4 built in coil drivers for wasted spark. Last job is to build a small tacho output circuit to drive the dash tach. Had it
hooked up to the laptop and downloaded a base map, everything seems to work as it should....
Naked board
USB board plugs into the small 5 pin connector
And some coil drivers, output on a seperate connector
alistairolsen - 16/6/12 at 10:35 PM
Starting to come together now! Megasquirt looks interesting, whats the story with the USB gubbins?
flak monkey - 9/7/12 at 07:04 PM
Done quite a bit over the last couple of months, been a manic time!
The pics tell the story so far I think....
The subframe connectors don't fit, the bushes in the front of the leaf springs need to be modified to fit in the spring perches as well. Probably
a sign of the joys yet to come. The most annoying thing about it is everything is meant to fit. Most of its new and I am going to end up cutting it
up to make it work. FFS
The subframe connectors hit the floor where the rear footwells are and still have about 1/2" to go before they are seated in the rear spring
pockets. And the holes for the bolts for the torque boxes don't line up by about 3/8".
The spring poly bushes need about 1/8" skimming off each side to make them fit for some bizarre reason. They should be 3.5" wide, per
standard, but are 3.7"
In good news I got some nice new wheels for a good deal, only done about 200 miles since new. 17x8 for the front and 17x9 for the back with 225 and
255 tyres.
[Edited on 9/7/12 by flak monkey]
flak monkey - 14/11/12 at 09:51 PM
Time for an update I think!
Gas tank modifications for fuel injection. Starting with making a small baffled 'sump' for it. Used an old tank thats been well vented and
been standing open a good few years. No worries about vapours in this one. This should allow me to run an inline fuel pump at the back of the car,
with just a feed and return line under the hood.
Its about 10"x7", drilled 2 1 1/4" holes in the tank under where the sump is fitted then welded it on. The take off at the front of the
tank is the fuel outlet. I added another to use as a tank drain, figured it might come in useful one day. The tank has an old breather line welded
into the top, which I plan to use as the fuel return. The gas cap I have has a 2 way breather so no problem there either.
Cut the old fuel gauge retaining ring off and turned up a ring from 1/8" plate to fit in the recess on the top of the tank. Drilled and tapped
it, then welded it on. Shortened the new sender unit so it should leave me a gallon or 2 when the gauge reads empty.
Pressure tested it and eventually was happy with the result.
Found a couple of rust spots on the inside of the inner quarter that were hard to get to. So as I needed to repair the quarter panel and rocker anyway
I thought I'd investigate the extent of the work required....
Imagine my suprise to find lots of filler, and not much metal underneath...
So after all that was cut out there wasn't much left at all. I've repaired the inner structure and painted it all, just have to weld the
patches on...
The rest of the rocker looks to be in reasonable shape, and the lower and inner sections are very good.
I made some stainless crush tubes for the rear polybushes.
Got the springs on the back axle and it hoisted into position. Actually was pretty easy with 2 people and 2 trolley jacks. That was a pleasant suprise
at least. Shocks went on ok, other than a struggle with the lower nut, new bushes made getting the nuts on a PITA. Only thing I didn't do is
torque the front bush bolts, I'll do that when its on it's wheels.
Shocks are Monroe Sensatracs and the springs are heavy duty ones, no idea on make or how it will all sit... until all the weights on it.
Fitted the brake backing plates, after opening the bores out a bit, didn't quite fit for some reason (~1/8" too small), though they are
earlier model back plates, still off a 10 bolt though. Reassembled the brakes with new cylinders and shoes and the original hardware as it was all
good.
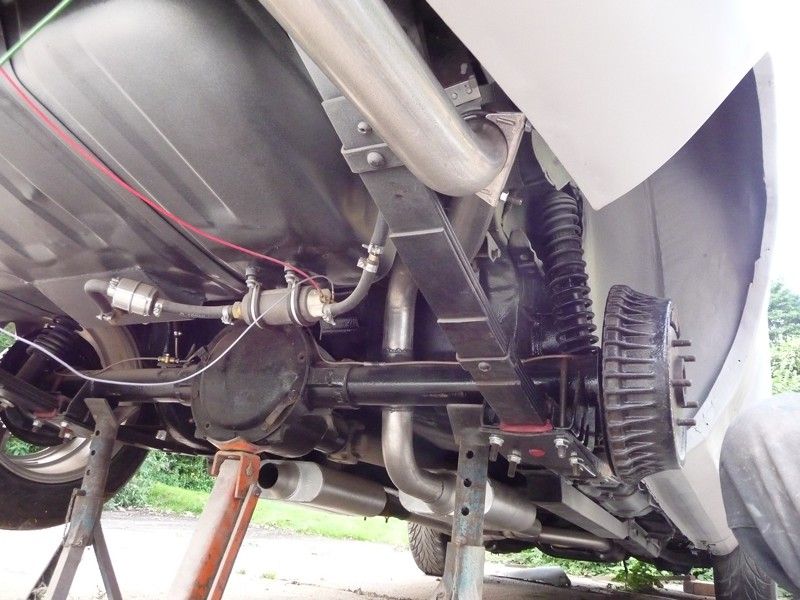
Then put the sub frame connectors on and torqued it all up.
Quite pleased with how the SFC's tuck up under the car.
Ignore the manky old diff cover, got a new one to go on eventually....
Swapped the front spindles and brakes over and fitted the front shocks. Just need to make the front lines now and its sorted.
Made the rear brake lines as well. Stainless braided flexi lines etc.
Cleaned up the transmission, made new oil cooler lines and found where a few of the leaks were coming from when I had the car on the road. Still need
to fit a new dipstick and going to blank off the kickdown cable. Dug the new torque convertor out as well, B&M Holeshot 2400.
Finished putting new core plugs in, fitted the new flex plate.
Worst bit was the engine mounts didn't line up by around 1/4" each side. Got the bolts in after a while. Hope I don't have to take them
out again....
Stuffed the headers on loosely as well just to see what clearance I've got, they're Hedman ones. Need shorty plugs and going to fit a mini
starter. Other than that, all looks good. Ground clearance looks good too, bottom of the header flange is level with my SFC's
I fitted the additional fuse and relay boxes on the firewall and plotted out a few other bits for the engine bay. Tried fitting the PS pump and found
the return hose will clash with the pitman arm, so need to find another pump. Might have a go at making the subframe to firewall braces next
weekend.
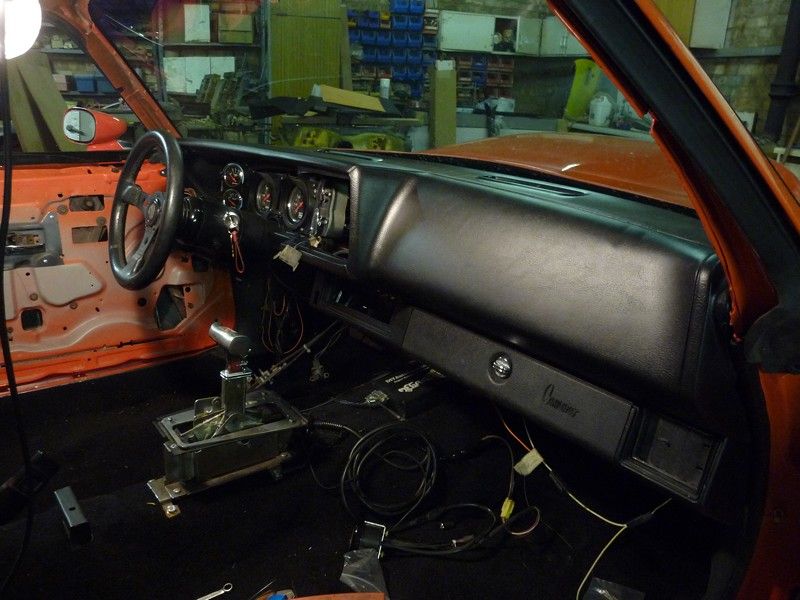
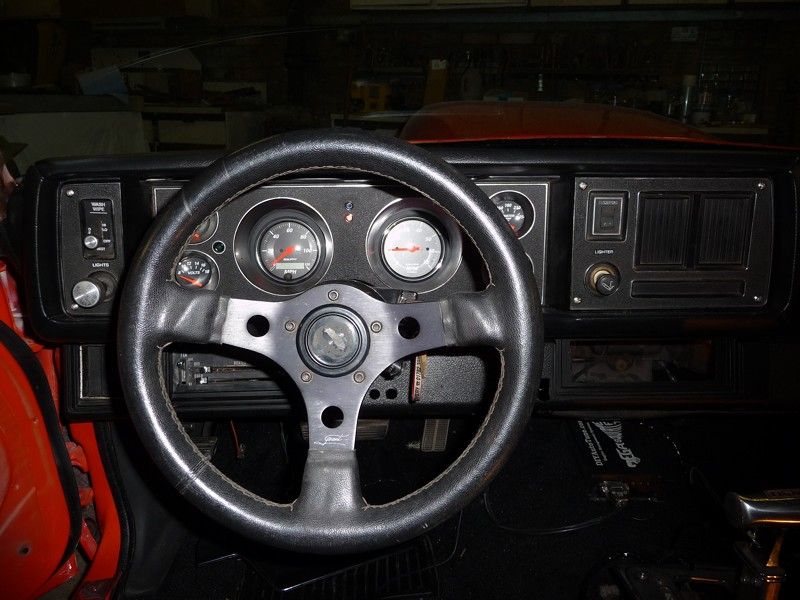
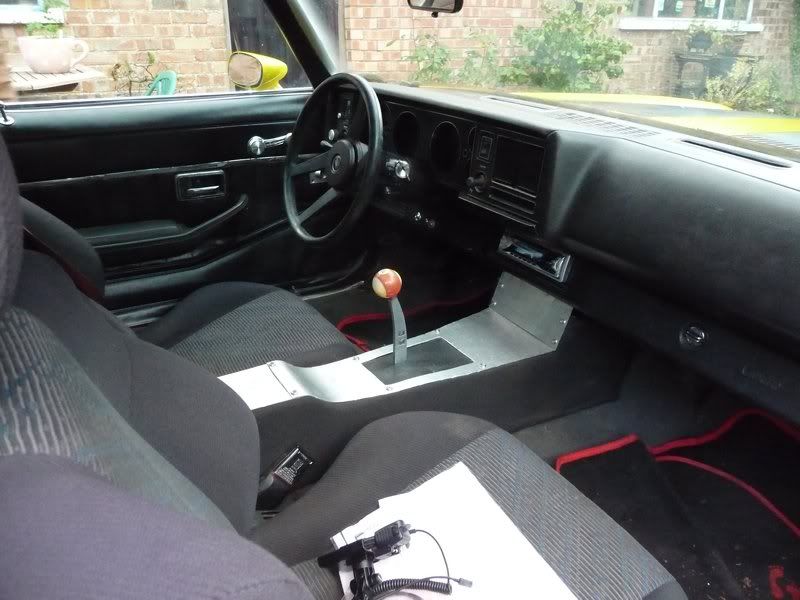
So thought I would have a go at the instrument panel in the evenings this week.
I wanted to keep the stock dash, but fit up to date instruments. Got a set of Autometer ones for a sensible price, but no way I was forking out on an
aftermarket custom dash. Still had the old gauge cluster and it seemed ripe for cutting up and making the others fit. Thankfully none of it's
visible once its installed anyway
Cut an aluminium plate to fit in where the speedo and tacho were to give me something to mount the new gauges to. Then cut out the holes for the
smaller gauges in the original cluster. Had to cut most of the back off the cluster, and still need to cut out some more to clear the clamps for the
gauges. Got too cold outside at that point so I gave up for today :lol:
Quite pleased with the results.
Wired the dash up, and tried getting a pic of it lit up as best I can. I like red illumination, so went with that option. Stock is white though...
Picked up some more parts last night. Now have a nice small 14" steering wheel on there, small starter motor with lots of header clearance and a
few other odd bits. Hoping to make a big start on wiring the engine bay this weekend with the aim to get it running by Christmas....
[Edited on 14/11/12 by flak monkey]
flak monkey - 16/11/12 at 09:07 PM
Well finished the ECU and looms off tonight, and thanks to Briz have got a trigger wheel. This weekend will mostly be wiring the engine bay once I
have finished a couple of other minor jobs, like a lambda sensor bung for the exhaust and fitting said trigger wheel and sensor. Which may take longer
than initially thought... :lol:
Simon - 17/11/12 at 12:00 AM
Very, very nice
ATB
Simon
Ivan - 17/11/12 at 07:28 AM
You are doing a great job David, thanks for posting all this - it's one of my favourite threads.
You and future owners are going to have an excellent car at the end of the work.
flak monkey - 29/11/12 at 12:32 PM
Spent every evening last and this week doing wiring, drilling holes in the firewall and doing more wiring. The ECU and engine wiring are more or less
done.
Still have to make a bracket for the VR sensor and make a new crank pulley. I temporarily mounted the trigger wheel on the damper, but it's far
from ideal. But it will do for just checking the mechanical bits out.
Fuse box on the firewall is just for the EFI system, fuel pump, coils etc. Its switched by a 70A relay direct from the battery.
I've since wrapped the loom up and tidied the rest of the wiring up.
Cleaned all the paint off the headers and repainted with them with high temp paint. Welded in a bung for the lambda sensor. Fitted a new transmission
pan and removed the kickdown cable and bunged up the hole.
So loads is happening, but yet again I have run out of money a week into the month
scootz - 29/11/12 at 01:59 PM
computid - 30/11/12 at 07:08 PM
Words cannot describe how cool this is so I'll just leave you a few smiley faces:
flak monkey - 22/12/12 at 05:19 PM
Exhausting stuff
Its worked out reasonably well, the pipes sit around 1/4" lower than the SFC's I made.
Finished wiring inside the car, nothing more to do other than run the cables to the rear of the car.
Installed the shifter so I could sort wiring for reverse lights etc and found that the shifter cable wanted to go through the floor and not the
existing hole. Some gentle persuasion with a big hammer soon fixed that. Need to repaint that section again now though. Also had to modify the bodged
shift lever on the transmission. However it's now all fully functional.
Pulled the x pipe off to extend and fully weld. Simple job, just need to get the hangers sorted for the mufflers now. Going to run without tail pipes
for the time being, might stick some turn downs on it. Tail pipes are a nice easy addition at a later date.
Dug the core support out from the corner of the workshop and bolted it up. Dropped the radiator in and made a top plate/bracket for it.
Made a start on the subframe braces, need to bend up a couple of bits of tube to finish them off. Needed to get these bits in as I plan to use them to
run the fuel feed and return, and I don't want to make up the braided hoses twice!
Need to reroute those heater hoses as well.
I'll finish all the fuel line plumbing off tomorrow, and then run some pressure tests. I also need to make an oil system priming tool as well.
monck - 22/12/12 at 07:08 PM
Must admit when i first saw the amount of rust in the early pics i thought you'd end up giving up ...
Glad to see you haven't and are making great progress with it ..
Ill keep an eye out for updates
flak monkey - 24/12/12 at 05:14 PM
Thanks, I am persistant...
Finished the braces off, just need to paint them at some point. Ran the fuel lines front to rear, finished some more wiring and plumbed in the
transmission cooler. Not too much more left to do other than fill it with some vital fluids and some final checks...
flak monkey - 31/12/12 at 08:20 PM
Well, what a week!
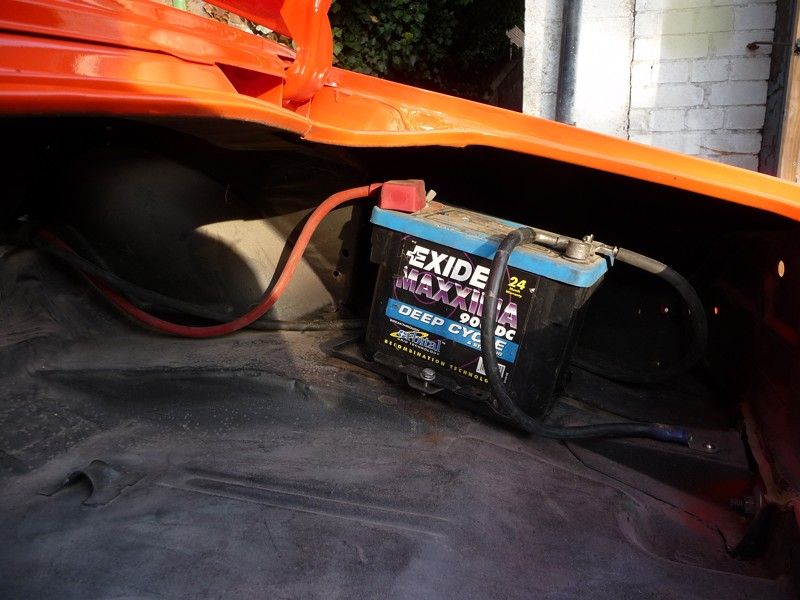
Decided to plough ahead and get the chevy fired up. Didn't want to play for various reasons. Turns out my Volvo battery isn't man enough for
a 10.5:1 V8.... Soon solved that with a massive 950CCA battery I had
Anyway, couldn't get it started at all, dodgy tach input signal, which ended up causing the engine to spit back and smash 2 teeth of my new flex
plate. So got to pull the transmission out tomorrow ready for a new flex plate later in the week. Solved the problem in the end, got the engine
started up and proceeded with the cam break in. Running really nicely, so grabbed a video.
After that it didn't want to play at all. Started hunting really badly, like it had a massive air leak. Pulled all the inlet manifold off and
resealed it all, still the same. Then noticed my fuel pressure was over 100psi oops. Turns out the return line was too restrictive, so had to drop
the fuel tank and add another return line into it. Will use the original as a breather only.
Now got a decent steady 3 bar fuel pressure. Haven't been able to get it running since the change though as the flexplates completely FUBAR now.
I am not dead certain this was the problem, but it can't have been helping at all.
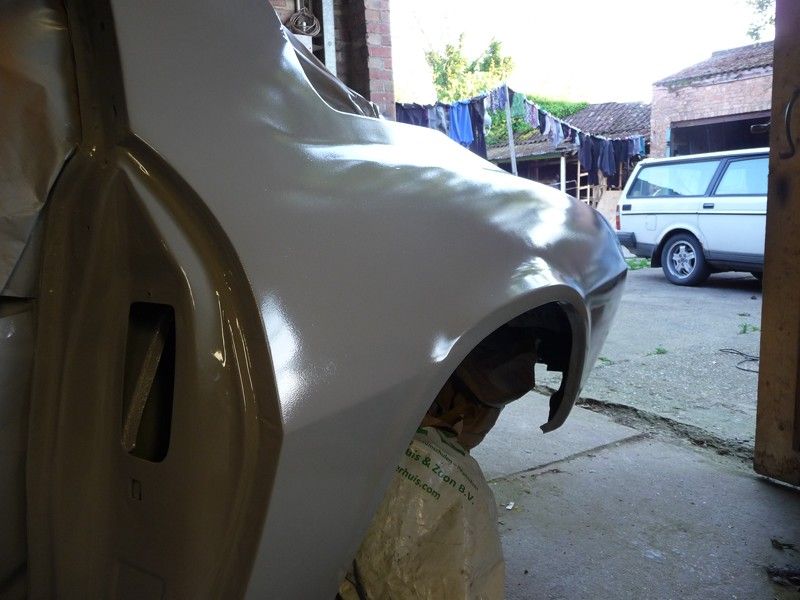
Did some more body repairs today. Sorted that drivers side quarter panel and sill out. Just a few bits to do around the boot, rear window and the
front of the driver side sill now.
franky - 31/12/12 at 08:30 PM
Well done, i'm sure you're aware more than most that things don't always go to plan.
Need vids with better sound next time
flak monkey - 31/12/12 at 08:33 PM
Nothing I do normally goes to plan
The vid's off my camera, not much will cope with the 110dB or so that it was in the workshop when I did the video
RK - 31/12/12 at 08:36 PM
Looks great, David! You're building a car that used to be extremely common around here, and I've built one fairly known over there...
(although there aren't a huge amount of SR20DET's I'm sure...) Keep up with the pics!
flak monkey - 5/1/13 at 07:26 PM
Ran the main battery cables to the trunk today (50mm^2 should do it...). Neg cable runs through the car then out the floor and onto one of the
transmission tail hosing bolts. Sorted the transmission fluid leaks at the dipstick and speedo drive. Will see how long that lasts, but in a somewhat
rare occurance, I have a car that retains all of its fluids (!), if only until its been used for a while.
After that thought I'd see if the transmission and brakes actually worked so drove it around the garden a few times :lol: Need a bigger yard! No
problems to report.
Thought as it was outside I'd get my decent camera out and take a movie with some reasonable sound (for a change) and some full HD.
Crawling aruond underneath checking for leaks I notice my mini starter is having a good go at bashing the teeth of the flex plate in a couple of
places. Lets hope that doesn't continue. Rechecked pinion clearance in several places, all good. Engages halfway across the teeth as it should.
So dunno whats going on there really.
flak monkey - 24/6/13 at 07:59 PM
Thought I better update this!
Took ages to make the panel under the quarter, was determined to do it in one piece. And also wanted the top of it to look right.
Spotted a 700r4 and converter sitting on a truck at the NSRA swap meet, bloke didn't seem to know what it was, and the result was a box scored
for �60. After selling some of my own junk, I came out even's for the day
The date code on the box makes no sense at all. But the dates on some of the castings all point to it being a late '88 box. Its also got the aux
valve body inside, which definately makes it an 87 or later box.
I'll probably give it an overhaul anyway. And take the opportunity to learn a bit more about auto boxes.
Pulled the oil pan and its clean enough inside. But whether it all works or not, who knows?!
No immediate plan to fit it yet, need's more work than I've got time to do currently
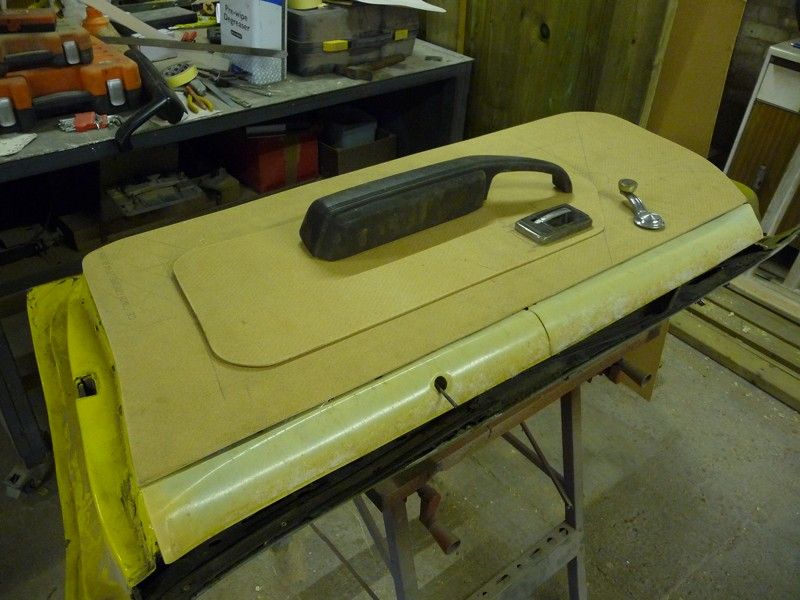
The last bit of the main body shell that needed sorting was the trunk hinge panel. There was nothing much left of it under a few layers of silicone
sealer and paint. I set about cutting it out and making good what lurked beneath. The supporting structure was well rotten on the left hand side and I
patched it up enough to make it good. Scraped all the old loose paint off and gave it a coat of Jotun.
The new panel came from Auto Metal Direct and was a pretty good fit...other than I had to cut it in half to get it in the hole. It threads in under
all the other panels, and due to its shape there was no way it was going in in one piece...
Popped it in and spot welded it up. Hope the back window still fits.
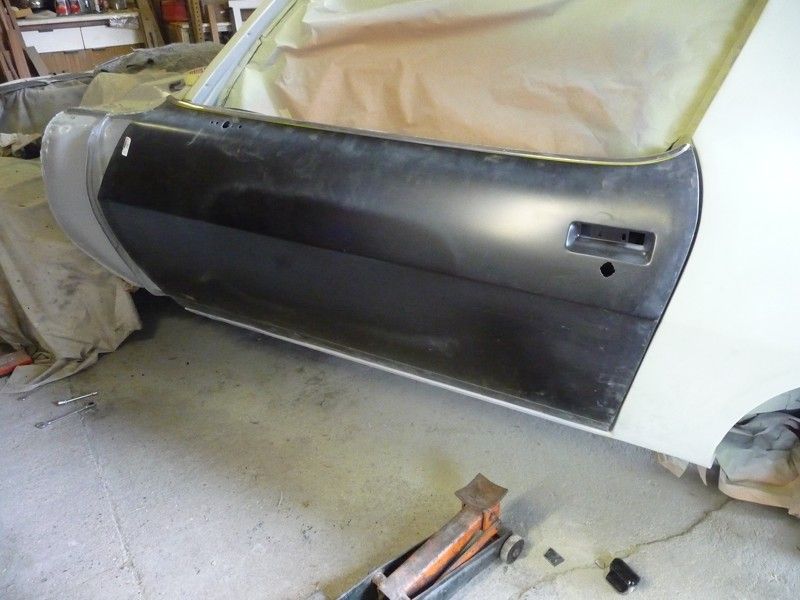
Did a 250 mile round trip to pick up a driver side door. The frame is really solid, skin has a scrape/dent, but no problem as I have a new skin
anyway.
[/URL]
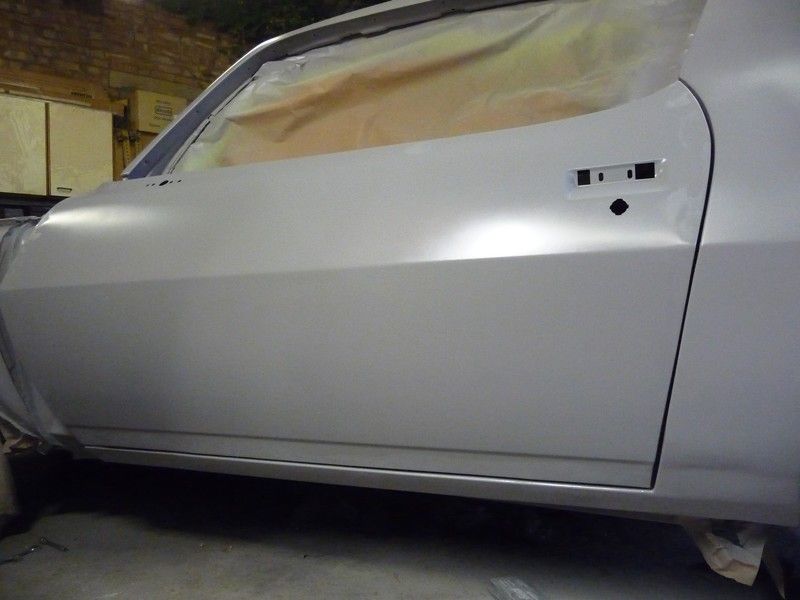
Started with the door shuts and finished off with the main panels.
Didn't find any nasty suprises under the old paint, just a couple of small pinholes that were easy enough to fix. Reckon there was about 15
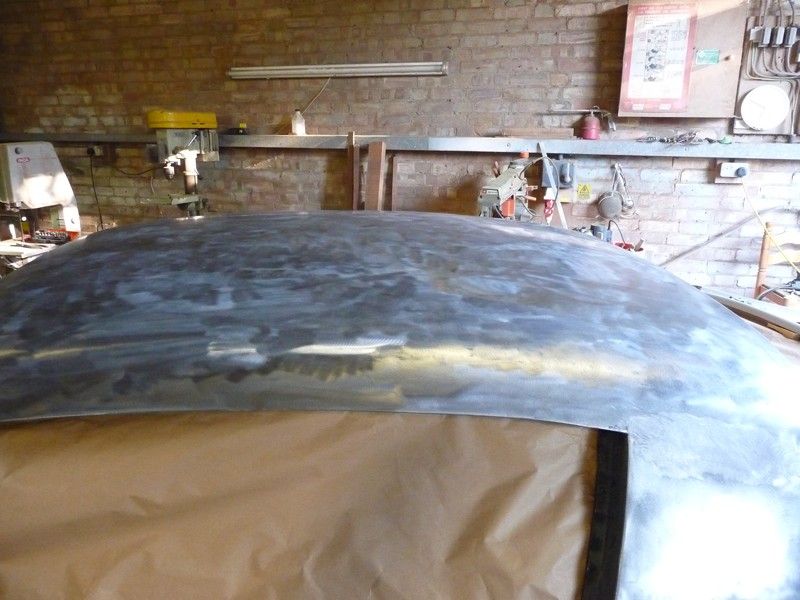
layers of paint on the car. Not easy to strip it off at all. Ended up using some of these things:
Block sanded the whole shell again, getting there with it now, a few areas still need attention. Took most of the day to get it all done.
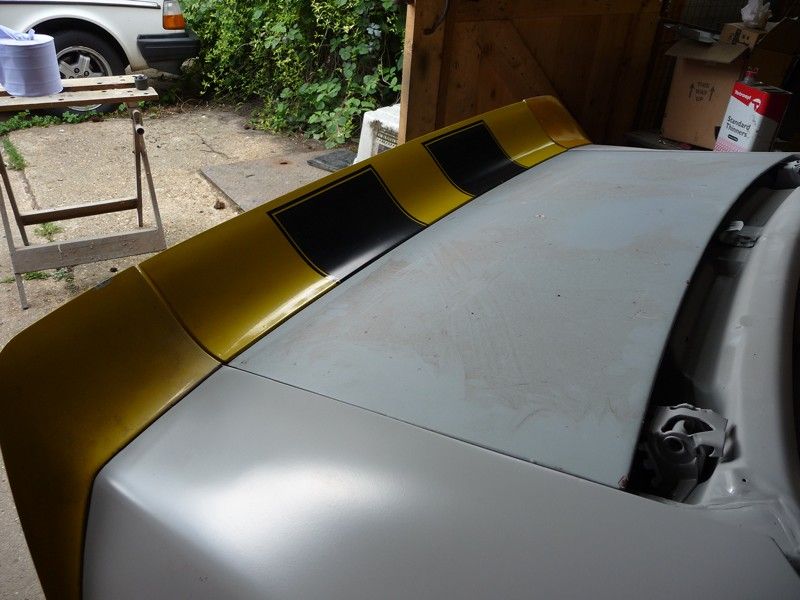
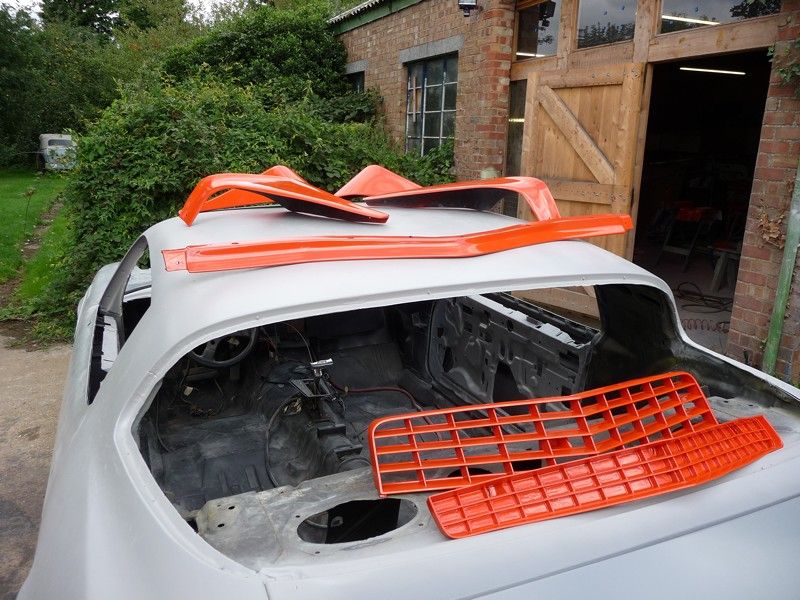
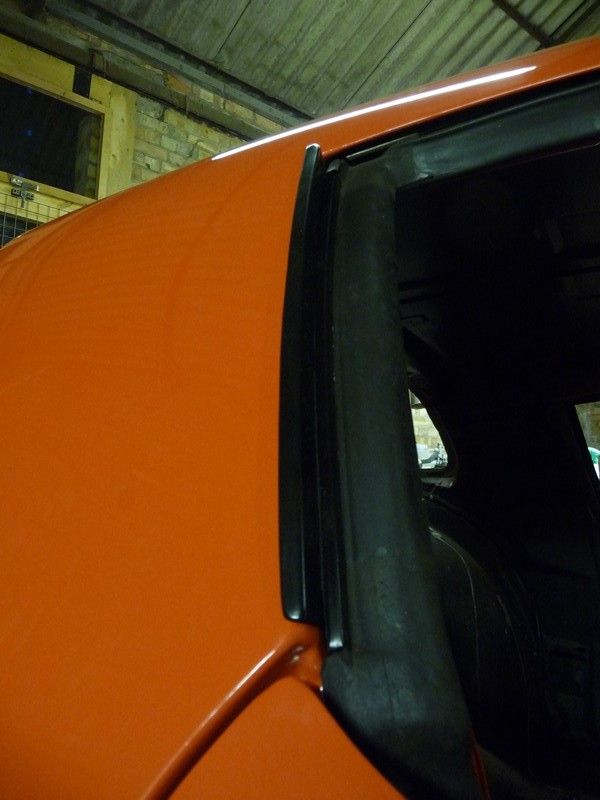
The new LH rear spoiler corner arrived from the USA so I thought I'd drill some holes in my nice quarters. Only had to elongate one to get enough
adjustment so it all lined up. Quite pleased with how it turned out for only 30 mins messing around, seen them a lot worse.
After I'd finished sanding, I thought I'd have a go at skinning one of the doors. Didn't turn out too bad for a first attempt. Got a
few dolly marks in the skin. Hopefully the next one will turn out better.
Another couple of days work on the bodywork. Primered the inside of the door, trunk lid and spolier centre section.
Finished off a few bits of filler and finished with a final coat of epoxy all over, including the cowl panels this time. Also prepped and primed the
spoiler side pieces.
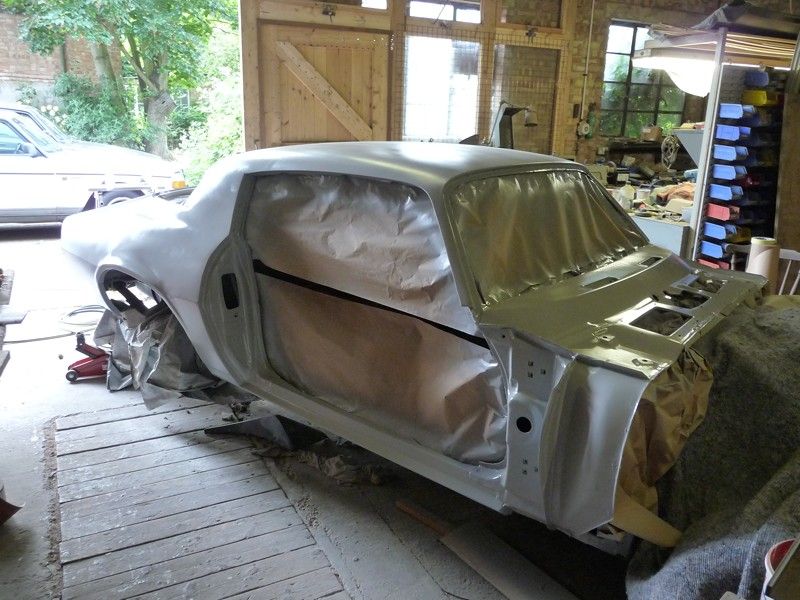
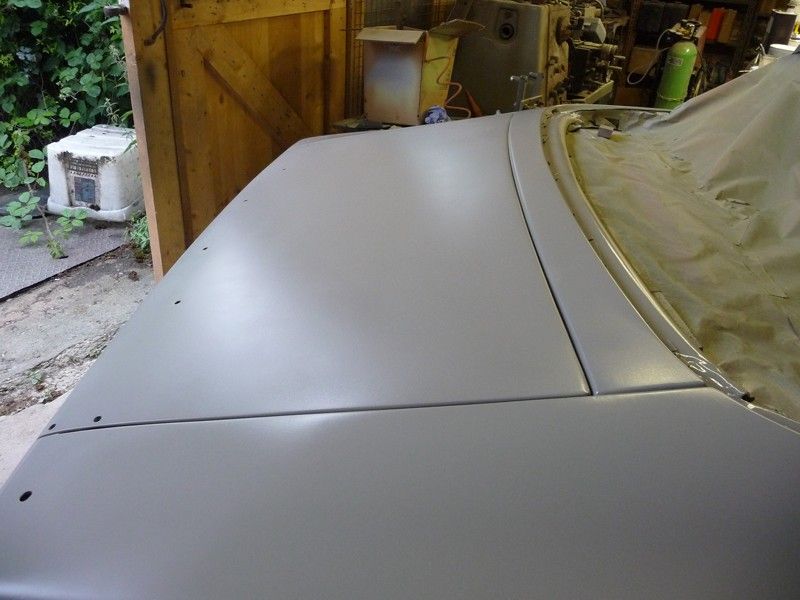
I spent another morning blocking the car again. Well happy with the result now.
A day of playing with the drivers door fitment and the last day of working on it for this week I reckon.
Took all morning to get the alignment nearly right, pretty pleased with the gaps in the end. Reckon I've got about 5/16" between the bottom
of the door and the rocker, and about 1/4" between the rear edge and the quarter.
It did take a bit of beating into shape, and I'm still not sure that its quite right around the bottom of the A-pillar. And a few hours with a
sanding block again. Final job was a v. light coat of epoxy to seal it all up properly. Nothing more to do on the main shell now. It's just all
the bolt on panels to fit....
Not sure this is quite right, it all fits, but not sure about the alignment.
Final results after blocking and another coat of epoxy
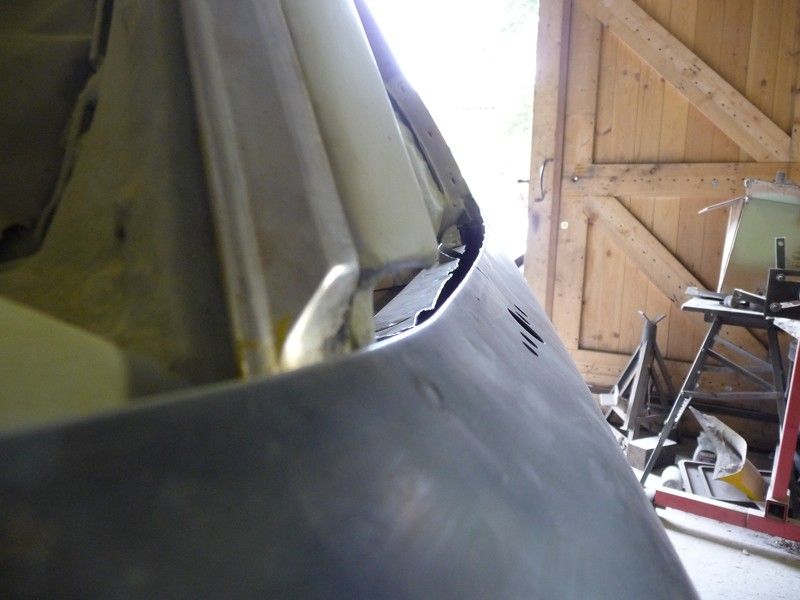
Was a bit worried about how the front fender was going to fit with the re-skinned door. So figured it was worth spending an hour trying to make it
fit. Doesn't seem to be too bad, the gap isn't perfect, but only varies by about 2mm. Also doesn't quite sit right along the top curve,
but sure I can fix that with a minor adjustment to the door skin with a large hammer!
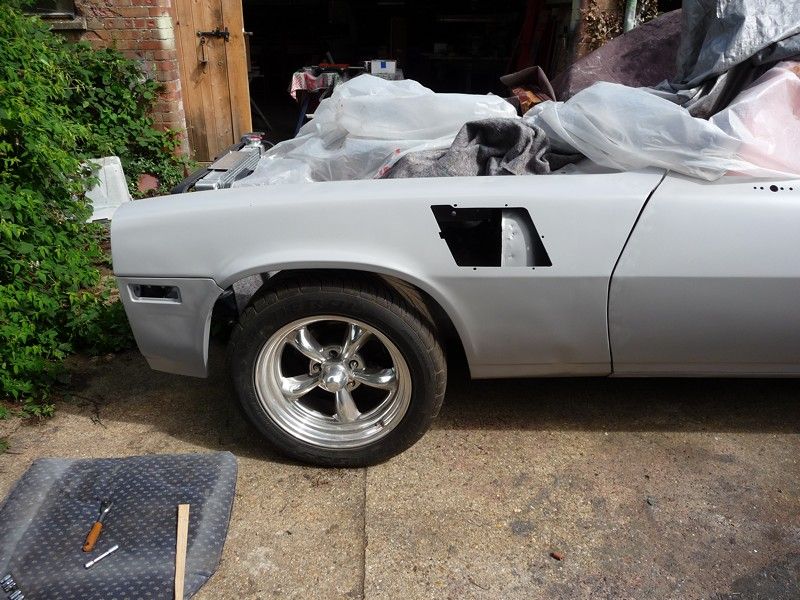
The '80 Z28 fender vents also arrived, only 5 days after they shipped out of the USA. Not bad.
flak monkey - 31/8/13 at 08:12 PM
Took the fenders in for blasting. A lot worse under the paint than I thought they might have been. Rotten along the top and rear edges too. The inner
reinforcement is also fairly rotten.
Skinned the other door, giving it a coat of epoxy inside and out and then fitted it up. It didn't go quite as well as the other one and needed a
bit of grinding on the back edge to even up the gap. Nothing too serious though. Eventually got it somewhere close enough, needs a little skim of
filler here and there
Spent a couple of days repairing the driver side fender. Wasn't too bad but I've had enough of grinding and welding now! Painted the inside
with silver Jotun epoxy so its just filler and the outside to do. Cut the hole in for the fender vent as well, was fairly strightforward. Fitted it
up, not too bad. Gap at the door is a little bigger at the top than the bottom and I've run out of adjustment. So that will have to do. The
overall shape of the door is fairly good though, which was a relief.
This is what the OS fender looked like before making a start this morning....!
Repaired worse, just don't like doing the work that's all :lol:
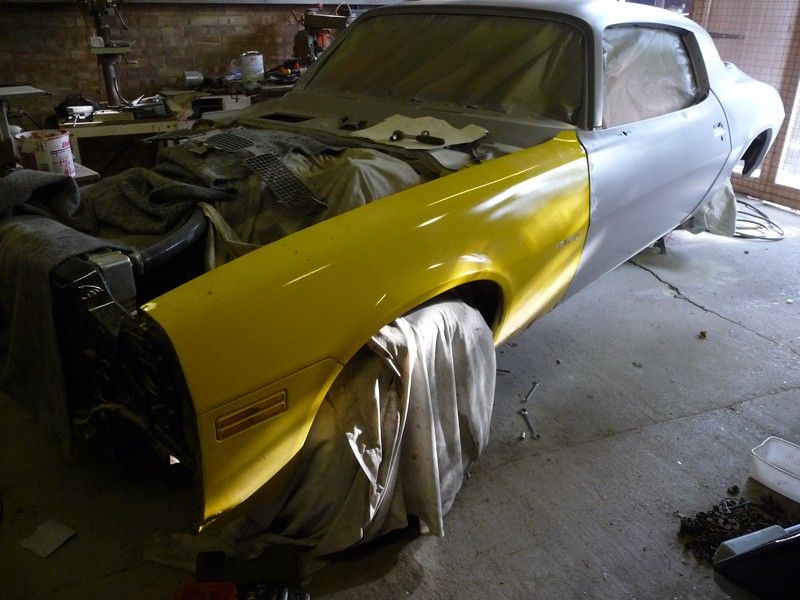
RH fender fitted well, much better than I had expected given the amount of cutting and welding it needed.
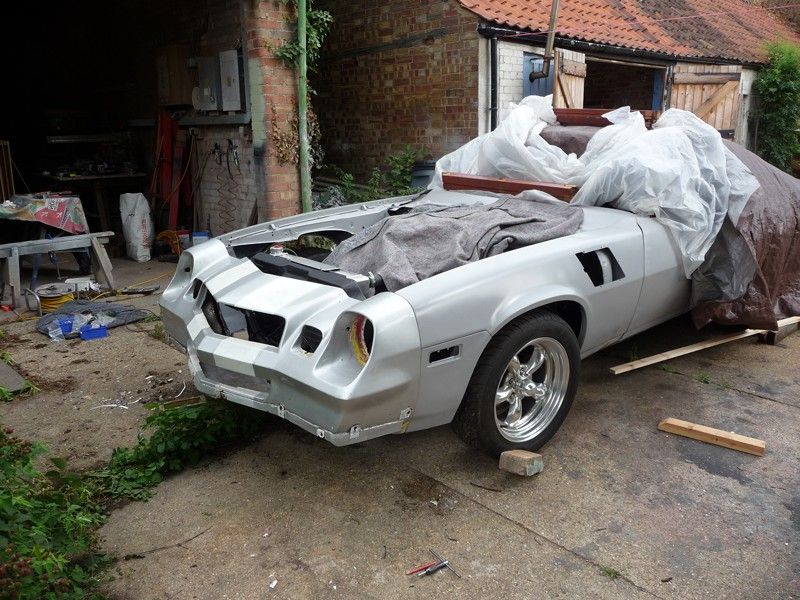
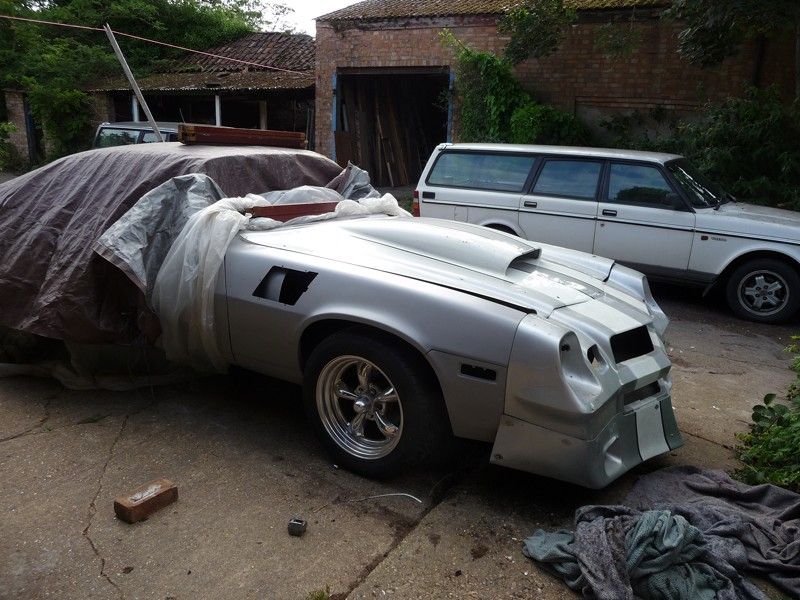
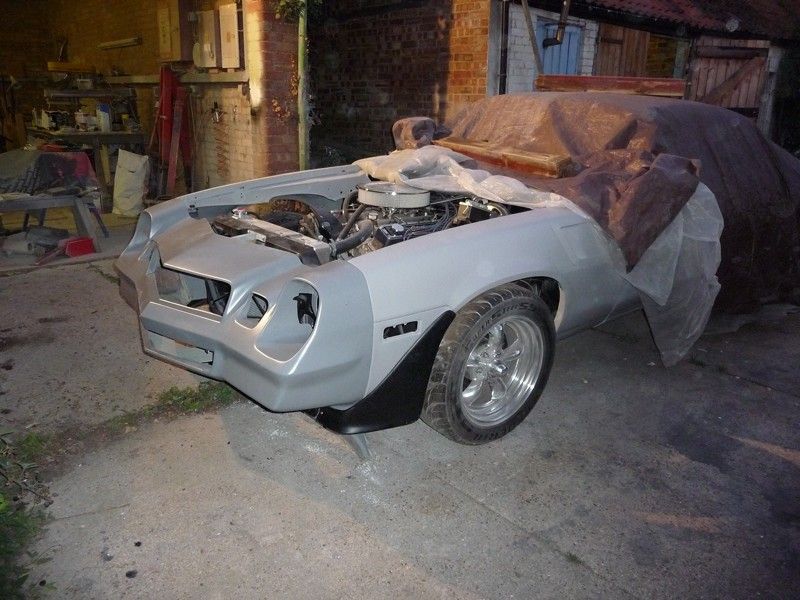
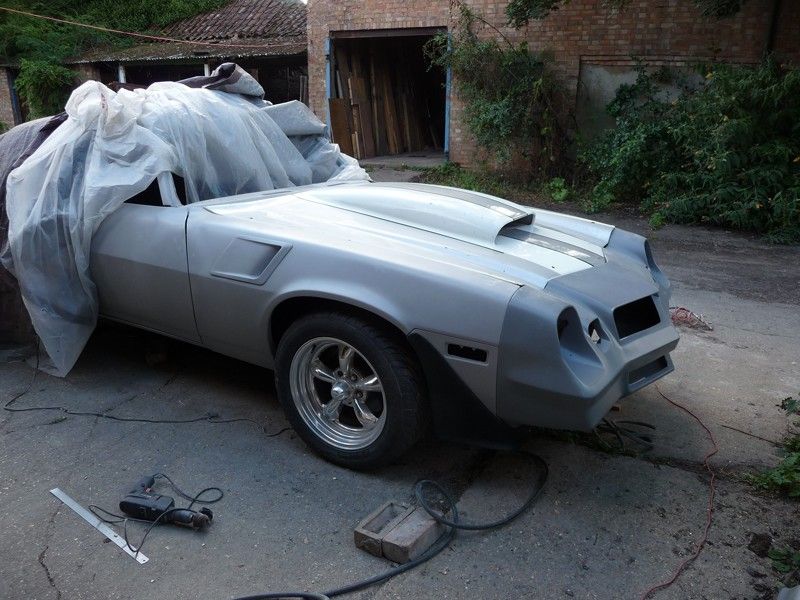
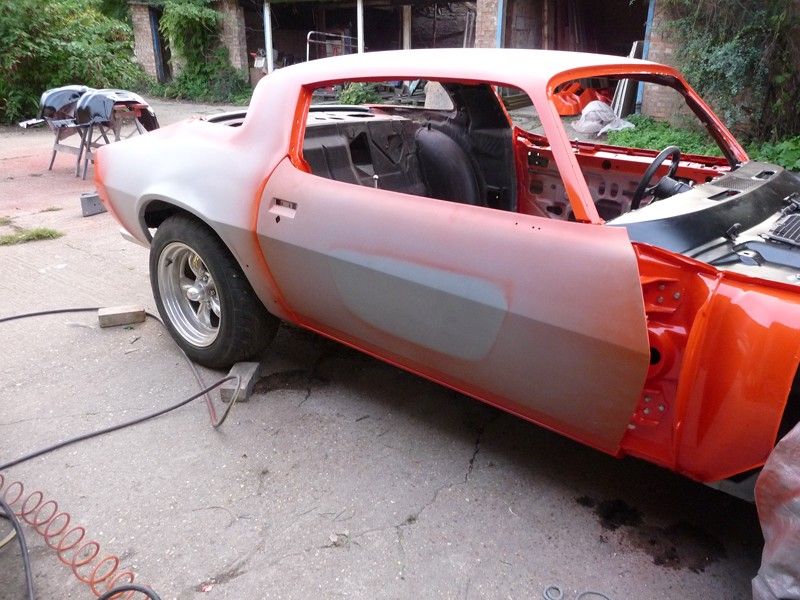
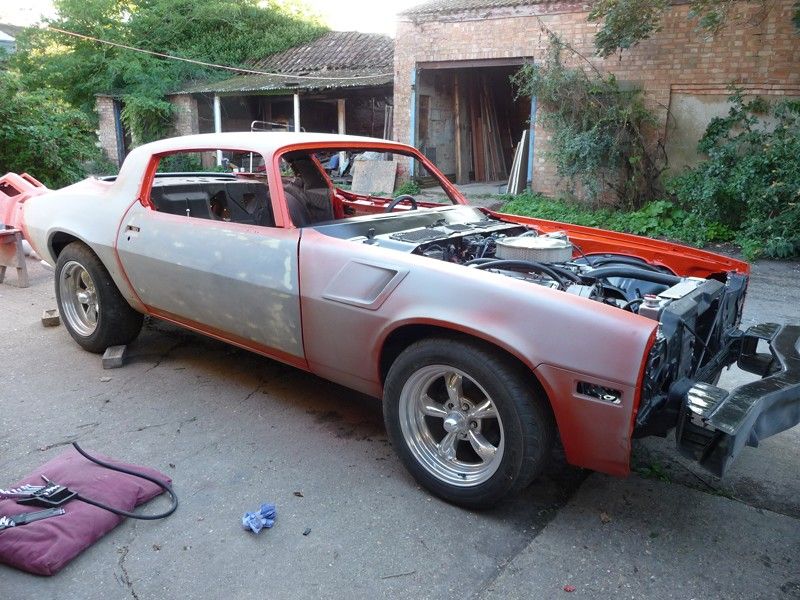
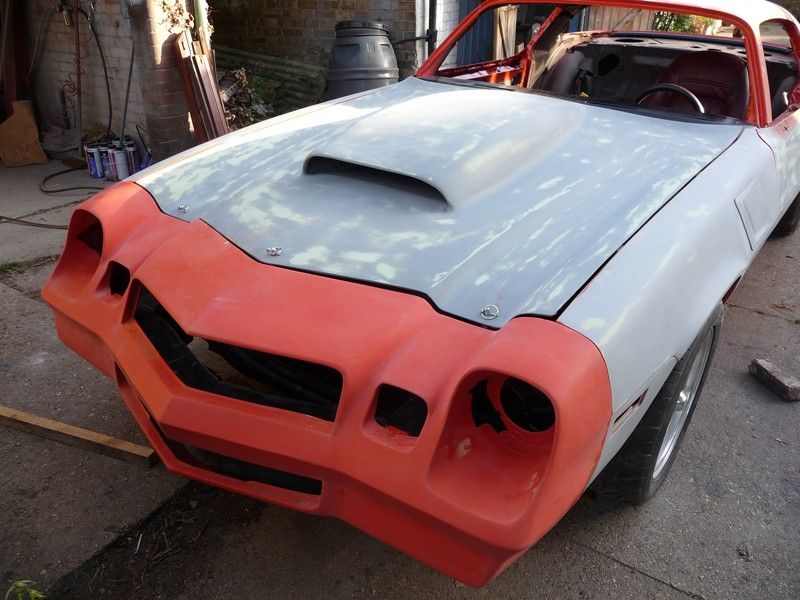
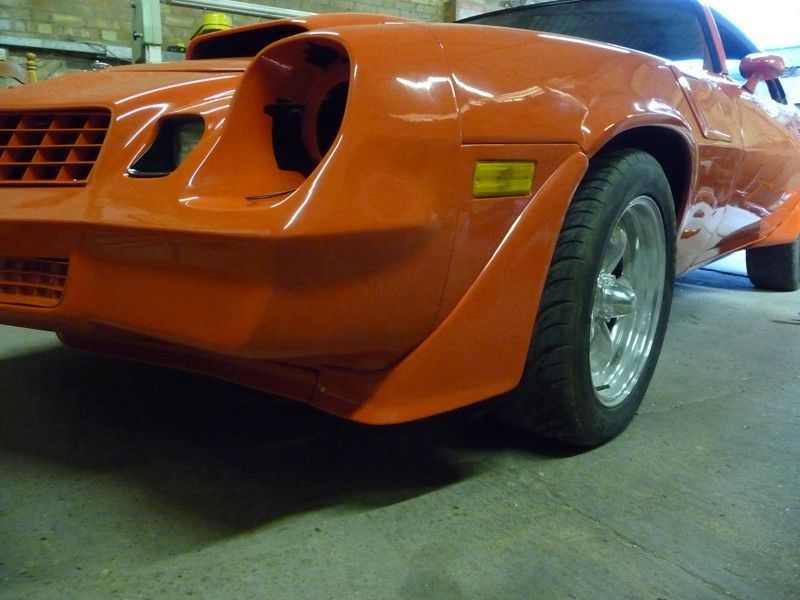
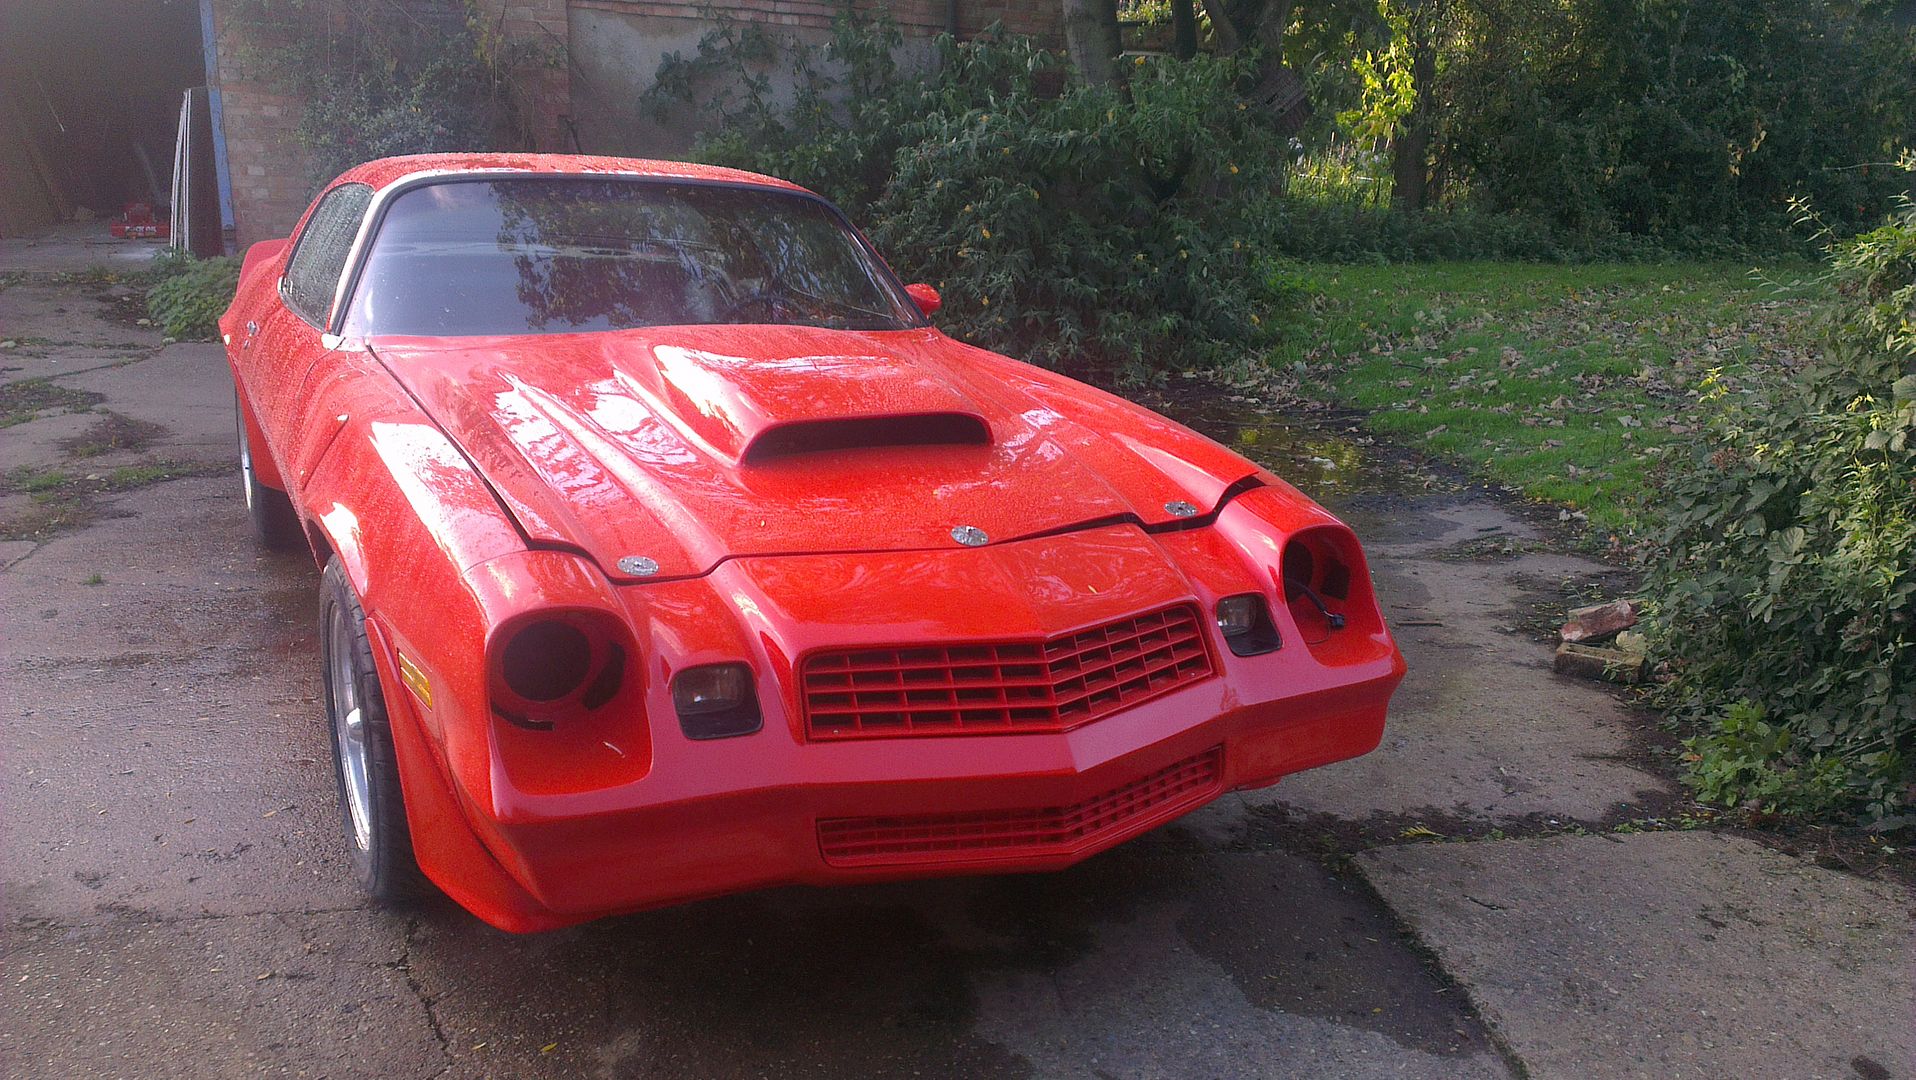
Then thought I'd throw the rest of the panels on just to see what it would look like and to get an idea of if the mismatch of panels have any
chance of working together. Had to make up various brackets and reinforcements to fit the GRP nose panel. But it seems to fit reasonably well. Not
quite the right shape around the lower extensions but it will blend in OK, have seen panels fit a lot worse in the past...
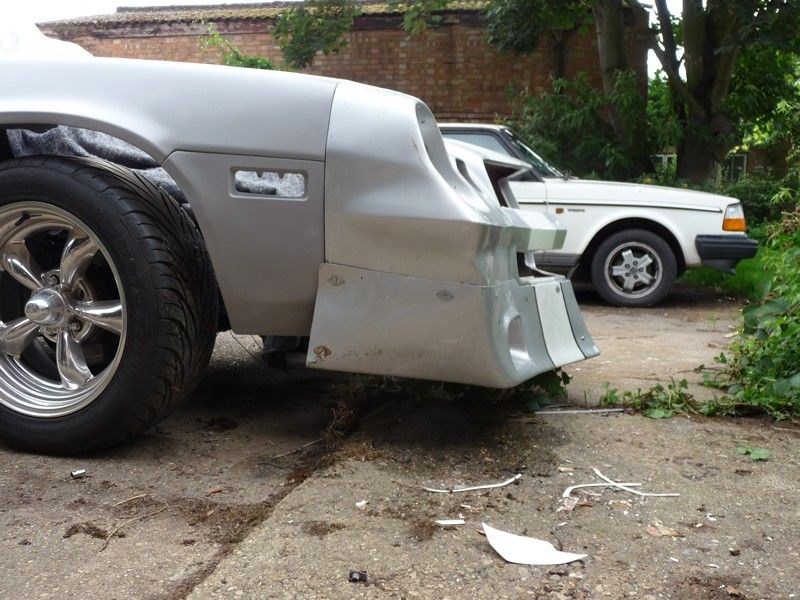
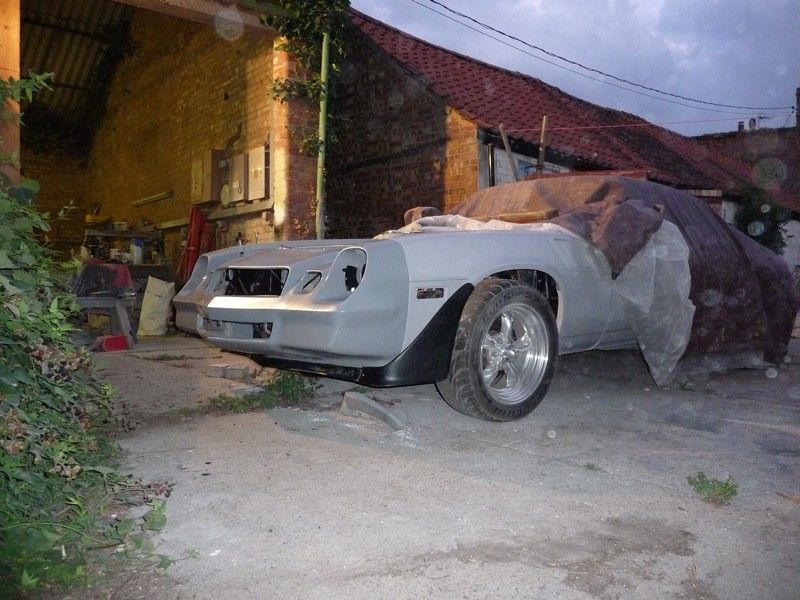
I need to remove the spats from the GRP wings to make it look right, but thought I would see how low the front sits with the splitter on. Low enough I
reckon...
Hood needs a lot of work to make it fit properly. Too wide at the back and slightly too narrow at the front. Scoop is functional and the air cleaner
sits right up inside it. Need to modify it slightly inside to clear the coils mounted on the bulkhead. The rad filler cap also touches at the front.
Think thats more an issue with the rad than the hood though. It also needs quite a few repairs and some stiffening adding along the front edge as
it's so light weight it doesn't hold its shape properly. Also going to add brackets to use the stock hood hinges, minus the springs. All
doable though just need to get on with it.
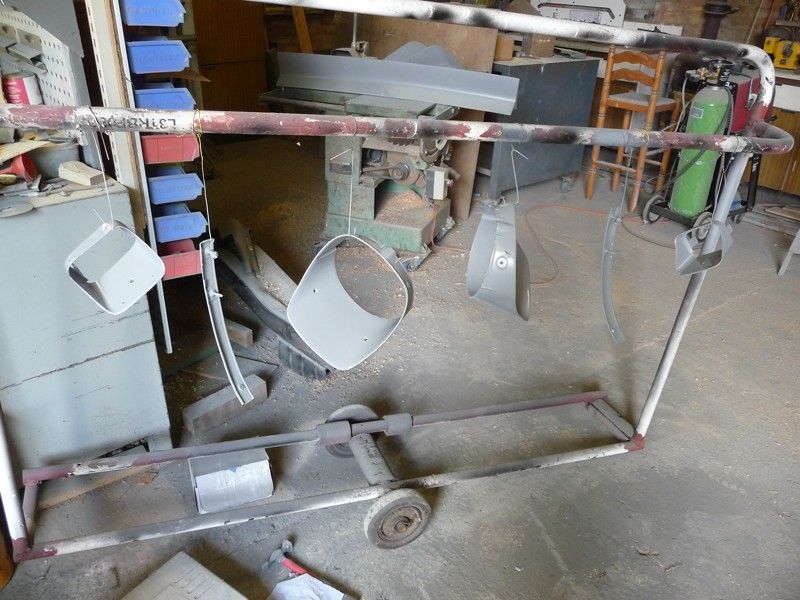
It's little things like this that seem to take all the time. Spent a whole day making the brackets to fit the headlights in the GRP bumper. It
had all been previously fitted to a track car and the lights simply held in with seam sealer for aesthetics only.
Lot of measuring, grinding and cutting and this is what I came up with, a piece of 1/8" plate. Works just like stock and all hidden as it should
be. Will eventually end up with the plates bonded in rather than just relying on the rivets.
Need to adjust the fit of the bezels, think the moulding is slightly off so may have to just make do...
Spent most of the day yesterday repairing the bumper with new GRP, then today prepping the front bumper for primer. Got it done in the end, still
needs a bit of work before fitting it, so doesn't look like I will get it on there this weekend. But I can still crack on with other things. Does
look better in one colour though.
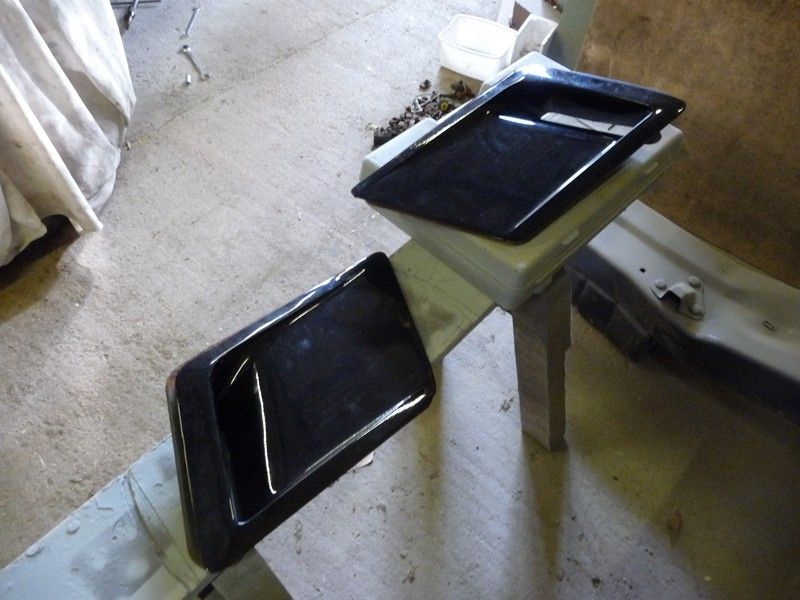
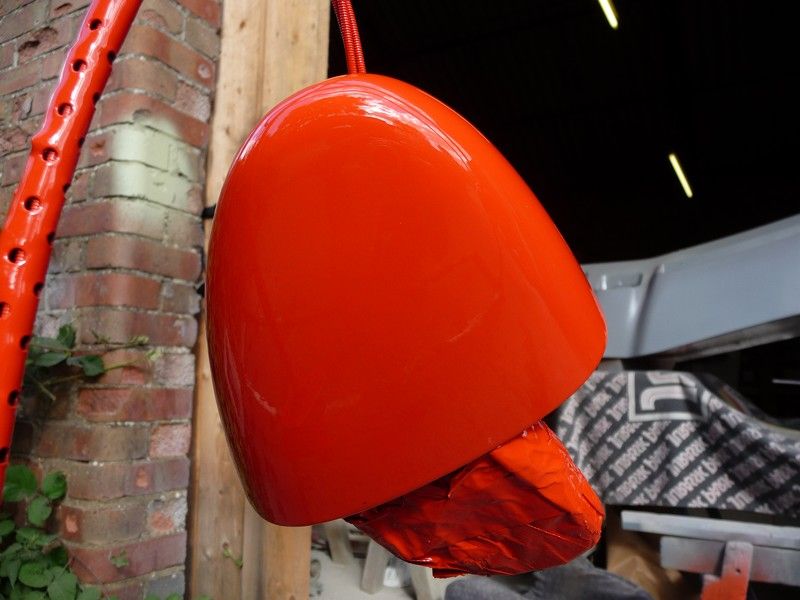
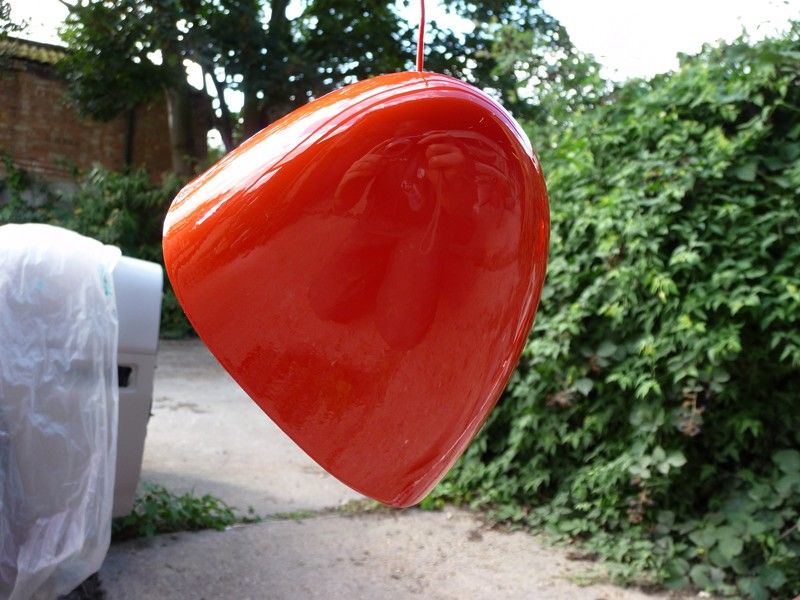
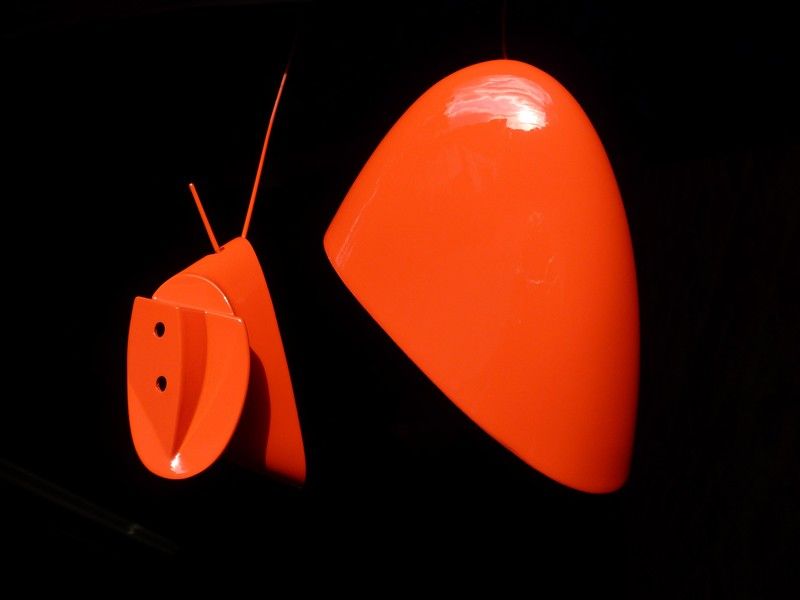
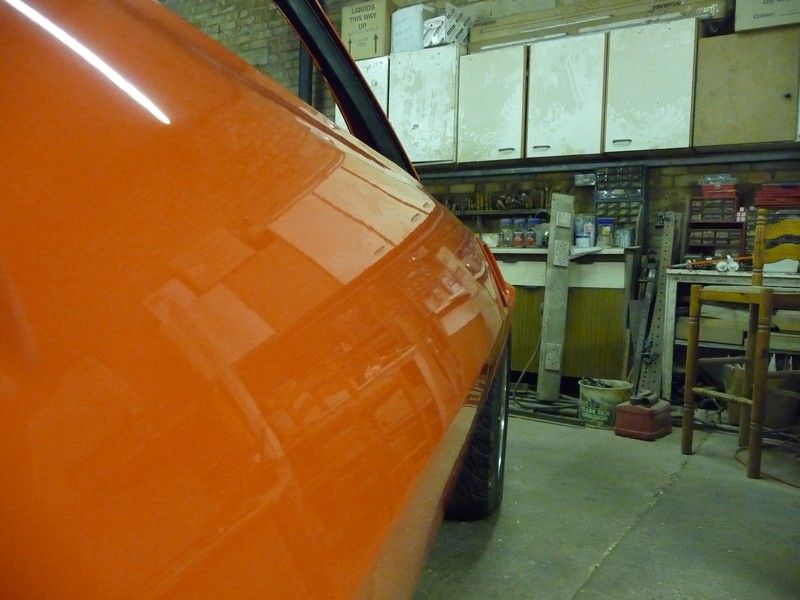
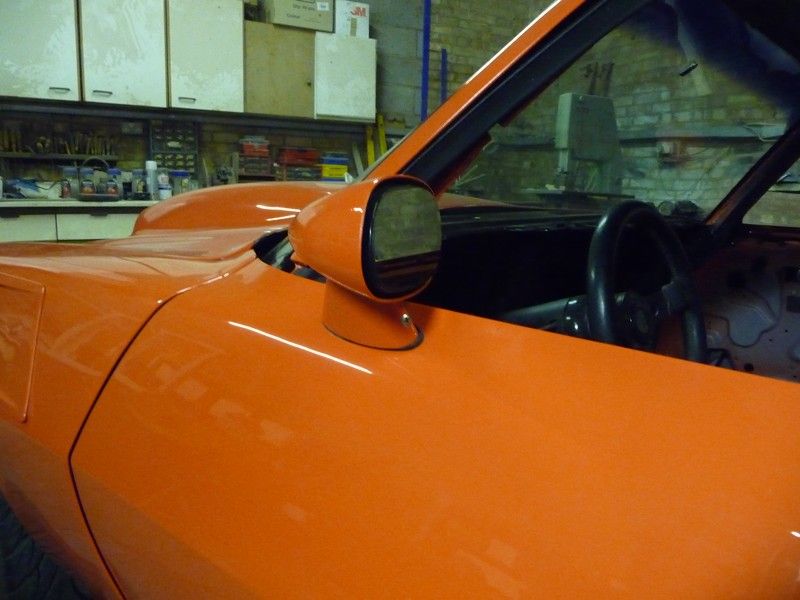
Then spent a couple of hours prepping and finish painting the mirrors. Seemed a good part to test the colour on anyway. Pleased with the colour
choice. Varies from orange to red depending on the light. The base coat looked really red before I applied the clear. Spent a bit of time dialling in
the mix and gun set up and and just for a change I am pleased with the results straight out of the spray gun.
[Edited on 31/8/13 by flak monkey]
CRAIGR - 31/8/13 at 08:29 PM
Fantastic !!!
imp paul - 31/8/13 at 08:35 PM
awesome build mate your a brave man realy good posts hope it all works out for you david
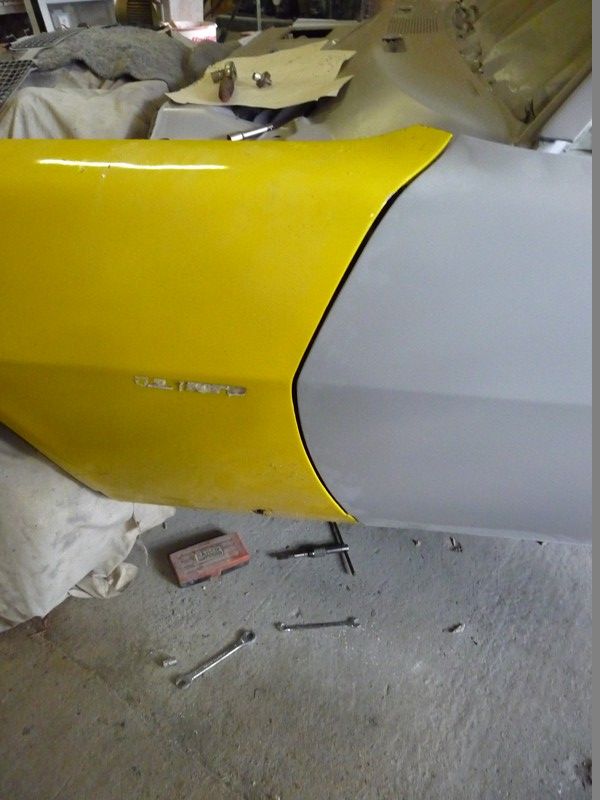
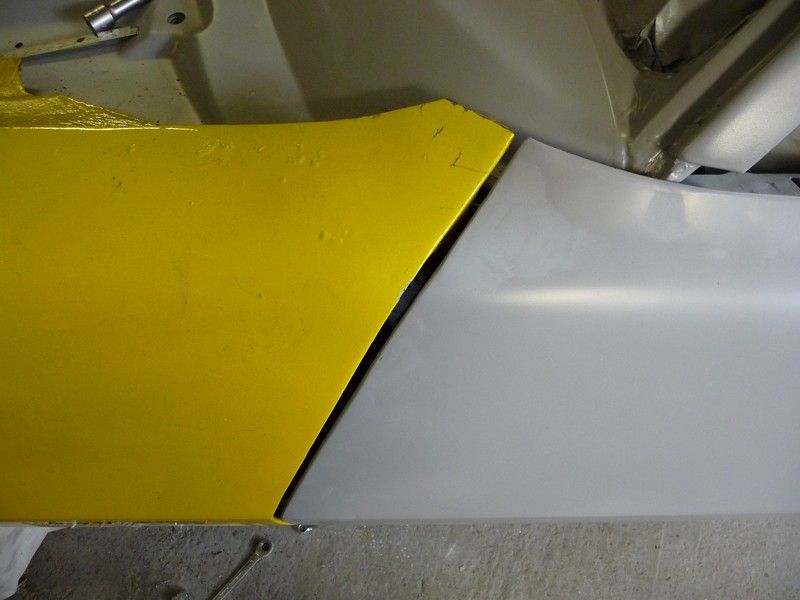
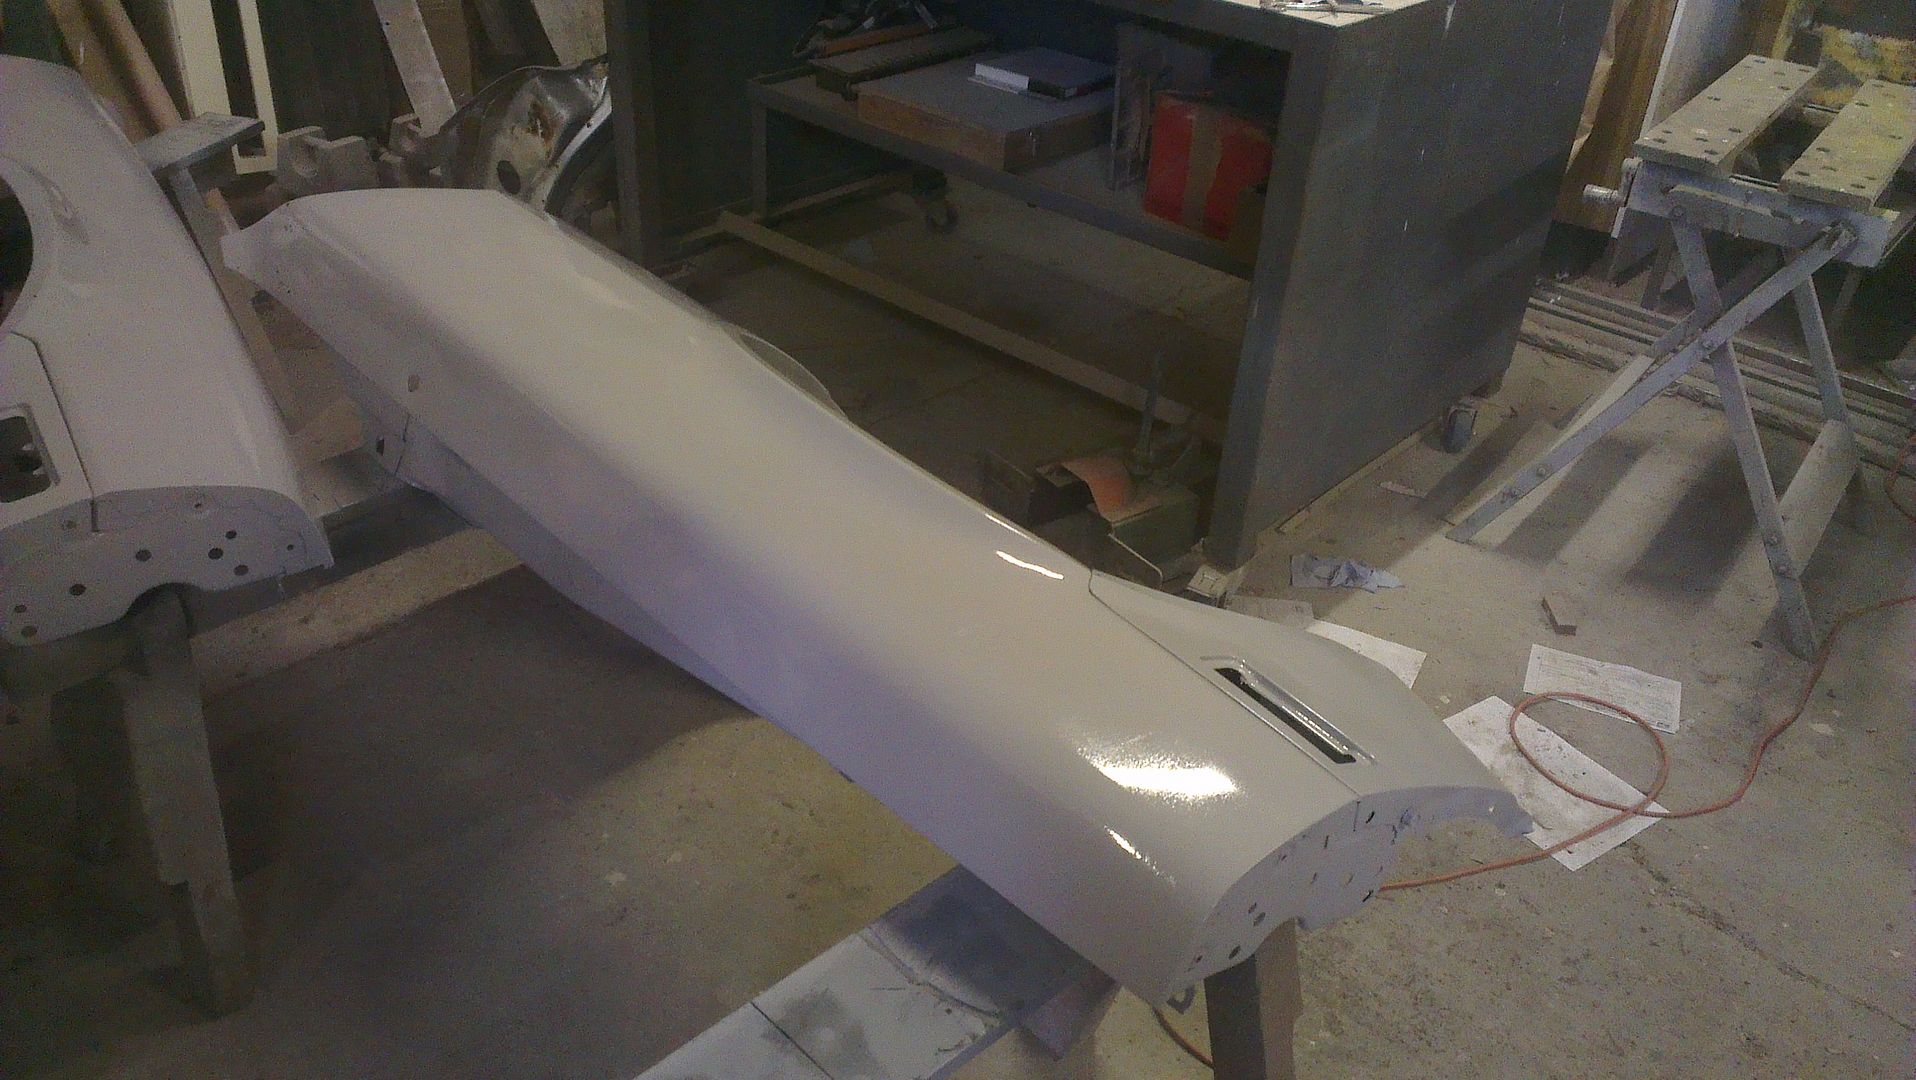
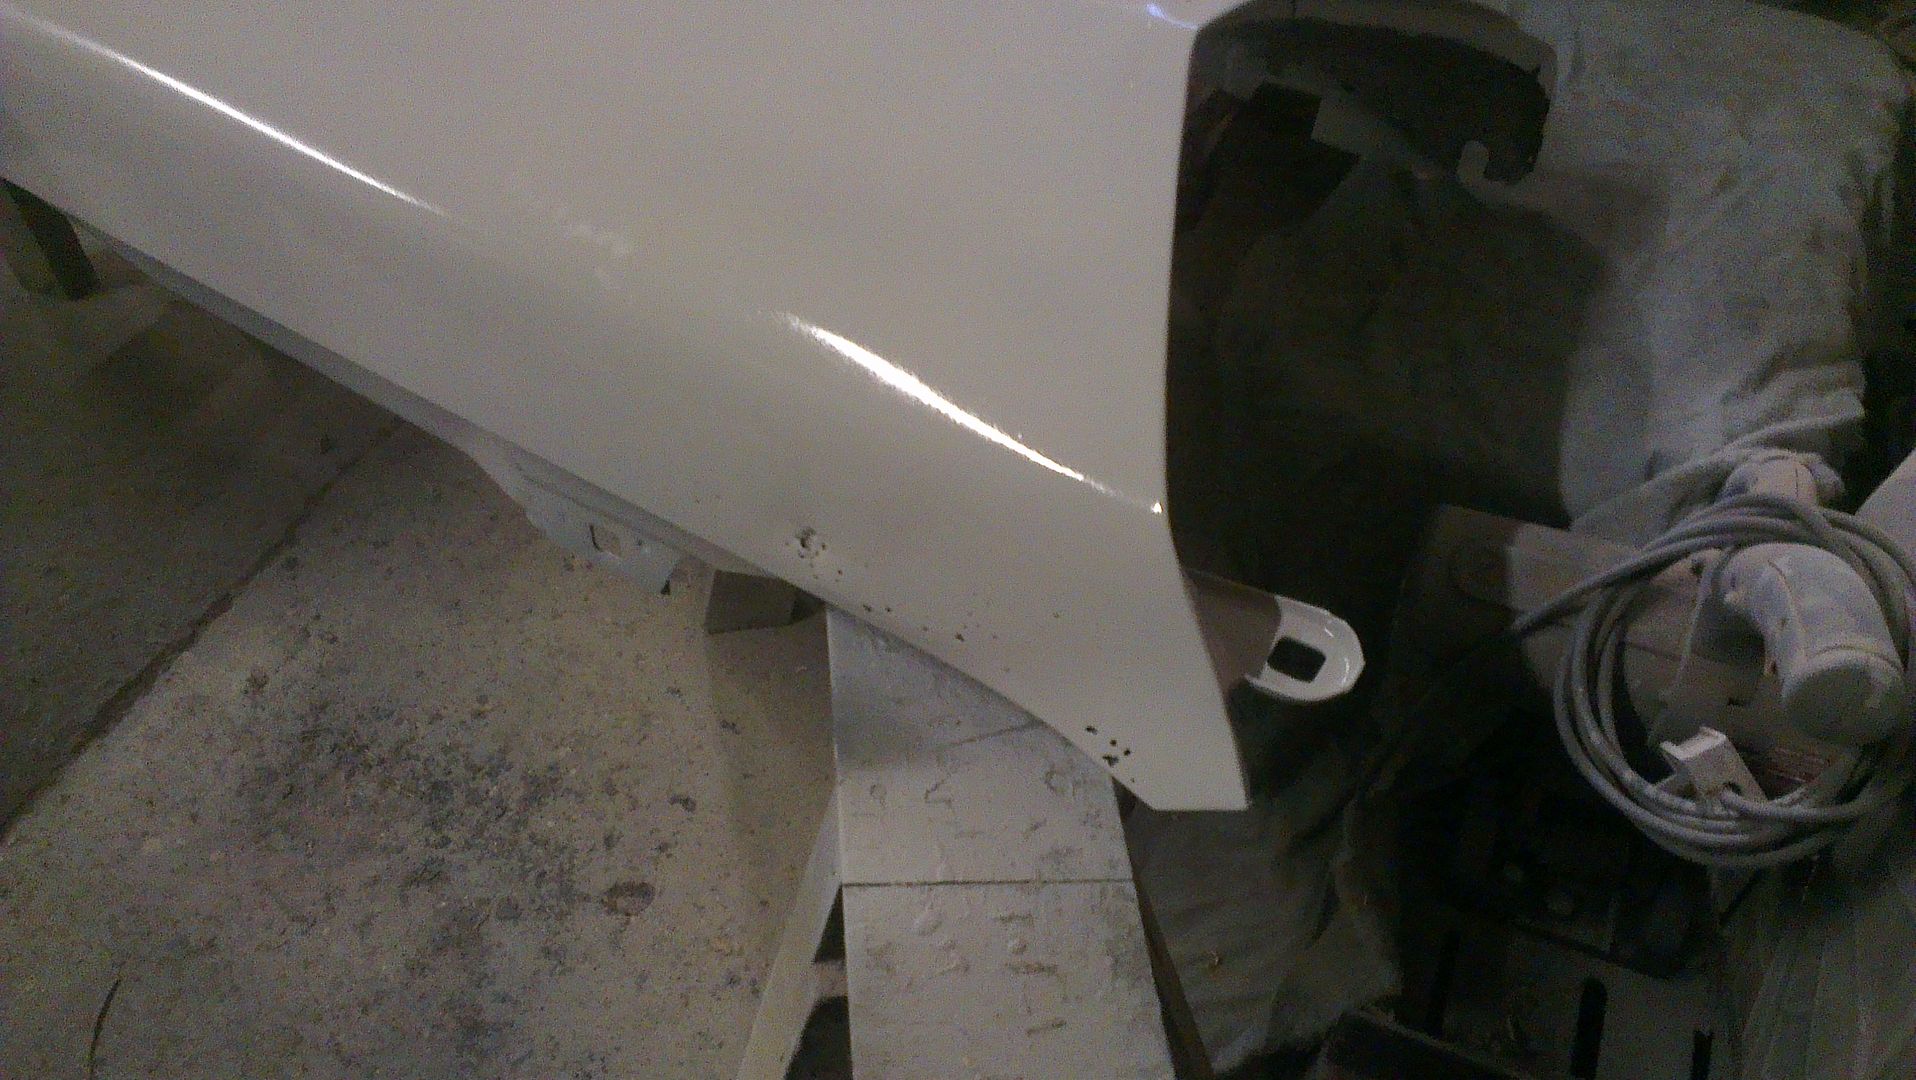
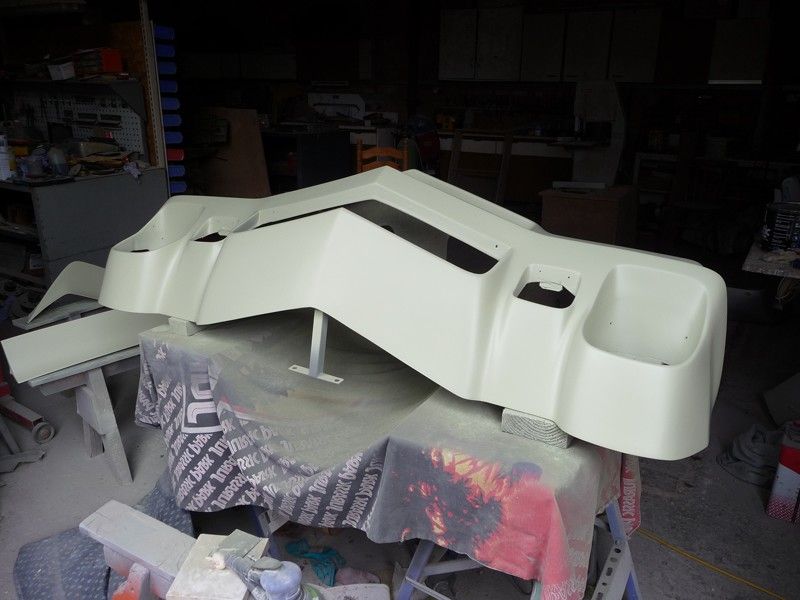
flak monkey - 1/9/13 at 05:53 PM
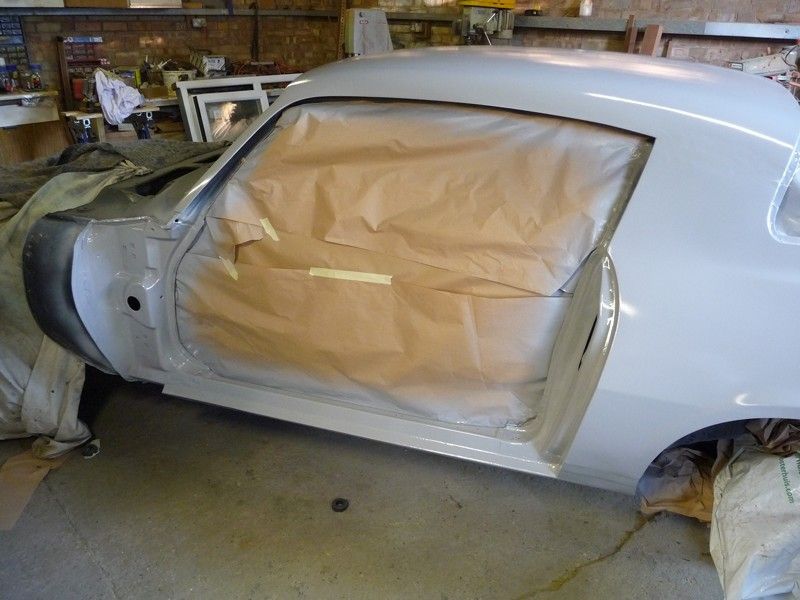
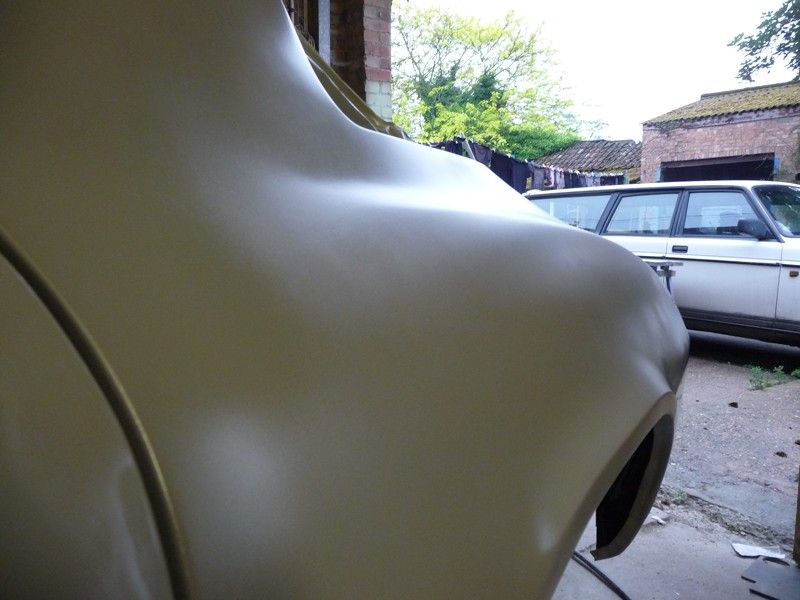
Finished off the filler on the bumper/nose today and squirted it with Green Ti. Just needs a quick rub down and a blast with epoxy tomorrow night then
it can be fitted back up.
Spent the rest of the day messing around trying to get the body lines right. With so much new sheet metal, and a lot of patching it took a while.
Fairly happy with the results. Looks a bit patchy where I've blown over the new filler with epoxy. Sharpened up all the lines and sorted the fit
of all the panels. Next thing to do once the bumper is on is fit all the flares so I know they go on ok.
franky - 1/9/13 at 05:57 PM
Great work, bet you're rightly pleased.
Awesome man cave(s) too
flak monkey - 2/9/13 at 07:30 PM
Thanks
I will be pleased when I am not spending every spare moment rubbing down poxy filler!
jeffw - 3/9/13 at 05:47 AM
Looking good (and so much better than when you first got it). Keep it up
flak monkey - 3/9/13 at 07:47 PM
Cheers Jeff
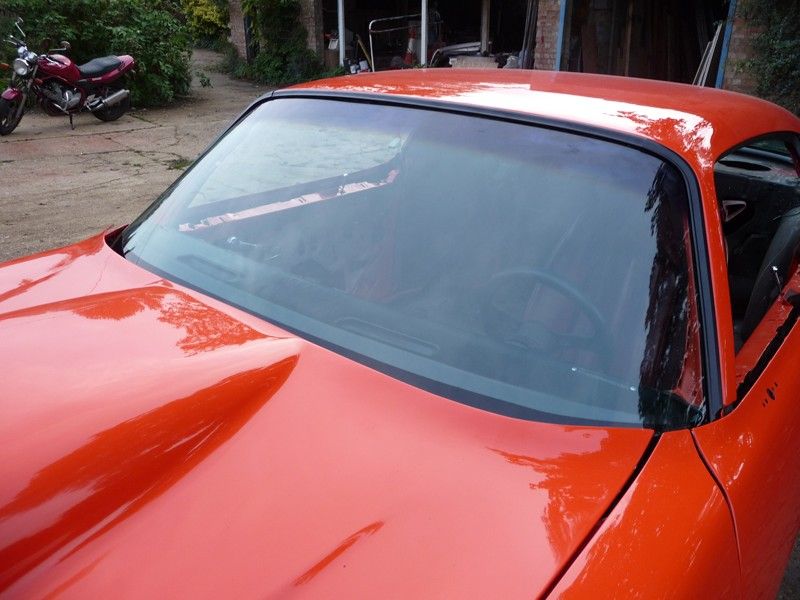
Rather busy night again and it's got it's nose back.... needs a couple of little tweaks here and there when I take it off for final paint.
Shouldn't be a problem. Got mixed up with primer colours somewhere along the line.
Doesn't fit too badly for a GRP repro
Have a new repro standard Z28 style front spoiler as well, so thought I would throw it on and see if it fitted. Amazingly, it's not too bad.
Could be better on the RH spat, but there's little I can do about that really. Again a few minor adjustments for final fit will get it good
enough to make me happy.
[Edited on 3/9/13 by flak monkey]
Andybarbet - 3/9/13 at 08:58 PM
Very nice :-)
On a side note, are they standard vents at the rear of the front wings ?
I reckon they would be good for getting some hot air out of the back of a locost bonnet.
mcerd1 - 4/9/13 at 07:31 AM
quote:Originally posted by flak monkey
Got mixed up with primer colours somewhere along the line.
is it weird that I quite like that two tone effect ? matt_gsxr - 4/9/13 at 08:26 AM
That looks amazing, well done for your tenacity.
One question. Your megasquirt video shows the fuel load at around 40% under fast idle conditions. I'd guess your req_fuel has been set on the
low side. Probably not a problem but you might run out of headroom (i.e. above 256) in the fueling table.
Thanks for all the updates, really interesting.
flak monkey - 6/9/13 at 07:28 PM
Thanks guys.
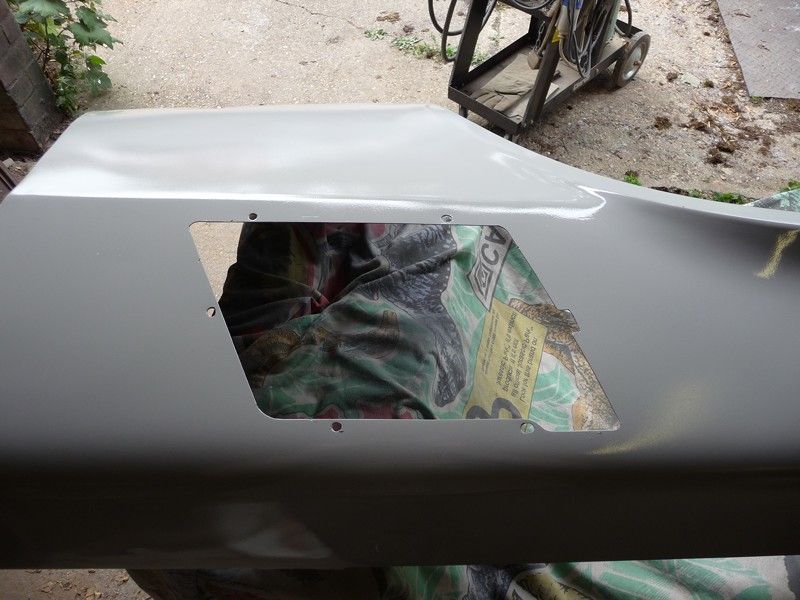
The vents are stock yes. That style was only used on the 80/81 though, earlier had a louvred type. They are bigger than they look though, cut out is
7" high by 10" long.
Not sure about the MS set up yet. Having problems with sync loss, but have a couple of modifications to look at. I have 8 injectors at 315cc/min each.
Should be more than enough. Req' fuel was calculated to be 15, upped it to 17 already. Will see how it goes when I get it on the road.
flak monkey - 7/9/13 at 04:31 PM
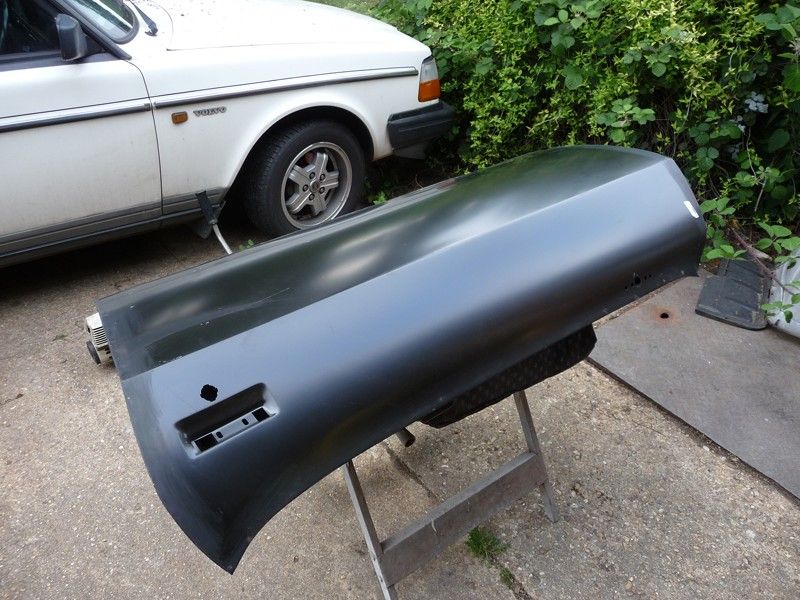
Little more progress. Spent most of the week prepping and re-painting the trunk lid. The only panel I didn't strip to bare metal and the primer
cracked, presumably reacted with the old paint. Pleased I did strip it as it had been at least 6 different colours!
Prepped and painted a load of trim parts this morning, along with the rear bumper bar. Lots of messing around to get it all sorted. Got there in the
end though. Grilles will be body colour and the headlight and marker bezels black, same as stock Z28.
Then spent a couple of hours trimming up the hood so it fitted between the wings and over the air cleaner and coils. Still needs some minor adjustment
and straightening of the edges, but I'll deal with that once its mounted. The aim is to have it on the stock hinges, and then 4 pins along the
front. Might need more just to hold it in alignment though. Firstly want it on the hinges so it's held in position properly, then I can make
reinforcements and adjustments as needed. It's going to take a good few hours to get it right... so thats the rest of this weekend and next most
probably accounted for...
flak monkey - 20/9/13 at 06:10 PM
Well, lots of progress made. Spent a good few days getting the hood to fit properly. It's not perfect, but I think it's about as good as it
can be given the fact it's quite flexible. I added a lot of strengthening underneath, and built up all the edges properly to even up the gaps.
Needs a little bit of finishing off when I take it off to hi-build and block it.
Then spent a good few hours prepping and painting all the spats and grilles. They still need a flat and polish to finish them off, but that's a
job for tomorrow.
Spent this afternoon starting to fit the tail pipes from Summit. Due to using a 'universal' x-pipe front section they needed a little
modification to get them to fit properly, so it took 3 hours or so to get the first one fitting. Just needs cutting to length to finish off.
Once the other pipe is done it's time to strip the car back down ready to paint the inside of the panels and the shuts.
Mr Whippy - 20/9/13 at 07:05 PM
God this turned into an epic project
Superb job your doing though
flak monkey - 20/9/13 at 07:16 PM
Thanks
flak monkey - 22/9/13 at 05:09 PM
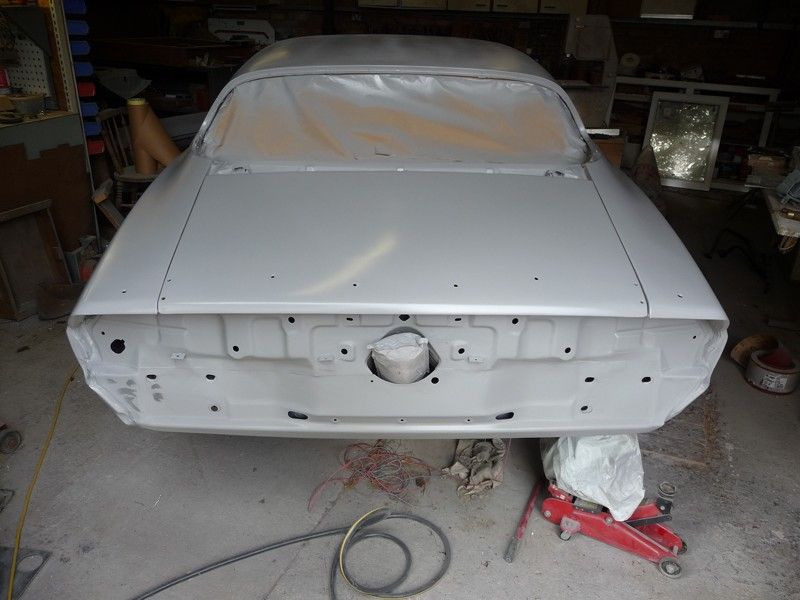
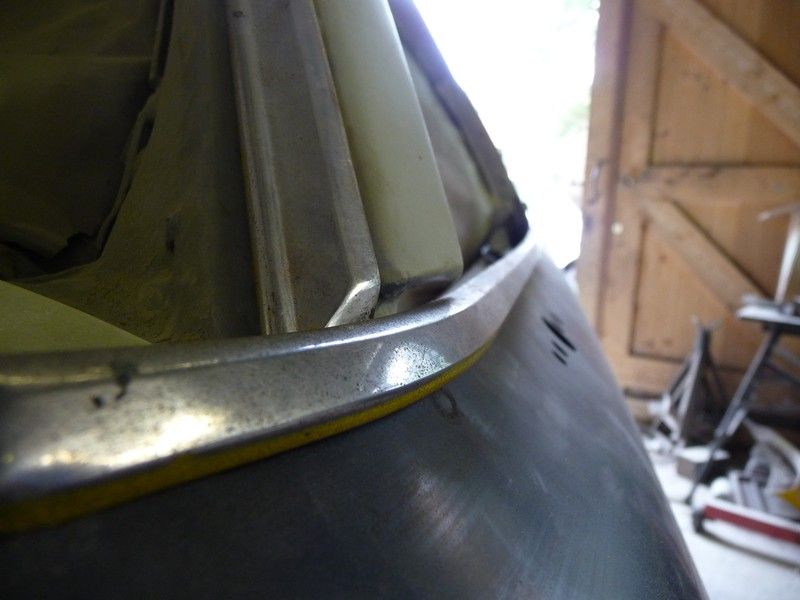
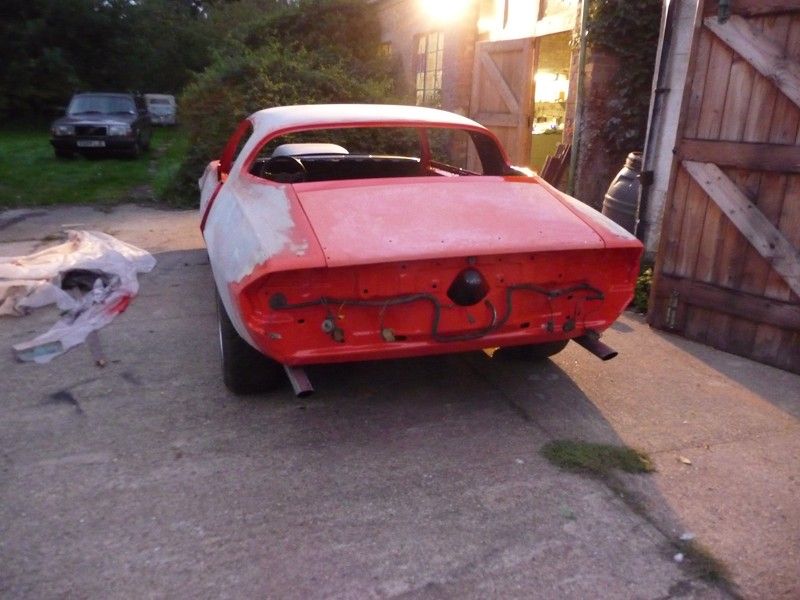
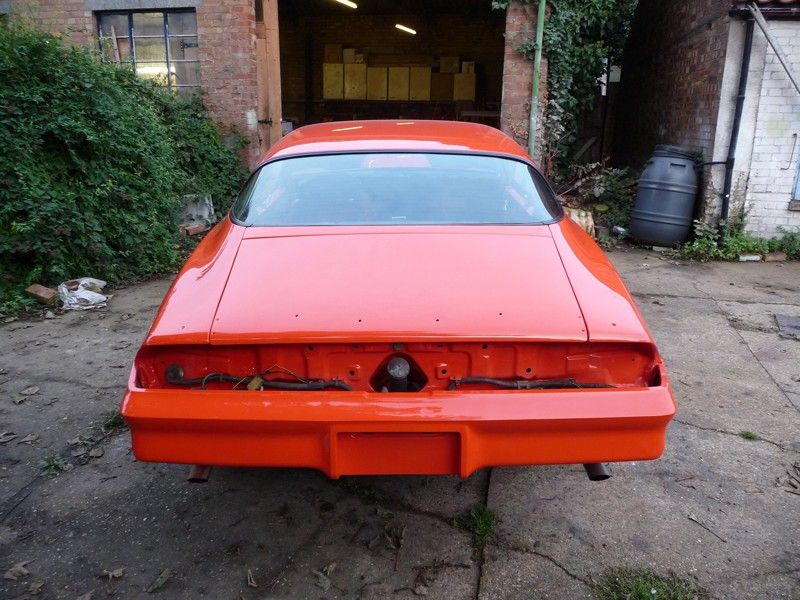
Finished the exhaust off yesterday morning and made a start on painting properly today, making the most of the good weather! Got the back panel and
trunk opening prepped and painted, came out reasonably well. Due to not having anywhere dust free to spray, I'm only doing the shuts and a few
small parts.
Tomorrow evening I'll start stripping all the panels off the car ready to do the rest of the shuts and the top cowl panel.
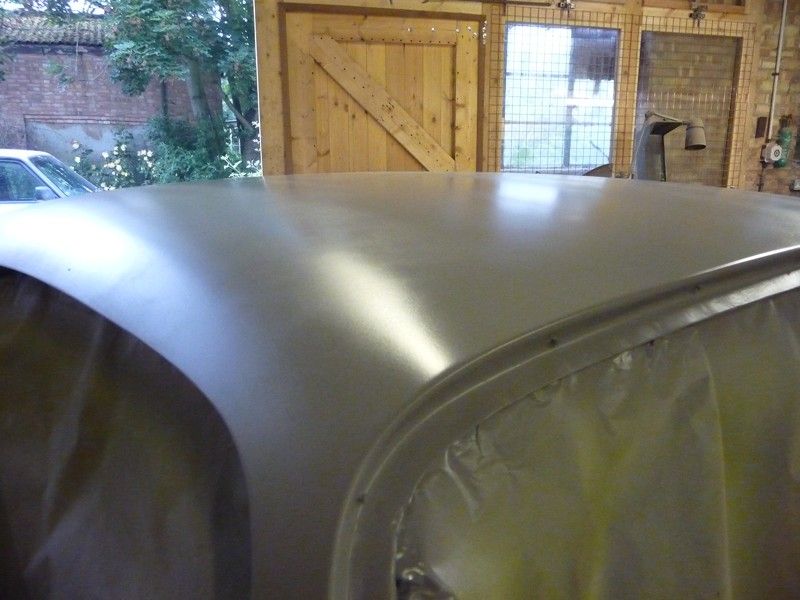
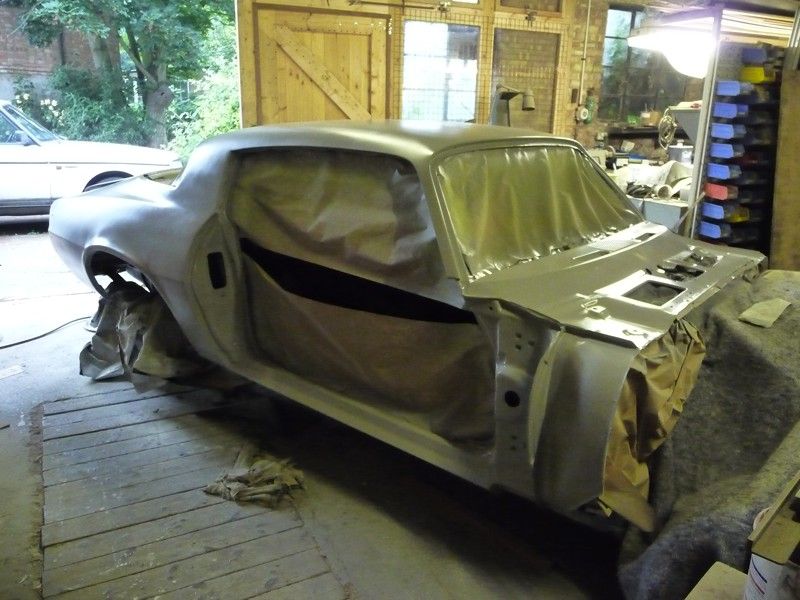
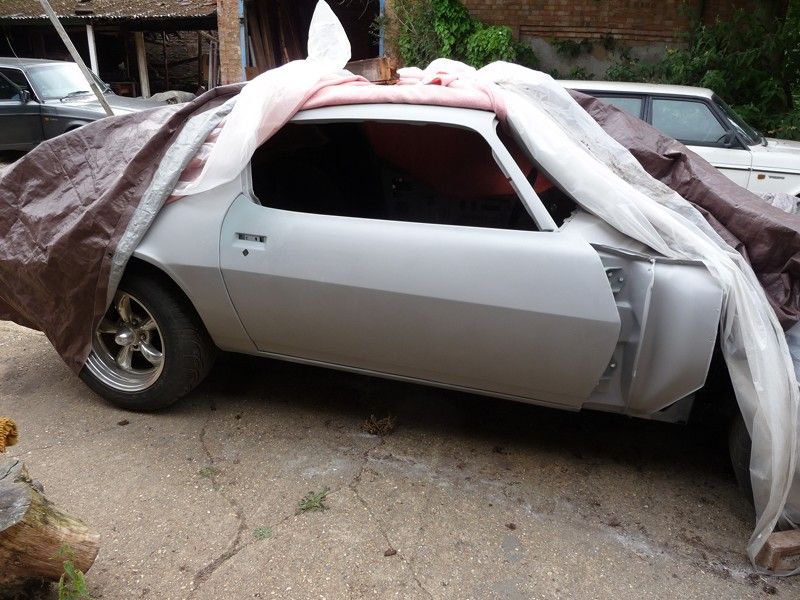
flak monkey - 24/9/13 at 06:48 PM
Thought I would have a go at painting the car myself, made a start this morning and tried painting the nose. Got the finish nice but the flies liked
it as well. Can't afford to do everything twice, so the initial plan is what I am going with. I'm doing the backs of the panels and the
shuts then someone else can spray it for me in a proper booth.
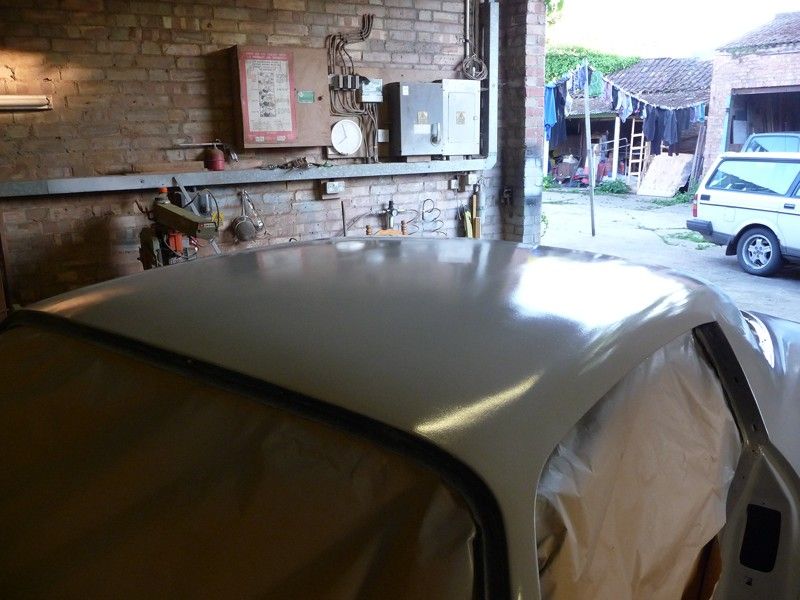
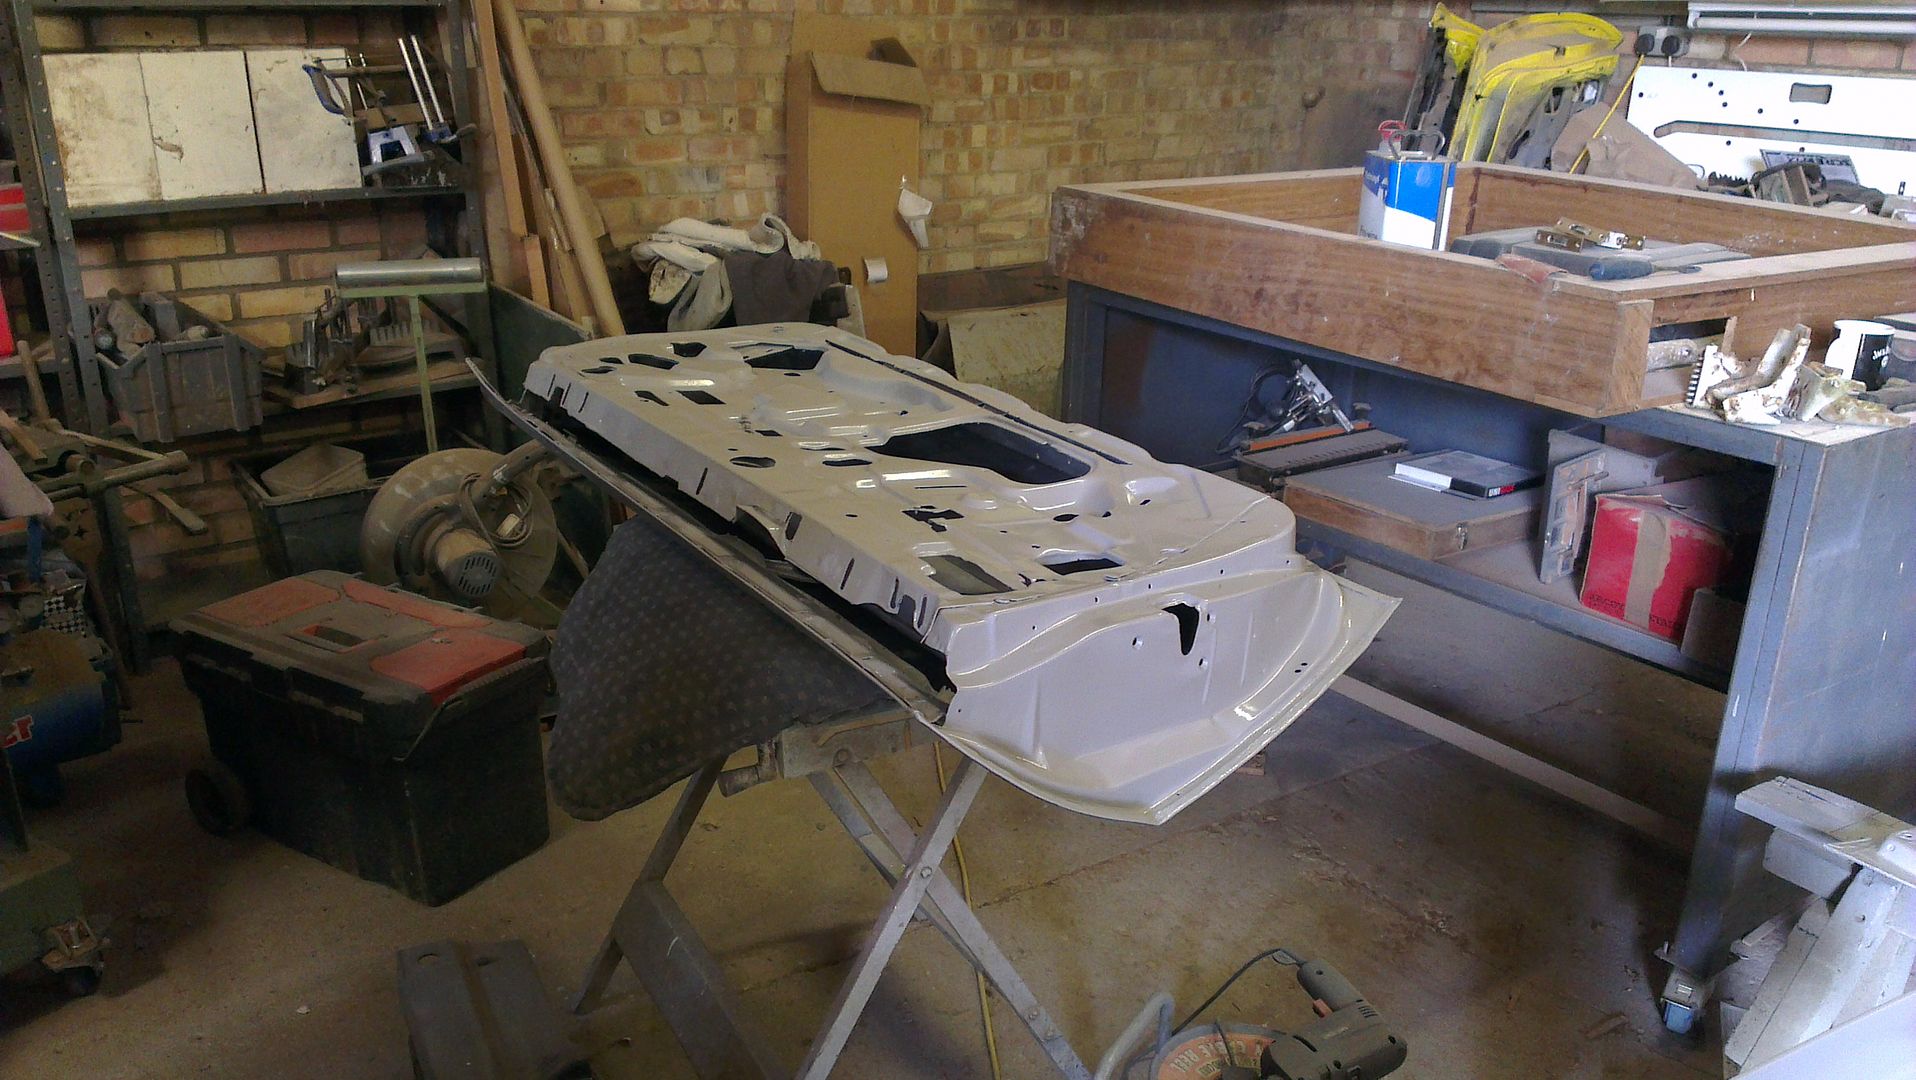
Car's back to a bare shell again now, all the panels are off waiting to be painted. Got the back of the trunk lid, inside of the fenders done.
Also sprayed the top of the cowl and the bit inside the rear window satin black.
Tomorrow I'll be doing the door shuts and around the front and rear window as I am planning on having the glass put in before the car goes off
for paint. Then moving onto the doors and hood. I have a couple more days off to get it all done, should be possible!
flak monkey - 25/9/13 at 07:02 PM
Got the doors and hood hi-build primered, blocked and epoxied ready to have the inner areas painted tomorrow. That took around half the day. Spent the
rest of the day sanding the incredibly fiddly door shut areas and the windows and painting them. I need to find someone local to put the glass back in
over the next week or so. Tomorrow I will be painting the inside of the doors and hood, then the whole car can go back together for the last time,
before paint.
Planning to get the glass put in next week, then off to paint the following week.
steve m - 25/9/13 at 07:23 PM
Why is the path red ??
My wife would go ballistic !!!!!!!!!
PAUL FISHER - 25/9/13 at 07:23 PM
Great work a real credit to you
flak monkey - 25/9/13 at 07:29 PM
quote:Originally posted by steve m
Why is the path red ??
My wife would go ballistic !!!!!!!!!
Overspray, though its mostly dust and will wash off next time it rains.
And thanks! steve m - 25/9/13 at 07:34 PM
haha
Looks good, but my overspray has never washed off
Hellfire - 27/9/13 at 07:19 PM
Can't wait to see this finally painted... It's gonna look amazing!!
Nice work David!!
Phil
flak monkey - 27/9/13 at 07:22 PM
Thanks Phil!
Final assembly has started! Refitted the doors, made all the easier by the fact I had scribed and dot punched some reference marks on the doors and
body. One went straight on with no adjustment required, the other only minor. Passenger side latches nice and smooth, and I've ordered a new
latch for the driver side. Had a little panic as I latched it closed and it jammed. Got it open again in the end though.
I do need to modify the inside of the drivers door slightly as it's an early one with the bolt on interior handle and I dont have the handle for
it, I do have a late style one though. Should be an easy modification that I can sort tomorrow.
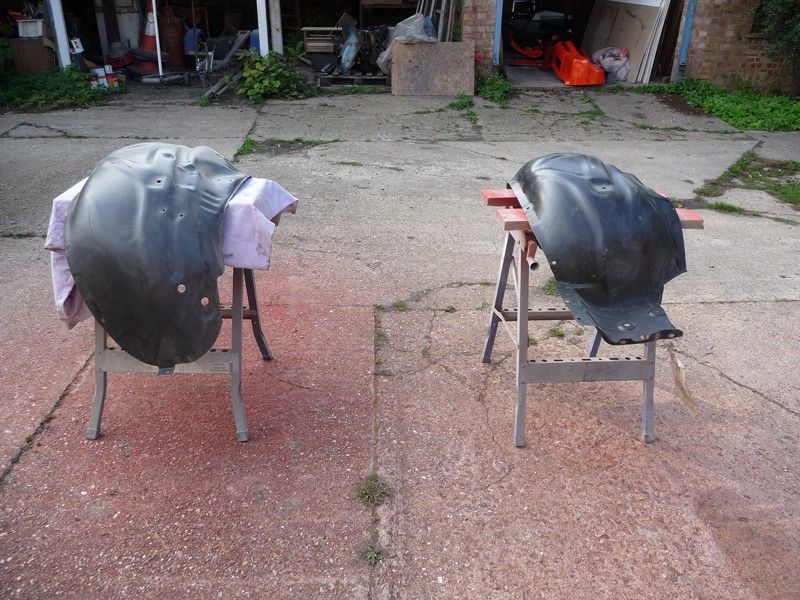
Took a couple of hours to prep the inner fenders for fitting. I managed to get hold of a pair of NOS GM ones, for less than the cost of a single
repro. Nice to have genuine new panels for a change.
They were a bit grubby and scratched up, so I sanded them down and gave them a few coats of satin black 2k. Look a bit better for it too.
Not sure whether to fit them before or after paint.
Last job was spraying the lower areas of the inside of the fenders with protective wax, hopefully to stop them rotting out again any time soon!
Tomorrow I'll be fitting the rest of the panels and then making a start on blocking the car down ready for final painting!
ashg - 27/9/13 at 09:56 PM
why don't you just build a wooden frame outside and cover it in plastic then just go for it? if you can keep the wind and the flys out the way
then tac cloth it down you should be able to get a pretty good finish.
perksy - 27/9/13 at 10:10 PM
Some great work here, its a credit to you
That colour is going to look lovely
flak monkey - 28/9/13 at 08:53 PM
Thanks guys.
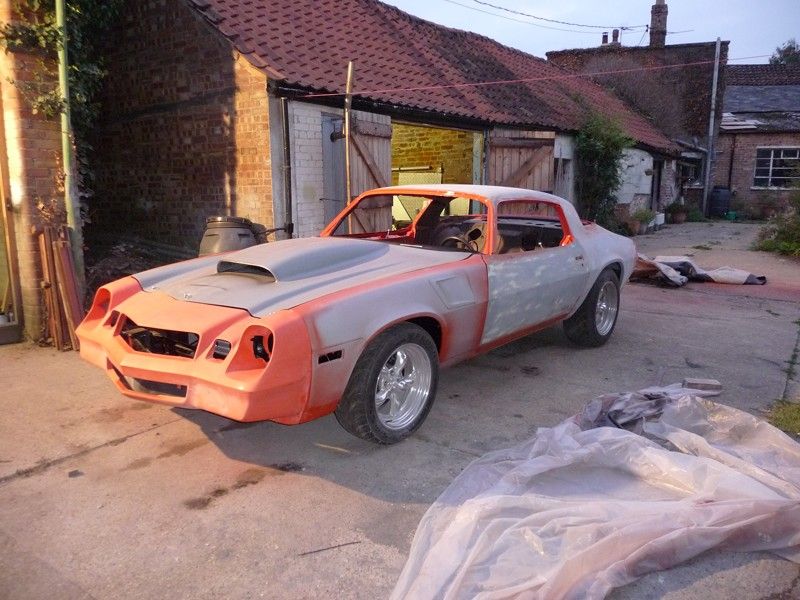
Spent the morning blocking down the rear quarters, roof and doors. Then put the front fenders back on and got them lined up and put the inner fenders
back in. Need to get the hood and front bumper back on tomorrow. Car's off to paint in a couple of weeks, got a lot to do in the mean time.
I did just realise I forgot to do something before I put the fenders on, hopefully I won't need to take them back off again to fix it!
flak monkey - 29/9/13 at 07:20 PM
Refitted the front bumper cover, wouldn't line up to start with but soon got it back into shape. Have to put the bolts in a certain order or it
just will not go on.
Fitted the sub-frame braces, had to make some spacers up, but didn't take long at all. Tidied all of the wiring and hoses up under the hood.
Refitted the wiring loom at the rear and wired in the fuel pump and fuel sender properly.
Fitted the hood, still needs some fine adjustment, will spend another hour on it tomorrow evening to finish it off.
Last things to do before paint are block down the fenders and hood, then refit the rear bumper and primer the cover. Paint man should be able to take
it in a couple of weeks.
I need to find a local company to refit my glass as well. Need to get it weather proof as soon as possible after paint as it's living outside.
Had it running tonight as well, sounds a lot nicer with the tail pipes fitted, not as in-your-face loud, but has a nice burble to it.
Got a long list of mechanical things that need sorting and finishing off in the next couple of weeks too.
DarrenW - 30/9/13 at 07:38 PM
That is going to be a stunning car. Great project. very well done.
flak monkey - 5/10/13 at 07:54 PM
Thanks Darren
Working on finalising a few bits for paint next weekend. Just have the rear bumper cover to finish off then it's ready, while the primer was
drying off I thought I would work on a few mechanical parts, and also prepped and sprayed the window moldings satin black.
When I installed the axle I discovered that one of the halfshafts was badly damaged where the bearing runs. I picked up a used shaft last year but had
been putting off changing out the bearings and seals. Made myself a slide hammer this morning with a 4lb bit of steel bar I had laying around. Pulled
one no problem, the other was a little bit more of a problem and resorted to modifying a puller and a bit of 3/4" square bar to get it out. Put
it all back together, some new stainless bolts in the diff cover, and some Fuchs 90LS oil. Finally installed the sway bar and tightened it all up.
Tomorrow I need to paint a few sections of the rear bumper and tick off some more mechanical and electrical jobs.
flak monkey - 6/10/13 at 06:26 PM
Another busy day. A few spot repairs on the primer, and a final sand down with 400 grit all over. Also got the battery mounted in the trunk, adjusted
the hood a little and fitted the tatty drivers seat so it's easier to move around for paint.
Had a tidy up under the hood as well, made an earth strap for the core support. Just have the cables for the front lights to finish off at some point.
Replacing a lot of it with new, so need to get some cable in for that. Subframe braces help to have somewhere to run fuel and electrics for the EFI
Last job was fit the rear bumper cover. Riveted it back on, seems to fit ok.
flak monkey - 12/10/13 at 06:28 PM
Well the car went off to paint this morning. Actually the first time I have driven it other than in and out of the workshop. Seems to run OK. A mate
gave me a tow with his SS Blazer. Should be able to pick it up next weekend I hope.
Got a couple of vids as well
Wheels244 - 12/10/13 at 09:13 PM
Looking forward to seeing this - you've done a great job so far.
flak monkey - 13/10/13 at 05:51 PM
Thanks
Spent all morning cleaning up the old glass, most of that time was scraping old sealer off. I need to find something to make some spacers from for the
back window install, and pursuade someone to do it.
This afternoon I made a start on the door cards as the originals are well past being useful. This was helped by the fact I have the original doors
laying in the workshop taking up space!
I decided I would make complete new cards myself rather than buy repro's as they work out expensive over here and the car is far from being a
resto!
Cut new panels from 1/8" board after tracing out the shape of the door, then cut out an inset panel. All of the fixings for the new panel will be
under the inset and the door pull will hold on the inset. Decided to do this rather than use the original clips as they are all broken and I prefer
screws to clips anyway :lol: The main panel will be black vinyl, and the inset will be body colour vinyl. Just need to get some vinyl and finish them
off now.
Ignore the fact the board is rough side up in the pics, I need to make a mirrored set for the p/s door.
Ultimately I'd like to do the seats to match, but thats another job!
flak monkey - 17/10/13 at 08:06 PM
Picked the car up tonight. Pleased with the result given it's my prep work... Unloading the trailer on the main road in the dark was a little
nerve wracking though!
I'll give it more of a buff up with the rotary at some point. Got the front and rear glass going in tomorrow afternoon, got a pro coming to do
that. Put all the clips on ready for the trim, they are very, very tight, getting the trim on is going to be interesting
Put the upper door seals on as well, just because I have so much stuff laying around I keep falling over everything. I also need to get the car water
tight as soon as possible as it will be living outside very soon.
sebastiaan - 18/10/13 at 05:30 AM
Ooh, that's nice! Love to have one of these big beasts myself but sadly don't have the garage space to accommodate one :-( so smallish
classics it is for me!
Have fun putting the thing back together. It is always good to say goodbye to all the dust of the paint prep stage and you can rest assured that it is
now all metal underneath, so she should be good for another fourty years!
flak monkey - 18/10/13 at 08:04 PM
Thanks
Got the glass in today and the trim on. Doesn't sit too badly, the RH windshield trim is a PITA though as I can't get it to clip down
properly. Will have another go at it tomorrow. Rear one worked out ok. Fitted the lower door seals as well.
Made a start on rewiring the front lights after that, should have it done in the morning. After that I'll get the side windows in. Lots to do!
mark chandler - 18/10/13 at 10:47 PM
Impressive work, far beyond my patience.
Looking forward to to the next set of pictures
flak monkey - 19/10/13 at 08:16 PM
Thanks Mark
Minor progress today. Finished rewiring the front lights. Tested most of it and it all seems to work ok. There was so much bodged wiring and dodgy
cables I decided to chop it all off at the inner fender and replace the whole lot.
Fitted the front markers and grilles. Waiting for some new headlights before I can get those fitted. It fits reasonably well considering its an
aftermarket nose. I do need to find a better lower grille at some point, and one that matches the upper. These will do for now though.
Fitted the reinforcement plates for the hood pins, needs a little adjustment to get it right but it's not far off now I've fitted new hood
bumpers. Also mounted the drivers side mirror, need the right bracket for the p/s, I ordered the wrong one!
flak monkey - 20/10/13 at 05:40 PM
More or less got the exterior of the car put together today. Still a few little things to do here and there, but need a dry day to get it outside to
do those. Also need to get hold of some dynamat or similar for the inside of the doors before I put the glass in. Hopefully get that sorted during the
week.
I decided to fit a gas strut to the trunk lid. I battled for half an hour with the torsion rods before the car went to paint, and chickened out of
fitting them after the lighter one did some minor damage. The strut lifts the boot lid with ease once it's unlatched.
I also fitted the new trunk seal. Not all that happy with that to be honest, trunk lid now sits about 1/8" too high and you really have to slam
the trunk to get it to shut, even after adjusting the latch. Will see how it goes over time, hopefully it will squash up a bit eventually. Also have
no idea if it's going to seal or not. Seal doesn't sit in the recess properly in several places which I dont think helps much.
Fitted all of the spats, I'd pre-drilled all the fixing holes before paint, so was a simple job really. Also fitted the rear spoiler and the
lights that I refurbed about a 18 months ago. Managed to get the spoiler lined up even with the trunk lid sitting a bit high, so pleased with that.
Last job was door locks and handles, simple enough. Repro handles are crap quality though, wonder how long they will last!
Need to get an emblem for the fuel door at some point. Least of my worries :lol:
matt.c - 20/10/13 at 08:34 PM
Thought i would have a little catchup with some of your projects and am totally shocked!!
Wow you really done well with this and the chopper project.
Ha ha whats next on the project hit list then? Boat?
Benzine - 20/10/13 at 08:42 PM
I've enjoyed following this thread, top stuff!
scootz - 20/10/13 at 09:24 PM
Great work!
flak monkey - 27/10/13 at 09:31 PM
Thanks chaps
Another short day after taking someone to pick up a car this morning...
Got the ecu etc reconnected after fitting the carpet. Fitted both door windows and adjusted as best I can for the time being. Think they still need a
little adjustment to be spot on. Fitted sound deadening to the rear parcel shelf and trunk divider panel. Could do with a little more, but I've
run out. Reckon what's there will make a big difference though.
Next job was to do some leak testing with the hose. Gave it a good blasting down and found a couple. I have one at the rear window, which I can fix
with a little extra sealer once its dried out again. We had a couple of problems when fitting the glass so that would explain it, no big deal. The one
that worries me is a slight trickle from the bottom RH corner of the heater box. I seam sealed the blower housing to the firewall when I assembled it,
but still have a slight leak. Not sure if its down to the sheer volume of water, or something else. Either way that one is a problem...
And both doors leak where the upper and lower seals meet. Not sure what to do about that one either as there's no adjustment there. The windows
don't leak though.
Had a little tweak around with the ECU as well, seems to start up better now and drives ok for the time being.
Tidied up some under dash wiring too. Found the cause of an intermittent turn signal, turned out to be a bad connection at the column plug. And the
horn wasn't working, but fitting a fuse helped!
flak monkey - 4/11/13 at 08:33 PM
Been off gothing it up in Whitby all weekend, so got nothing done on the car But we got back this morning, so thought I better get on with it.
Cleaned up all of the dash parts and sprayed them with black vinyl dye. Great stuff and dries really quick, reassembled the dash and fitted new clips.
Spent a while refitting all the brackets and the heater cables before refitting the dash and tidying up the wiring. Pleased with how it's all
gone back together especially with the new cowl/dash panel I fitted last year.
After that I fitted the new headlights, and checked everything worked (which it does!) Tomorrow I'll be finishing off under the dash and
reassembling. Then I am going to have a battle with getting the headliner in. Should be fun
flak monkey - 6/11/13 at 09:09 PM
I went for a bow style headliner conversion as it was a lot cheaper option, although it was a lot more work. Fitted the 2 rails for the clips 15"
apart on the roof about the centre line.
Then the sides were all pulled tight, cut and glued to the roof with high strenth spray adhesive. Not forgetting to pull the dome light wires through!
Pleased with the result for a first attempt. It's far from perfect, but it'll do for me.
I also refitted the dash bezel and tested the rest of the electrical systems. All seems to function OK. Had to fit new warning lights to the bezel as
I'd chopped the instrument pod up and done away with all of the original warning lights.
Today I spent most of the day spraying vinyl dye on all of the interior panels, seats etc and then refitting them all. Pleased with the results.
flak monkey - 8/11/13 at 06:56 PM
Yesterday morning I set about covering the door cards I'd made. First I laid up some fiber glass on the platic top sections as they had become
very brittle. Just a single layer of 250gsm mat was enough to make them nice and solid again. After that I had a late night having a battle with the
seats. But I did get them done eventually. They came out ok, not perfect, but good enough for me.
This morning I checked over all of the suspension and fitted a few split pins I had forgotten about. Fitted and tested the windshield washers, they
worked ok for a while (just long enough) but I am ultimately going to replace the mechanical pump with an electric one.
After that I thought I'd take it for an MOT.... and the result meant I could part with some money and get one of these!
Yes after 2 and a bit years its back on the road!
Done about 20 miles as an initial shake down and have a small list of things that I need to sort over winter:
Washer pump
Wipers need adjusting - drivers one runs just onto the screen trim.
Exhaust rattle - think it's the left hand rear tail pipe hitting the chassis rail
Brakes are terrible - though good enough to pass the MOT they have no initial bite at all. Will try some better pads first.
New door pulls are needed - I just put the broken old ones back on for the time being.
Intermittent communications issue with the laptop and ECU - a little annoying when trying to tune on the road
Apply some stone chip in the rear wheel wells
Transmission oil leak at the speedo drive/output.
Quite a few rattles to sort
But overall it's great to have it back up and running. The ride is firm but not harsh and it corners nice and flat with the suspension upgrades I
did. The 3rd gen steering box has transformed it, steering is super quick now. It's quiet when crusing at steady throttle but howls when you open
it up a bit. Lots of induction noise as well as exhaust.
scootz - 8/11/13 at 07:42 PM
Great work!
scimjim - 8/11/13 at 08:38 PM
Awesome rebuild
quote:Originally posted by l0rd
I would say
Scrap the chassis. Keep the body panels and start building a new chassis NASCAR like
flak monkey - 10/11/13 at 04:59 PM
Thanks guys. Still lots to do
Done about 100 miles over the weekend just to identify a few bugs to be working on. Got the ECU set up well enough to start easily and drive smoothly
at all normal road speeds. Think I could do with adding some more timing in at cruising speeds which should let me lean it out some more.
Gave it a quick polish up and tidied a few loose ends today. Just thought I would post a couple of before and after shots....
Before:
During:
After:
Ivan - 11/11/13 at 07:22 AM
Superb job David - love the shape of the bonnet scoop.
ashg - 11/11/13 at 08:04 AM
looks great! nice to see an old car brought back to life.
have you thought about painting the front grills and light recesses either all black or all silver? personally i think that would finish it off
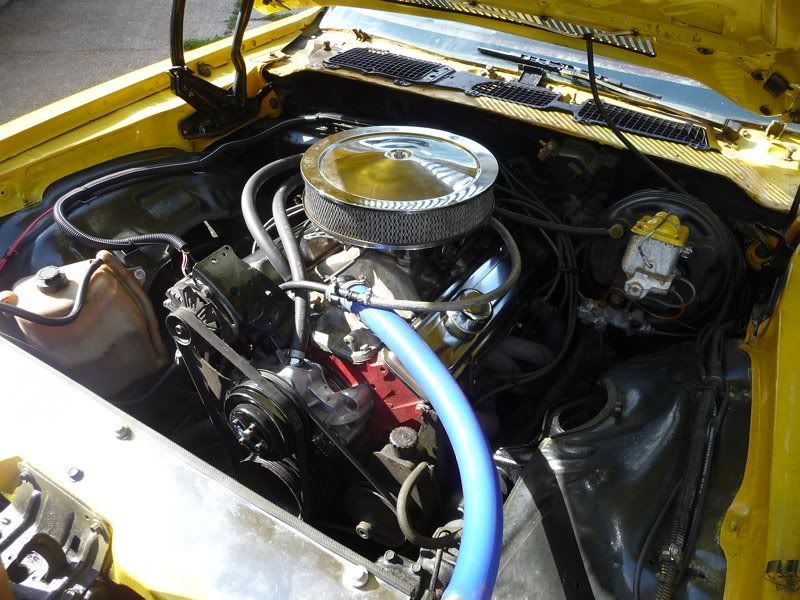
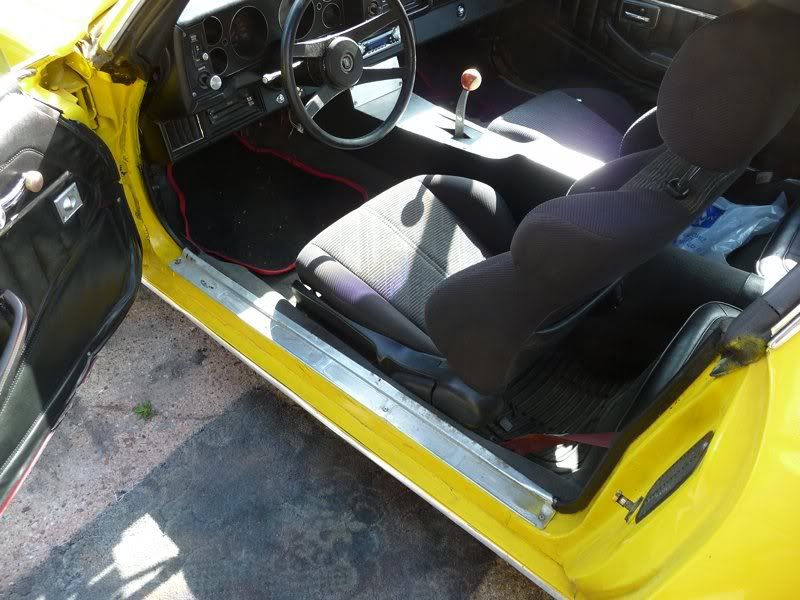
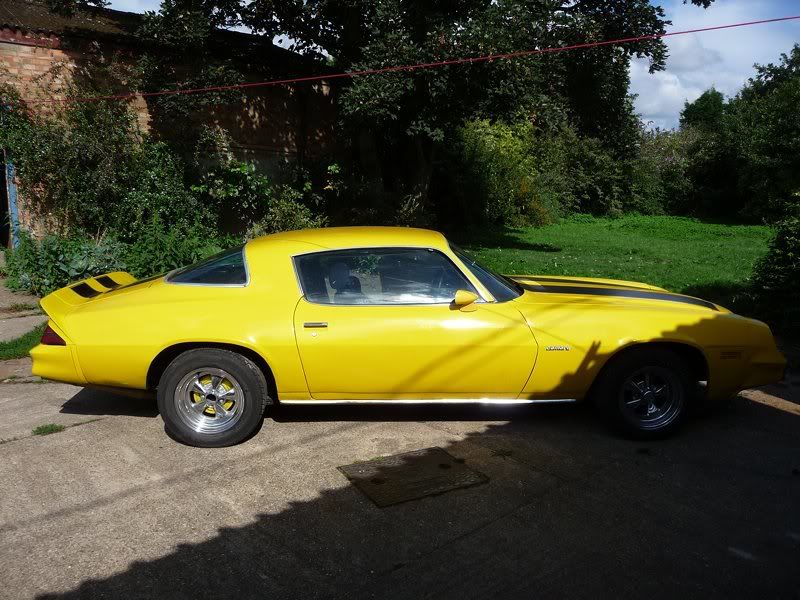
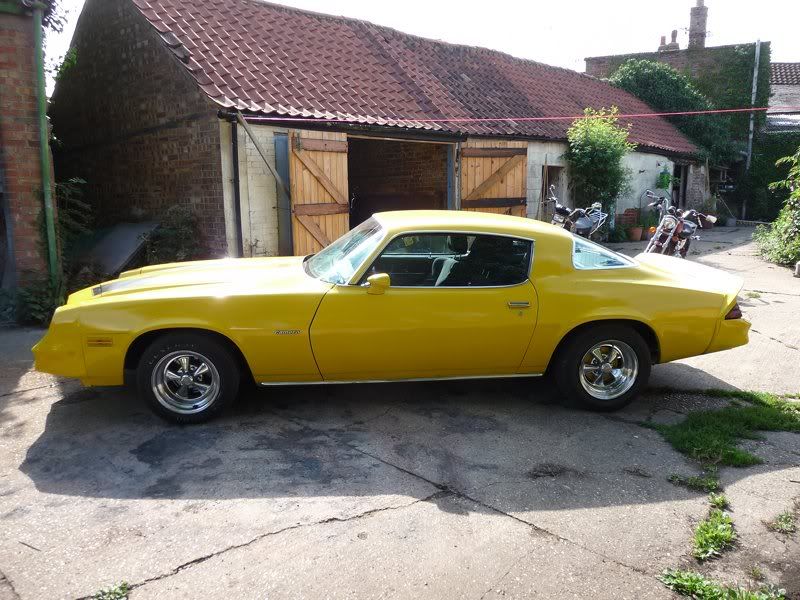
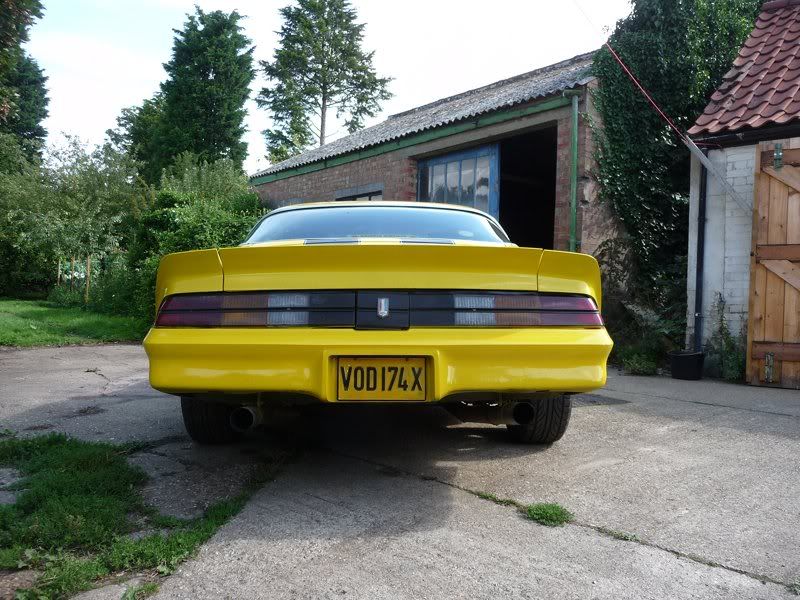
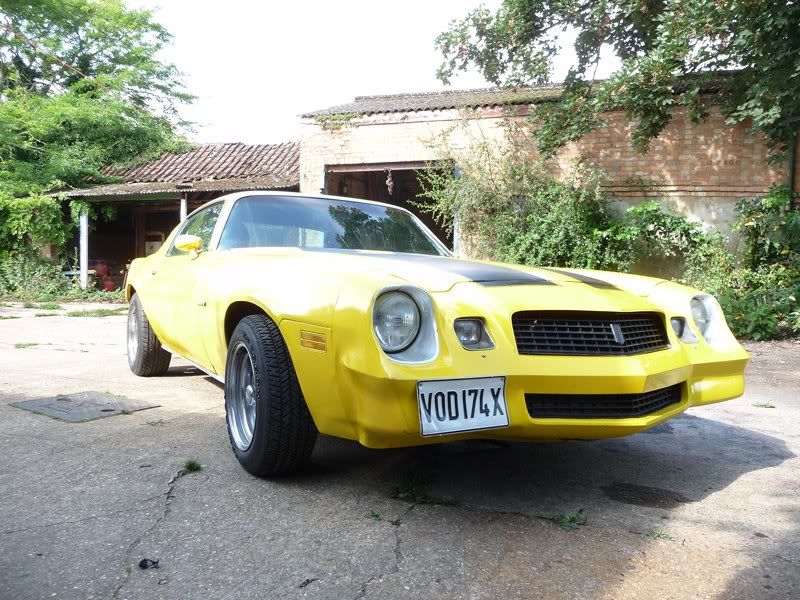
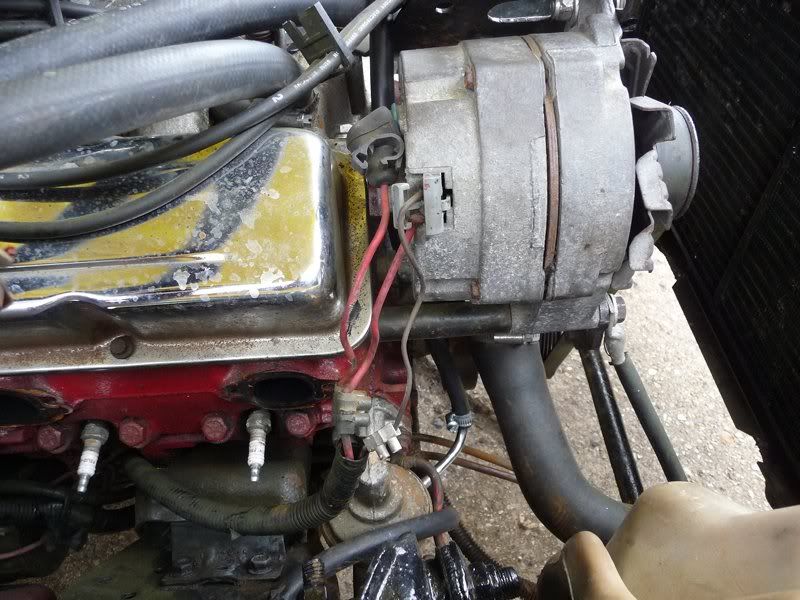
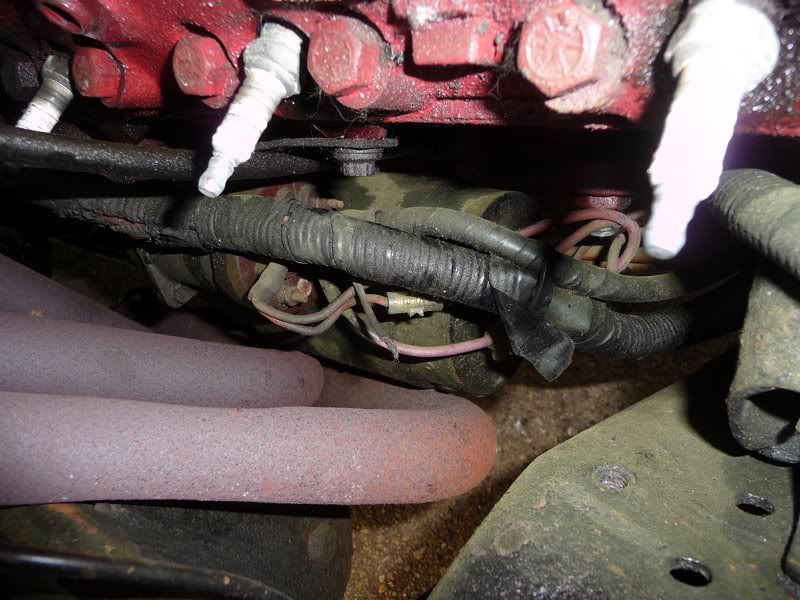
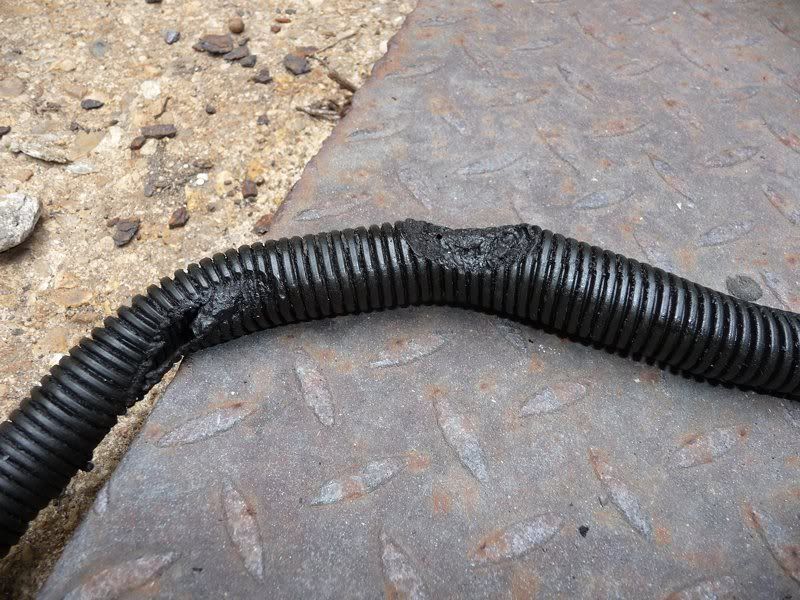
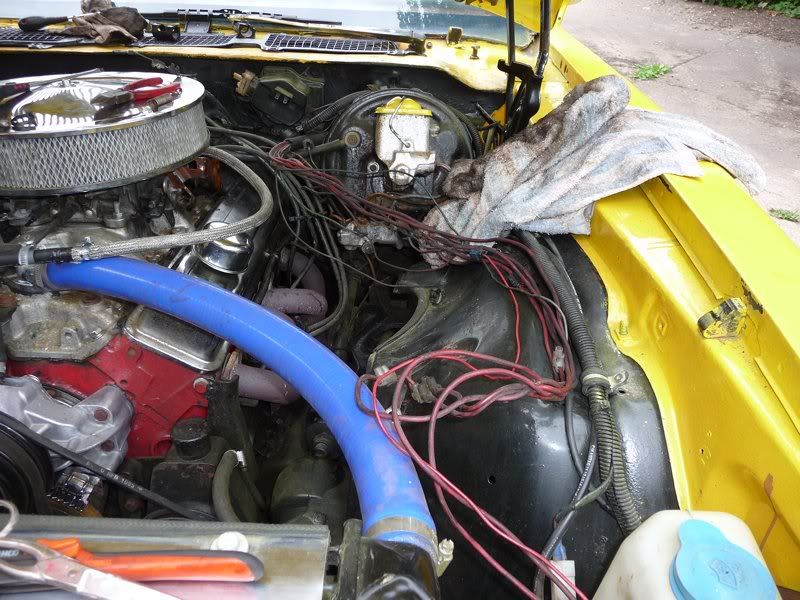
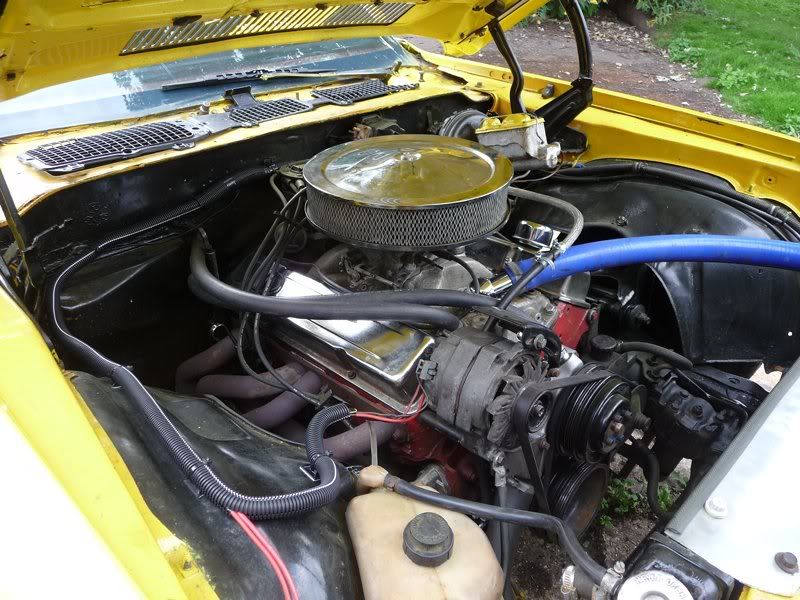
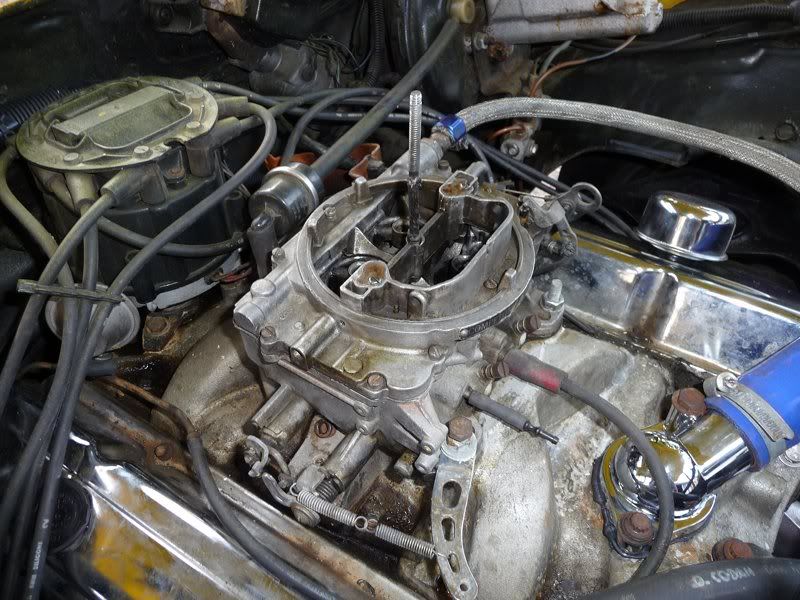
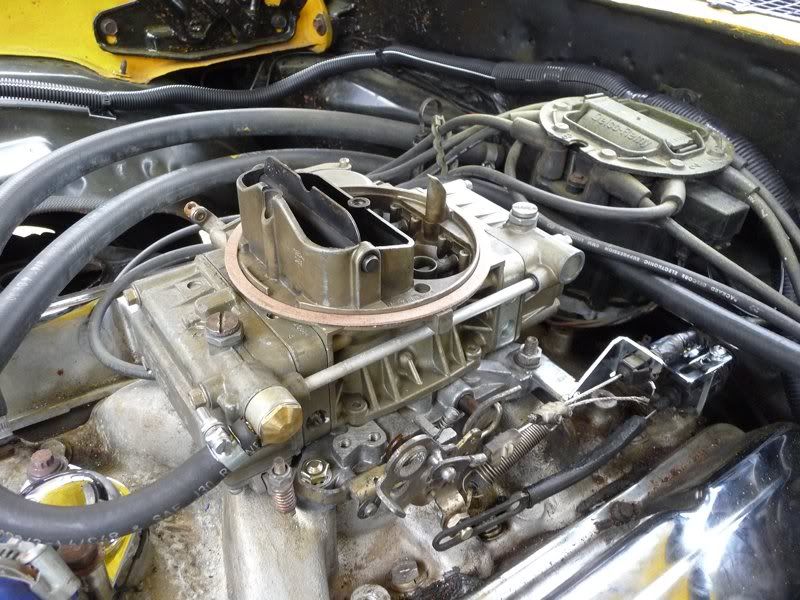
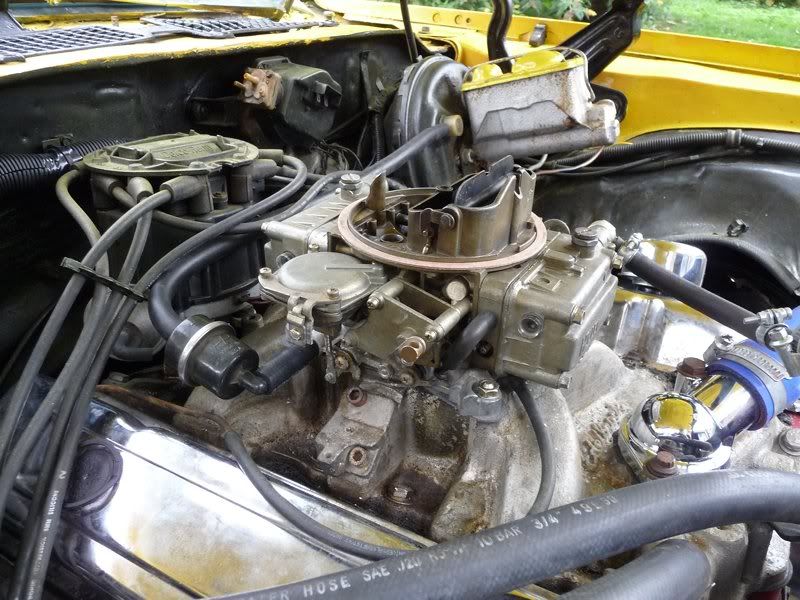
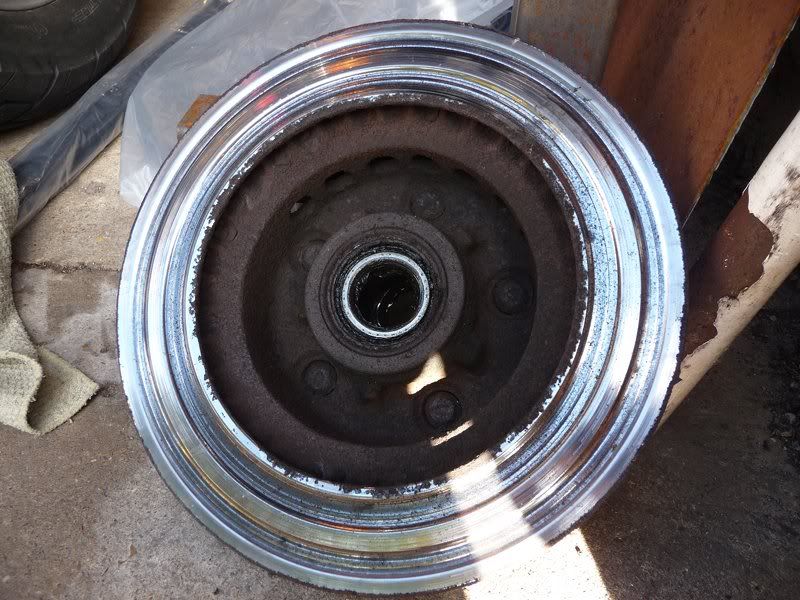

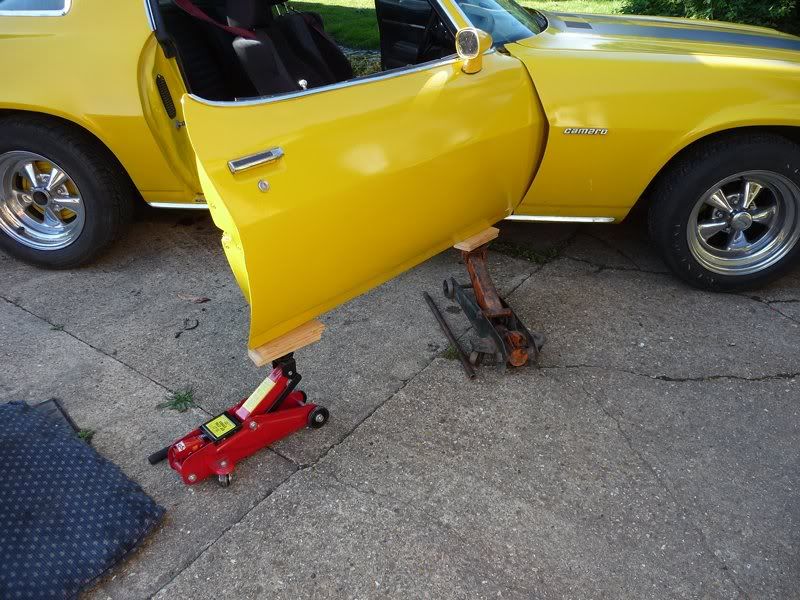
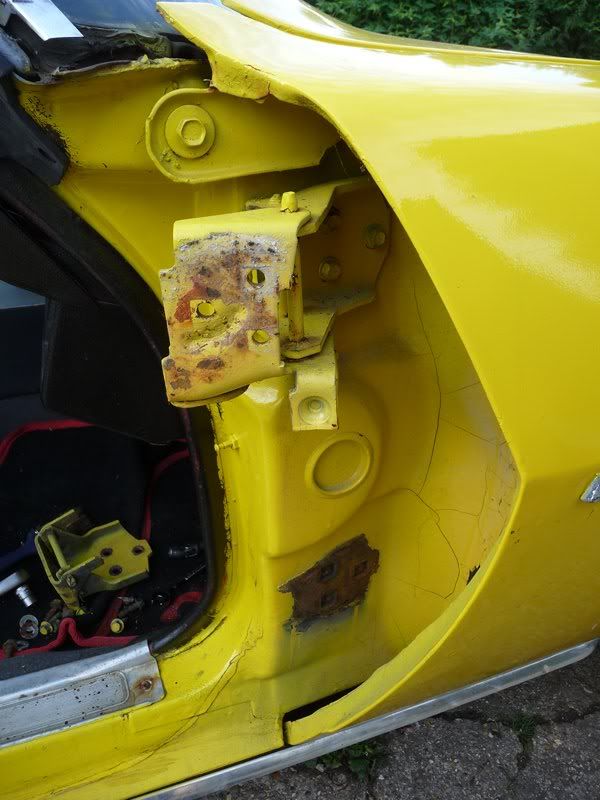
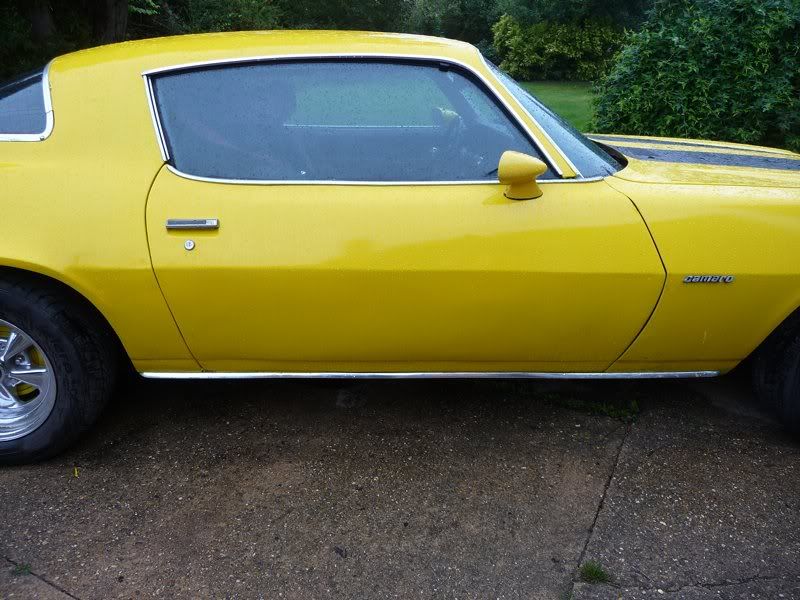
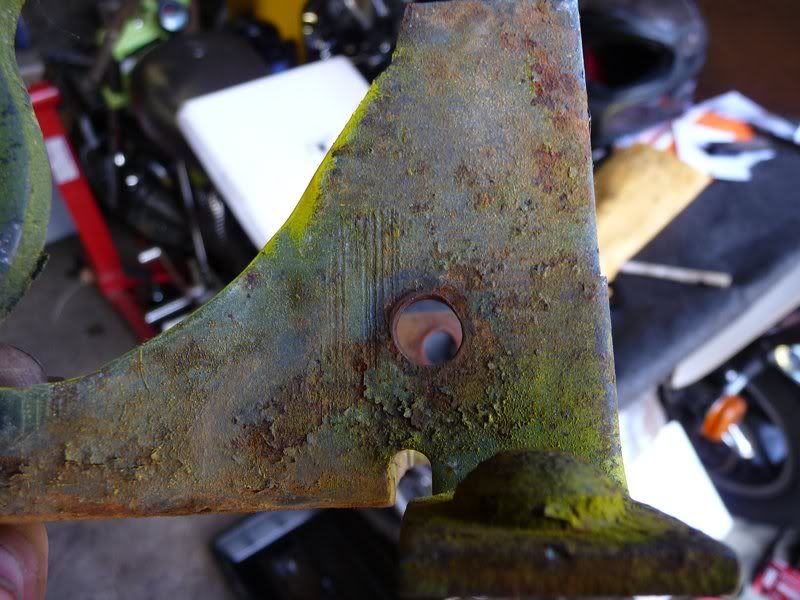
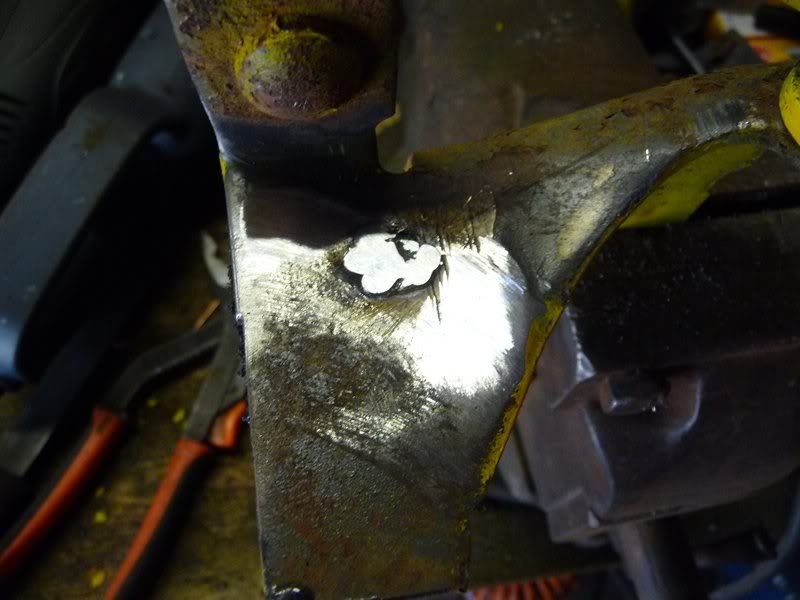
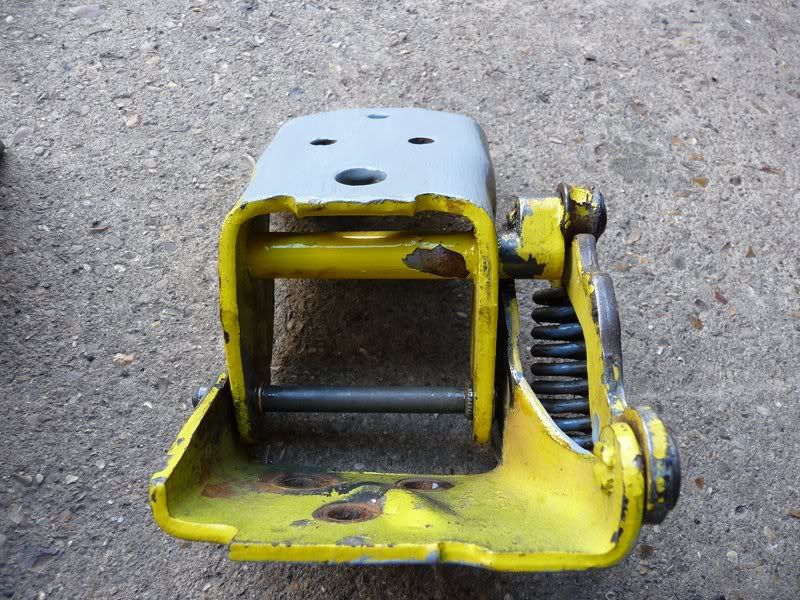
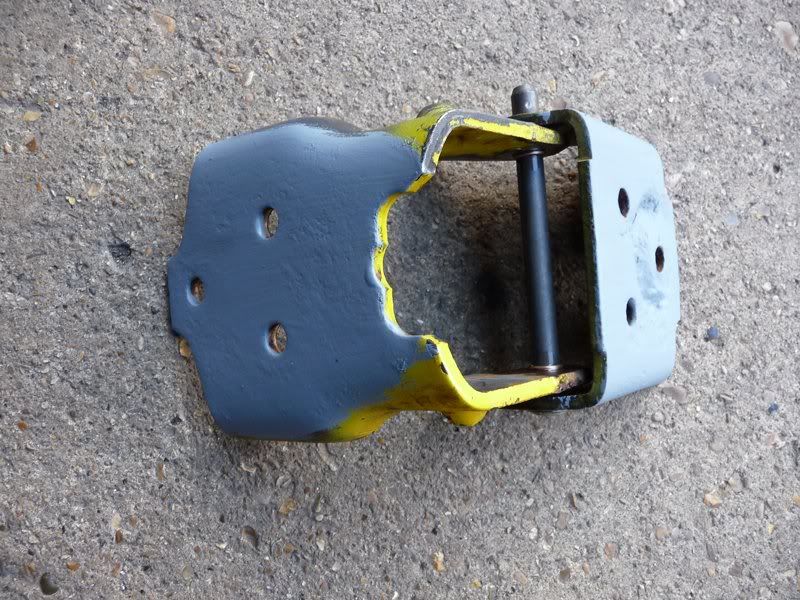
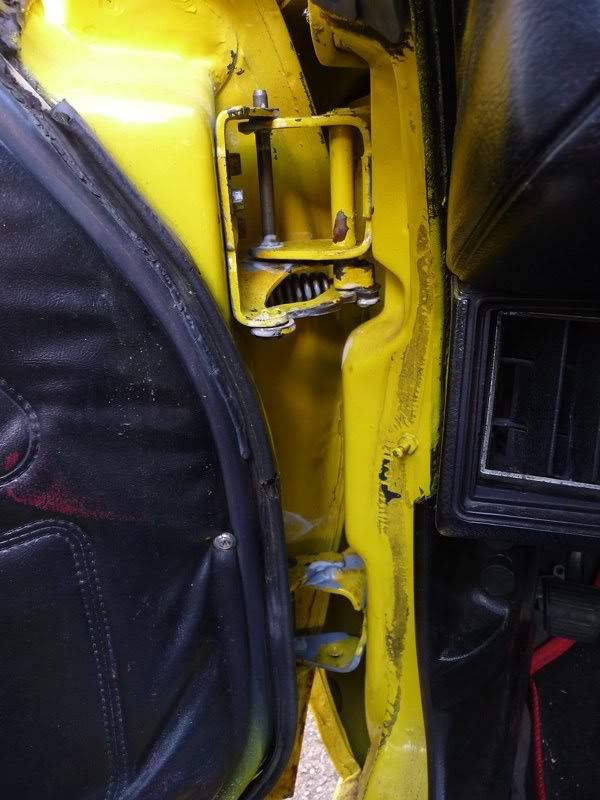
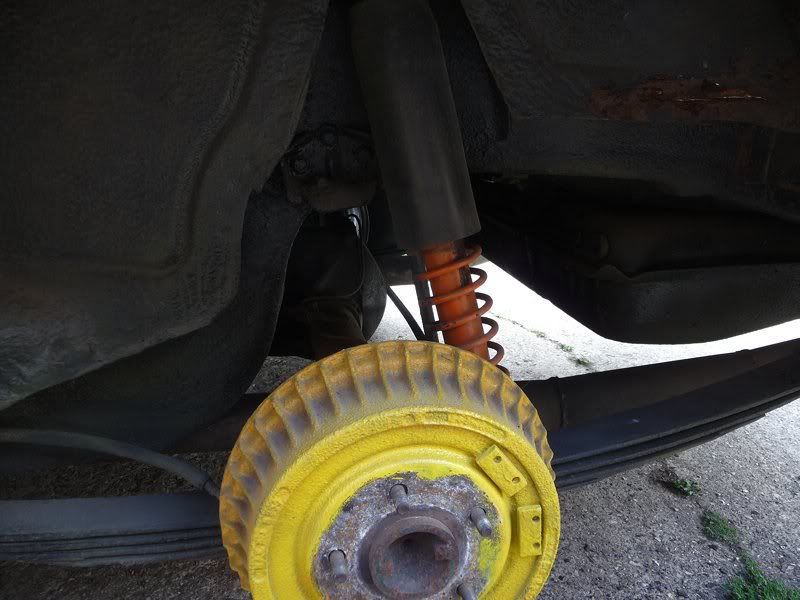
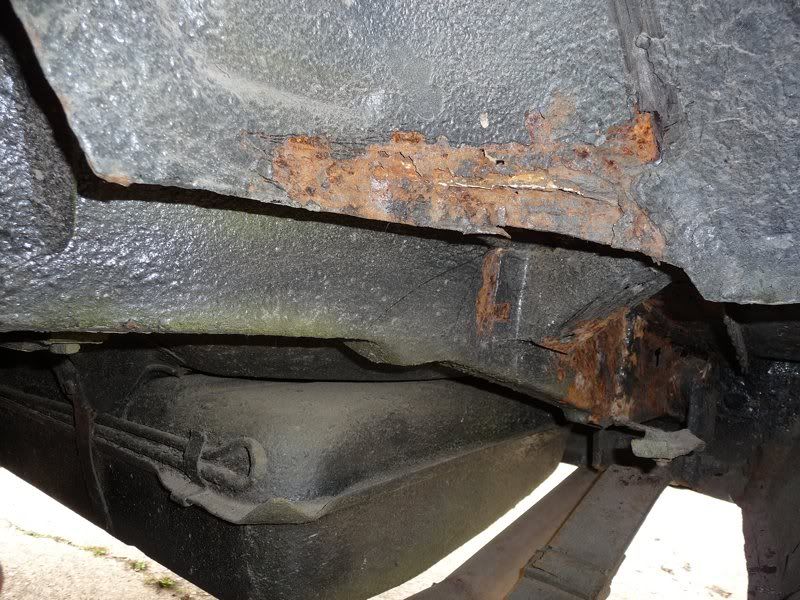
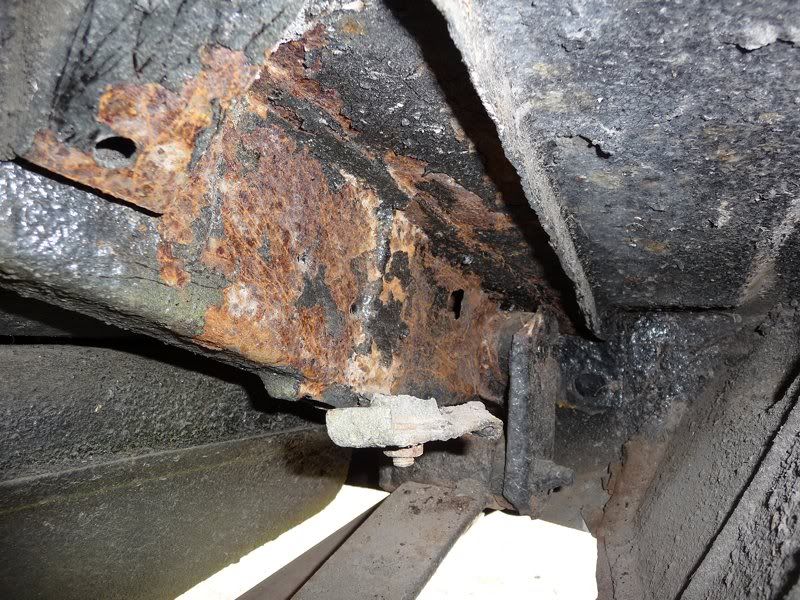
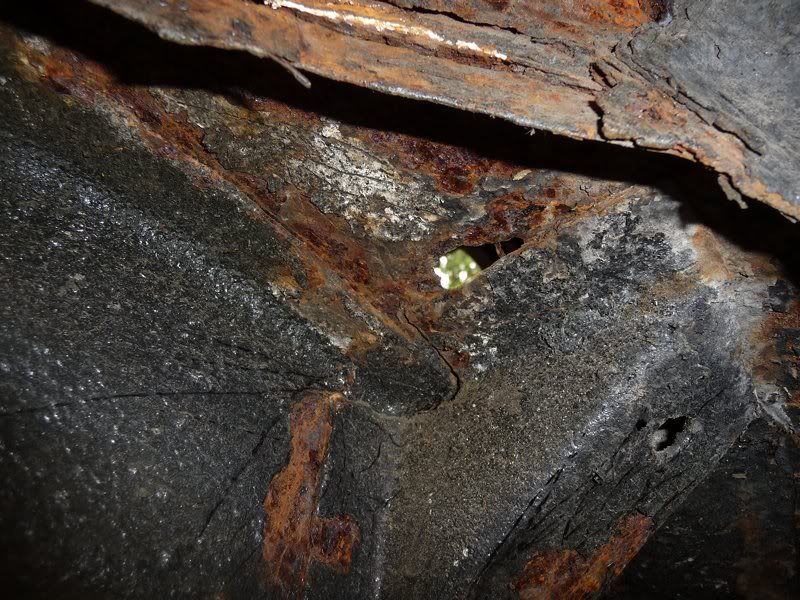
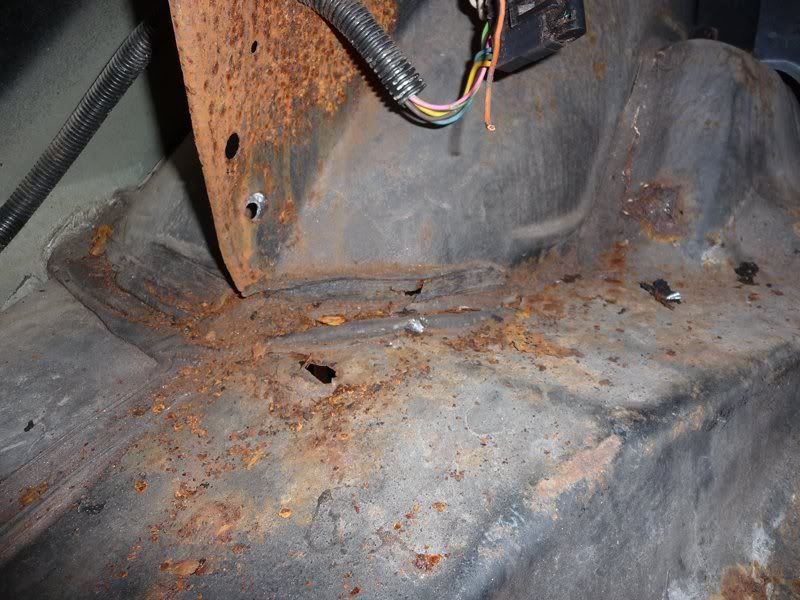
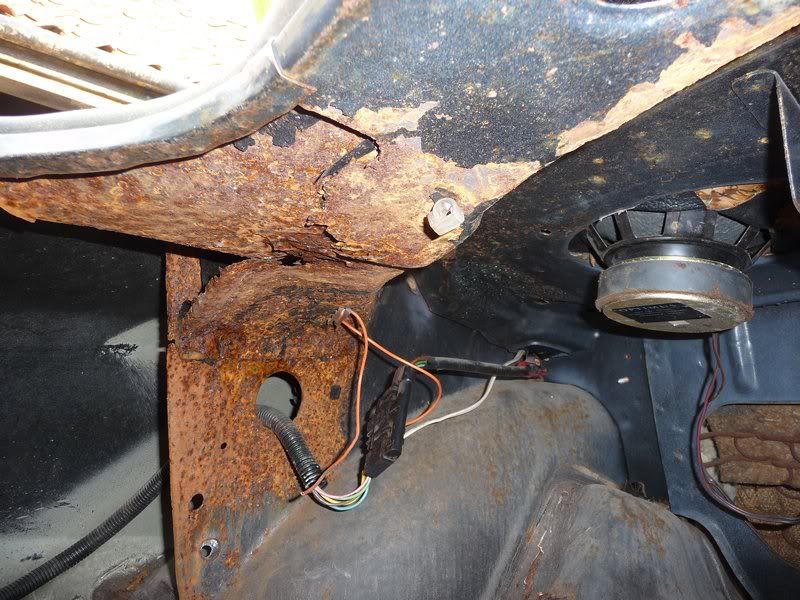
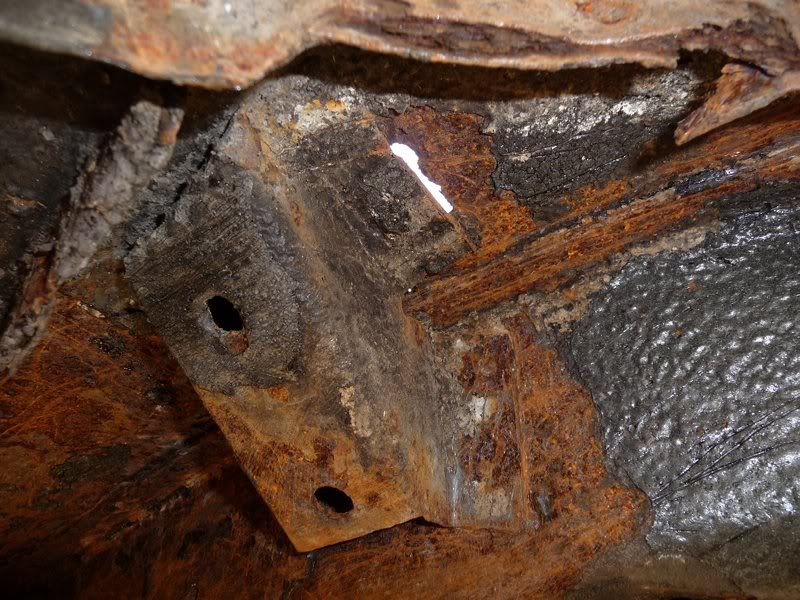
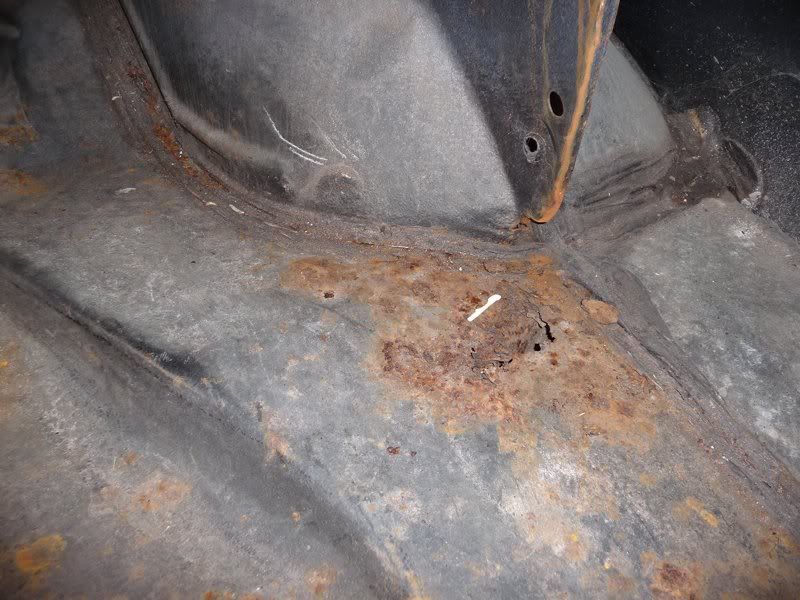
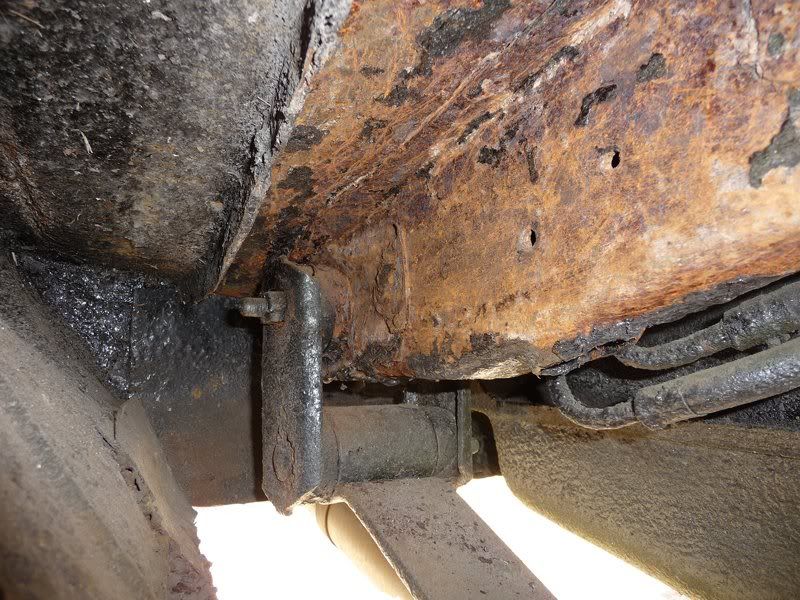
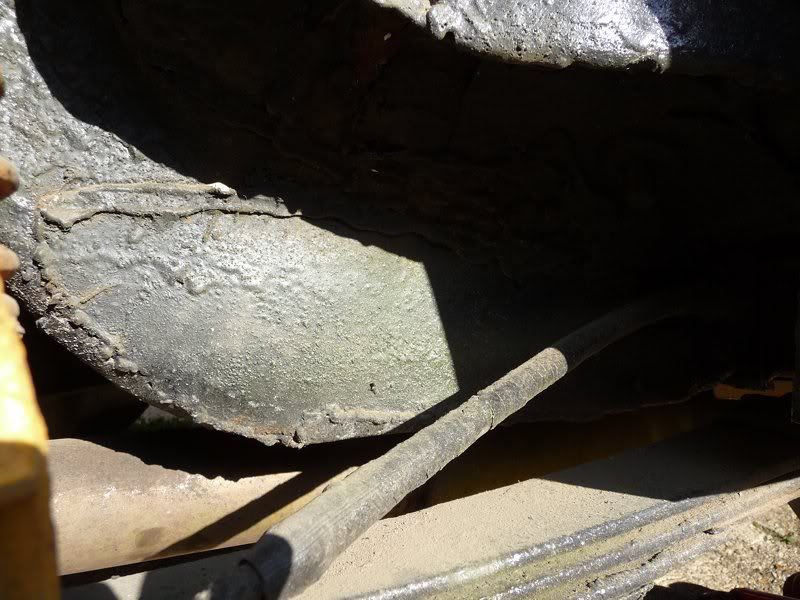
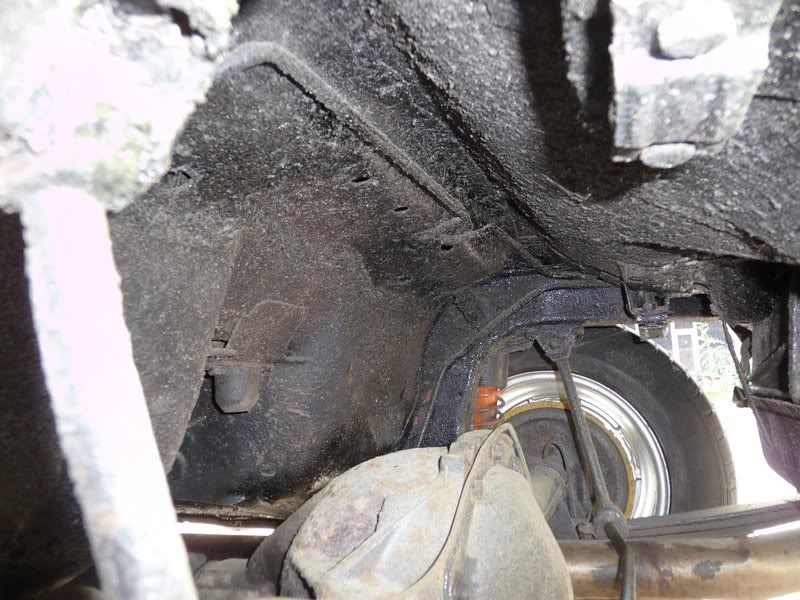
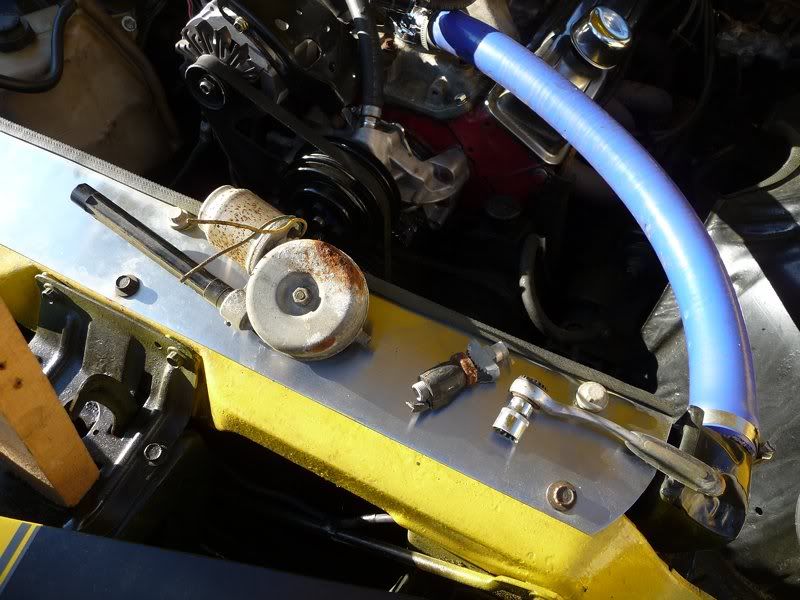

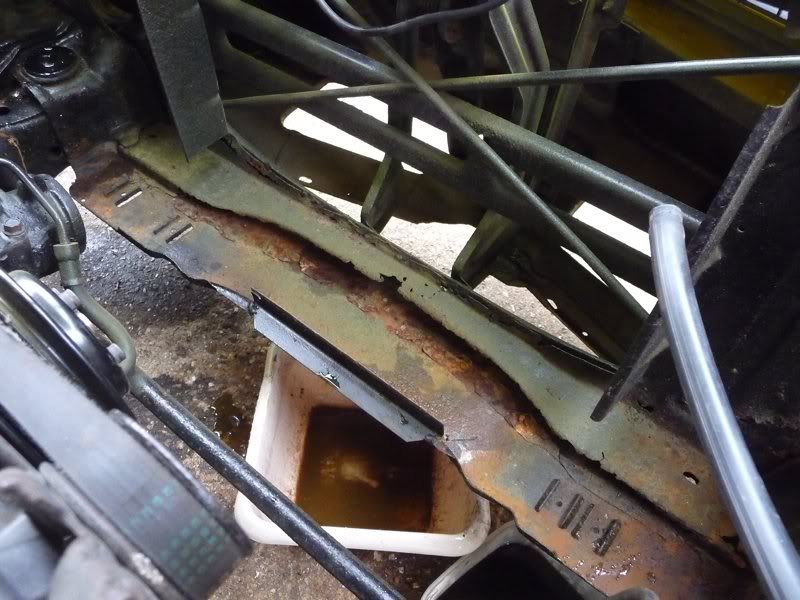


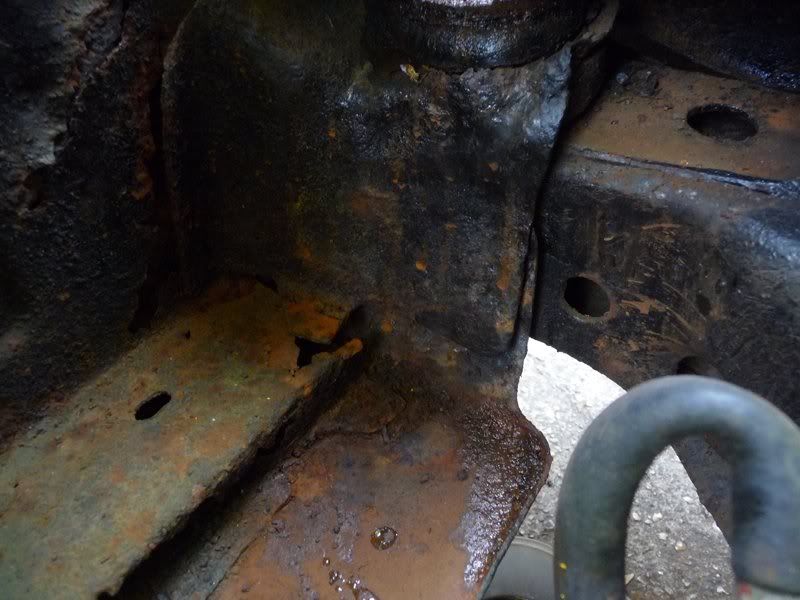
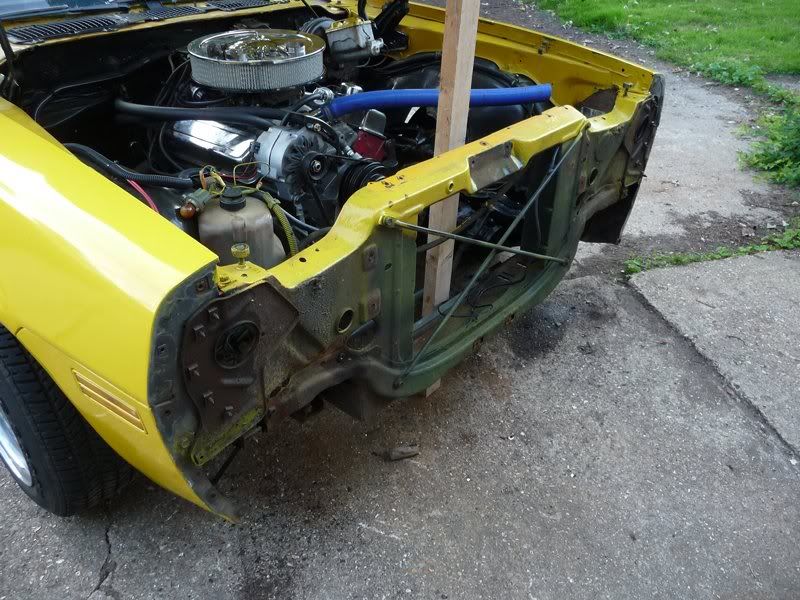
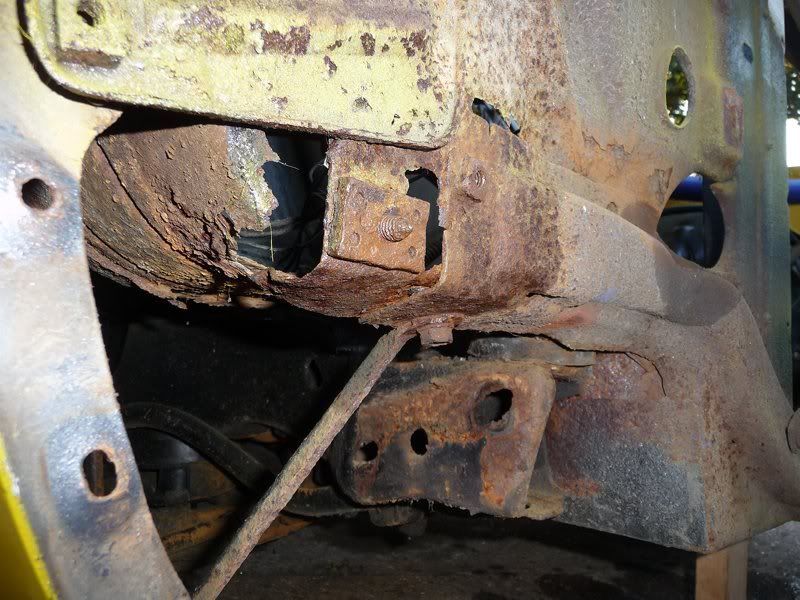
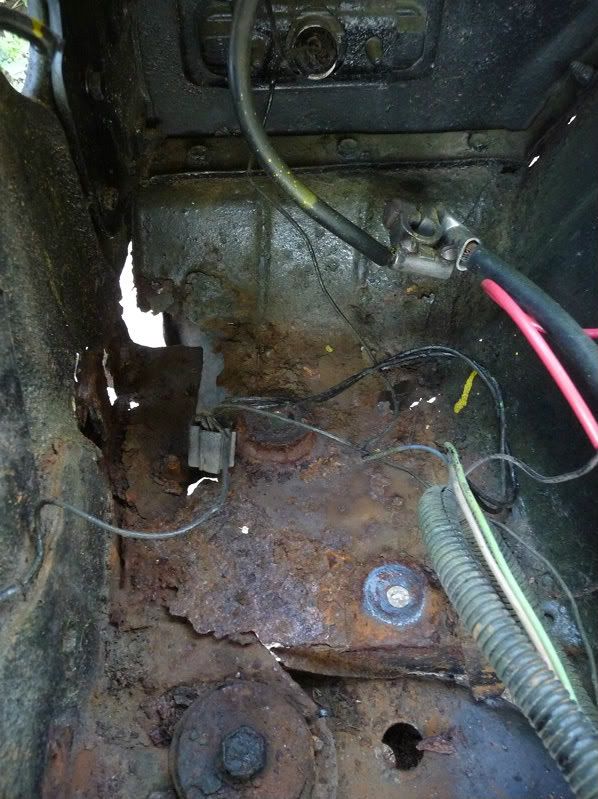
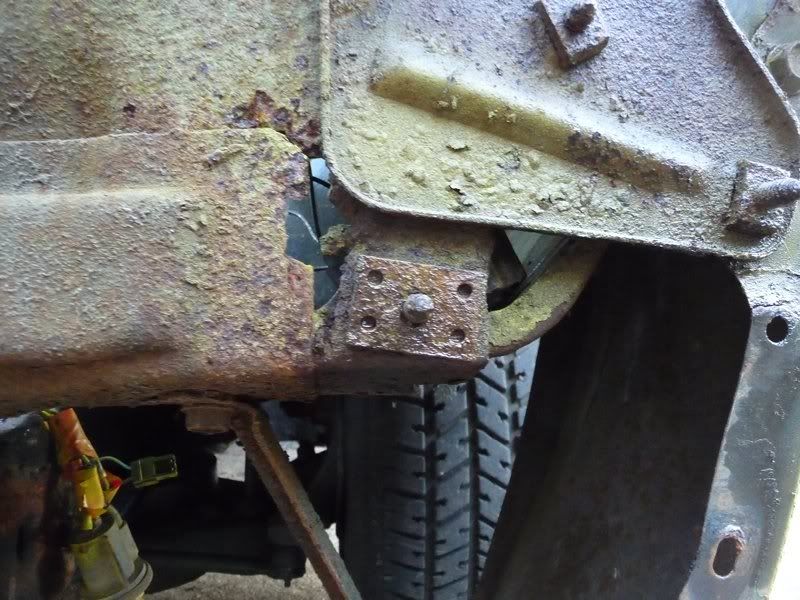

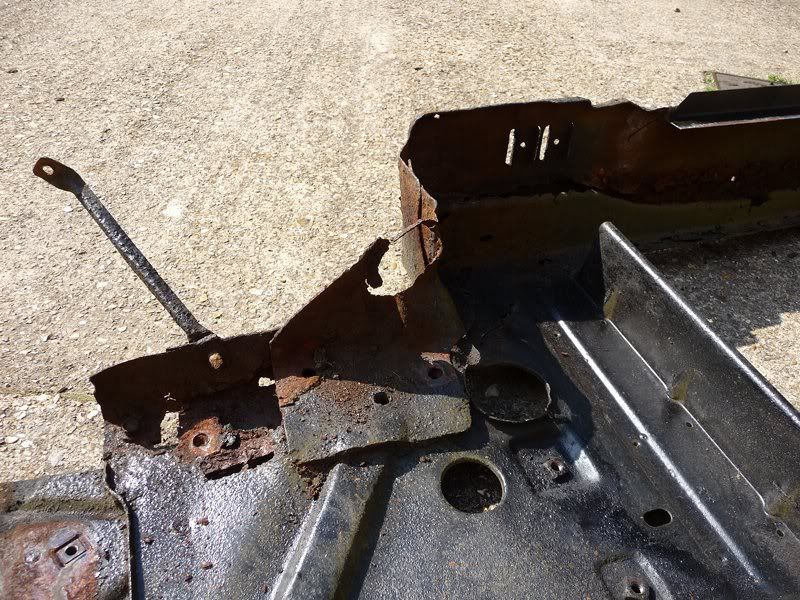
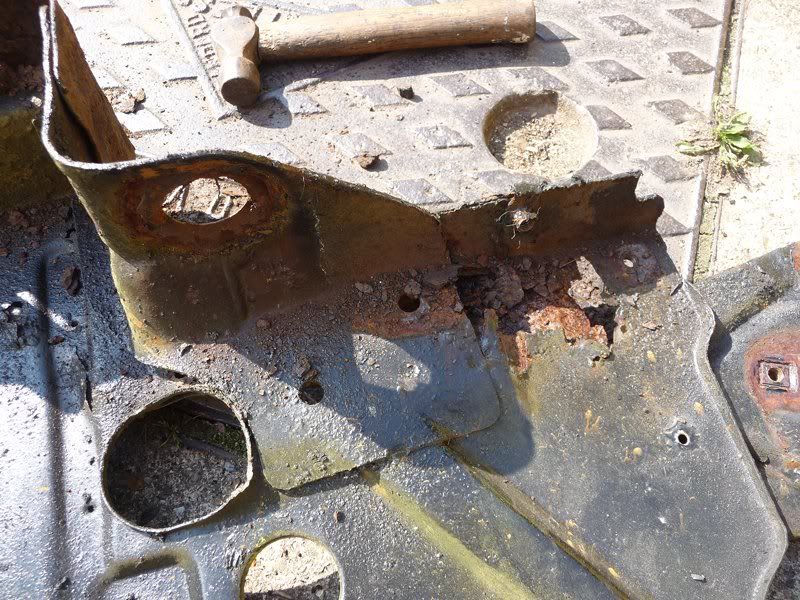
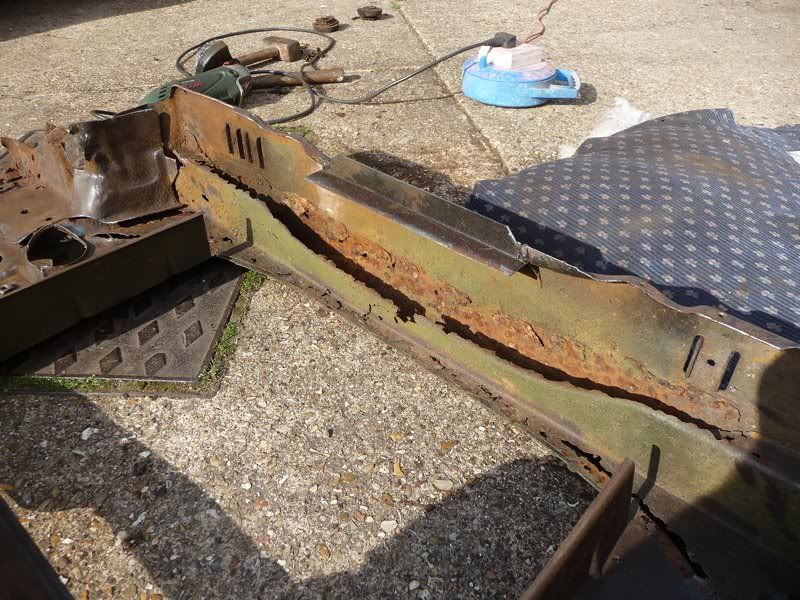
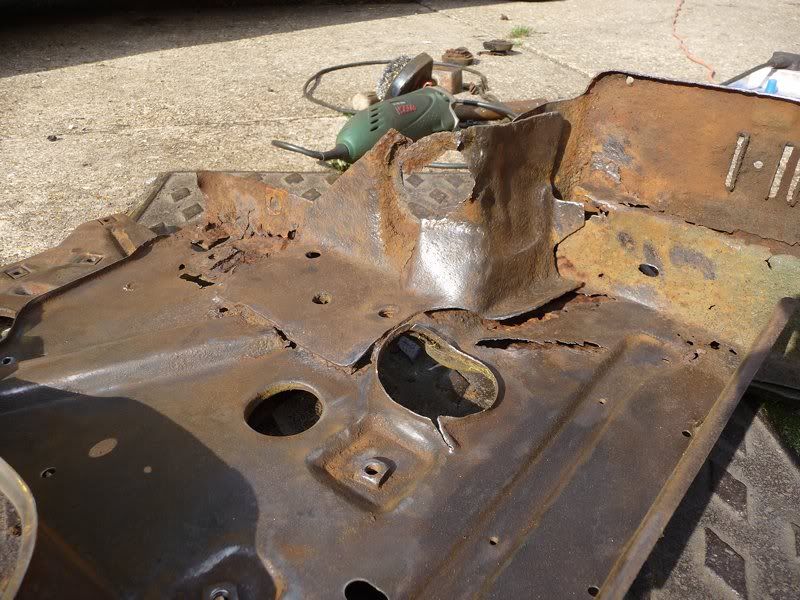
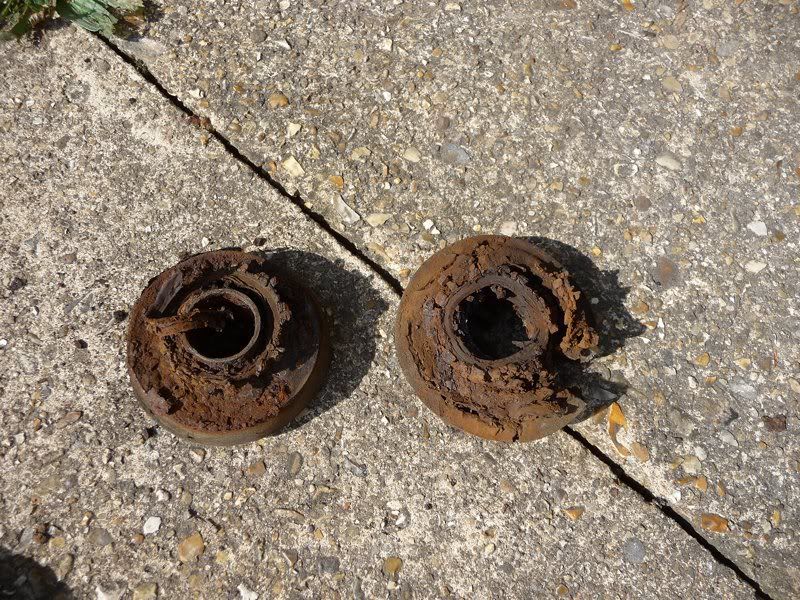
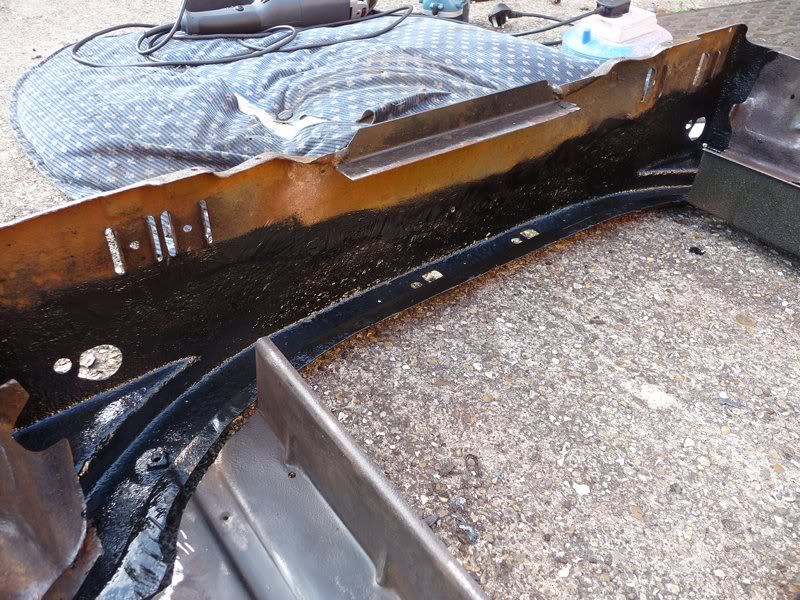
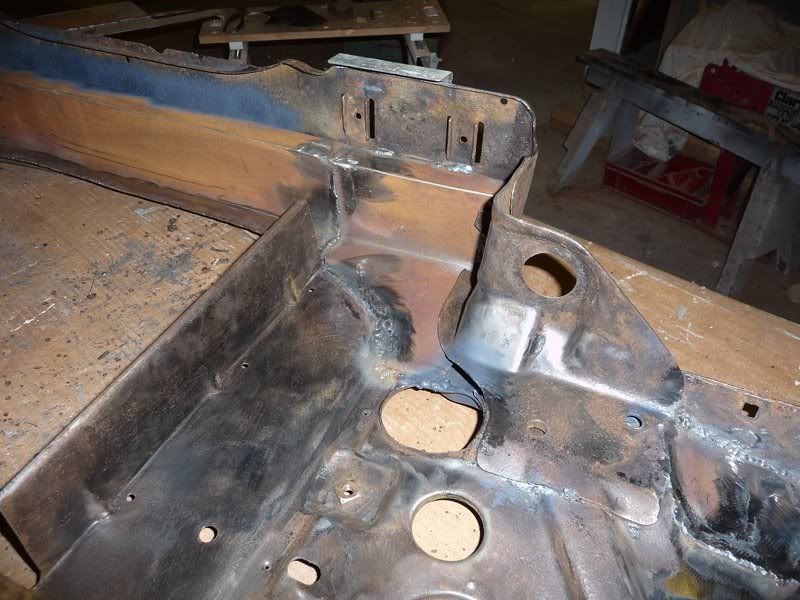
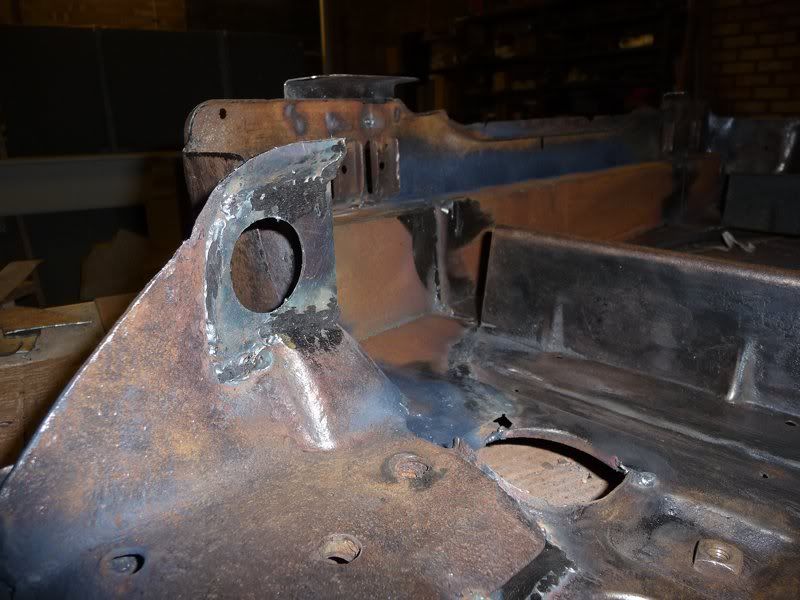
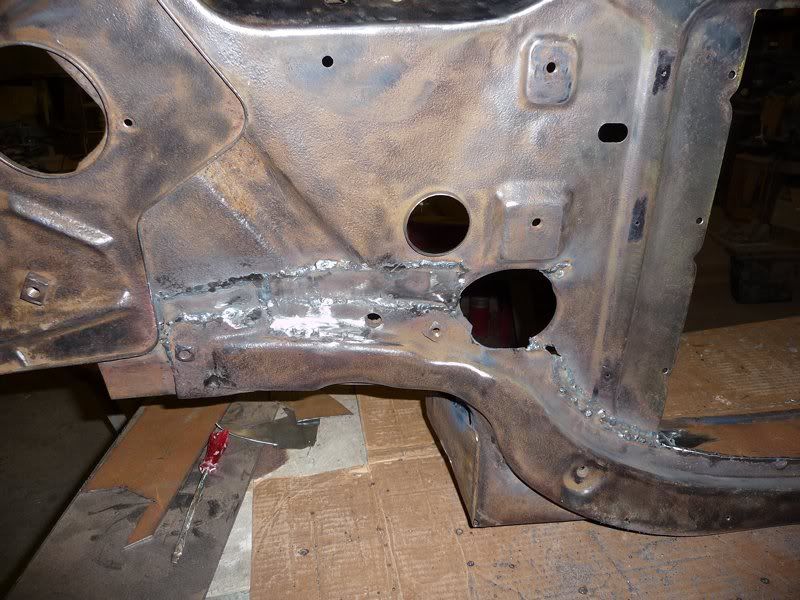
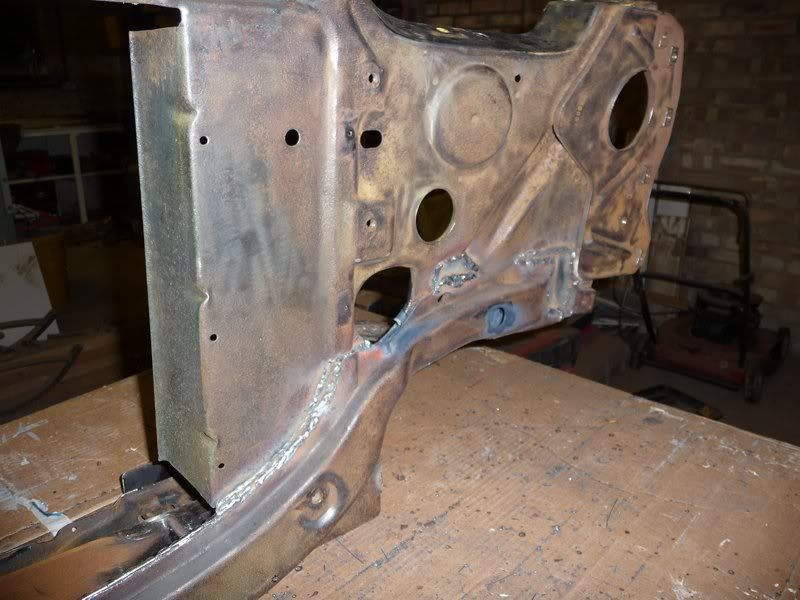
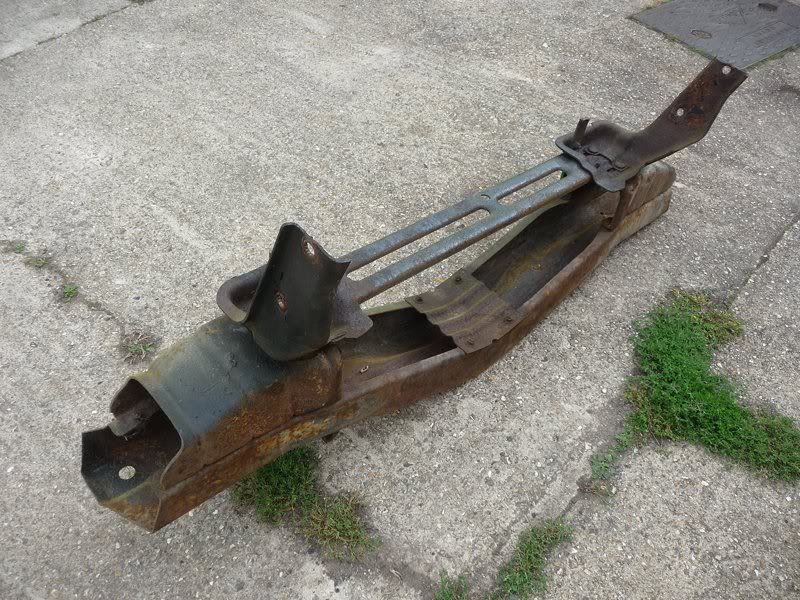
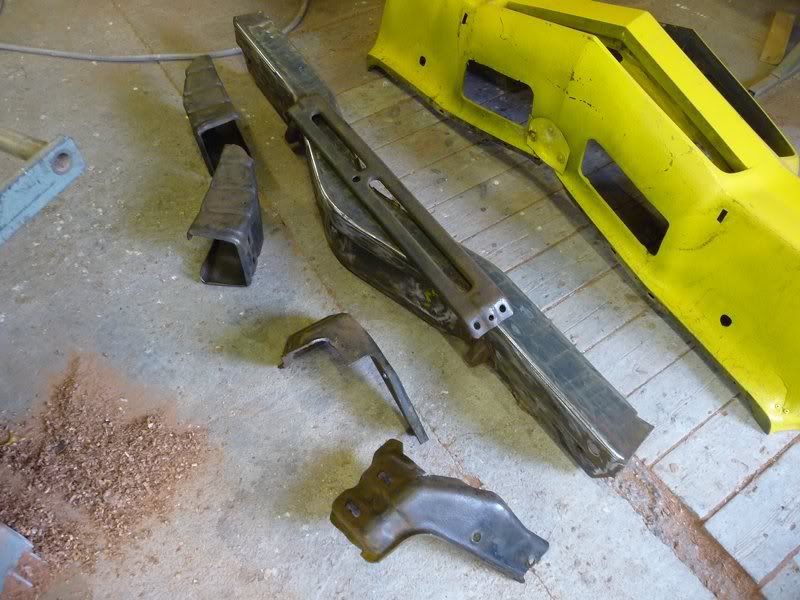
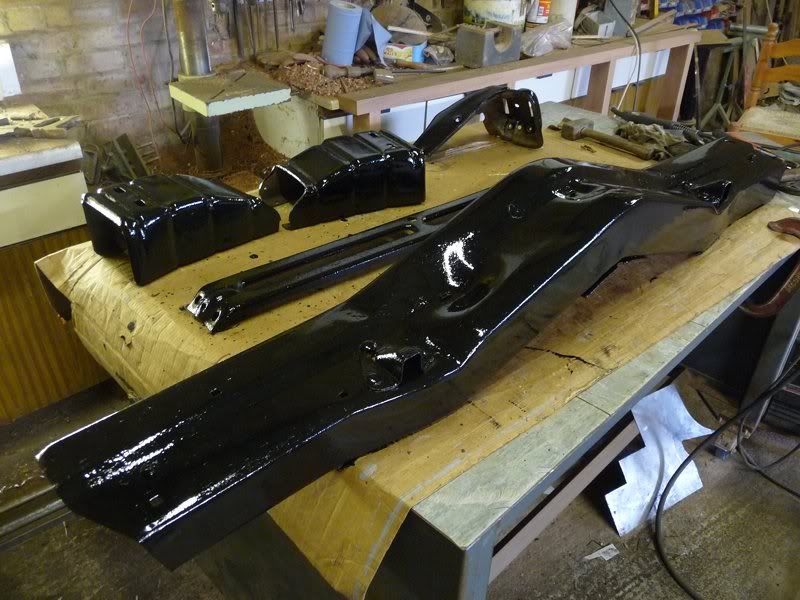
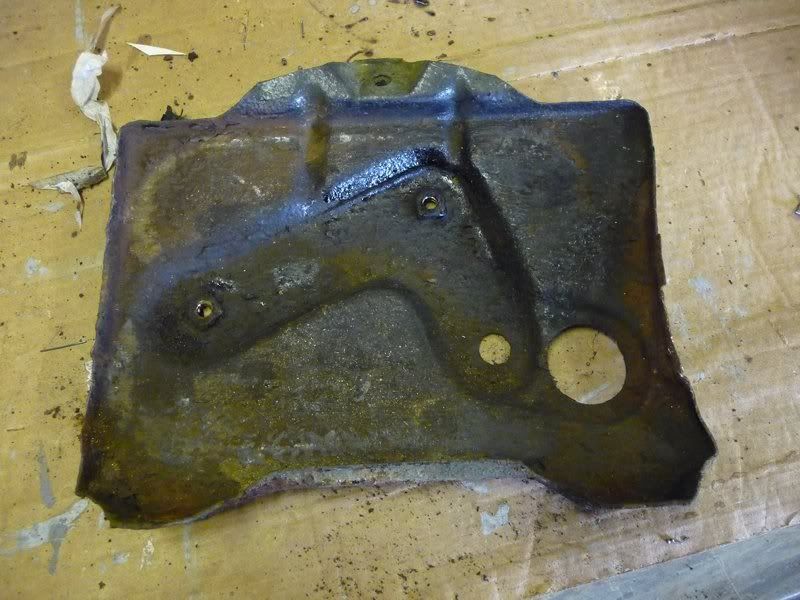
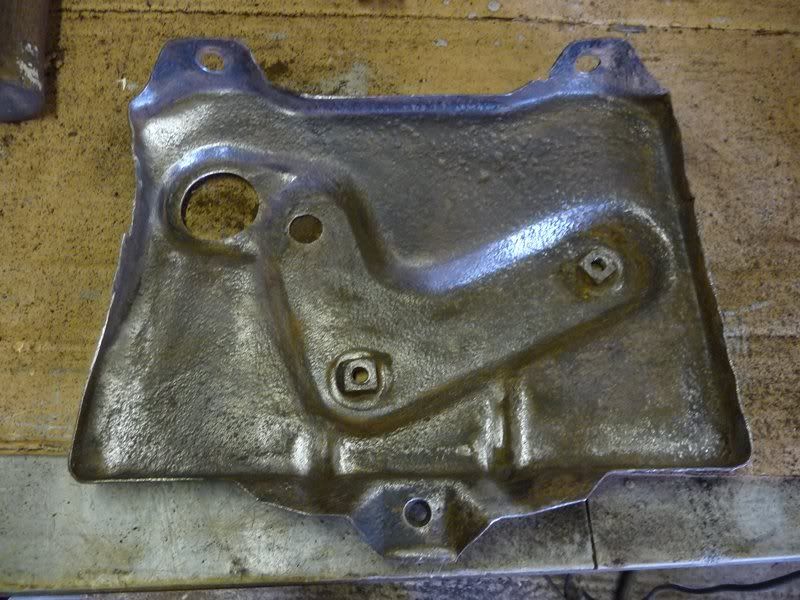
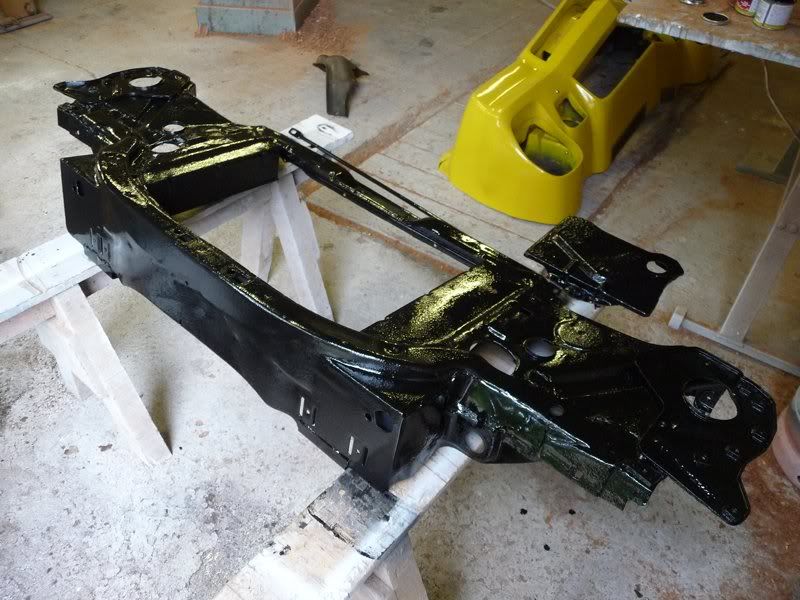
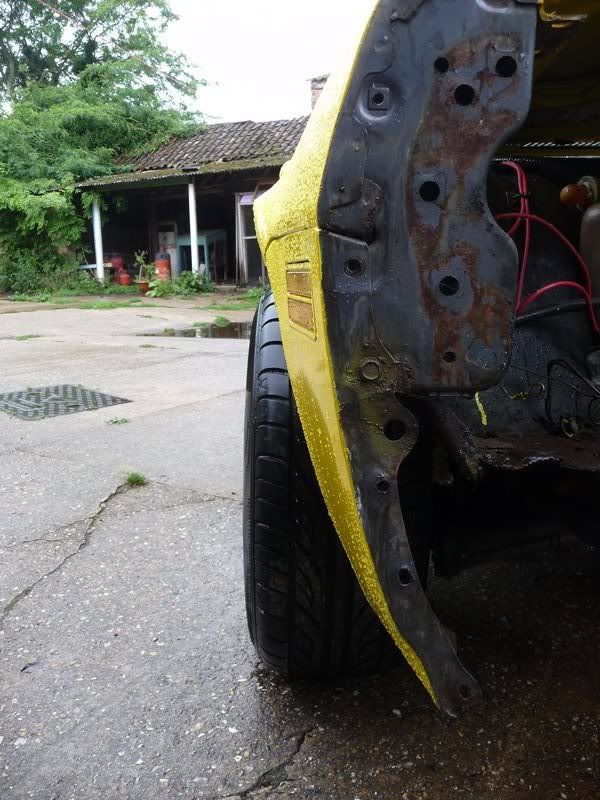
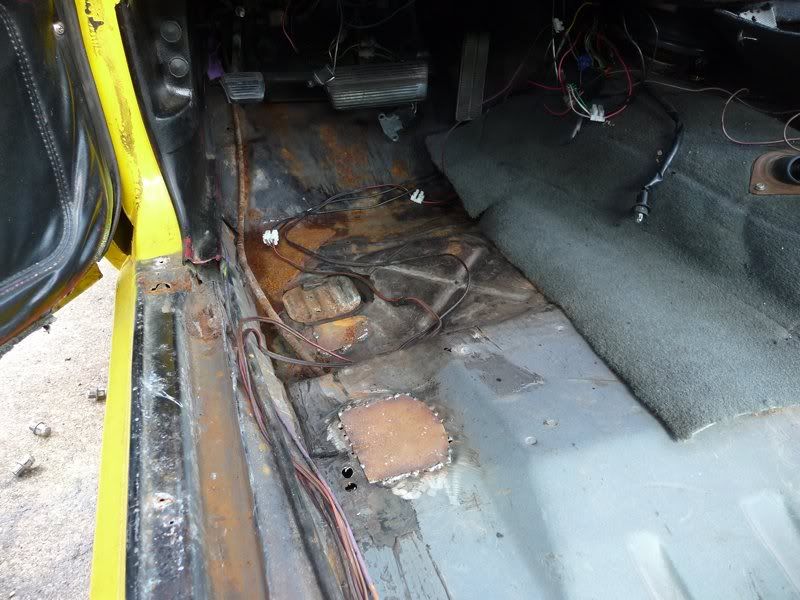
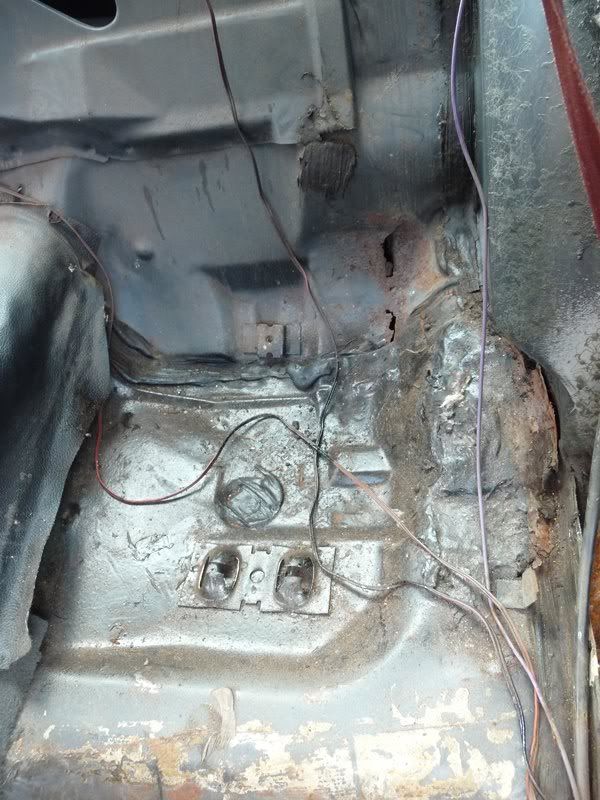
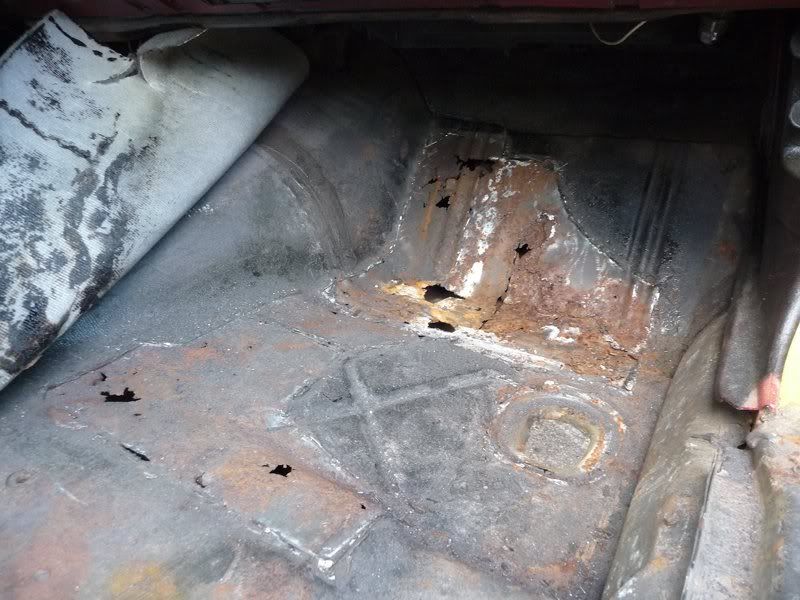
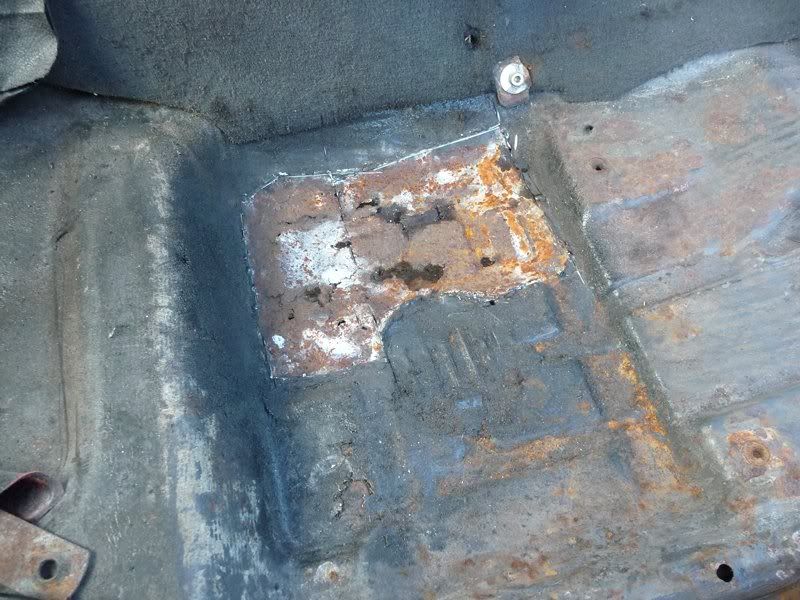

 I am going to be
fitting a wideband lambda gauge when I do the instruments though. So it'll make setting it up a bit easier anyway
I am going to be
fitting a wideband lambda gauge when I do the instruments though. So it'll make setting it up a bit easier anyway 
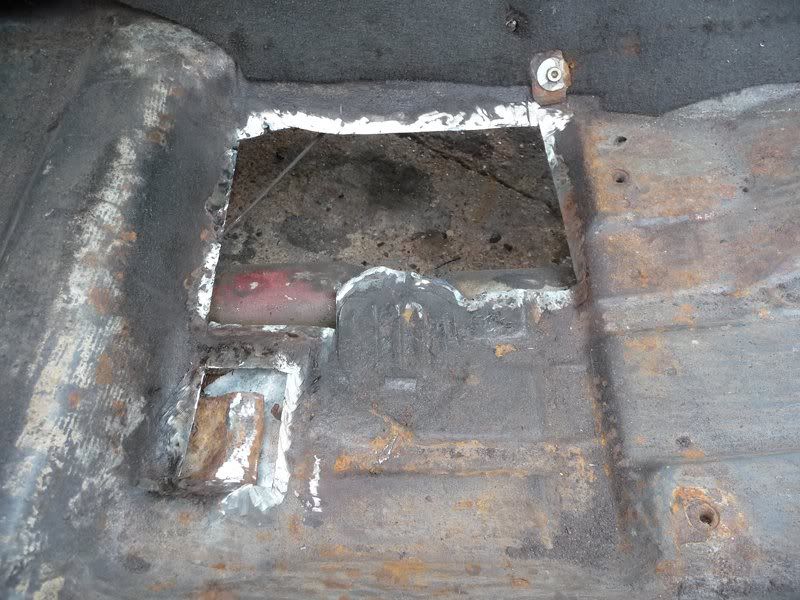
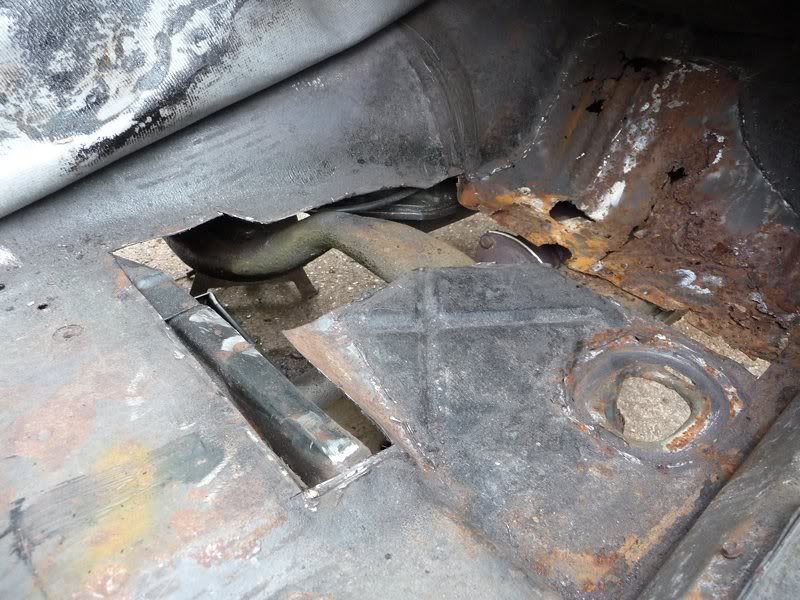
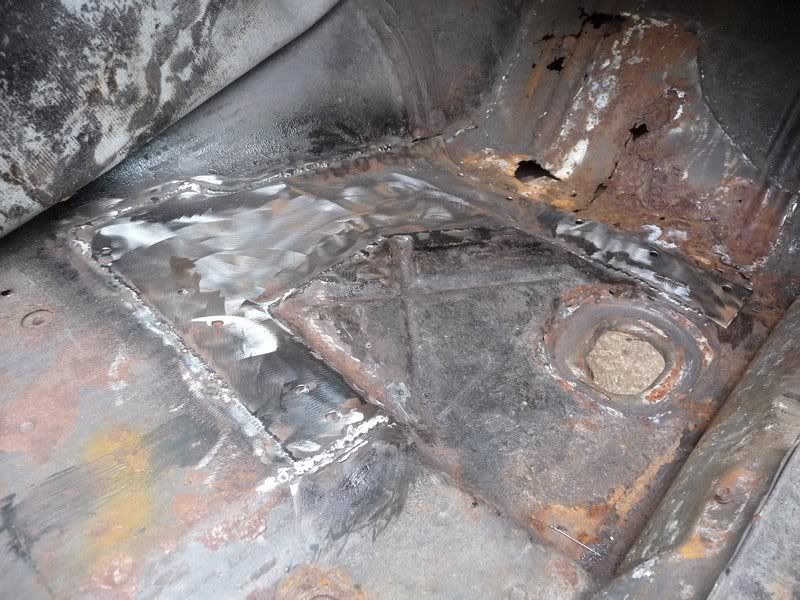

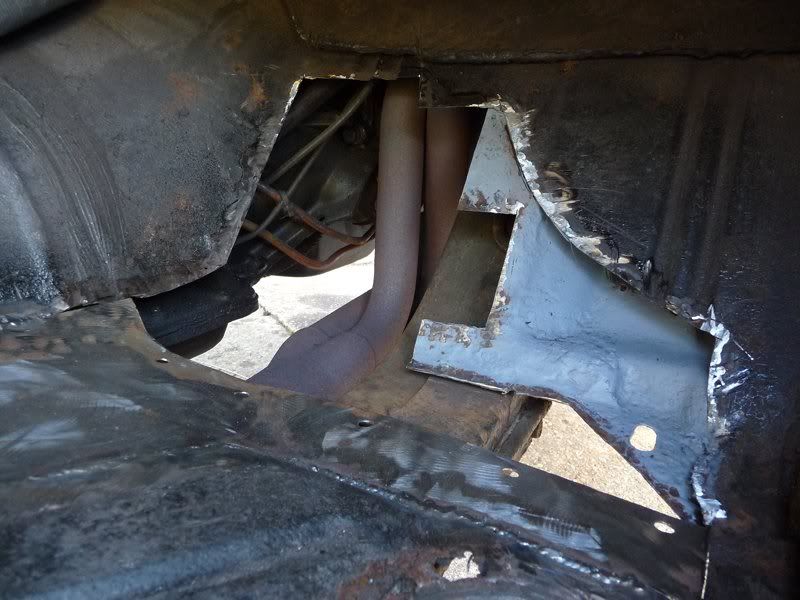
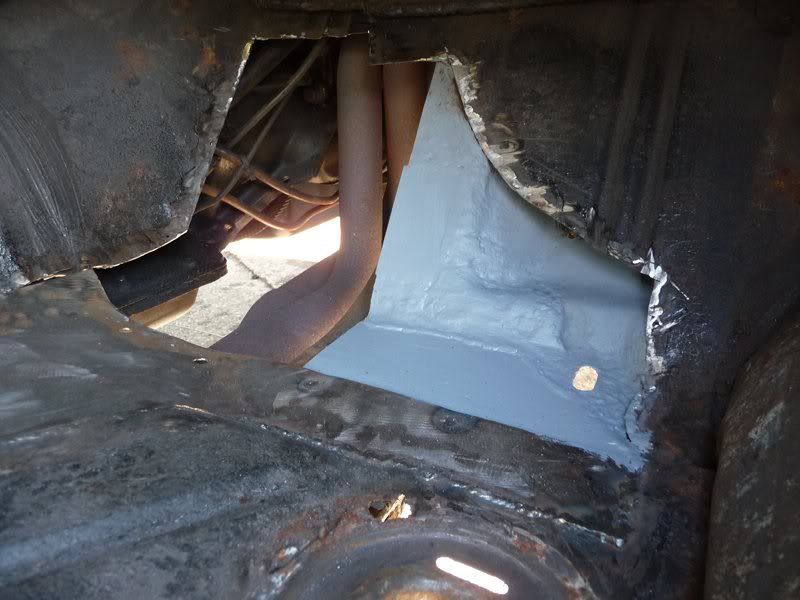
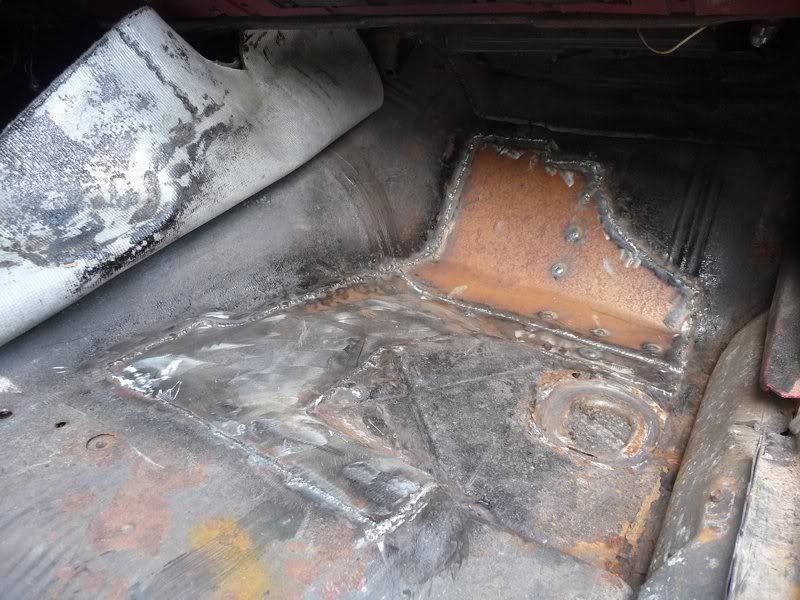
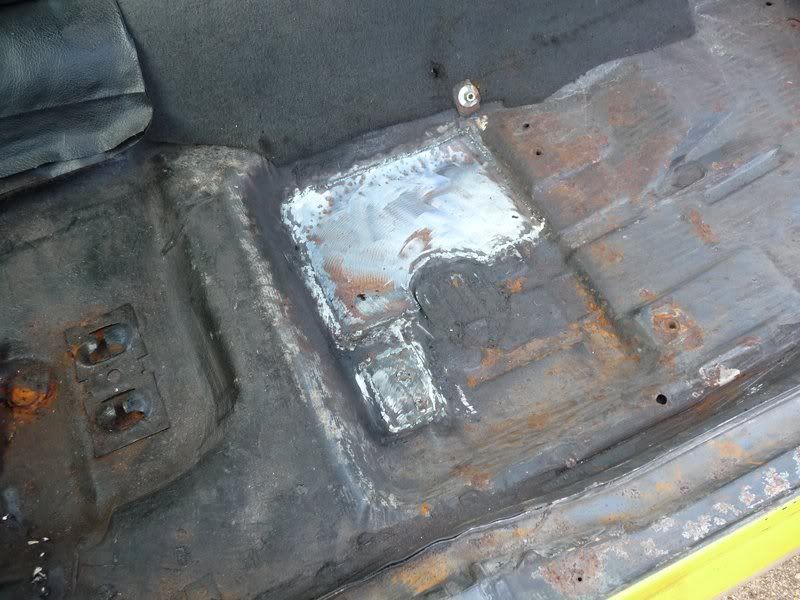
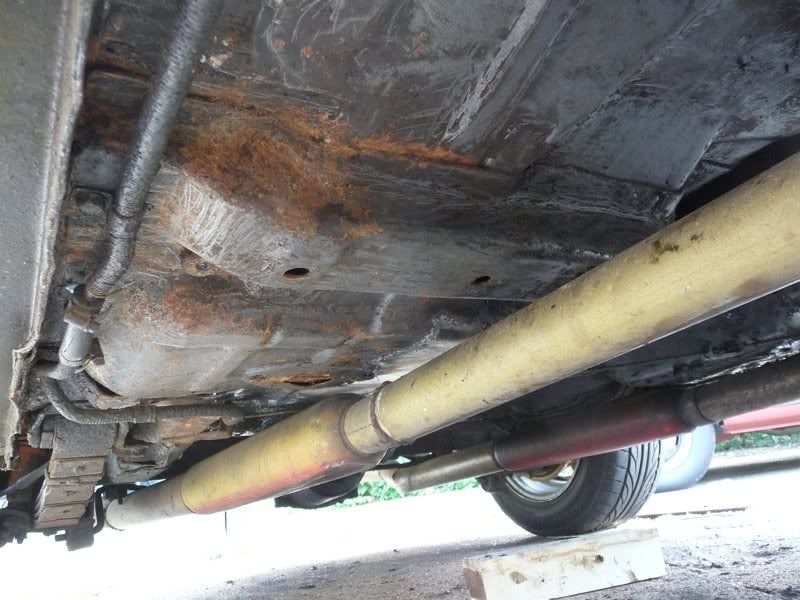
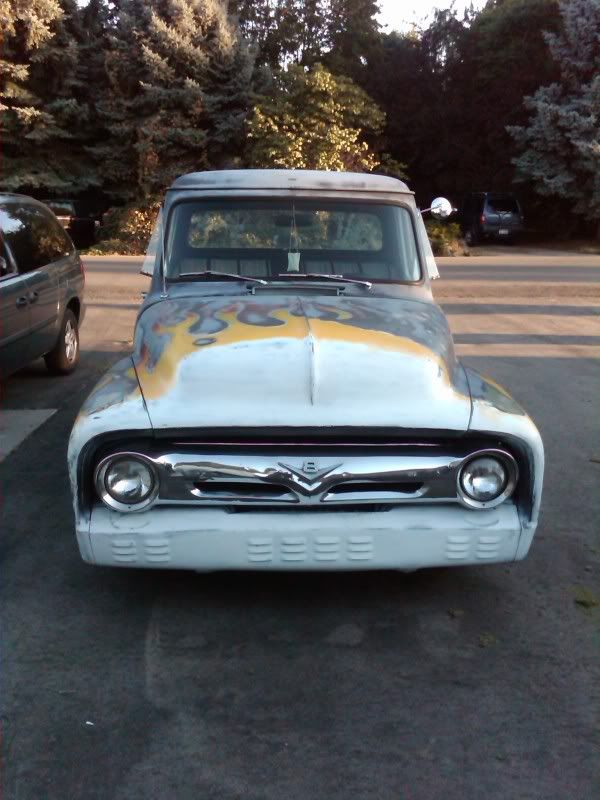
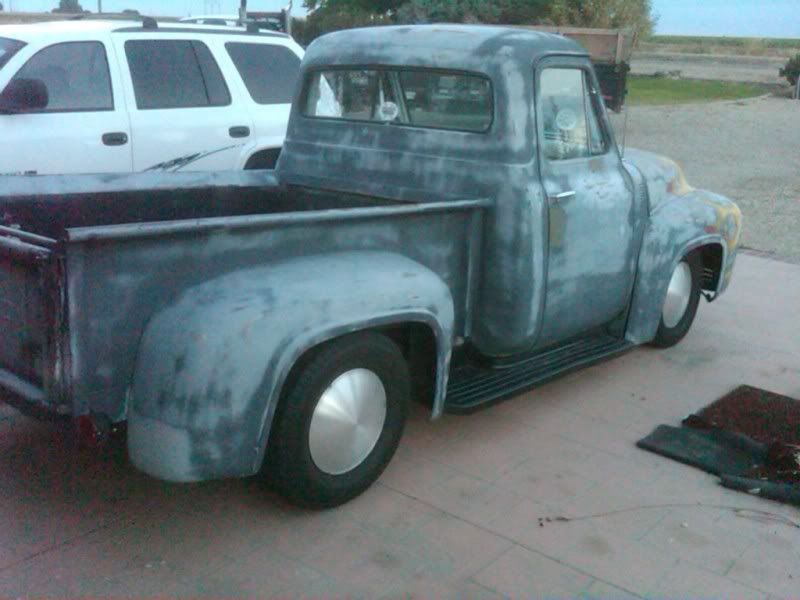
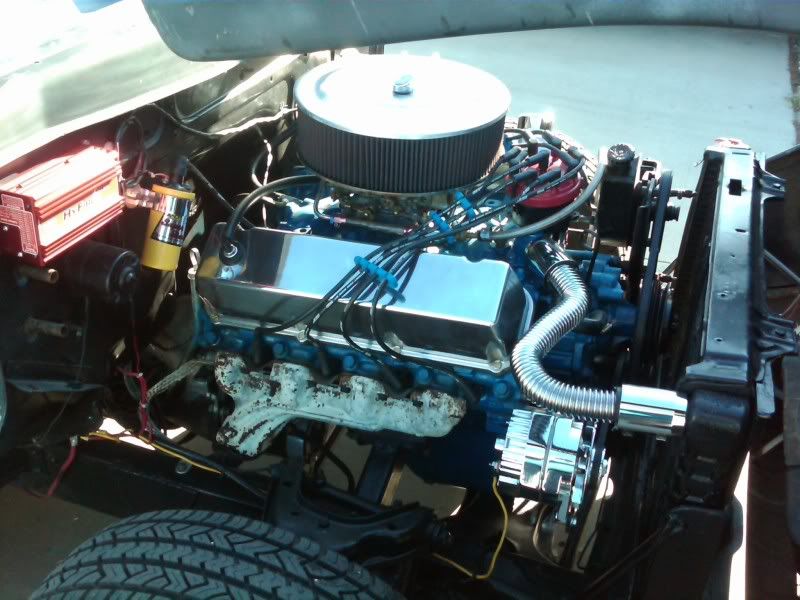
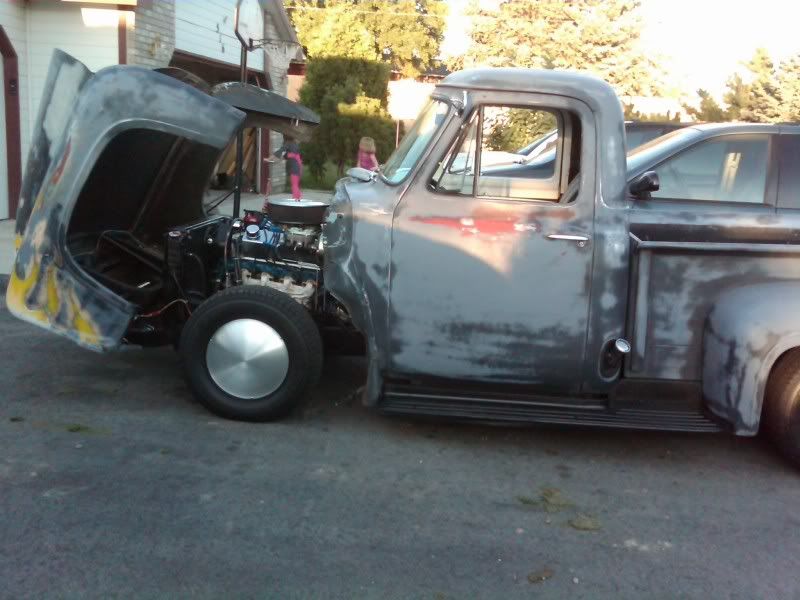

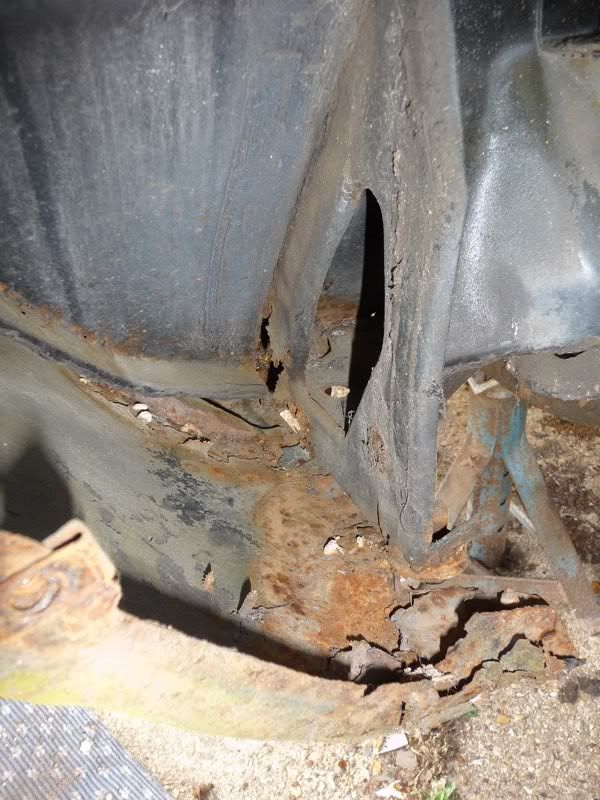
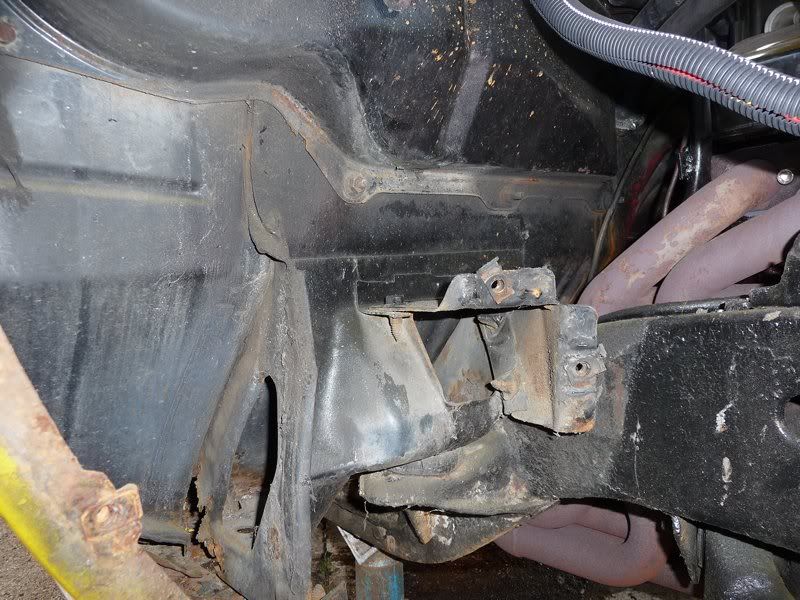
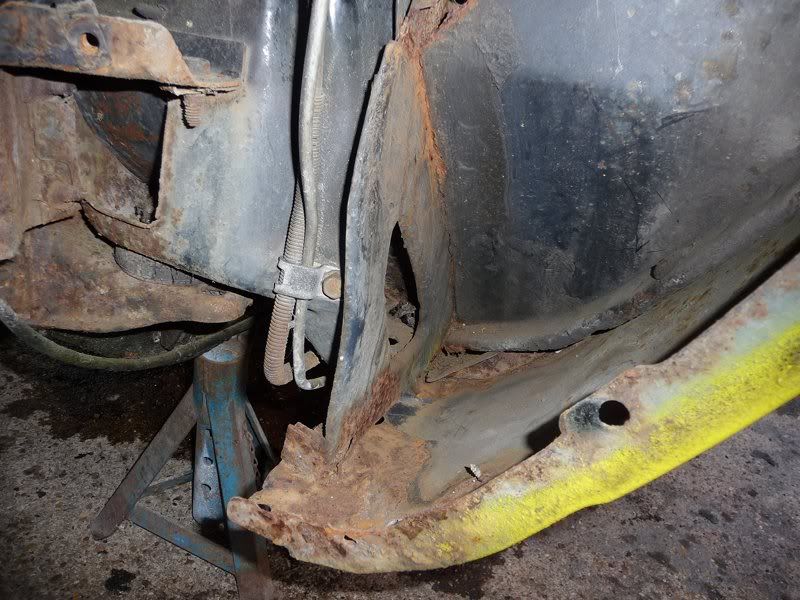
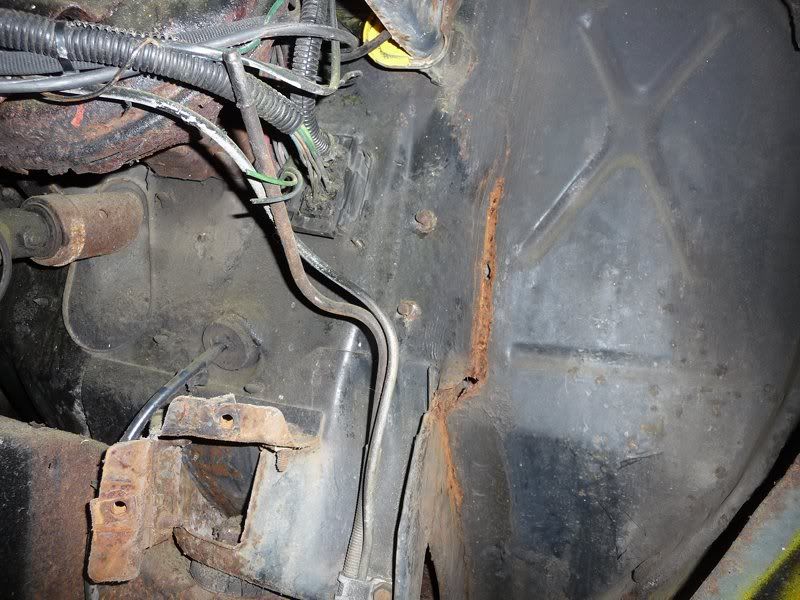
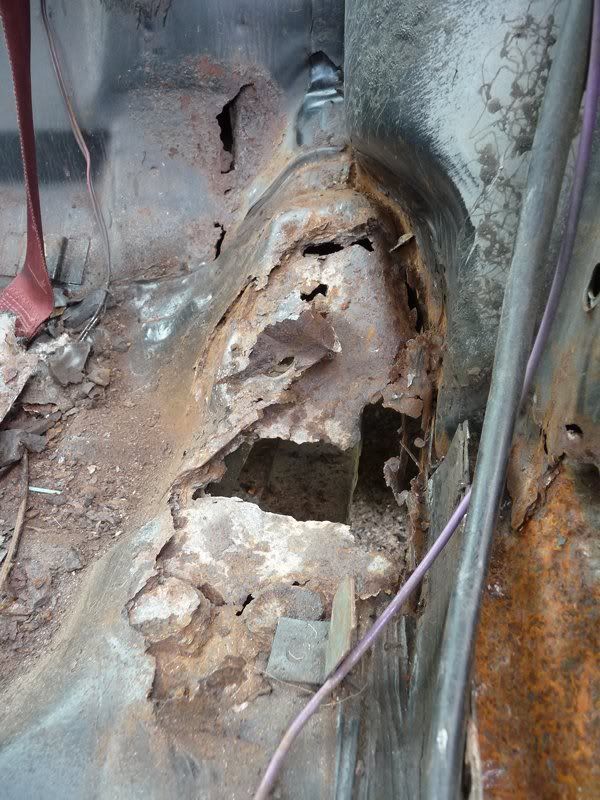
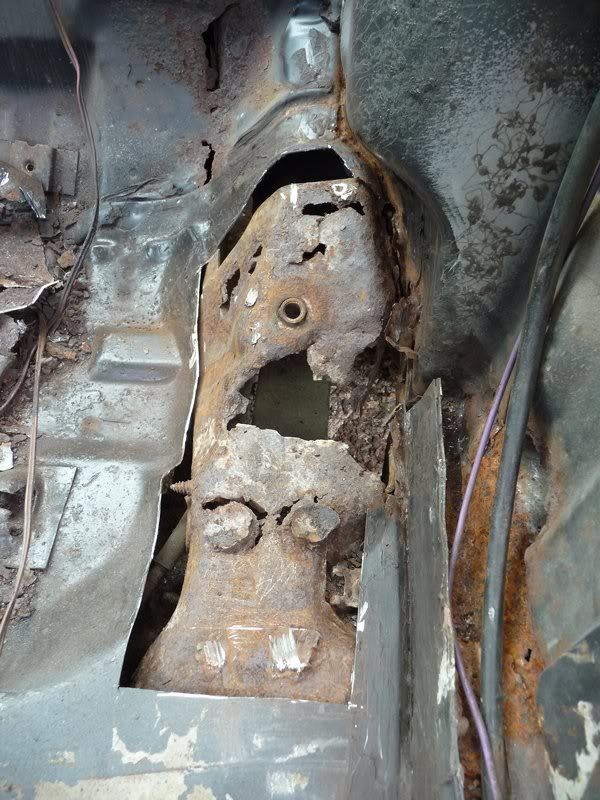
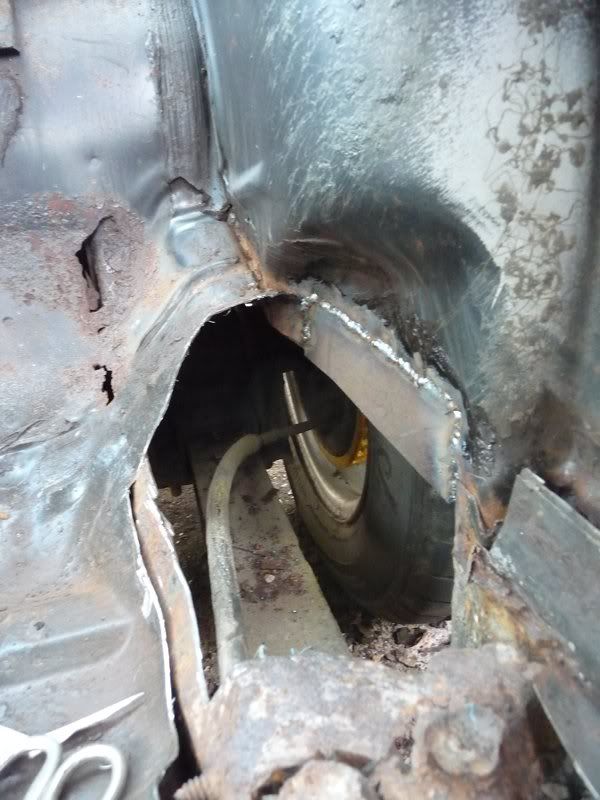
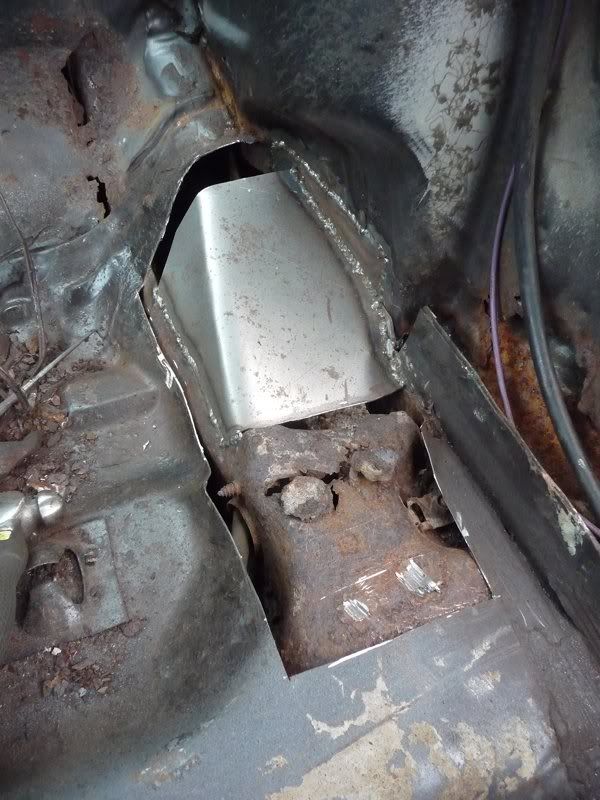
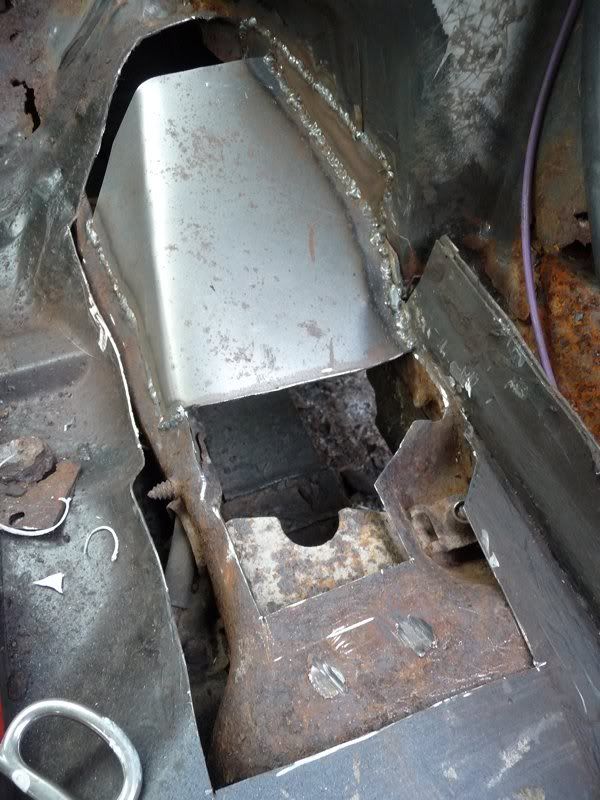
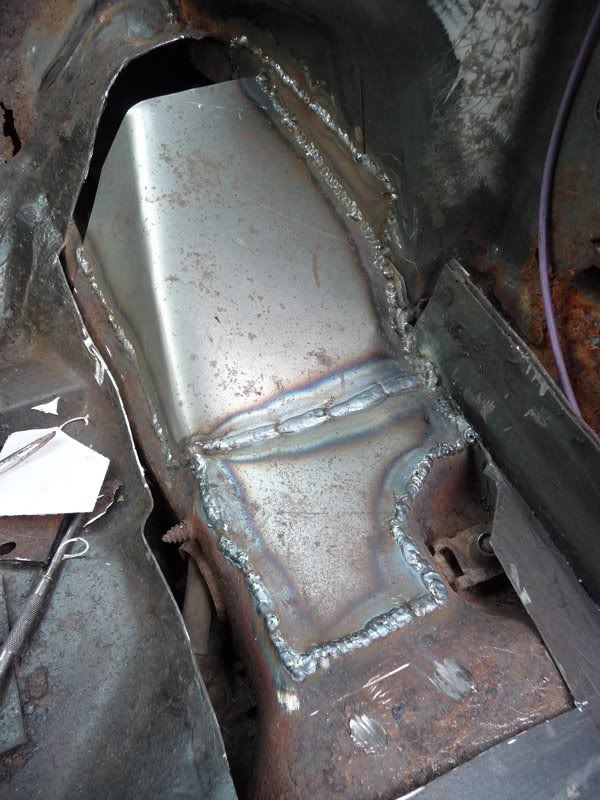
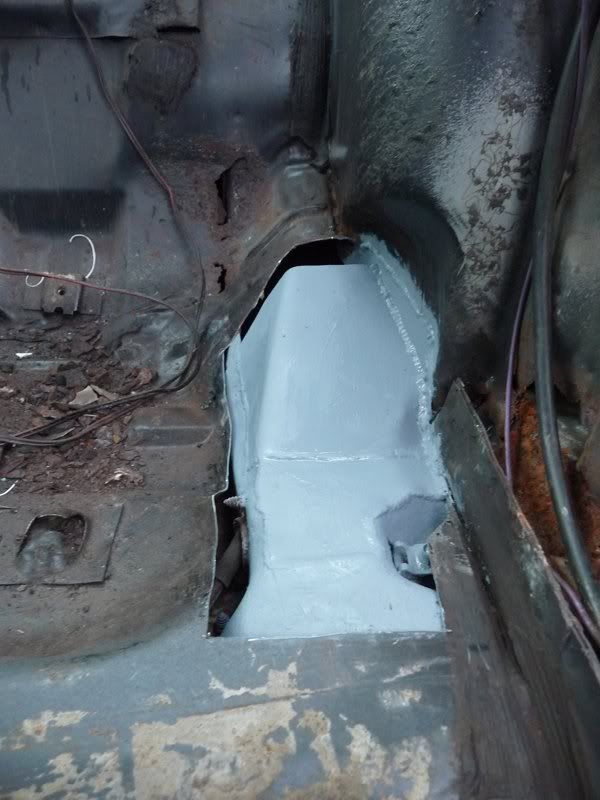
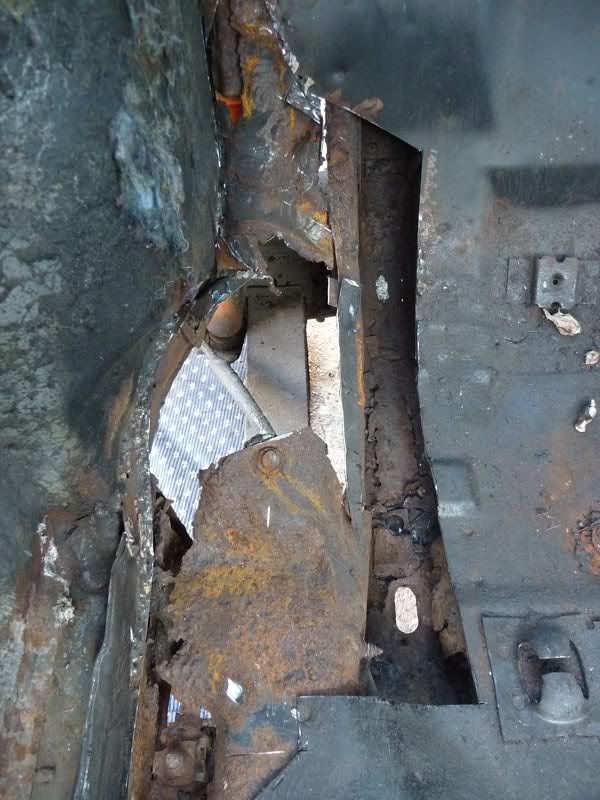
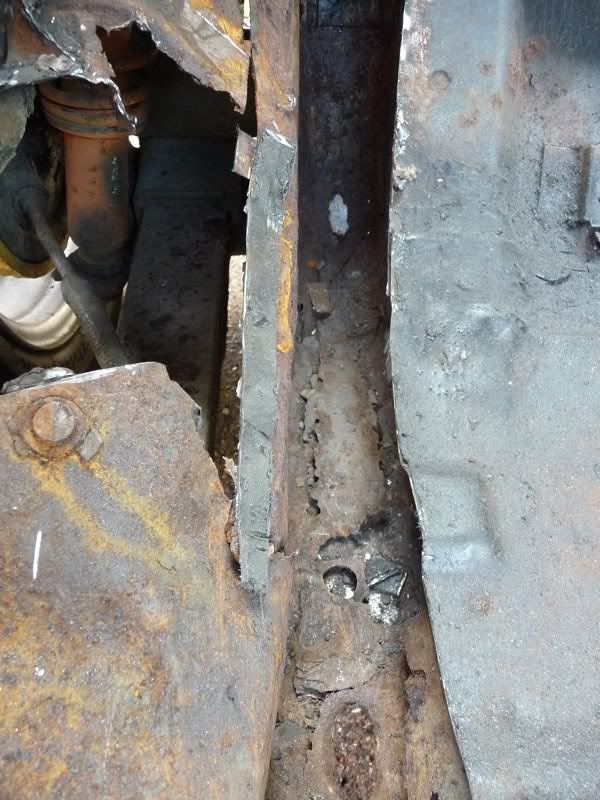
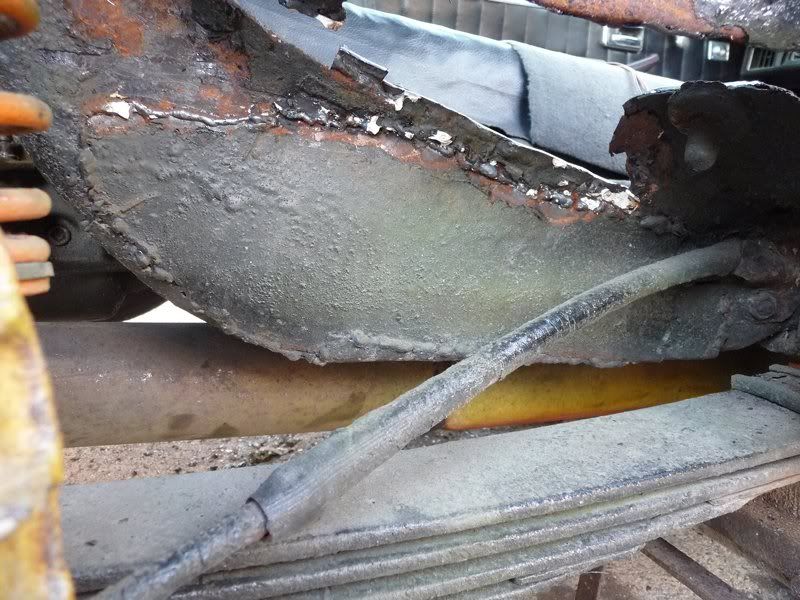

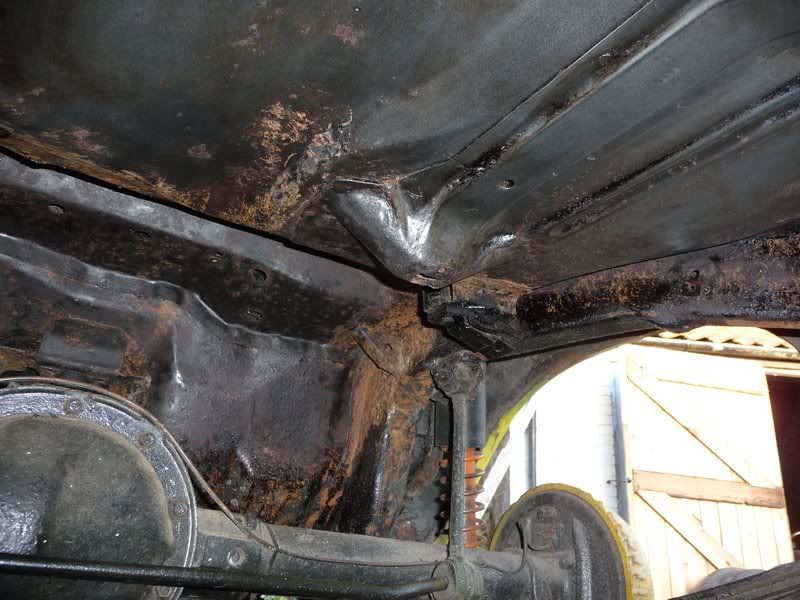

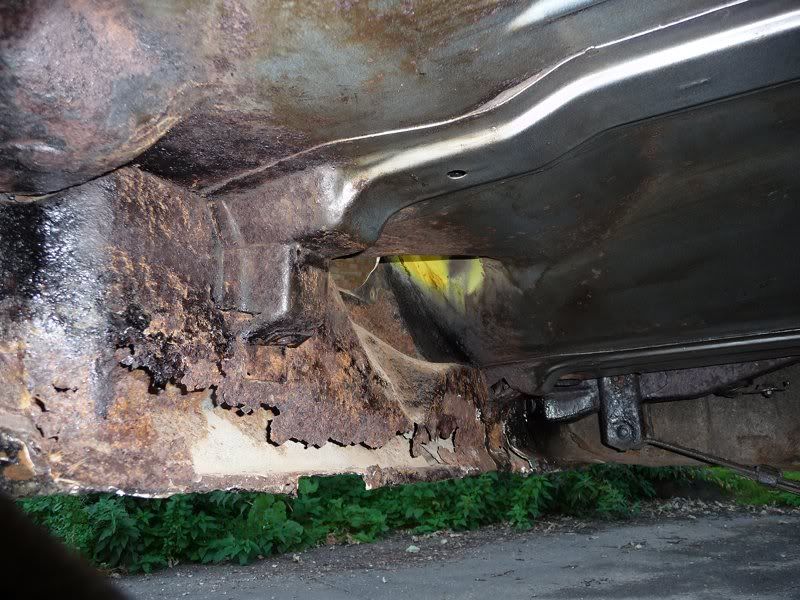
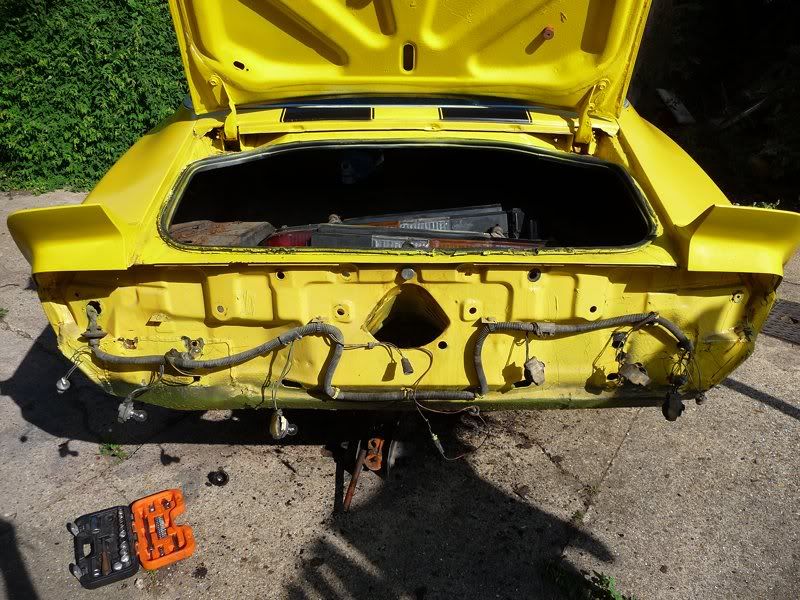
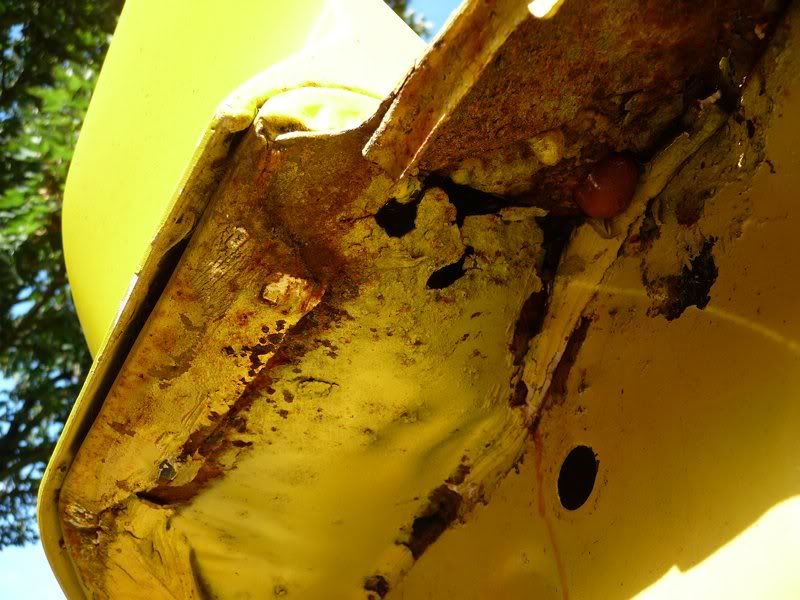
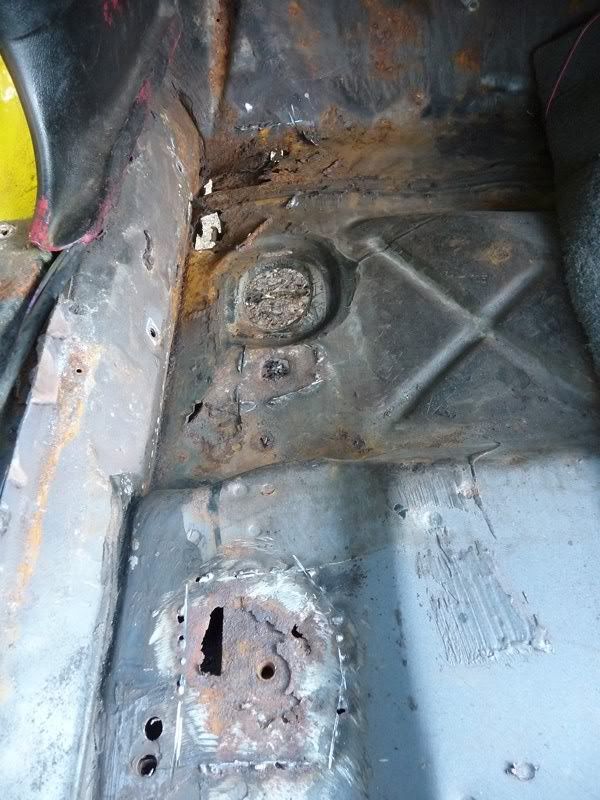
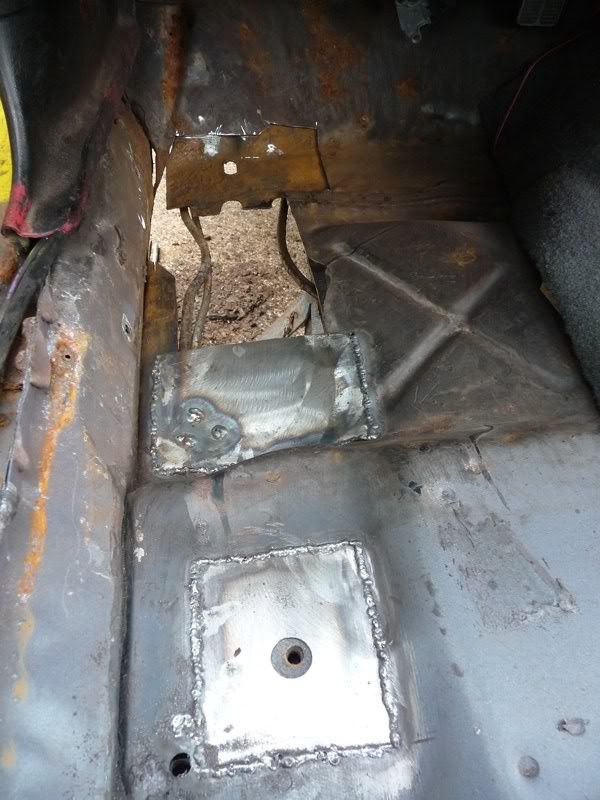
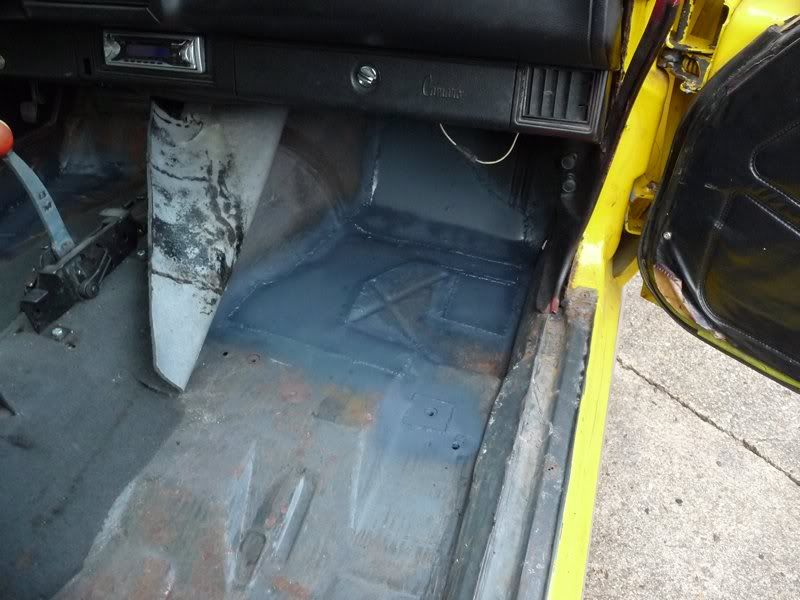
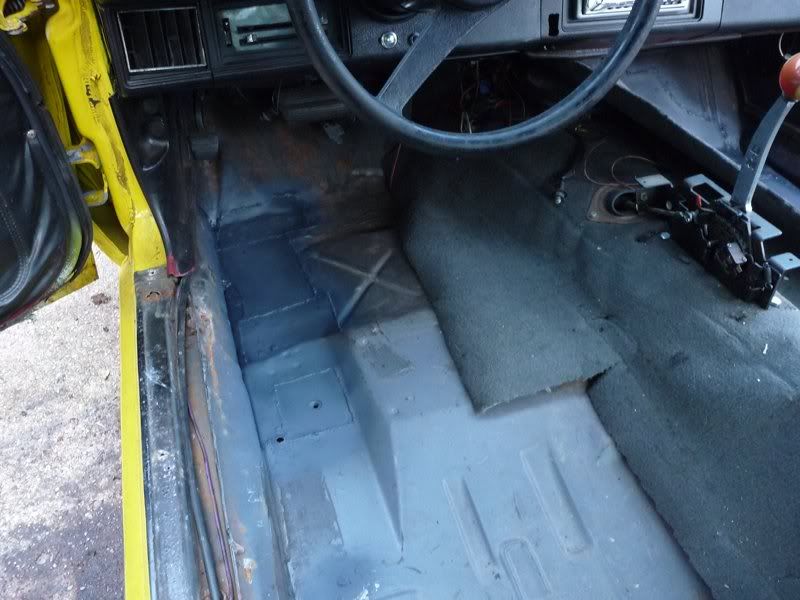
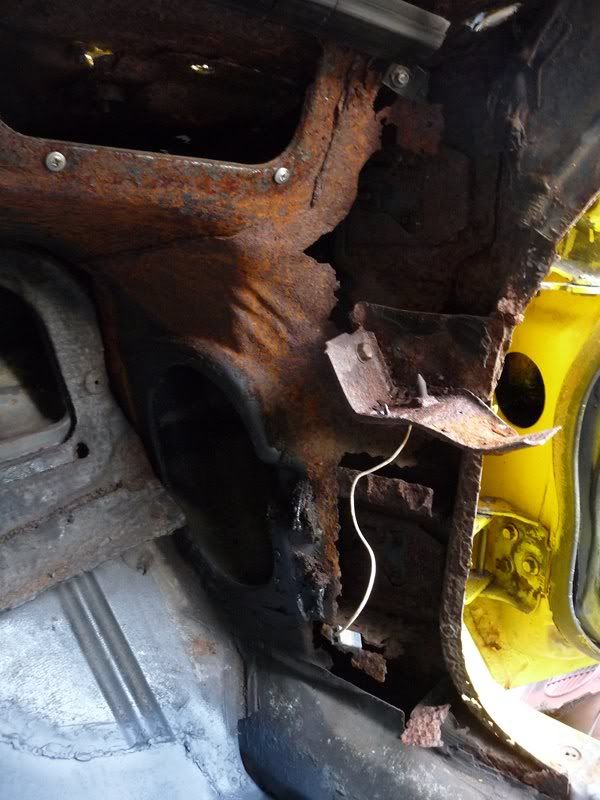
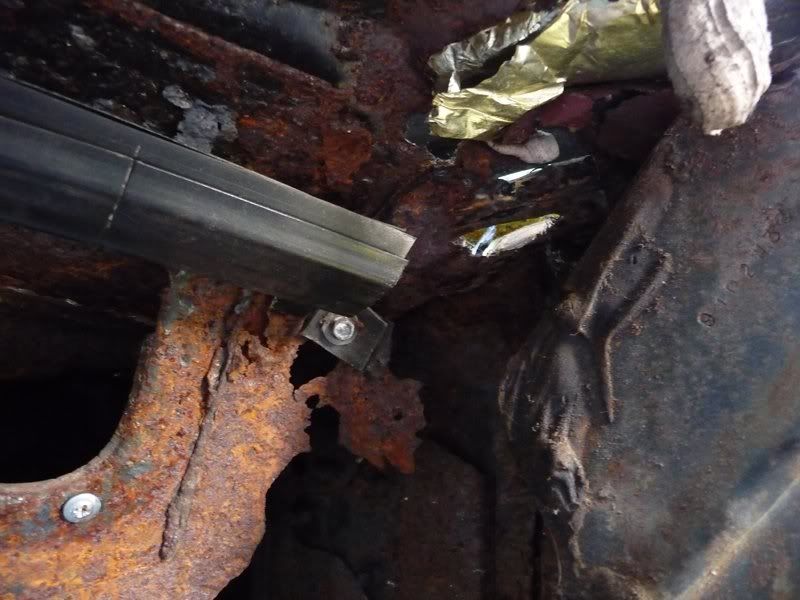
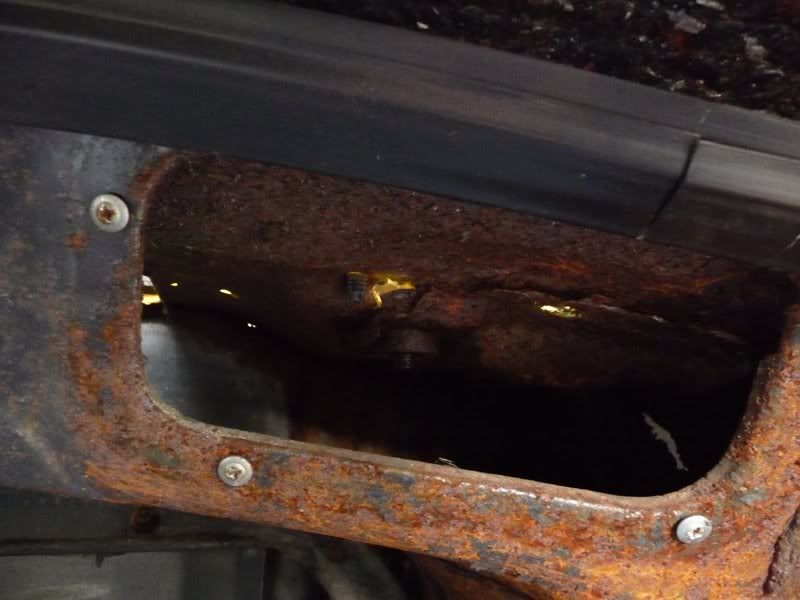
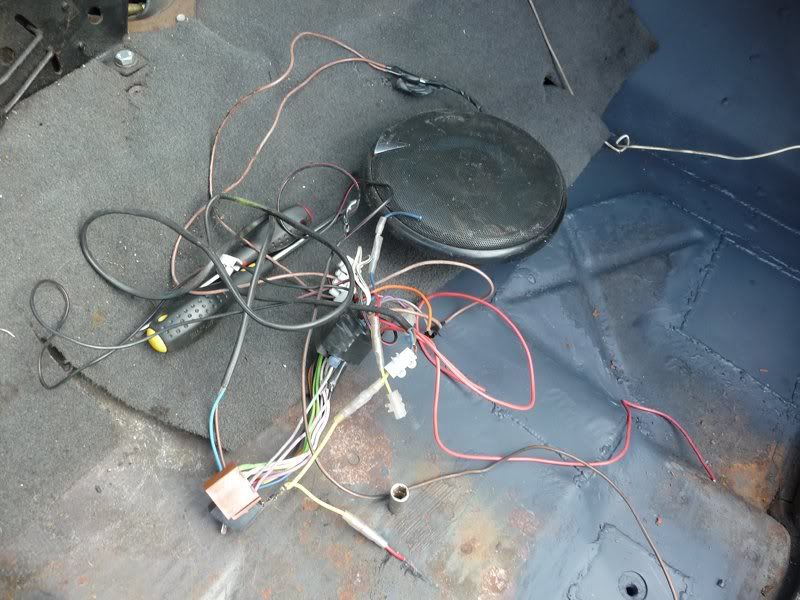


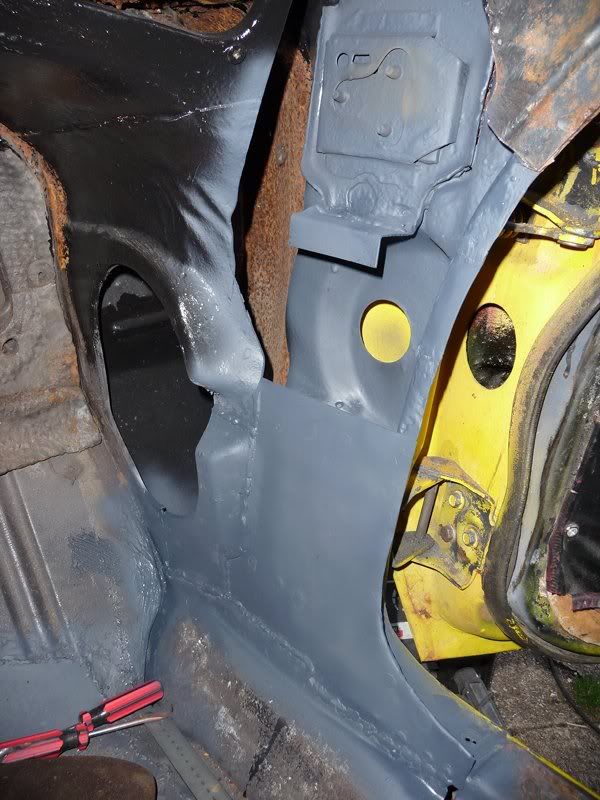
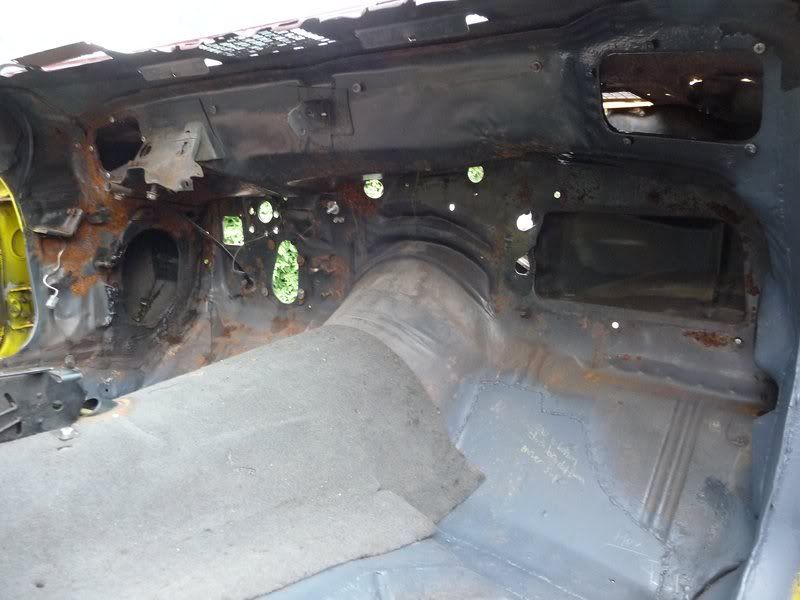
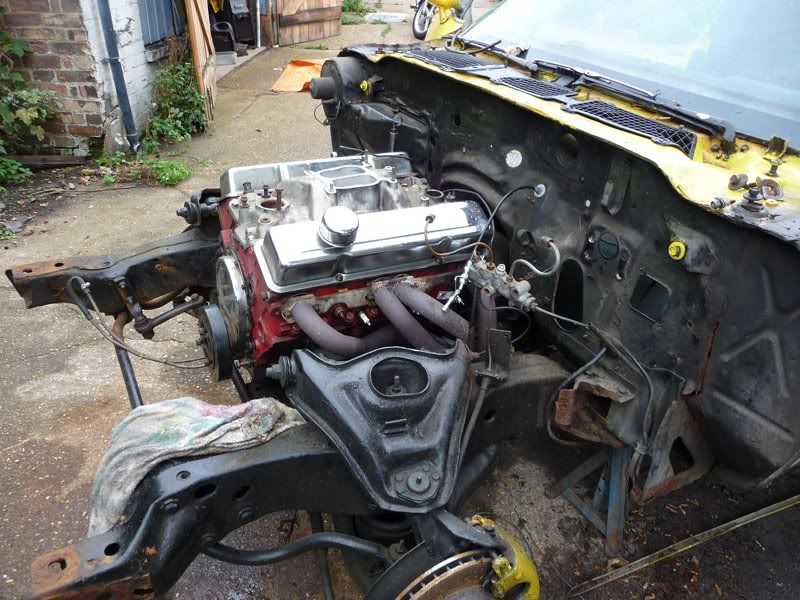
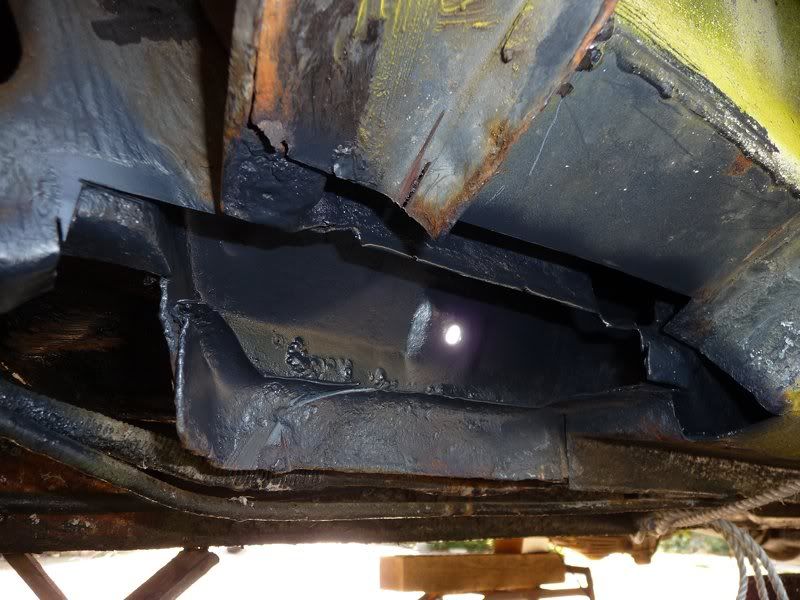

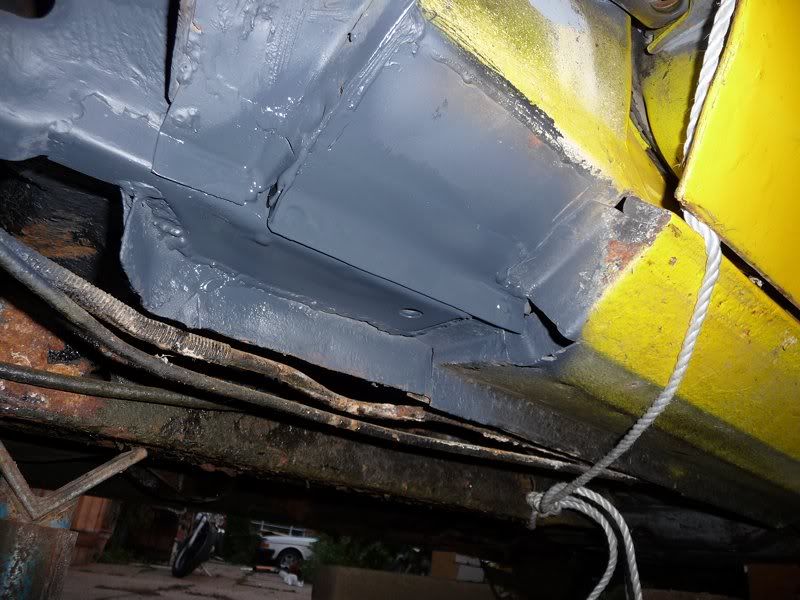
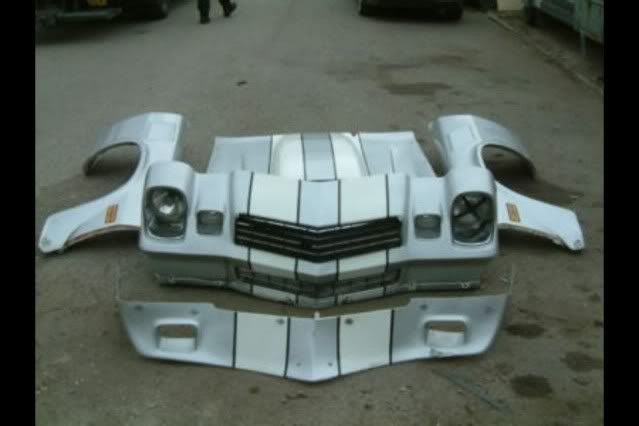
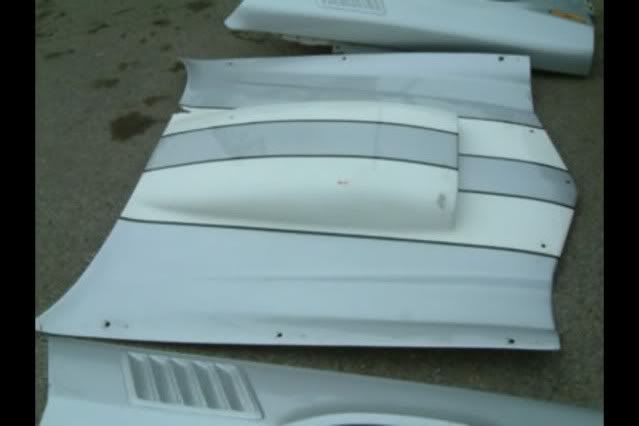
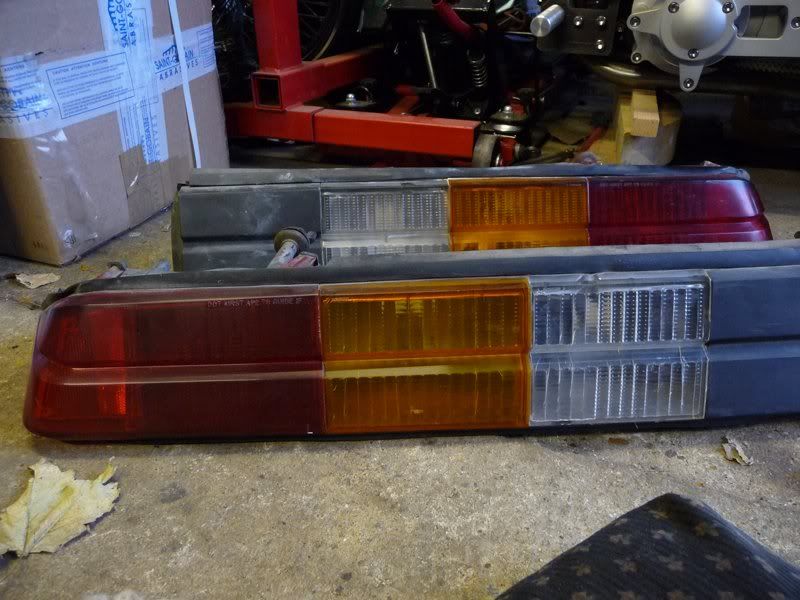

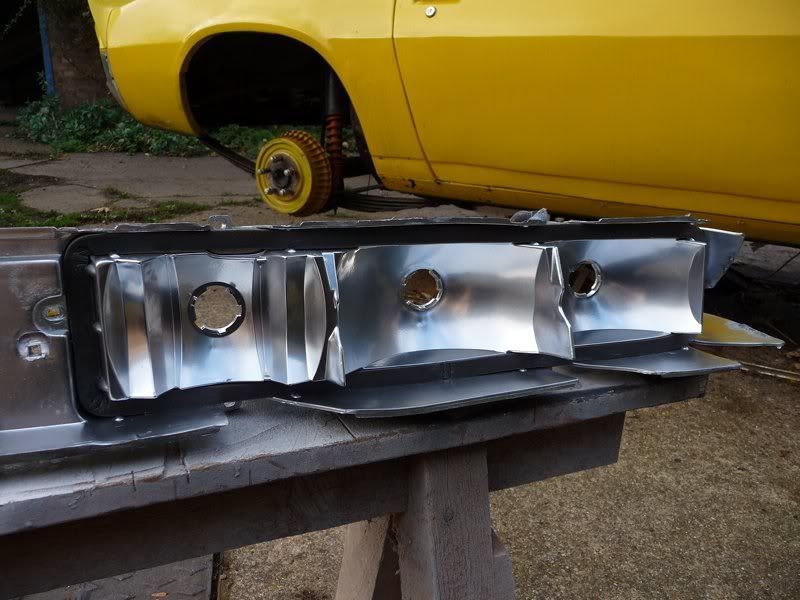
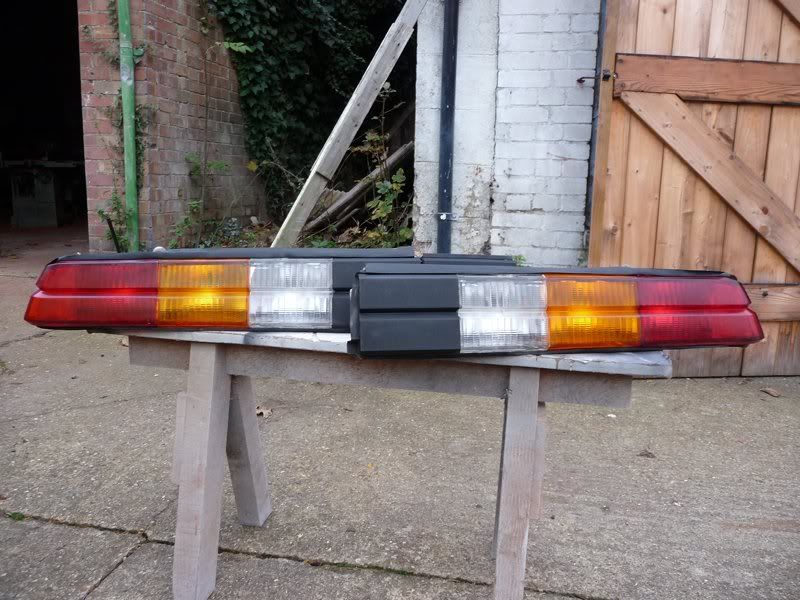
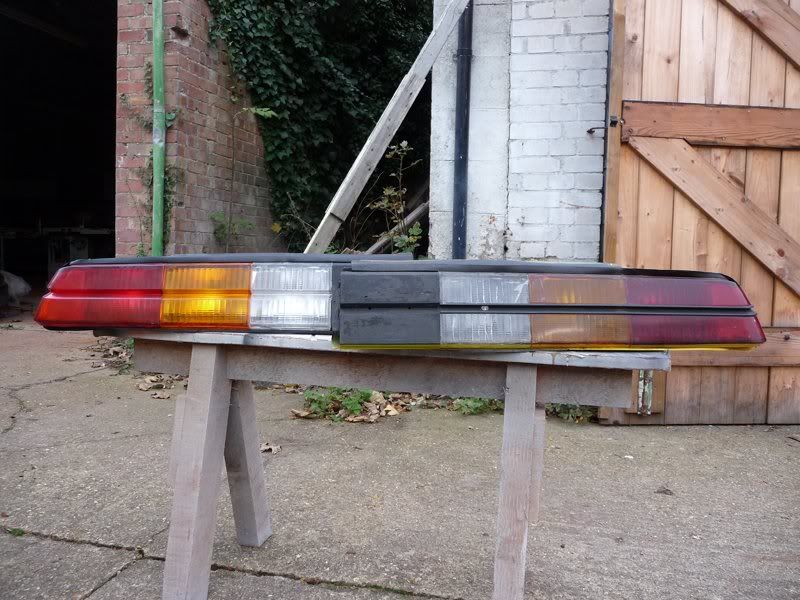
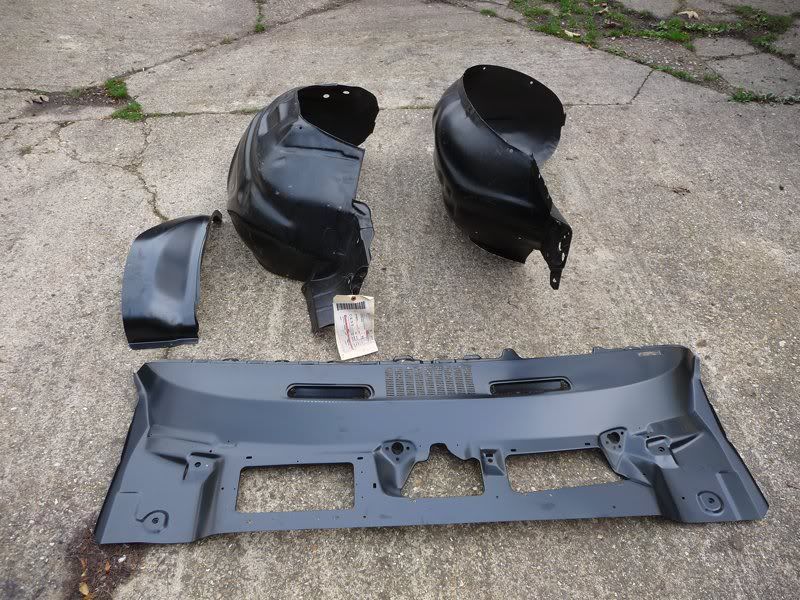

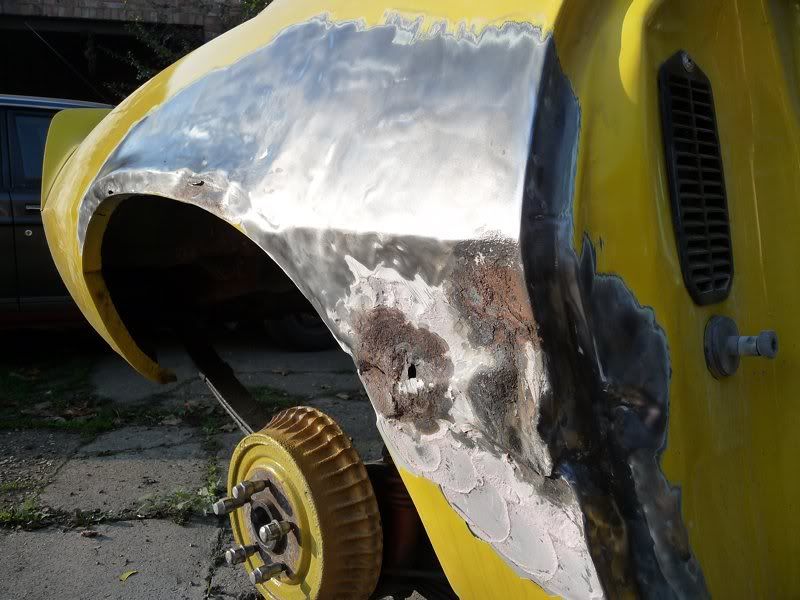
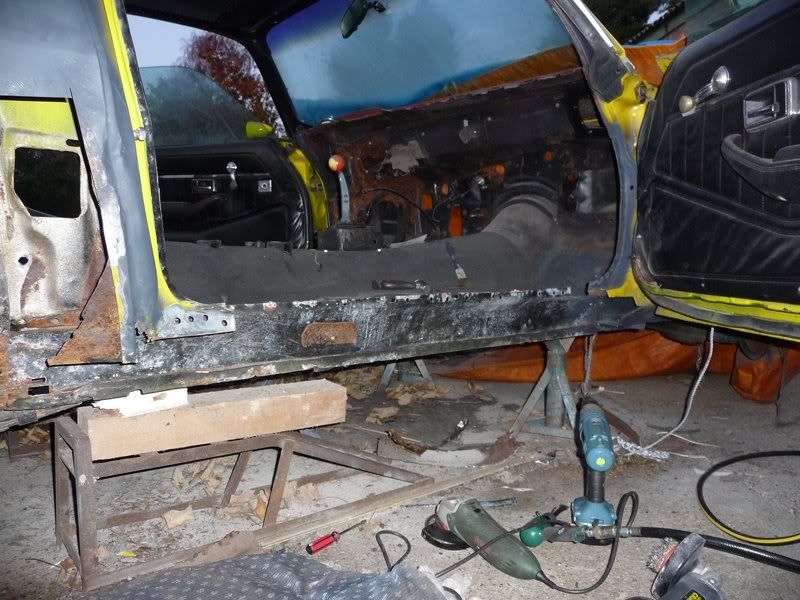
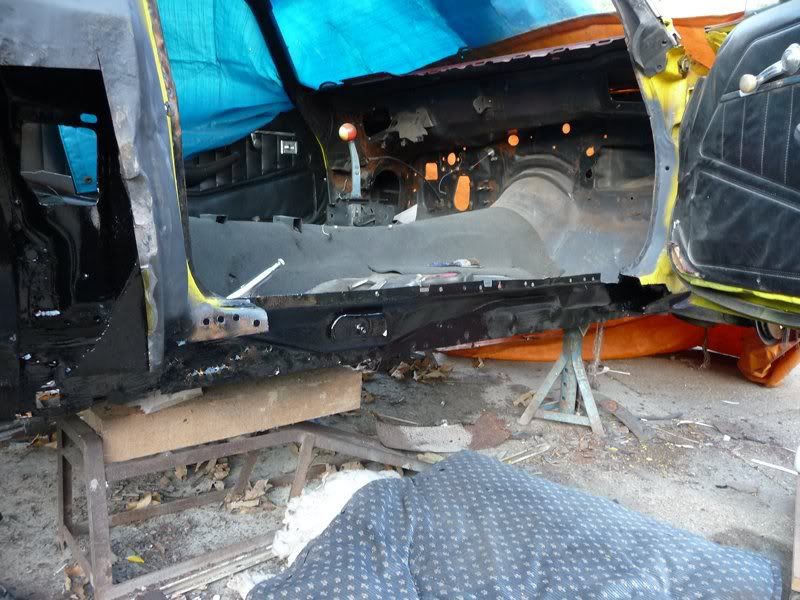


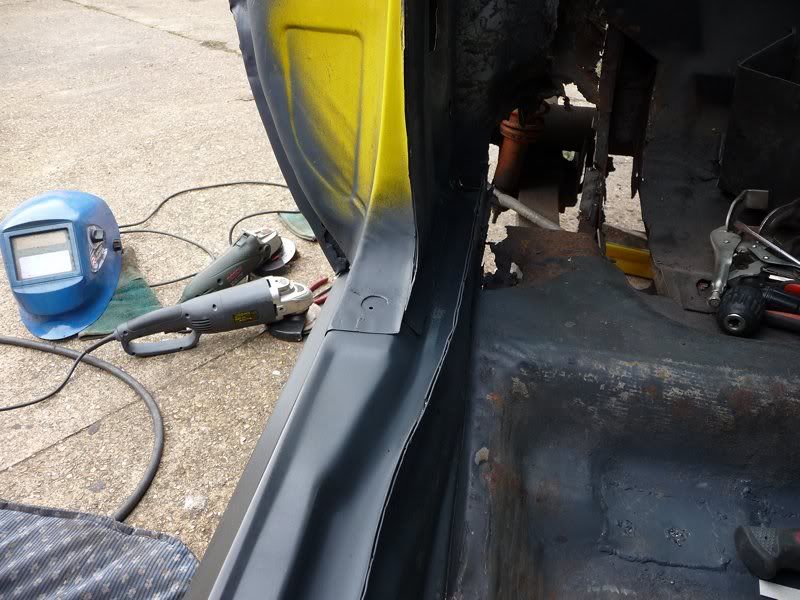

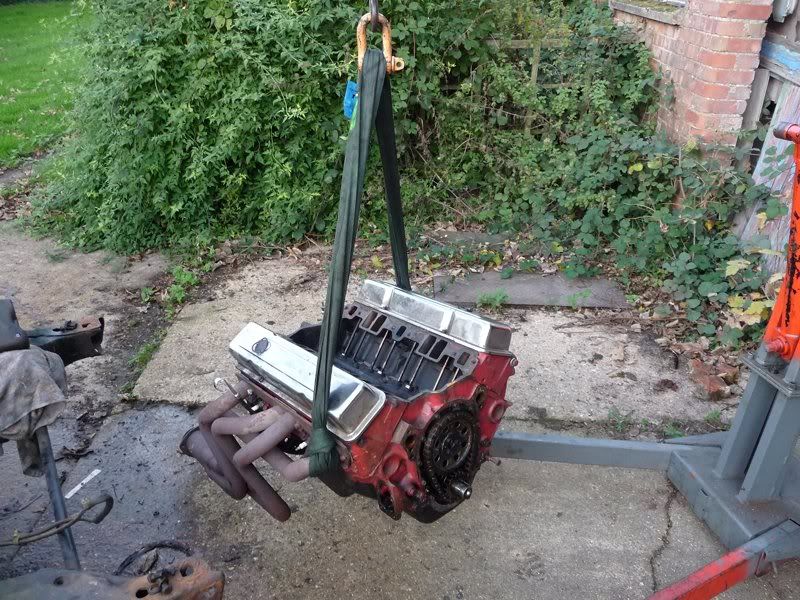
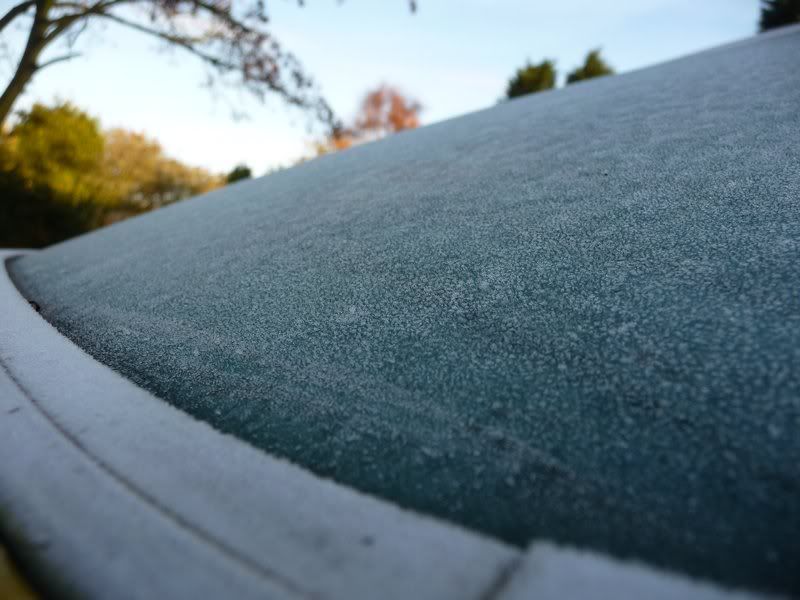

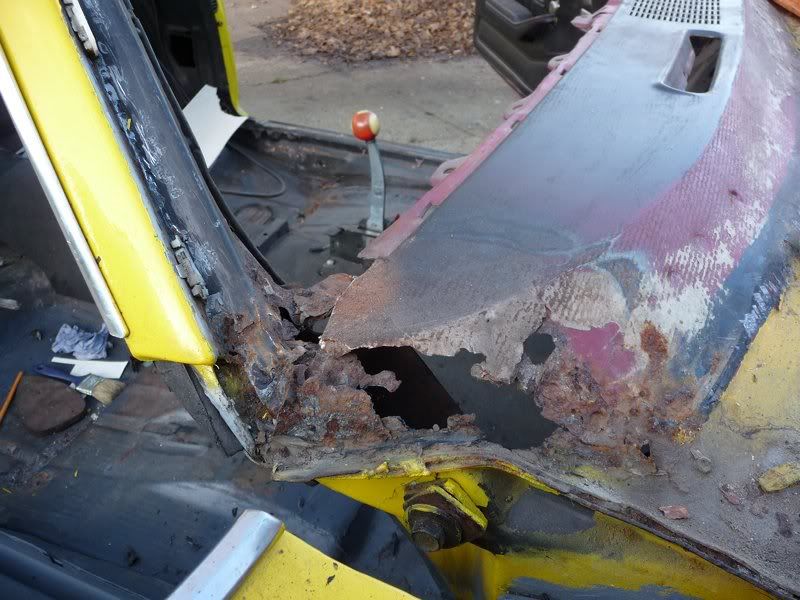
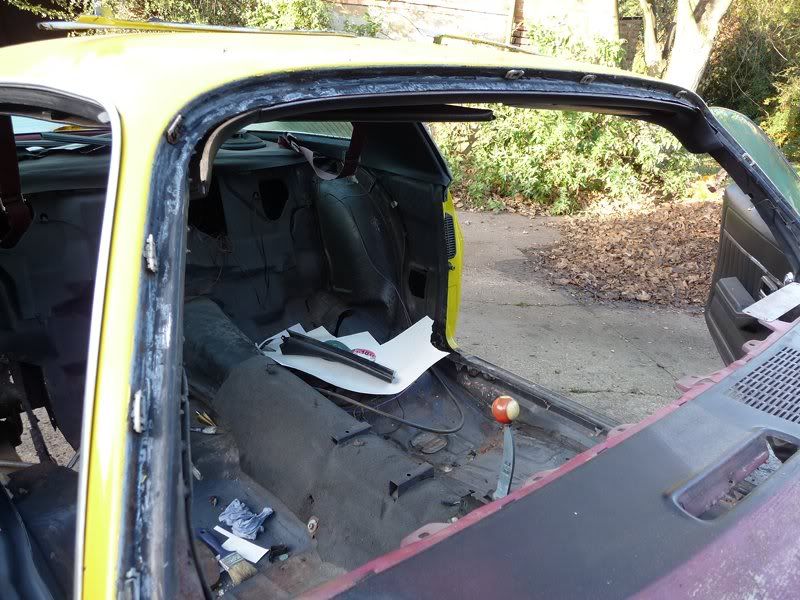
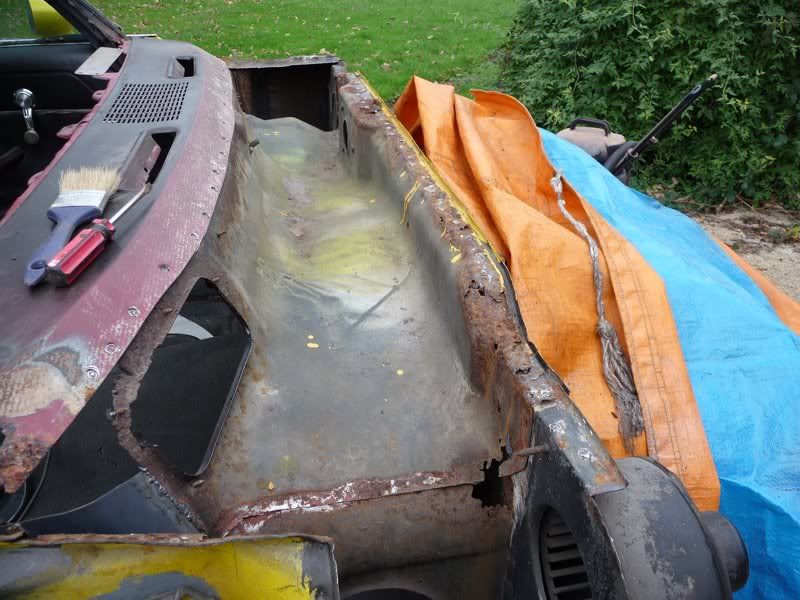


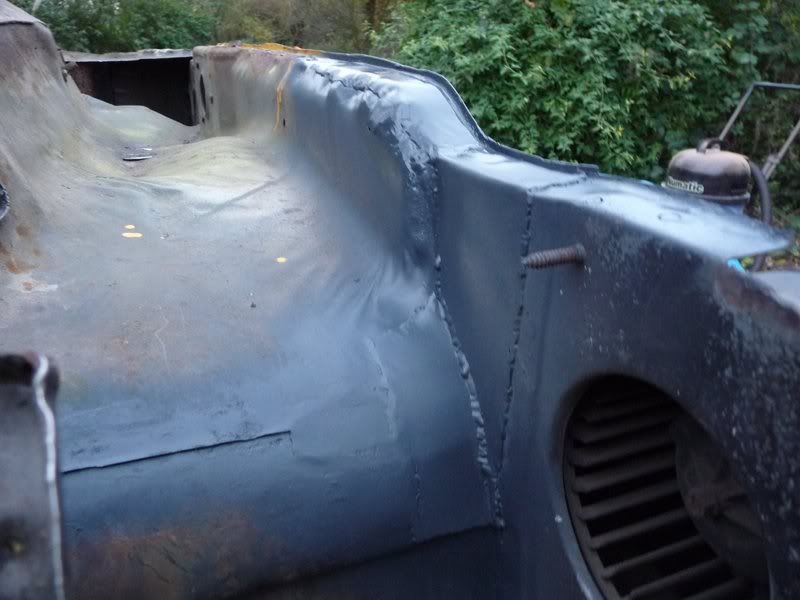
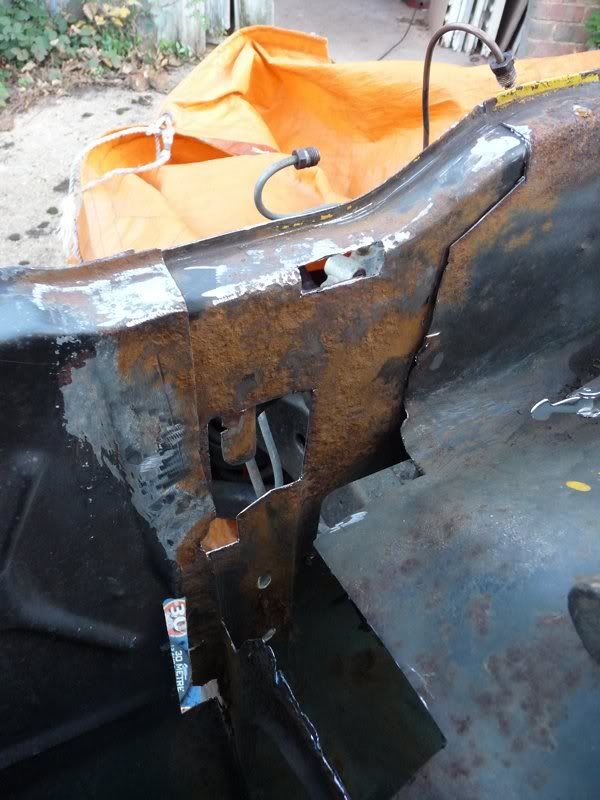

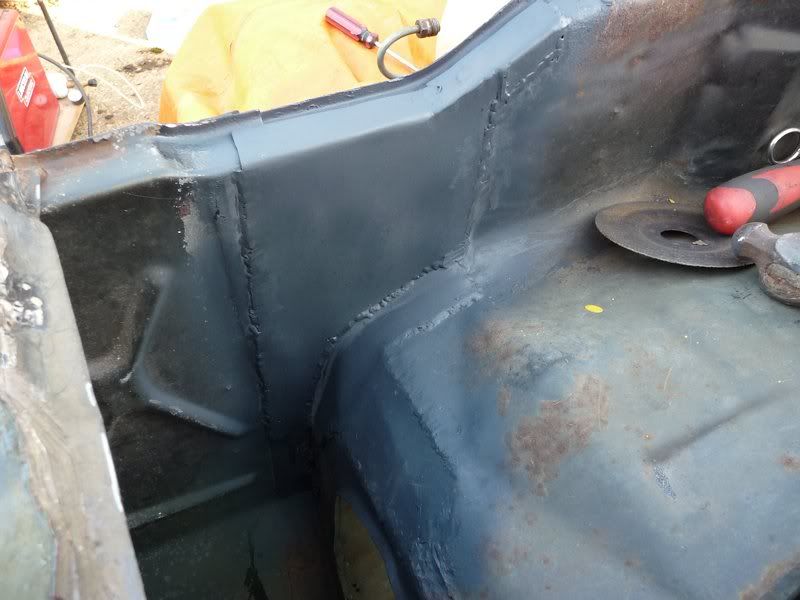
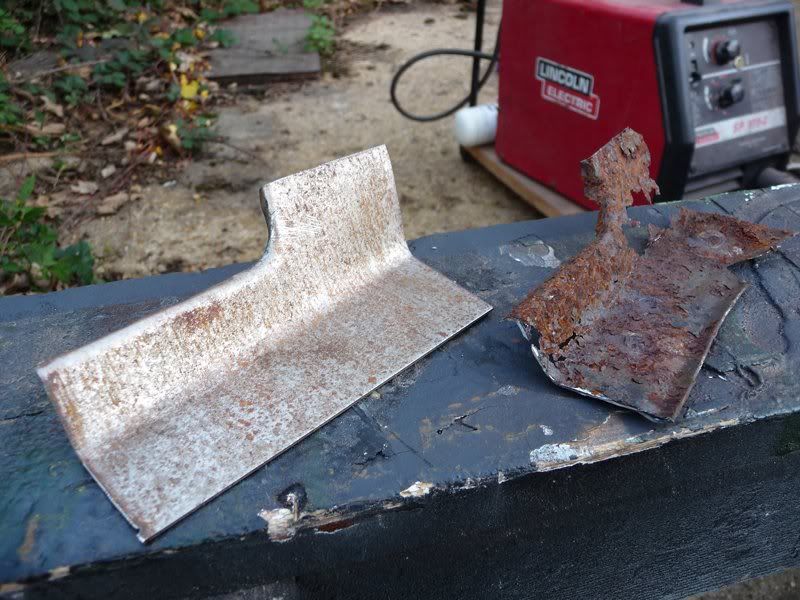
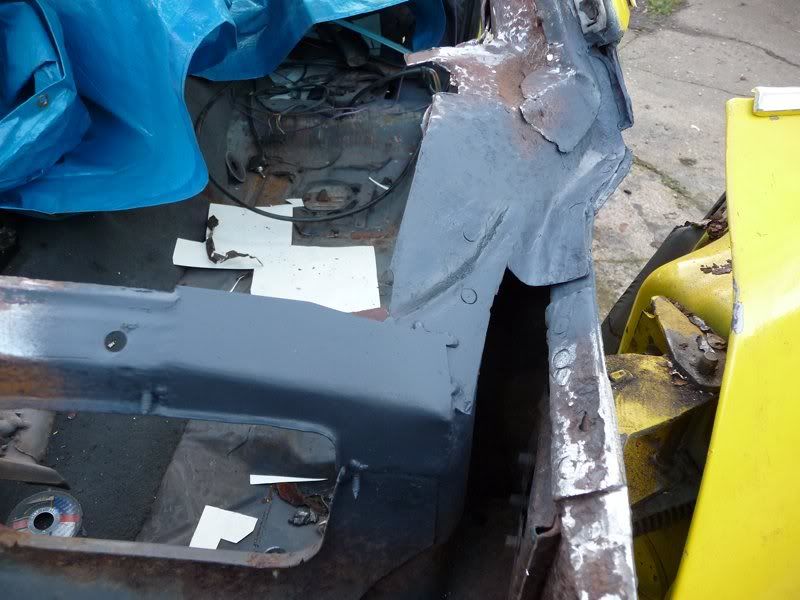
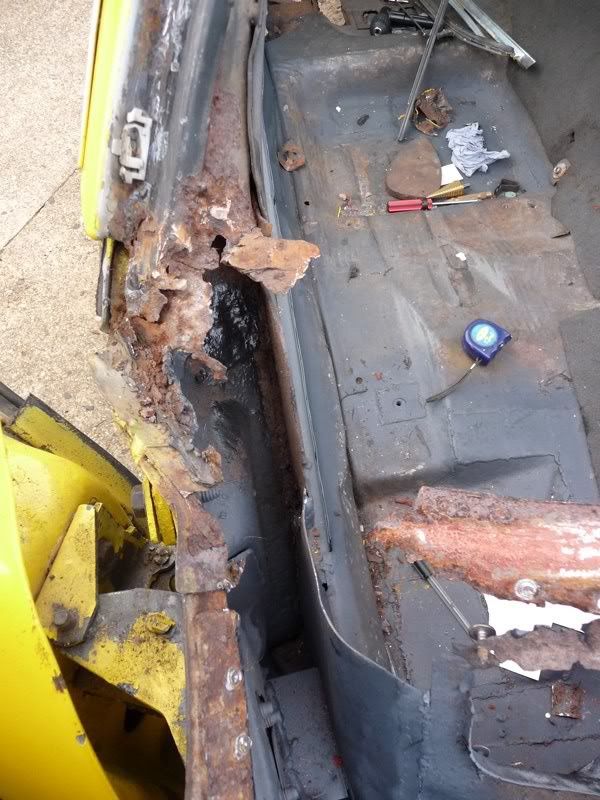
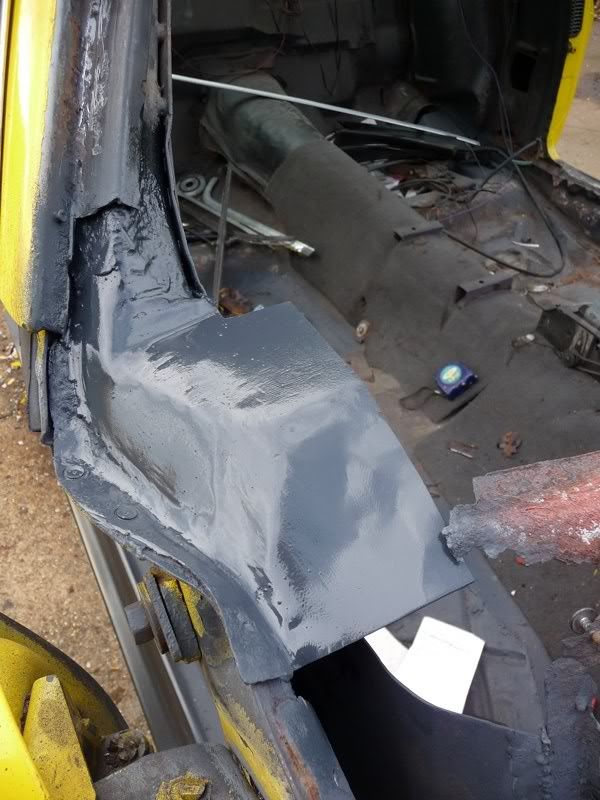

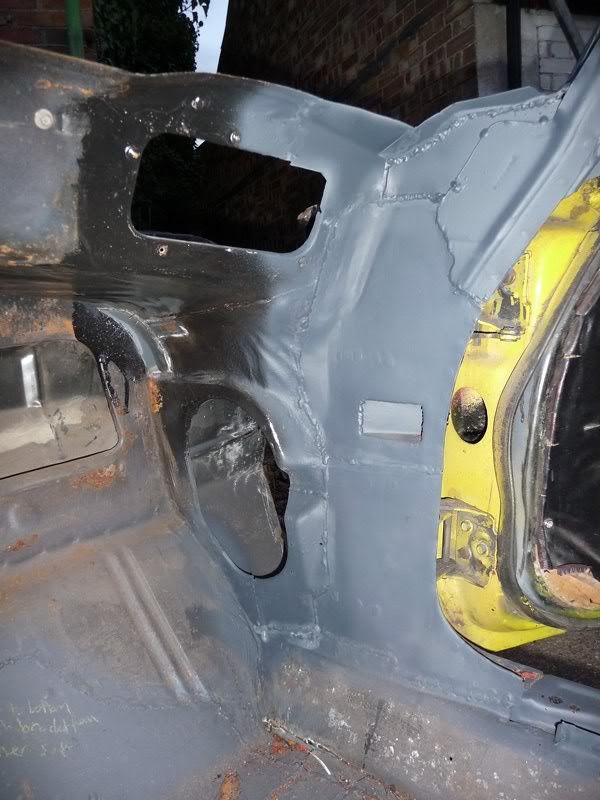
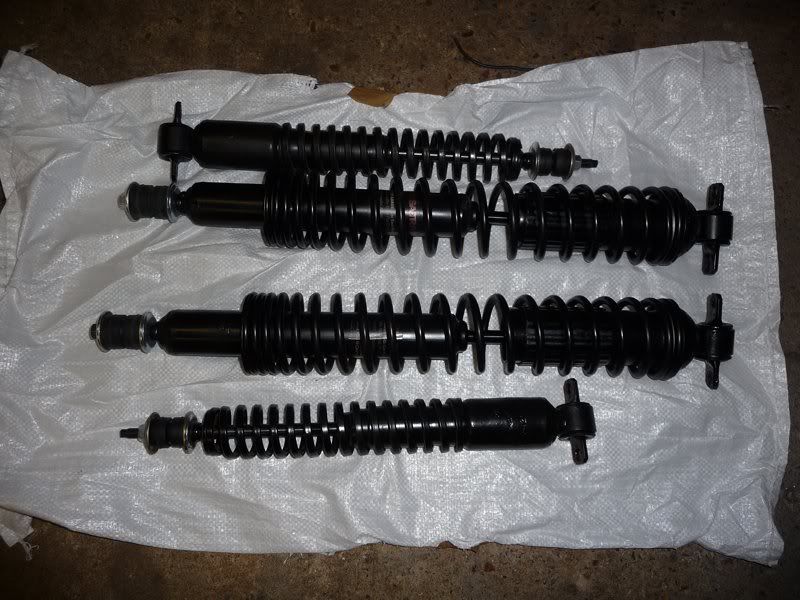
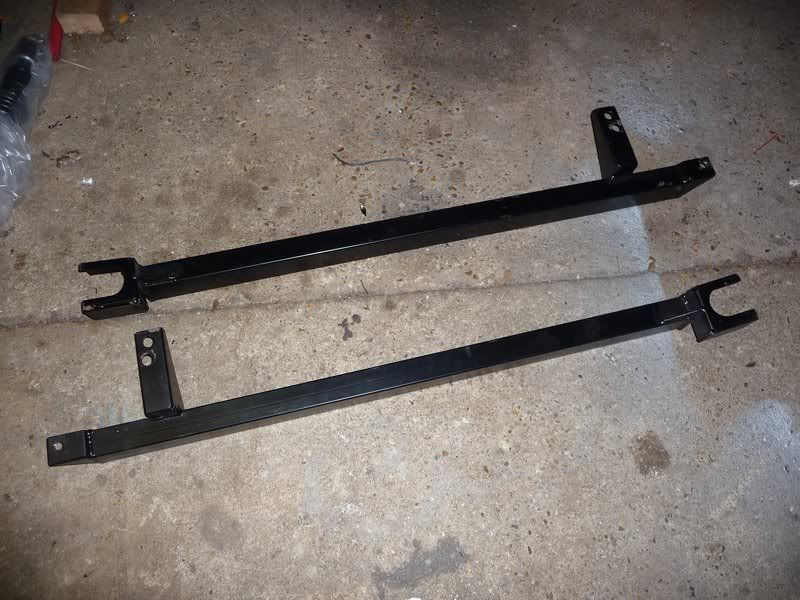


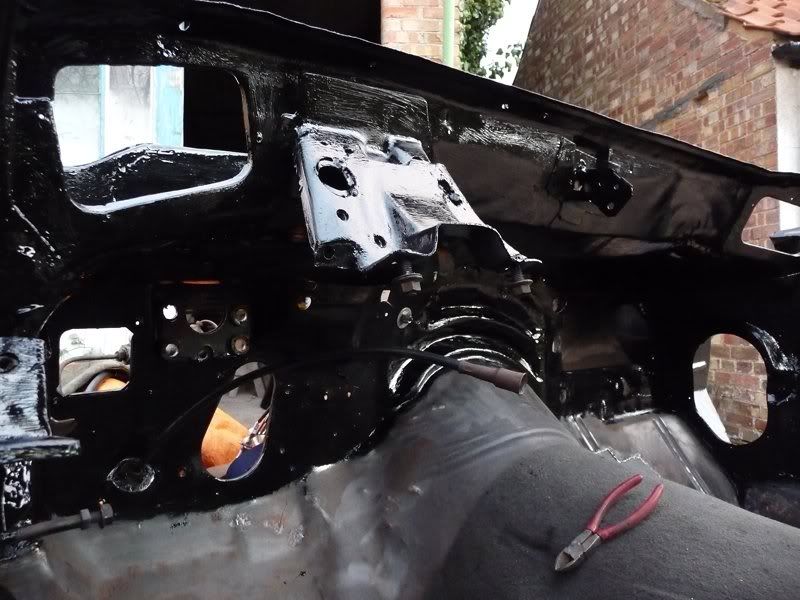
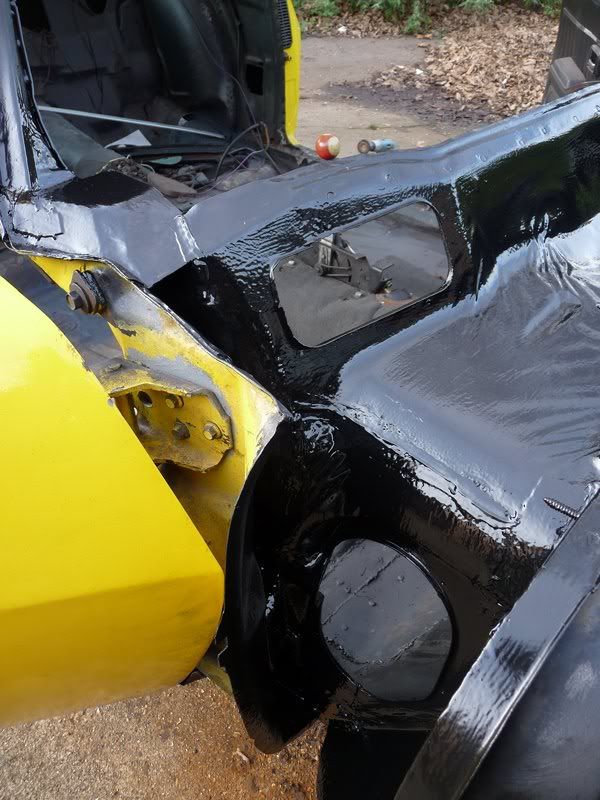
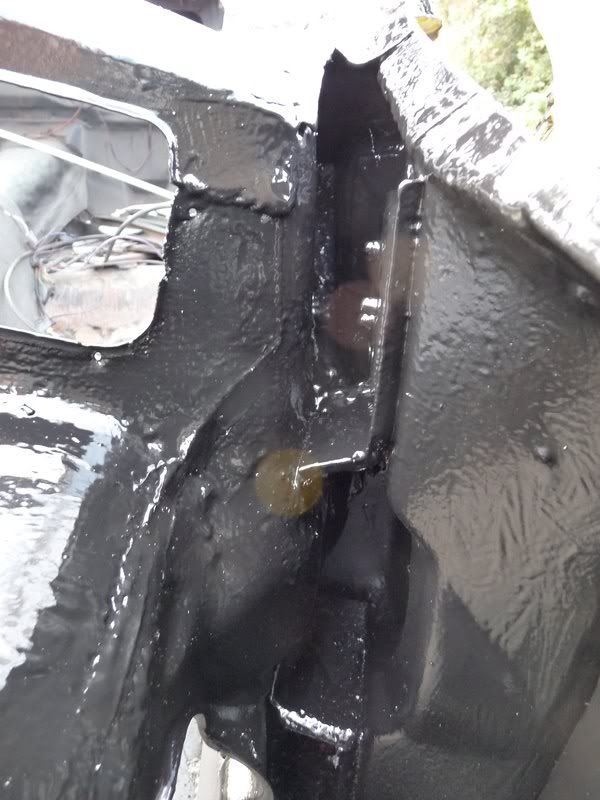
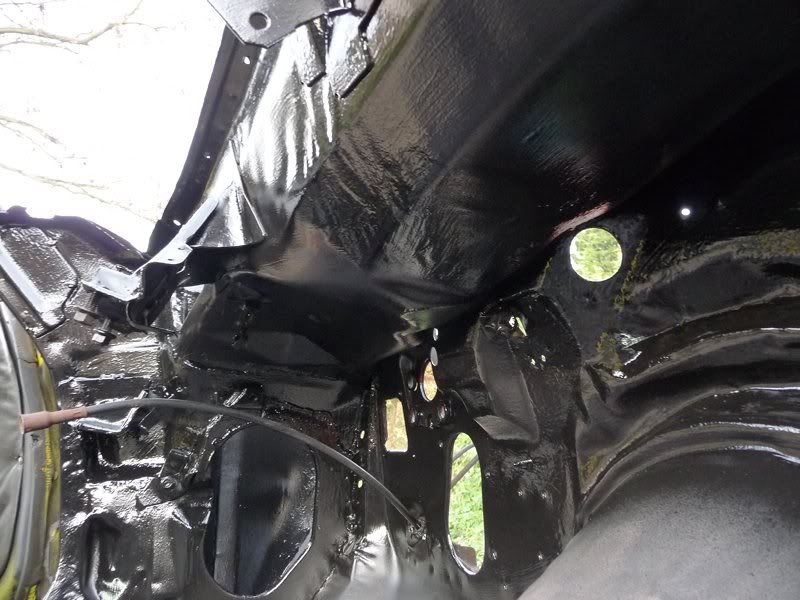
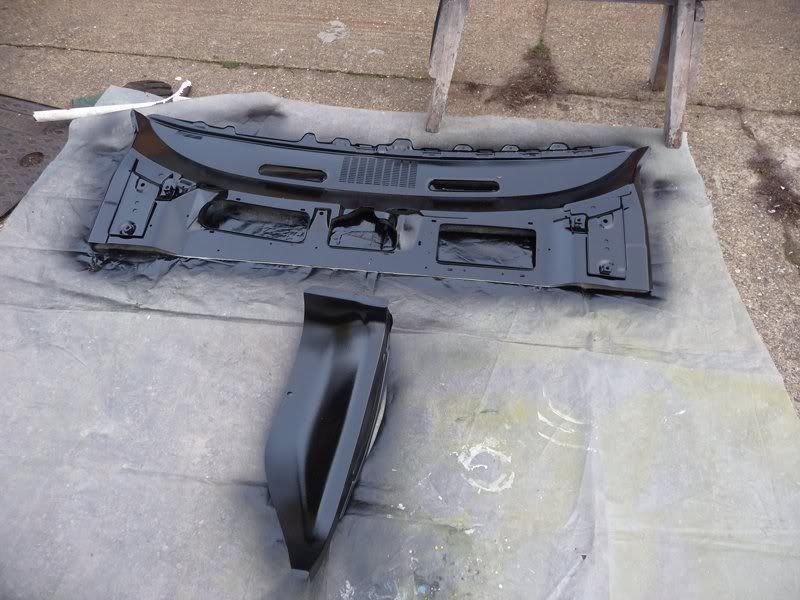
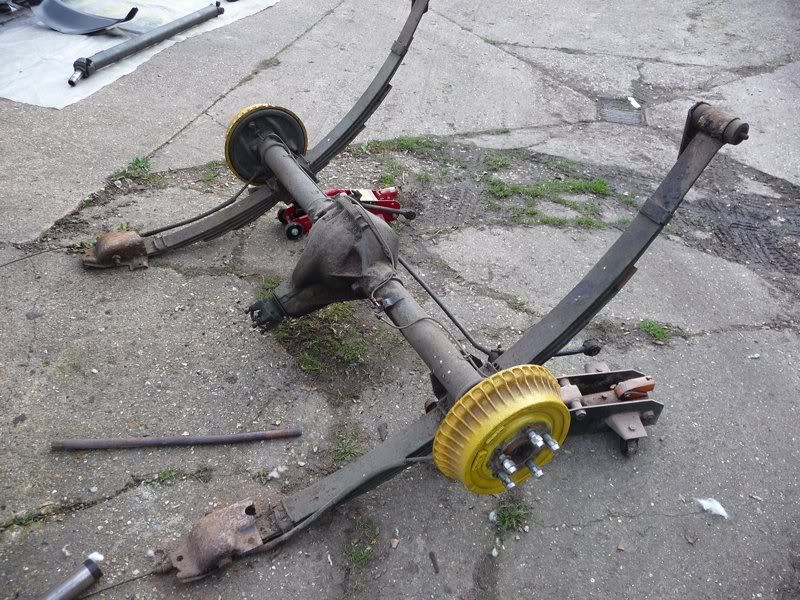
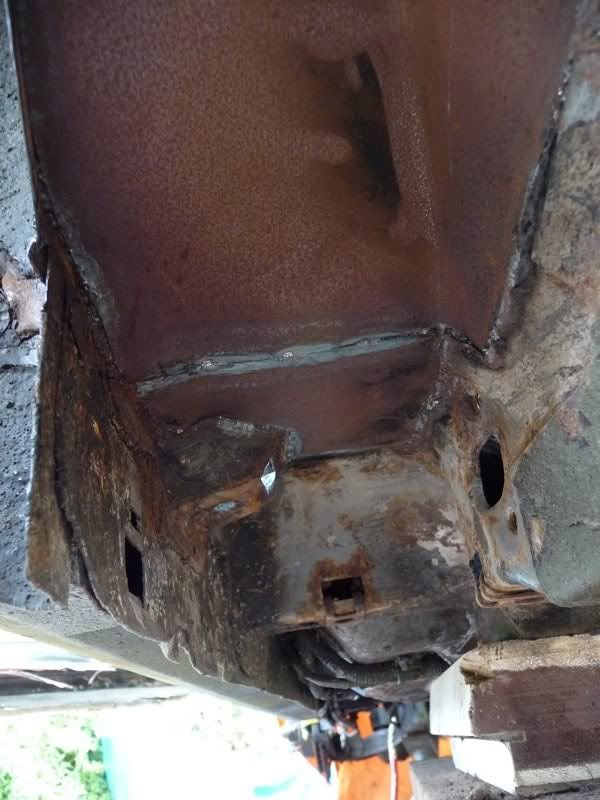


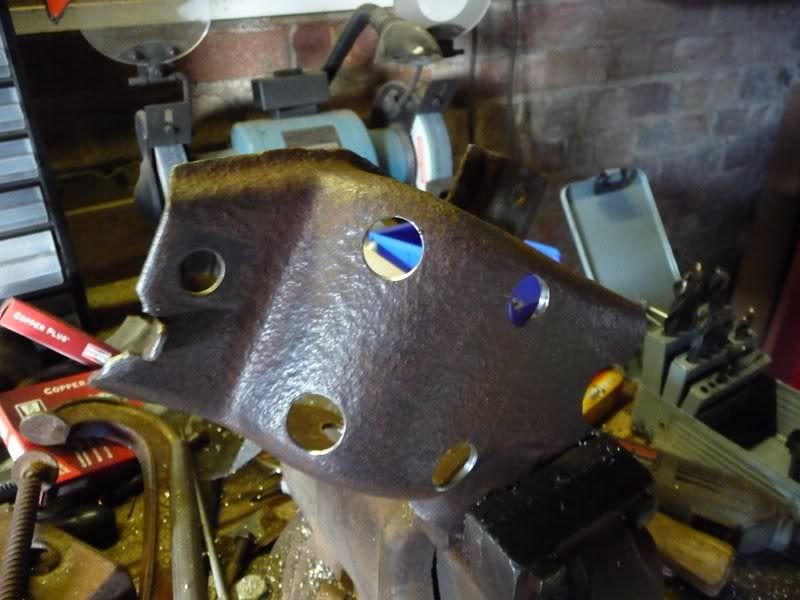
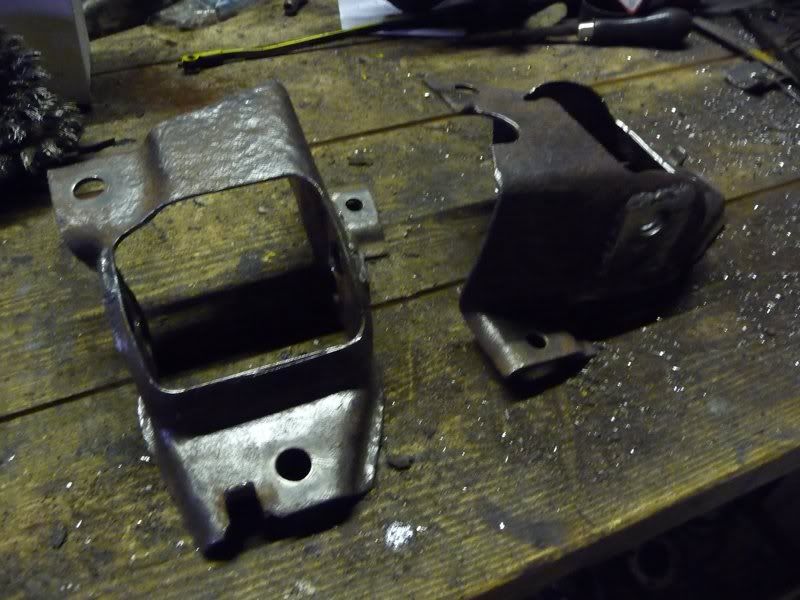
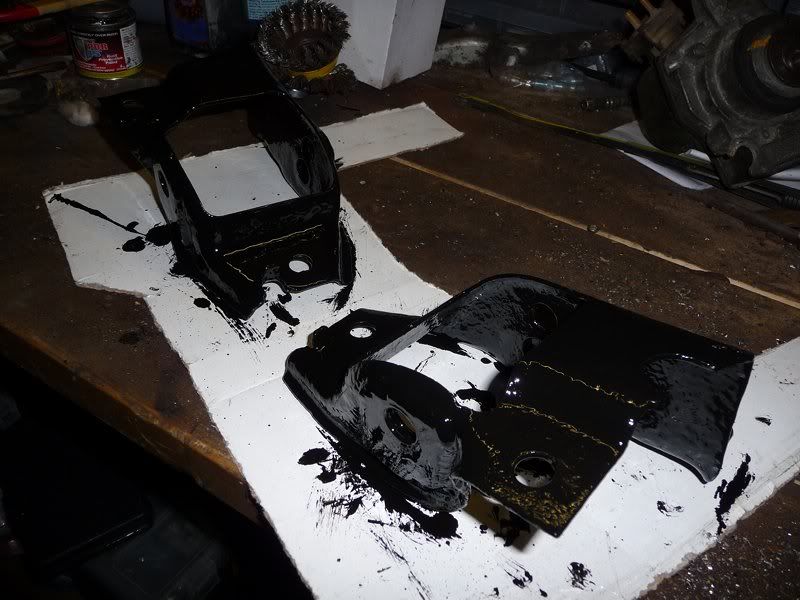
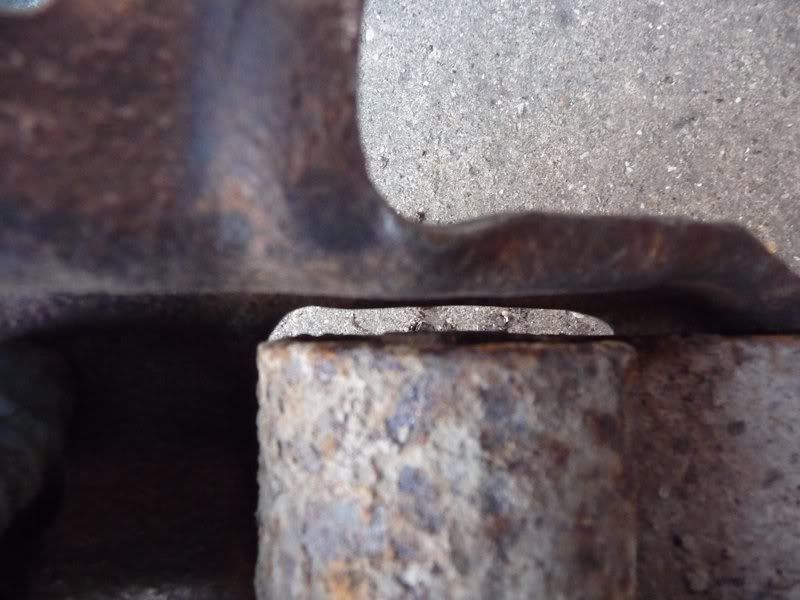

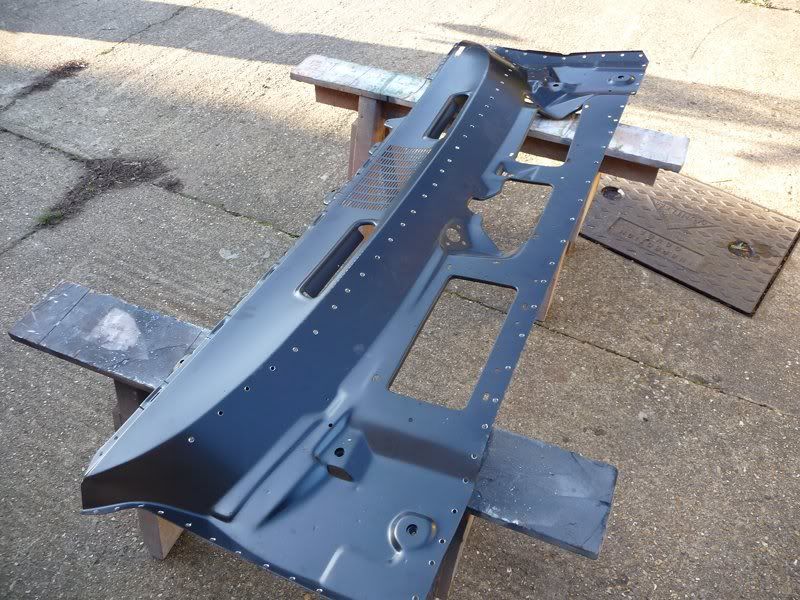
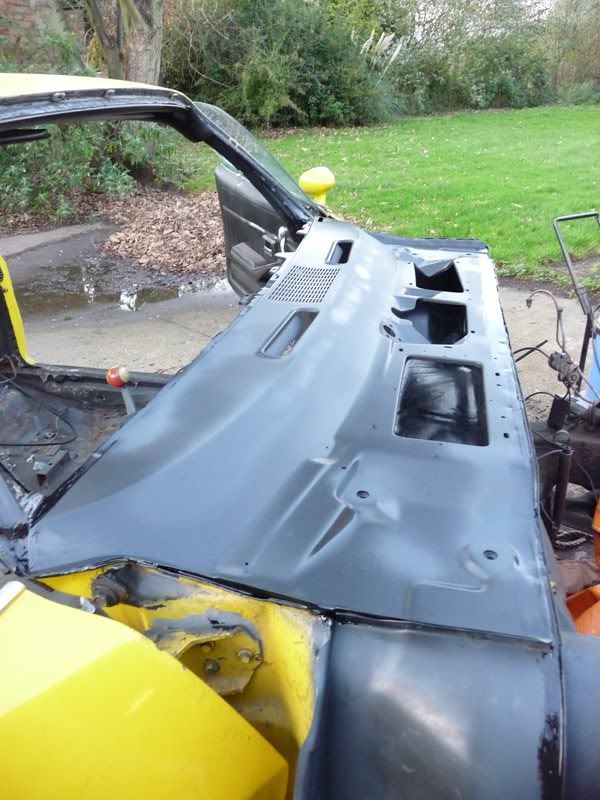
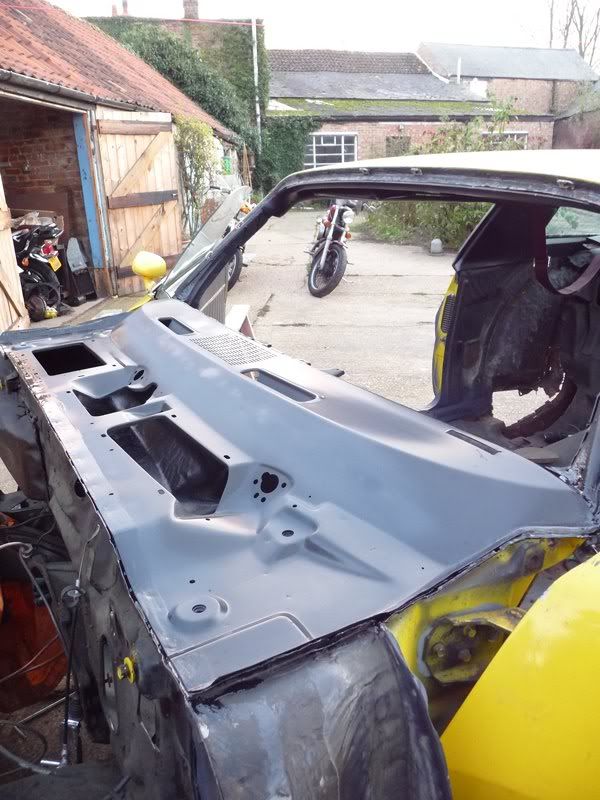
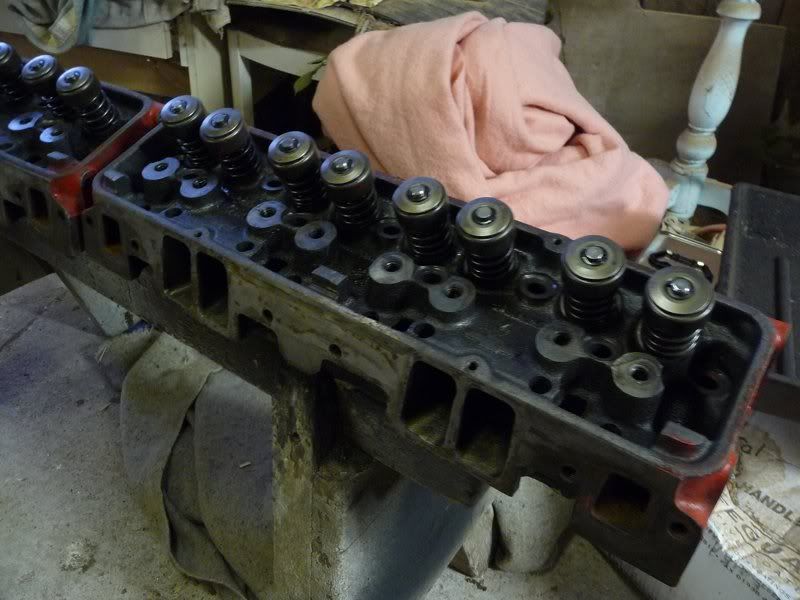


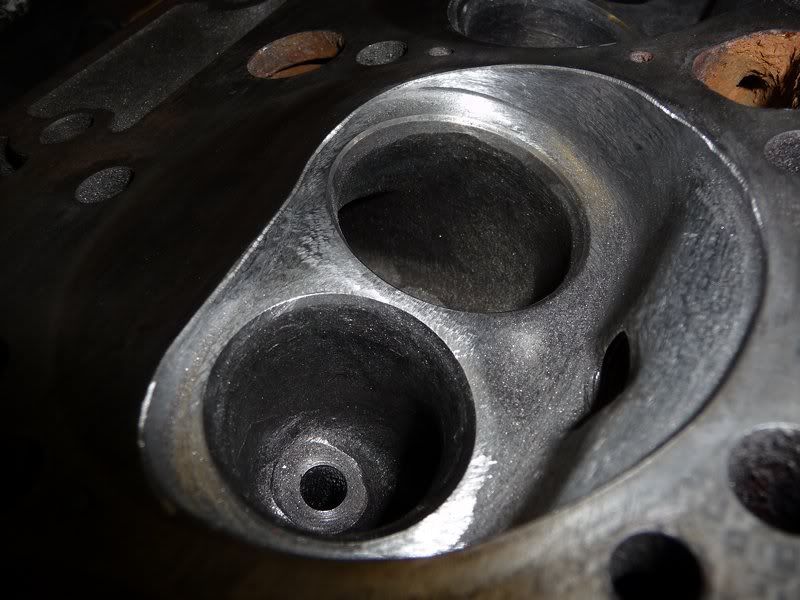
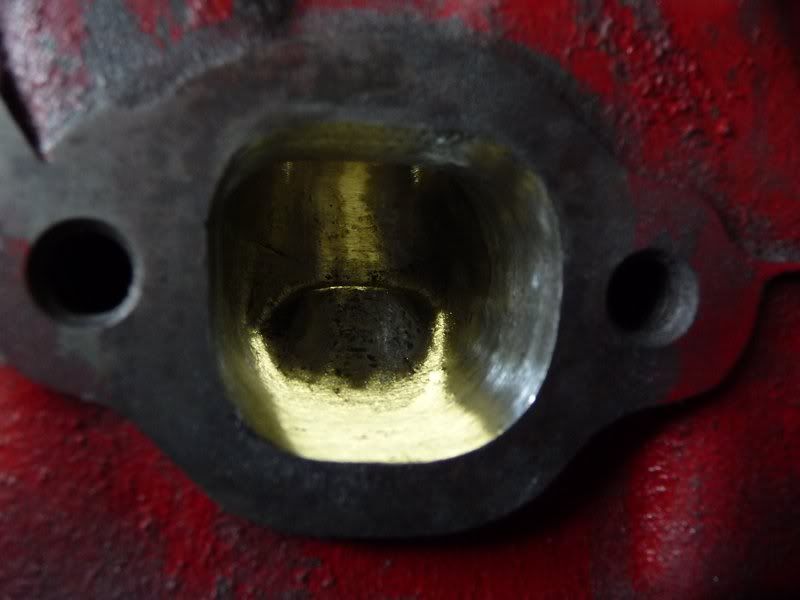
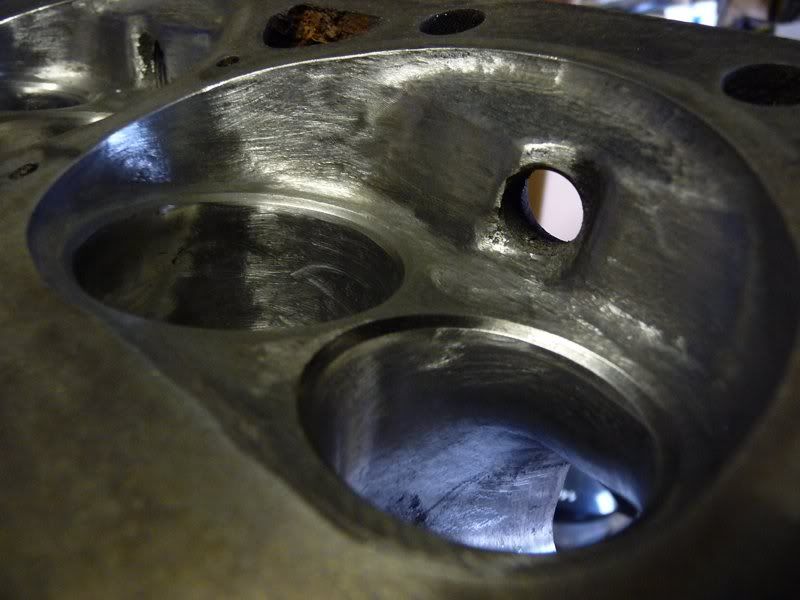
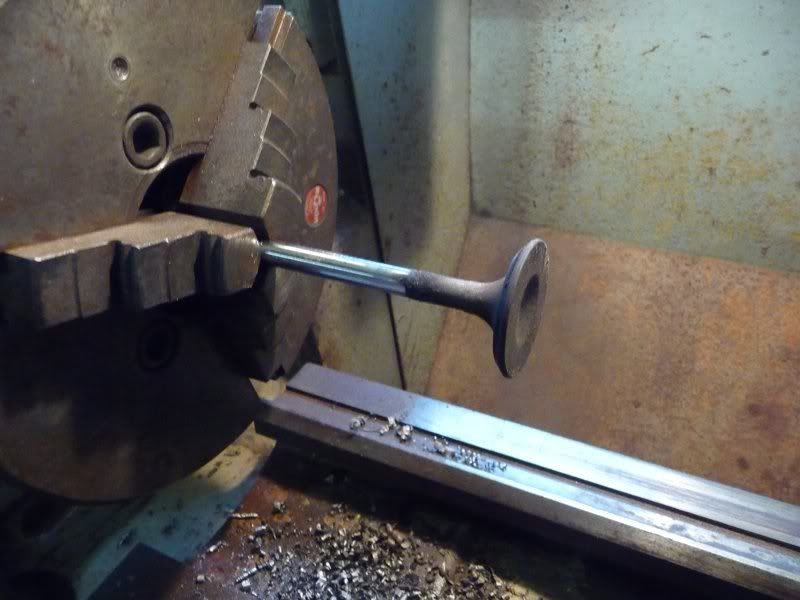
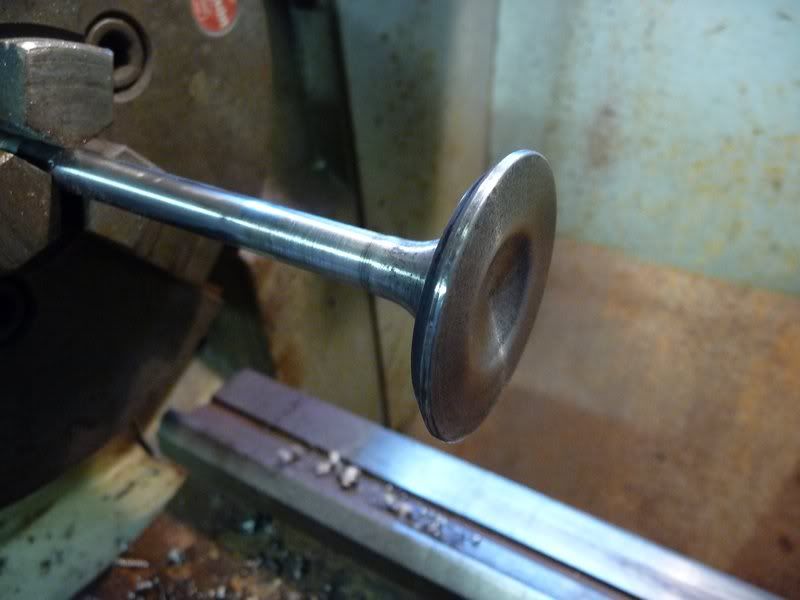
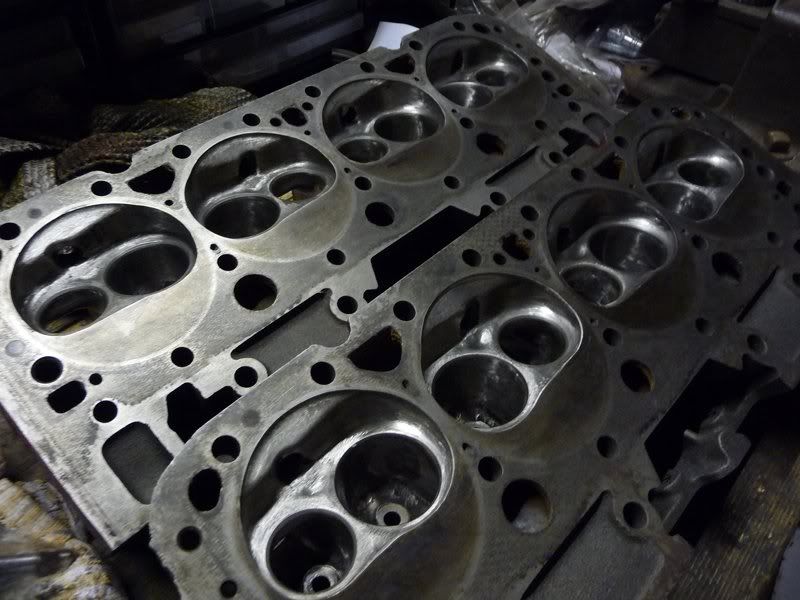
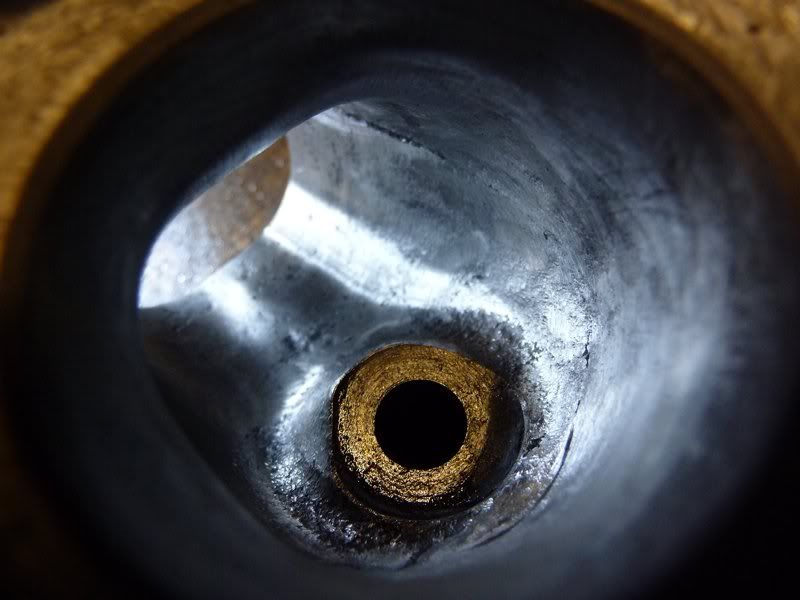
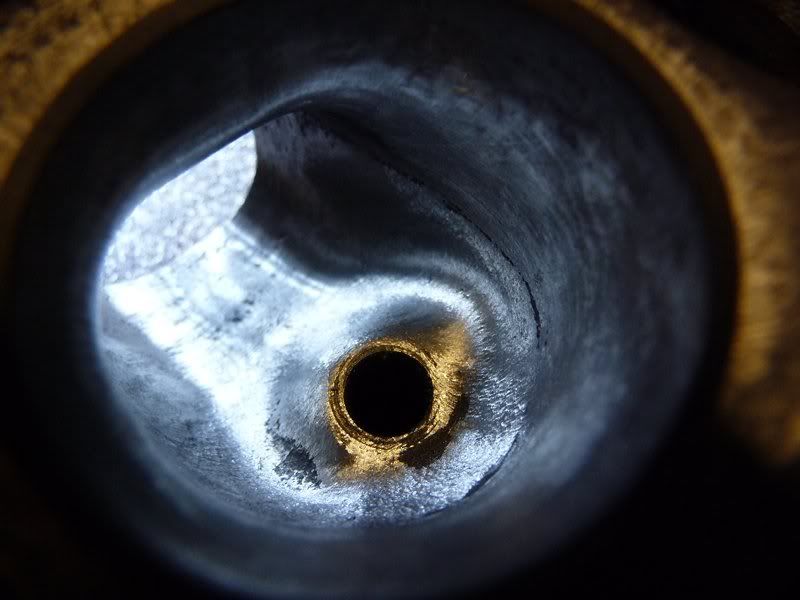
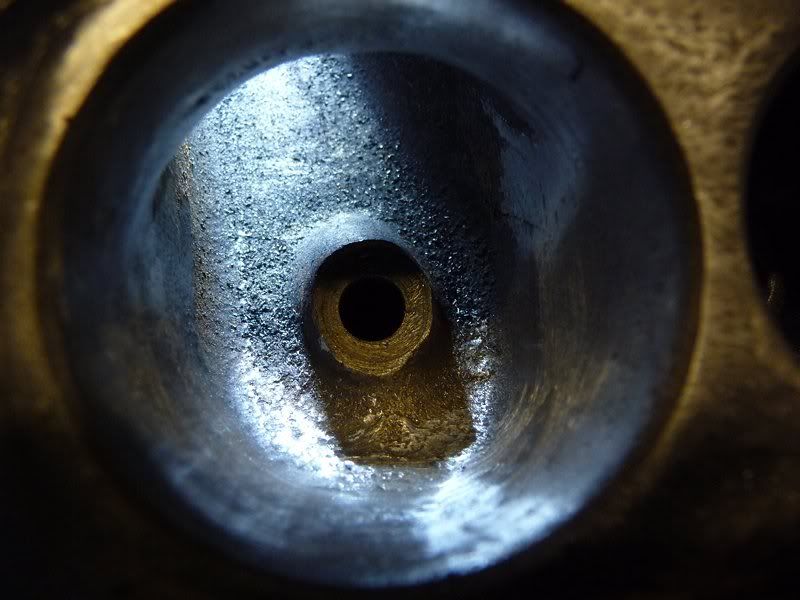
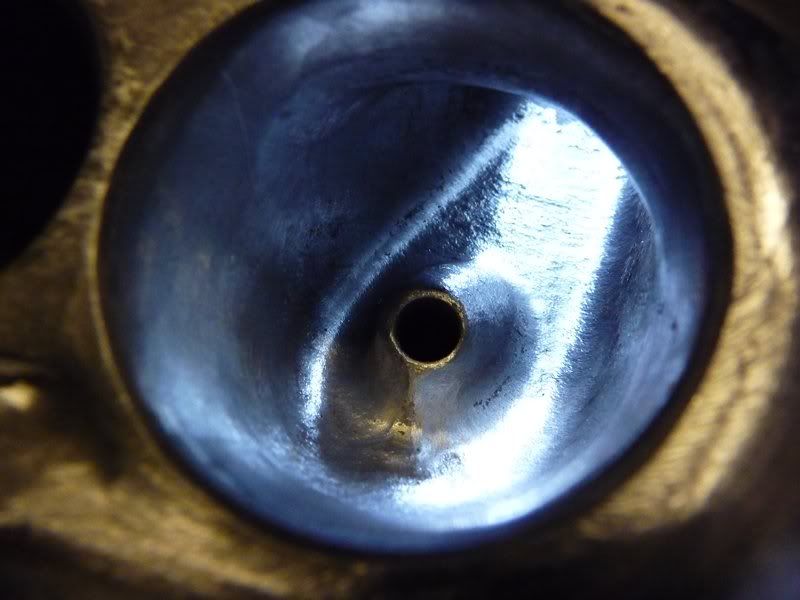
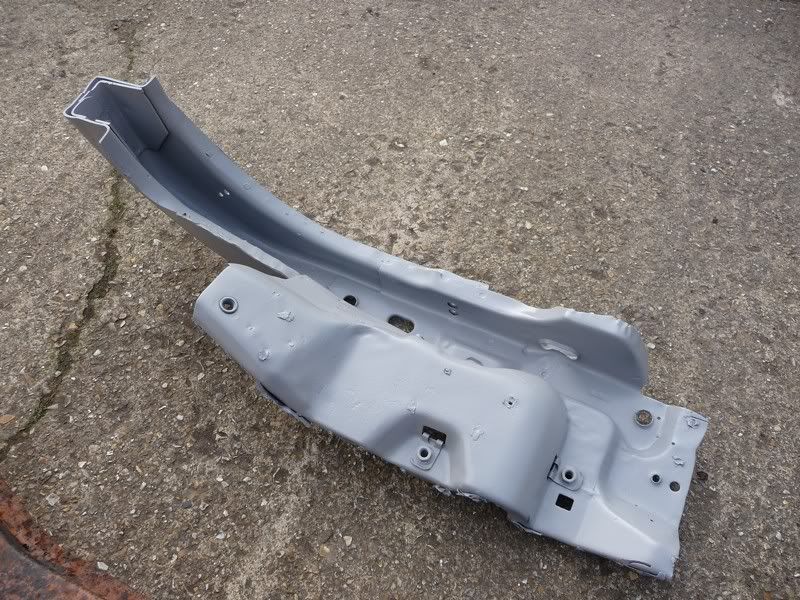
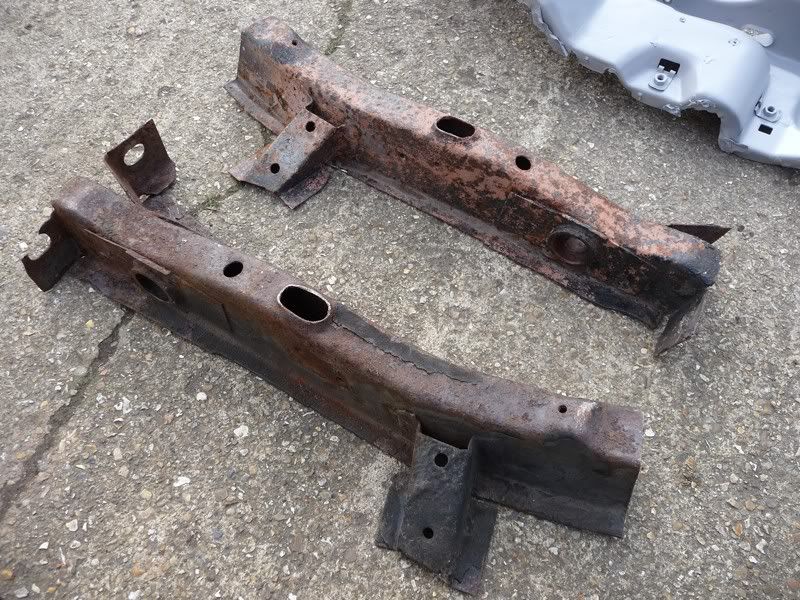
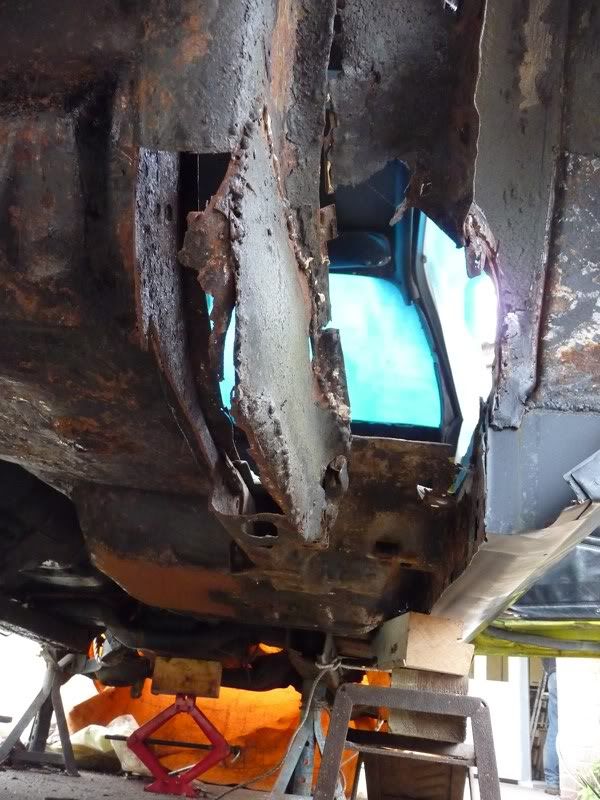
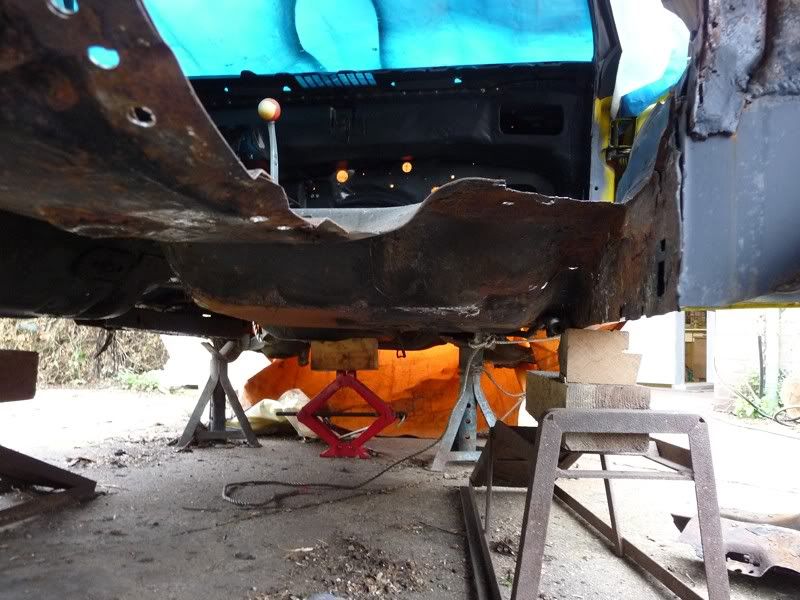
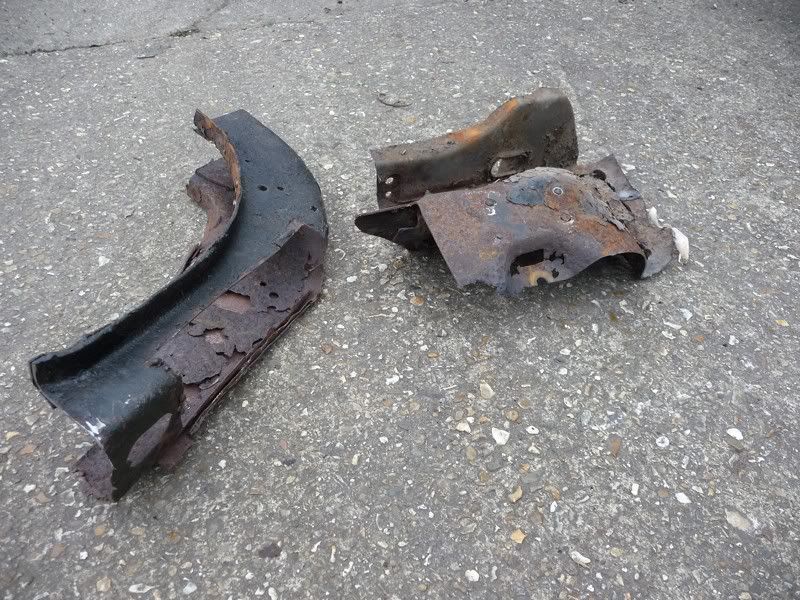
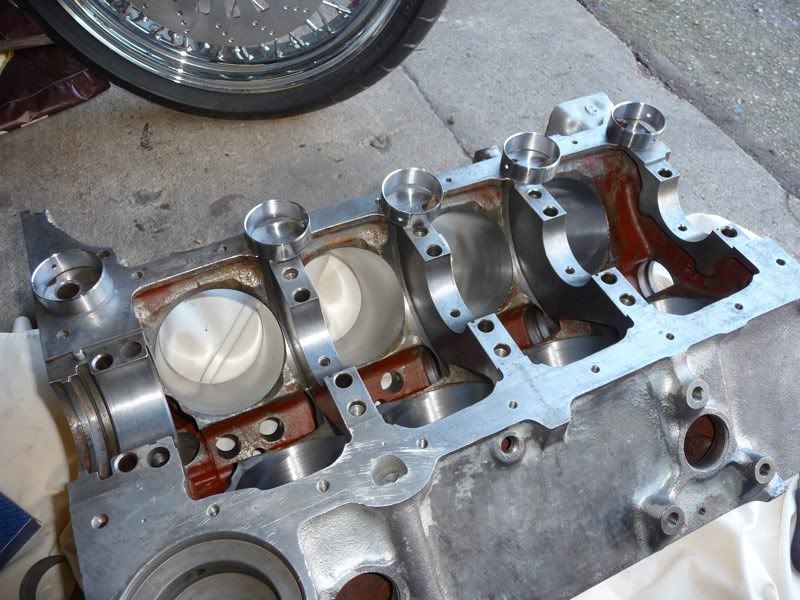
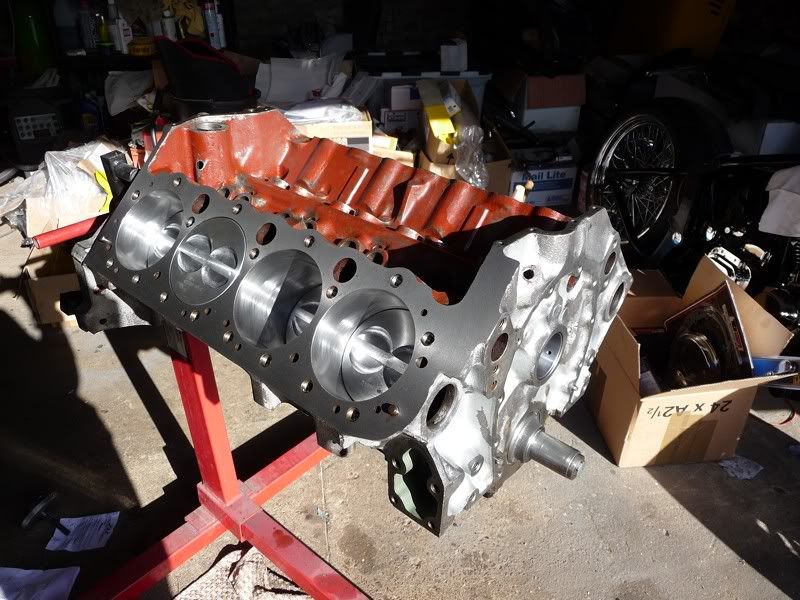
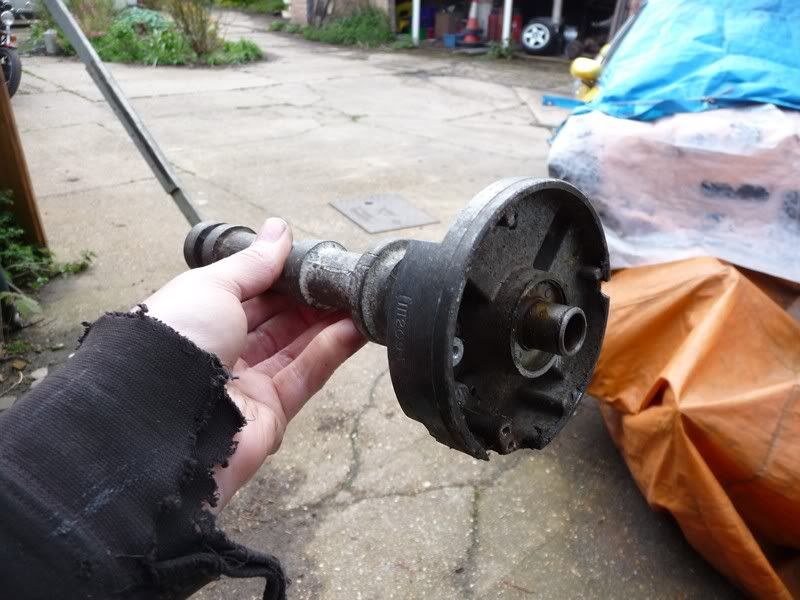
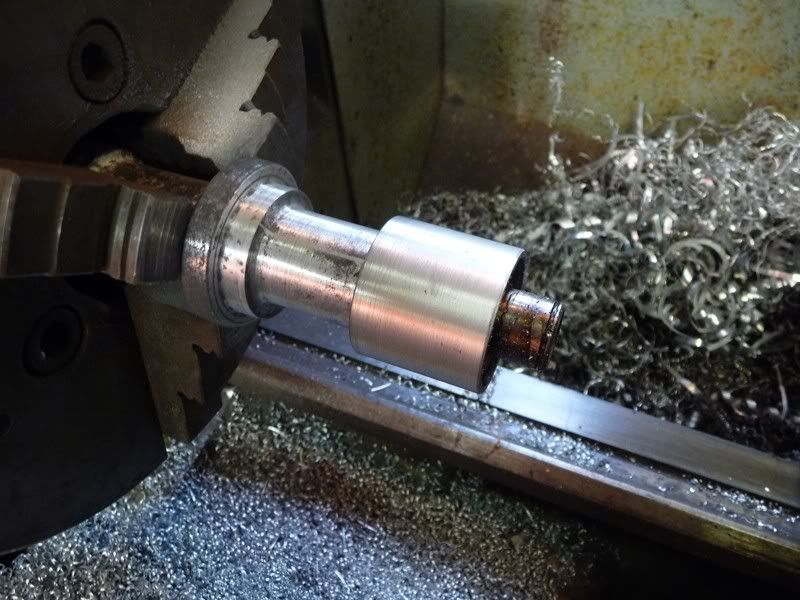
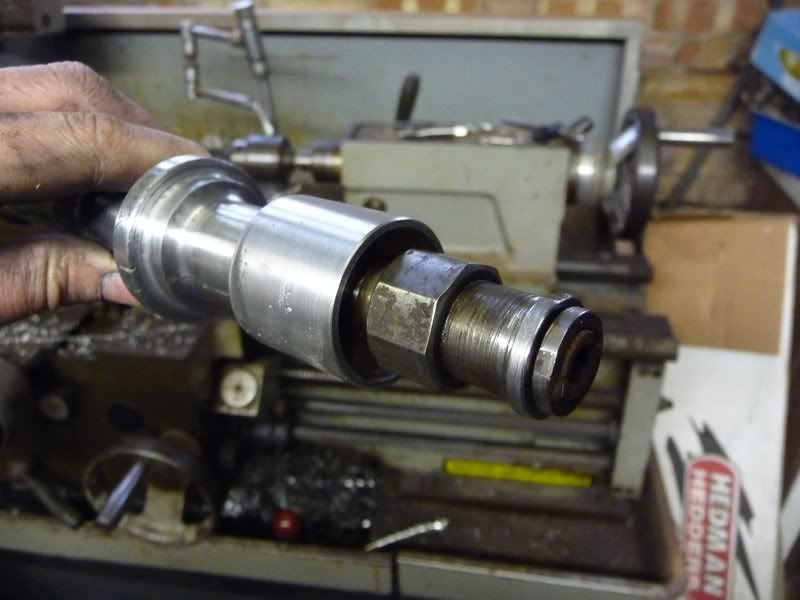
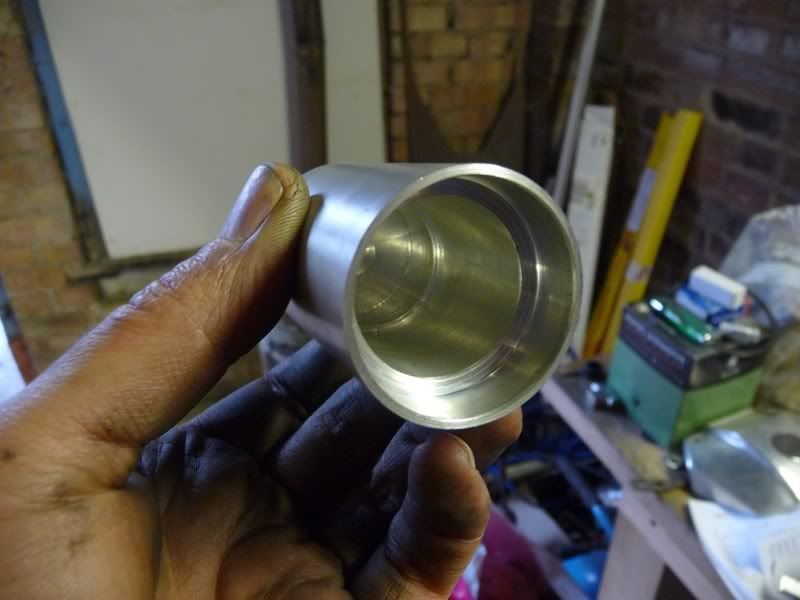
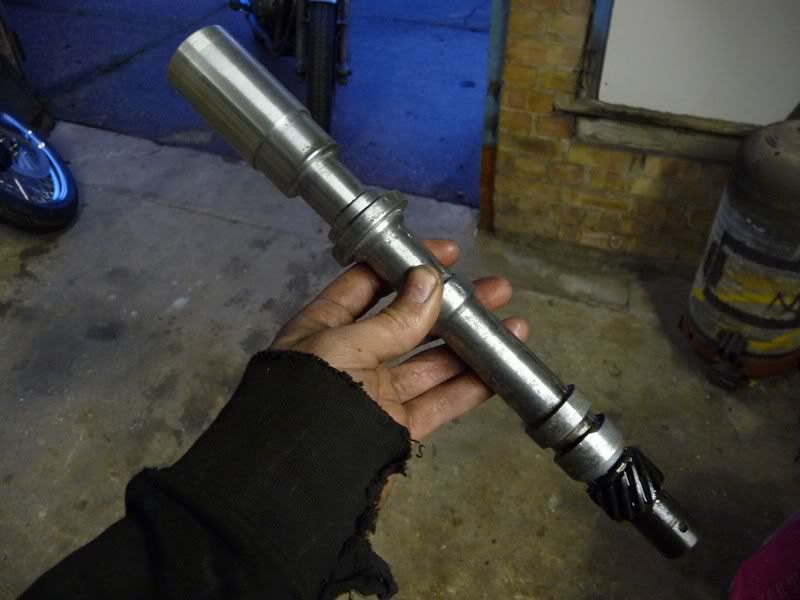
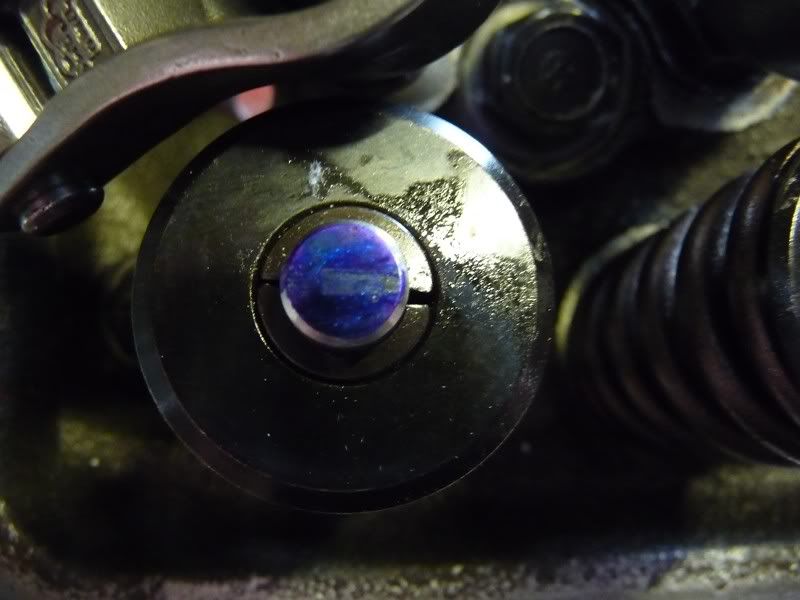

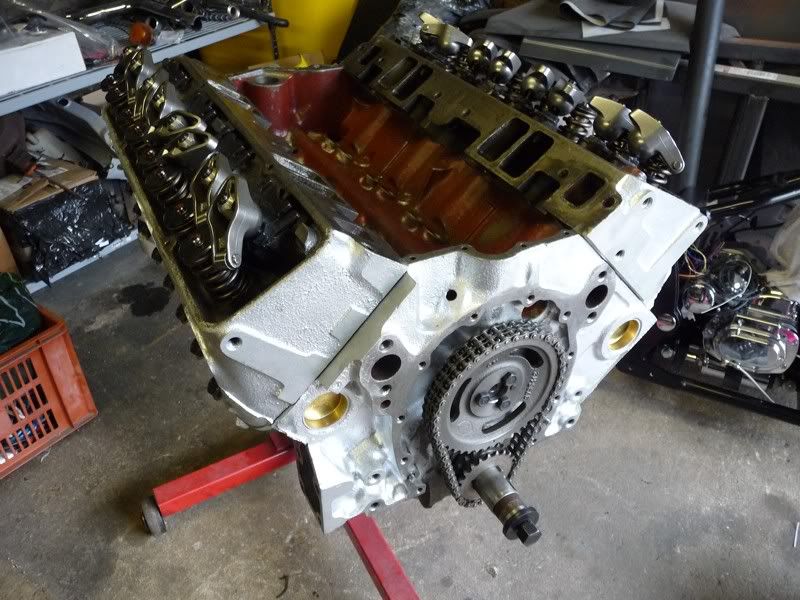
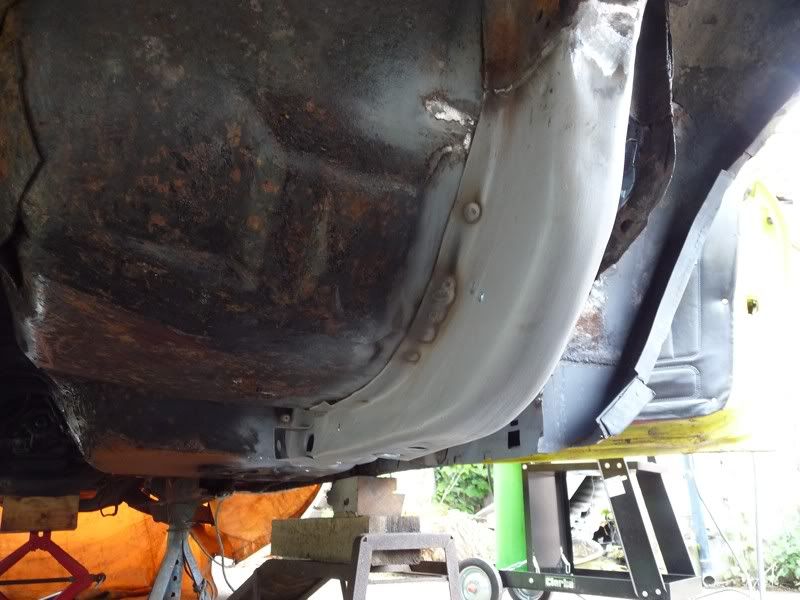
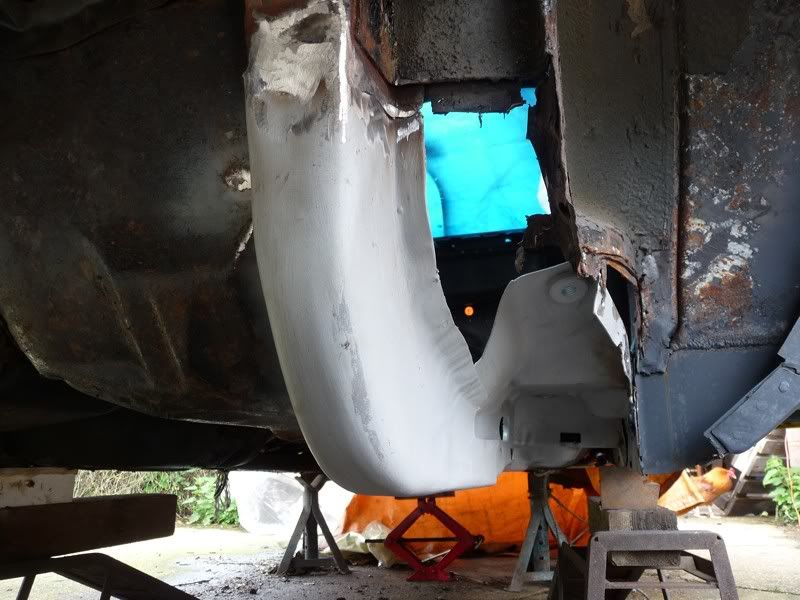

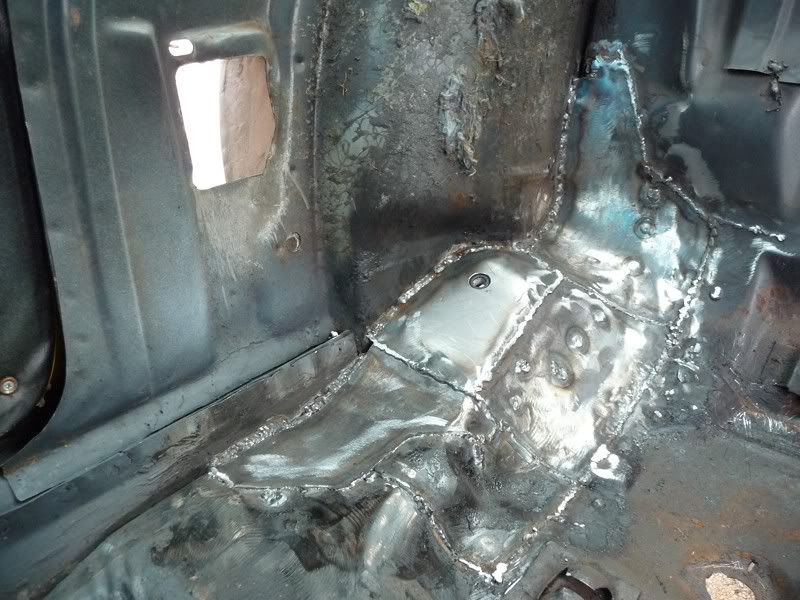

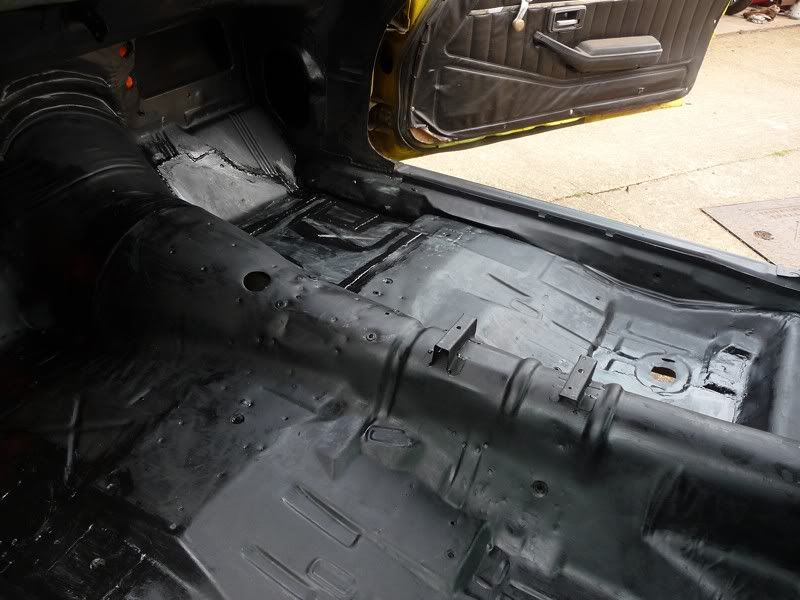


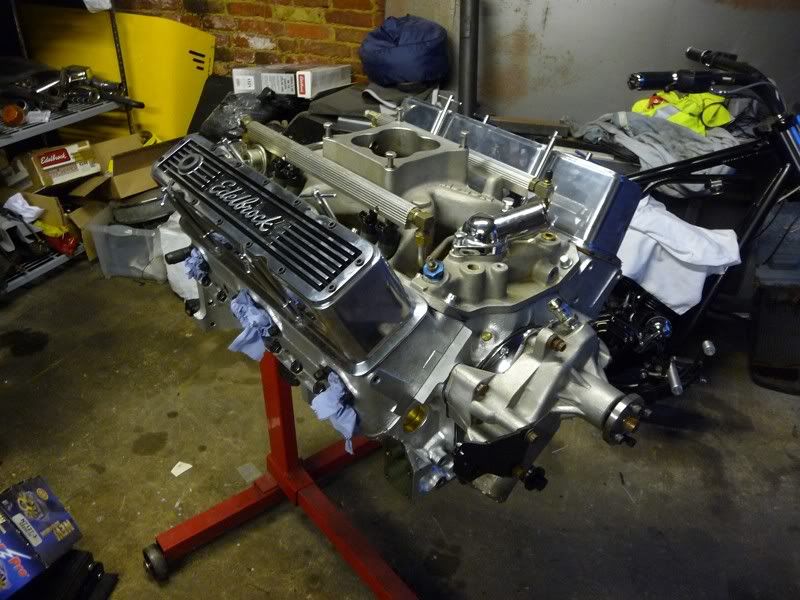
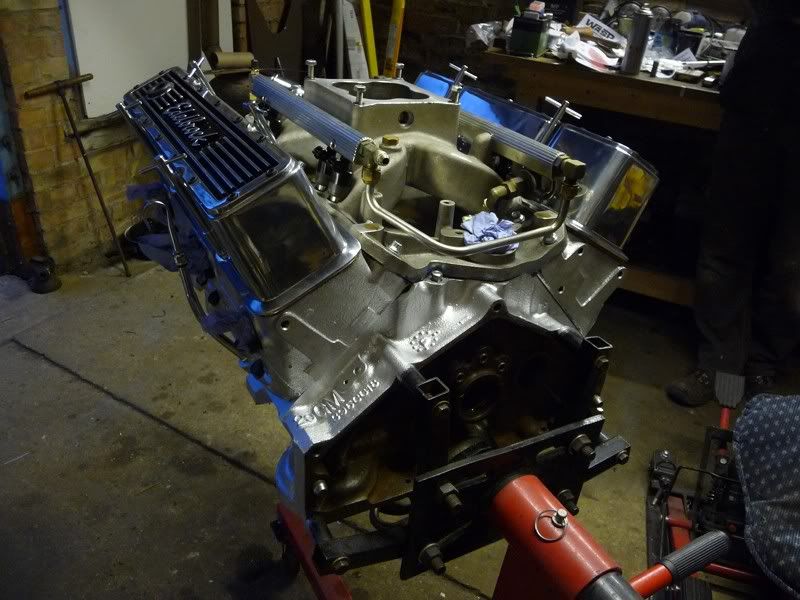
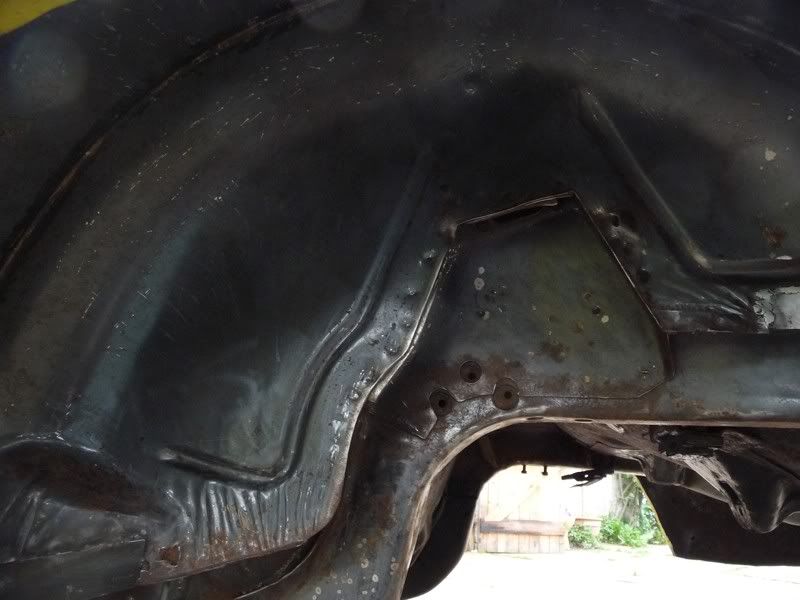
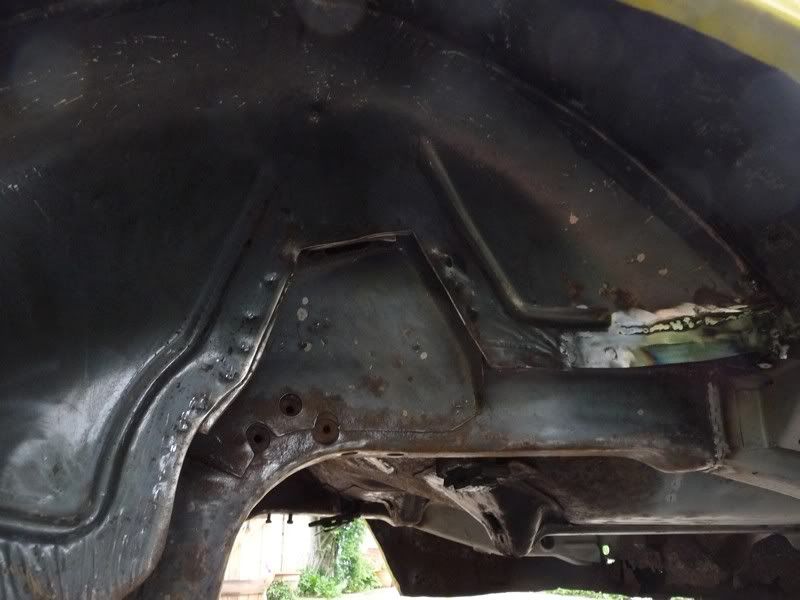
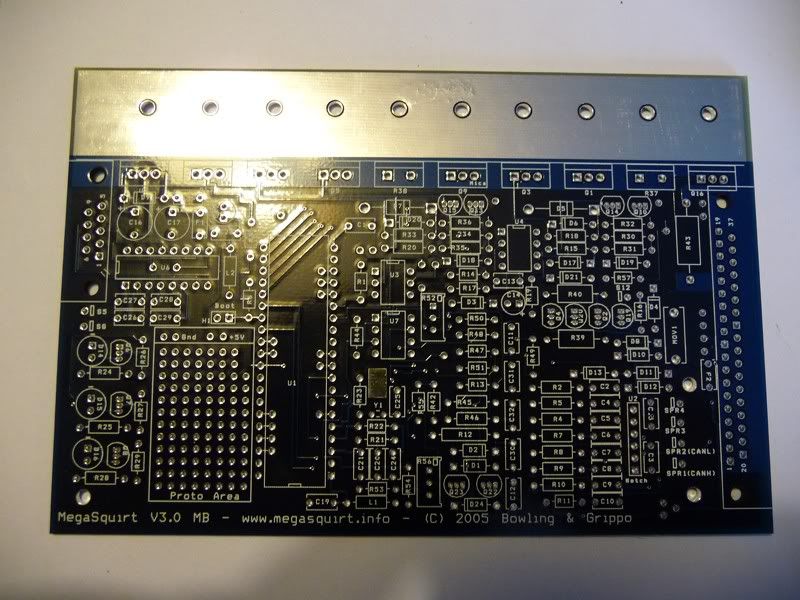
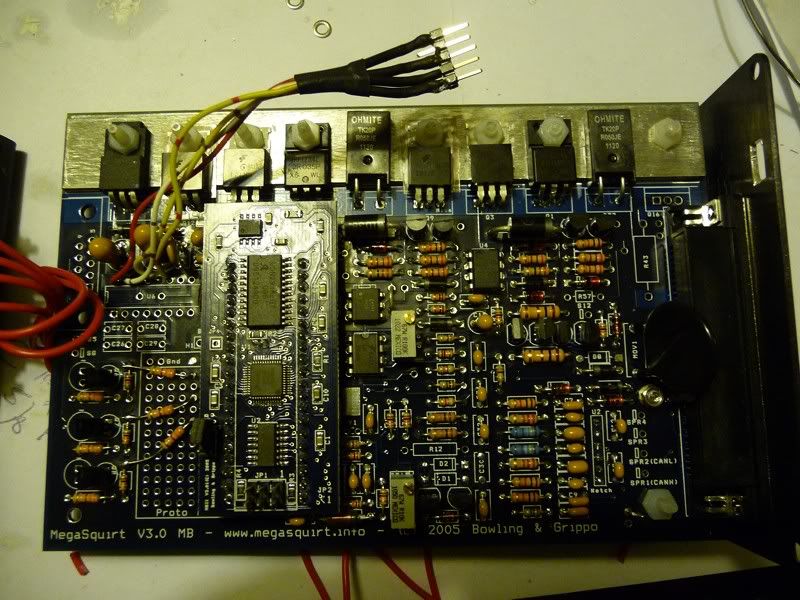
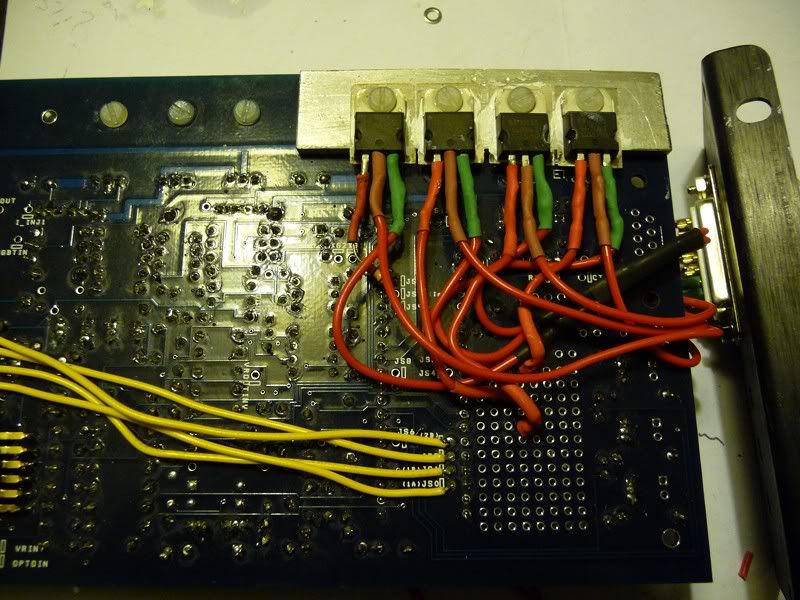
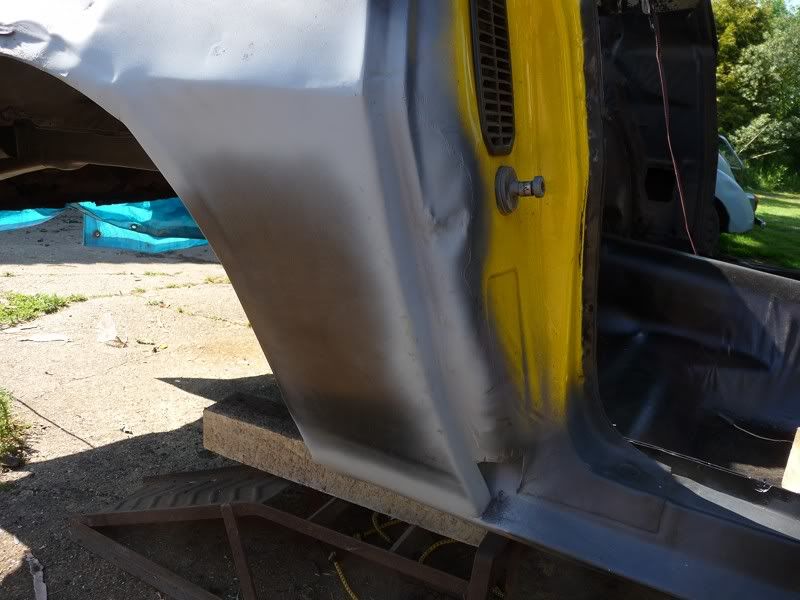

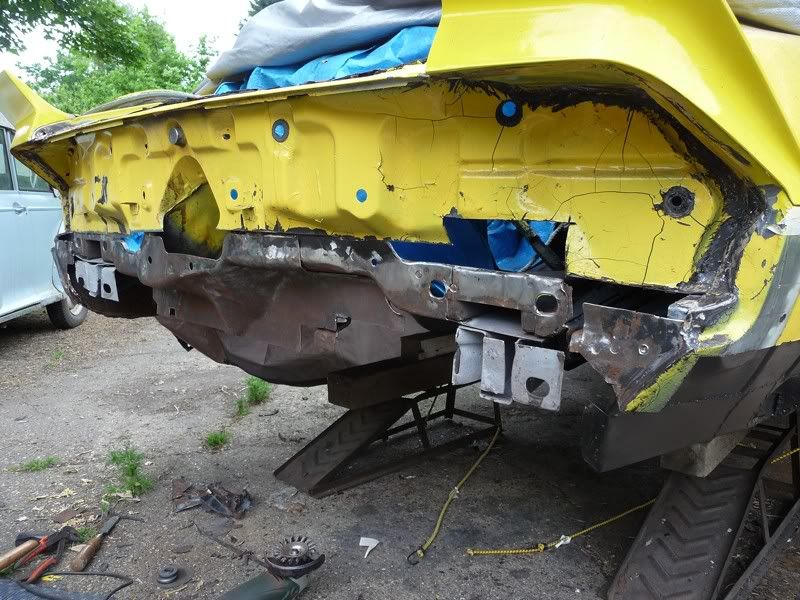
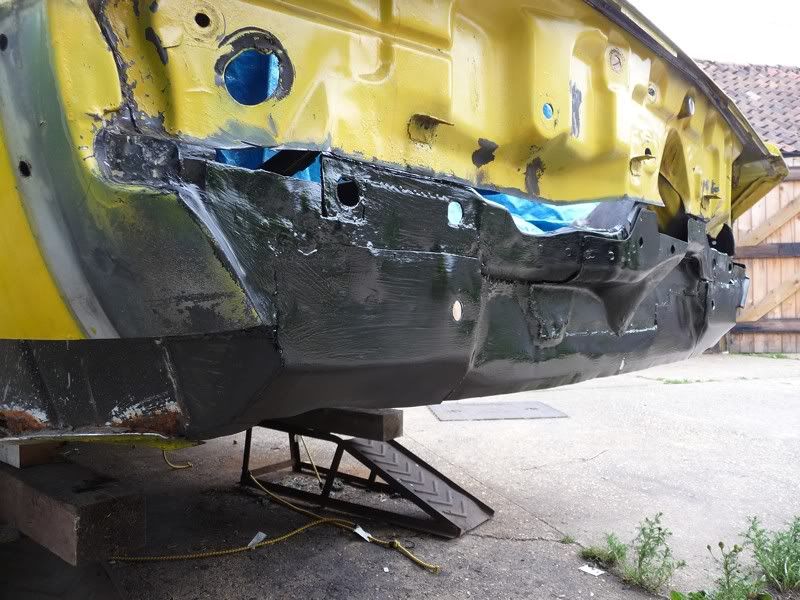
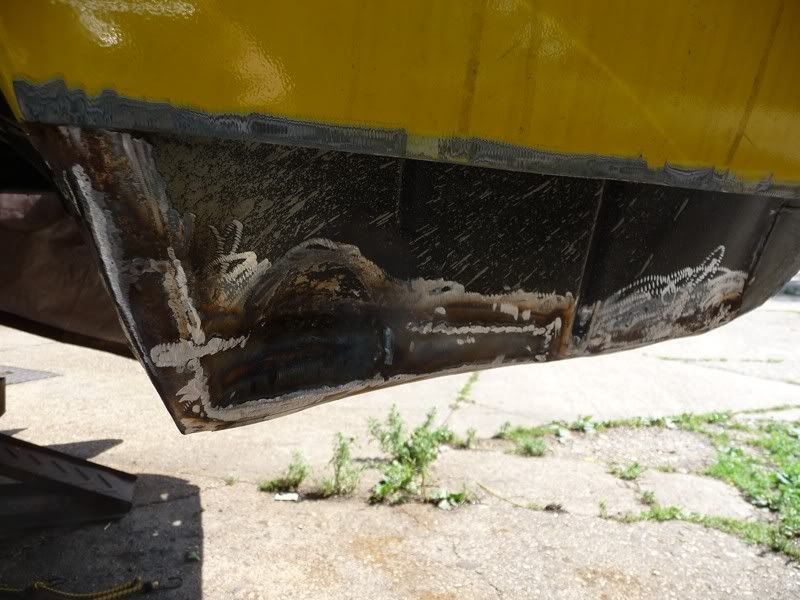
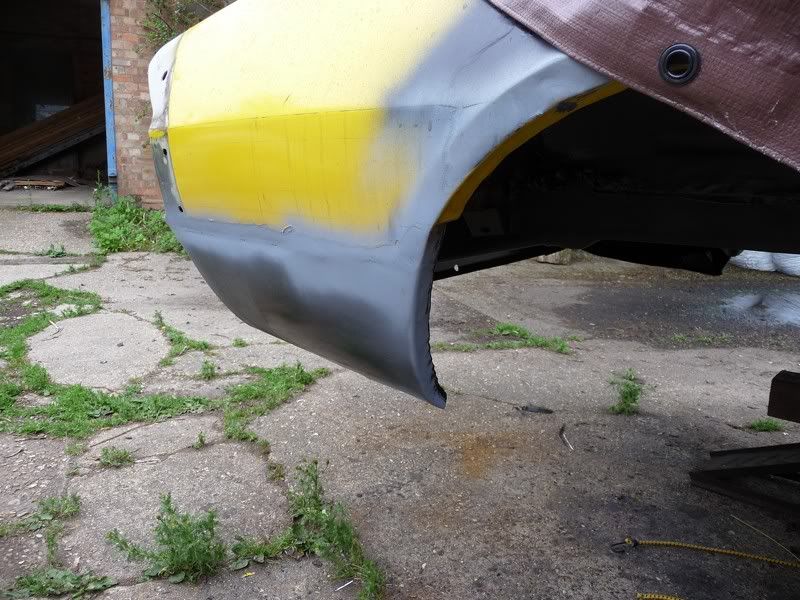
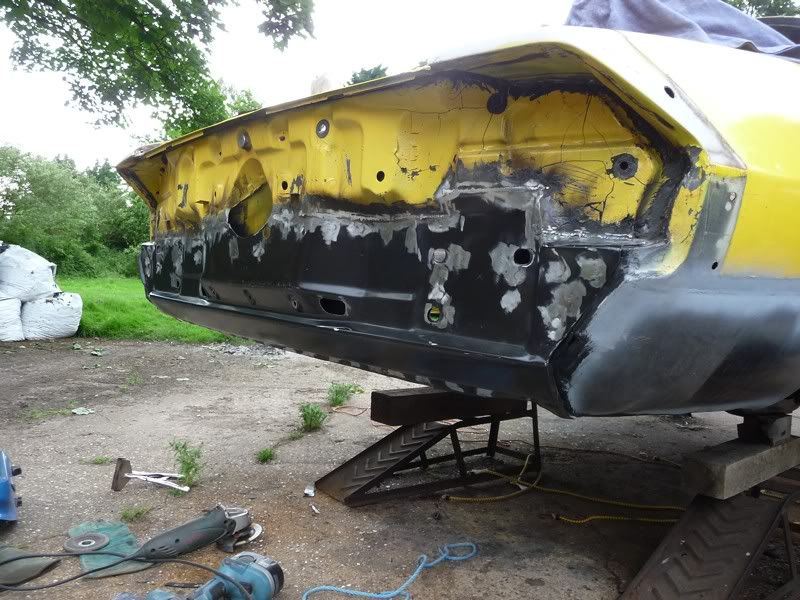
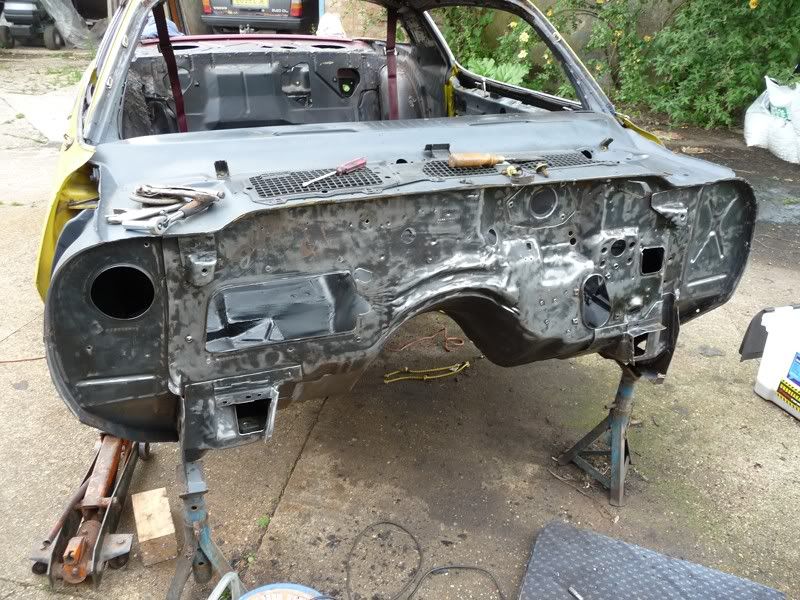
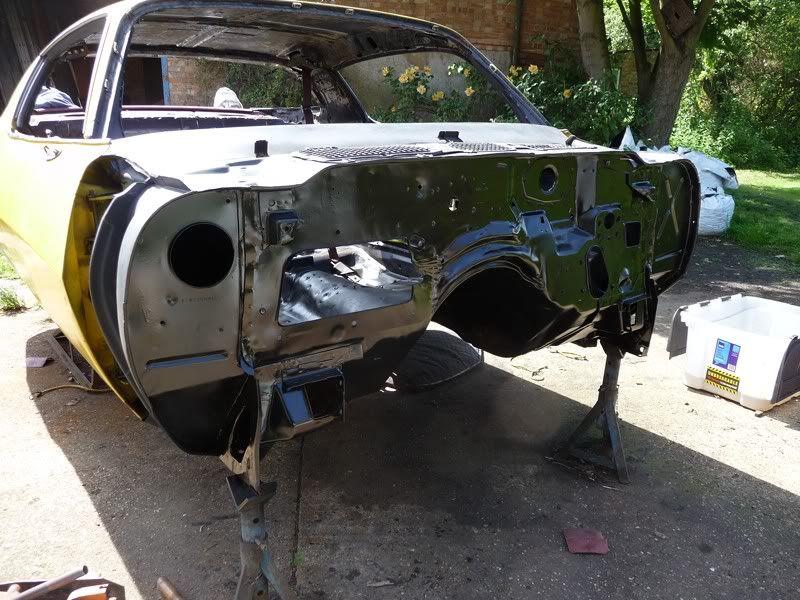
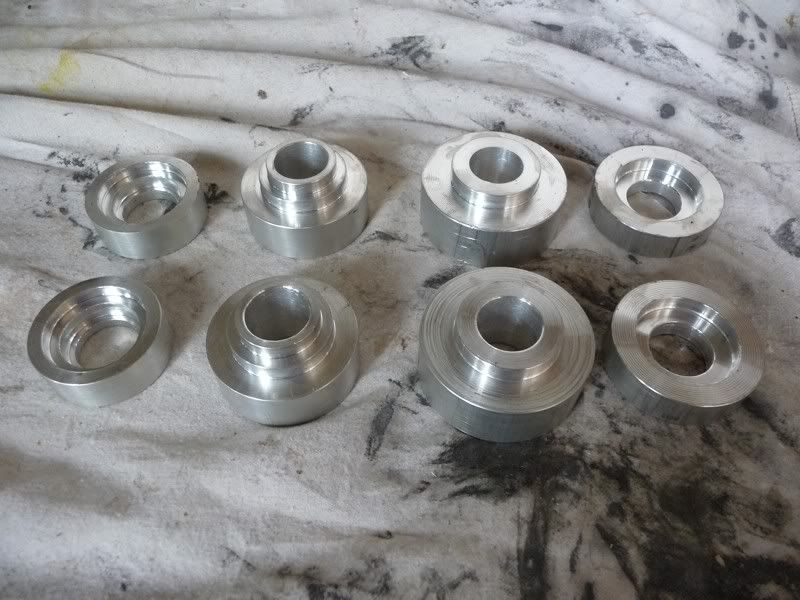

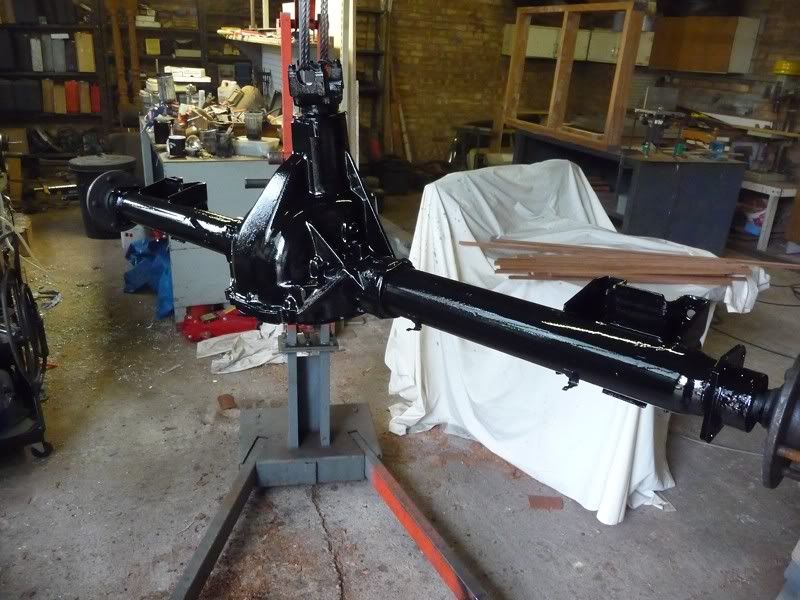

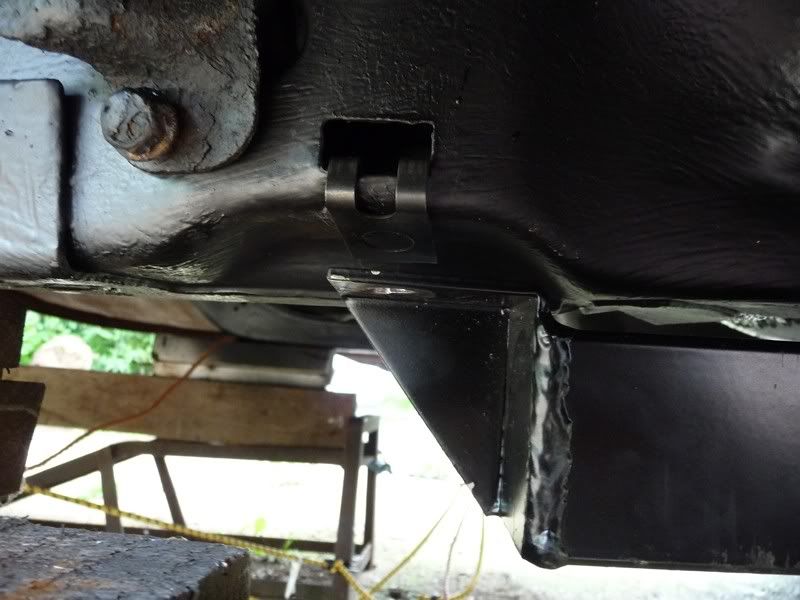
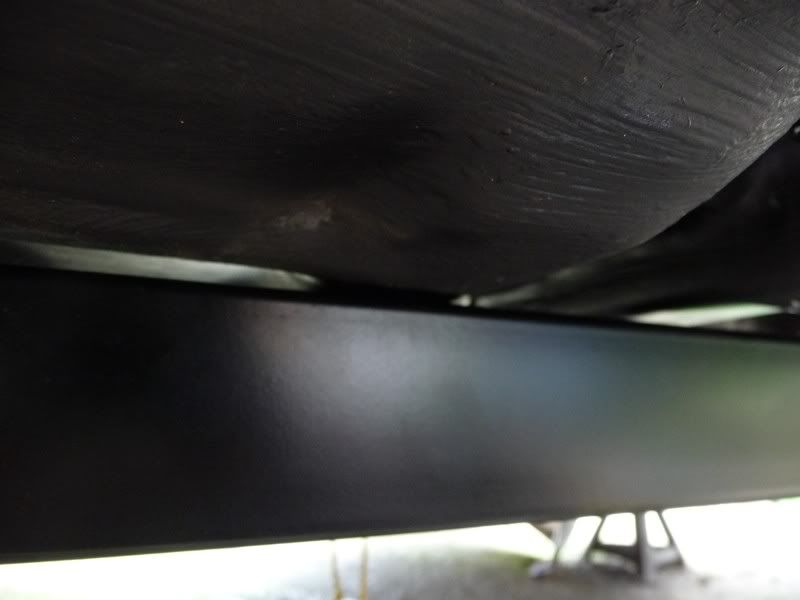
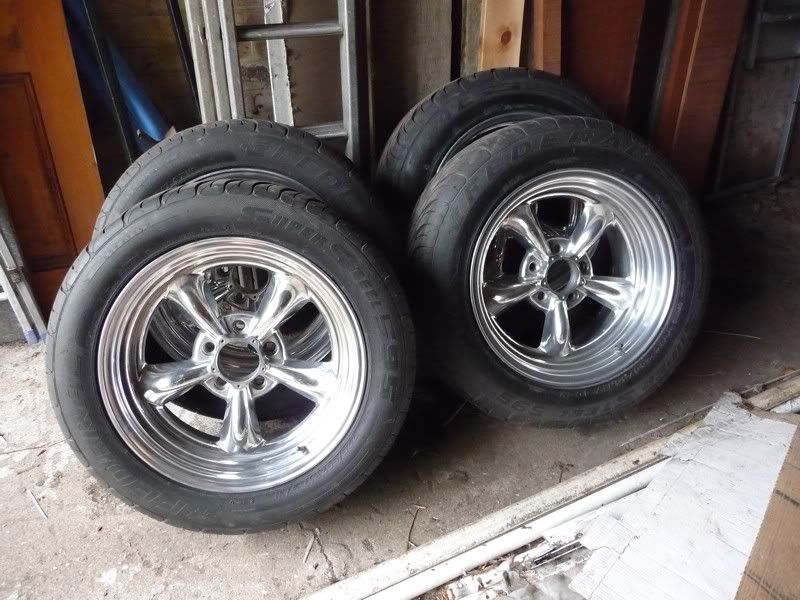

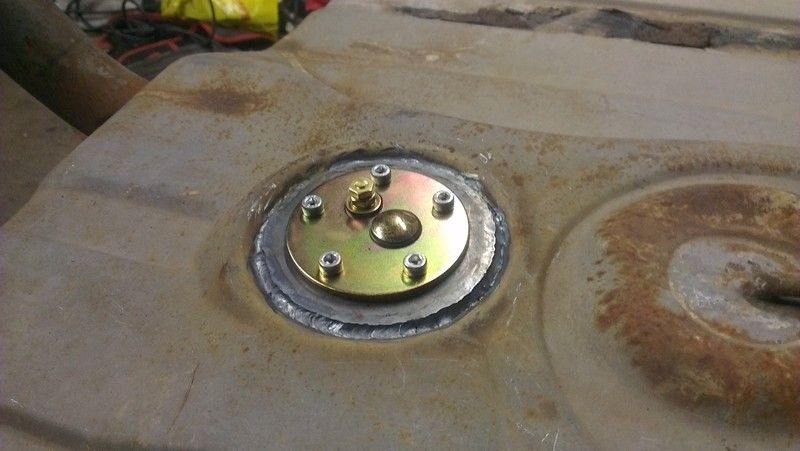
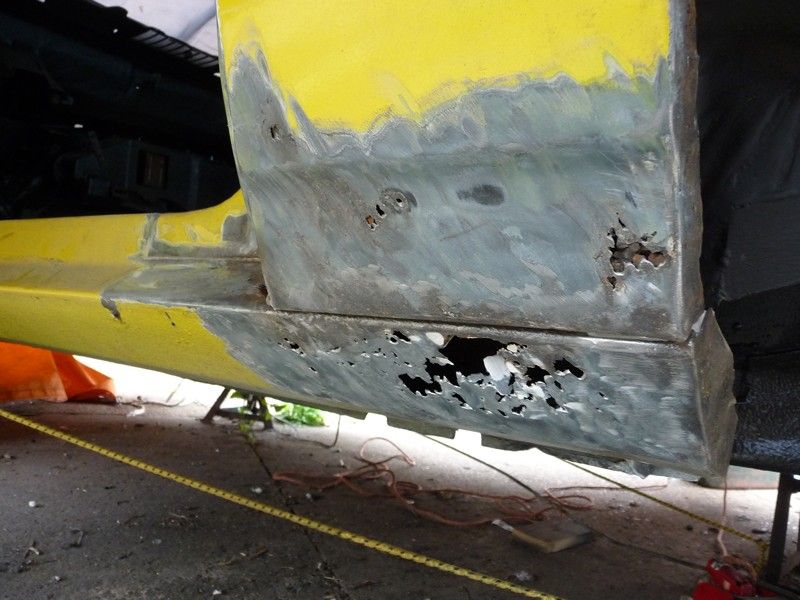
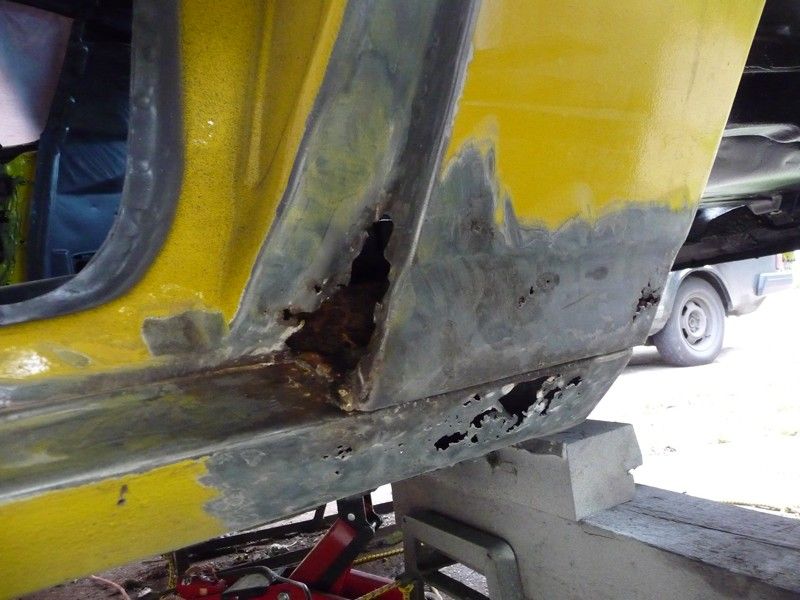
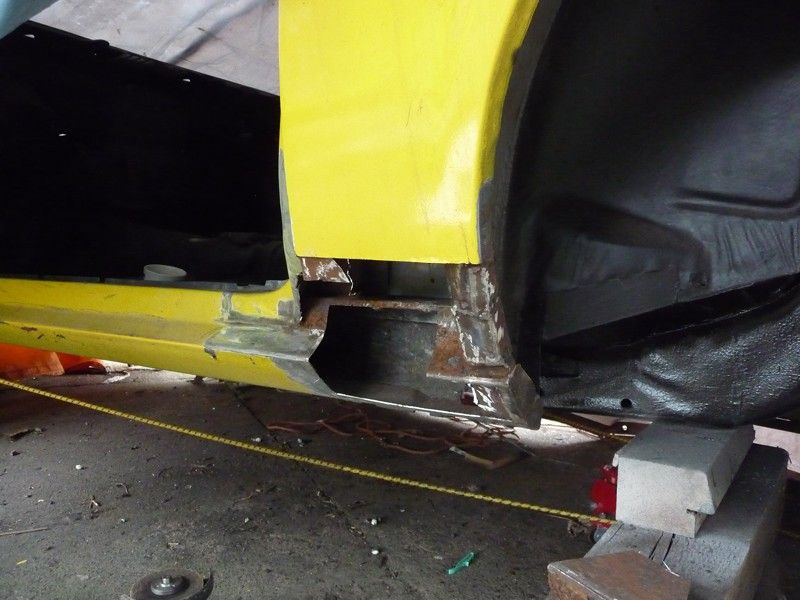
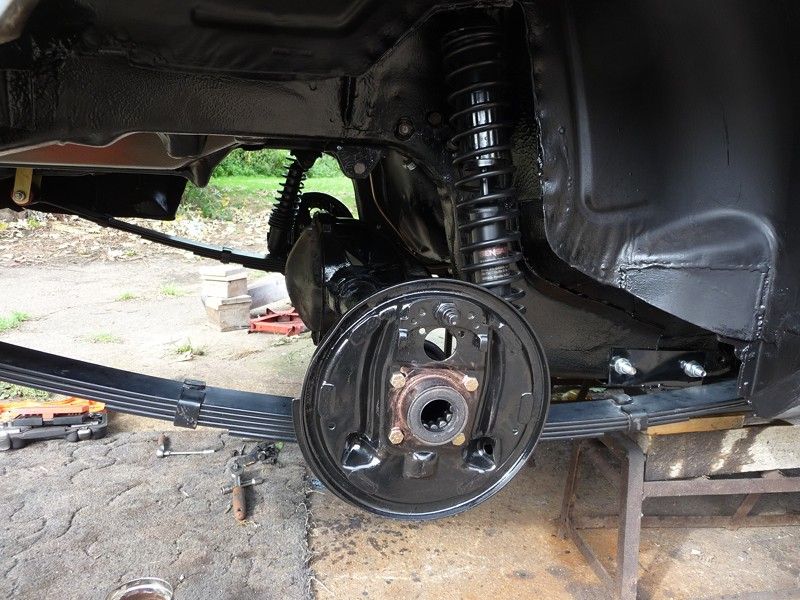
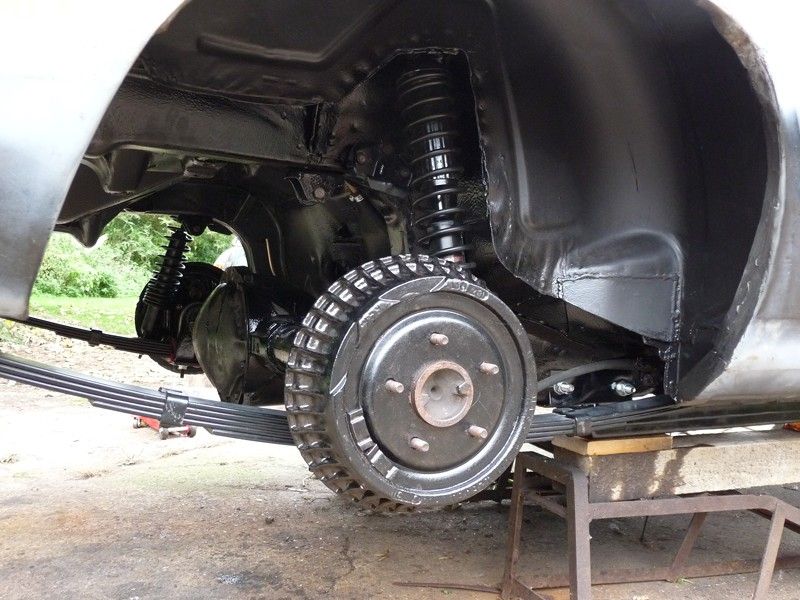

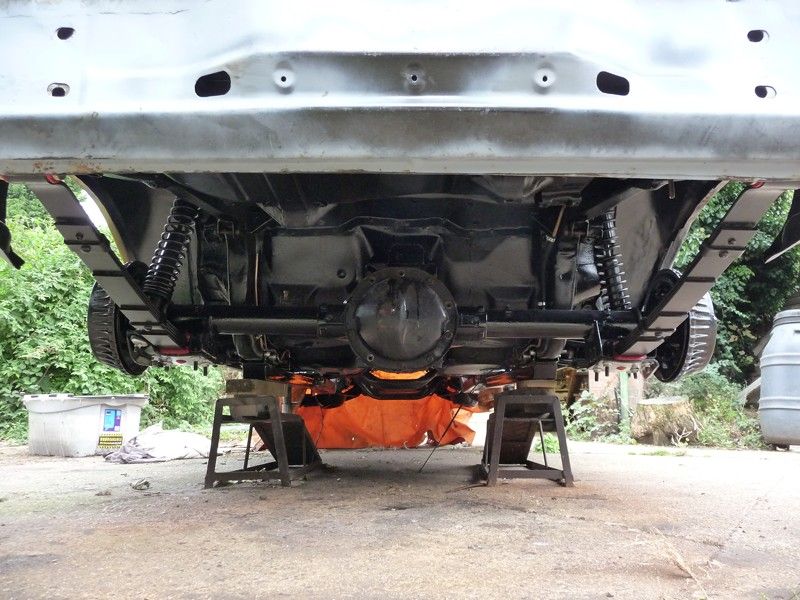
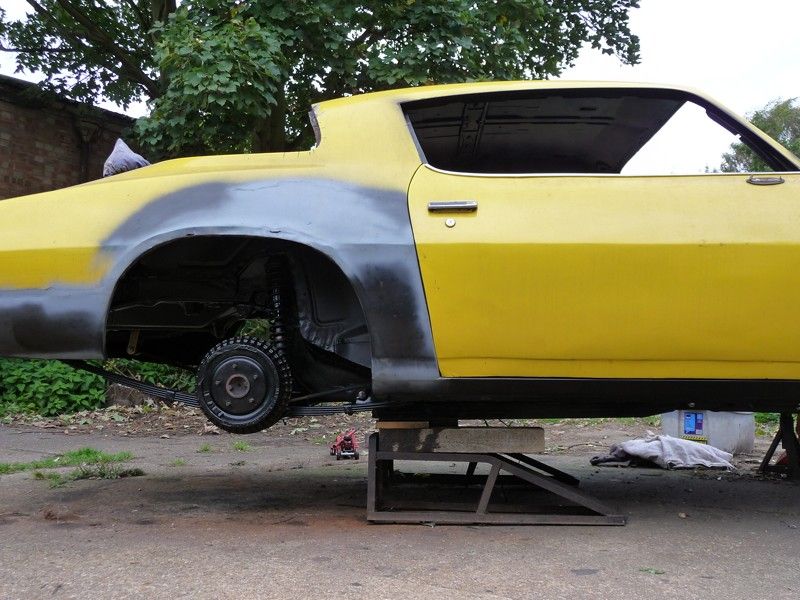
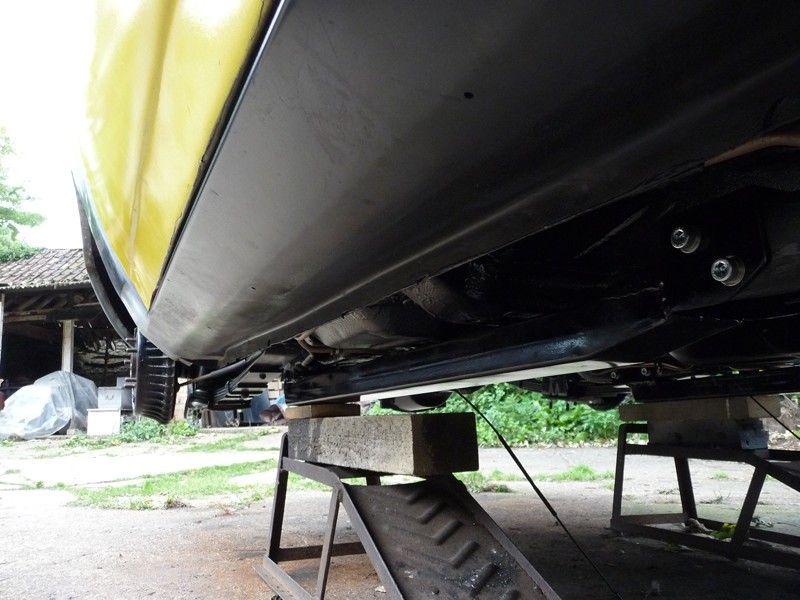
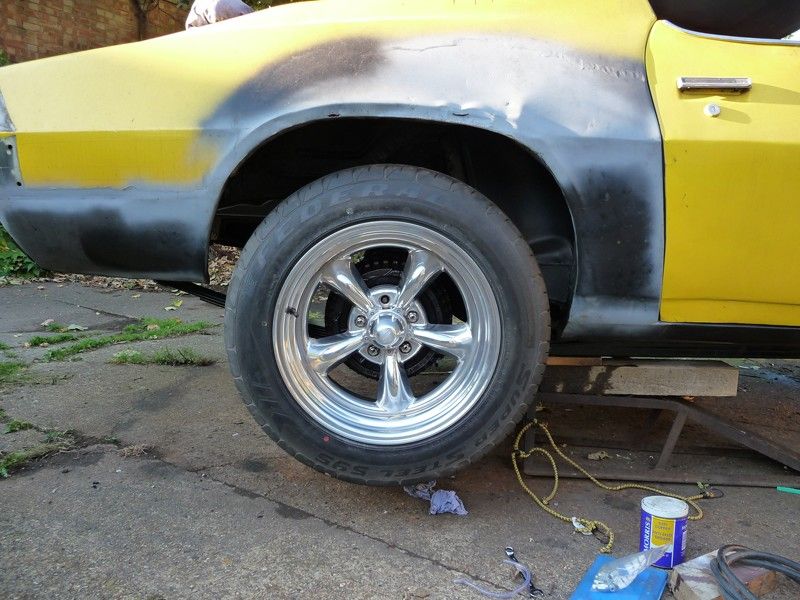
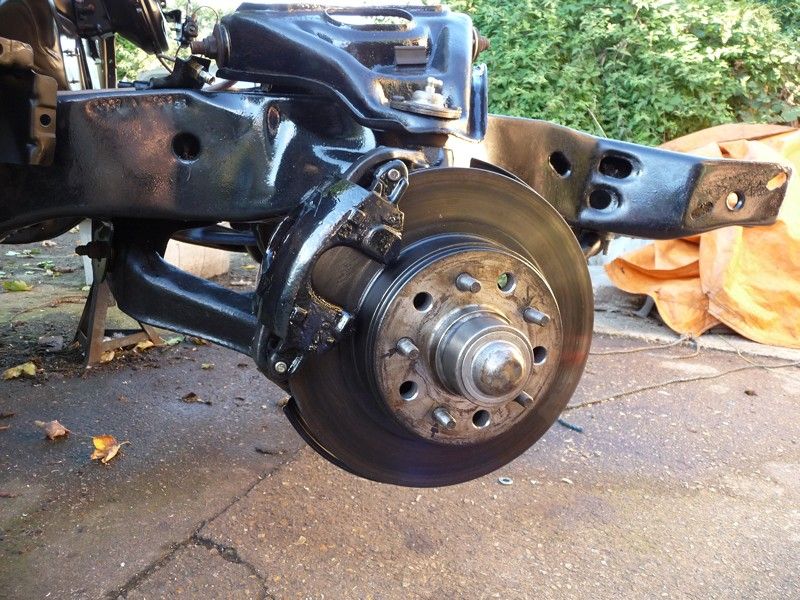

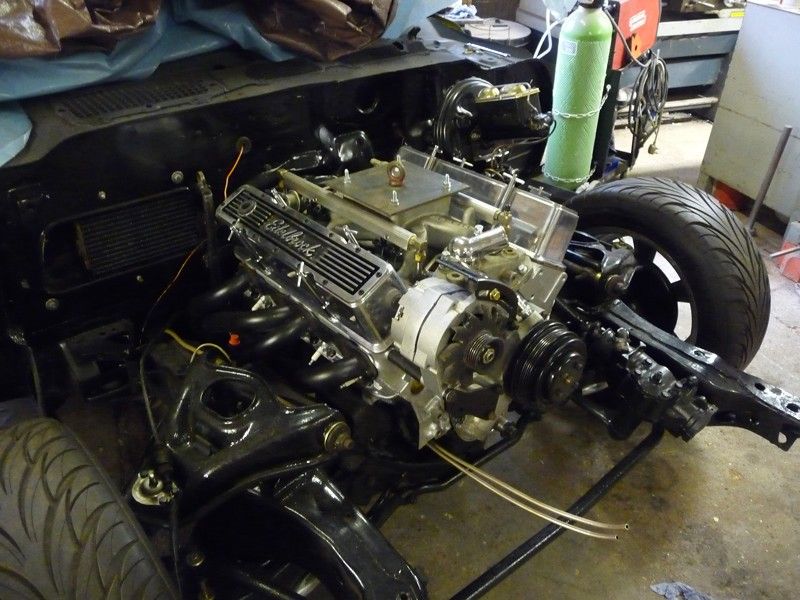
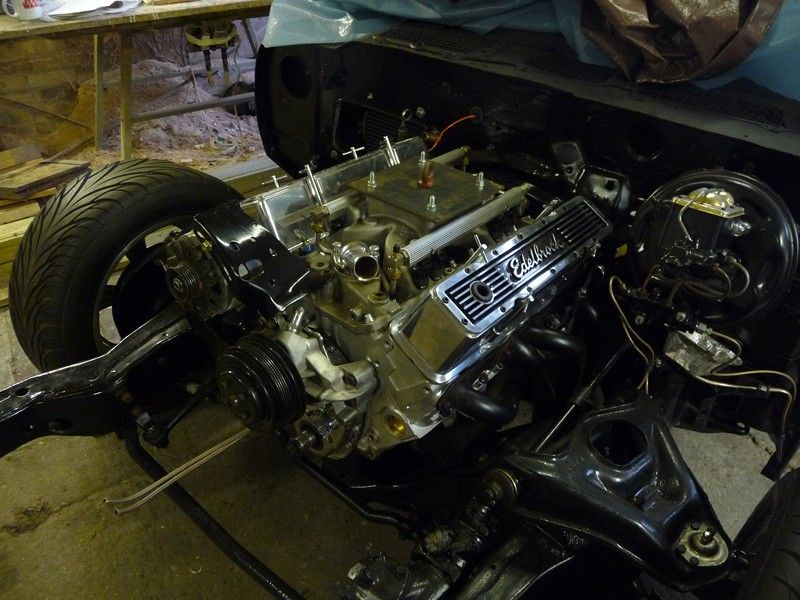
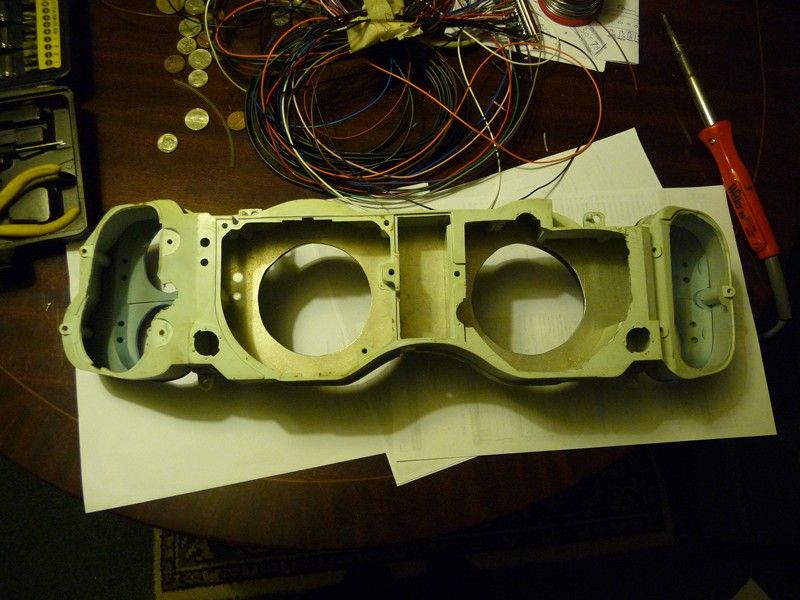
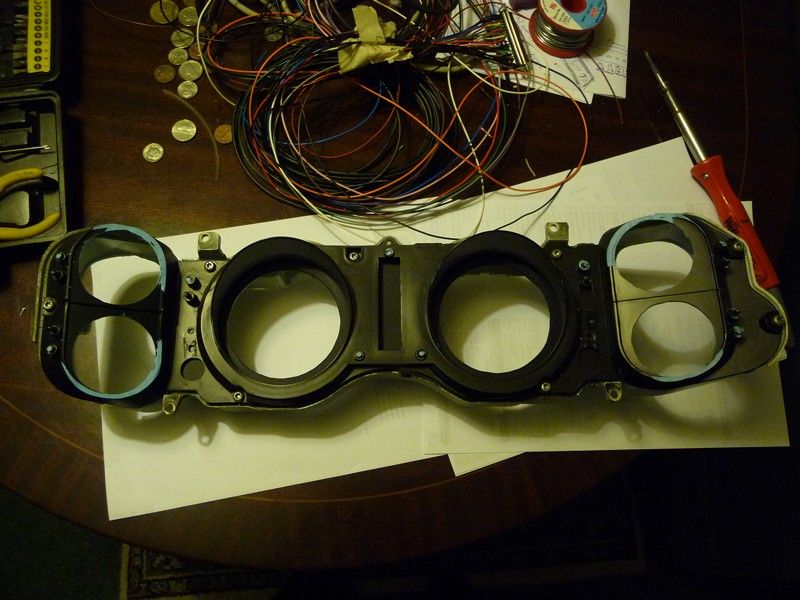
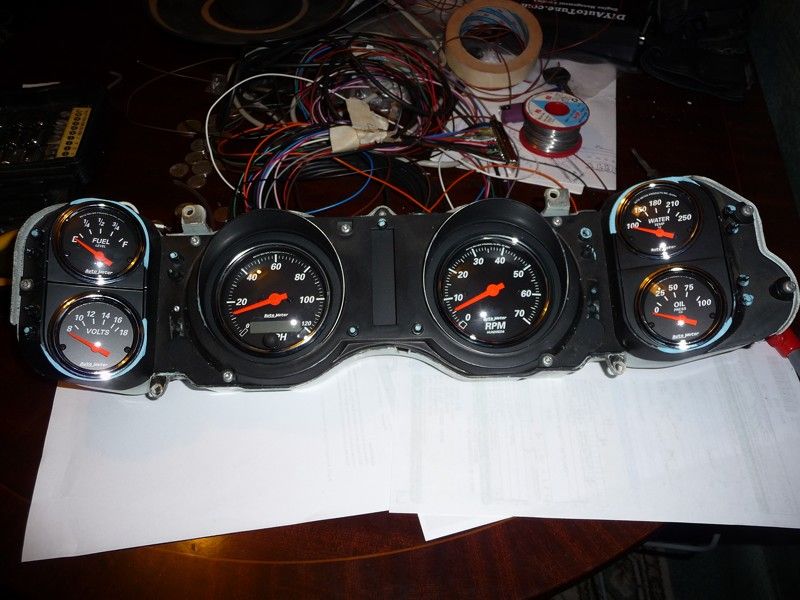
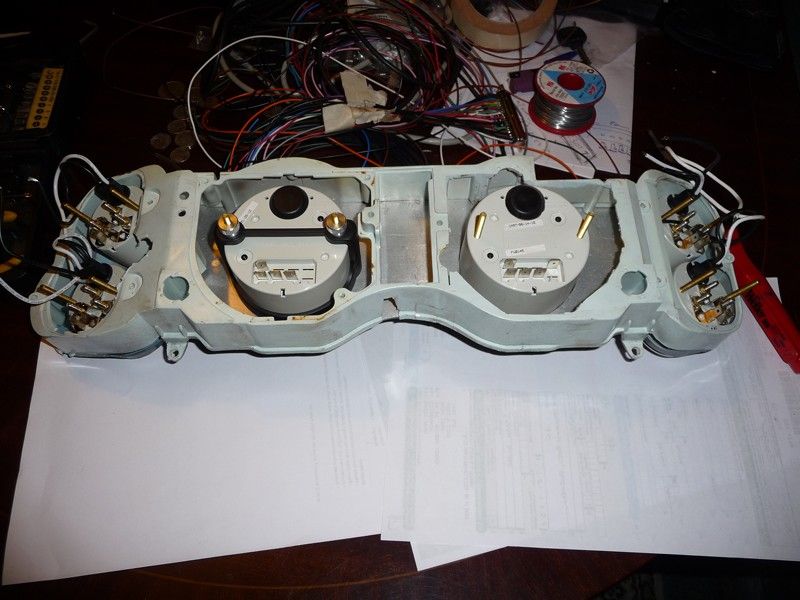
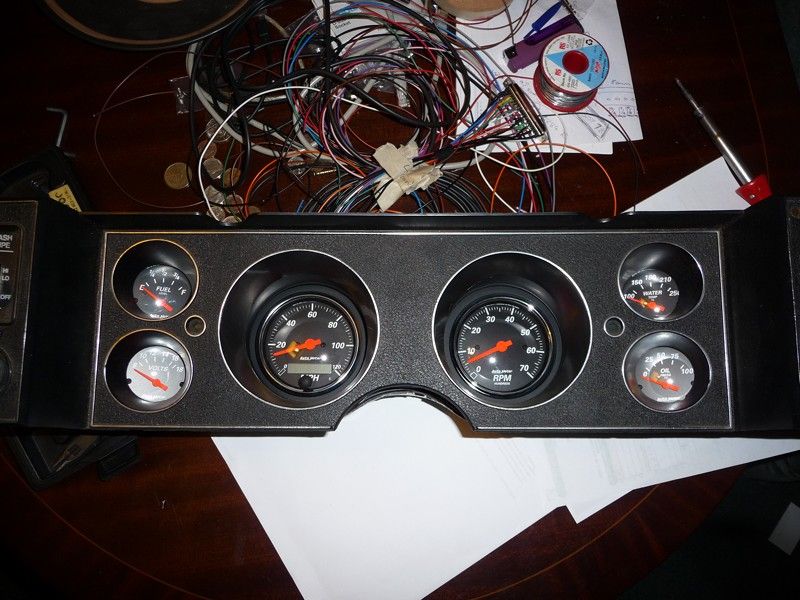

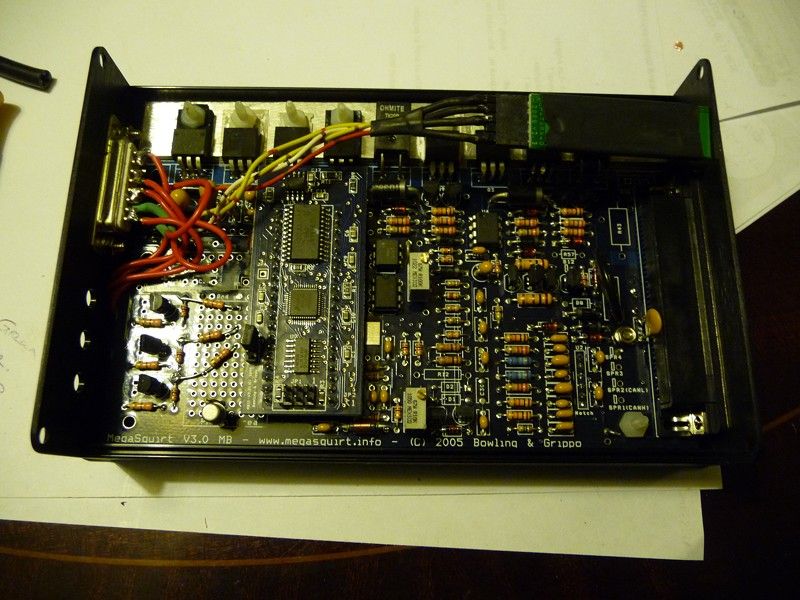
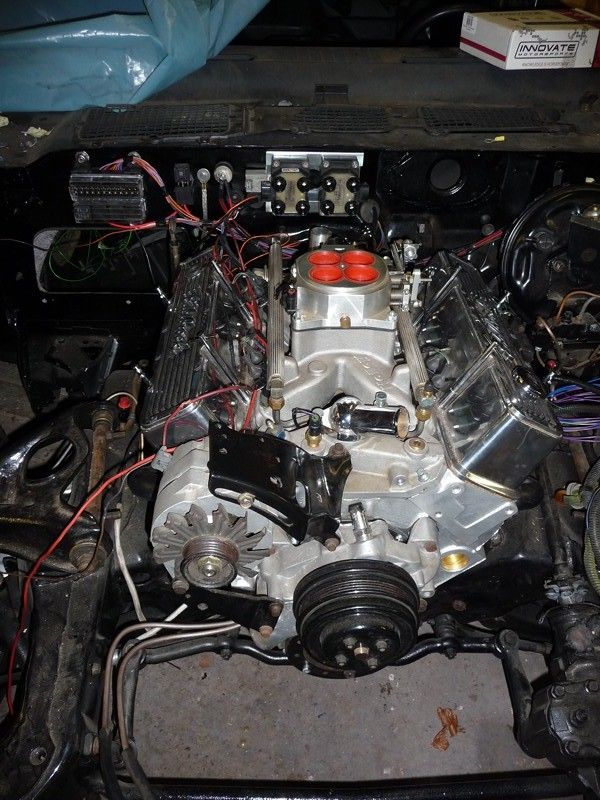
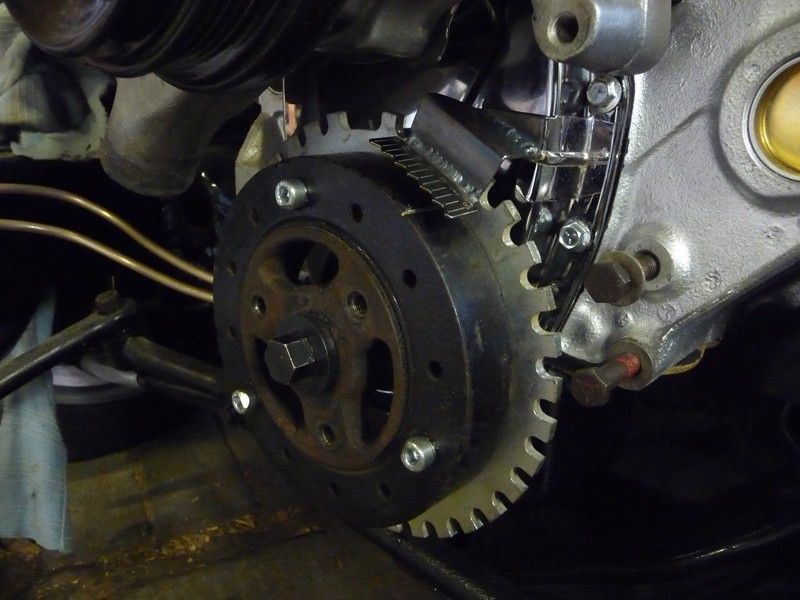
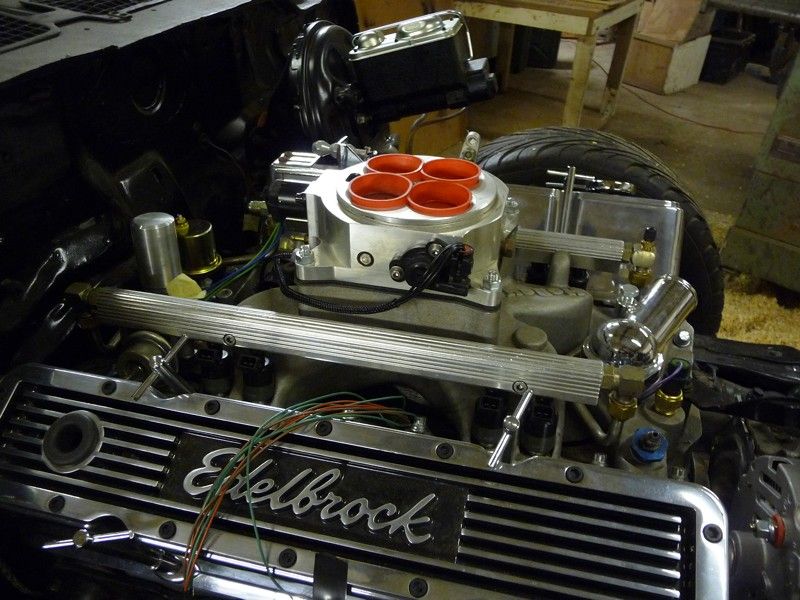
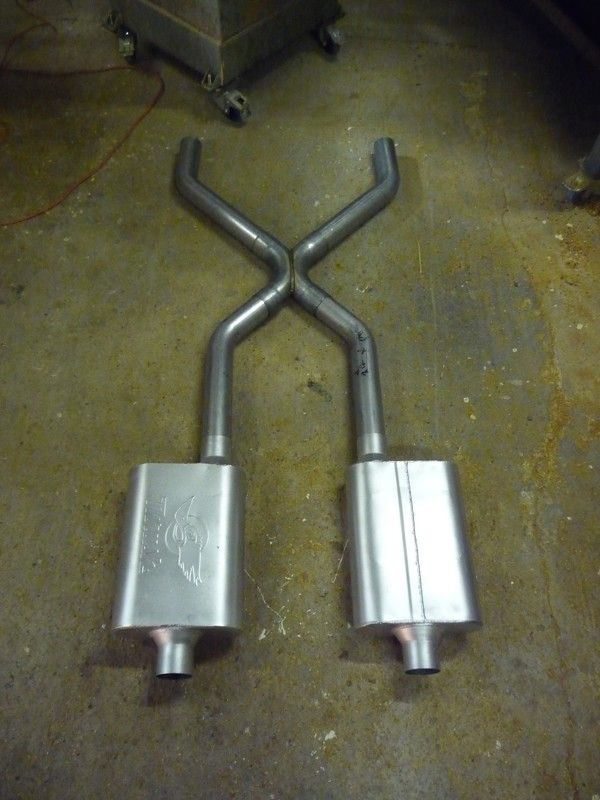
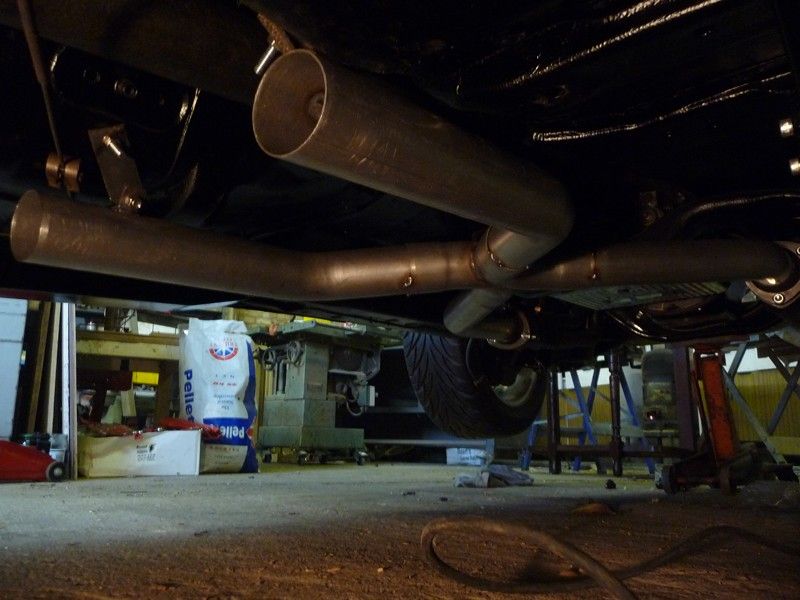
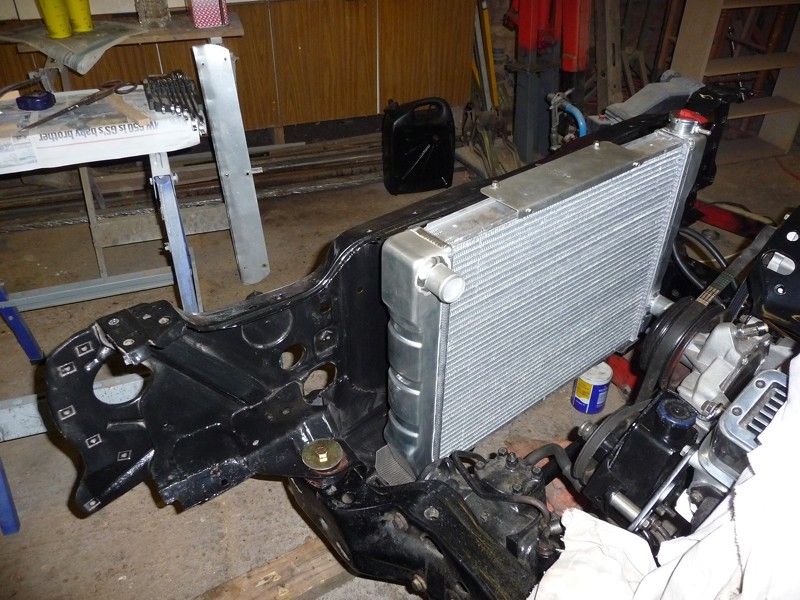
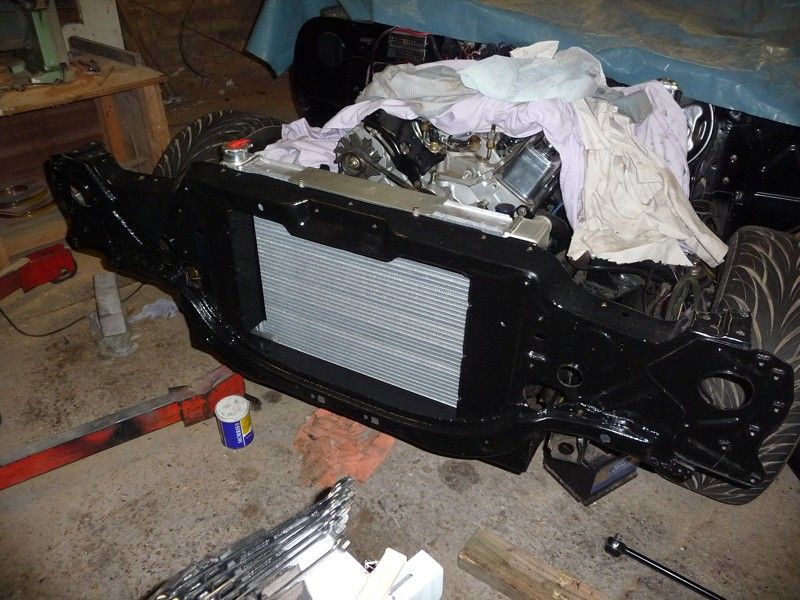
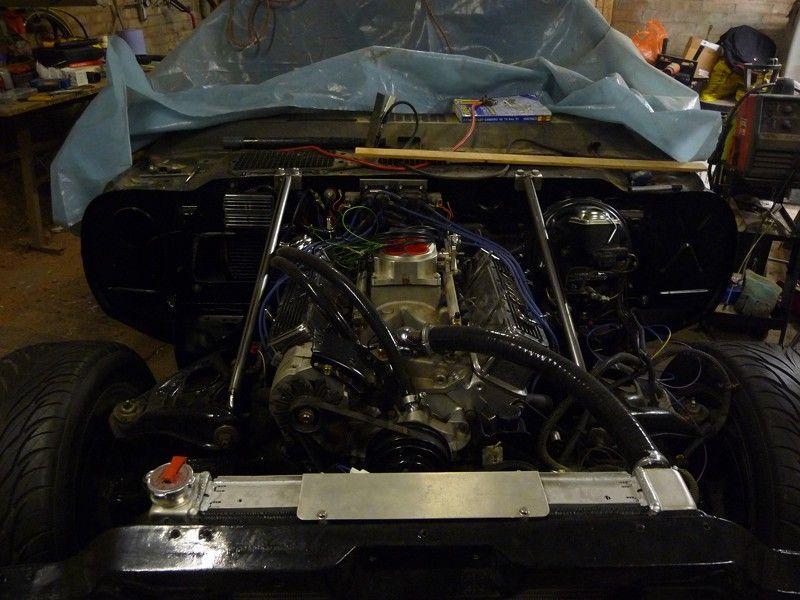
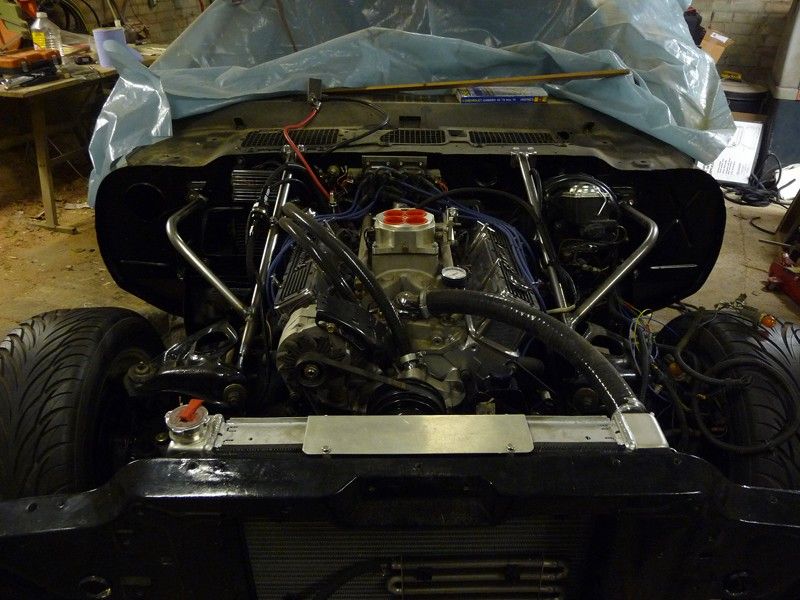
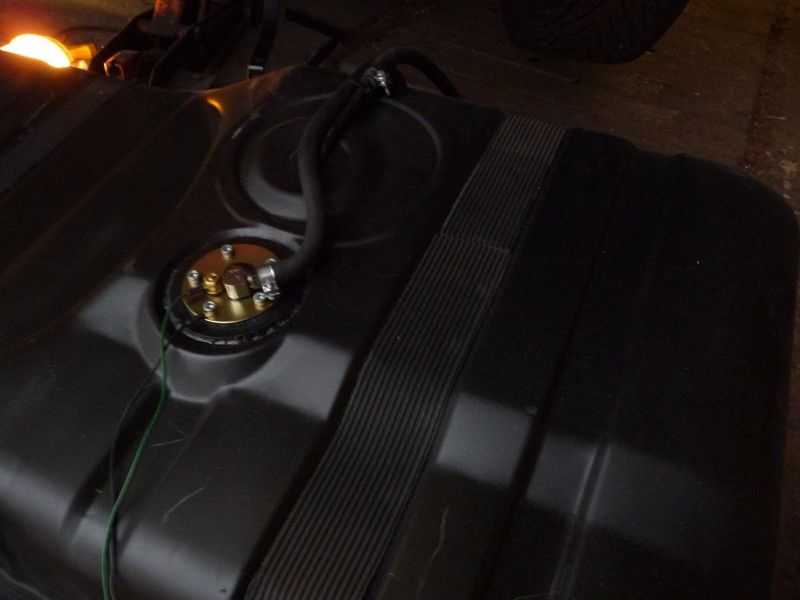
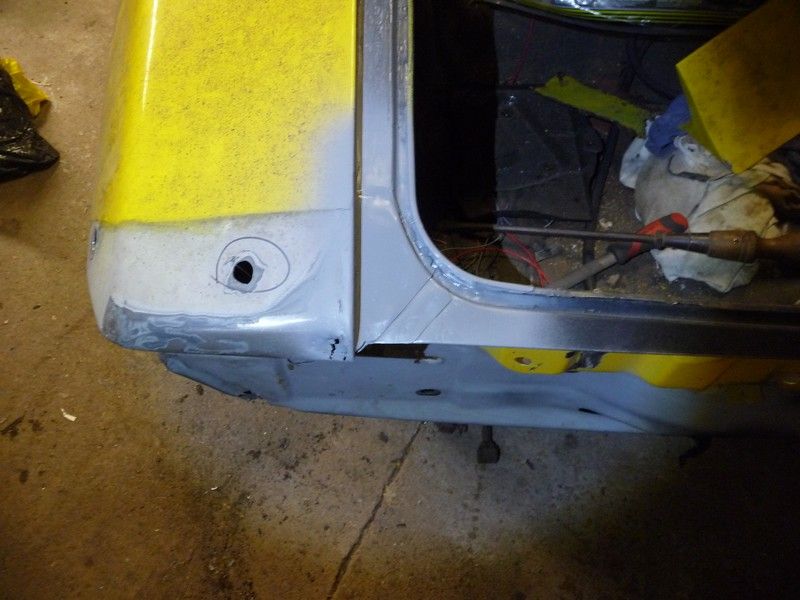
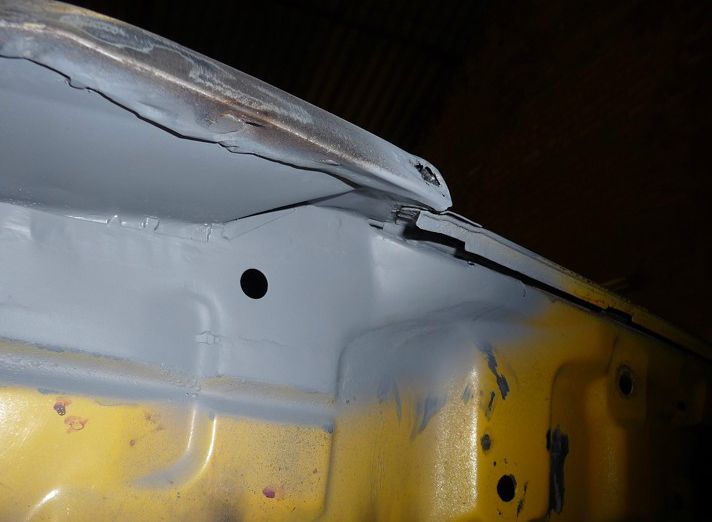
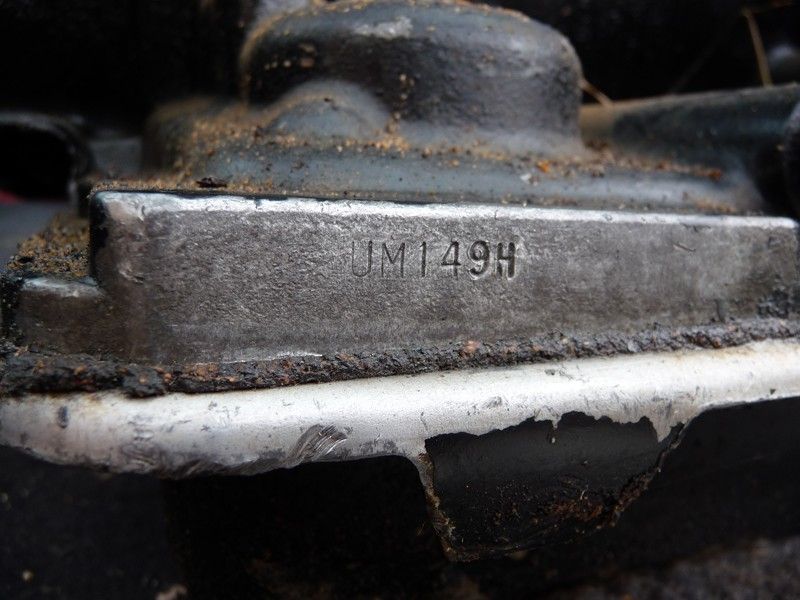
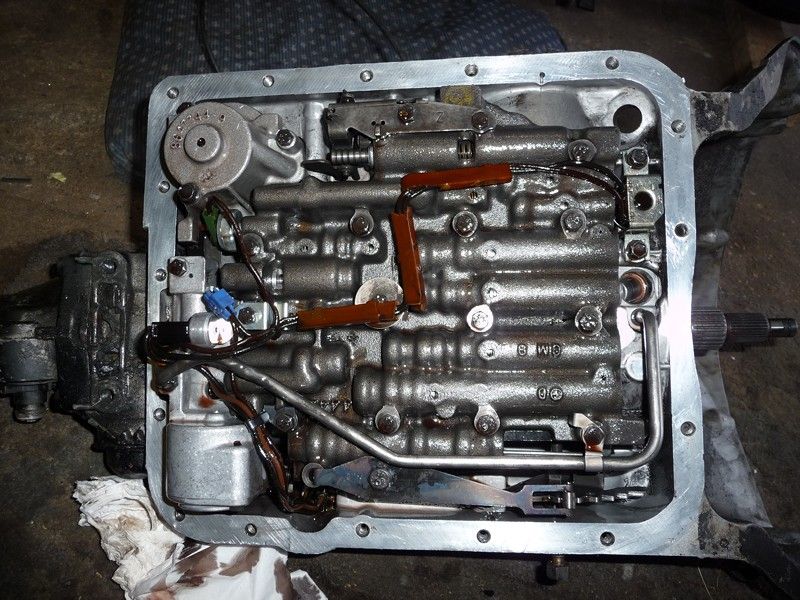
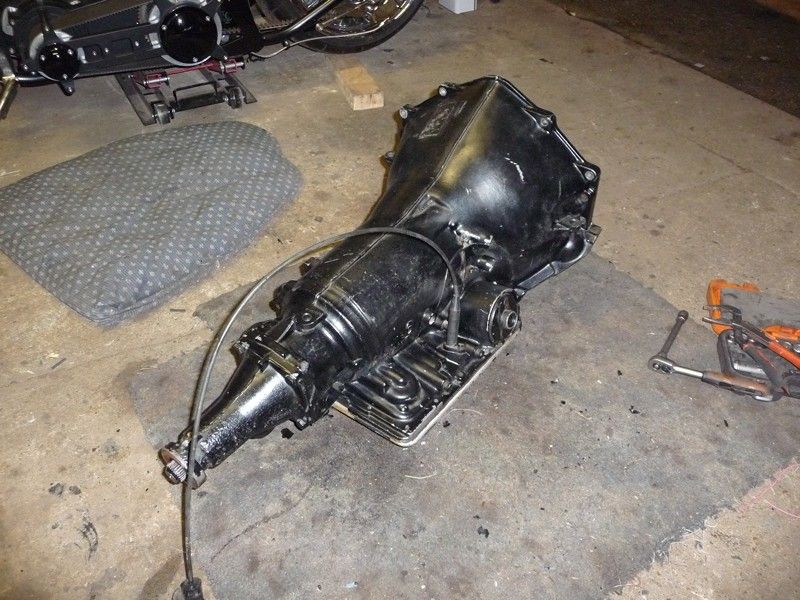
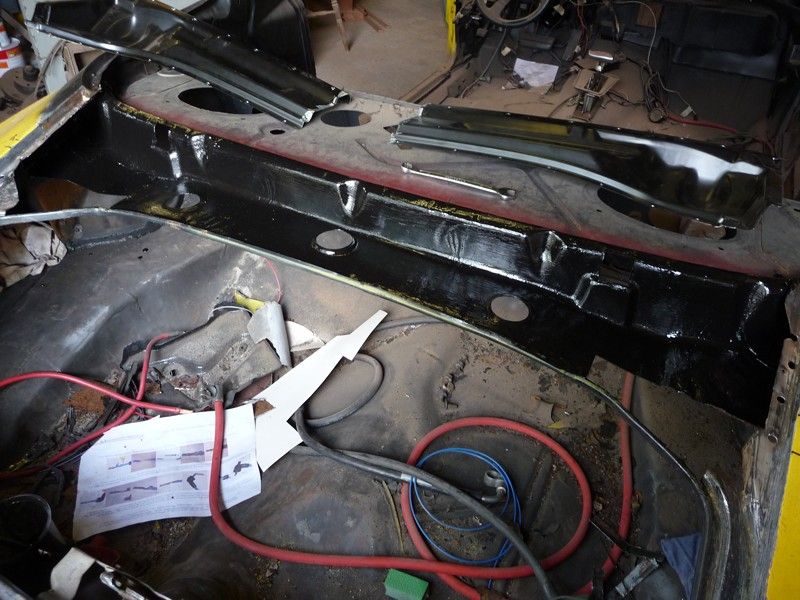

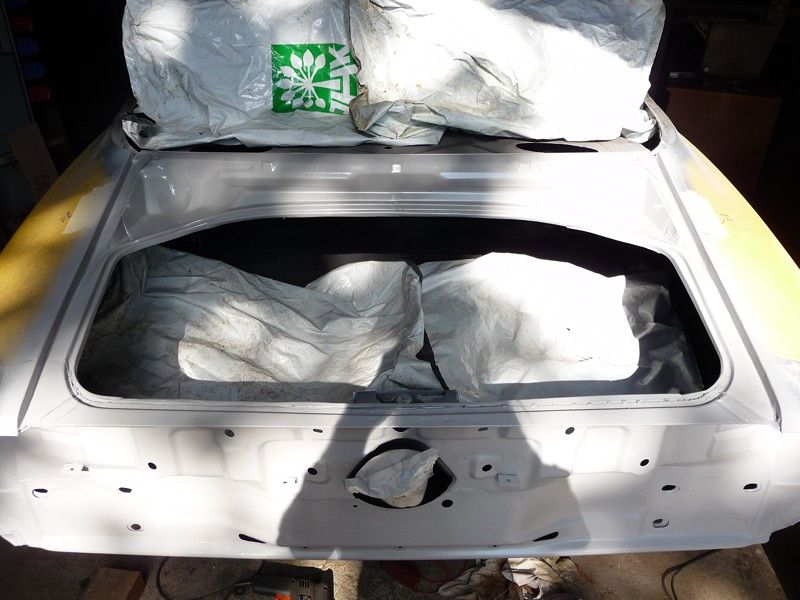 [/URL]