yellowcab
|
| posted on 9/1/14 at 04:43 PM |

|
|
Yus alot of refitting and removal, thankfully the nose cone is probably the easiest panel to remove and refit
|
|
|
|
|
40inches
|
| posted on 9/1/14 at 04:46 PM |
|
|
quote:
Originally posted by yellowcab
Yus alot of refitting and removal, thankfully the nose cone is probably the easiest panel to remove and refit
Especially when it's hinged  
|
|
|
loggyboy
|
| posted on 9/1/14 at 04:49 PM |
|
|
This is my plan for duct, rather than vertical faces that could cause buffeting, I want some sort of flexible sheet (PU, thin rubber) that can
effectively skirt the inside of the nose cone and give an (almost) velocity stack style entry to the rad.
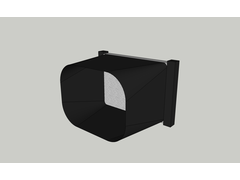 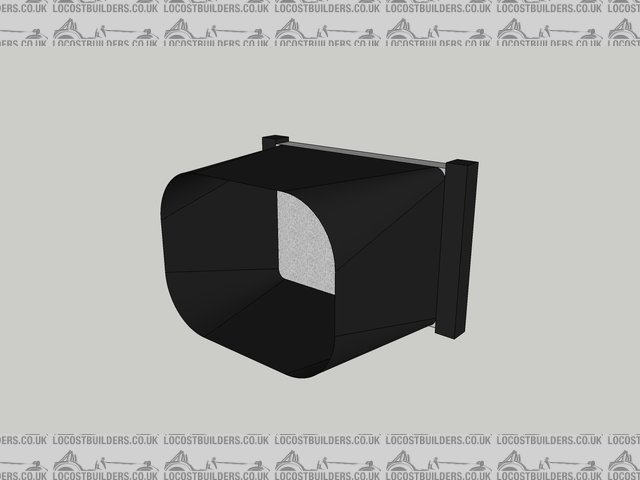
Radiatorduct
[Edited on 9-1-14 by loggyboy]
Mistral Motorsport
|
|
|
yellowcab
|
| posted on 9/1/14 at 05:03 PM |
|
|
PU foam covered in duct tape would be ideal for this (race car seat style)
|
|
|
loggyboy
|
| posted on 9/1/14 at 05:09 PM |
|
|
That would work, i did plan on having it loose in the nose cone so it could be slid on and off, but If you formed it in to the nose cone then it would
be just as easy to gain access to the front of the car.
Mistral Motorsport
|
|
|
yellowcab
|
| posted on 9/1/14 at 05:13 PM |
|
|
Lovely carvable stuff with a sharp knife too
|
|
|
Hellfire
|
| posted on 9/1/14 at 07:31 PM |
|
|
We used expanding foam on ours. We made a template for the nose cone and a similar one for the radiator and then boxed it in using MDF before wrapping
in cling film and filling the void in the nosecone with expanding foam. Once dried, remove the MDF and job done.
Phil

|
|
|
yellowcab
|
| posted on 11/1/14 at 06:15 PM |
|
|
Cheers for all the advice & experiences chaps - I've today bought a can of expanding foam, so this poo could get messy lol
So a couple of nights ago, I went down the garage to complete the boot lid top... this is my progress
Before I even opened up the garage, I got bored (just at the thought) of doing the bootlid, so I turned my attention to a hammer, a vice, and about 4
hours of painstaking too'ing and fro'ing... much more enjoyable 
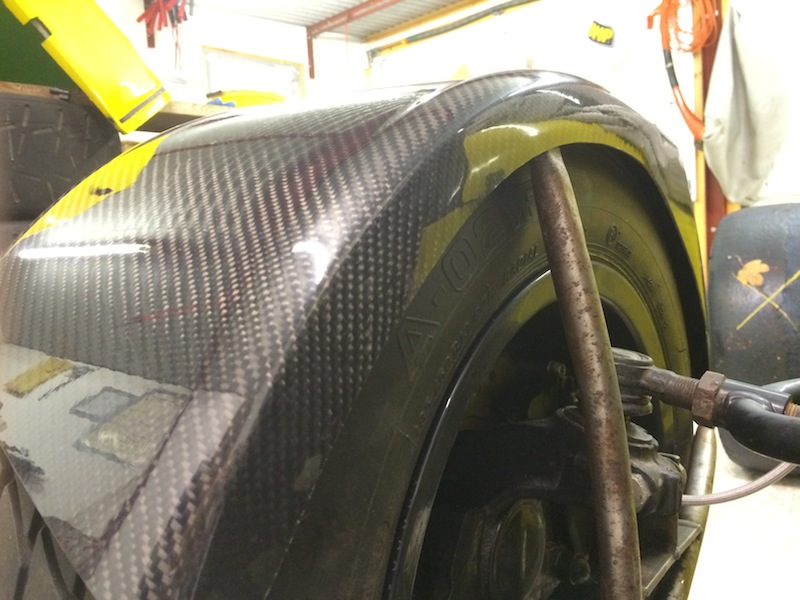
The front cycle wings, I didn't like how off-centre they were due to the big gap inboard (over an inch clearance on the wing stays on the
wall of the tyre)
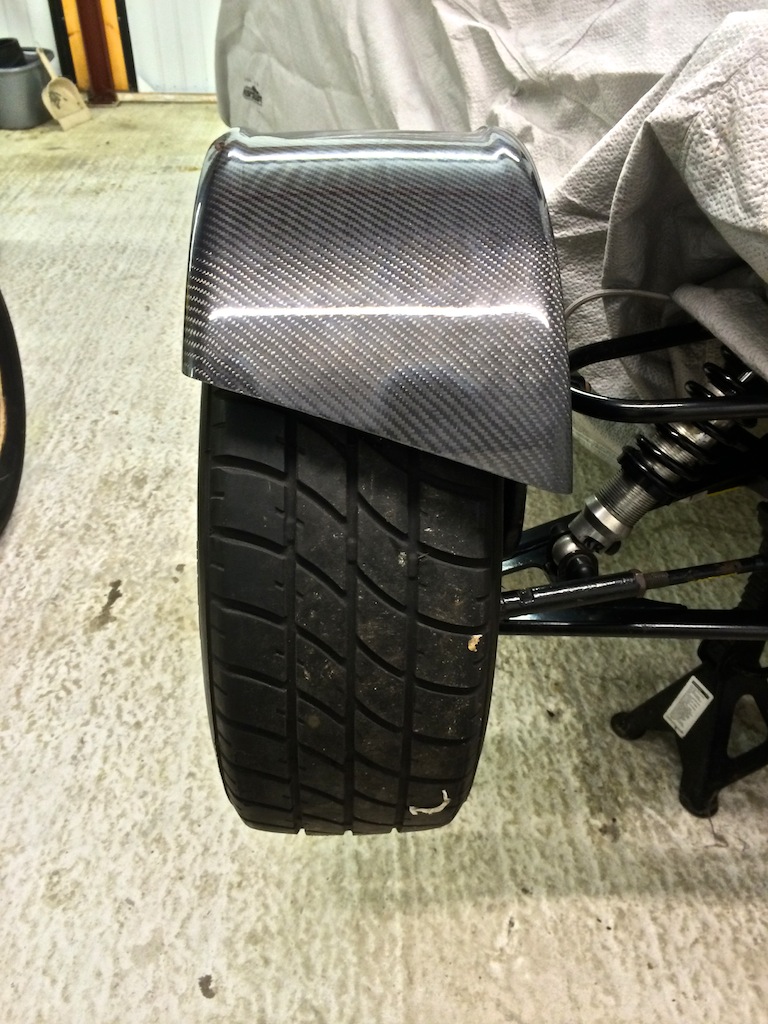
Aswell as the overly large gap on the tyre treads
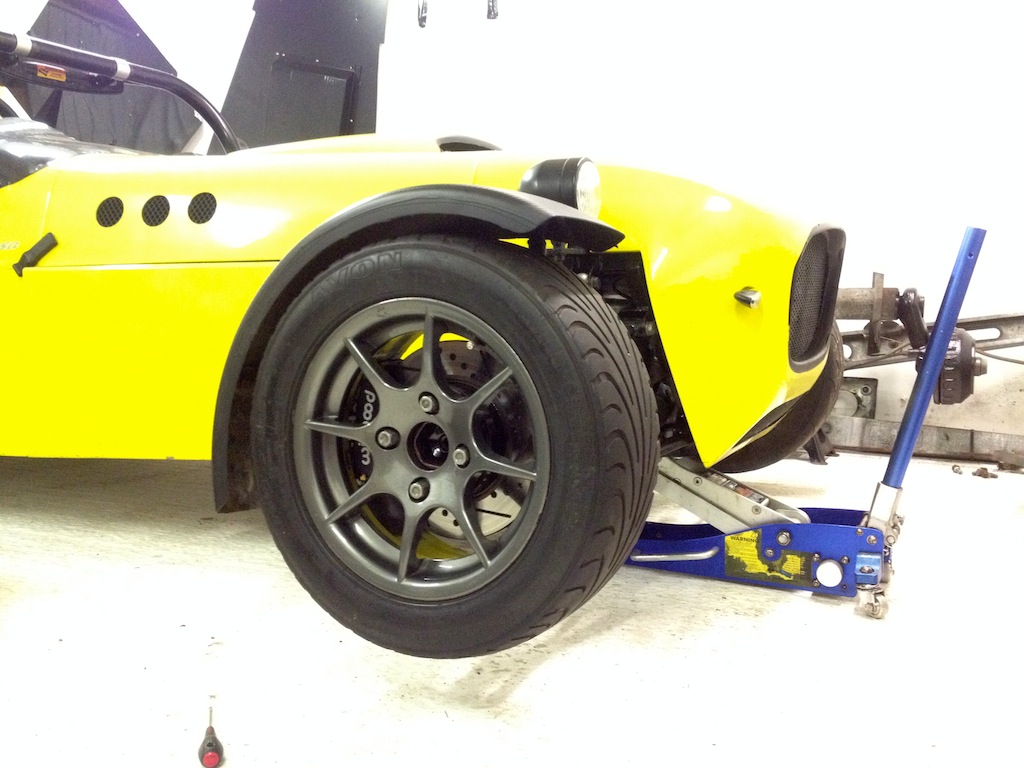
Whipped my wet wheels off, and stuck on the dry Caterham wheels, with my rear slicks (as they're much bigger than I'd ever expect to run
on the front, but just incase I come into strife, I could always stick one of these on with clearance, to limp it back onto trailer etc)
First of all, without moving the cycle wing stay main tubular section, I bent in the 90degree part to get it a little closer, but it didn't
really make a great deal of difference to how far it sat away from the 'tread'
So I bent the tubular section in a vice, and kinked it towards the inner tyre wall so my carbon arches could sit outer more, and more centrally to the
tread, straightened out the flat section, and re-curved it around the tyres profile
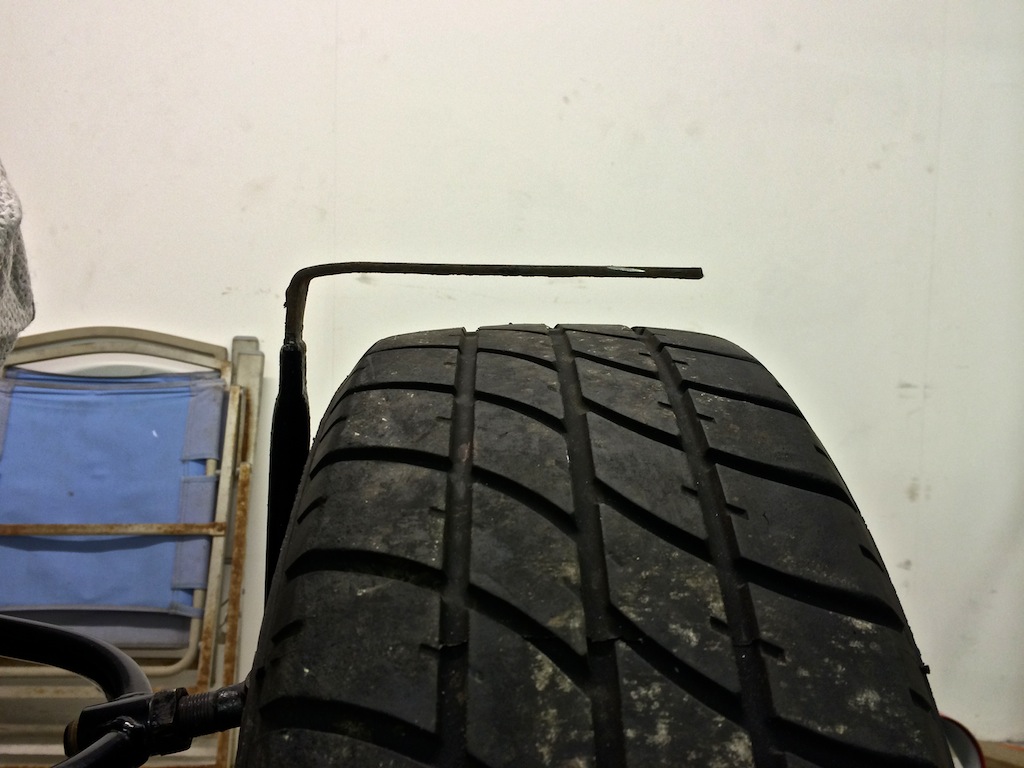
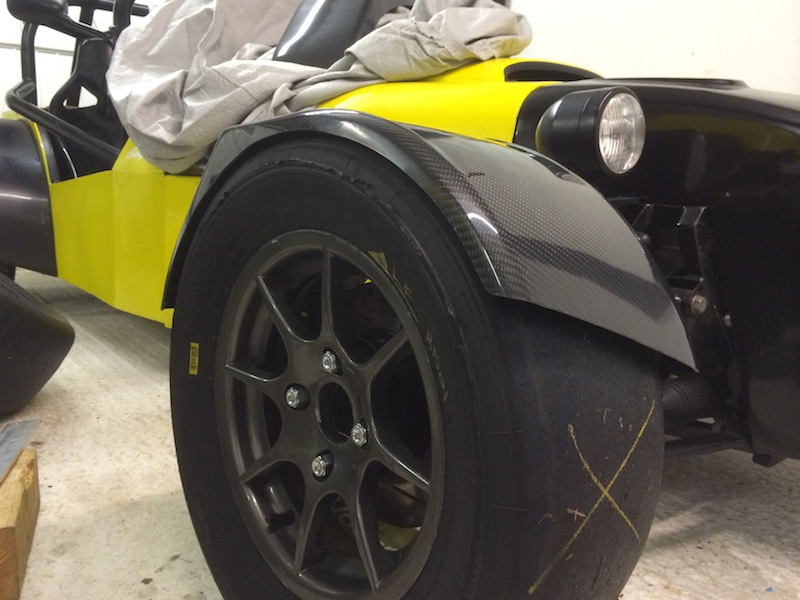
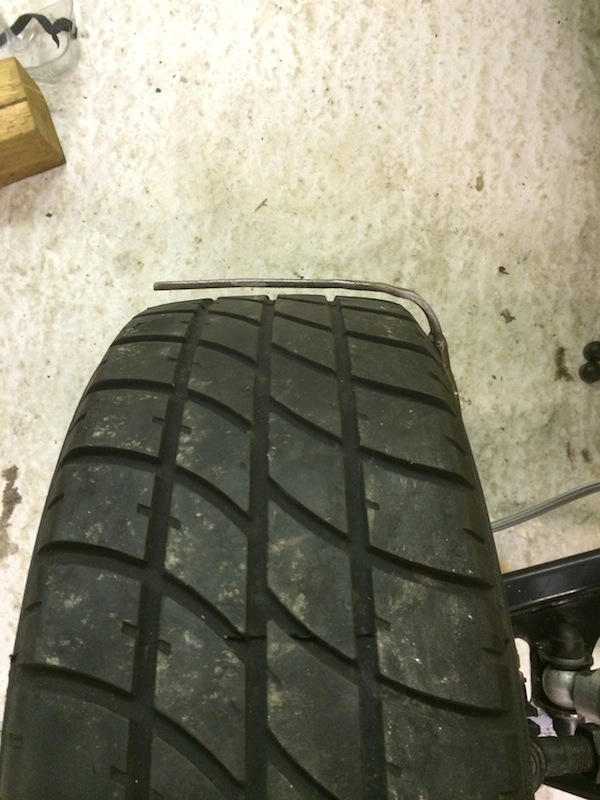
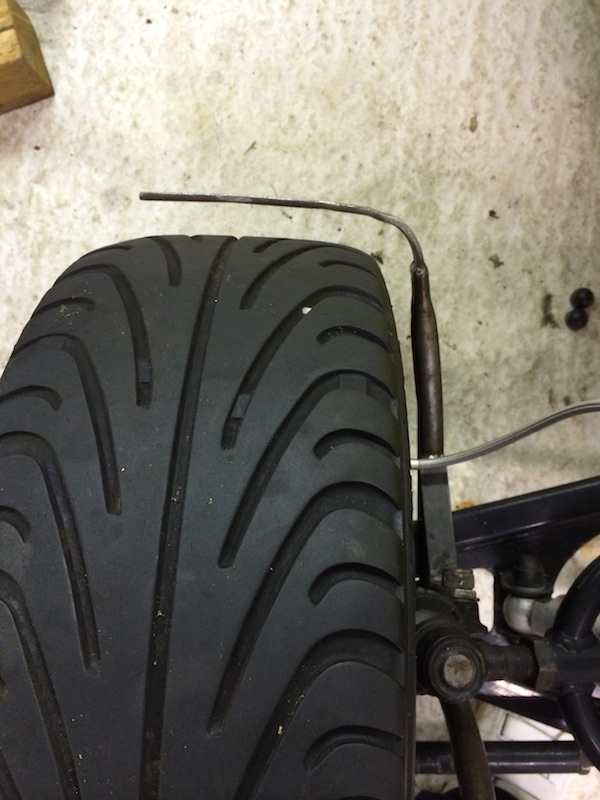
But the wing stay was too long, it came too far over the tread, leaving the cycle wing itself sticking up towards the outer most edge, like so:
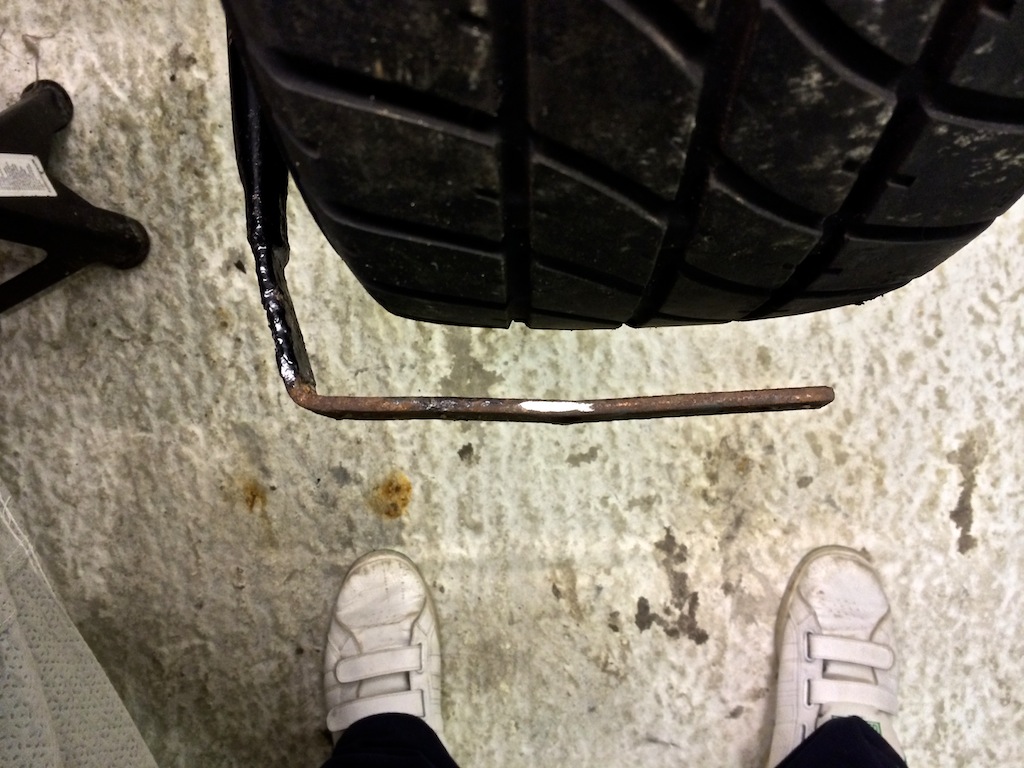
I cut them down so they sit nice and flush and evenly across the thread
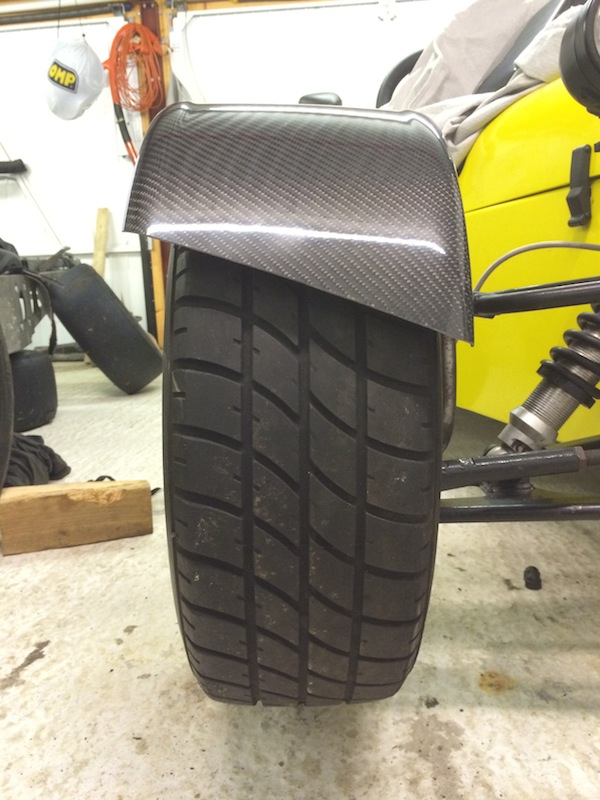
Got them back to bare metal ready for powdercoating or painting
Nice and close with a 2-3mm gap (on the biggest wheel & tyre combo I have)
So I will be drilling, tapping a thread in the flat section, & grub screwing with thread lock as there is not enough room to put a nut on the
underside... this will make my tops removable, as its so much easier to remove the cycle wing stays with the top removable, otherwise if I Tigerseal
bond the tops on, you have to disconnect brake lines & wishbones to remove cycle wings otherwise, which is a faff
|
|
|
yellowcab
|
| posted on 11/1/14 at 06:18 PM |
|
|
Just to re-iterate... the car will not be driven in anger on the above front tyres, its just to get me out of trouble when pushing the car around

Oh, and because I want to tinker with aero stuffs, I've bought an aero front splitter like this so I can pop it on for trackdays
And a half width nose cone, instead of the connards
[Edited on 11/1/14 by yellowcab]
|
|
|
sam919
|
| posted on 12/1/14 at 05:05 AM |
|
|
You might find them too close, remember the tire will expand quite a bit and centrifugal force will push the tyre out as it rotates. Slicks like those
should be around 18 psi cold a few times round the track then all set to 21psi, if your using air, but they will get slightly bigger none the less.
The cycle wing will also act downward probably pushing the outer edge closer to the tyre as well as there is more flex towards the non support end.
Another thing to bare in mind is trying to get the wheel on and off, if the stay/ cycle wing is too close the outer edge of the cycle wing wont allow
the the wheel on, you can fit them all in place then use a air sander to shave off under the outer edge untill the tyre fits, you do end up with much
less cycle wing than you started with when your trying to get it as close to the tyre as possible without fouling.
Remember with the front wing in place generating downforce the rear will become lighter so you might have to think if you havent already about
stiffening the front up, this will then generate understeer in lower speed corners it all becomes a trade off ......as with more aero, the lower your
top end will be.
Worth an experiment none the less
|
|
|
Ben_Copeland
|
| posted on 12/1/14 at 07:29 AM |
|
|
That's why he put this ;-)
quote:
Just to re-iterate... the car will not be driven in anger on the above front tyres, its just to get me out of trouble when pushing the car around
Ben
Locost Map on Google Maps
Z20LET Astra Turbo, into a Haynes
Roadster
Enter Your Details Here
http://www.facebook.com/EquinoxProducts for all your bodywork needs!
|
|
|
sam919
|
| posted on 12/1/14 at 08:30 AM |
|
|
I thought that was in refference to tyre condition, rather than tyre profile.
|
|
|
yellowcab
|
| posted on 12/1/14 at 08:33 AM |
|
|
Yeah Ben is spot on.
I'd never run these tyres at the front of the car, as the equate to something like 215-65-13 or something daft.
|
|
|
sam919
|
| posted on 12/1/14 at 09:43 AM |
|
|
Nice and close with a 2-3mm gap (on the biggest wheel & tyre combo I have):
This is why i mentioned it.
|
|
|
yellowcab
|
| posted on 12/1/14 at 09:54 AM |
|
|
Gotcha Sam, it's more for me pushing the car around, on and off the trailer and around the workshop, didn't want to become a time where
the wheels didn't even fit on, hence why I used these as clearance wheels, all my other front wheels are smaller in circumference.
Front wets: 185/60/13
Front dry: 175/60/13
Rear wets: 205/60/13
Rear dry: 215/65/13 (slick equiv) (the aboves)
[Edited on 12/1/14 by yellowcab]
|
|
|
yellowcab
|
| posted on 12/1/14 at 10:04 AM |
|
|
These are my dry fronts fitted with the old cycle wings, where the original gap on the big slicks was about an inch, you can see on my proper front
tyres it's about 1.5-2inches, so now with only 2-3mm clearance on my big slicks, I have a feeling the gap will still be too large on my proper
fronts
quote:
Originally posted by yellowcab
Fronts fit OK, despite gappy cycle wings (due to be changed anyway)
|
|
|
waggy
|
| posted on 12/1/14 at 01:08 PM |
|
|
Fantastic thread! I just spent my Sunday morning reading it from start to finish.
I'm right at the start of my live axle, probably fireblade but definitely bike engined Locost build and I managed to get a few fantastic ideas
and tips from your thread, thanks.
|
|
|
CosKev3
|
| posted on 12/1/14 at 01:22 PM |
|
|
quote:
Originally posted by yellowcab
Hi pal, thanks for post.
The wider side panels are just bits if aluminium wrapped in yellow, so just a case of hacksawing your old fibreglass ones off
Alternatively, have a look at Ben_Copelands post called 'Z20LET into a Haynes' he's recently done it simply by cutting his
fibreglass and moving them outward and re-riveting it, they're not 'as' wide, but it's free
ah right cheers.
something to look into if I go for a colour change.
|
|
|
yellowcab
|
| posted on 12/1/14 at 09:19 PM |
|
|
Cheers for the comments Waggy - glad it kept you semi entertained lol
Oh - before I forget, here is a short video clip of the gaps I have inside my nose cone, whilst fitted, around the bottom, sides & top of radiator
and oil cooler...
As aerodynamics go, I know its important to let the air escape through the top of the nose cone, so I'm not wanting to blank that off, but would
you guys say it was worth me doing the bottom and sides, or not really?
Video: http://www.youtube.com/watch?v=6geVal4yHSA&feature=em-upload_owner
Not a very entertaining update unfortunately, just more fettling with the passenger side cycle wing stay... and of course it didn't go to
plan
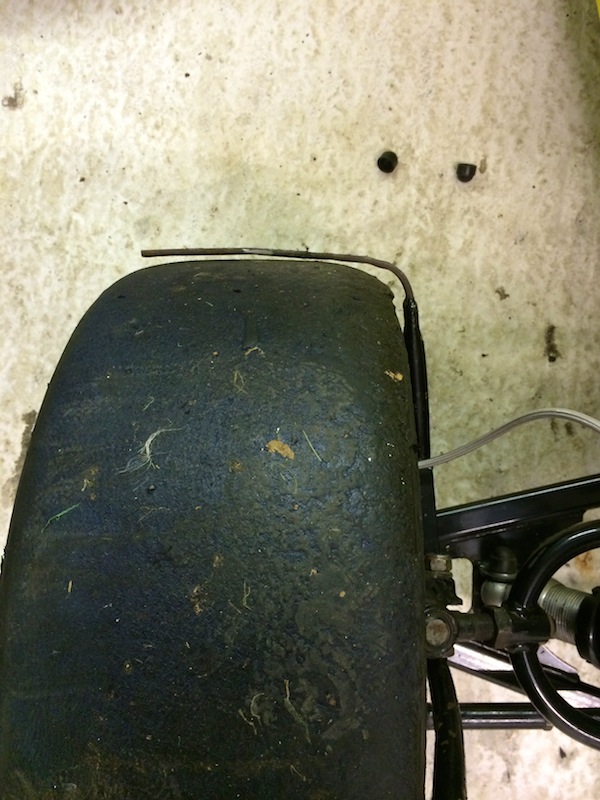
So despite the cycle wing stays being rather close the the tyre tread, it still 'appears' that they sit miles off the tyre once
they're going to be fitted...
21mm to be exact at the front leading edge
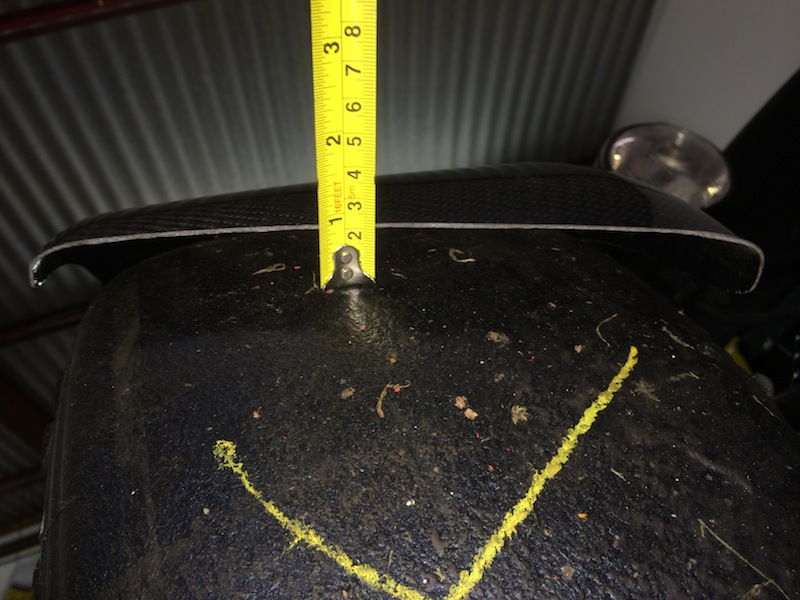
Nice and close to the inside tyre walls which I wanted
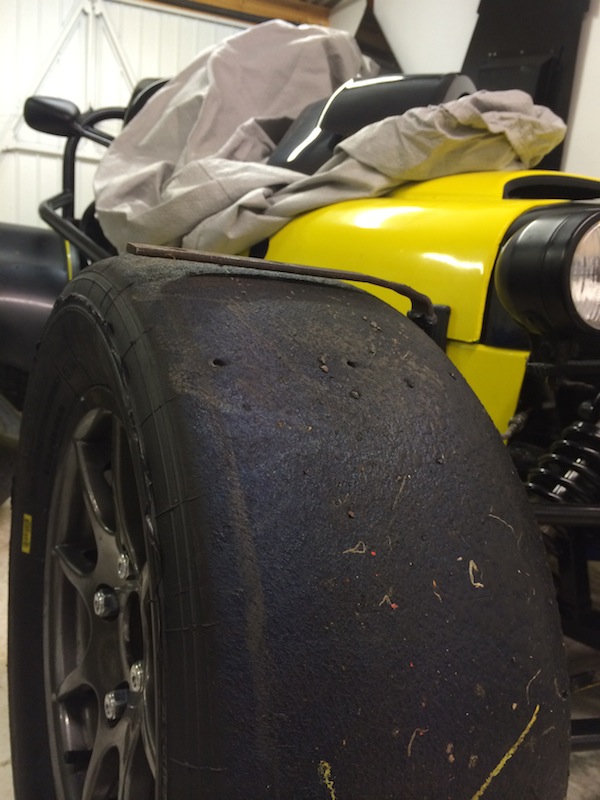
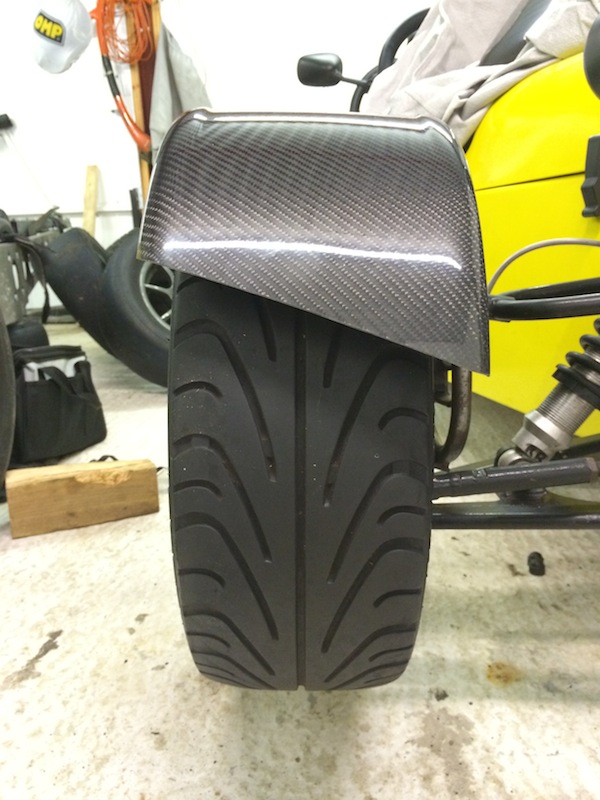
So to now show how much more clearance I have with my 'correct' front wheel & tyre setups, here are my wets - Yokohama A021R
185-60-13, with around 6-7mm clearance (28mm gap to front leading edge of carbon)
However I really dislike (due to correct offset) how they sit quite far inwards, but if I mount my cycle wings any further inwards, then my largest
tyres would scrub on the outside, so this is the compromise

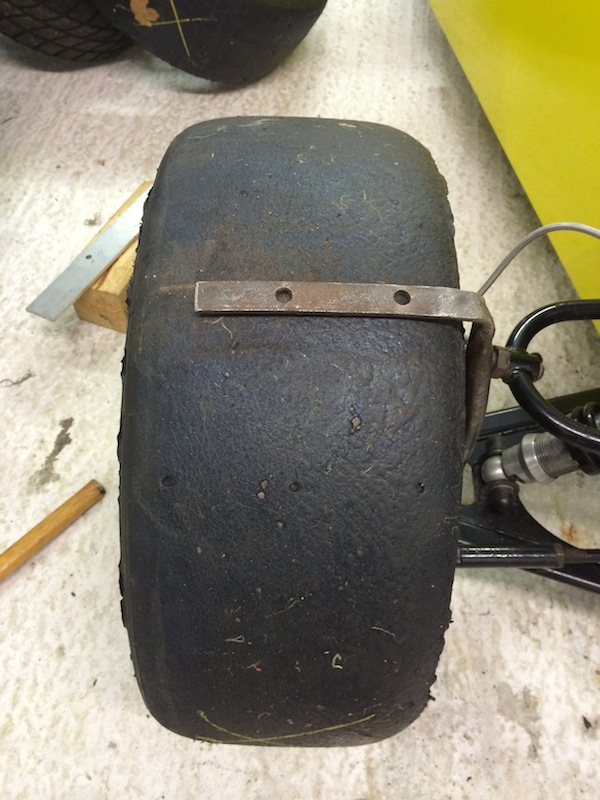
Onto my dry fronts, currently 175-55-13 Avon CRB500, but have the capability to go larger (especially in width), rather large gap, over an inch to the
metal cycle wing stay, and probably 45mm gap at carbon leading edge once fitted

So there is my reason for using my biggest wheel & tyre combo that I own, because if had made them fit snug to the above, I'd have been
stuffed with either trying to fit my wets
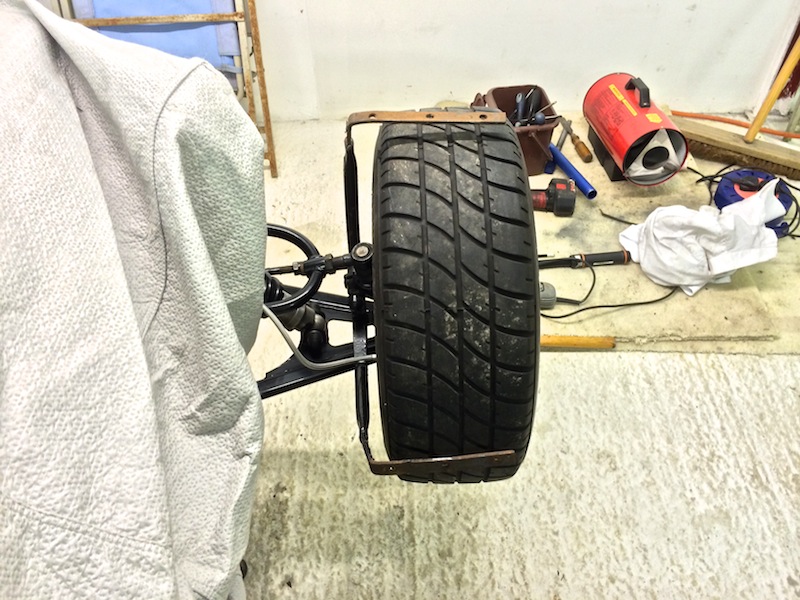
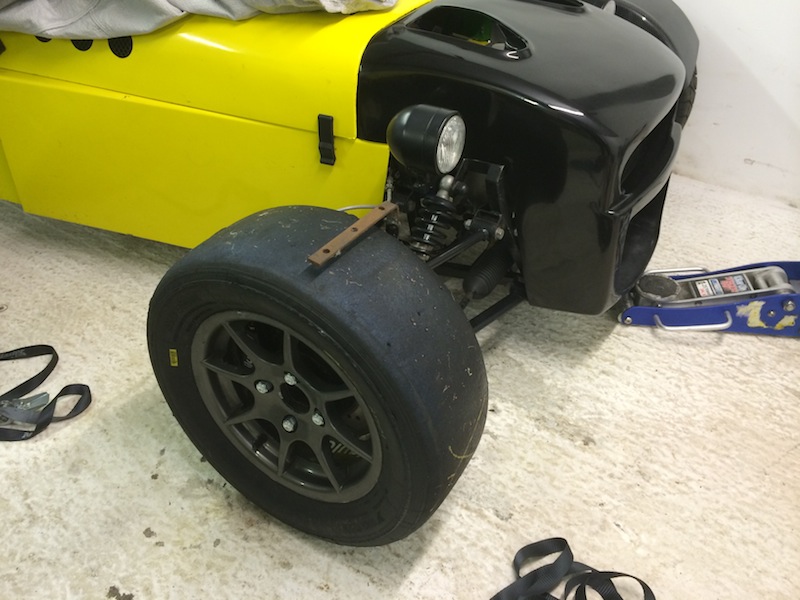
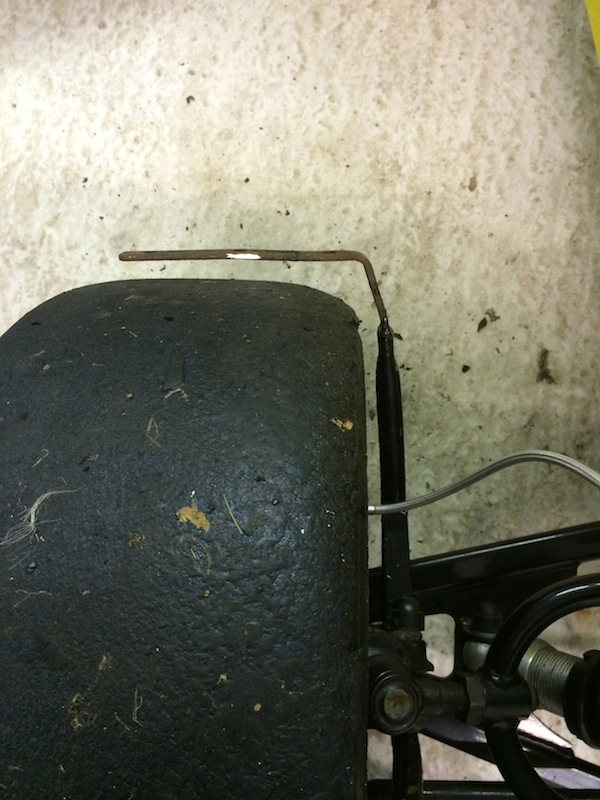
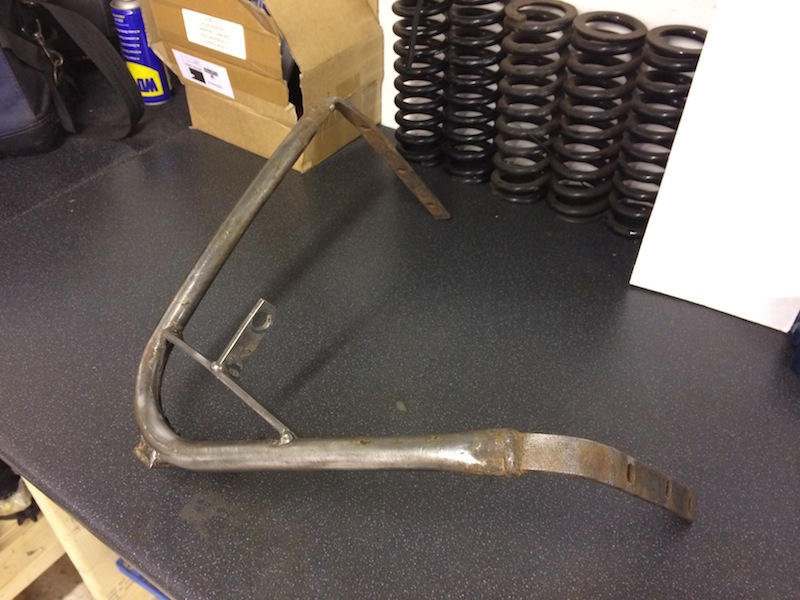
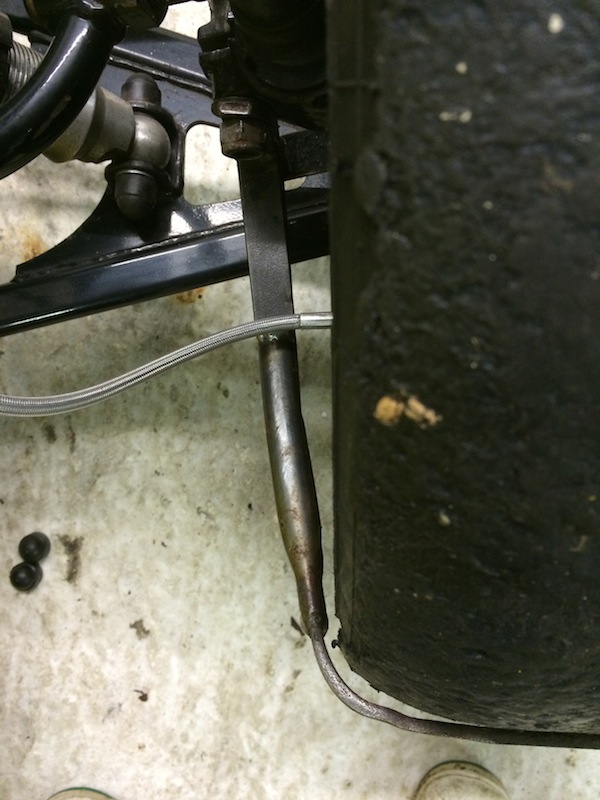
Whoever wanted a pic of the stay in place, without a wheel or cycle wing - here it is
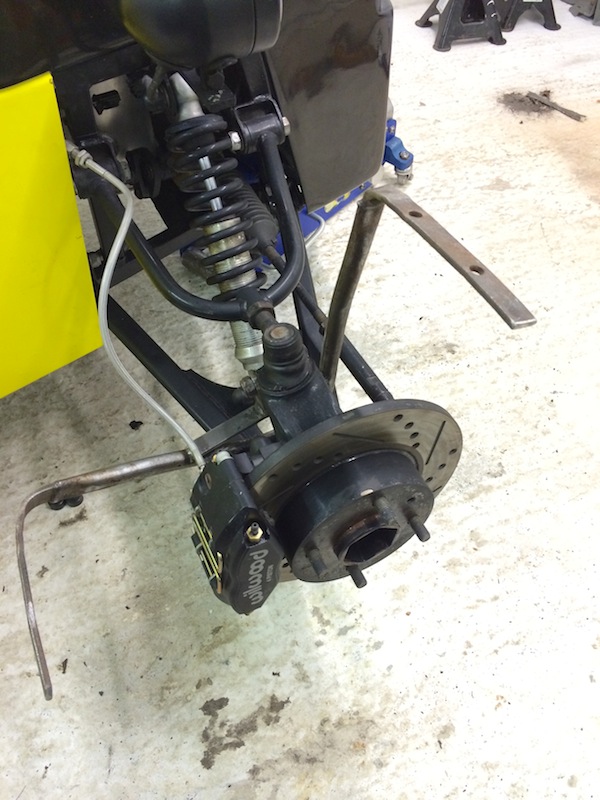
In order for the cycle wings to house the wheel centrally left to right, I just kinked the uprights on the cycle wings like so
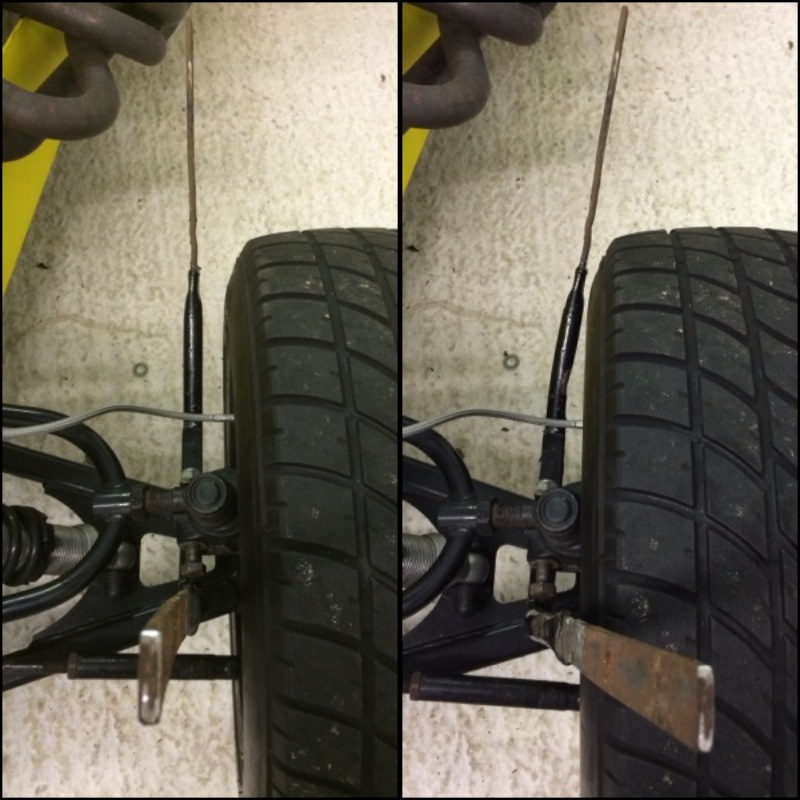
Passenger side didn't quite go as smoothly, but thanks to Colin and the loan of his welder, all got sorted in the end, and it was a damnsite
easier just welding the angle at the correct height, rather than trying to bend the curve around the tyre precisely!

[Edited on 12/1/14 by yellowcab]
|
|
|
yellowcab
|
| posted on 13/1/14 at 01:36 AM |
|
|
Can't be arsed with two sets of cycle wings just for a trackday bit of fun and weekend blats lol
|
|
|
40inches
|
| posted on 13/1/14 at 02:36 PM |
|
|
Looking at the video it looks like you are almost there, as far as ducting is concerned, you just need to try to seal all around the radiator core
with ally sheet. Air like water and, I suppose, electricity, will take the line of least resistance, you need to force the air to go through the rad
rather than around it. Sealing the top of the rad to the nose cone will let the two top vents work by creating low pressure.
The only problem is with the large openings in the nose cone, ideally they should only be around a third the size of the radiator matrix, you could
try it as it is then cover one up and see what effect it has on cooling.
Have found this on the Interweb, it explains far better than I could. Sections 2,3 and 4 are
what we need. Sections 2,3 and 4 are
what we need.
[Edited on 13-1-14 by 40inches]
|
|
|
yellowcab
|
| posted on 13/1/14 at 03:52 PM |
|
|
I would like to take the crown for the most crude drawing ever... however I hope you get the idea I'm suggesting.
Rather than my pieces of aluminium 'framing' my radiator, which could cause pockets of air, could I not have forward facing bits of
aluminium (the green bits) blocking off an easy way for the air to get to the holes at the top of my new nose cone, and the only way for the air to
get to them, is through the cooler & rad
Please say if I'm completely wrong lol
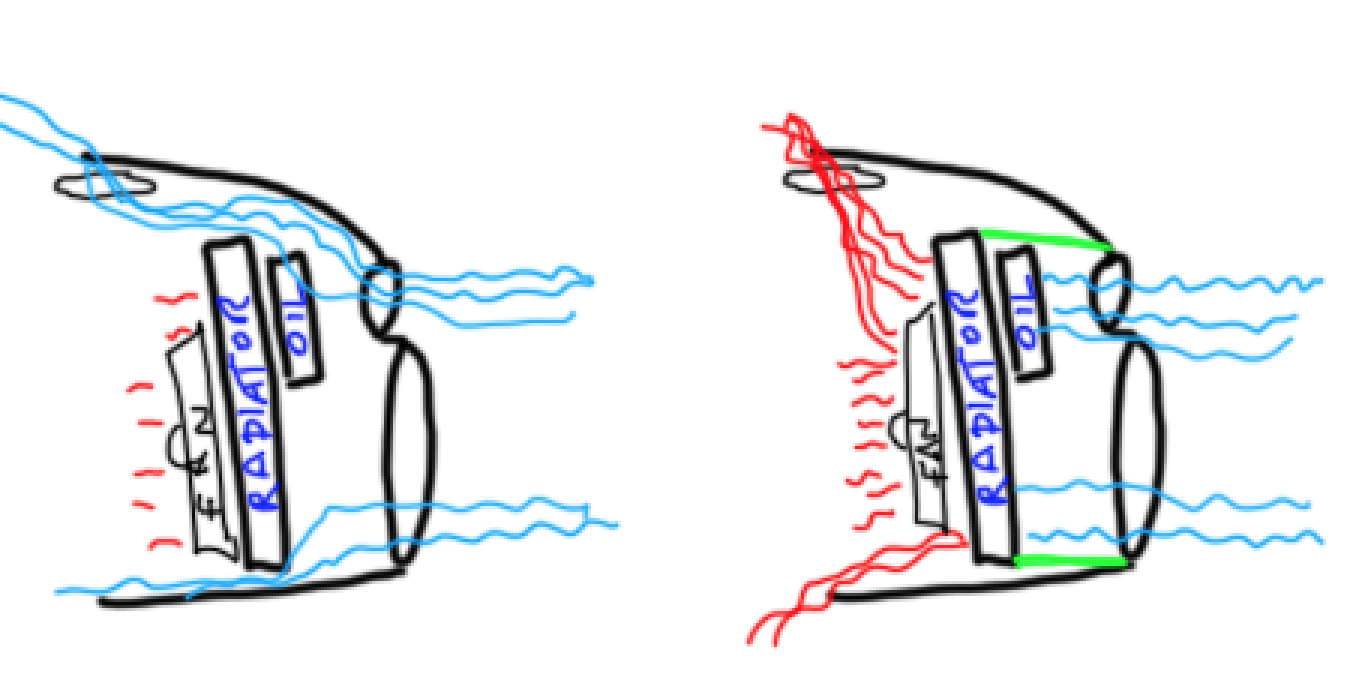
[Edited on 13/1/14 by yellowcab]
|
|
|
40inches
|
| posted on 13/1/14 at 04:07 PM |
|
|
Don't see why that wouldn't work, it would be much better than all the air bleeding around the rad 
|
|
|
yellowcab
|
| posted on 13/1/14 at 04:13 PM |
|
|
So when I go back down the garage tonight to finish the bootlid top, I'll do these instead
Deal!
|
|
|
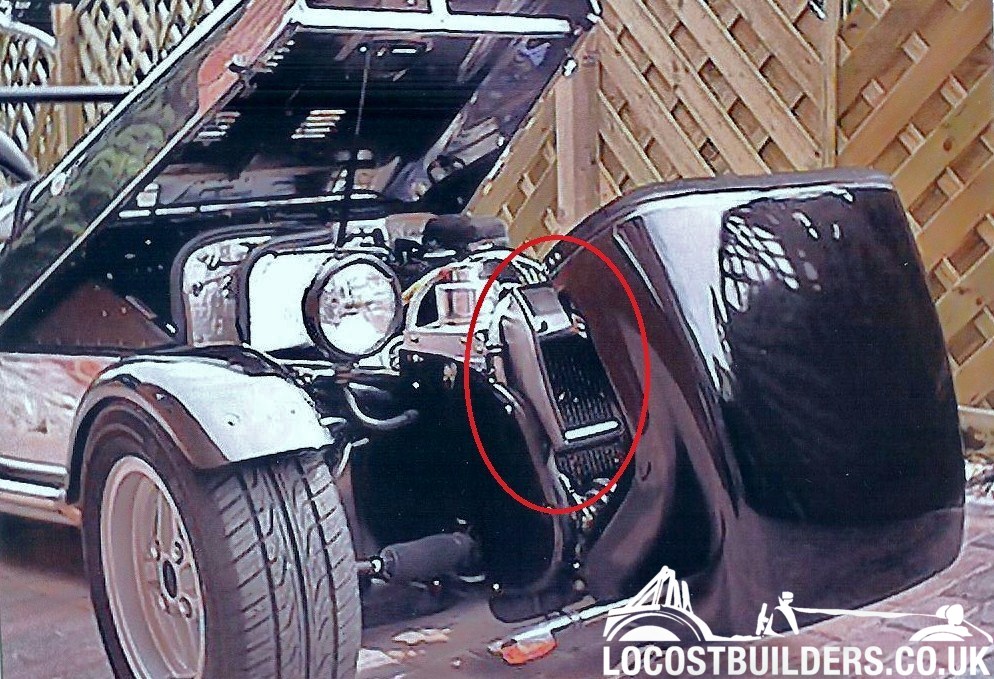
40inches
|
| posted on 13/1/14 at 04:22 PM |
|
|
quote:
Originally posted by yellowcab
So when I go back down the garage tonight to finish the bootlid top, I'll do these instead
Deal!
Focus! That's all it takes
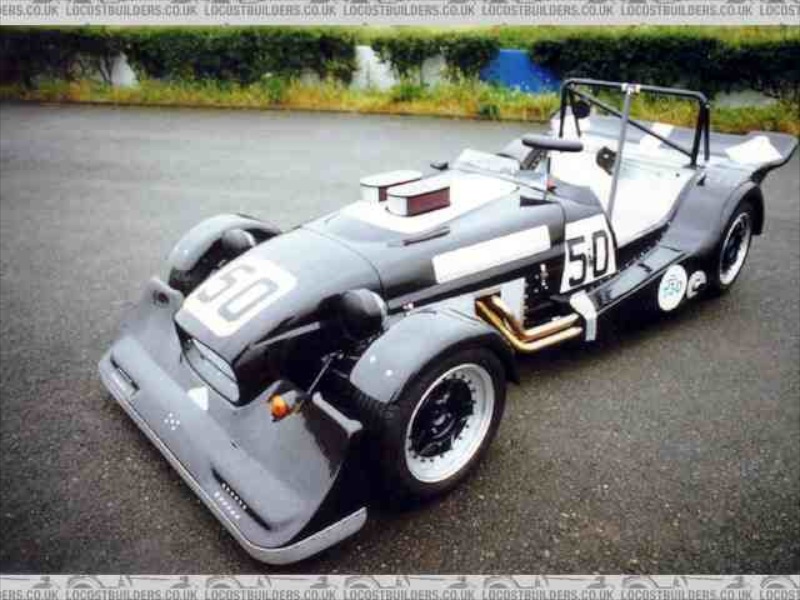
I did something similar when I built the 2B, dropped the temp by about 10degrees. image taken from a scan of a scanned photo
|
|
|