flak monkey
|
| posted on 11/12/11 at 05:57 PM |

|
|
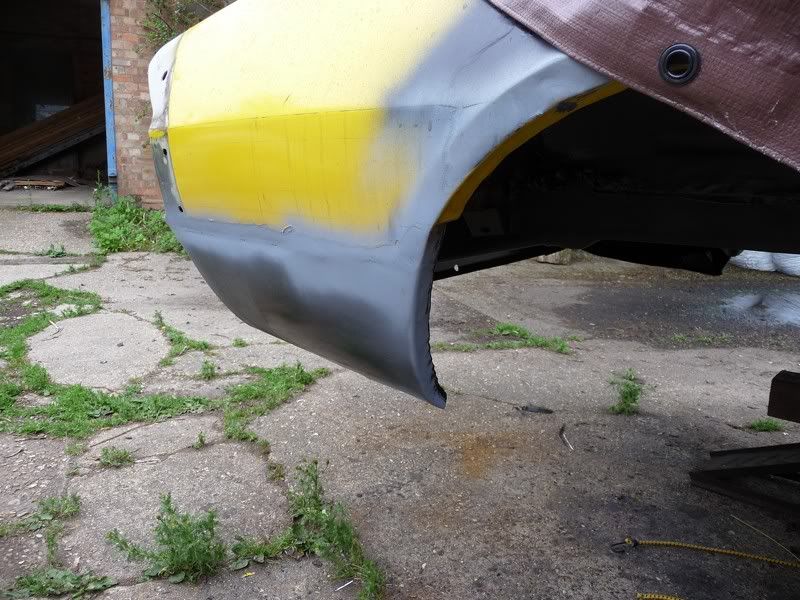
Seam sealed the cowl panel yesterday, so its ready for top coat when the weather warms up (so that will be next year then!)
Then started cleaning up the plastic vent panel which had quite a few badly done coats of paint on it. Took ages, but its now bare plastic again.
Might give it a light coat of satin black paint when I do the cowl, as its not in the best condition on close inspection. I know repro's are
available, but then this isn't a show car.
As it was so cold, I decided to do some work inside, which mean making a start on the heads. Stripped the valves out, they all seem to be in good
condition and are lightweight stainless items from what I can make out. Not sure what the springs are, they look like stock ones to me, so I'll
probably change them for beehives while I am there.
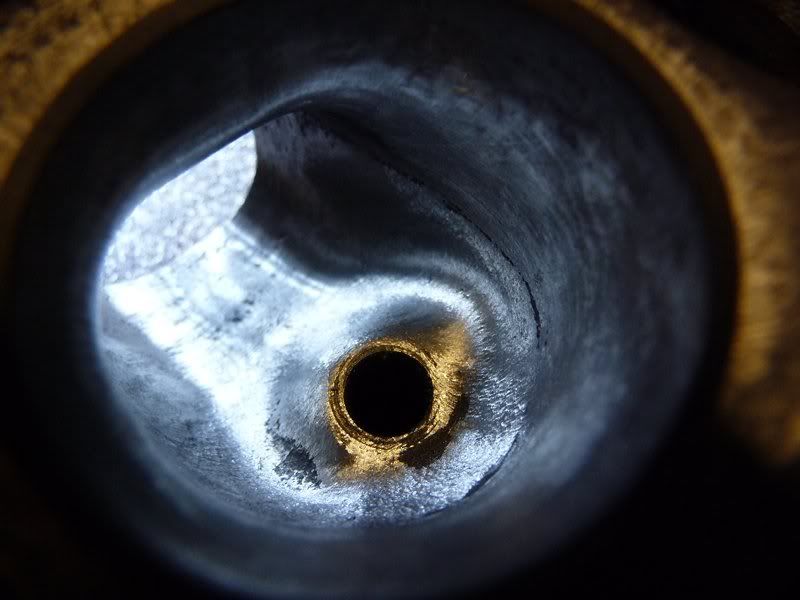
Took a wire brush to the ports to see what had been done to them. Looks like they have just had most of the casting marks cut out with a carbide burr.
No major reshaping that I can see.
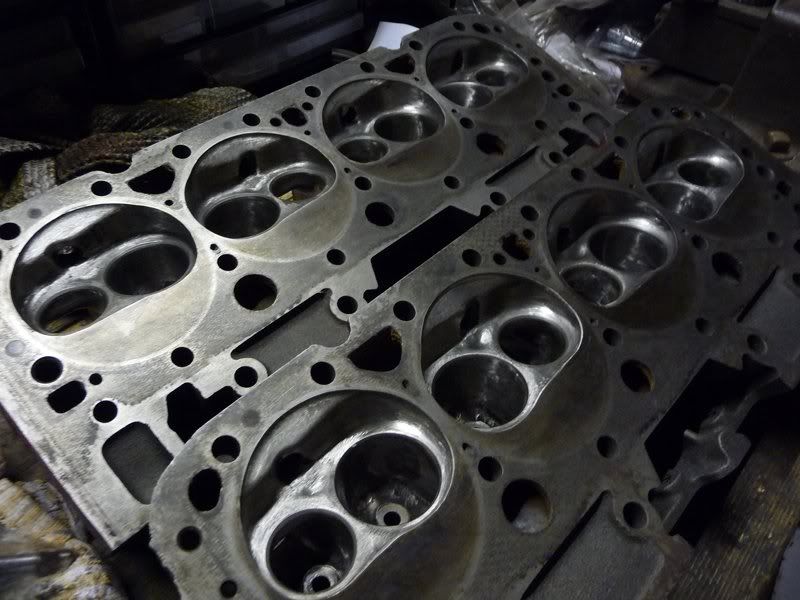
Started off with cleaning up the combustion chambers, deshrouding the valves and removing all the sharp edges. I am not going to the extent of
polishing them, as there's bigger benefits to be had in some port and valve reshaping...
Heres a comparison shot

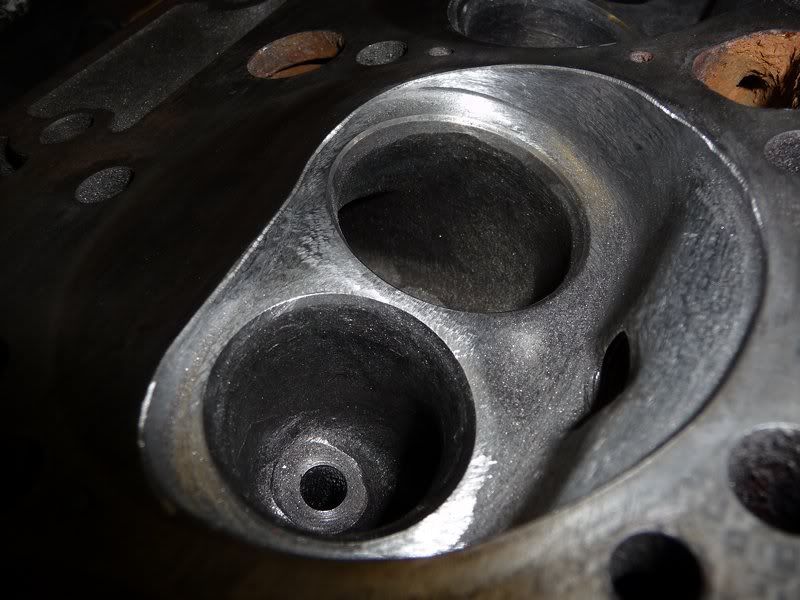
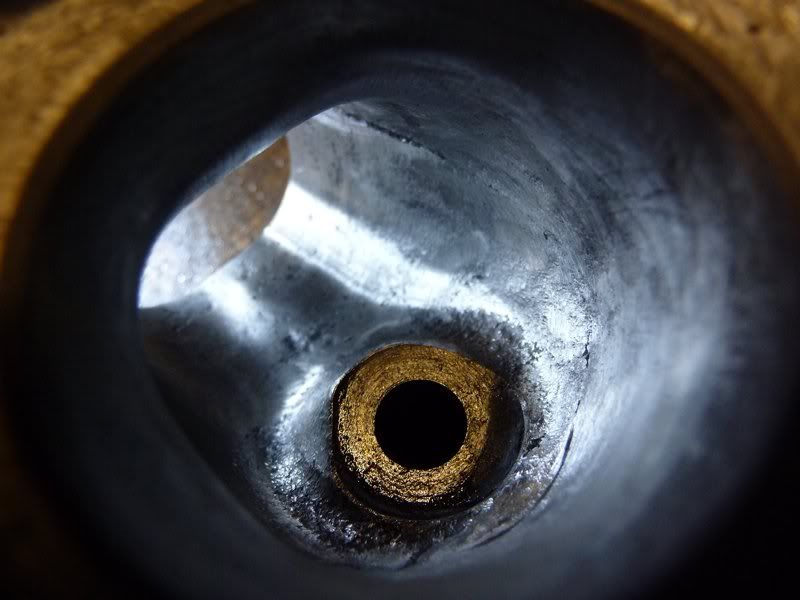
There is plenty of material to come out of the valve throats, this is the narrowest part of the port anyway, so the biggest gains are in opening that
area out and blending into the valve seats, over any work closer to the manifold areas of the ports.
All the material was removed in the valve throat directly under the valve seat itself. Basically took it out to around 1mm under the diameter of the
valve seat, then blended into the seat with a radius. The poor mans 3 angle seat. Then just blended the short turn back in again as best possible.
Finished off with a 60 grit roll.
Annoyingly I seem to have misplaced my 8mm carbide ball burr, so didn't get as far as slimming down the valve guides. But I'll get another
one this week so I can do that next weekend.
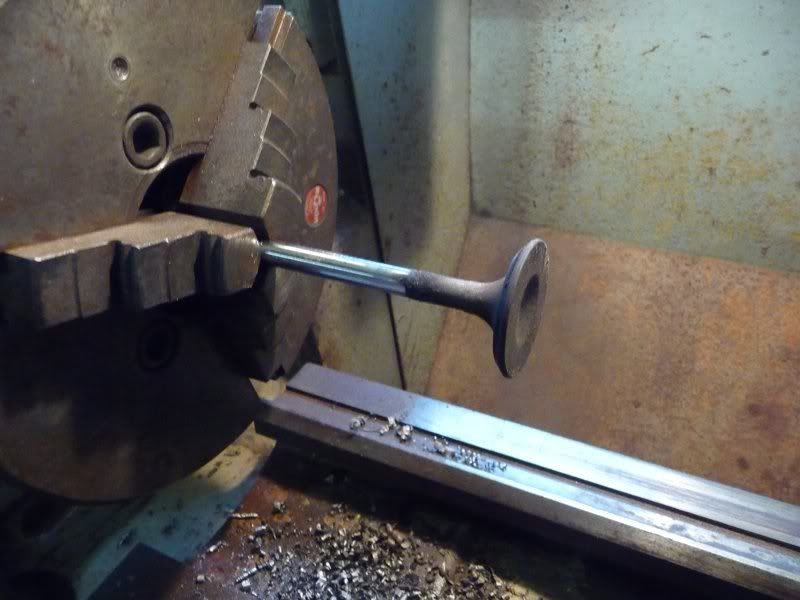
Cleaned up the valves, one of the many uses for a lathe I guess. Some of the inlet valves are quite pitted, not sure whether to replace them or
not.
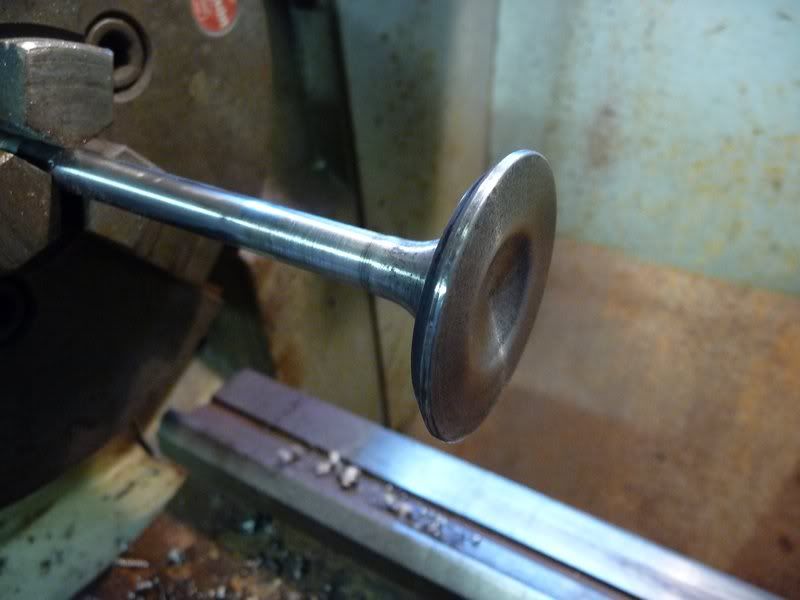
After that, lapped in the exhaust valves, a job made quicker with a cordless drill. Next thing to do is put the valves back up in the lathe and put a
nice chamfer on the back face behind the seat and radius the front face.
Sera
http://www.motosera.com
|
|
|
|
|
flak monkey
|
| posted on 16/12/11 at 06:04 PM |
|
|
Continued on the heads this afternoon. Nearly finished the grinding now. 3 more inlet ports to do. Then just finishing with emery rolls.
The last bits I wanted to tidy up were the valve guide bosses. And as my new burr arrived yesterday I was able to crack on with it. I can't
really feel my hands now though and my compressor has been running flat out trying to keep up
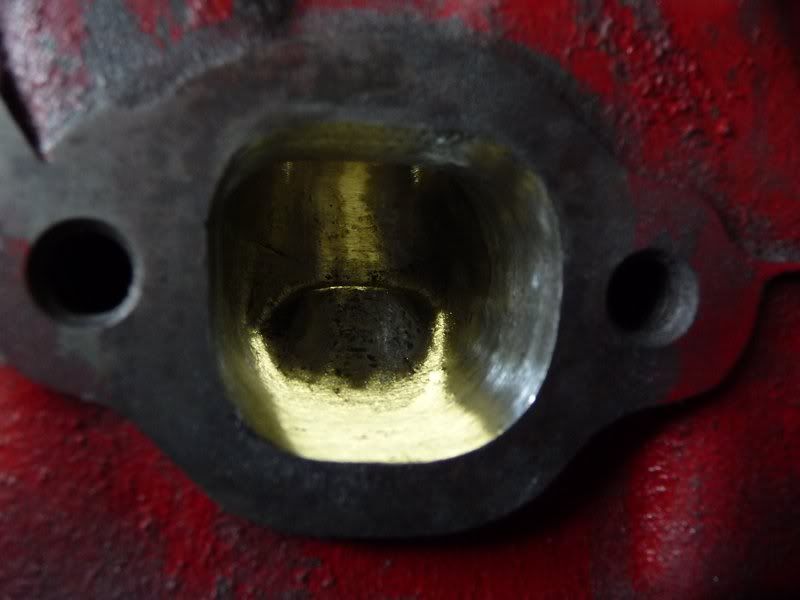
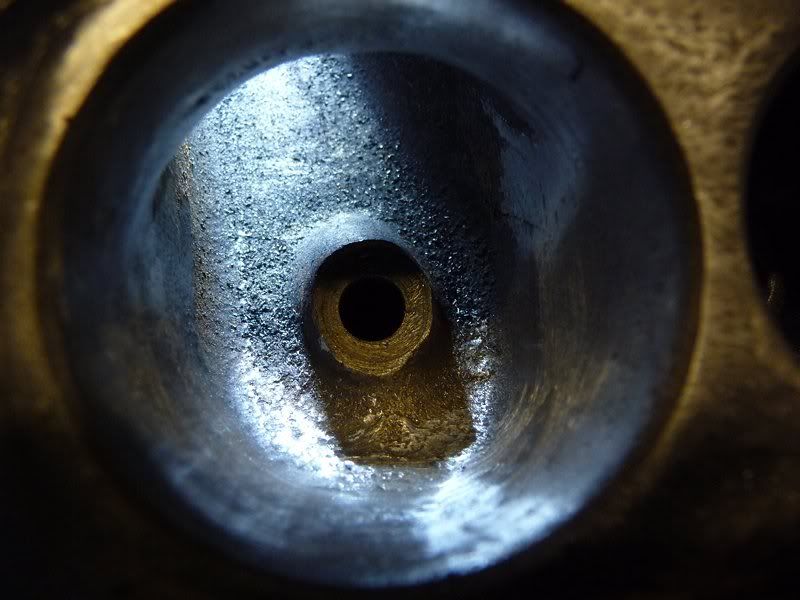
The exhaust guide bosses are pretty chunky
Slimmed them down a bit. Not removed anything off the lengths of these at all.
The exhaust ports only took a couple of hours.
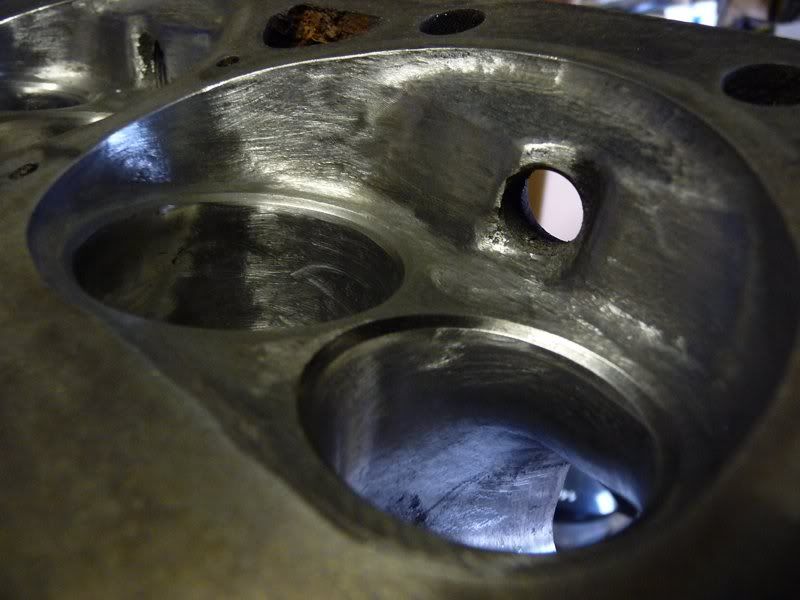
Then moved on to the inlets, these are taking quite a long time as there is a fair bit of metal around the guides that just needs blending in.
Again they start off pretty chunky
And the finished shape
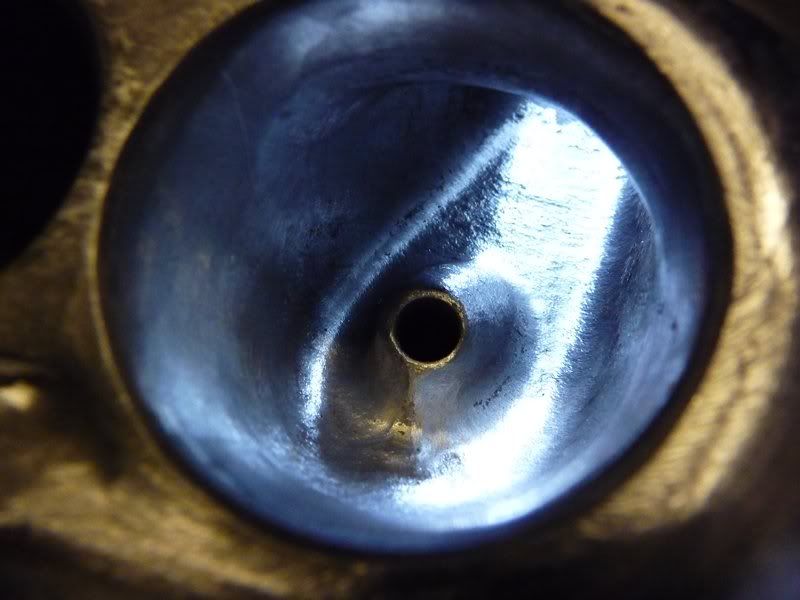
Hopefully that will pay off a bit 
Ordered some new inlet valves and a set of rods this week. Though they won't be here until after Christmas now I expect.
Sera
http://www.motosera.com
|
|
|
NS Dev
|
| posted on 23/12/11 at 09:48 AM |
|
|
Just flicked through your thread! Interesting as we're doing a camaro of the same vintage at the mo. Its been stripped to a bare shell/tub and
blasted. Much the same rot as yours, except on this one the boot floor is a bit sketchy as are the 1/4 panels. They all looked fine until blasted,
then the very nice filler work was uncovered!!
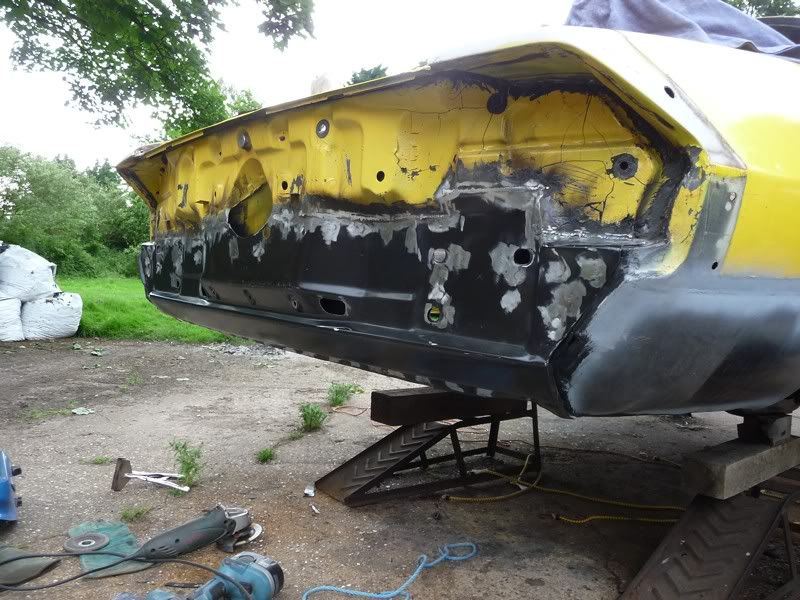
The joke with the scuttle/cowl area (as no doubt you have found) is that they filled it with bloody foam!!! No wonder they rotted so badly!!
We're getting a '69 camaro in early spring, which should be a hell of a project, its going LS3 power, with a LOT of metalwork mods on the
body, broadly similar to THIS one at Detroit Speed..........
Retro RWD is the way forward...........automotive fabrication, car restoration, sheetmetal work, engine conversion
retro car restoration and tuning
|
|
|
flak monkey
|
| posted on 23/12/11 at 11:50 AM |
|
|
Cheers Nat.
Yeah the design is pretty poor. However they weren't filled with any type of foam from the factory. Its a well known bodge though.
Sera
http://www.motosera.com
|
|
|
flak monkey
|
| posted on 25/2/12 at 05:55 PM |
|
|
Been and picked up a 3.42 LSD back axle today, along with a big front ARB and a complete set of seats. Front seats need recovering, but at least they
are original ones so I can plug up the drilled holes in the floor! Still need a new set of door cards really, but they are pretty cheap even new.
Not done much else. Keep plugging away at buying parts I need as I can afford them, or not as the case may be sometimes 
To be honest I'll be pleased when I don't have projects eating all my cash to be honest! Time for a break from it all apart from minor
jobs.
Sera
http://www.motosera.com
|
|
|
scootz
|
| posted on 26/2/12 at 11:39 AM |
|
|
quote:
Originally posted by flak monkey
To be honest I'll be pleased when I don't have projects eating all my cash to be honest! Time for a break from it all apart from minor
jobs.
I've been saying the same thing for years now David! Doesn't stop me from the odd impulse-buy here and there though
It's Evolution Baby!
|
|
|
flak monkey
|
| posted on 13/3/12 at 08:39 PM |
|
|
Turned out the LSD in the axle is buggered, so thats more expense I just dont need 
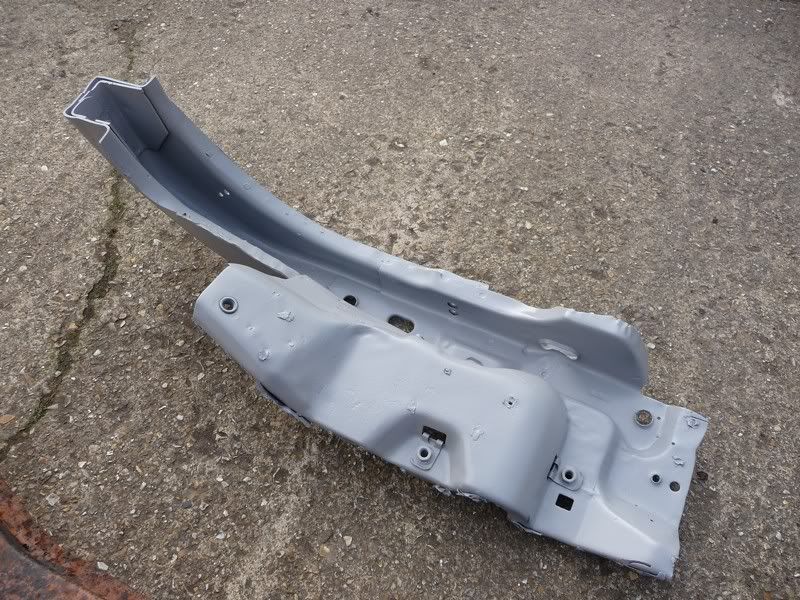
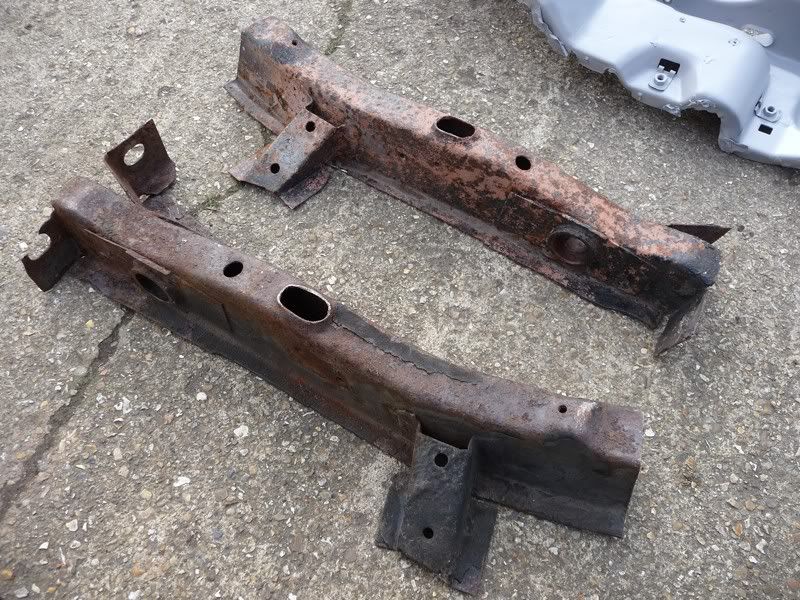
I got the front section of frame rail back from being grit blasted. Came up really nice, no bad rust on it anywhere. Just threw some epoxy primer on
it to stop it going rusty again
Then spent a couple of hours cutting the rear sections out from my other replcement rails which had just been hacked out of another car. I'll be
getting them blasted too next time I pass the blasting place... So now I have all the parts to fix up the rear frame rails properly, once the weather
gets better anyway...
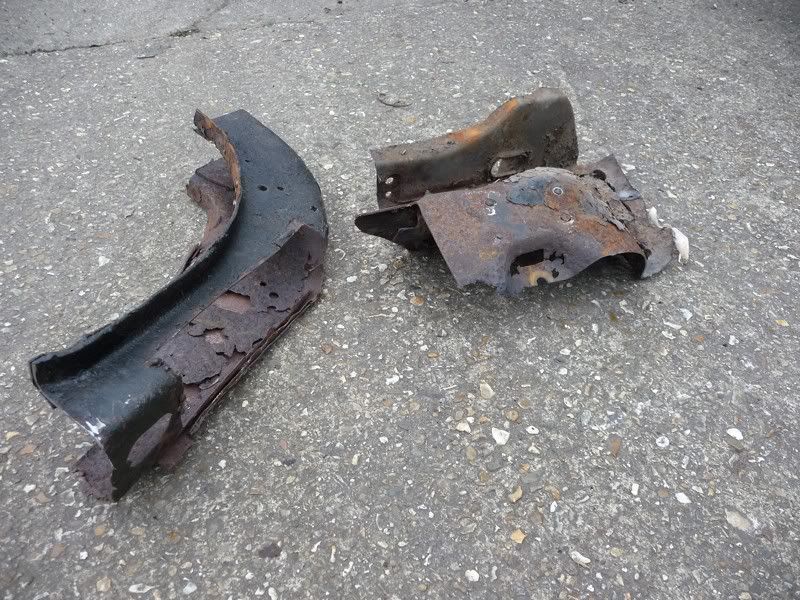
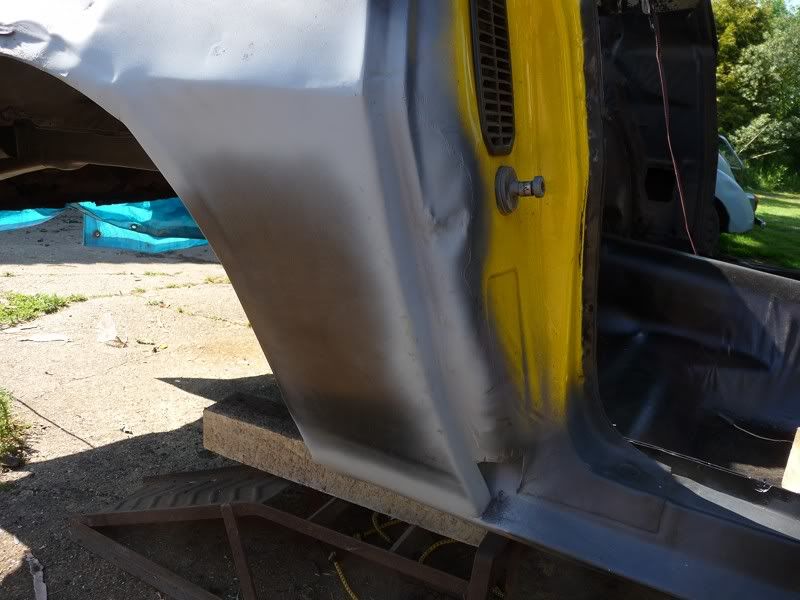
Spent yesterday afternoon cutting out that rotten frame rail. Not as bad as I thought it would be, took about 3 hours and came out in 2 decent sized
chunks. Now all I need to do it cut the original rail through in exactly the right place for the new one to butt up to it properly.
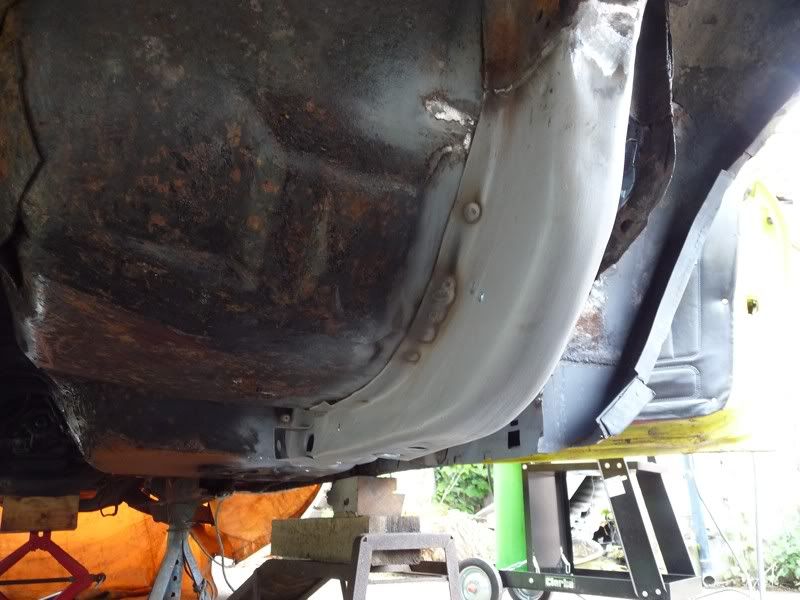
Now you see it
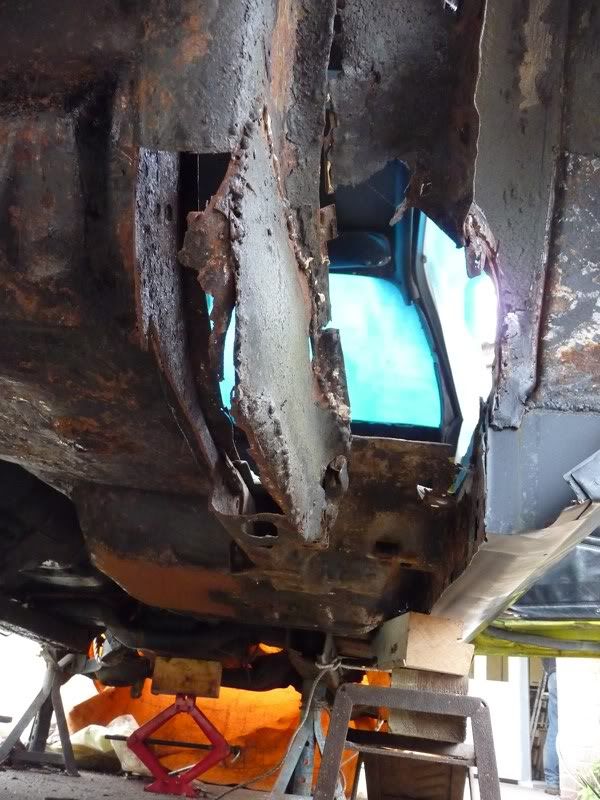
Now you dont
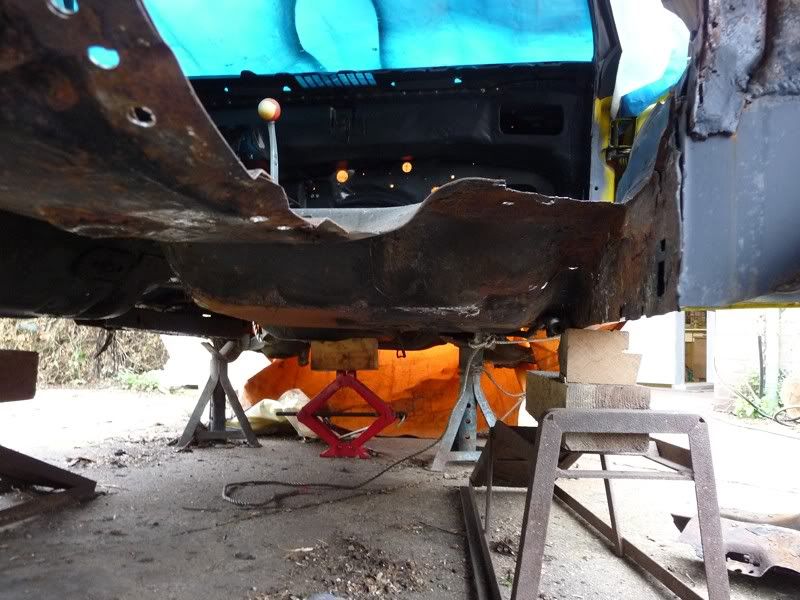
The job was made easier by there being so little of the original left :lol:
Got to tidy a few details up, then give it a good coat of paint where the new rail is going to fit, then more welding...
|
|
|
scootz
|
| posted on 13/3/12 at 09:00 PM |
|
|
Where do you find the time!!!???
It's Evolution Baby!
|
|
|
flak monkey
|
| posted on 13/3/12 at 09:04 PM |
|
|
Dunno... lol
I need to get these projects done...really!
|
|
|
alistairolsen
|
| posted on 15/3/12 at 07:15 PM |
|
|
So much for buying it an using it! Some serious work going into it now!
My Build Thread
|
|
|
flak monkey
|
| posted on 15/4/12 at 08:19 PM |
|
|
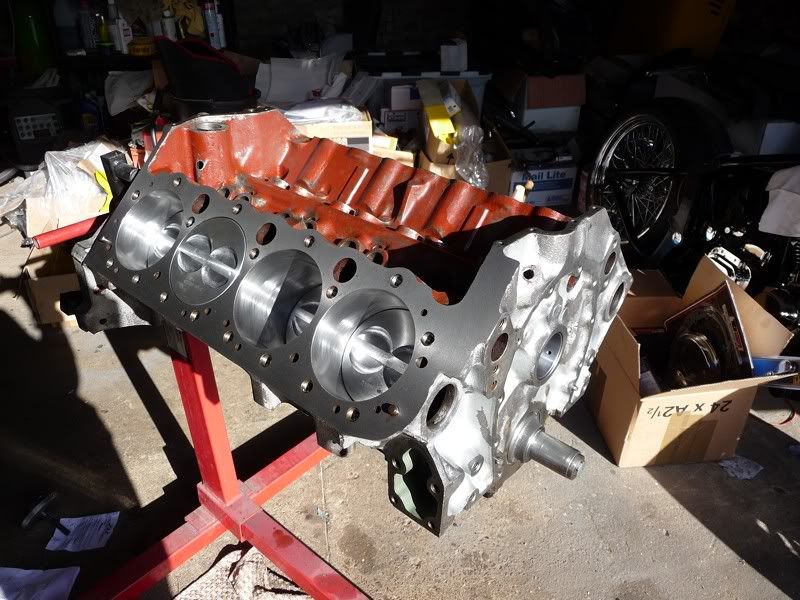
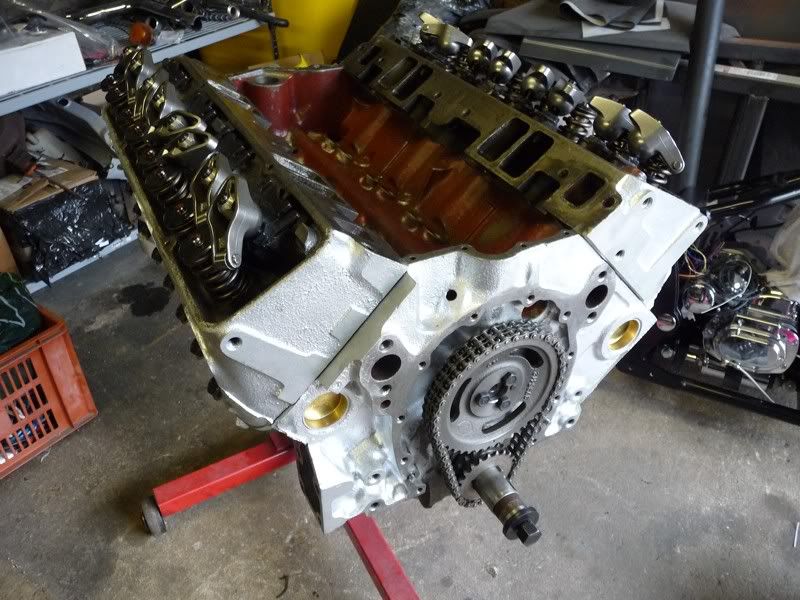
Built up the short block today.
Had 0.020" skimmed off each deck face to bring the pistons flush, should help squish a bit and bring CR up to 10.5:1 with the flat top pistons.
Got it honed as well while it was in.
Made up a tool to change the cam bearings, time consuming, but the old ones were knackered.
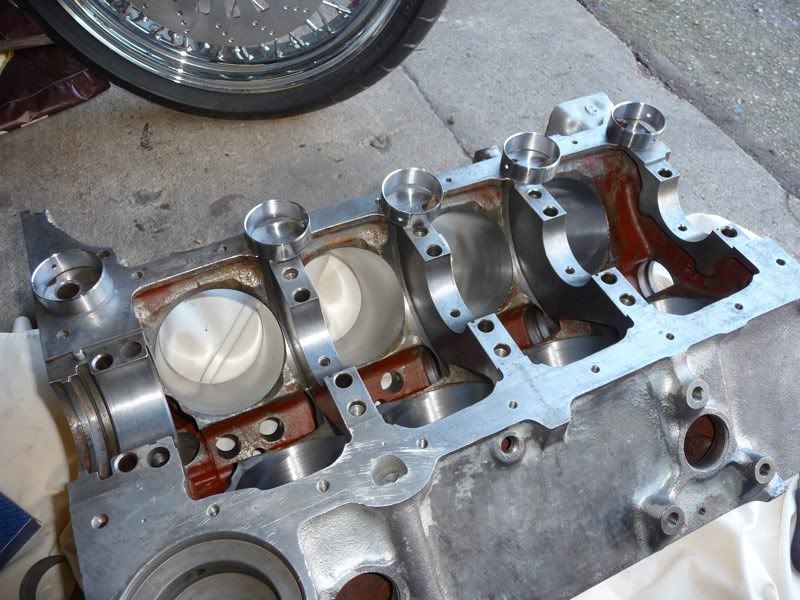
Spent the rest of the day swearing at my poo piston ring compressor, and generally battling getting the pistons fitted. But job done... Rotating
assembly done, all new bearings, Eagle steel rods and hypereutectic pistons.
|
|
|
flak monkey
|
| posted on 24/4/12 at 08:24 PM |
|
|
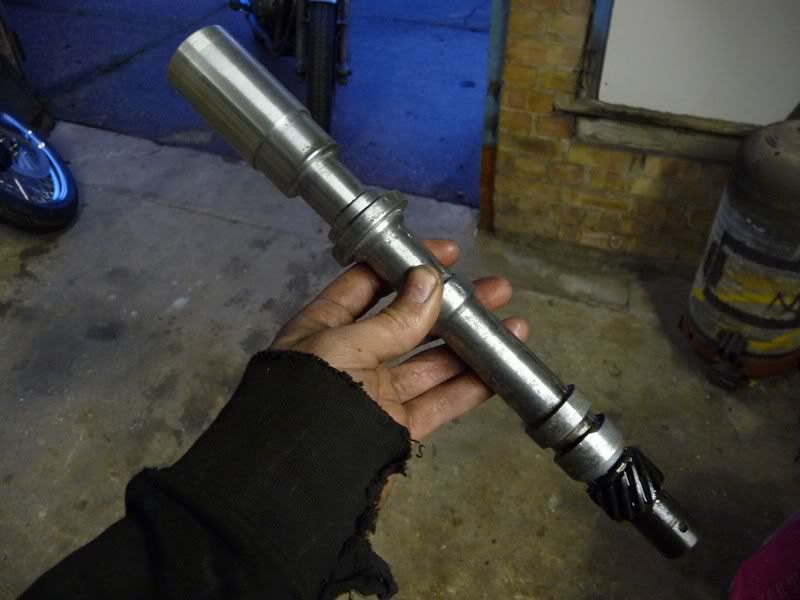
Decided I really ought to sort an oil pump drive out. Going with fuel injection, I don't need the distributor so thought I'd grab an old
points one and modify it.
Stripped the gubbins
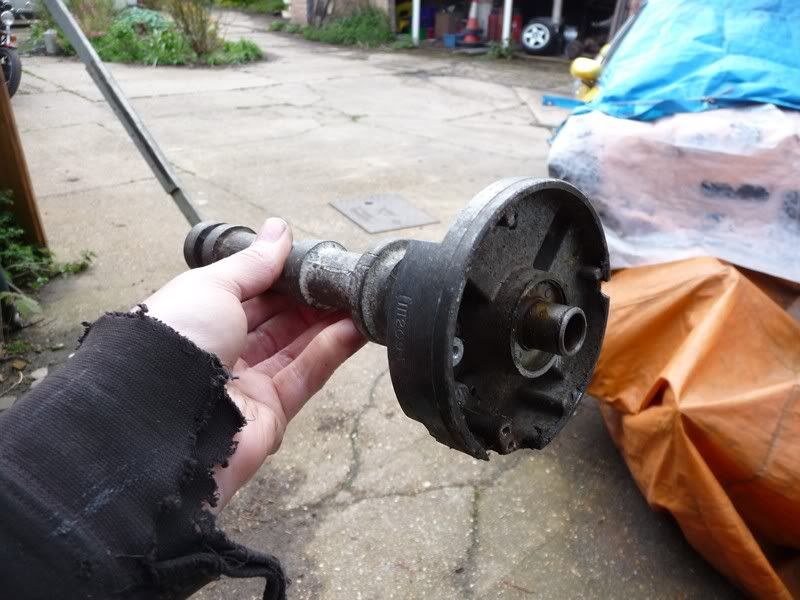
Put it in the lathe and turned the top end down and gave it a quick polish up as well
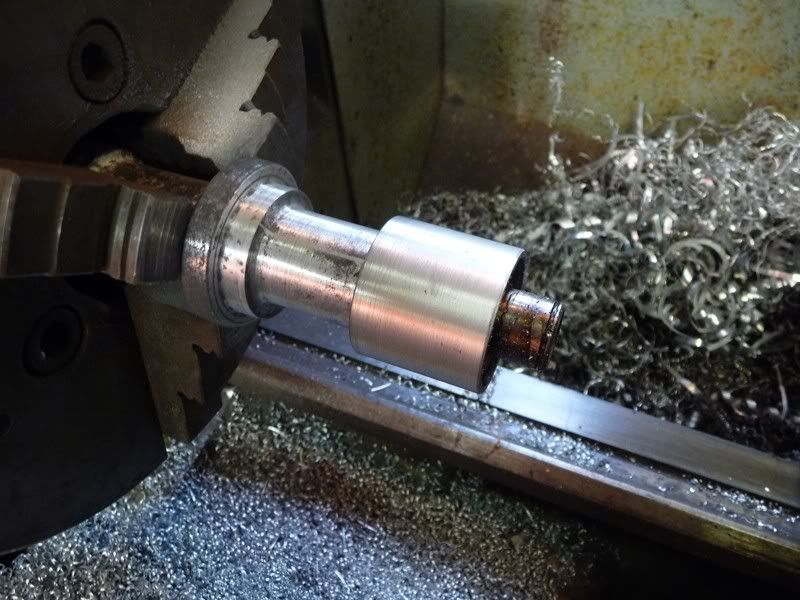
Also had to remove the advance mechanism from the top of the shaft
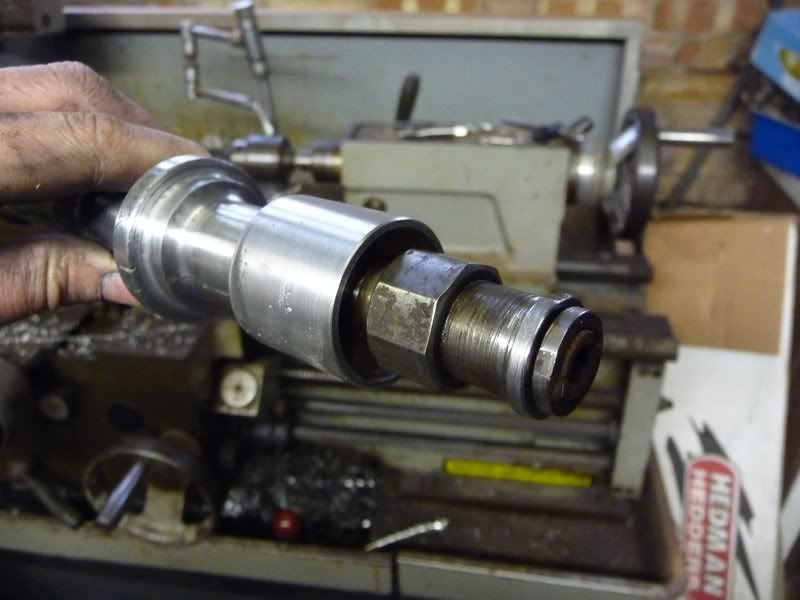
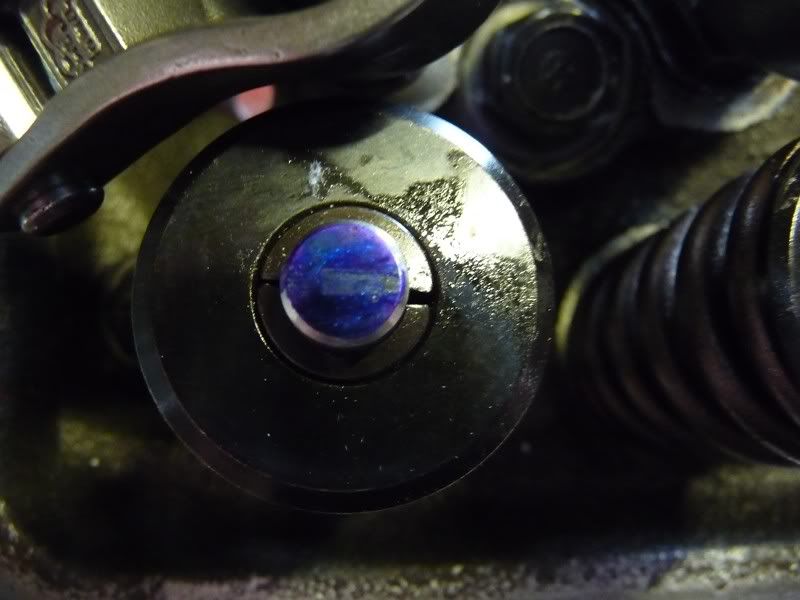
Made a press fit cap to cover the end up out of a bit of ally bar stock
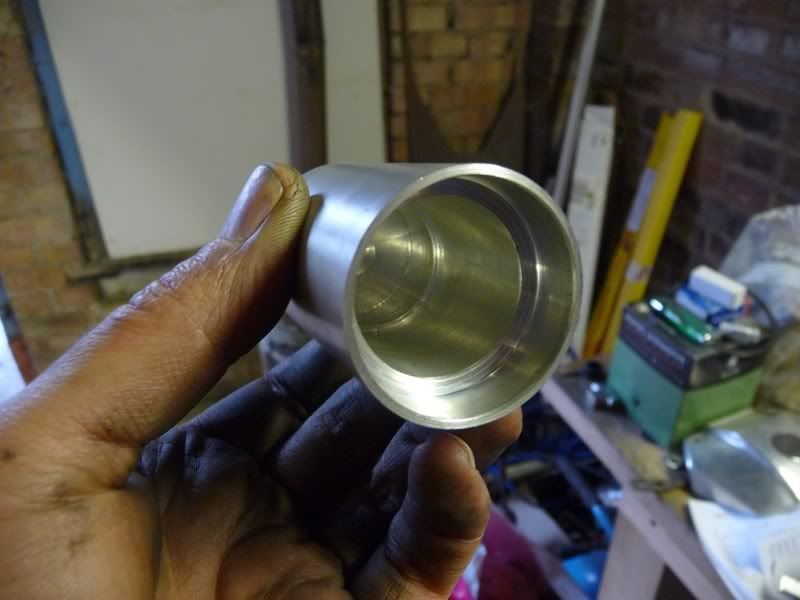
And a couple of hours later, job done
That should do it
|
|
|
flak monkey
|
| posted on 4/5/12 at 06:12 PM |
|
|
Got the cam in and timed up, heads on. Just need to get some hardened pushrods now. I had some stock length rods kicking around, so tried them to get
an idea if they are the right length.

Just waiting for a sump and a few other bits, then I can get it finished off.
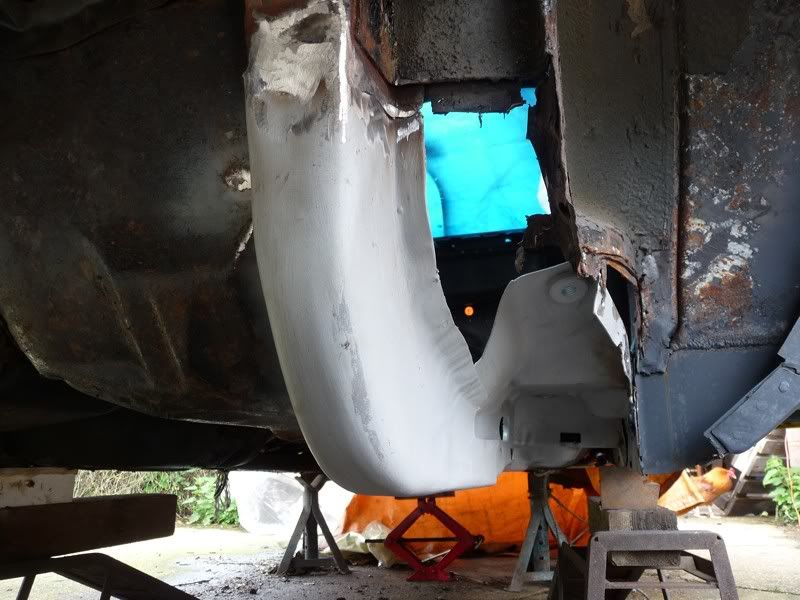
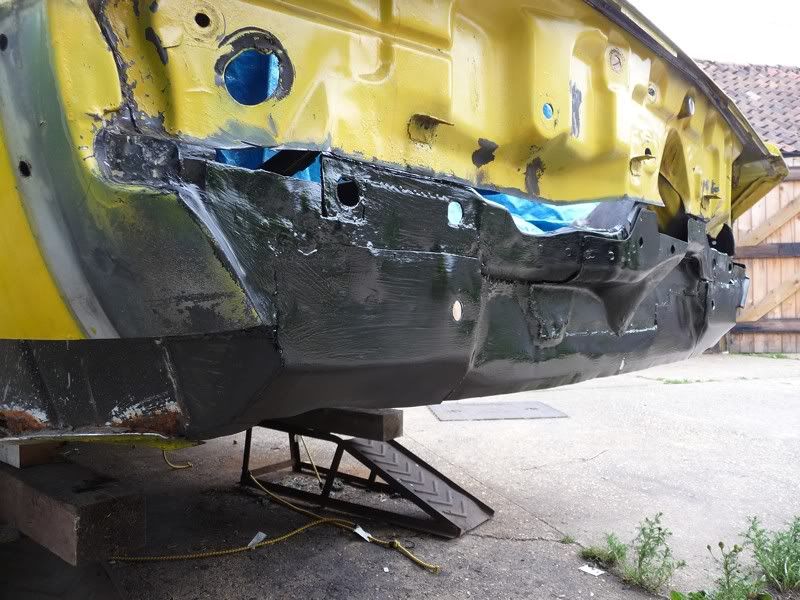
Finished work at 1 today, and it had stopped raining for the first time in about 4 weeks so I got a chance to do some more work on the rust bucket.
Cleaned the floor up, gave it a quick coat of paint and trimmed the old and new frame rails to fit nicely. I was quite pleased with how simple it was
really.
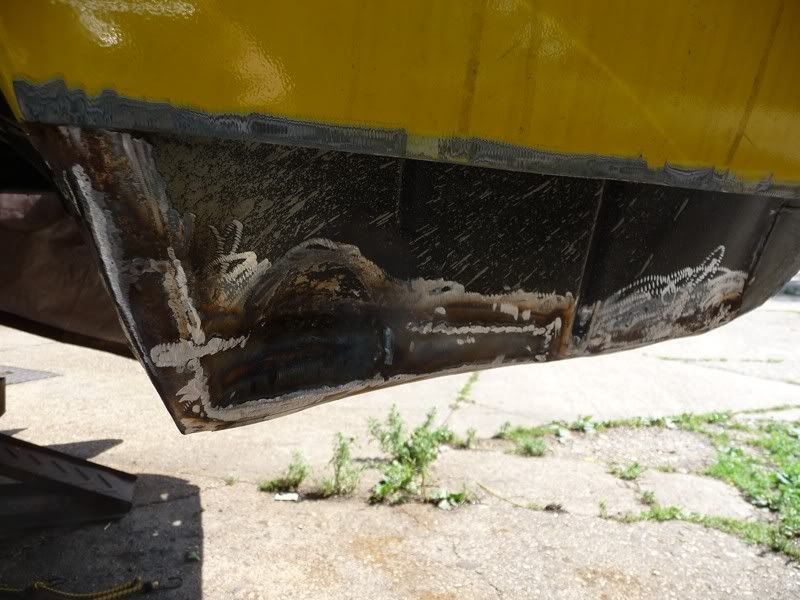
Got it welded in, also went smoothly. Obviously on a roll today...made easier by doing a lot of it from above, other than the part that fits to the
inner rocker. I added a few extra welds that were either missing or they didnt bother from the factory as well. Can't hurt. Once finished I
painted it with epoxy to keep it all protected.
Now thats done I can finish the repairs to the floor inside. Which will be a major step forward.

[Edited on 4/5/12 by flak monkey]
|
|
|
flak monkey
|
| posted on 6/5/12 at 06:32 PM |
|
|
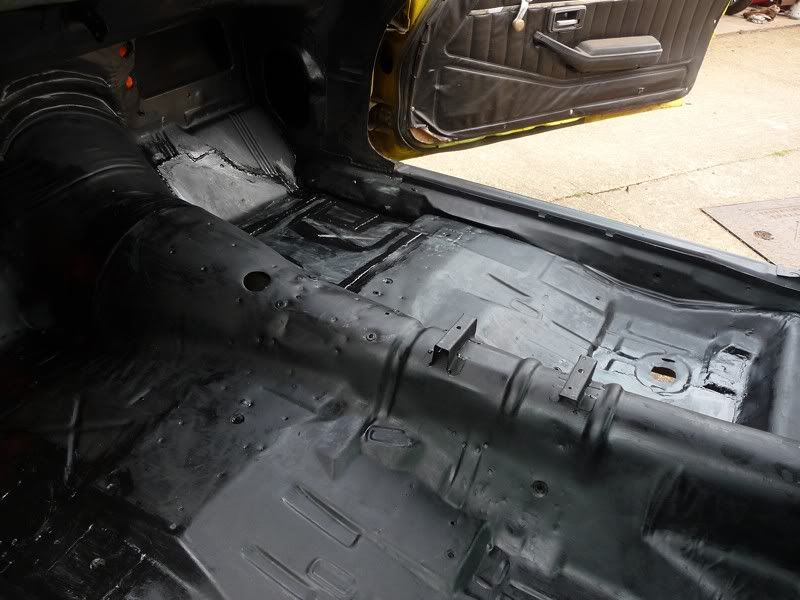
Repaired the bulk of the floor yesterday...
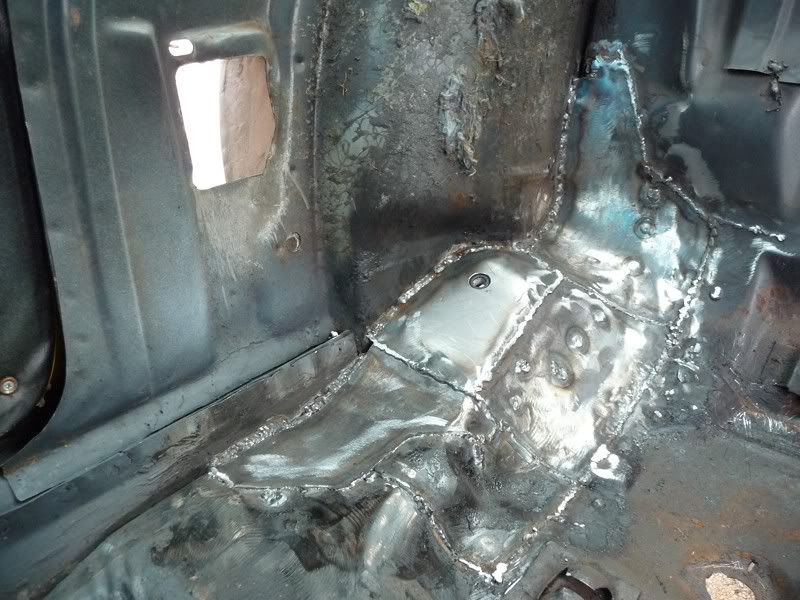

OK it aint pretty, but its better than it was....
Spent all morning today cleaning off underseal, then wirebrushing and sanding the floor down ready for paint. Used the good old Jotun 87 again.
Thinned about 30%, not only is it easier to brush on, but it also runs into all the nooks and crannies much better. Just needs another coat tomorrow
and thats the floor done, finally!
Things always look better when they are one colour eh? Paint was still wet when I took the pics.

|
|
|
Ivan
|
| posted on 6/5/12 at 08:00 PM |
|
|
Hi David - I am also looking at Fuel Injection for my 383 - what system are you planning on going for?
|
|
|
flak monkey
|
| posted on 6/5/12 at 08:03 PM |
|
|
Holley inlet manifold and throttle body, with megasquirt controlling it... well hopefully anyway!

|
|
|
flak monkey
|
| posted on 8/5/12 at 09:09 PM |
|
|
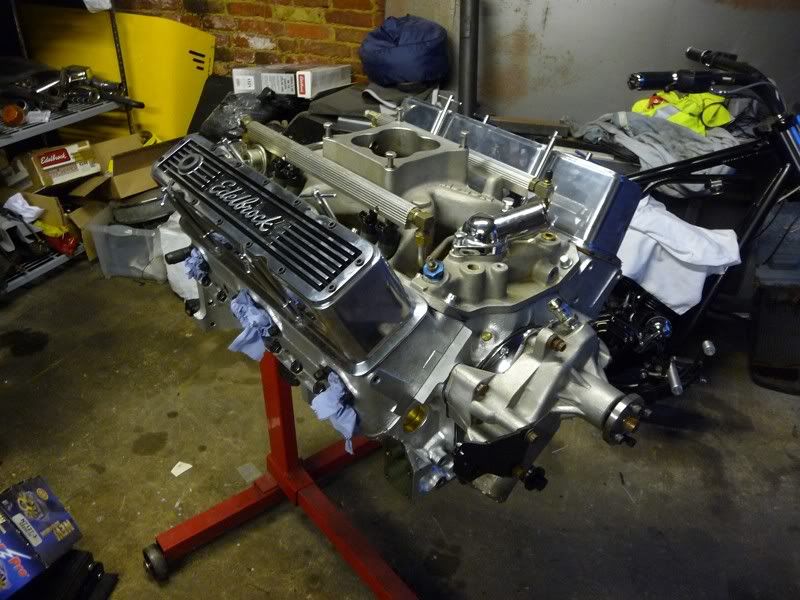
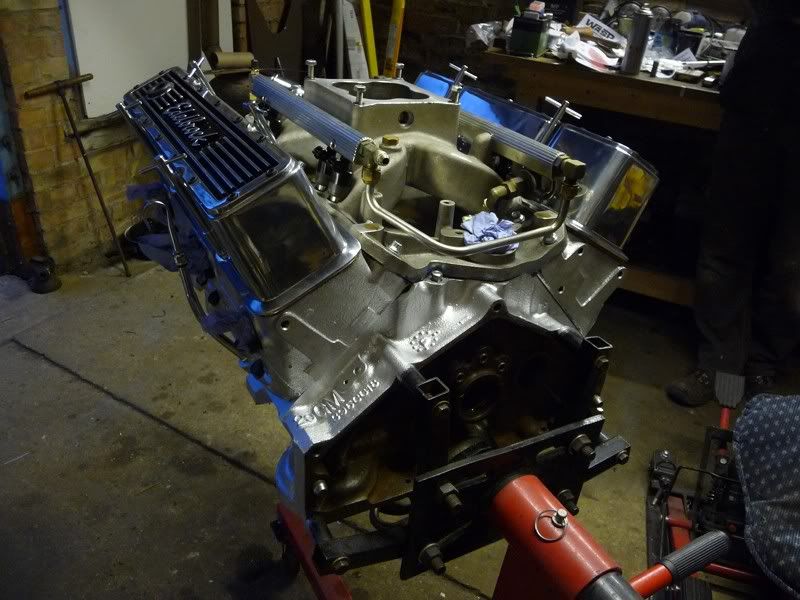
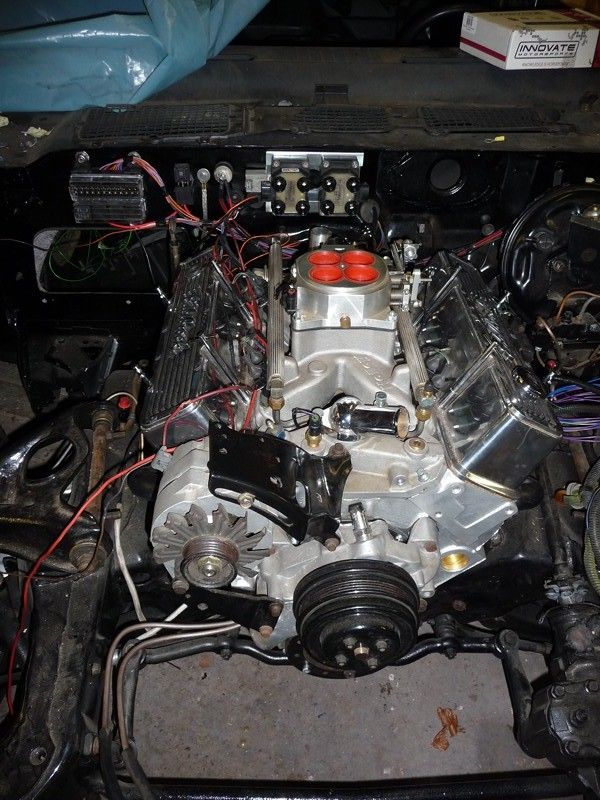
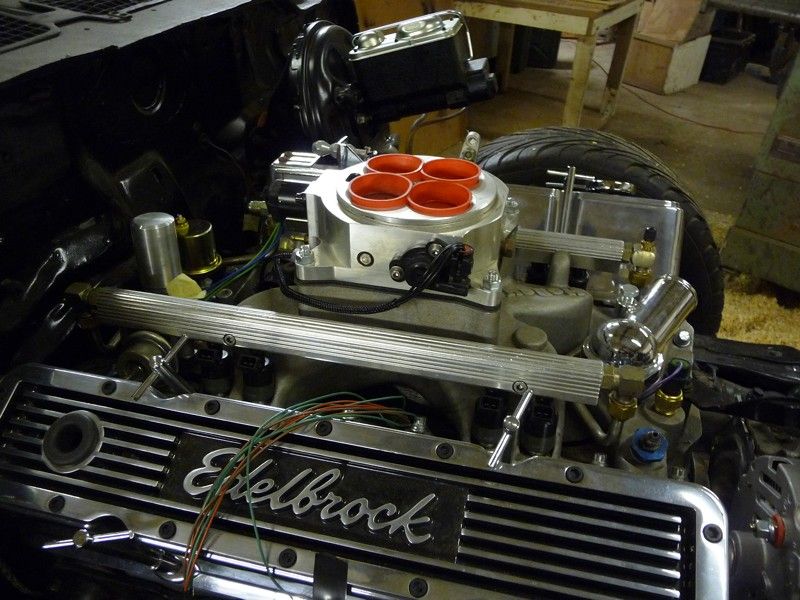
Mostly finished the engine assembly off tonight as my pushrods arrived so got them in, adjusted the rockers, fitted the inlet manifold and popped the
rocker covers on just to keep the crap out of it. Last thing to do it the sump, which also arrived today, but I need to paint it. A job for
tomorrow.
|
|
|
flak monkey
|
| posted on 18/5/12 at 09:43 PM |
|
|
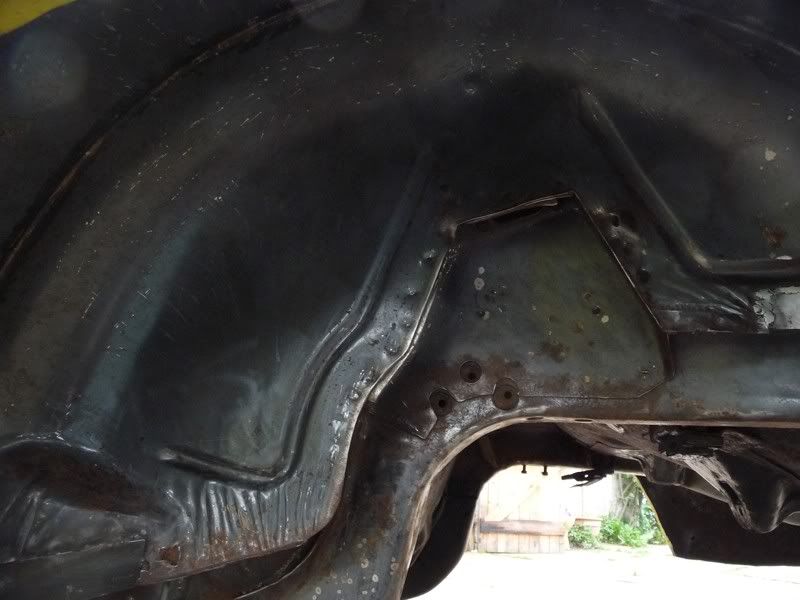
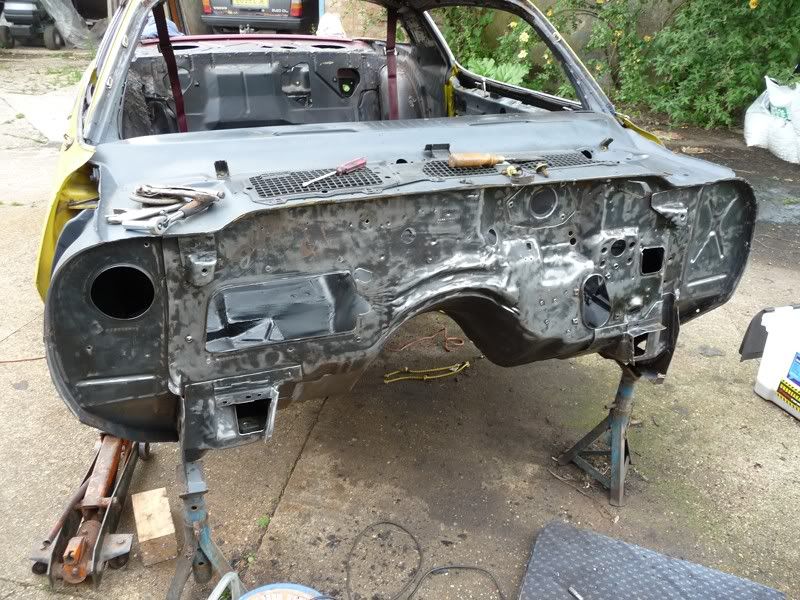
I was actually plesantly suprised how good the inner quarters were underneath the factory undercoating. Nice shiny new paint  other than a couple
of small patches. It'll be getting scuffed up and a coat of epoxy over it then recovered with modern stonechip paint. other than a couple
of small patches. It'll be getting scuffed up and a coat of epoxy over it then recovered with modern stonechip paint.
I finished off the repairs to the boot floor today, along with some patches on the rear shock towers. All a bit of a pain to get to, either curled up
in the boot or welding blind under the car. Done now though...
Tomorrow I am going to be prepping and painting both the underside and inside the boot. If the weather is good anyway!
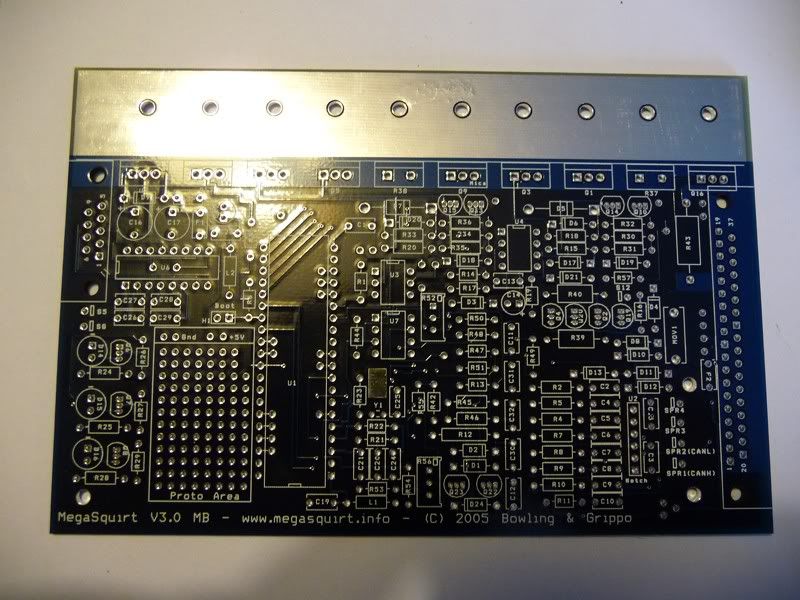
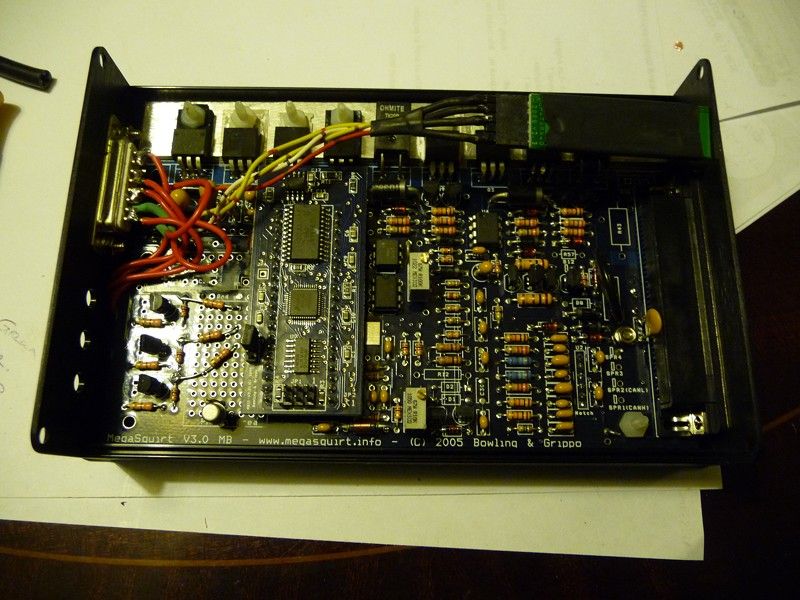
In cleaner news, I decided to start building the ECU for the EFI. Decided to use megasquirt, and instead of buying a built unit then having to modify
it anyway, I thought I'd get a kit and build and mod it myself. Modifications include installing USB comms and doing away with the rather old
skool serial/RS232 and 4 built in coil drivers for wasted spark. Last job is to build a small tacho output circuit to drive the dash tach. Had it
hooked up to the laptop and downloaded a base map, everything seems to work as it should....
Naked board
USB board plugs into the small 5 pin connector
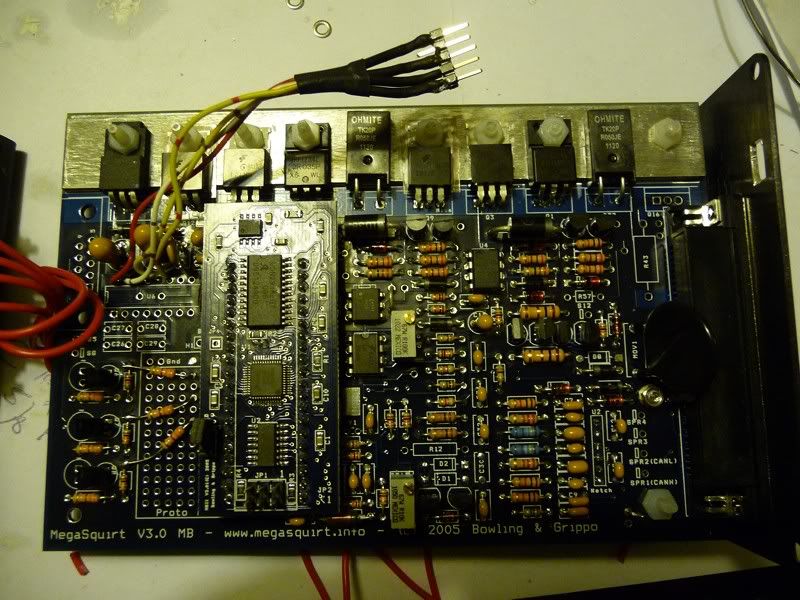
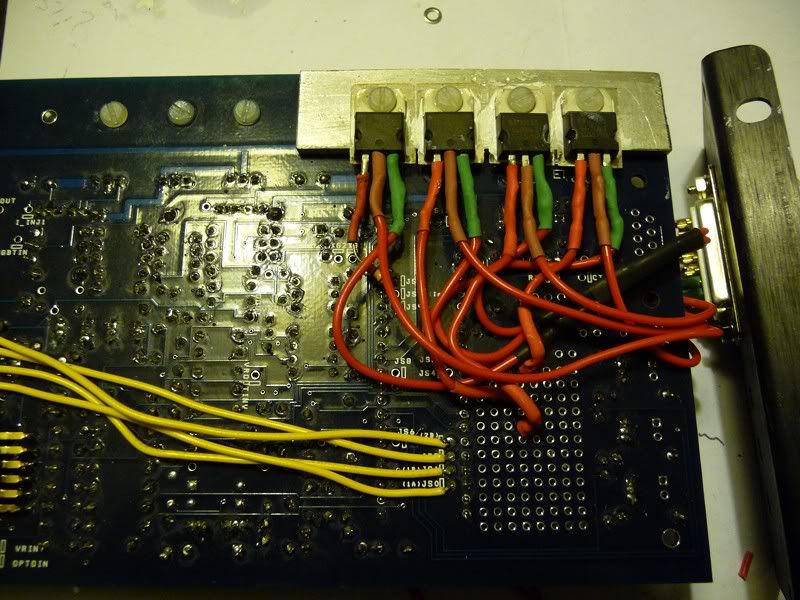
And some coil drivers, output on a seperate connector
|
|
|
alistairolsen
|
| posted on 16/6/12 at 10:35 PM |
|
|
Starting to come together now! Megasquirt looks interesting, whats the story with the USB gubbins?
My Build Thread
|
|
|
flak monkey
|
| posted on 9/7/12 at 07:04 PM |
|
|
Done quite a bit over the last couple of months, been a manic time!
The pics tell the story so far I think....


The subframe connectors don't fit, the bushes in the front of the leaf springs need to be modified to fit in the spring perches as well.
Probably a sign of the joys yet to come. The most annoying thing about it is everything is meant to fit. Most of its new and I am going to end up
cutting it up to make it work. FFS
The subframe connectors hit the floor where the rear footwells are and still have about 1/2" to go before they are seated in the rear spring
pockets. And the holes for the bolts for the torque boxes don't line up by about 3/8".
The spring poly bushes need about 1/8" skimming off each side to make them fit for some bizarre reason. They should be 3.5" wide, per
standard, but are 3.7"
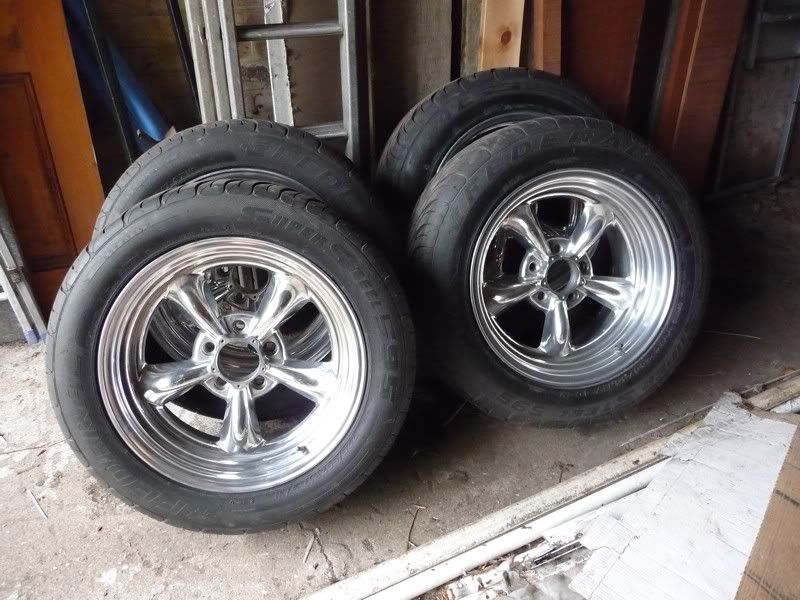
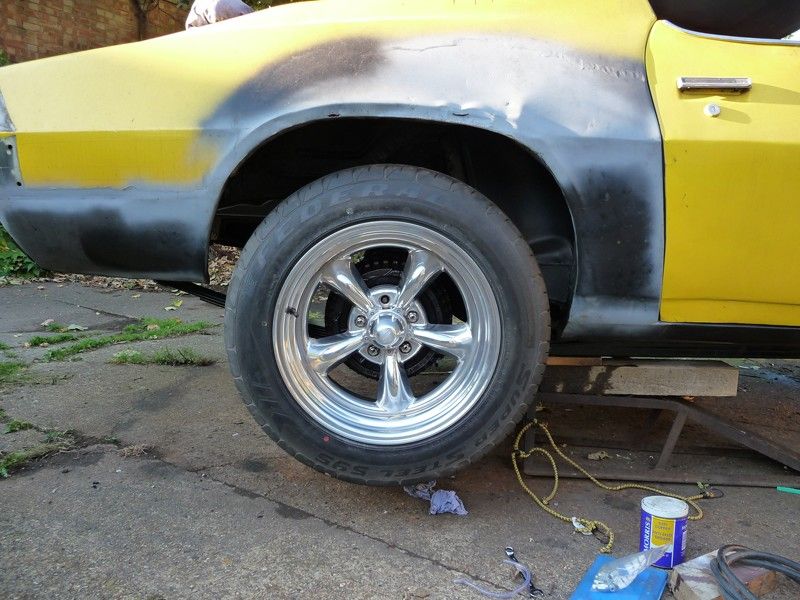
In good news I got some nice new wheels for a good deal, only done about 200 miles since new. 17x8 for the front and 17x9 for the back with 225 and
255 tyres.
[Edited on 9/7/12 by flak monkey]
|
|
|
flak monkey
|
| posted on 14/11/12 at 09:51 PM |
|
|
Time for an update I think!
Gas tank modifications for fuel injection. Starting with making a small baffled 'sump' for it. Used an old tank thats been well vented and
been standing open a good few years. No worries about vapours in this one. This should allow me to run an inline fuel pump at the back of the car,
with just a feed and return line under the hood.
Its about 10"x7", drilled 2 1 1/4" holes in the tank under where the sump is fitted then welded it on. The take off at the front of
the tank is the fuel outlet. I added another to use as a tank drain, figured it might come in useful one day. The tank has an old breather line welded
into the top, which I plan to use as the fuel return. The gas cap I have has a 2 way breather so no problem there either.

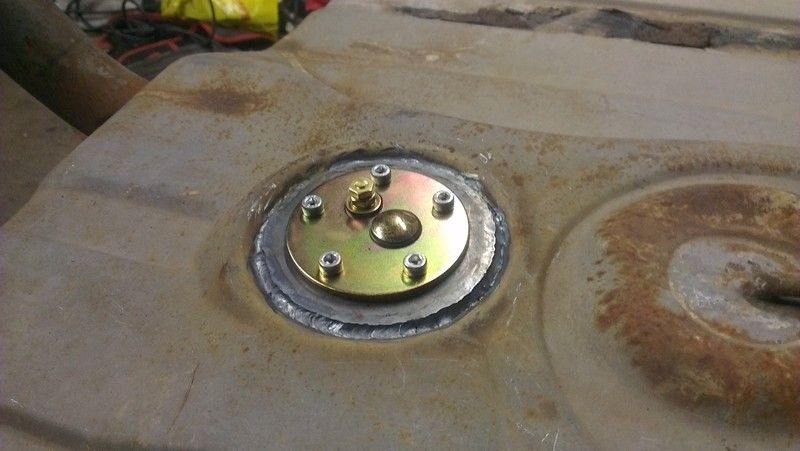
Cut the old fuel gauge retaining ring off and turned up a ring from 1/8" plate to fit in the recess on the top of the tank. Drilled and tapped
it, then welded it on. Shortened the new sender unit so it should leave me a gallon or 2 when the gauge reads empty.
Pressure tested it and eventually was happy with the result.
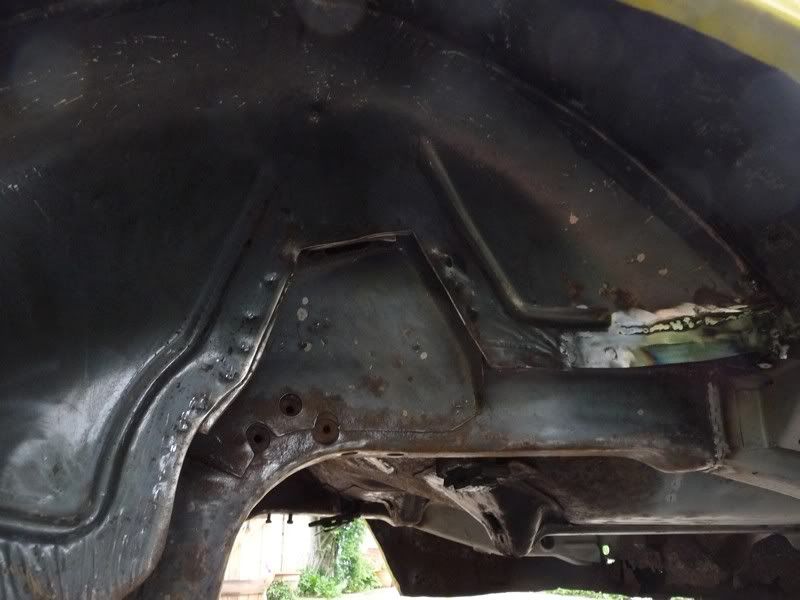
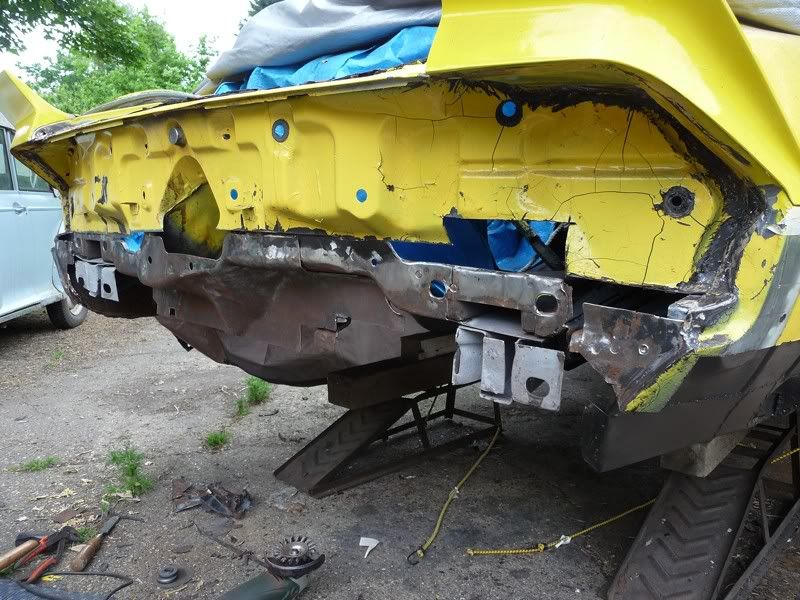
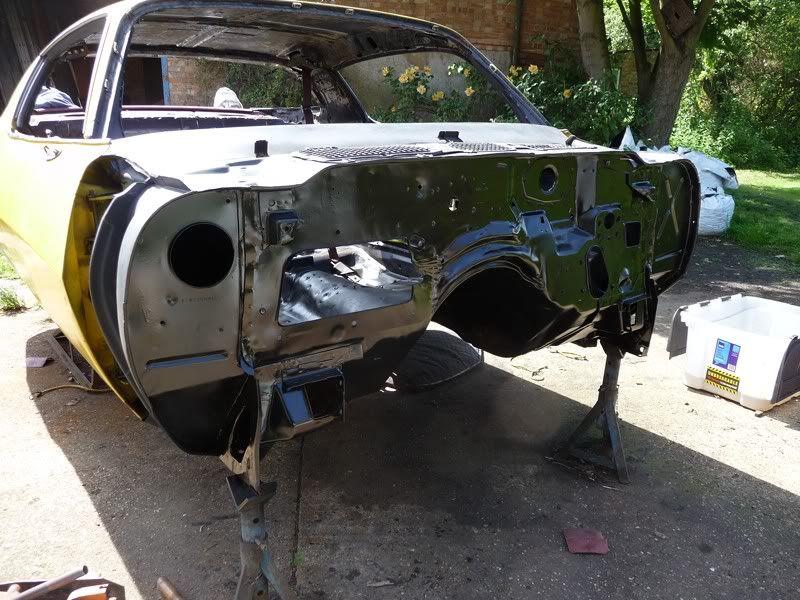
Found a couple of rust spots on the inside of the inner quarter that were hard to get to. So as I needed to repair the quarter panel and rocker anyway
I thought I'd investigate the extent of the work required....
Imagine my suprise to find lots of filler, and not much metal underneath...
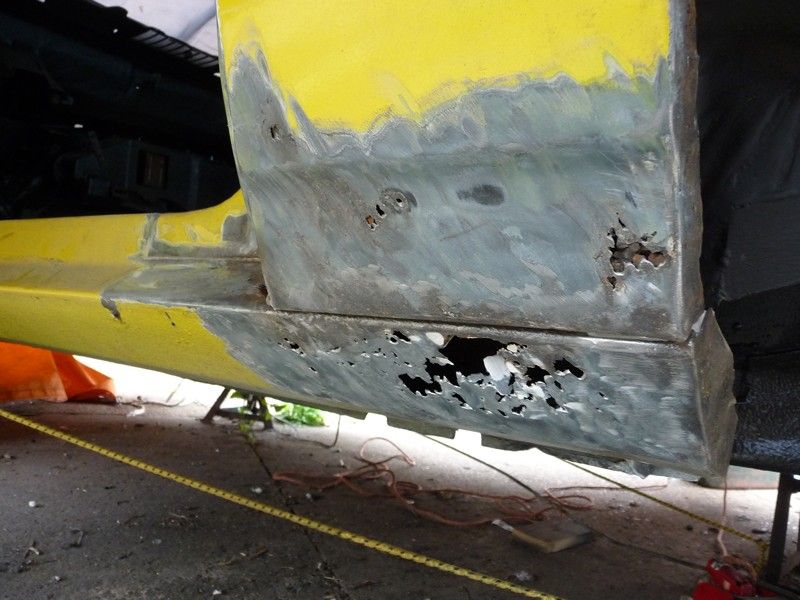
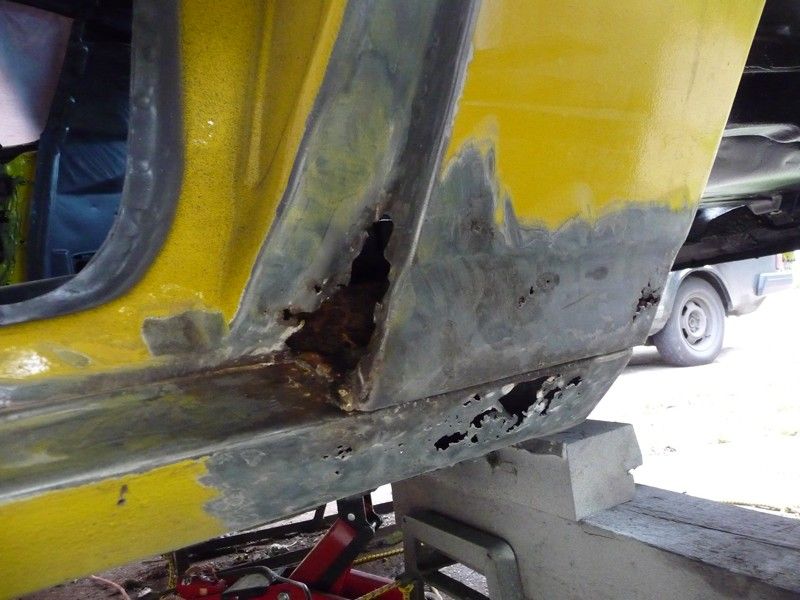
So after all that was cut out there wasn't much left at all. I've repaired the inner structure and painted it all, just have to weld the
patches on...
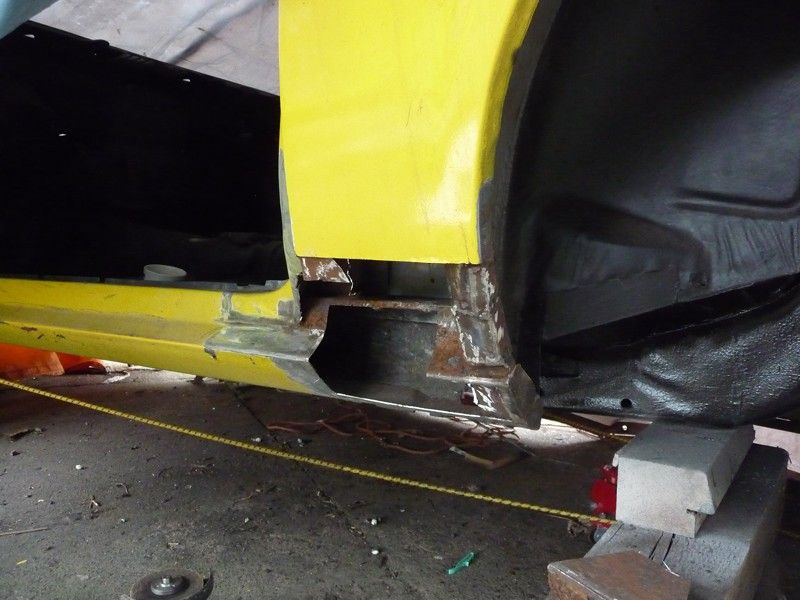
The rest of the rocker looks to be in reasonable shape, and the lower and inner sections are very good.
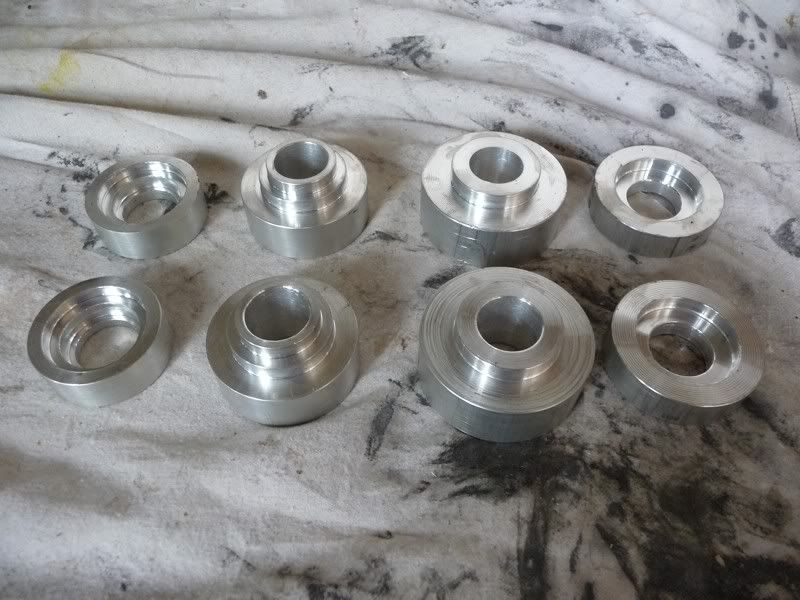
I made some stainless crush tubes for the rear polybushes.
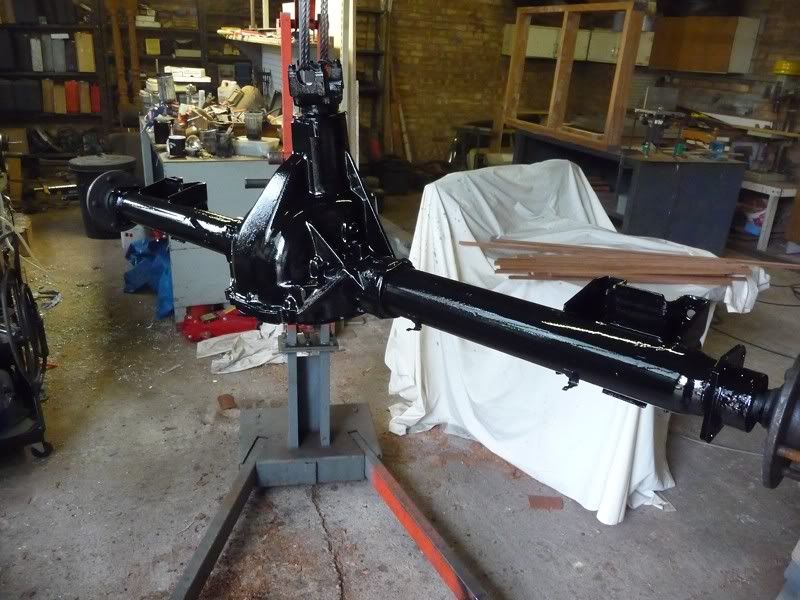
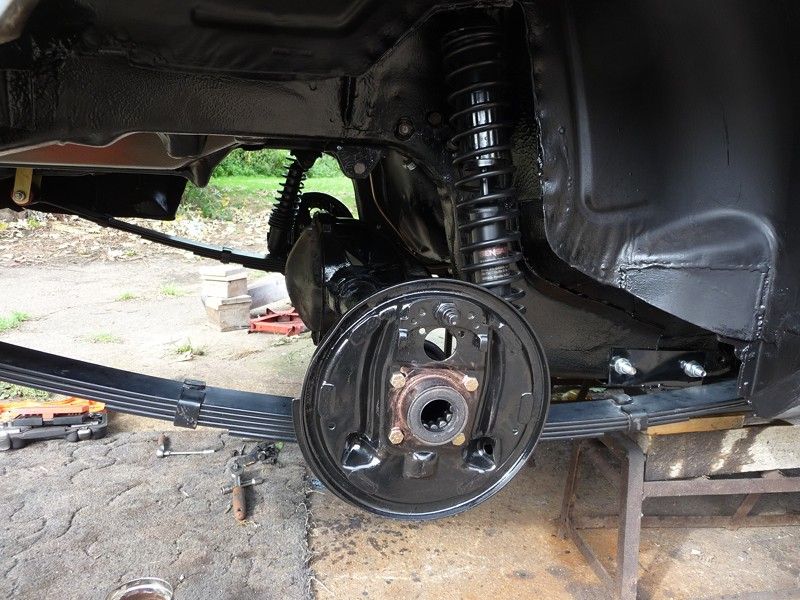
Got the springs on the back axle and it hoisted into position. Actually was pretty easy with 2 people and 2 trolley jacks. That was a pleasant suprise
at least. Shocks went on ok, other than a struggle with the lower nut, new bushes made getting the nuts on a PITA. Only thing I didn't do is
torque the front bush bolts, I'll do that when its on it's wheels.
Shocks are Monroe Sensatracs and the springs are heavy duty ones, no idea on make or how it will all sit... until all the weights on it.
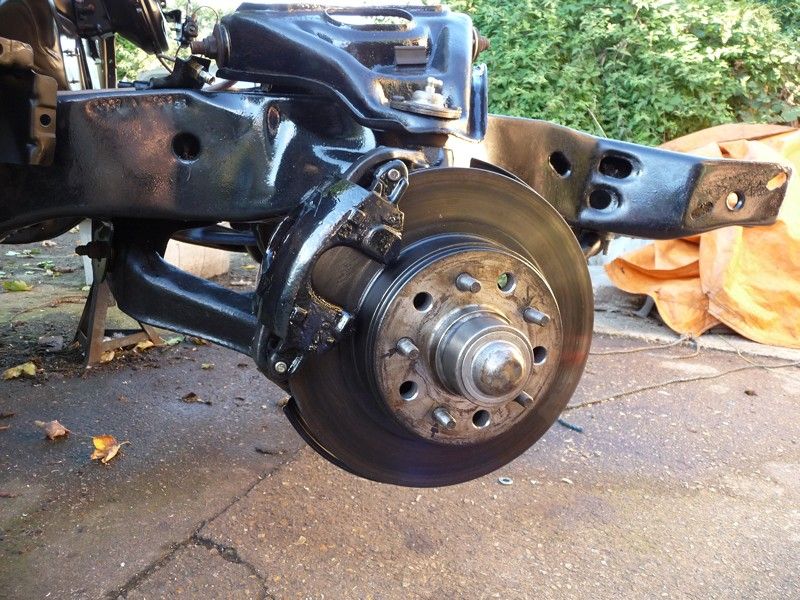
Fitted the brake backing plates, after opening the bores out a bit, didn't quite fit for some reason (~1/8" too small), though they are
earlier model back plates, still off a 10 bolt though. Reassembled the brakes with new cylinders and shoes and the original hardware as it was all
good.
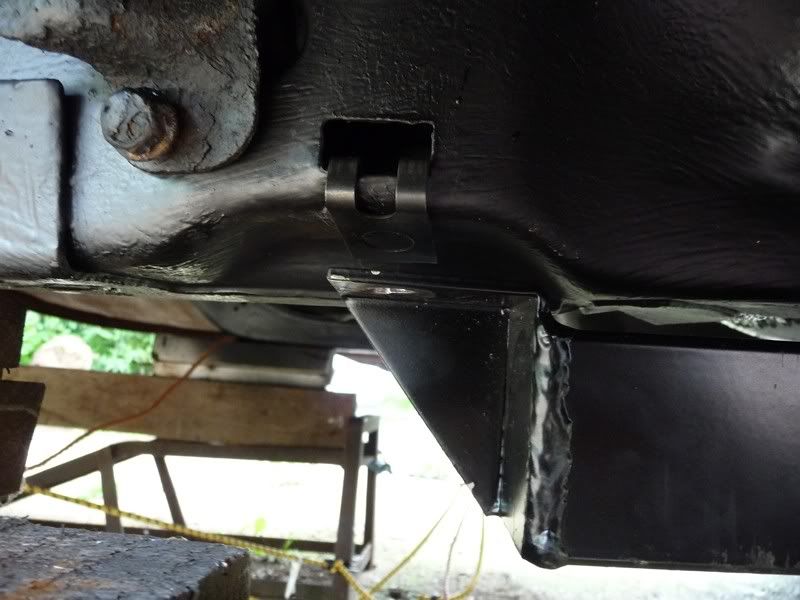
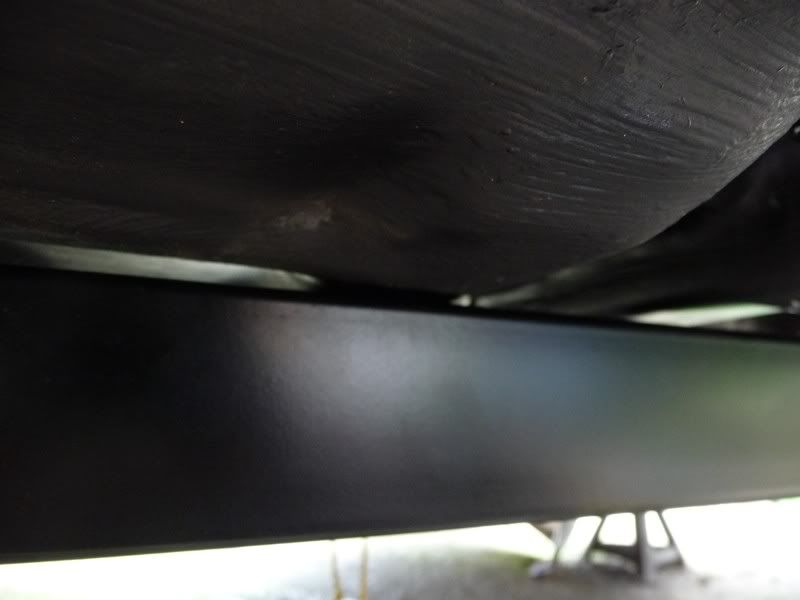
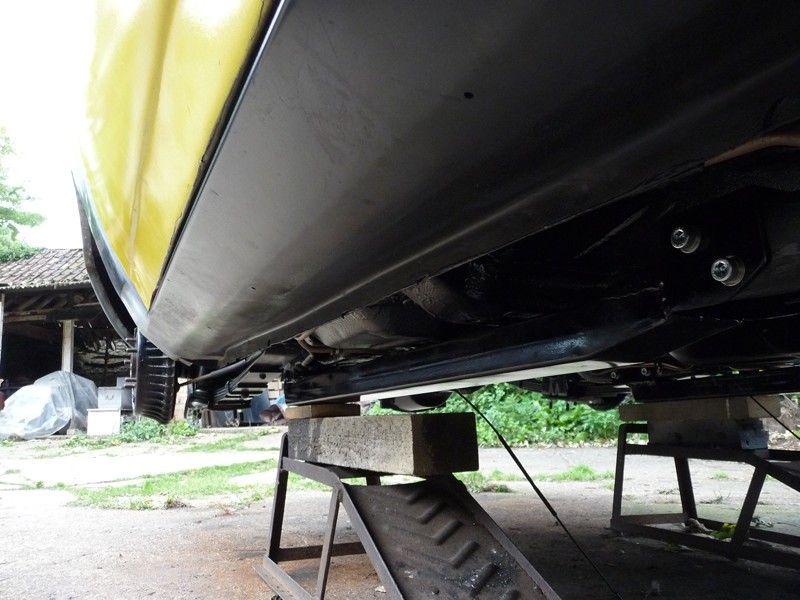
Then put the sub frame connectors on and torqued it all up.
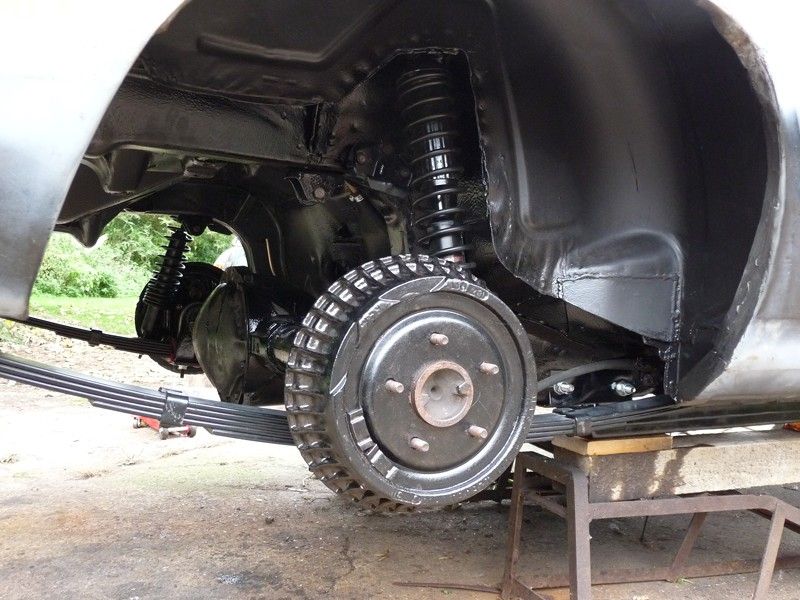

Quite pleased with how the SFC's tuck up under the car.
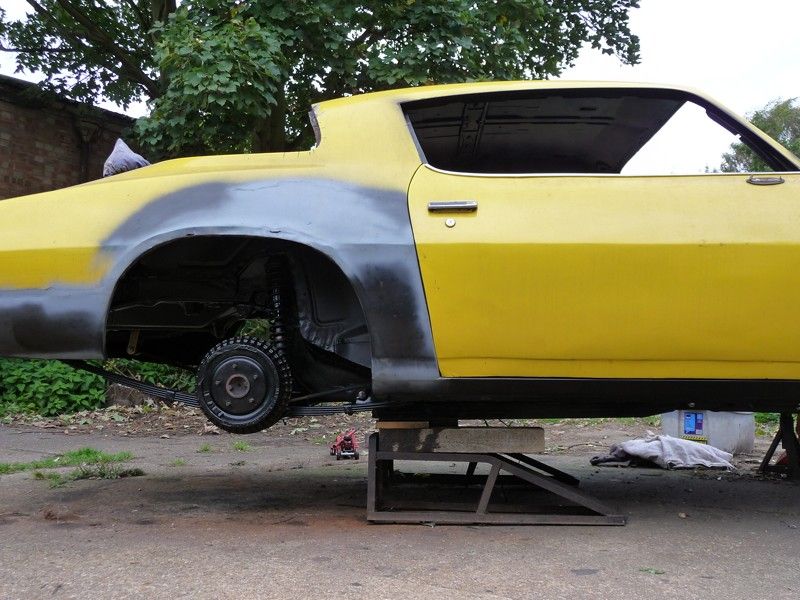
Ignore the manky old diff cover, got a new one to go on eventually....
Swapped the front spindles and brakes over and fitted the front shocks. Just need to make the front lines now and its sorted.
Made the rear brake lines as well. Stainless braided flexi lines etc.
Cleaned up the transmission, made new oil cooler lines and found where a few of the leaks were coming from when I had the car on the road. Still need
to fit a new dipstick and going to blank off the kickdown cable. Dug the new torque convertor out as well, B&M Holeshot 2400.
Finished putting new core plugs in, fitted the new flex plate.
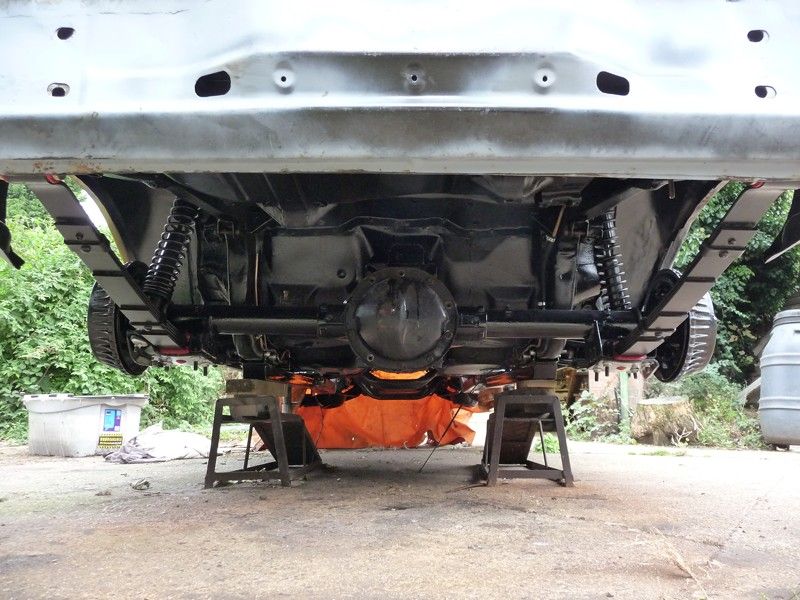
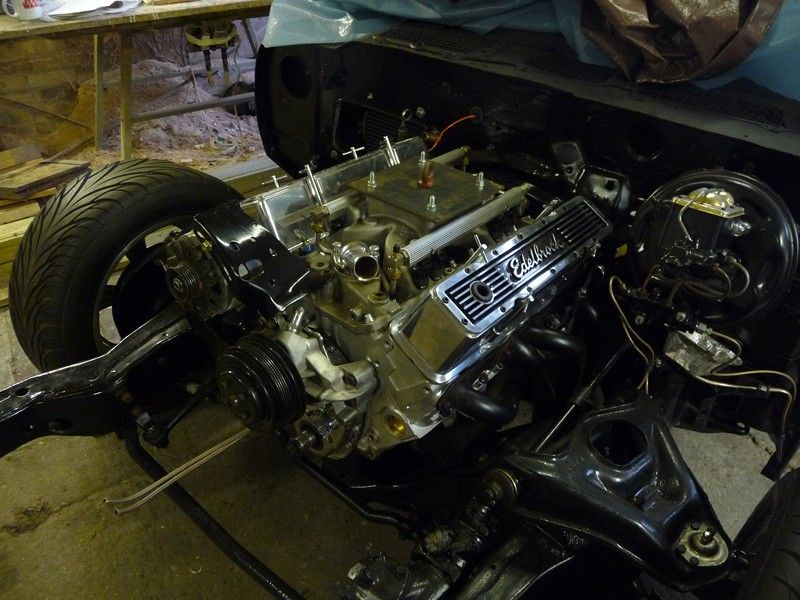
Worst bit was the engine mounts didn't line up by around 1/4" each side. Got the bolts in after a while. Hope I don't have to take
them out again....
Stuffed the headers on loosely as well just to see what clearance I've got, they're Hedman ones. Need shorty plugs and going to fit a mini
starter. Other than that, all looks good. Ground clearance looks good too, bottom of the header flange is level with my SFC's

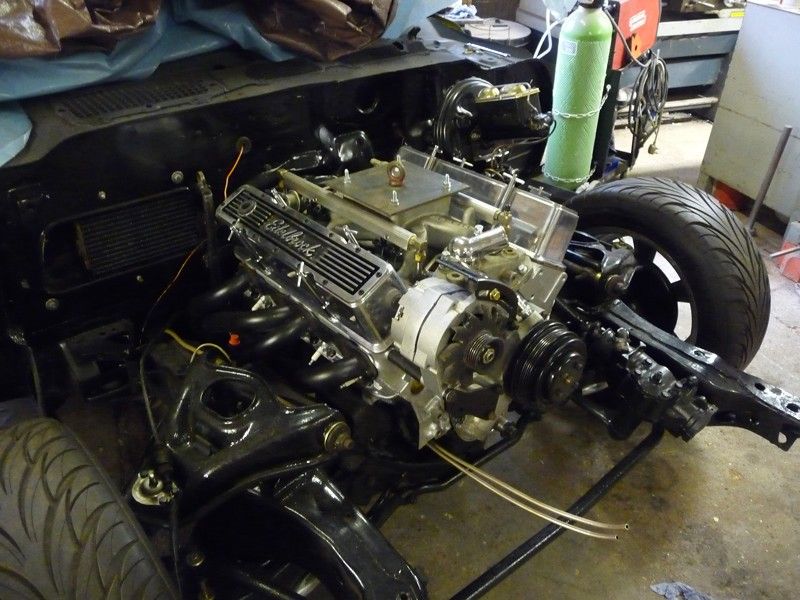
I fitted the additional fuse and relay boxes on the firewall and plotted out a few other bits for the engine bay. Tried fitting the PS pump and found
the return hose will clash with the pitman arm, so need to find another pump. Might have a go at making the subframe to firewall braces next
weekend.
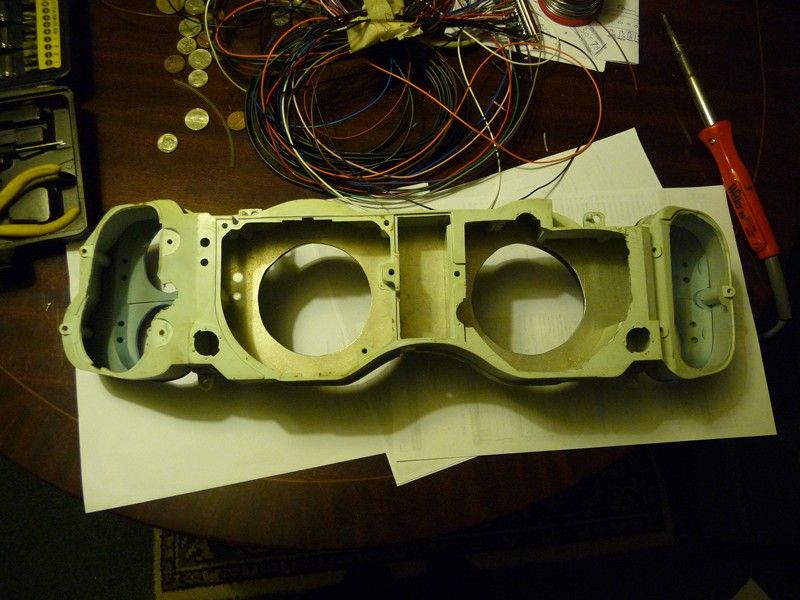
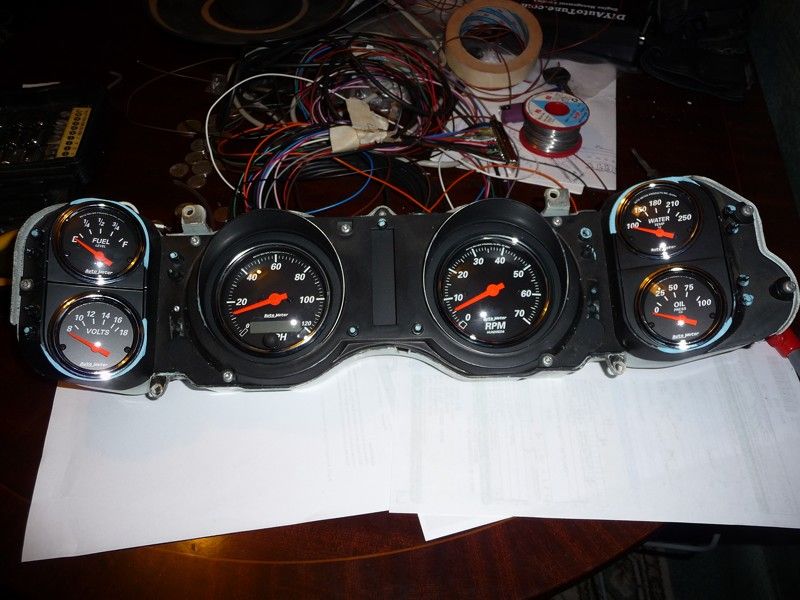
So thought I would have a go at the instrument panel in the evenings this week.
I wanted to keep the stock dash, but fit up to date instruments. Got a set of Autometer ones for a sensible price, but no way I was forking out on an
aftermarket custom dash. Still had the old gauge cluster and it seemed ripe for cutting up and making the others fit. Thankfully none of it's
visible once its installed anyway
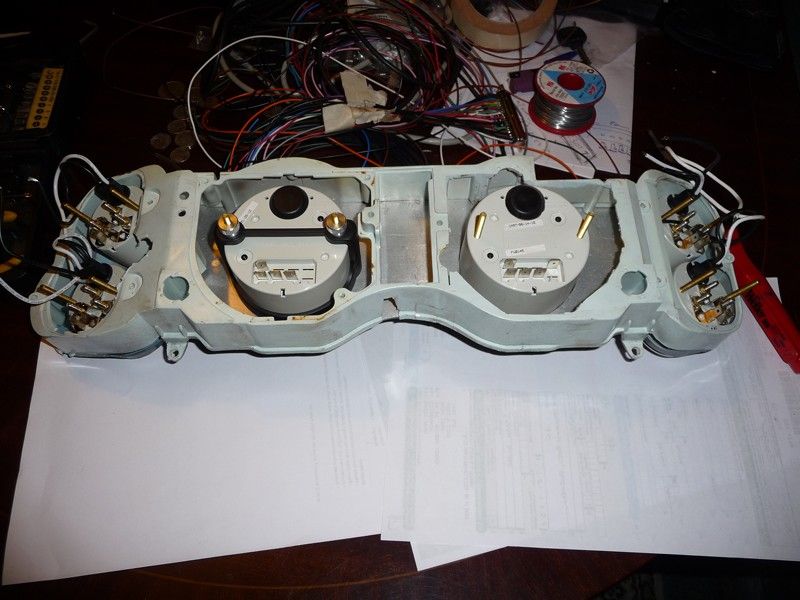
Cut an aluminium plate to fit in where the speedo and tacho were to give me something to mount the new gauges to. Then cut out the holes for the
smaller gauges in the original cluster. Had to cut most of the back off the cluster, and still need to cut out some more to clear the clamps for the
gauges. Got too cold outside at that point so I gave up for today :lol:
Quite pleased with the results.
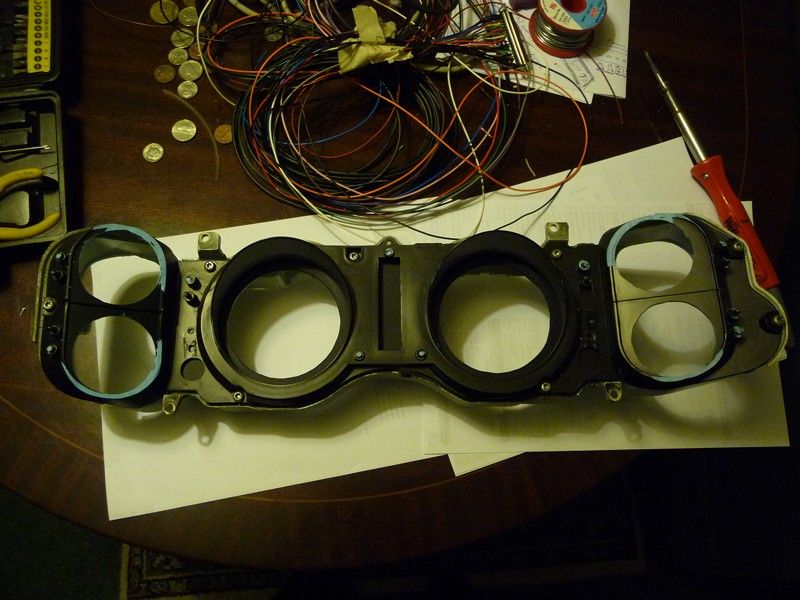
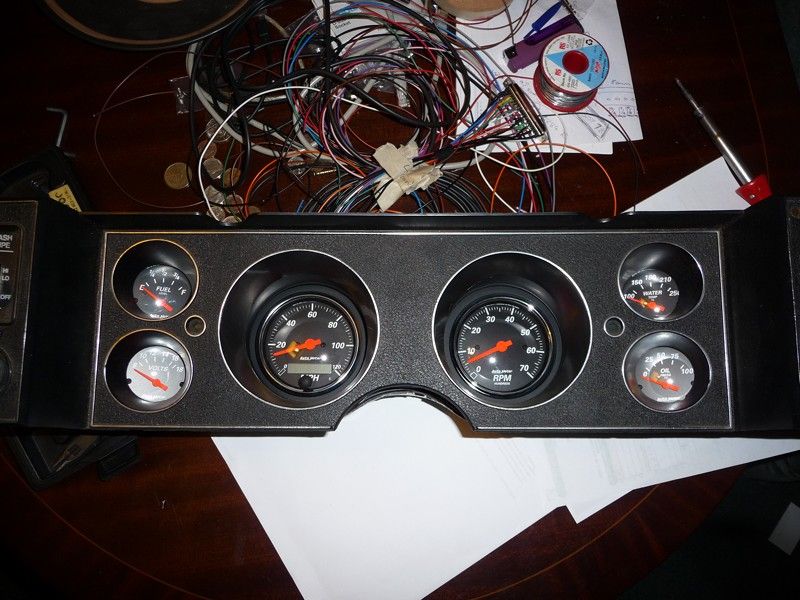
Wired the dash up, and tried getting a pic of it lit up as best I can. I like red illumination, so went with that option. Stock is white though...

Picked up some more parts last night. Now have a nice small 14" steering wheel on there, small starter motor with lots of header clearance and a
few other odd bits. Hoping to make a big start on wiring the engine bay this weekend with the aim to get it running by Christmas....
[Edited on 14/11/12 by flak monkey]
|
|
|
flak monkey
|
| posted on 16/11/12 at 09:07 PM |
|
|
Well finished the ECU and looms off tonight, and thanks to Briz have got a trigger wheel. This weekend will mostly be wiring the engine bay once I
have finished a couple of other minor jobs, like a lambda sensor bung for the exhaust and fitting said trigger wheel and sensor. Which may take longer
than initially thought... :lol:
|
|
|
Simon
|
| posted on 17/11/12 at 12:00 AM |
|
|
Very, very nice
ATB
Simon
|
|
|
Ivan
|
| posted on 17/11/12 at 07:28 AM |
|
|
You are doing a great job David, thanks for posting all this - it's one of my favourite threads.
You and future owners are going to have an excellent car at the end of the work.
|
|
|
flak monkey
|
| posted on 29/11/12 at 12:32 PM |
|
|
Spent every evening last and this week doing wiring, drilling holes in the firewall and doing more wiring. The ECU and engine wiring are more or less
done.
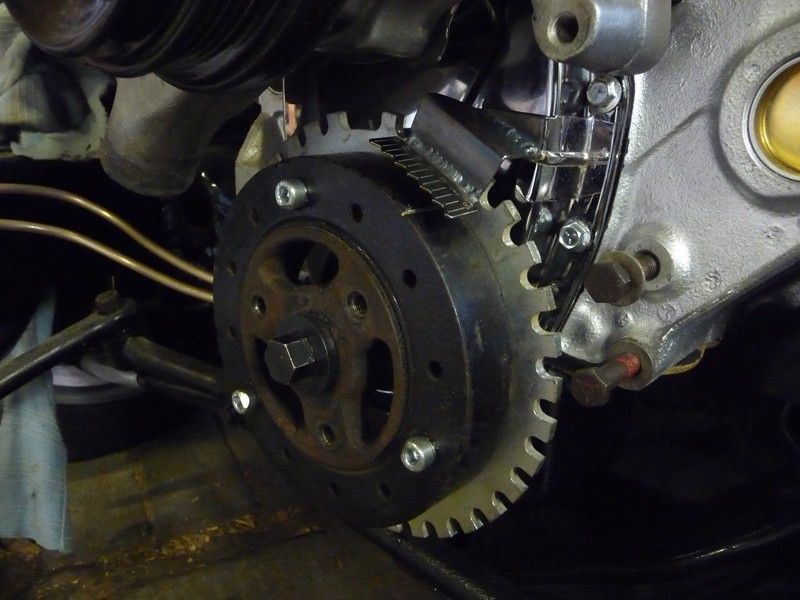
Still have to make a bracket for the VR sensor and make a new crank pulley. I temporarily mounted the trigger wheel on the damper, but it's far
from ideal. But it will do for just checking the mechanical bits out.
Fuse box on the firewall is just for the EFI system, fuel pump, coils etc. Its switched by a 70A relay direct from the battery.
I've since wrapped the loom up and tidied the rest of the wiring up.
Cleaned all the paint off the headers and repainted with them with high temp paint. Welded in a bung for the lambda sensor. Fitted a new transmission
pan and removed the kickdown cable and bunged up the hole.
So loads is happening, but yet again I have run out of money a week into the month 
|
|
|