*davies144*
|
| posted on 9/2/09 at 10:14 PM |

|
|
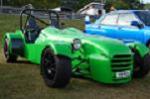
cortina hubs (part 2)
hi does anyone no if the plate on the hub is necessary?( arrow to it in pic) and does anyone have any info on how to take them apart to get to the
discs, i have the calipers off and all the ball joints off now, what fun that was  .JPG)
|
|
|
|
|
blakep82
|
| posted on 9/2/09 at 10:15 PM |
|
|
erm, not can't see an arrow lol if you mean the crappy thin plate behind the disc, then it can come off. take of the hub and disc and there
should be 3 bolts holding to the upright i think
________________________
IVA manual link http://www.businesslink.gov.uk/bdotg/action/detail?type=RESOURCES&itemId=1081997083
don't write OT on a new thread title, you're creating the topic, everything you write is very much ON topic!
|
|
|
*davies144*
|
| posted on 9/2/09 at 10:17 PM |
|
|
sorry paint.JPG)
|
|
|
Paul TigerB6
|
| posted on 9/2/09 at 10:19 PM |
|
|
Best bet is to see if anyone has the Cortina manual as a pdf file, or can scan the relevant sections for you.
|
|
|
blakep82
|
| posted on 9/2/09 at 10:21 PM |
|
|
yeah, thats the one i was thinking. take off the grease cap out the centre, the split pin and the nut holding the hub on, the hub and disc can slide
off (the disc bolts to the hub from behind) and then you can get to the bolts holding the plate off
________________________
IVA manual link http://www.businesslink.gov.uk/bdotg/action/detail?type=RESOURCES&itemId=1081997083
don't write OT on a new thread title, you're creating the topic, everything you write is very much ON topic!
|
|
|
*davies144*
|
| posted on 9/2/09 at 10:25 PM |
|
|
nice 1 mate, that a little job for tomorrow night! plan to get them blasted this weekend all being well!!
|
|
|
blakep82
|
| posted on 9/2/09 at 10:30 PM |
|
|
no worries 
according to haynes, 27 lb f ft for tightening the hub nut.
as to what paul said about scanning the pages, theres no mention of that plate in the manual, but from memory, 3 bolt takes it off, but everything
else comes off first
[Edited on 9/2/09 by blakep82]
________________________
IVA manual link http://www.businesslink.gov.uk/bdotg/action/detail?type=RESOURCES&itemId=1081997083
don't write OT on a new thread title, you're creating the topic, everything you write is very much ON topic!
|
|
|
*davies144*
|
| posted on 9/2/09 at 10:43 PM |
|
|
excellent wriitten all that down cheers again!
|
|
|
GeorgeM
|
| posted on 9/2/09 at 10:45 PM |
|
|
when you refit, tighten the nut to 27lb/ft
whilst tuning the hub - then back it off 1/4 turn.
bearing wont last long ifyou don't!!
you will feel some movement after adjusting,
but it works.
GeorgeM
|
|
|
*davies144*
|
| posted on 9/2/09 at 10:48 PM |
|
|
good advice i shall post a piccy of them in there new state when ther done!!!
|
|
|
wrigglypig
|
| posted on 9/2/09 at 11:00 PM |
|
|
bring em round if you want ben, I'll be playing on Thursday no doubt
|
|
|
embraboy
|
| posted on 9/2/09 at 11:13 PM |
|
|
Copy of manual available here - linky
Also - have a look at electrolysis for cleaning them up. I did it on my hubs and they came up like new. See picutres in my archive
here - in the just out picture it still
looks pretty bad but the rust just flakes off in big chunks leaving metal like new underneath. It's like magic and very locost....

|
|
|
mark chandler
|
| posted on 9/2/09 at 11:21 PM |
|
|
Mine looked worse than that upon arrival, throw the back plate away, if the little bolts shear is does not matter as this is best placed in the
bin.
Quick scratch with a wire brush to move the crusty lumps then into a bucket with soda crystals, and plug in you battery charger.
|
|
|
02GF74
|
| posted on 10/2/09 at 10:17 AM |
|
|
unless someone has said it already, that "plate" is known as the dust shield.
not seen one fitted on any kit car.
|
|
|
*davies144*
|
| posted on 10/2/09 at 06:40 PM |
|
|
excellent advice again!! i shall bring them round on thurs then kev!
|
|
|
*davies144*
|
| posted on 10/2/09 at 10:16 PM |
|
|
jus got them all stripped down,so into the electrolosis bath!!!
|
|
|