flak monkey
|
| posted on 3/4/11 at 08:01 PM |

|
|
Bloody hell its been nearly 2 months since I had any time to do some work on this thing!
The DIY on the house is pretty much done now, so I snuck out to do some more this afternoon.
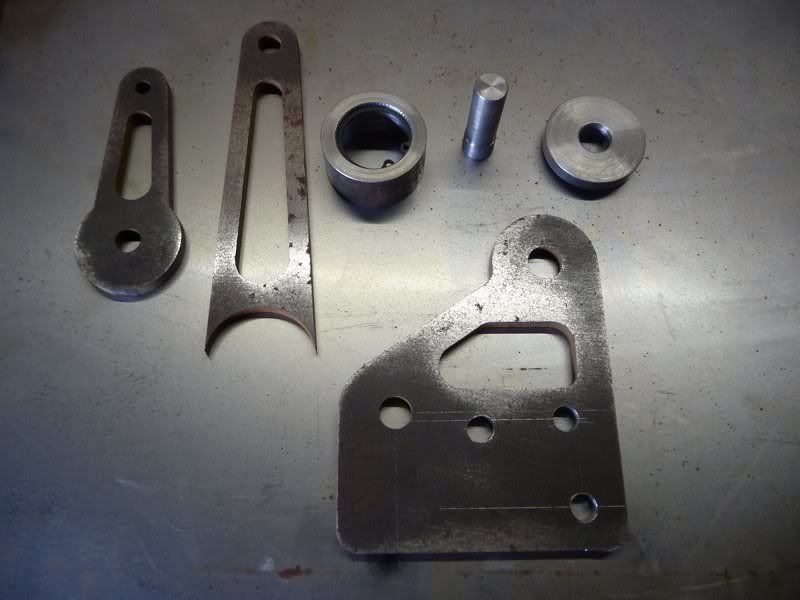
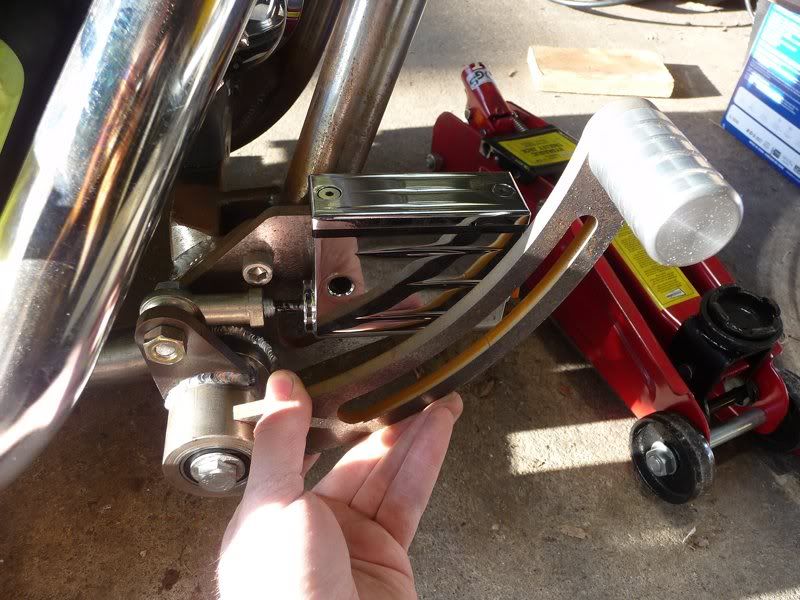
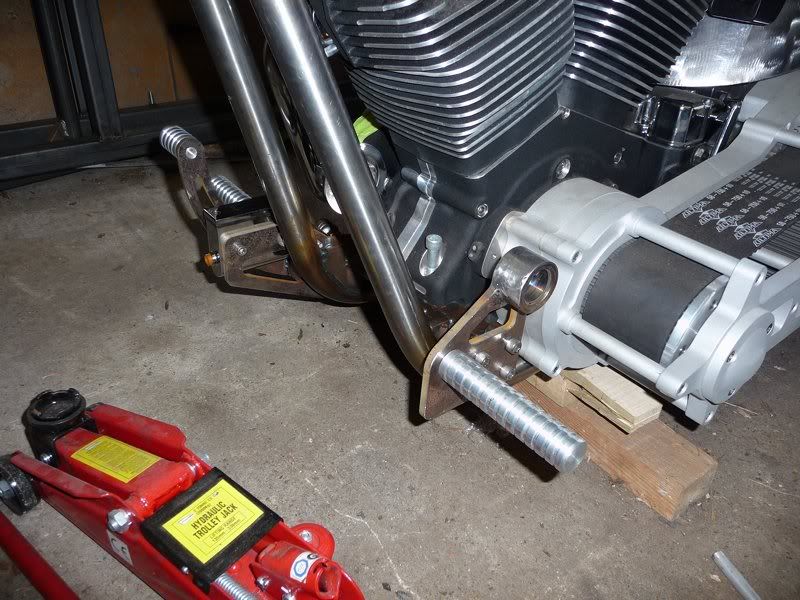
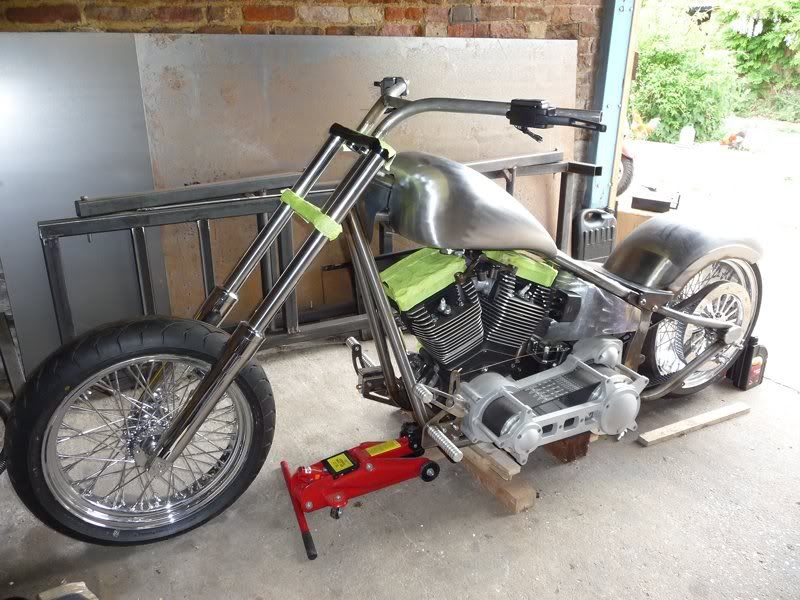
Set about making a start on the forward controls this afternoon. I had most of the parts water jet cut a while back, and the first job was to drill
the back plates
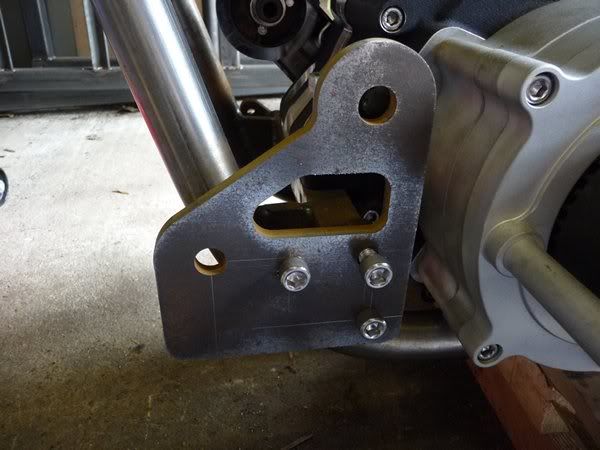
Which ended up giving m an injury! I really must get a bigger machine vice!
Also gave me a proper chance to try out the positions of the foot pegs and it looks like its all worked out ok.
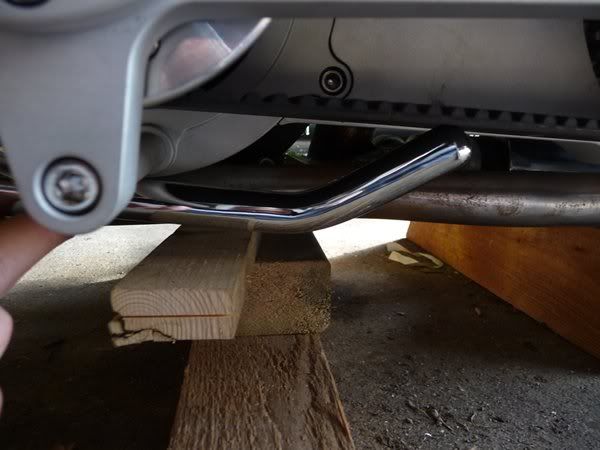
Tried the side stand as well, its going to need some modification or its going to hit the primary drive belt when its folded up.
Next I'll be turning all the pivot parts for the forwards and pressure testing the oil tank.
Hopefully my fuel tank will arrive before the end of the month as I have some holiday coming up where I am hoping to finish off most of the assembly
and fabrication.
Sera
http://www.motosera.com
|
|
|
|
|
flak monkey
|
| posted on 27/4/11 at 06:46 PM |
|
|
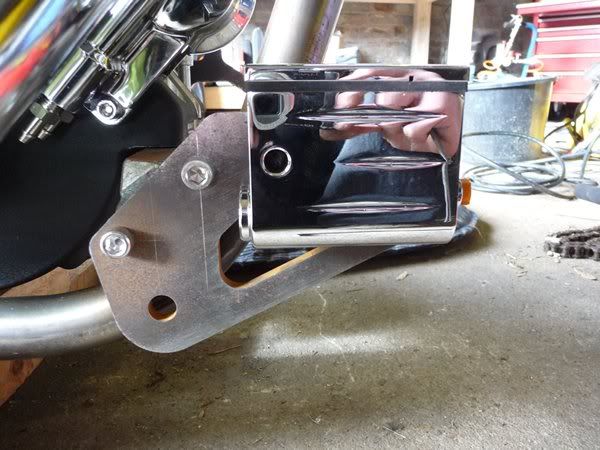
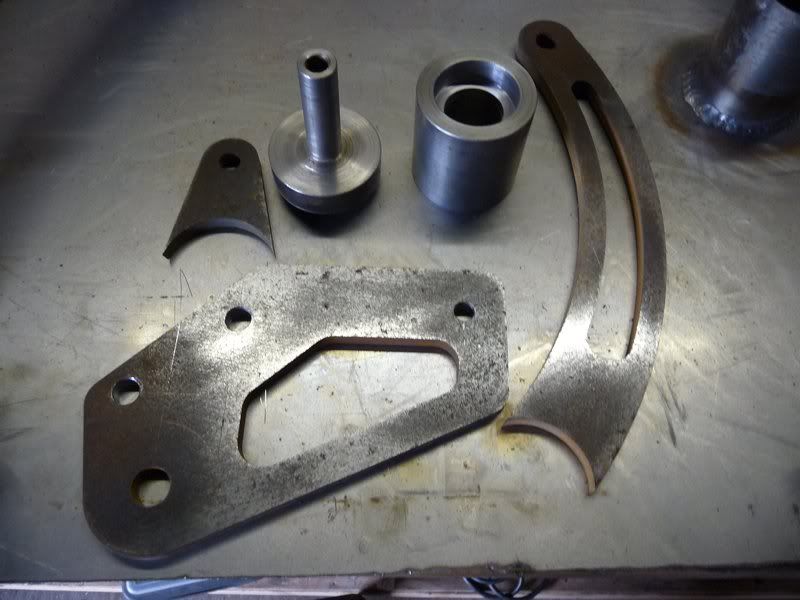
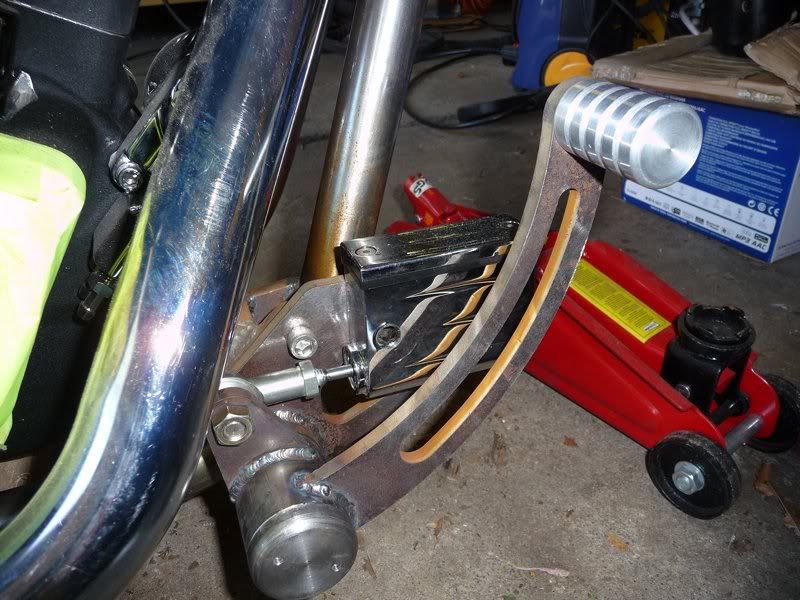
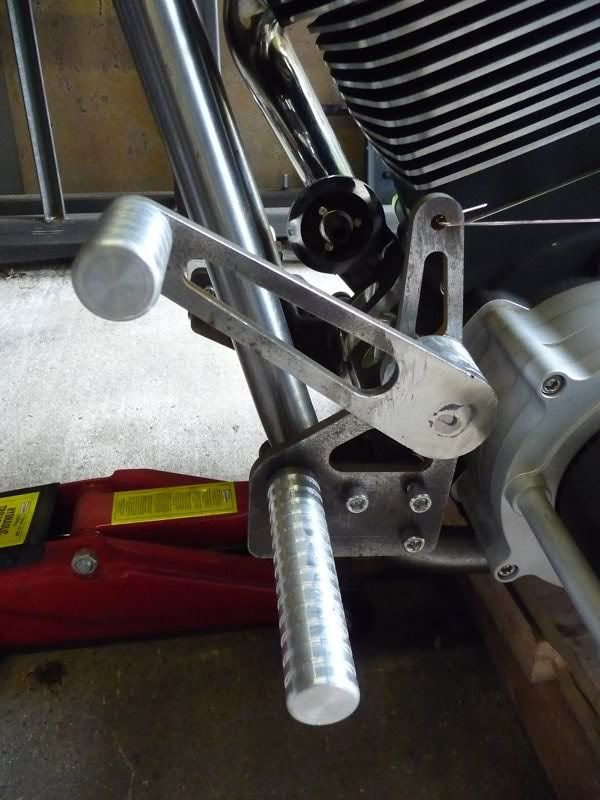
Got the rest of the bits made for the forward controls, and welded some of it together. I think if I were doing it again I would have made the
forwards themselves from aluminium as well. But there we go.
All the pivots are on 2 sealed ball bearings, so its all nice and smooth 
Bits for the left side:
Bits for the right side:
Turned the 2 pegs for the levers, run out of material to make the foot pegs...typical!
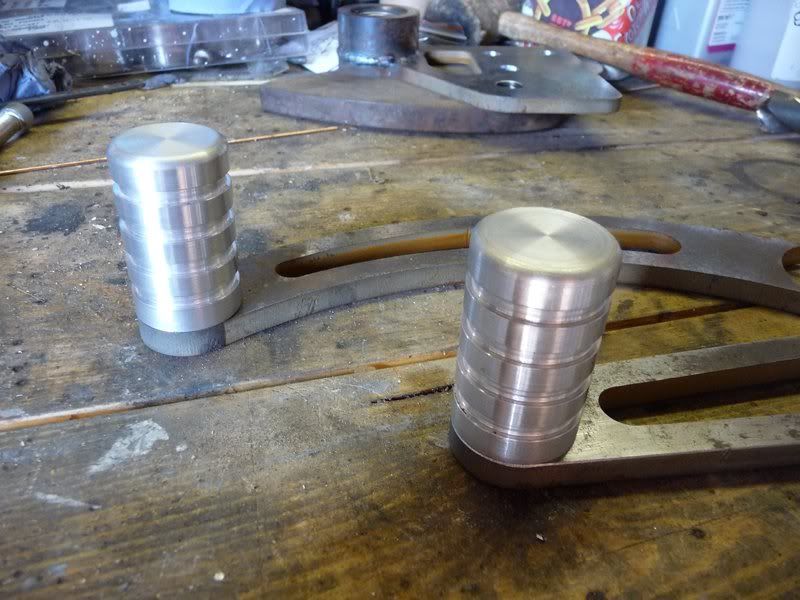
Made up a pushrod for the rear master cylinder and had a bit of a play around getting the alignment right. All seems to work now, will require some
creativity to make the pegs level again. Nothing that cant be solved though
And now its coming together. Once I get the footpegs made I can finally weld the lever on.
Obviously the bolts are going to be changed, and theres a proper end cap to go on rather than a bolt and washer :lol:
Sera
http://www.motosera.com
|
|
|
SeaBass
|
| posted on 27/4/11 at 07:12 PM |
|
|
Wow - how did I miss this one.... I know nothing about bikes but love this type of machine and get a rare thrill flicking through Back Street Heroes
in WH Smith every now and again.
Great project and your making such a good job of it!
James
|
|
|
matt.c
|
| posted on 27/4/11 at 08:37 PM |
|
|
I cant wait till rolls up my road!!!
My neighbours are going to have heart attacks lol 
Everything you do is always perfect, puts my work to shame. 
|
|
|
flak monkey
|
| posted on 2/5/11 at 05:57 PM |
|
|
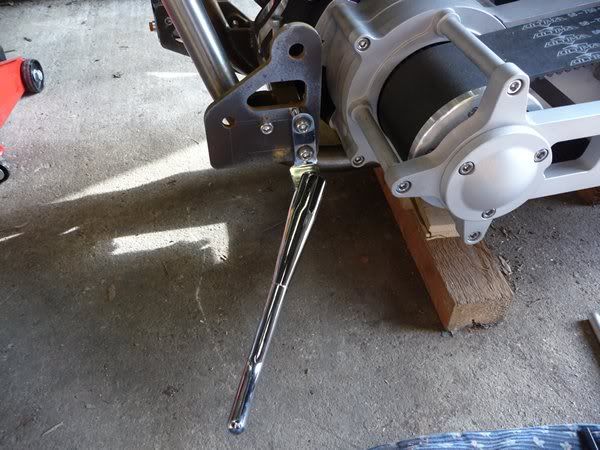
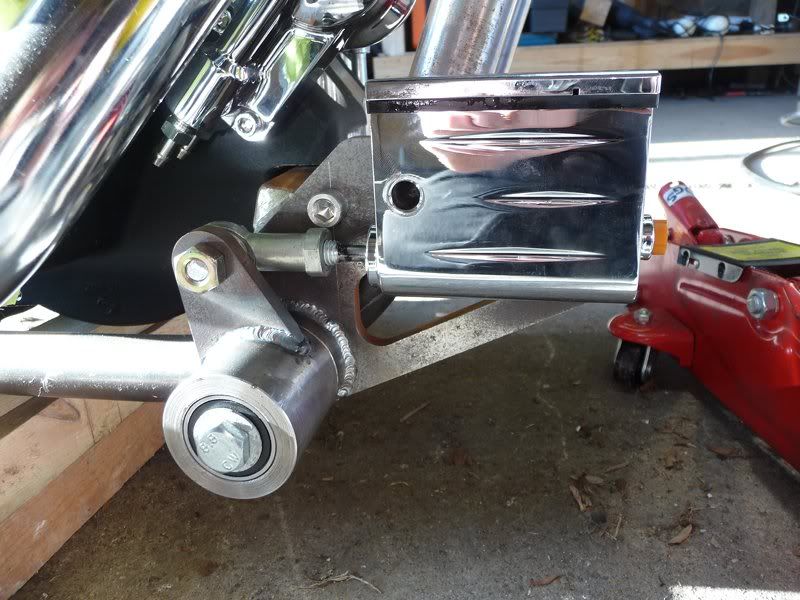
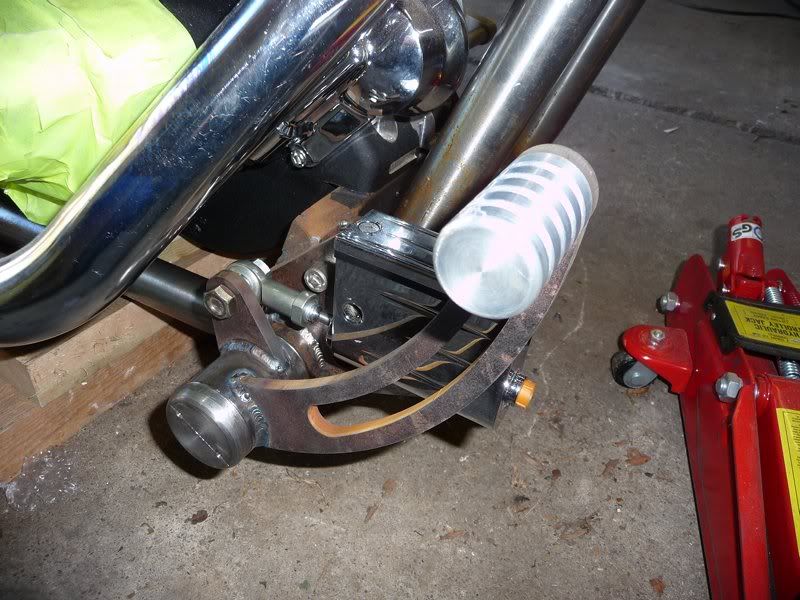
Finished the brake/right side forward off this morning. Actually happy with the results of my TIG welding for a change, the practice is paying off
slowly. :lol:
Sera
http://www.motosera.com
|
|
|
ch1ll1
|
| posted on 2/5/11 at 06:32 PM |
|
|
wow, that looks great,
not been on here for along time
been doing what you have, building bikes,
hope it goes well !
just a quick one, that stand is going to be a real pain in the arse ( mines the same but with no openbelt )
i end up leaning over and pull it out ( not cool )
paul
[Edited on 2/5/11 by ch1ll1]
|
|
|
ch1ll1
|
| posted on 2/5/11 at 06:41 PM |
|
|

rev-tec engine


Uploaded with ImageShack.us
Uploaded with ImageShack.us
s&s engine
[Edited on 2/5/11 by ch1ll1]
|
|
|
big_wasa
|
| posted on 2/5/11 at 06:45 PM |
|
|
Months since I had a read of this  Your Tig has come on well. Just wish I had the time to sit and practice mine, Your Tig has come on well. Just wish I had the time to sit and practice mine,
|
|
|
flak monkey
|
| posted on 2/5/11 at 06:52 PM |
|
|
Nice bikes Paul. Like the second one.
Thanks Warren. Getting there
Sera
http://www.motosera.com
|
|
|
flak monkey
|
| posted on 3/5/11 at 07:57 PM |
|
|
Finished the pegs off.
Man is this thing going to be a comfy ride
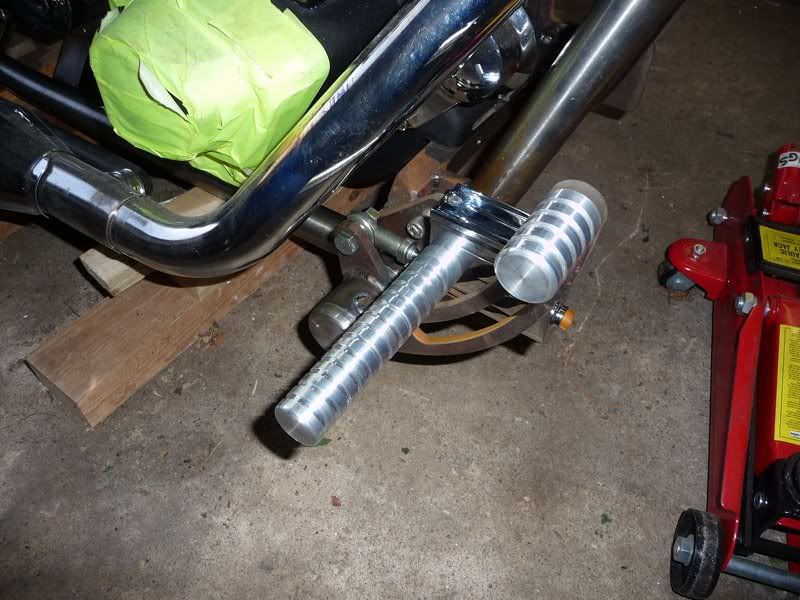
Just to finish off some milling for the gear shifter now
Sera
http://www.motosera.com
|
|
|
perksy
|
| posted on 3/5/11 at 08:22 PM |
|
|
Enjoying this
Keep up the Good work
|
|
|
David Jenkins
|
| posted on 3/5/11 at 09:35 PM |
|
|
It looks impressive!
Just one question - not trying to be all negative or whatever - but maybe those alloy foot-pegs are going to look scuffed very quickly?
Perhaps stainless would be more durable...
|
|
|
flak monkey
|
| posted on 4/5/11 at 06:58 AM |
|
|
quote:
Originally posted by David Jenkins
It looks impressive!
Just one question - not trying to be all negative or whatever - but maybe those alloy foot-pegs are going to look scuffed very quickly?
Perhaps stainless would be more durable...
Thanks David. Going to be getting them hard anodised (clear) then the grooves black paint or powdercoat to match the engine casing
Well thats the plan anyway
I thought about making them from stainless, but thought the chances of me scraping them on a corner are pretty high anyway. Easy to replace or change
at a later date should I want to
Sera
http://www.motosera.com
|
|
|
MikeCapon
|
| posted on 4/5/11 at 07:35 AM |
|
|
quote:
Originally posted by flak monkey
Thanks David. Going to be getting them hard anodised (clear) then the grooves black paint or powdercoat to match the engine casing
Well thats the plan anyway
Hi David,
Hard anodising will not come out clear. Generally a bronze/brown or grey colour. Talk to your anodiser first. As far as I know then only
'clear' or natural finish you'll find is ordinary decorative anodising.
About filling in the grooves black. In the past I've made similar footrests and fitted some fat section O rings into the grooves. Result is a
nice colour contrast plus a non slip footpeg.
Knowing your fascination for black finishes I have recently had some black chrome done which may interest you. The base is a reasonably thick coat of
electrolytic nickel, followed by a few microns of black chrome.
In terms of hardness, colour depth and consistency and corrosion resistance this is an excellent finish. The only thing it may lack for you is gloss.
The finish is a very nice (IMO) satin. Oh and it's not dear either. Which is nice. I can post some pics if you want...
Cheers,
Mike
|
|
|
flak monkey
|
| posted on 4/5/11 at 10:30 AM |
|
|
Thanks Mike. I contacted several companies, none of whom were even remotely interested in black chroming parts for me. If you have a contact for a
company that can do it, I would really appreciate it.
I really want black nickel plating to match the engine covers, but again I can't find anyone to do it!
Sera
http://www.motosera.com
|
|
|
MikeCapon
|
| posted on 4/5/11 at 11:08 AM |
|
|
Hi David,
These guys did my last batch of stuff. Their workshop etc is not pretty to look at and they are typical old school platers.
Northampton + Midland
They do do one off stuff though. I saw a roll hoop there last time I visited. They also do stuff for EBC.
HTH
Mike
ET correct messed up linky
[Edited on 4/5/11 by MikeCapon]
|
|
|
flak monkey
|
| posted on 4/5/11 at 01:08 PM |
|
|
Thanks Mike, I have been in touch with them before and they said they couldnt plate aluminium parts...
So back to square one!
Sera
http://www.motosera.com
|
|
|
flak monkey
|
| posted on 6/5/11 at 08:02 PM |
|
|
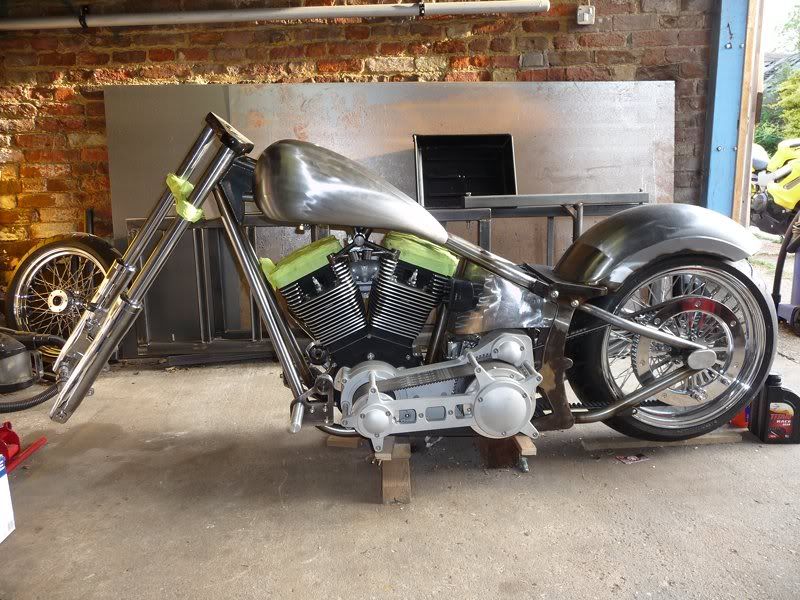
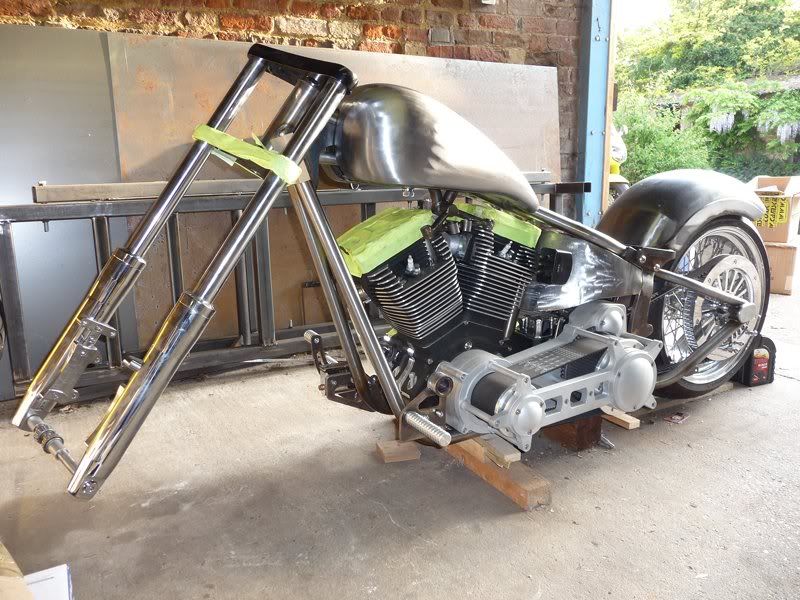
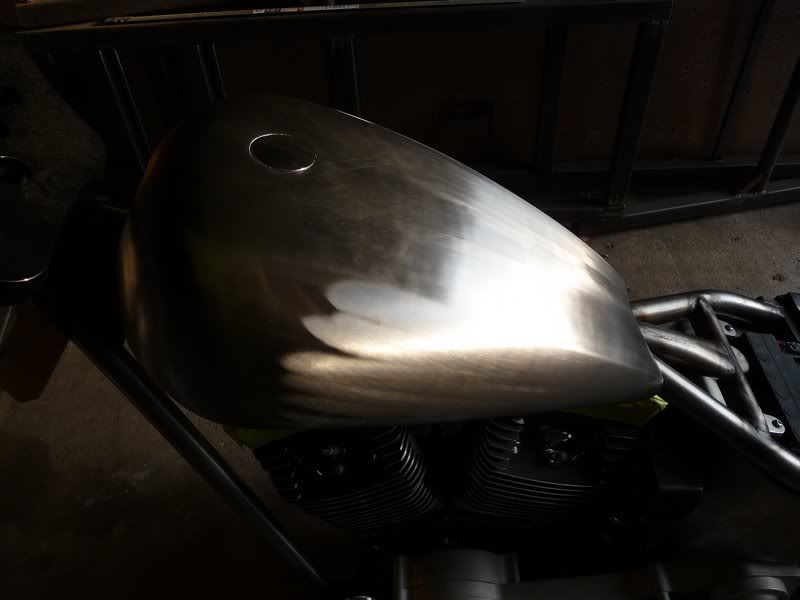
The fuel tank has finally arrived after 5 months....
Popped it on the frame and thanks fully it fitted pretty well...then came the puzzle of how to level and set it central with nothing to measure from
other than curved surfaces. All good fun.
Once I had it positioned, with a few pieces of rubber hose as spacers, I cut up the mounts and tacked them on. The removed the tank and spacer bits,
then put it back to make sure it all cleared the frame as expected.
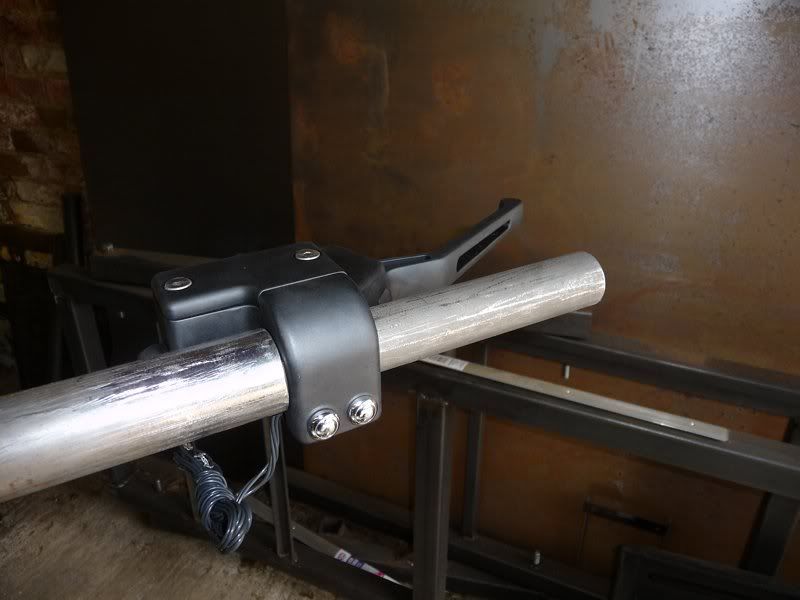
Didn't take very long really. Next job is the bars....
Sera
http://www.motosera.com
|
|
|
flak monkey
|
| posted on 7/5/11 at 05:42 PM |
|
|
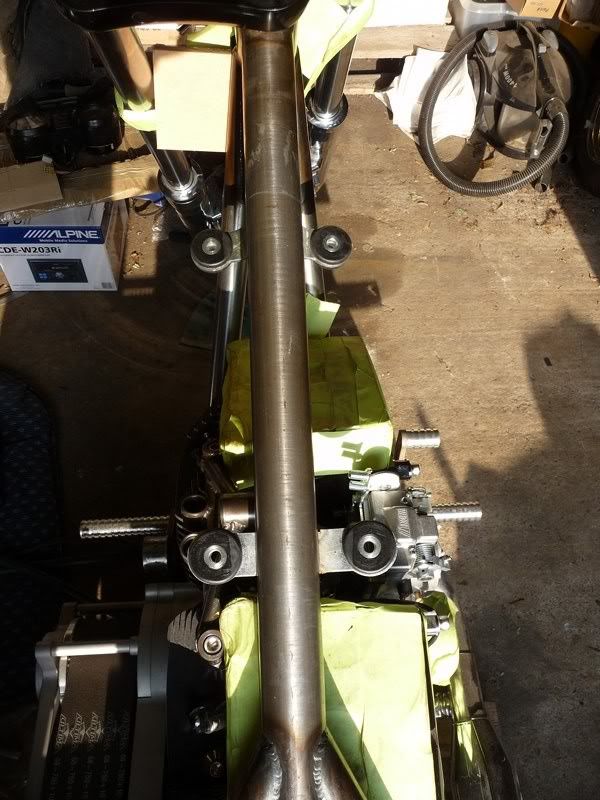
Mocked up some bars today, just to test out the idea. Need to get some proper tube bent up, but we have about 1 tonne (literally) of this white
1.25" tube laying about, so thought it was worth a test. The final bars will be 1.25" seamless...
Going to lose about another 3" off the end of each bar and increase the bend angle to 85-90deg. They aren't as wonky as they look in the
pic as the forks arent set straight, but then its only to get a rough idea :roll:
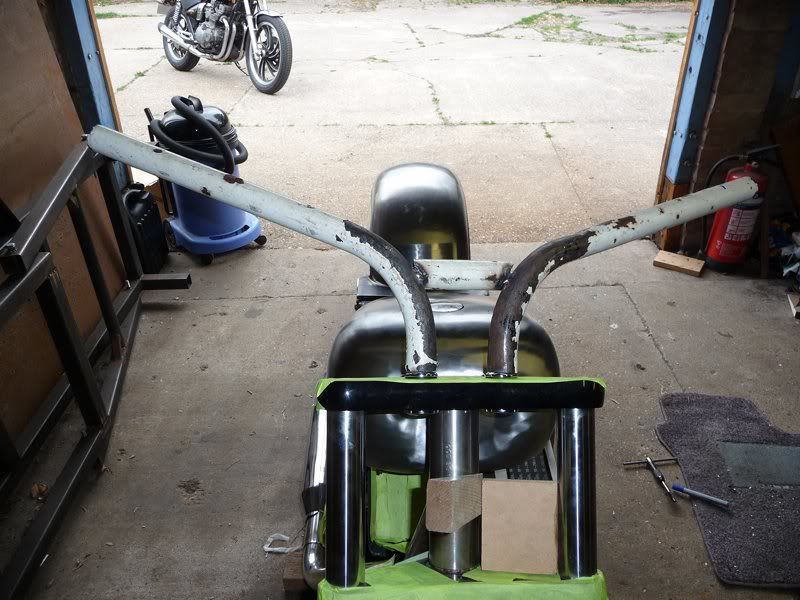
They should make it nice and easy to run the internal cables and hydraulics too :lol:
They were bent with one of those cheapo Clarke benders (die fits perfectly), but I wont be using that for the proper ones.
[Edited on 7/5/11 by flak monkey]
Sera
http://www.motosera.com
|
|
|
flak monkey
|
| posted on 15/5/11 at 03:01 PM |
|
|
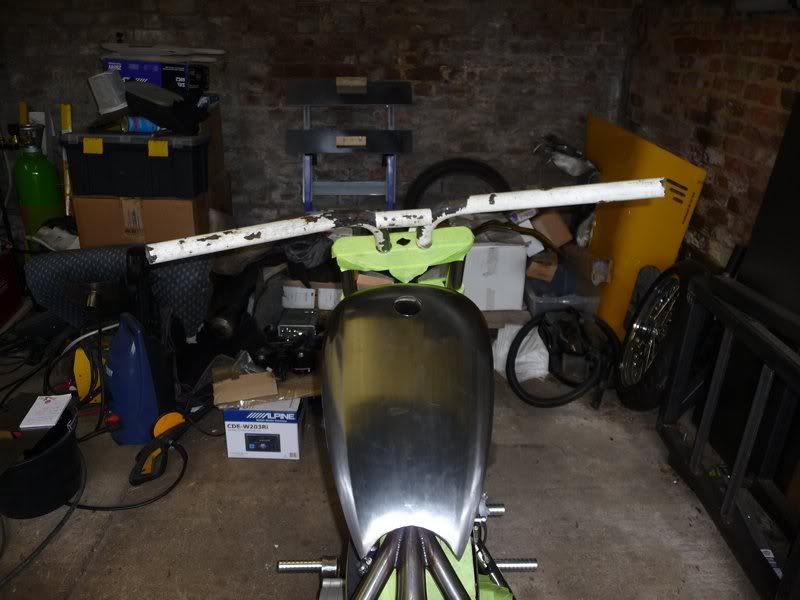
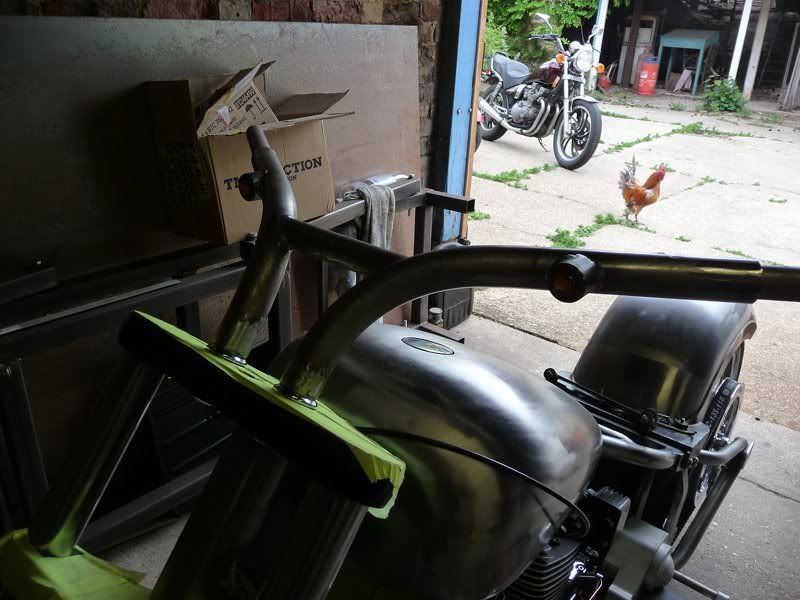
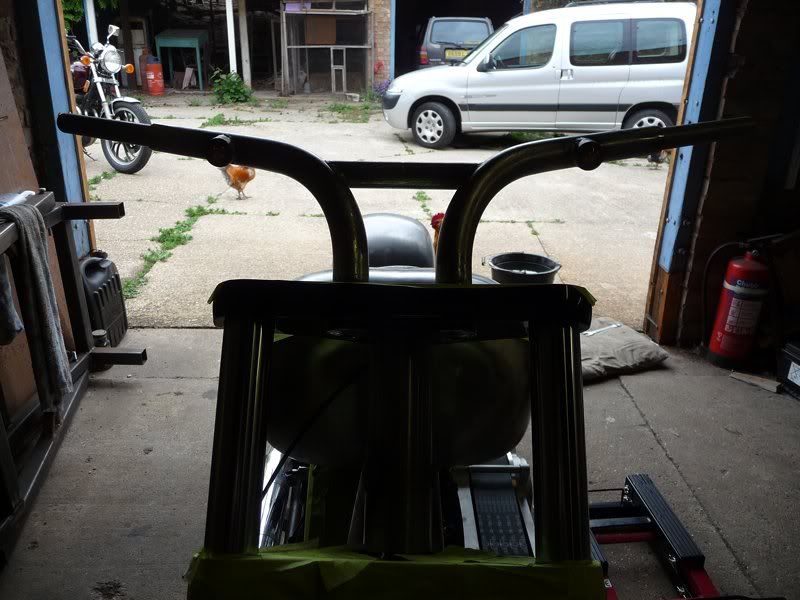
Got the bars done, well I might narrow them by 80mm OA, but thats easy... Went to see Briz on Friday to get the tube bent, then back home to chop them
up and weld together.
Lots of fiddling to make sure the bars were exactly the same, measuring, checking and rechecking. In the end it took all day to get them cut and
welded up but they are symmetrical within 1mm...so I am pleased with the result. They are 1.25" seamless tube with 1" tubes plug welded in
each end for the controls.
Still need to drill all the holes in them for the wiring and internal throttle.
The reason I might have to shorten them is I made the mistake of not checking how the controls would fit, the grip wont actually sit up against the
outside edge of them or the lever is in completely the wrong place, so looks like I will be making up a couple of spacers as well. Not a major problem
by all accounts though.
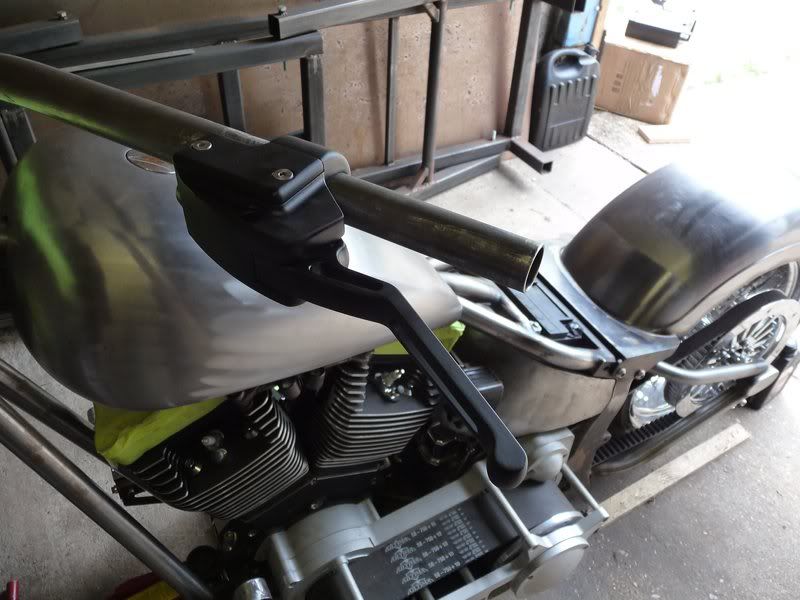
Also finished off the gear selector (I know the linkage might not be up to the job!  ) Hopefully the angle is about right. ) Hopefully the angle is about right.
And so its starting to look like a bike, major fabrication finished off more or less, now lots of fiddly little things like drilling holes in the
frame...  for the wiring and hydraulics etc. for the wiring and hydraulics etc.
Sera
http://www.motosera.com
|
|
|
Confused but excited.
|
| posted on 15/5/11 at 04:23 PM |
|
|
Ooo, it's looking good David.
Try these people for your black nickel plating; http://www.macrodevelopments.co.uk/blacknickel.htm
They reckon they can plate onto any metal.
HTH. John.
Tell them about the bent treacle edges!
|
|
|
flak monkey
|
| posted on 15/5/11 at 04:29 PM |
|
|
Thanks John, funny enough I have been talking to macro developments last week, need to send some photos of the parts over that I want plating to get a
price.
Sera
http://www.motosera.com
|
|
|
Stuart_B
|
| posted on 15/5/11 at 06:37 PM |
|
|
that is very nice
stu
black mk indy, 1.6pinto on cbr600 bike carb's.
|
|
|
flak monkey
|
| posted on 28/5/11 at 06:22 PM |
|
|
Cheers
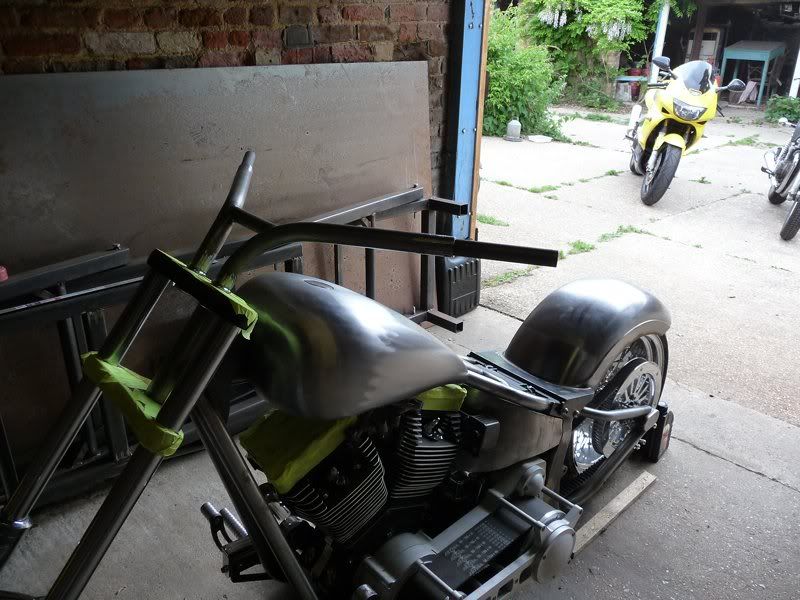
Getting there slowly. Now its got eyes....
Made the front indicator mounts this morning, turned up a couple of bosses chopped them up, spent ages making sure they were level and welded them to
the bars. Sorry about the dodgy pics :lol:
Also made the template for the splash guard and and fitted the studs for the numberplate bracket.
Sera
http://www.motosera.com
|
|
|
flak monkey
|
| posted on 4/6/11 at 06:02 PM |
|
|
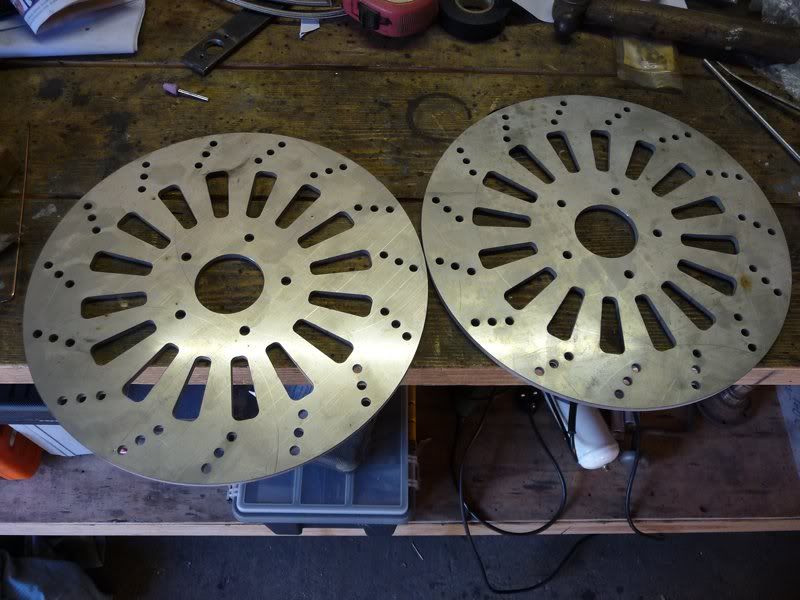
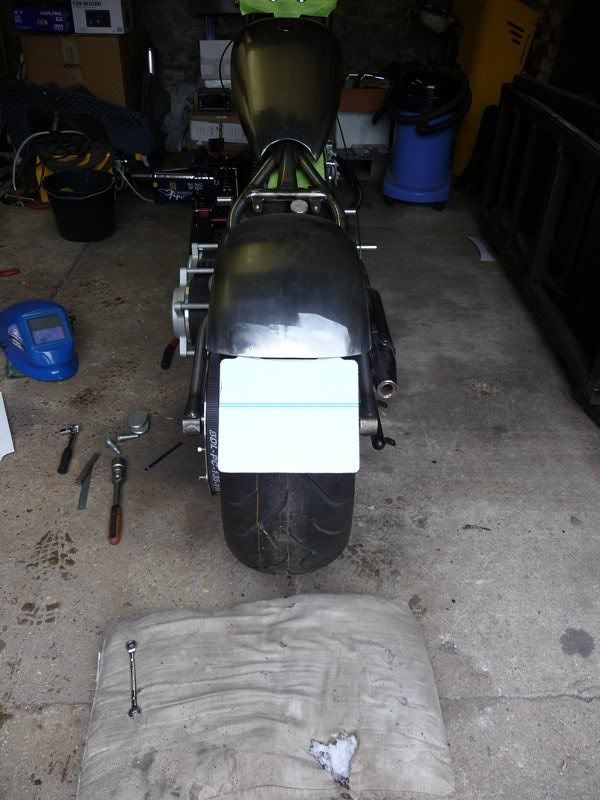
I have a distinct lack of motivation at the moment, unsure why. But things still continue to progress.
I recieved some more parts from the water jet cutter yesterday, including the brake discs I drew up. Looks like they will fit OK, just need to check
the run out and have them surface ground if necessary. They were cut from 5mm stainless plate.
The instrument/dash thing arrived as well.
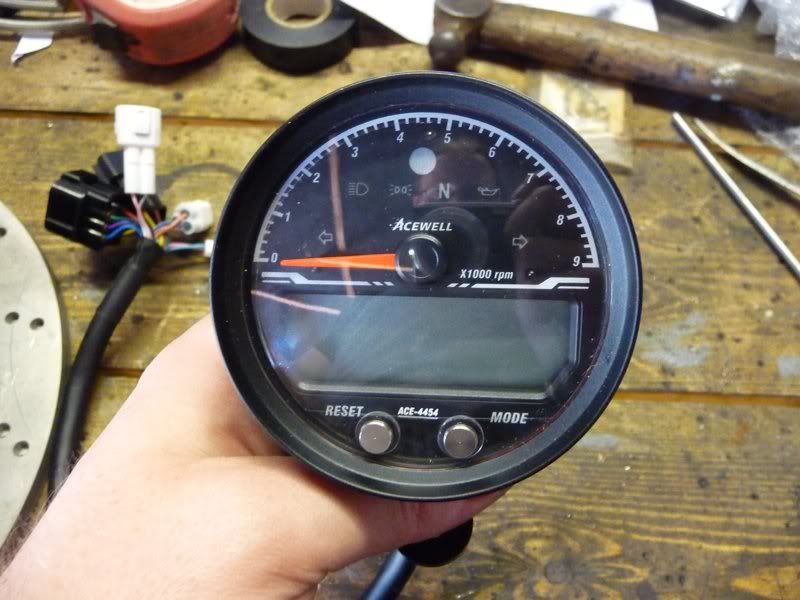
Theres a cunning plan brewing to mount it to the tank, which I have been swearing about today. Its a nice neat unit, but the built in mounting
facilities/choice is limiting. Anyway, hoping to get the mount finished tomorrow and then I'll put some more pics up.
And that stupid legal requirement about having a space for a number plate...so there we go. Another bit of 1.5mm stainless, the rear lights will also
be attached when I remember to get some stainless TIG welding rods.
So jobs for tomorrow, finish the instrument pod mount and then start on the seat pan. Oh and the paint design is almost finalised, though that will
remain a relative suprise 8)
Once thats done I think I am pretty much there with pre-assembly, and its ready to come apart, have various brackets attached properly and the holes
drilled for the internal cables etc. Then its going to be a couple of months waiting for some money to get it finished off.
Sera
http://www.motosera.com
|
|
|


.jpg)
