2cv
|
| posted on 23/9/10 at 12:54 PM |

|
|
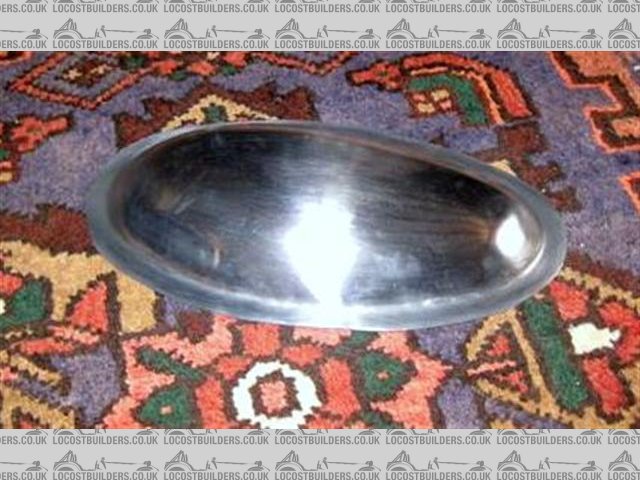
Aluminium Power Bulge; at last some pictures
Funny thing as I was working on this, this morning, I had a strong feeling that Saint Trev was looking down and having a bit of a chuckle!. Anyway,
here goes;
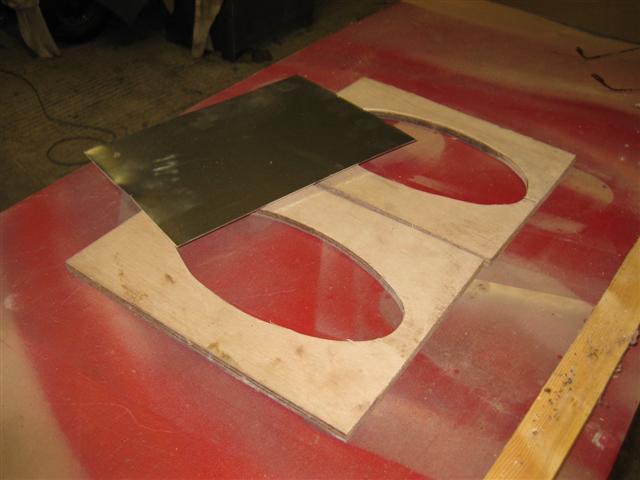
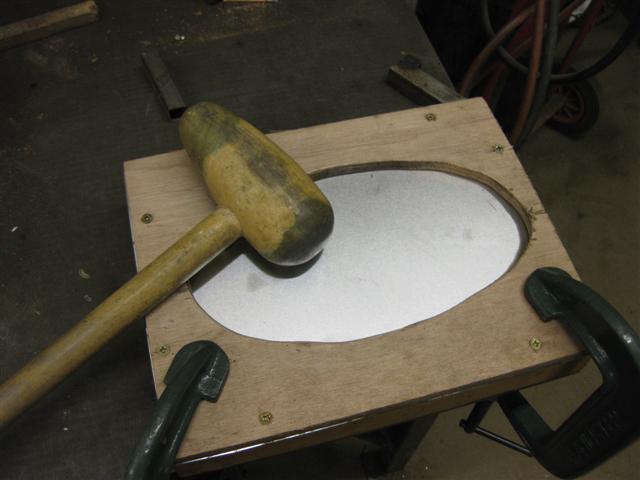
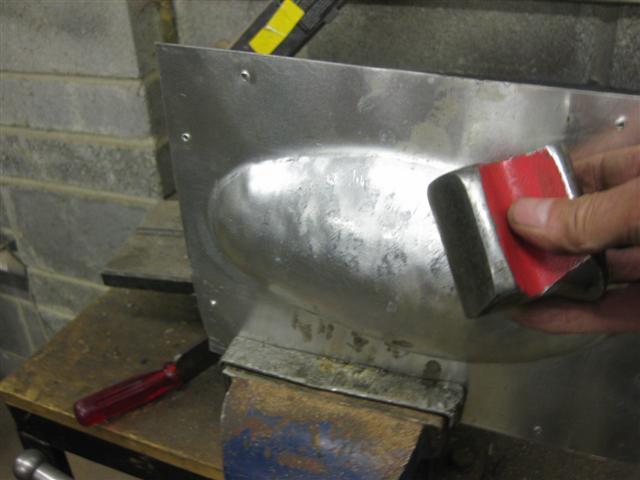
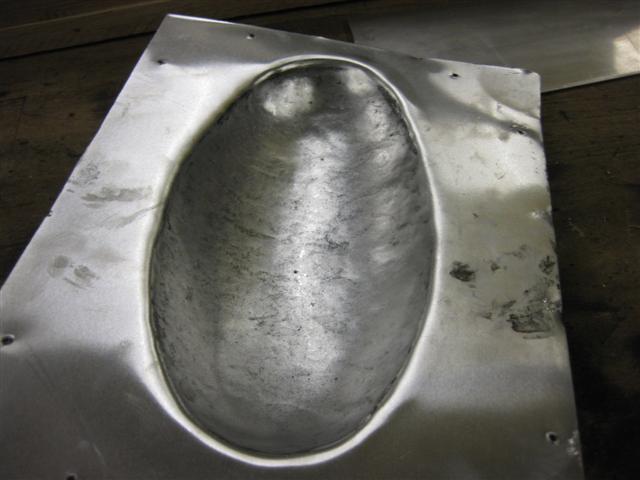
I started by cutting a Hammerform from plywood and the great thing about this technique is that it can be to whatever shape you want and is
dimensionally absolutely accurate. Cut the shape you want in one bit of ply and a similar shape but half inch or so larger all the way round and
sandwich the aluminium 1.5mm 1050A between the two. I stood it off from the bench with some blocks and screwed it together so that everything was
tight and the aluminium could not move.
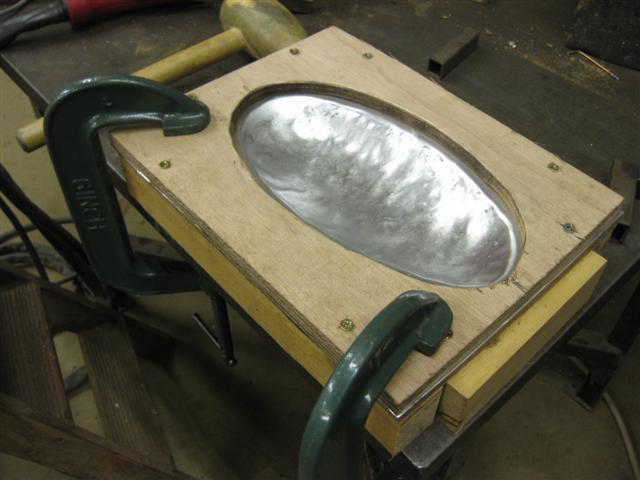
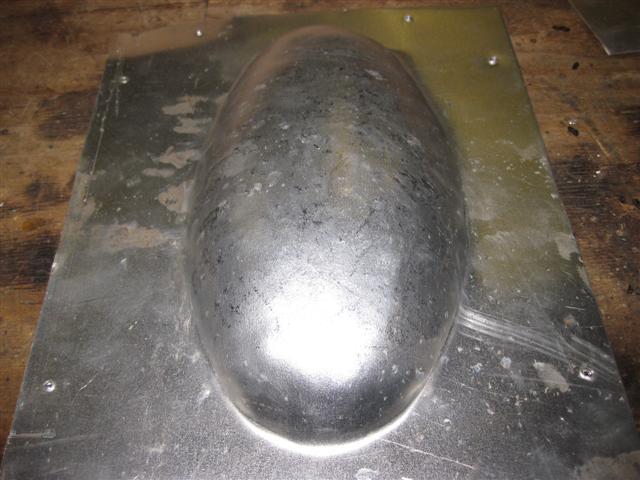
I used a bossing mallet to get some shape. You can certainly taper the bulge by adjusting your hammering. When I was happy with the profile, I removed
the aluminium and started to planish out the hammer damage using a dolly and a slapper. They give amazing results!!!!!
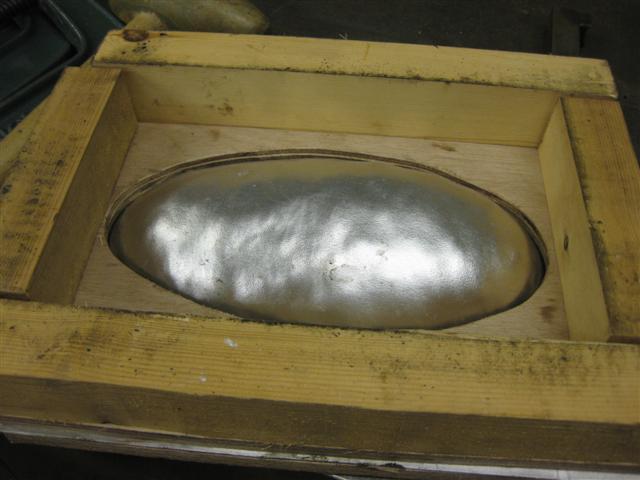
Although not perfect, a bit more planishing is still needed, I reckon it shows how easily quite a nice piece can be made with nothing more than most
of us have in the workshop.
[img]
Description
[/img]
[img]
Description
[/img]
[img]
Description
[/img]
[img]
Description
[/img]
[img]
Description
[/img]
[img]
Description
[/img]
[img]
Description
[/img]
[img]
Description
[/img]
|
|
|
|
|
jabbahutt
|
| posted on 23/9/10 at 01:06 PM |
|
|
that's superb!!
|
|
|
chrsgrain
|
| posted on 23/9/10 at 01:07 PM |
|
|
That looks great - now give it a sand with a flat block, or a gentle file to identify the low points...
Chris
Spoing! - the sound of an irony meter breaking...
|
|
|
2cv
|
| posted on 23/9/10 at 01:12 PM |
|
|
Absolutely right Chris and that's what I'd do if I were making the part for a job. All I wanted to do here was to show that something that
on the face of it looks beyond us, is well within the capabilities of anyone who wants to have a go.
|
|
|
blakep82
|
| posted on 23/9/10 at 01:23 PM |
|
|
ooh thats some good work 
________________________
IVA manual link http://www.businesslink.gov.uk/bdotg/action/detail?type=RESOURCES&itemId=1081997083
don't write OT on a new thread title, you're creating the topic, everything you write is very much ON topic!
|
|
|
chrsgrain
|
| posted on 23/9/10 at 01:30 PM |
|
|
quote:
Originally posted by 2cv
Absolutely right Chris and that's what I'd do if I were making the part for a job. All I wanted to do here was to show that something that
on the face of it looks beyond us, is well within the capabilities of anyone who wants to have a go.
Ahh - didn't realise this was for instruction - missed the previous threads! Did you anneal it before you started, or was there no need?
Chris
Spoing! - the sound of an irony meter breaking...
|
|
|
Humbug
|
| posted on 23/9/10 at 01:37 PM |
|
|
Looks really great! The ali must be very soft to stretch that much?
Just a question (not a criticism...): would it be possible to get a smooth enough finish not to have to paint it, or does this method always leave
some tiny dents?
|
|
|
2cv
|
| posted on 23/9/10 at 03:21 PM |
|
|
Chris, yes I did anneal it just to make things easy now that I'm getting a bit feeble.
Humbug, with careful planishing followed by sanding out the high spots as Chris said and then more of the same, it can be finished to a very high
standard.
|
|
|
l0rd
|
| posted on 23/9/10 at 04:07 PM |
|
|
good work
I have to say, it looks a bit like a beaten small submarine

|
|
|
RK
|
| posted on 23/9/10 at 06:31 PM |
|
|
You've done a great job there! However, as a mortal, my experience bending and shaping ally has been quite disappointing. I have never been able
to get a smooth finish. Body filler etc, have never worked on such a curved surface either. In fact, it is so hard to do that I won't be doing
it again!!
But bet of luck to those who want to give it a go! I'd love to see how it is finished off.
|
|
|
blakep82
|
| posted on 23/9/10 at 09:33 PM |
|
|
How do you go about annealing it? It that where you mark it with soap then heat til it goes black?
Might give that a go myself actually. Got an idea :-)
________________________
IVA manual link http://www.businesslink.gov.uk/bdotg/action/detail?type=RESOURCES&itemId=1081997083
don't write OT on a new thread title, you're creating the topic, everything you write is very much ON topic!
|
|
|
2cv
|
| posted on 24/9/10 at 05:39 AM |
|
|
This part could be formed without any annealing but it does make life a bit easier if you do particularly when you are getting on a bit in years.
I've not tried the soap method, I've always blackened the surface of the aluminium with an acetylene rich flame and then arrived at the
correct temperature by heating the aluminium with a neutral flame until the black has disappeared. Some care is needed as the annealing temperature of
aluminium is not far short of its melting point.
|
|
|
2cv
|
| posted on 24/9/10 at 03:07 PM |
|
|
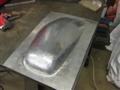
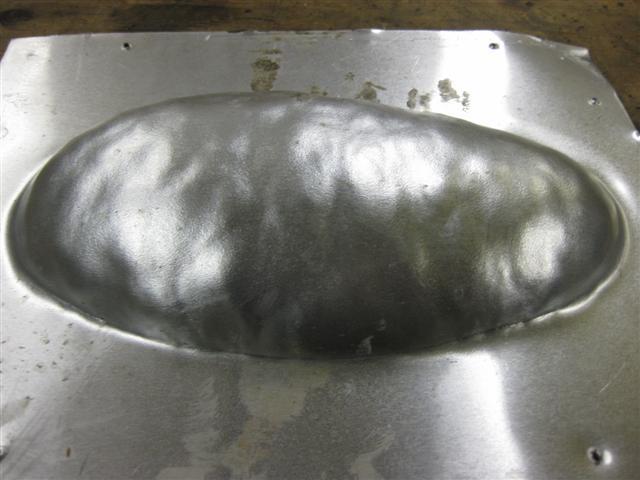
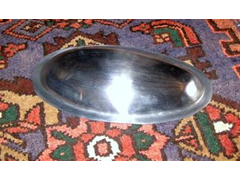
I've just done a bit more planishing with a bit of sanding and a quick polish. In all, it's taken no more than 3 hours start to finish to
produce this part.
Please don't think I'm trying to tell you how good I am, (I know there's plenty of room for improvement as my teachers used to say),
I'm just trying to encourage others to have a go at what I think is a very creative and satisfying technique.
If this part is any good to anyone, I'll gladly send it for the cost of the postage.
[Edited on 24/9/10 by 2cv]
[img]
Description
[/img]
[Edited on 25/9/10 by 2cv]
|
|
|
Trev D
|
| posted on 26/9/10 at 01:29 PM |
|
|
Well done that man keep up the good work you can come and work for me soon Trev. Trev.
|
|
|
2cv
|
| posted on 26/9/10 at 03:24 PM |
|
|
quote:Well done that man keep up the good work you can come and work for me soon Trev.
Trev, Aithankyou, if I were 50 years younger I'd be there!!
|
|
|