JeffJeffers
|
| posted on 3/10/11 at 10:48 AM |

|
|
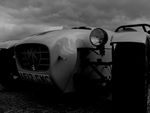
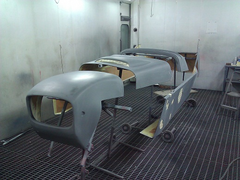
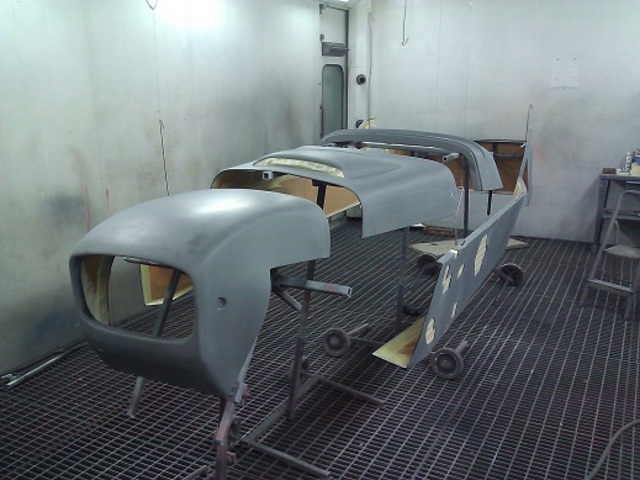
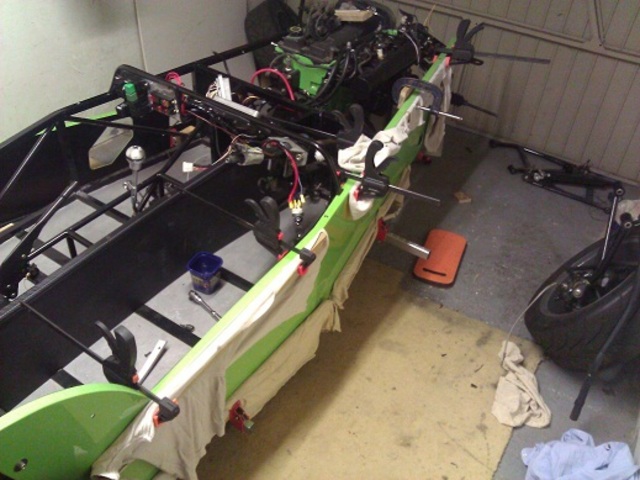
MK indy progress
I have been building my Indy R for about 18 months now. Progress has been slow but I have spent a lot more time on it over the last couple of months.
Now it is starting to look like a car.
The front arhces are only resting on the wheels for the picture, I have still got the fun job of bending the stays.
The engine has run badly for a few seconds. Hopefully will get the wiring finshed properly in the next couple of weeks so I can try the engine
again.
After engine is running it is off to be painted.
 
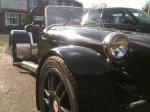
SIDE 3OCT
back 3oct
dash 3oct
|
|
|
|
|
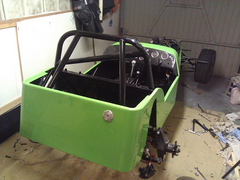
Proby
|
| posted on 3/10/11 at 12:18 PM |
|
|
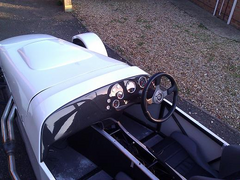
Looks good, I like your dash layout, looks very neat.
|
|
|
L5W
|
| posted on 3/10/11 at 08:22 PM |
|
|
Very nice! I like your dash layout too. Looks like we're both at a similar stage in the build.
Lee
http://l5w-mk-indy-zetec.blogspot.com/
|
|
|
big_wasa
|
| posted on 3/10/11 at 08:26 PM |
|
|
looking good 
|
|
|
JeffJeffers
|
| posted on 3/10/11 at 09:41 PM |
|
|
quote:
Originally posted by L5W
Very nice! I like your dash layout too. Looks like we're both at a similar stage in the build.
Lee
Thanks all.
I must admit Lee I have used your build blog a lot for ideas and help. It has been a really helpful blog.
|
|
|
JeffJeffers
|
| posted on 13/10/11 at 08:54 PM |
|
|
Its a alive
After a few problems finally the engine runs.
http://youtu.be/Per5SLIvmJI
|
|
|
jabbahutt
|
| posted on 14/10/11 at 07:13 AM |
|
|
coming along nicely, I also think the dash layout is really well done.
|
|
|
fullpint
|
| posted on 14/10/11 at 11:03 AM |
|
|
That was one BIG  you had on your face.. Looking good. I guess this will be ready for Spring-time 2011.. you had on your face.. Looking good. I guess this will be ready for Spring-time 2011..
I've over 28 years in dealing with magnesium wheels. Refurbishment and can powder coat most metal parts. Visit my web site if you wish..
www.tpcs-magnesium-refurbs.co.uk
|
|
|
JeffJeffers
|
| posted on 20/11/11 at 11:01 PM |
|
|
A had a fairy productive day in the garage today unlike yesterday.
I was at work Saturday morning which normally would be rubbish but I knew we would be painting my panels so I was looking forward to going for once.
Me and Ed ,the painter, had stopped late Wednesday night and sanded down the already primered panels. So all we had to do is mask them and it would be
time for the colour.
After what seemed like hours of masking the panels where set out in the paint bay for painting.
Panels ready
The problem came when we went to mix the paint. One of the colour ingredients had been used on the Friday. So we was unsure if there would be enough.
We thought we would give it ago but we barely had enough for one coat.
So now we need to order some more paint Monday, do a load more sanding to key the surface and then have another go.
 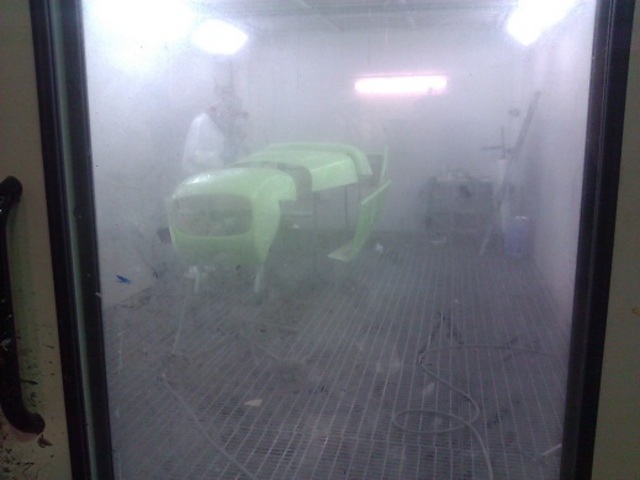
painting 2
|
|
|
bobinspain
|
| posted on 21/11/11 at 10:15 AM |
|
|
Showing my ignorance I know, but why does the gel coat need painting?
|
|
|
JeffJeffers
|
| posted on 21/11/11 at 11:29 AM |
|
|
quote:
Originally posted by bobinspain
Showing my ignorance I know, but why does the gel coat need painting?
The gel coat didn't need painting. Infact it was a very good finish, but the car dealership I work at has a bodyshop. So why not paint it to be
a little different!
|
|
|
chrisspartan
|
| posted on 21/11/11 at 01:11 PM |
|
|
Switches
Jeff, nice looking dash, out of interest which switches have you ended up fitting I notice you have 5. I don't mean which make but which
function. I assume they are Apem/Savage switches. I am just struggling to establish which functions I need for IVA before I order them off RS.
Chris
|
|
|
JeffJeffers
|
| posted on 21/11/11 at 02:53 PM |
|
|
quote:
Originally posted by chrisspartan
Jeff, nice looking dash, out of interest which switches have you ended up fitting I notice you have 5. I don't mean which make but which
function. I assume they are Apem/Savage switches. I am just struggling to establish which functions I need for IVA before I order them off RS.
Chris
They are Savage switches. The bottom is fog lamp, side lights, dipped headlamps, main beam and finally hazards. For the indicators I have used a
toggle switch. I know Savage do the warning lights as well but I couldn't justify the cost.
This is what a wasted day of painting looks like. It is kind of a marble affect.
 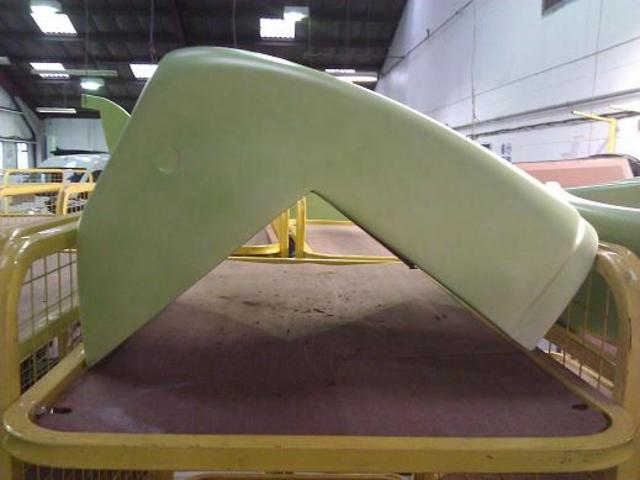
1st paint3
|
|
|
JeffJeffers
|
| posted on 26/11/11 at 03:32 PM |
|
|
Better day of painting today. I'm really happy with how it looks and can't wait to see it in the sunlight.
 
Painted panels
 
Close up paint
|
|
|
procomp
|
| posted on 26/11/11 at 03:43 PM |
|
|
Hi
Just one observation. The front dampers are on upside down IE the adjuster knobs at the top. The end result of that will be air where there should be
oil and no damping. !!!
Cheers Matt
|
|
|
JeffJeffers
|
| posted on 28/11/11 at 09:53 AM |
|
|
quote:
Originally posted by procomp
Hi
Just one observation. The front dampers are on upside down IE the adjuster knobs at the top. The end result of that will be air where there should be
oil and no damping. !!!
Cheers Matt
The front dampers are fitted with the adjuster knob at the bottom now. That picture must have been taken when I was having problems getting the
dampers to fit.
Thanks for the warning.
|
|
|
procomp
|
| posted on 28/11/11 at 07:46 PM |
|
|
Hi
Always worth mentioning as all the MK Indy R's i have setup have had the front dampers on upside down and has been one off the main reasons for
poor handling.
Cheers Matt
|
|
|
JeffJeffers
|
| posted on 7/12/11 at 11:17 PM |
|
|
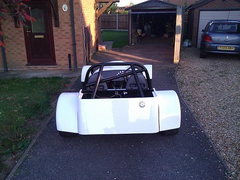
I have got a little futher over the last week or so.
The side panels have been bonded in place and the back panel fitted.
I tried to bleed the brakes last night. All was going well until I tried them for the 1st time and fluid came out of the rear caliper I had rebuilt.
So rather than mess around with it I bought a reconditioned caliper. The black paint is drying on it now. So another go tomorrow at bleeding the
brakes.
Side Stuck
Rear panel
|
|
|
JeffJeffers
|
| posted on 19/1/12 at 04:08 PM |
|
|
I have been fairly busy over the last few weeks.
Got most of my panels fitted now properly so it looks a bit more like a car.
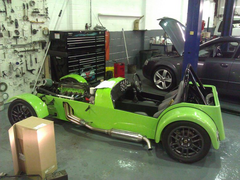 
19th jan 2012
I had a few problems getting my engine to run properly so I decided to trailer the car to my work to see if some of the mechanics could help.
Didn't take to long to find it was a problem with the idle control valve. With that fitted correctly the engine seemed to run really well.
After it had been running for a few minutes we noticed a knocking noise. It sounded a lot like a bottom end rattle.
So I stopped late that night and removed the sump to have a look what I could find. No.4 Shell looks in a very sorry state and has damaged the crank.
So now the engine is coming out again.
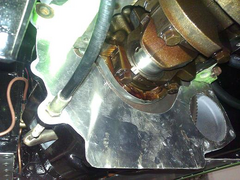 
crank damage
|
|
|