Sloan85
|
| posted on 25/4/13 at 06:51 AM |

|
|
Fixing side panels - questions and photo request
I am looking at fitting my side panels fairly soon and was interested in using rivnuts so they are removable.
What centres should I be fixing the rivnuts at? I was thinking about padding chassis rails with thin adhesive foam to stop the panels rattling, is
there anything else I should be doing?
Does anyone have photos of their side panels being fixed to the chassis?
http://mkindygsxr.blogspot.co.uk
|
|
|
|
|
AndyW
|
| posted on 25/4/13 at 07:09 AM |
|
|
Sorry cant help with spacings as I riveted and bonded mine. But I would ask yourself, do you really need removable side panels? I'm sure that
you would need quite a few rivnuts per side to get the panel tight and that many rivnuts could weaken the chassis due to the amount and size of holes
you would be drilling in the chassis rail?
Just a thought!!
Andy
|
|
|
welderman
|
| posted on 25/4/13 at 07:26 AM |
|
|
As above, my side panels are bonded and rivited too, you dont need access to anything once there fitted, the inside panels on the tunnel you can have
removable if you need to get at the prop, fuel lines etc.
many pictures in my archive, beware of carbon 
 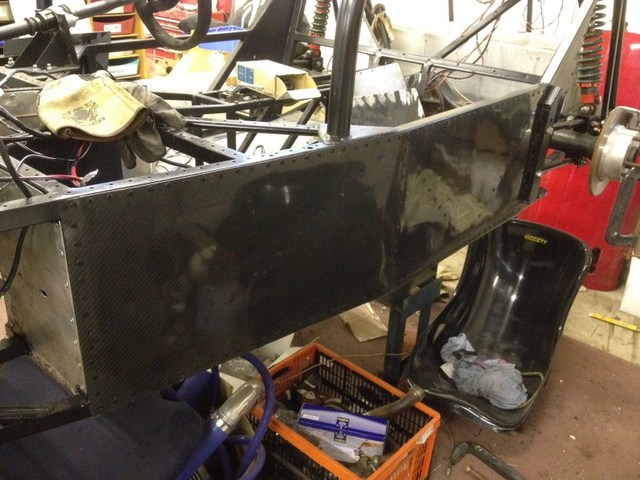
side panel
Thank's, Joe
I don't stalk people
http://www.locostbuilders.co.uk/forum/23/viewthread.php?tid=172301
Back on with the Fisher Fury R1
|
|
|
Sloan85
|
| posted on 25/4/13 at 08:53 AM |
|
|
I was thinking removable in case there were ever a problem with the pedals. Just got all the pedals sorted at the weekend and I can't see how I
could have done that if the side panel was in place.
http://mkindygsxr.blogspot.co.uk
|
|
|
Peteff
|
| posted on 25/4/13 at 09:05 AM |
|
|
Fasten them on with Velcro  Can't you get at your pedals if you remove the scuttle ? Can't you get at your pedals if you remove the scuttle ?
yours, Pete
I went into the RSPCA office the other day. It was so small you could hardly swing a cat in there.
|
|
|
Hellfire
|
| posted on 25/4/13 at 11:18 AM |
|
|
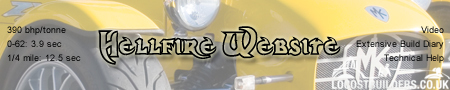
If you make your battery tray removable, you get easy access to the foot pedals and can bond your side panels to the chassis. On our first Indy, we
split the GRP battery tray along the drivers footwell chassis rail to make it easy for access to the pedals.
There was some pictures on our website but we lost the hosting a few years ago.... 
Phil
|
|
|
welderman
|
| posted on 25/4/13 at 12:49 PM |
|
|
foot
or cut a hole out so you can gain access from the top.
Thank's, Joe
I don't stalk people
http://www.locostbuilders.co.uk/forum/23/viewthread.php?tid=172301
Back on with the Fisher Fury R1
|
|
|
L5W
|
| posted on 25/4/13 at 05:53 PM |
|
|
Hiya,
I used rivnuts to secure the side panels on my build. A couple of pics:


I used M6 countersunk screws and some of these from
CBS to spread the load a bit along the top in the engine bay and so that the bonnet sits flush. Along the cockpit sides, I countersunk the holes in
the aluminium hockey trim and used the same countersunk screws. To secure the underside I just used M6 cap heads and normal washers.
Lee
http://l5w-mk-indy-zetec.blogspot.com/
|
|
|
Bizarro
|
| posted on 28/4/13 at 03:45 PM |
|
|
You'll also find that the side panels are quite a bit bigger than the chassis, mine were up to 10mm wider in places, you will need to seal them
with something to stop water coming in.
I also used rivets and sikaflex, plus plastic spacers to make up the gaps!
|
|
|
Sloan85
|
| posted on 2/5/13 at 07:12 AM |
|
|
If I were to use rivnuts what should they and the countersunk bolts be made from? Aluminium, steel or stainless rivnuts?? BZP or stainless bolts?
I can't remember if there are combinations of metal that shouldn't be next to each other if they are likely to get wet.
Cheers
http://mkindygsxr.blogspot.co.uk
|
|
|
40inches
|
| posted on 2/5/13 at 07:35 AM |
|
|
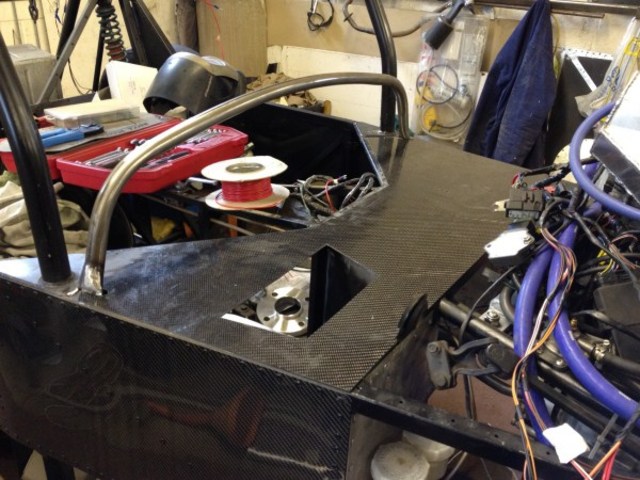
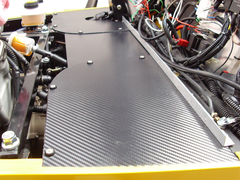
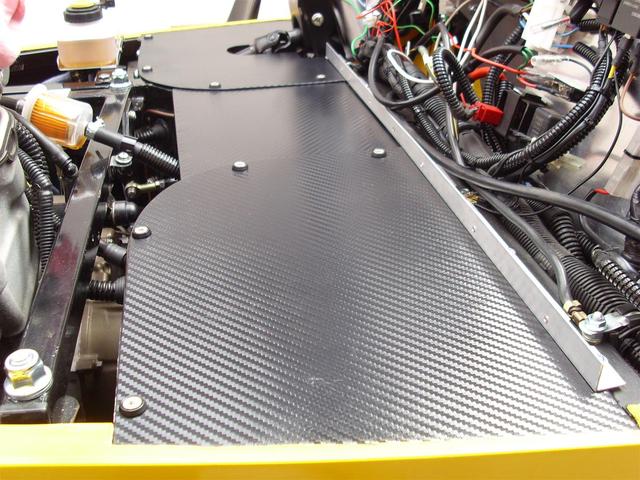
I bonded the side panels on, but split the top panels into three section, so I can get to the pedals easily, in fact I fitted the pedals way after the
side panels.
 
Carbon fibre?
Description
|
|
|
loggyboy
|
| posted on 2/5/13 at 08:46 AM |
|
|
As mentioned, I would be concerned about weakening the chassis with size of holes required for rivnuts.
I will be wrapping my side panels over the top chassis rails in the cockpit to ensure a nice smooth finish without the need to edge trims. Il be using
counter sunk rivets on the side panels so I can vinyl wrap over the rivets.
I have also used PU sealent to ensure a water proof seal (and add some strengh) as it protects the chassis from water ingress and my trousers!


Mistral Motorsport
|
|
|
blowden86
|
| posted on 2/5/13 at 12:46 PM |
|
|
Hi James,
I used stainless M6 rivnuts (9mm hole) with a small shoulder from memfasts on eBay, £2/3 for 25 I think. I worked to roughly 25cm spacing between each
i think. I then used button head stainless M6x25 bolts to secure in place. As I've put some 6mm foam from CBS on the underside of the bonnet
there's no issue with having the proud bolt heads. I also used larger M6 repair washers under the bonnet area. Must have taken me a whole
weekend to do it so riveting is certainly faster, but I'm happy with the finish I've got. Expect I'll probably have to put some
sealant/bonding agent on once the car is finished though.
All done fairly cheap with bits off eBay!
Cheers,
Ben
My MK Indy R GSXR 1000 Build Diary: http://www.suma-uk.com/indy/
|
|
|
Toprivetguns
|
| posted on 3/5/13 at 02:55 AM |
|
|
It's been mentioned about weakening the structure, well we all have about 100+ holes
underneath our car for the ally under tray.
Personally I used M6 rivnuts with galvanised Allen key dome bolts and washers, but don't go over the top. Space them efficiently.
As mentioned be prepared to shim the panels as on MK the panel is slightly bigger.
Only drive as fast as your angel can fly... !
|
|
|
loggyboy
|
| posted on 3/5/13 at 07:10 AM |
|
|
quote:
Originally posted by Toprivetguns
It's been mentioned about weakening the structure, well we all have about 100+ holes
underneath our car for the ally under tray.
Personally I used M6 rivnuts with galvanised Allen key dome bolts and washers, but don't go over the top. Space them efficiently.
As mentioned be prepared to shim the panels as on MK the panel is slightly bigger.
4.5mm holes for rivets, are are meer flesh wound compared to the gapping 9mm holes required for m6 rivnuts. I was reluctant enough to put a few on my
top rails for my brake lines, but along the whole length of both top and bottom rails would be iffy IMO. also using normal rivets at decent centres
makes the panels part of the structure, doing it with lesser rivnuts will not give as much.
Mistral Motorsport
|
|
|