Thebig25
|
| posted on 17/9/13 at 08:46 PM |

|
|
Thunderace BEC Build
Hi Everyone,
Been lurking for a while reading and absorbing all the good stuff on here, but have now taken the plunge with a build so thought I'd introduce
myself.
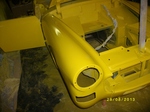
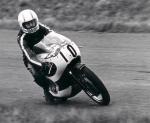
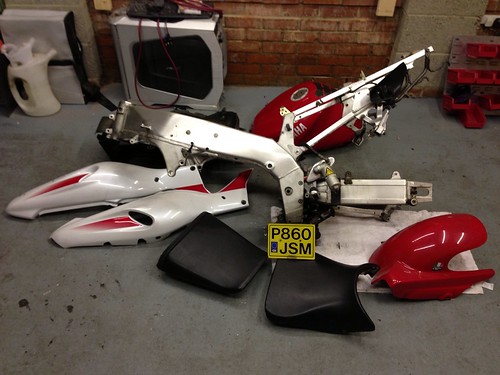
So, I've got one of these:
And one of these:
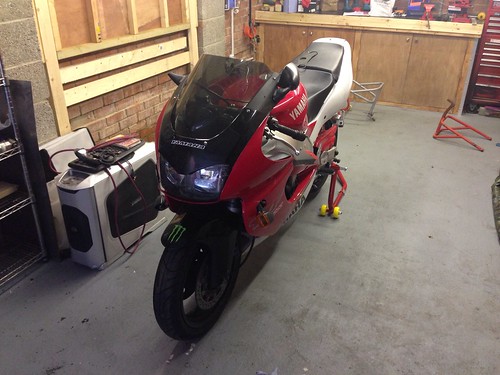
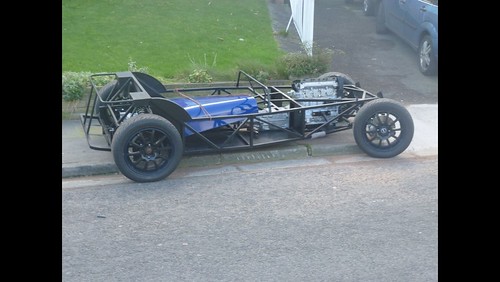
Which now looks like this:
The chassis (I think it's a Luego but am not certain) was originally going to house a K series but I want to go the BEC route. I got the
Thunderace for absolute peanuts- I ideally wanted a later EFI bike, but could not pass it up at the price I was offered.
I'm picking the chassis up this Friday and I will break down the work the previous owner did on the chassis so I can begin afresh. I am happy
enough with the suspension, braking and steering systems, but when it comes to the engine I'm a bit flummoxed! I've done engine
conversions on road cars before, but have absolutely no experience of bikes, or bike engines.
The engine is as it comes on the bike, and has none of the conversion parts necessary to adapt it to the car chassis. Basic research tells me that I
should be considering (or at least understanding) the following:
Engine cradle
Sump baffle
Prop adaptor & prop
Throttle cables
Hydraulic clutch issues
Fuel storage and pumping system
Jetting for carbs
Exhaust headers and system
Electrics
There is probably much more that I've not even thought of, but basically I'm looking for some advice on what is best to do about the
above, especially around sourcing the the components needed for the thunderace as it does not seem to be a common donor. Car will be primarily be a
road car, but I will be looking to display my lack of skill on the track occasionally too!
I'll keep this thread updated as I build.
Cheers
TB25
|
|
|
|
|
rick1962uk
|
| posted on 17/9/13 at 09:39 PM |
|
|
the thunderace is a good engine it was a toss up between the ace or zzr1100 for my build zzr came up first good luck with the build and give me a
shout if you need and engine help as i have years working n these and have loads of data i have decided to run with every thing as off the bike and
change bits one by one air box etc as it can be a bitch to get them to run sweet the more you get away from std
as to oil im going to build my own sump plate and fill the oil level up to the mark when running its amazing how much gets oil gets pumped away from
the oil pump
look forward to see more photos when you get some
|
|
|
kj
|
| posted on 17/9/13 at 09:45 PM |
|
|
I have a 91 thunderace engine to put in my mk locost over the winter, keep in touch
[Edited on 17/9/13 by kj]
Think about it, think about it again and then do it.
|
|
|
Daddylonglegs
|
| posted on 18/9/13 at 06:28 AM |
|
|
Looking forward to the pictures etc. 
And welcome to the forum 
It looks like the Midget is winning at the moment......
|
|
|
Thebig25
|
| posted on 18/9/13 at 08:20 PM |
|
|
Thanks for the replies and U2U's, much appreciated.
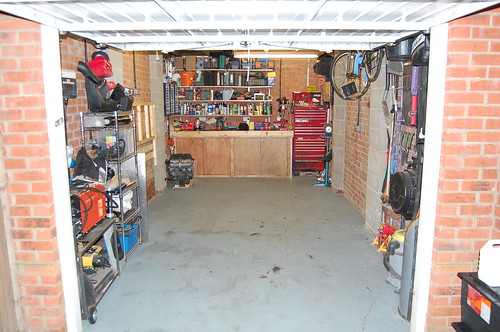
Spent this evening clearing the ManCave out ready for the collection of the chassis on Friday. Got to get some trestles to put the Chassis on, but
I'll pick some up from Jewson tomorrow.
As empty as it will be for quite a while!
|
|
|
nick205
|
| posted on 18/9/13 at 08:30 PM |
|
|
I do like a tidy garage 
|
|
|
Thebig25
|
| posted on 21/9/13 at 09:47 PM |
|
|
Collected the chassis and parts from Liverpool yesterday, but was too tired when I got back to do anything constructive other than put the chassis up
on the trestles and square away the parts
Didnt have much time today either, so spent an hour or so going over the chassis. Looking at the welds and the overall finish of the thing. learnt a
few things:
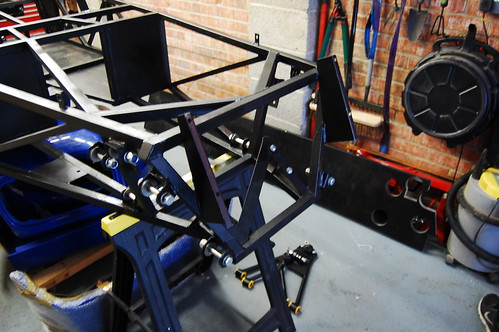
At least 2 people have worked on the chassis as there are 2 very distinct welding styles on display. happily both look competent as penetration looks
good.
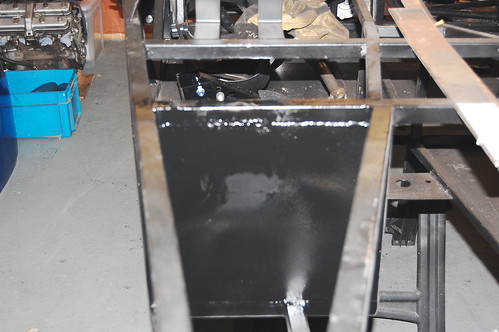
Chassis has been liberally coated in hammerite
Floor panels and fire walls are welded in steel panels
Wishbones look well done - nice and neat. Bushes already inserted
Im unsure if this is a professionally made chassis or if its a home brew. it looks somewhat like a Luego chassis I looked over last month, but I
dont know.
Found a couple of small areas Im not happy with so I have marked them up and job one is to get some steel and redo.
Had a look at some of the other parts that came with the kit:
Cortina front uprights, hubs and discs
Unidentified rear uprights and brake back plates (ford)
Push in drive shafts, cut to fit with hubs and bearings
Ford diff (cortina/sierra?). label says 3.62 ratio
Gaz shocks
Rover steering column
Rover handbrake & cables
Full bodywork set and precut alloy side panels
Escort rack (not sure if it is a quick rack)
Fuel tank
All the above are in great condition and look like they are ready to go.
Had some spare time in the evening and decided to have a go at fixing one of the areas of the chassis that I wasn't happy with.
The steering rack bracket didn't have any support at the top end, and as a result it ws showing signs of bending even at the build stage. Having
a look at the Haynes book and some pictures of others it seems common to have some supports going back to the horizontal member behind so i decided to
put some of these in. A nice simple first job to get started with:

once this was done I thought I'd mock up the front steering end suspension. have a dilemma about whether I've got them on the right way
round? no big drama if it does as its all got to come off so I can do the side panelling.
A good first day!
|
|
|
fullpint
|
| posted on 22/9/13 at 08:53 AM |
|
|
That's a good first days work mate. Look forward to following your build.
|
|
|
kj
|
| posted on 22/9/13 at 09:09 AM |
|
|
Good luck and keep in touch i am about to start fitting the same engine in mine, the tax disc went back last week and been getting a few things ready.
Think about it, think about it again and then do it.
|
|
|
Thebig25
|
| posted on 22/9/13 at 03:17 PM |
|
|
Thanks gents, was going to do a bit more today but our washing machine has broken and apparently fixing that comes first! Will try and do a bit more
tonight.
I'm keeping drums on the back so Just spent a while investigating pedal box and front brake options. I'm probably going to go with
wilwoods calipers and an OBP pedal box but am unsure what master cylinder size to go for. Any advice? Also, what rating of fixing must be used for the
IVA? All the bolts are stamped 8.8. Is ths enough?
Cheers,
TB25
My Thunderace BEC build blog
|
|
|
Thebig25
|
| posted on 29/9/13 at 08:39 PM |
|
|
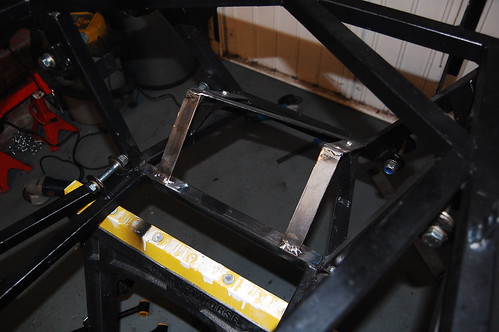
After a week frustratingly taken up with too much of that bill paying work we all need to do, I was finally able to get a bit more done on the car
today.
Today's task was to redo the diagonal stays that go from the top of the rear suspension mount to the bottom of the rear 'wheel
arch'.
Although the rest of the chassis is in pretty good shape, this had for some unknown reason been a bit bodged. lightweight thin wall tube had been
roughly welded at the bottom and the tube had been splayed and welded at the top. Very poor.
After measuring and marking in several places to help me keep things square, I I cut out all of the bodge work and began the process of replacing it
all with 25x25x2 square section and 3mm plate.
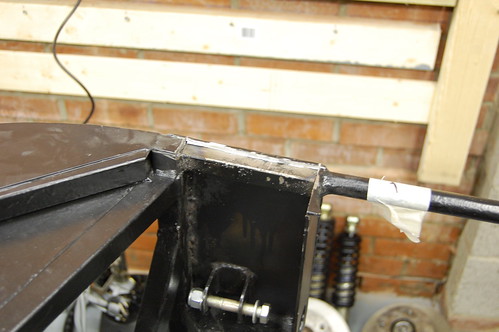
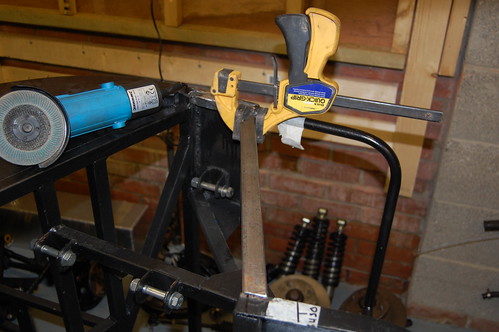
With the components tacked in place I remeasured to check for square and the proceeded to finish the welds, moving from one side to the next and
letting the metal cool before doing the next bit.
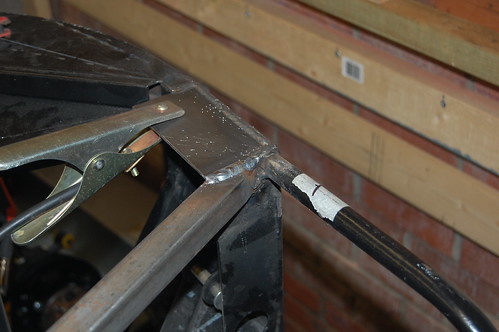
Once both sides were in and checked for square I gave the whole thing a coat of Rustoloem to keep the tin worm off. I'm planning to get all
brackets and whatnot for the mechanical components welded in and then break the whole thing back down for blasting and powder coating, so the
Rustoloem will do for now.

I've got a couple more little bits to do on the chassis, mainly because I'm fussy, and then we get to move on to the good stuff- putting
shiny bits on!
My Thunderace BEC build blog
|
|
|
Thebig25
|
| posted on 1/10/13 at 09:11 PM |
|
|
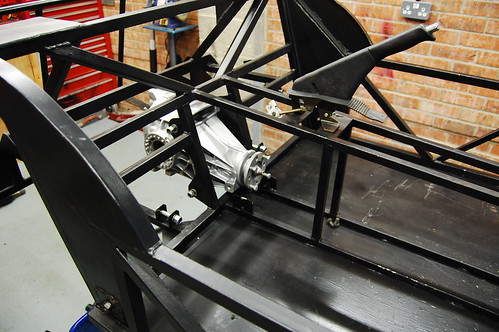
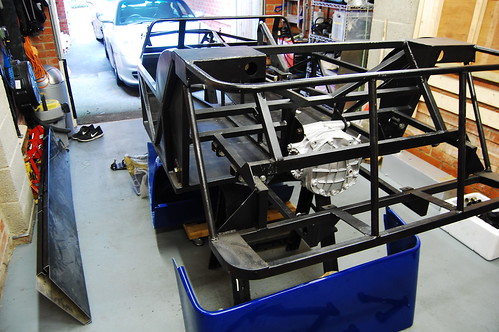
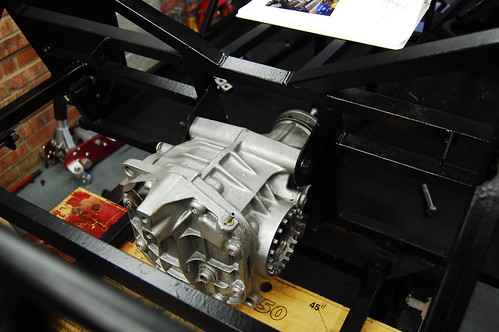
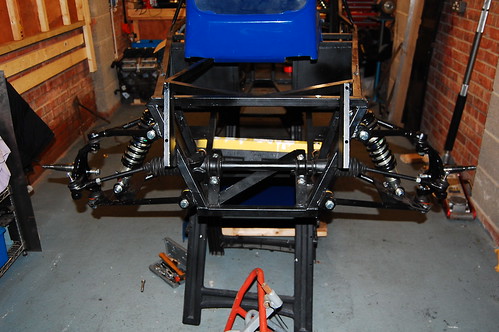
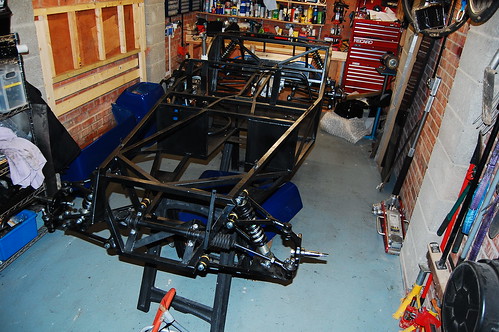
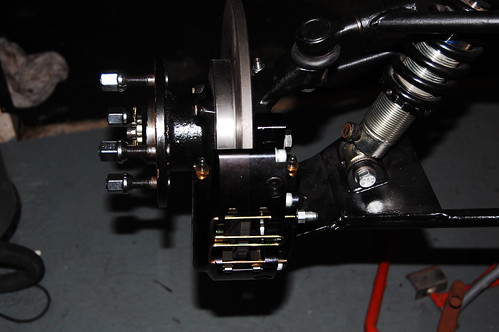
Had a few hours to spare today so thought I'd crack on and start getting the suspension and a few other bits installed.
Started by installing the diff - two bolts, simple stuff:
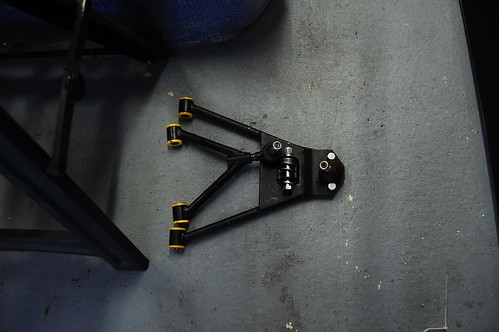
Then moved on to installing the rear wishbones. As I have no build manual I had a bit of a trawl round Google images to make sure I got the
orientations right (still not totally sure!):
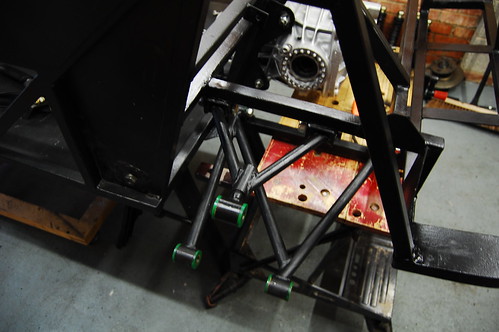
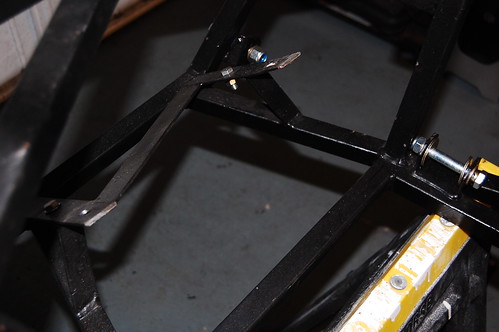
Then I installed the rear uprights and drive shafts. The drive shafts are of the push in type so this was pretty simple, but it led to my first dilema
of the day: How much thread should be showing when the M12 nylocks are tightened up? I had read somewhere that the IVA man like to see at least 2
threads showing above the nut to ensure propper engagement. The bolts that came with the chassis were clearing the nuts so were properly engaged, but
not showing the 2 threads. I umm'd and ahh'd but in the end decided to go and get some new ones as I'd kick myself if this caused an
IVA fail down the line.
After this I bolted in the shocks. Again, pretty simple stuff but I did have to pad out the brackets with washers to ensure there was no horizontal
movement.
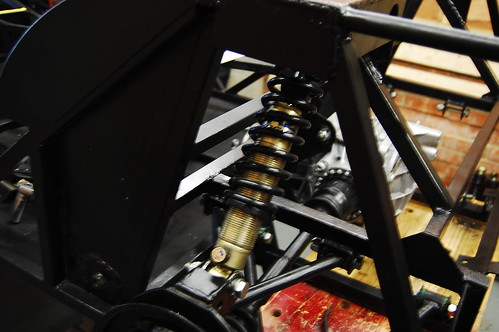
That was pretty much the back end done.
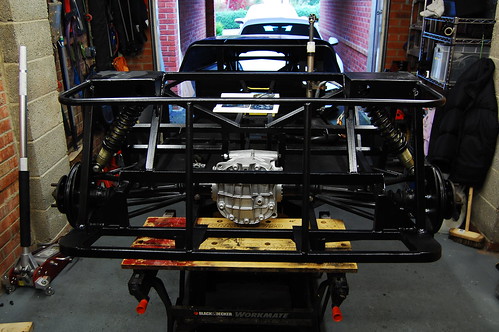
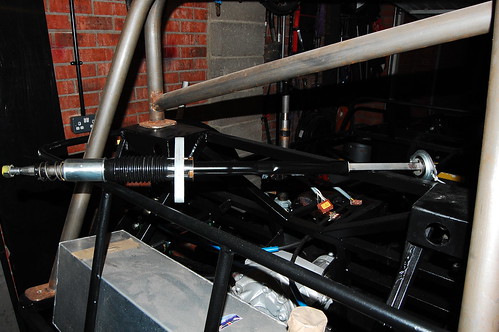
I then moved on to the front. I won't bore you with all the details as, like the rear, its a pretty simple nuts and bolts type task. I did have
to refer to the web again for reference materials to make sure I got the orientation right, and had some fun with a dodgy thread on one of the ball
joints, but all in all it was pretty painless.
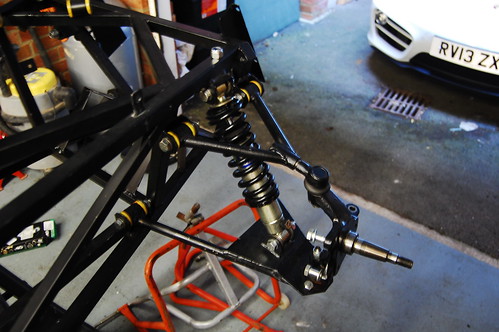
Finally I bolted in the rack. I haven't connected the steering arms to the uprights yet as the angles are too severe to get the thread through
the tapered hole. I'll do this when I put the car on its wheels.
Was quickly running out of time so I decided to finish the day by clearing up the garage. I've made up a local rule that I will put tools away
after every session in order to allow me to get started straight way in the next one. So far, its going well- We'll see how long it lasts!
My Thunderace BEC build blog
|
|
|
enginearin
|
| posted on 2/10/13 at 12:43 PM |
|
|
quote:
Originally posted by Thebig25
Finally I bolted in the rack. I haven't connected the steering arms to the uprights yet as the angles are too severe to get the thread through
the tapered hole. I'll do this when I put the car on its wheels.
Doesn't this indicate that something is very wrong with either rack placement or steering arm length?
What is going to happen when you hit full droop on the road? Major stress into the steering arms i'd guess?
[Edited on 2/10/13 by enginearin]
|
|
|
enginearin
|
| posted on 2/10/13 at 12:44 PM |
|
|
quote:
Originally posted by Thebig25
Finally I bolted in the rack. I haven't connected the steering arms to the uprights yet as the angles are too severe to get the thread through
the tapered hole. I'll do this when I put the car on its wheels.
Doesn't this indicate that something is very wrong with either rack placement or steering arm length?
What is going to happen when you hit full droop on the road? Major stress into the steering arms i'd guess?
|
|
|
Thebig25
|
| posted on 2/10/13 at 05:44 PM |
|
|
Nope, it indicated I was being a bit thick!
Went to have another look this morning and they bolted straight up with no drama. Don't know why I could not do it yesterday.
On the question of racks: how can I identify which one I have? I got it as part of the part finished kit but there is no receipt for it in the file.
It came without a UJ to connect to the spline and I need to get hold of one.
My Thunderace BEC build blog
|
|
|
Thebig25
|
| posted on 4/10/13 at 08:18 PM |
|
|
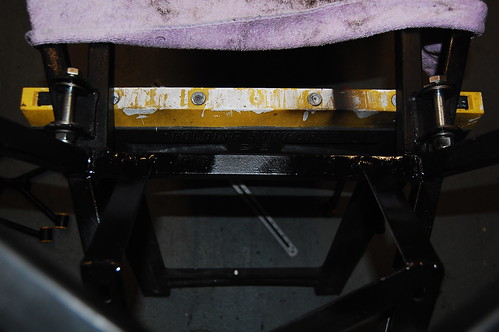
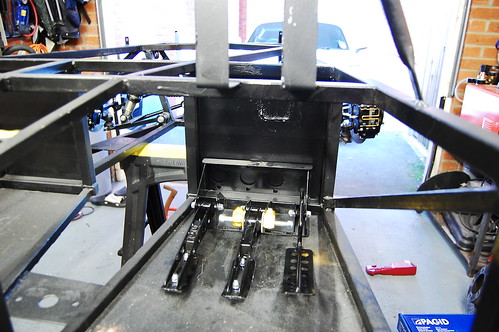
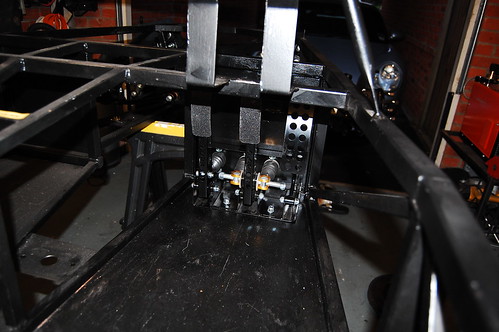
Today's simple task was the simple process of installing the pedal box I purchased from Optimum Balance Products.
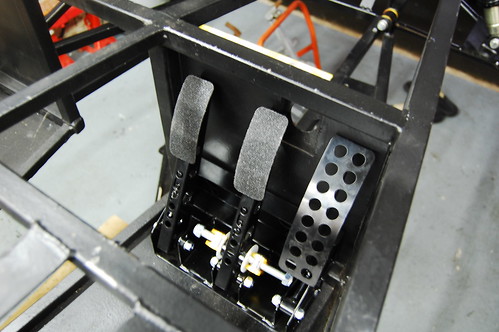
As soon as I offered it up I realised that there was the potential for it to foul the steering column, add this to the fact I have large feet which
might snag the column too it left me pretty sure that this wasn't going to work. And I thought this kit building lark was easy!
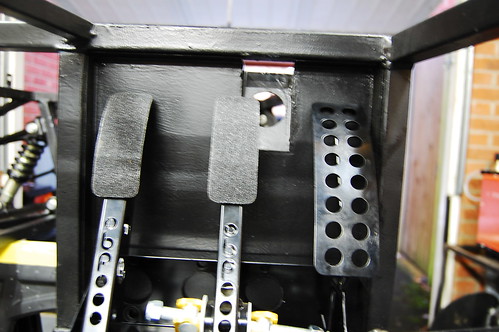
So what to do? After doing a Google image search and some trawling on here I noticed that some kits and builders put the steering bush on top of the
pedal area, and some suggestion that this setup also produces an nicer, more vertical wheel angle. That looked like it would work for me so I decided
to begin by cutting out the existing hole and weld in a bit of plate plate. I'll position the bush/bearing later on when I do the column.
Cut out the existing steering bush hole
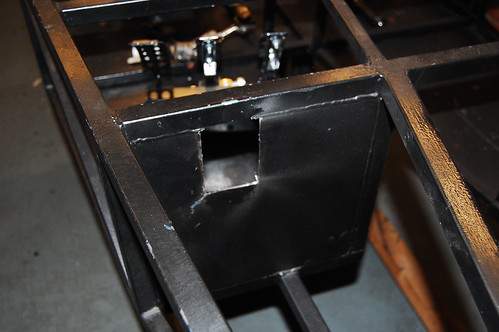
Cut out a plate in 2mm steel to fit
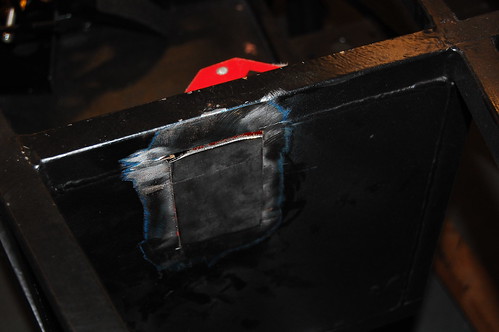
Welded in, not the best but its all sealed.

Ground flat
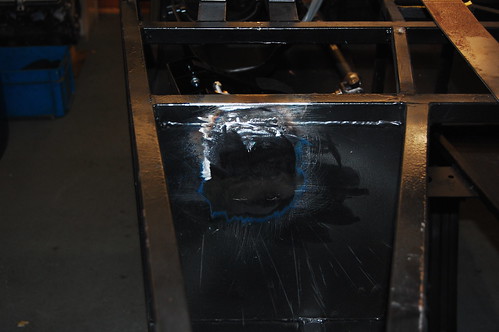
Lick of Rustoleum to seal it prior to powder coating.
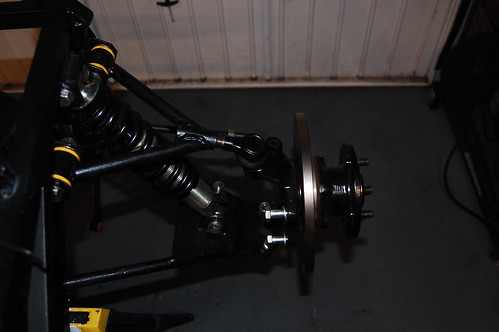
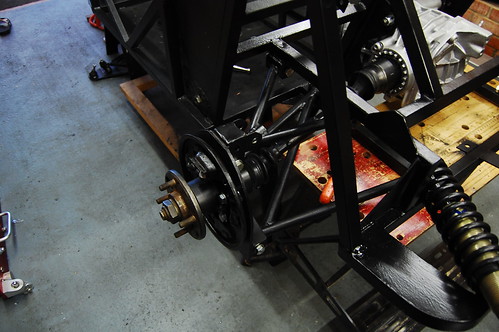
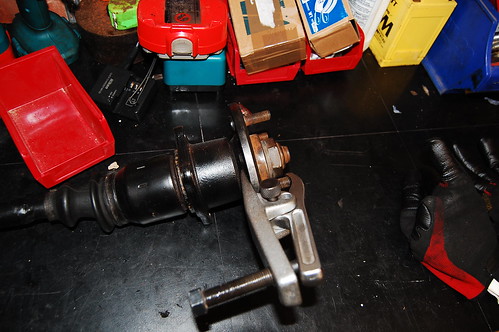
I needed to let this dry before cracking on with the pedalbox so I decided to fit the Wilwood front brakes I ordered from Rally Design.

Really nice bits of kit, very easy to assemble. First put the discs on the hubs:

Then build up the calipers with the spacers and brackets provided with the kit:
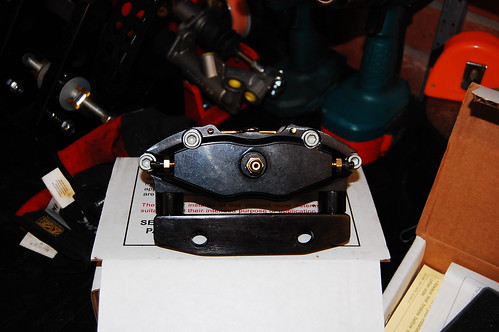
Finally put it all back on the car:

Annoyingly, this wasn't without problems either. Firstly I've managed to misplace one of the Cortina hub nuts which means I can't
finish the job, and also I think I've been supplied with the wrong hose adapters for these calipers as I cannot get more than half of the
threads engaged in the caliper. I tried cleaning the threads, but it gets so tight about halfway down the thread I'm worried I'm going to
snap something if I go any further.

I'll give Rally design a call and see what the issue is.
[Edited on 4/10/13 by Thebig25]
My Thunderace BEC build blog
|
|
|
Thebig25
|
| posted on 6/10/13 at 09:23 PM |
|
|
Only had an hour or so today so I thought I'd carry on with the pedal box. Spent quite a while playing with the position of the box to make sure
that I got them into a comfortable position and that the pedals could move through their range of motion unhindered.
I settled on a first position and marked it with a scribe, but just before I broke out the hole cutter I had a crisis of confidence with it and
decided to go and find my biggest, widest trainers to mock up my foot position.
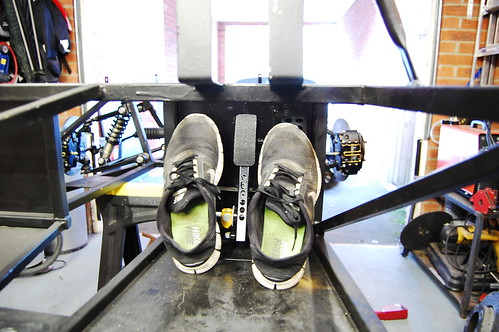
Looks a bit odd but it paid off as it helped me see the pedals properly (something I was struggling to do sat in the car) I and quickly realised I had
put the pedals too far left.
This mini disaster averted I remarked the position and revved up the hole cutter. As you can see the cheapo 38mm hole cutter I bought for this was
starting to get a bit sketchy on the last hole.
I deburred and filed the holes and refitted the pedal box to check for alignment (forgot to take photo of this!). Once in I found that there was a bit
of vertical flex in the pedal box when you pressed the pedals so I drilled some holes in the bottom of the pedal box and through the floorpan so I can
put some bolts through to eliminate this.
Final job was to give it a coat of Rustoleum. When it dries I'll do the final fitting of the pedal box and then its on to the brake lines.
My Thunderace BEC build blog
|
|
|
40inches
|
| posted on 7/10/13 at 10:17 AM |
|
|
That's coming on nicely
A couple of tips, if you weren't already going to, cut a slot in the front handbrake mounting bracket, and fit the lever from underneath,
using washers as spacers, gets the handbrake lever out of the way when you change gear
 
Description
When you panel the foot well, panel the left hand side on the outside of the chassis, this will give an extra 25mm pedal clearance.
|
|
|
Thebig25
|
| posted on 7/10/13 at 10:57 AM |
|
|
quote:
Originally posted by 40inches
That's coming on nicely
A couple of tips, if you weren't already going to, cut a slot in the front handbrake mounting bracket, and fit the lever from underneath,
using washers as spacers, gets the handbrake lever out of the way when you change gear
Description
When you panel the foot well, panel the left hand side on the outside of the chassis, this will give an extra 25mm pedal clearance.
I have just bought a classic Mini handbrake lever to use to replace the rover 200 one that came with the kit (its huge!) and was planning to recess it
down into the tunnel to avoid the problem you mentioned. Was pondering how best to do that so thats a nice tip, thanks!
My Thunderace BEC build blog
|
|
|
Thebig25
|
| posted on 12/10/13 at 11:58 PM |
|
|
Only had an hour or so today, but managed to get a few bits done.
First of all I finally finished the pedal box and installed the master cylinders. Simple nuts and bolts job that has taken me over 2 weeks! (in my
defence I only had a few hours on the car in that time!)
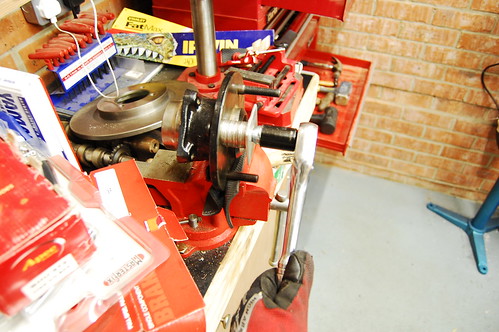
Then I replaced all of the wheel studs for longer ones as the hubs on on the Team Dynamics wheels I've bought are too thick for the standard
ones. I started off by pushing them out with a ball joint splitter...
But this lead to the first build related injury- One of the rear studs was really in there and the amount of tension being put on the splitter was
obviously too much as it snapped and a bit of it hit my thumb like a bullet. Ouch. After this the rest of them got the lump hammer treatment , which
ironically was quicker and more satisfying.
I wound the new studs in by winding on a wheel nut using some washers as spacers:
After this I rebuilt the front end and fitted the correct tapered brake nipples that Rally Design sent out and the new hub nuts that I had to order
after I lost one of the originals. I say lost but I actually mean misplaced as I found the original one about a minute after I had finished tightening
its replacement. Oh well, I didn't want that £17 anyway.
Final job was to begin reconditioning the steering wheel I bought from Loggyboy. I started derusting the column using Bilt-Hamber Deox-C earlier in
the week:
Today I finished the job by giving the column a buzz over with a wire brush, masking it up and giving it a coat of primer:
Hopefully tomorrow I'll get some more done.
My Thunderace BEC build blog
|
|
|
loggyboy
|
| posted on 13/10/13 at 12:16 AM |
|
|
Bilt wahty whaty? looks alot more efficient than the Hammerite Rust Removed ive be using.
Mistral Motorsport
|
|
|
Thebig25
|
| posted on 13/10/13 at 12:54 AM |
|
|
Deox-C. Its great stuff. I made up a bath using an old plumbing expansion
tank. leave in for a day or so and stuff comes up like new
My Thunderace BEC build blog
|
|
|
Thebig25
|
| posted on 13/10/13 at 08:36 PM |
|
|
Had some more time today so I decided to carry on with the resto of the steering column. I started by giving the column a nice coat of black
Rustoleum. I put this aside to dry and then made a start on the ally casting that the ignition and column stalks attach to. I decided early on that I
would not be using column stalks and that my ignition key will be mounted elsewhere so was left with what to do with the top of the column. Being more
of bodger than an engineer I decided to let it know who's boss with the angle grinder.
The bits that didn't make it.
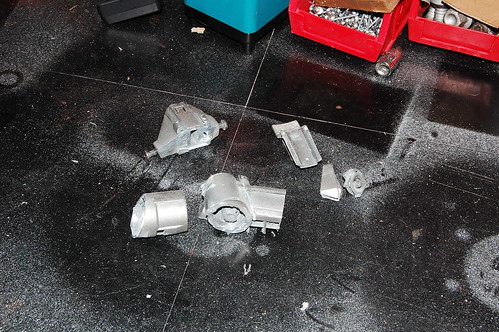
That left me with this:
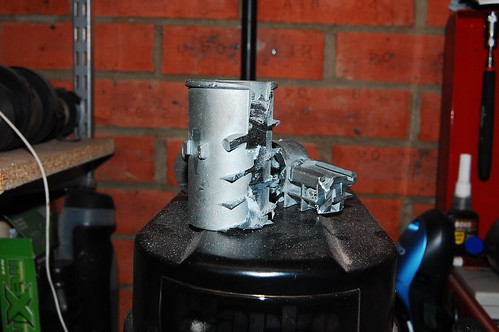
Which I attacked with a flap disc until it looked like this:

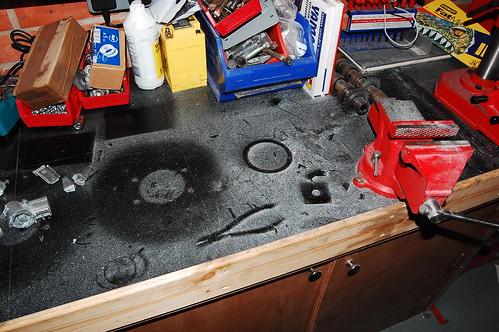
Which left quite a bit of grinding dust!
Finally, I reassembled the column ready for use:
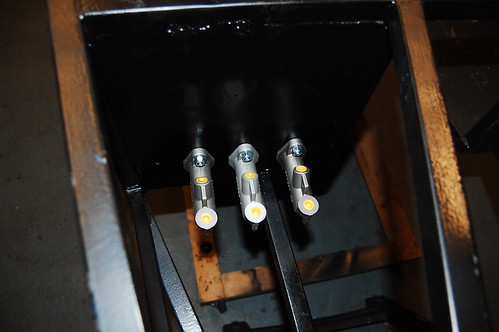
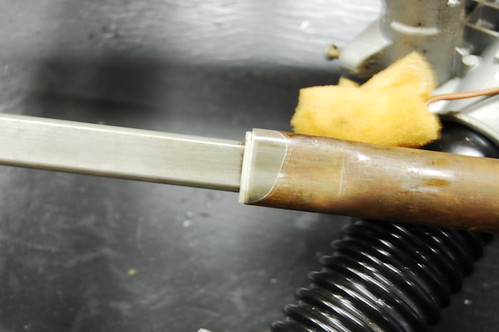
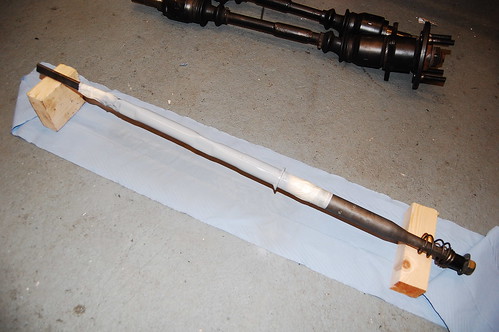
I still had some time before the dinner bell so I made a start with the front brake pipes. I cut a length pipe that was roughly correct for the run
from the front m/c to the t-piece and taped it in place so I could make the rough bends:
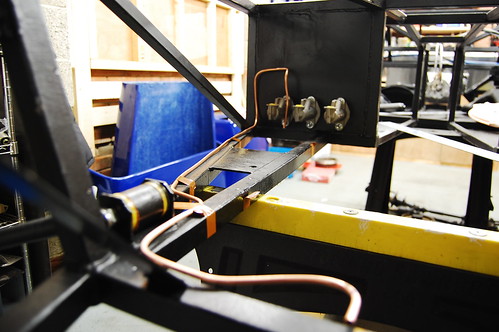
I then Rivnutted the T-piece in and flared the male ends (no photos of this) and then worked my way backwards to the m/c adding a M4 rivnet every
100mm. I used stainless rubber p-clips and Hex nuts to fix it to the chassis:
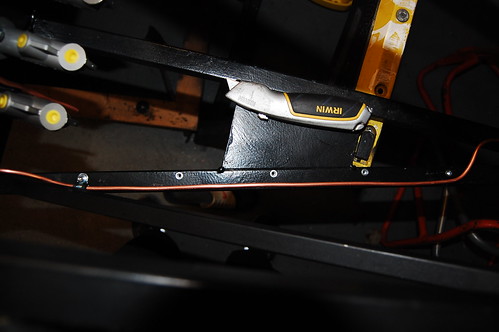
I also put in the N/S front pipe and female end, I'll do the O/S one after I put the steering in so that I can make sure clearance is ok:
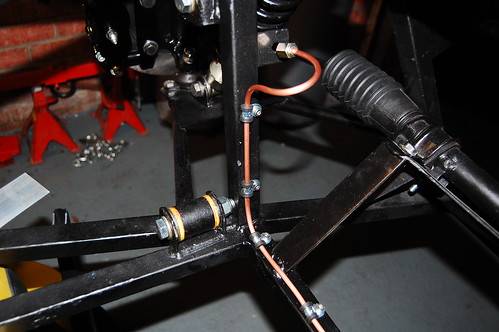
Which left me with this:

Annoyingly I could not attach to the M/C as I didn't have an 3/8 unf male ends. I must learn to plan better as I keep doing this sort of thing
and I don't ever seem to finish a job in the session I started it in. I'll pick some up tomorrow, and order the front hoses this week.
Hopefully next weekend I'll be able to get the steering in and then complete the rolling elements of the front end.
My Thunderace BEC build blog
|
|
|
loggyboy
|
| posted on 13/10/13 at 09:06 PM |
|
|
quote:
Originally posted by Thebig25
I must learn to plan better as I keep doing this sort of thing and I don't ever seem to finish a job in the session I started it in.
I got used to that situation very early on. One bonus is, if you let 5-6 of these 99% jobs build up, you can have one maddly successful day where 5-6
jobs all get finalised in one go!
Mistral Motorsport
|
|
|