Slimy38
|
| posted on 18/9/24 at 12:21 PM |

|
|
Ideas or inspiration for MX5 daisies
I have a set of MX5 daisy wheels for my car, personally I think they're ideal for the style of car and I'm glad I have them. But they
didn't come with centre caps, and I'm loathe to pay current Ebay prices (they're about twice the price of what I paid for the
wheels!).
I'm currently trying a 3D print to see if that would work, but I'm not 100% sold on the idea. Mainly because the 3D print is flat, and I
would have liked a slight curve on it. What other material or process could I use to accomplish the same thing? I don't need a logo or symbol,
and they're about 140mm wide. I'm printing cylinders on the back that will fit tight on the wheel nuts, so I could use a similar fixing
again.
|
|
|
|
|
nick205
|
| posted on 18/9/24 at 03:29 PM |
|
|
Any chance you could 3D print them the other way up (print the curve at the top)?
You may have to give them a very fine sand down and spray with aerosol filler and paint to finish them. We've done similar using our 3D printer
at work to prototype injection moulded plastic components.
|
|
|
Slimy38
|
| posted on 18/9/24 at 06:38 PM |
|
|
quote:
Originally posted by Mr Whippy
3D print is flat? a somewhat contradiction there...
 I meant that to get a good surface it's flat. I've designed many prints in Fusion, and the one thing I still struggle with is good
quality curves. Particularly shallow domes, the circular layer marks become very obvious. Having said that I've not tried much post-processing.
I'll have to look into aerosol fillers. Sanding on it's own seems to fail or delaminate, but adding a filler first might make more sense. I meant that to get a good surface it's flat. I've designed many prints in Fusion, and the one thing I still struggle with is good
quality curves. Particularly shallow domes, the circular layer marks become very obvious. Having said that I've not tried much post-processing.
I'll have to look into aerosol fillers. Sanding on it's own seems to fail or delaminate, but adding a filler first might make more sense.
I specifically want to avoid logos though, even if I could get genuine caps for a decent price I'd fill in the logo.
I've printed a flat cap with cylinders to fix it to the wheel, the exposed surface is flat. I'll have a go at printing a dome of the same
size and glue the two together.
|
|
|
Slimy38
|
| posted on 18/9/24 at 06:42 PM |
|
|
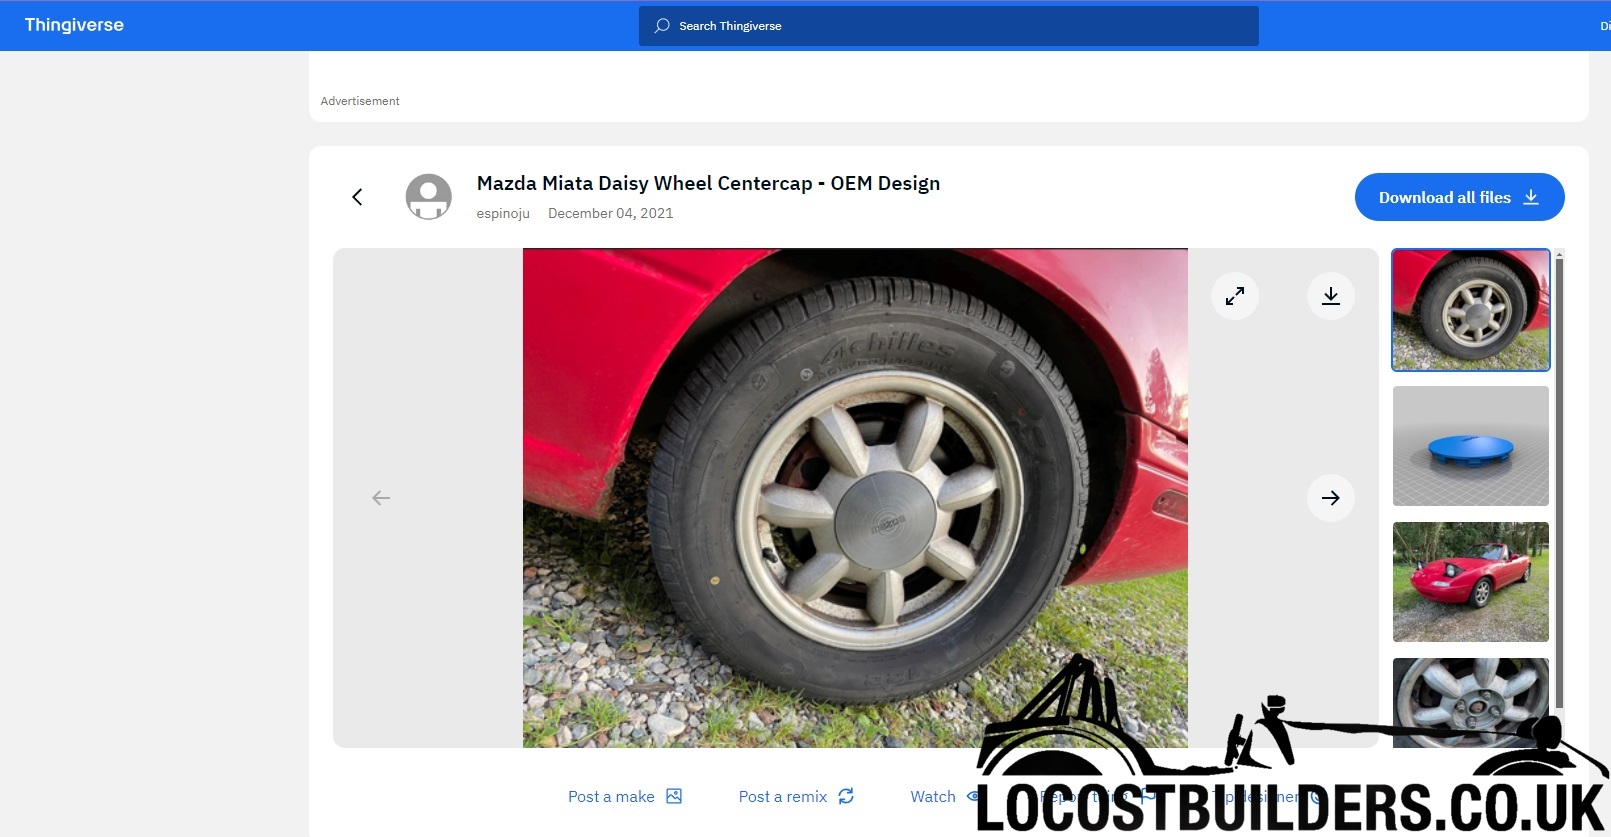
One thing I did realise is that I may have posed the question wrong. The MX5 daisies have a larger centre cap. Here's a pic of the wheel;
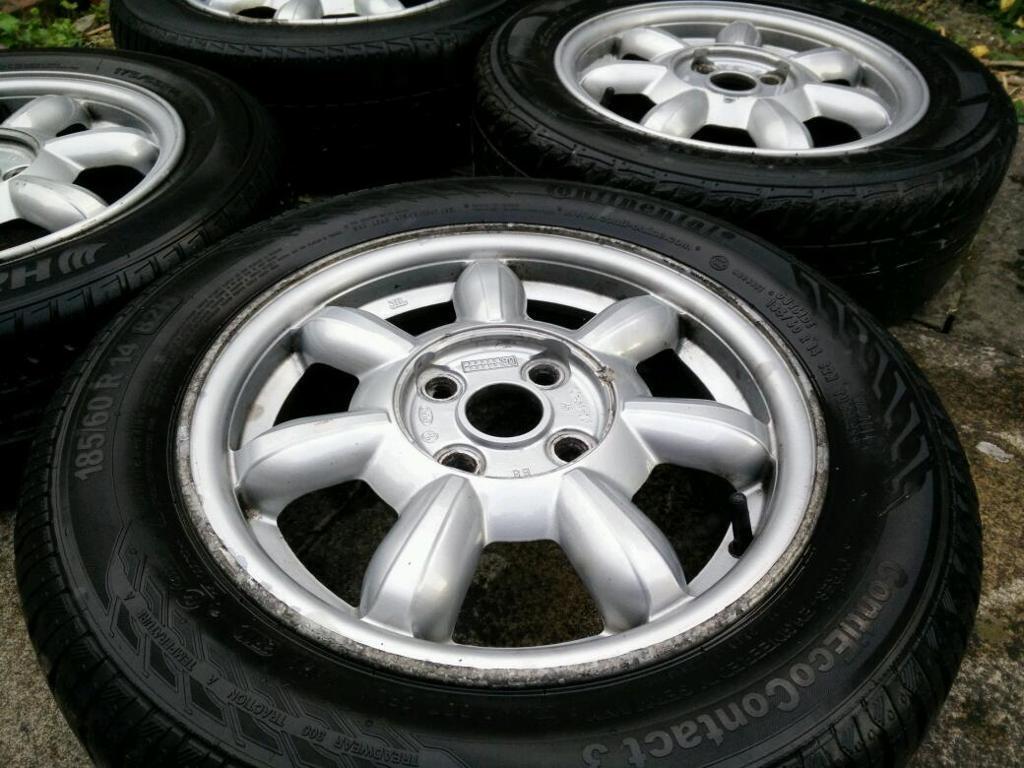
The cap isn't just for the centre hole, it covers the four wheel nuts as well. The curve I need is to follow the profile of the wheel centre.
|
|
|
Mr Whippy
|
| posted on 18/9/24 at 09:12 PM |
|
|
These -
|
|
|
obfripper
|
| posted on 18/9/24 at 09:16 PM |
|
|
I've printed my own centre caps on the striker, I printed them flat and also printed an arbor that allowed the cap to be spun in a drill so I
could wet sand the faces evenly before spraying with 2k lacquer.
Description
Here's a design for the daisy wheel centre cap, looks to be a good match to oe but needs some mods to get to a reliable design - a change of
material to petg or abs might be good enough, or adding a groove for a snap ring inside the clips to stop the material creep loosening the clips when
hot. The designer has also provided an nx .prt design file which can be modified in solid edge for makers which is freely available, or importable
with fusion 360 pro.
https://www.thingiverse.com/thing:5154925
With the curve of the oe cap face, it might be worth trying a non planar slicer to allow you to print the final layers in 3d space instead of flat
layers, they are a bit of an experimental thing at the moment, and need setting up according to the printhead clearances available to you. Using a
long nozzle (like a volcano type) can improve the clearances for this type of printing.
It is also not gained much traction as autodesk hold several patents that are serving to block the implementation of non planar slicing in the open
source community, the following link is the newest useable one I know of, also have a look at teaching tech and cnc kitchen channels for several
videos on the subject.
https://github.com/EiNSTeiN-/PrusaSlicer
Dave
|
|
|
Slimy38
|
| posted on 19/9/24 at 07:22 AM |
|
|
quote:
Originally posted by obfripper
I've printed my own centre caps on the striker, I printed them flat and also printed an arbor that allowed the cap to be spun in a drill so I
could wet sand the faces evenly before spraying with 2k lacquer.
Description
Here's a design for the daisy wheel centre cap, looks to be a good match to oe but needs some mods to get to a reliable design - a change of
material to petg or abs might be good enough, or adding a groove for a snap ring inside the clips to stop the material creep loosening the clips when
hot. The designer has also provided an nx .prt design file which can be modified in solid edge for makers which is freely available, or importable
with fusion 360 pro.
https://www.thingiverse.com/thing:5154925
With the curve of the oe cap face, it might be worth trying a non planar slicer to allow you to print the final layers in 3d space instead of flat
layers, they are a bit of an experimental thing at the moment, and need setting up according to the printhead clearances available to you. Using a
long nozzle (like a volcano type) can improve the clearances for this type of printing.
It is also not gained much traction as autodesk hold several patents that are serving to block the implementation of non planar slicing in the open
source community, the following link is the newest useable one I know of, also have a look at teaching tech and cnc kitchen channels for several
videos on the subject.
https://github.com/EiNSTeiN-/PrusaSlicer
Dave
Thanks for the link, I didn't find that because I was searching for MX5, MX-5 etc. I should have just searched for Mazda!! I need to get rid of
the logo but at least it gives me info on the curve.
A while back I watched a Youtube video about non planar slicing, even if it was still built up from layers and then a non planar final surface would
solve the problem. At the time it didn't seem to be going anywhere, I didn't know about the patents which would explain things. I think
you're right though, just looking at my printer in the office here I've not got a great deal of clearance.
Great idea about the arbor though, I'll add that to the print.
|
|
|
Slimy38
|
| posted on 19/9/24 at 03:47 PM |
|
|
The first dome print has come out 'ok', its a very rough surface which would need major work. I forgot to do a decent thickness on it
though, so the edges fade into nothing and haven't printed well. The curve matches the wheel well, so I'm going to do a few different prints
to see if I can improve the surface.
But first I need to replace the hot end, I think my excursion into ABS has messed things up!
|
|
|
Mr Whippy
|
| posted on 20/9/24 at 08:05 AM |
|
|
I wouldn't have bothered at all with ABS, it's an utter PITA to use and overrated. PLA would have worked fine but PETG would have been the
best choice. Are you using the highest printing quality? Especially important if printing gradual curved surfaces to reduce the number of layers.
I use car brush on primer on things like that as the coat is very thick in comparison to cans and you can sand back with W&D paper. A couple of
coats should be enough to remove all layer lines. This is how I do my huge ship hulls and they end up perfectly smooth with very little work.
|
|
|
Slimy38
|
| posted on 20/9/24 at 09:48 AM |
|
|
quote:
Originally posted by Mr Whippy
I wouldn't have bothered at all with ABS, it's an utter PITA to use and overrated. PLA would have worked fine but PETG would have been the
best choice. Are you using the highest printing quality? Especially important if printing gradual curved surfaces to reduce the number of layers.
I use car brush on primer on things like that as the coat is very thick in comparison to cans and you can sand back with W&D paper. A couple of
coats should be enough to remove all layer lines. This is how I do my huge ship hulls and they end up perfectly smooth with very little work.
Aye, I need to drop the layer height I think, since it's only 10mm deep I should be able to get away with thinner layers. I'll get a roll of
PETG, I don't think I've tried it yet. I tried a 'PLA+' that didn't seem to be any better than PLA, and while ABS printed
really well for small parts and the acetone smoothing was brilliant, but apart from that it wasn't worth the grief.
|
|
|
Mr Whippy
|
| posted on 20/9/24 at 09:58 AM |
|
|
During tests on some of the Youtube channels, standard PLA seemed to be one of the strongest options, it's main disadvantage for cars is the low
heat tolerance but a lot of that is determined by the parts location and colour. PETG is much better in that respect but a little harder to print.
I've tried many different filaments now and buy on price and bulk more than anything as I've found very little between different makes of
PLA. I do have specialist ones like clear and foaming (for planes). More often it's how the parts printed i.e. infil density, layer height &
wall thickness count (like wood grain direction) that makes the most difference.
|
|
|
Slimy38
|
| posted on 20/9/24 at 11:11 AM |
|
|
One of my first car prints was a PLA phone holder, it took one sunny day before it deformed so much that my phone wouldn't fit in anymore!
I'm pretty much there with PLA prints, and I agree I've not really found much difference in brand. ESun appears to be pretty cheap on Amazon
at the moment so I've got a PLA reel and PETG reel arriving before 10 tonight.
|
|
|
Half Finished
|
| posted on 23/9/24 at 07:59 AM |
|
|
I had some success with ASA recently. It has much higher temperature, UV and water resistance. It's prints at much higher temperatures but my
cheap printer seemed to handle it fine. I did find some prints need a raft as they tend to lift from the bed.
overture ASA
Used for a 3rd brake light:
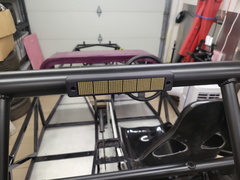 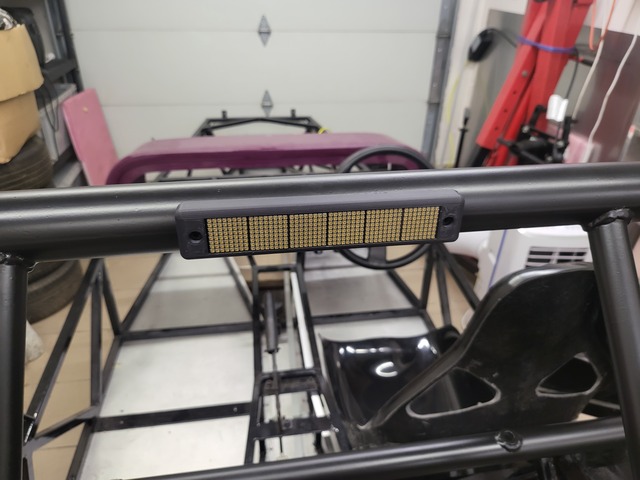
Description
|
|
|
Mr Whippy
|
| posted on 23/9/24 at 12:03 PM |
|
|
quote:
Originally posted by Half Finished
I had some success with ASA recently. It has much higher temperature, UV and water resistance. It's prints at much higher temperatures but my
cheap printer seemed to handle it fine. I did find some prints need a raft as they tend to lift from the bed.
overture ASA
Used for a 3rd brake light:
Description
240 to 270, certainly seems a higher temp material, interesting cheers
|
|
|
Slimy38
|
| posted on 23/9/24 at 07:46 PM |
|
|
quote:
Originally posted by Mr Whippy
quote:
Originally posted by Half Finished
I had some success with ASA recently. It has much higher temperature, UV and water resistance. It's prints at much higher temperatures but my
cheap printer seemed to handle it fine. I did find some prints need a raft as they tend to lift from the bed.
overture ASA
Used for a 3rd brake light:
Description
240 to 270, certainly seems a higher temp material, interesting cheers
On that subject, a question for both ASA and PETG. I currently have a standard hot end with the PTFE liner, am I going to struggle with the extra
temperature of PETG or ASA? I've just about managed to do ABS but I've had to put a new tube and hot end on now. Should I go for an
all-metal option before trying PETG?
|
|
|
Half Finished
|
| posted on 23/9/24 at 08:03 PM |
|
|
I printed this at 250, the printer is an ender 3 clone (Geeetech) and the marlin firmware was configured for max 250 too. It also has a ptfe liner and
it still works fine.
Also regarding the layer lines, if you print with the part inclined or vertical you could eliminate the stepped layer line finish at the expense of
more support material.
|
|
|
Mr Whippy
|
| posted on 24/9/24 at 11:07 AM |
|
|
quote:
Originally posted by Slimy38
quote:
Originally posted by Mr Whippy
quote:
Originally posted by Half Finished
I had some success with ASA recently. It has much higher temperature, UV and water resistance. It's prints at much higher temperatures but my
cheap printer seemed to handle it fine. I did find some prints need a raft as they tend to lift from the bed.
overture ASA
Used for a 3rd brake light:
Description
240 to 270, certainly seems a higher temp material, interesting cheers
On that subject, a question for both ASA and PETG. I currently have a standard hot end with the PTFE liner, am I going to struggle with the extra
temperature of PETG or ASA? I've just about managed to do ABS but I've had to put a new tube and hot end on now. Should I go for an
all-metal option before trying PETG?
I've cranked mine up to 250 with the foaming and transparent stuff and sod all happened to the tube even after hours printing fuselages and I buy
on price. People seem to spend a fortune on upgrades to solve their problems which are more to do with not spending the time setting the printer up
properly in the first place, like flow and retract settings. Do benches and string tests and get your Cura setting correct and saved.
The only tricky ones I've seen are the flexible filaments like TPU which I can't be bothered with anyway. The only upgrades I've ever
bought after years using them were some glass beds.
I do need to change the fans though as they are all falling to pieces 
|
|
|
Slimy38
|
| posted on 26/9/24 at 07:55 AM |
|
|
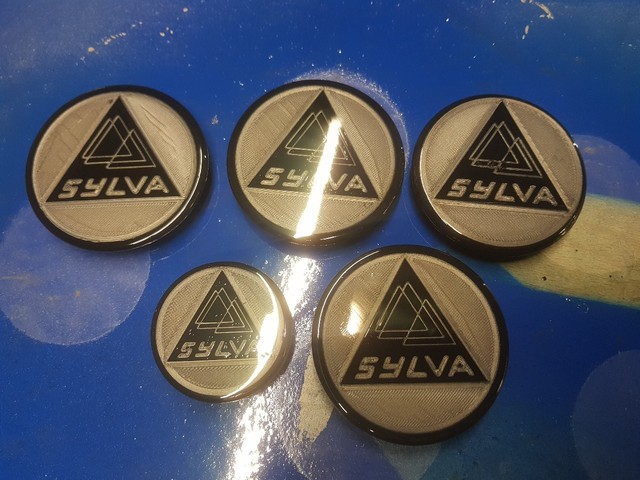
I tried my first print with PETG last night, first a Benchy then an actual piece. The Benchy turned out ok, very stringy and not brilliant surfaces.
After all my worries about not getting things hot enough, I think it was actually too hot.
The hub cap printed ok, until I came to take it off the bed. My time with ABS has taught me that bed adhesion is key, but I didn't need to worry
about PETG. Printing on to Scotch blue tape with a wide print and it was bonded better than some of my Tiger sealed body panels!! As it was on masking
tape I was able to remove the tape from the bed, then the part from the tape. The stuff is mega sticky though!
Still, it's infinitely easier than ABS printing, so thanks Whippy for the recommendation. I'll stay with PETG for now, I do need to look at
my filament storage though as reading into PETG suggests it absorbs moisture quicker than anything else.
|
|
|