DanP
|
| posted on 29/1/06 at 02:13 PM |

|
|
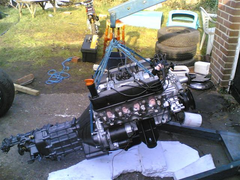
Few pics of V8 viento build progress...
Trial fitted the engine yesterday and thought I'd post a few pics.. the engine didn't go in totally hassle free I had to remove a bit from
the gearbox extension and modify the gerabox mounting bracket to get it to fit in the tunnel, any tips on how to secure the gearbox mounting bracket
to the chassis? I'll probably drill it and bolt through it but was curious as to how others had done it.
Rescued attachment enginein01.jpg
|
|
|
|
|
DanP
|
| posted on 29/1/06 at 02:13 PM |
|
|
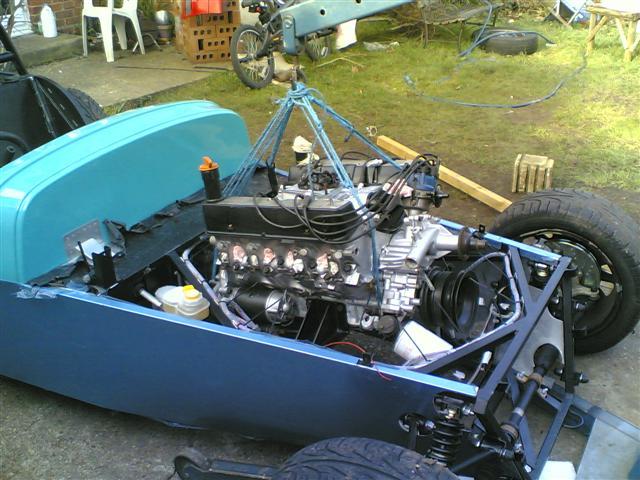
another..
Rescued attachment enginein02.jpg
|
|
|
DanP
|
| posted on 29/1/06 at 02:14 PM |
|
|
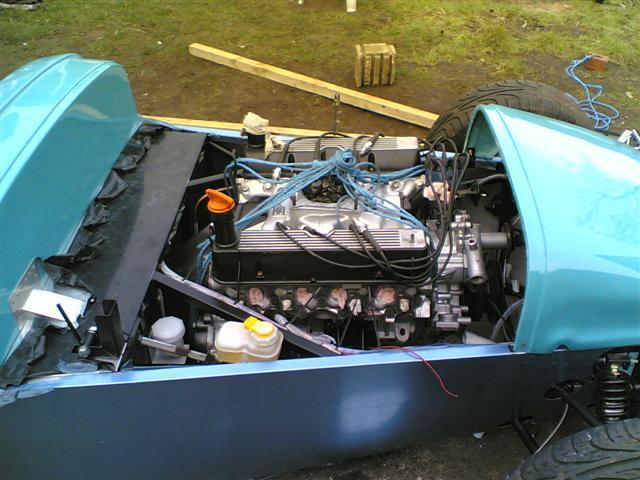
another..
Rescued attachment enginein03.jpg
|
|
|
DanP
|
| posted on 29/1/06 at 02:14 PM |
|
|
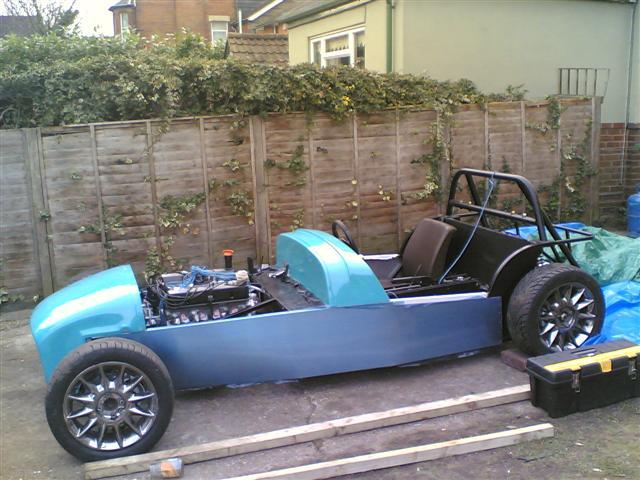
last one..
Rescued attachment enginein04.jpg
|
|
|
grumpy griff
|
| posted on 29/1/06 at 06:42 PM |
|
|
Looks really good and I'm at a similar stage in my Viento build. Hopefully engine will go in in a couple of weeks time. What are you going to do
about the alternator, will you fit the standard RV8 and brackets?
I spoke to Luego on friday about the gearbox mounting and they said to use the centre bolt hole only. Not sure this sounds right but I'll have
a look once it is fitted.
|
|
|
Paul (Notts)
|
| posted on 29/1/06 at 06:43 PM |
|
|
Looking good...
about 6 months ahead of my build. Just started rebuilbing my 3.5 engine and hope to fit it this summer..
Your colour looks very much like mine..!!!!!!!!
I did think mine would be unique in colour  
see http://www.locostbuilders.co.uk/photos.php?action=gal&user=wilkingj
for ideas on gearbox mounts
[Edited on 29/1/06 by Paul (Notts)]
|
|
|
DanP
|
| posted on 29/1/06 at 06:59 PM |
|
|
Thanks for the comments and suggestions.
Sorry Paul, I didn't mean to steal your colour! -- it was seeing a pic of yours that made up my mind to have it. 
The alternator is a bridge I'm yet to cross! I'm gonna see if i can fit the standard one and standard bracket I have, but if I have no joy
then I belive there is a different bracket that slings the alternator up to the side of the O/S rocker cover.
I think for the gearbox mount I will probably have a bolt either side of the central bolt mounting hole - the central bolt actually screws into the
geabox casing so presumably I can't either use it for mounting (as it would be a rigid connection between gearbox and chassis) or ditch it as it
must be there for a purpose! 
|
|
|
Scotty
|
| posted on 30/1/06 at 08:40 AM |
|
|
Fantastic!
i was going to ask the SAME question myself this morning !
anyone got any more info ?
PLEASE NOTE! All comments made by this person are to be considered "Tongue in Cheek" and are not meant to be taken seriously in any way - so there!
|
|
|
wilkingj
|
| posted on 30/1/06 at 10:27 PM |
|
|
Luego supplied me with a gearbox bracket, they make it up on demand.
Flat Trapeziodal plate with two Angled Ears for the gearbox to mount the rubbers on the two angled side lugs.
Had to bend the ears to get the rubbers in!.
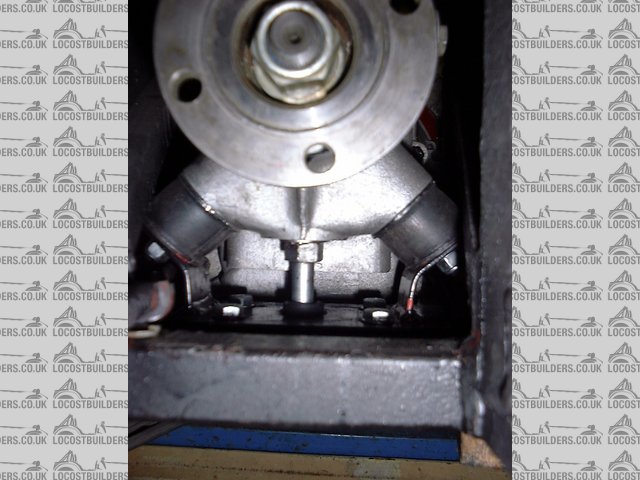
I have also fitted the the central rubber mount that has the bolt through underneath (goes between the two angles side mounts).
It makes a really firm back mounting.
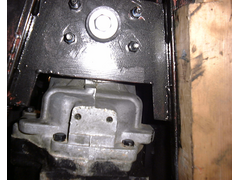
I had to cut a small section of the plate on the chassis away (see pic) so I could get the engine and box back as far as possible. This made the
engine/gearbox mating point about 4" in front of the back of the engine bay.
All fitted in well. However, doing the bolts up on the gearlever extension was a pig.
Also I forgot to put in the reversing switch... another pig job in situ.
I considered cutting little hatches / holes in the tunnel sides and then filling with large gromets.
just my 2d worth.
Nice looking engine... Keep building... you will get there soon.

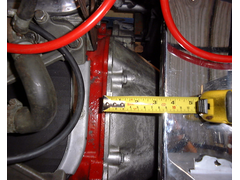 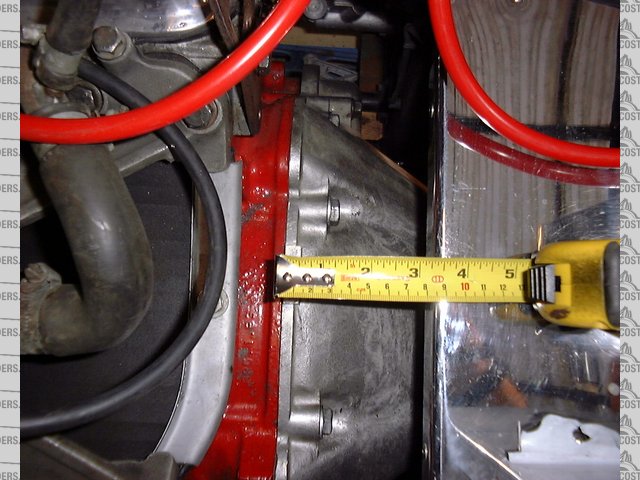
Gearbox position
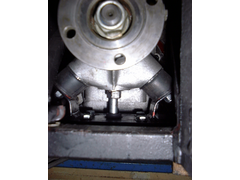 
Gearbox Rear mounting
 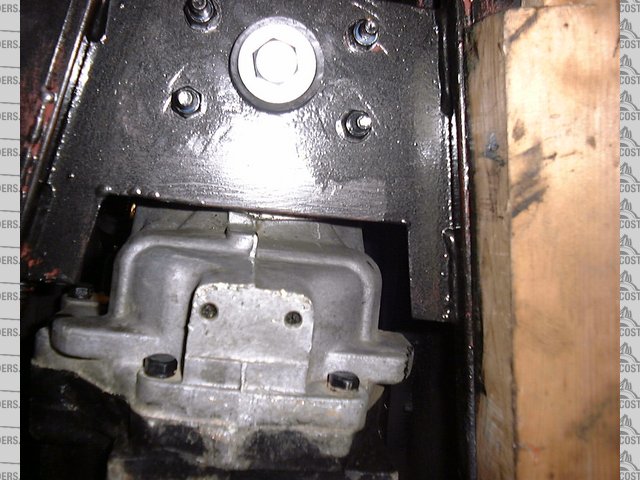
Gearbox Mounting Cutaway (underneath)
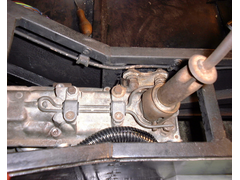 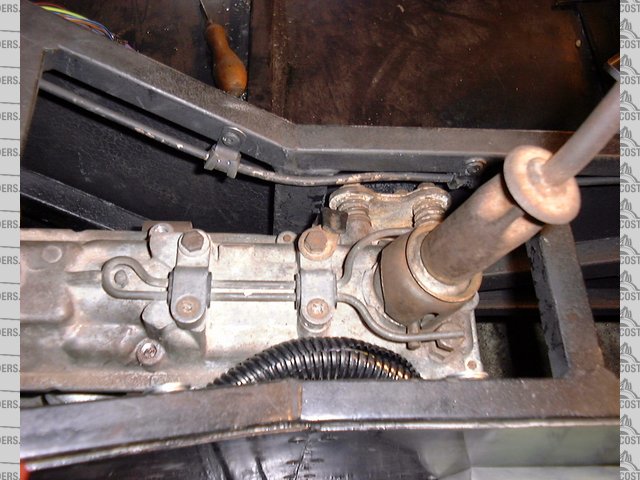
Gearbox extension position
[Edited on 30/1/2006 by wilkingj]
1. The point of a journey is not to arrive.
2. Never take life seriously. Nobody gets out alive anyway.
Best Regards
Geoff
http://www.v8viento.co.uk
|
|
|