Fred W B
|
| posted on 15/12/11 at 05:28 PM |

|
|
Thanks for the kind responses all.
Re scrapping the buck sections, It's what I have to do to move on, so I just got on with it. I did double double check where I was cutting
before I fired up the angle grinders and chain saw though!
It is great to have some more room in the garage now, for years I have been moving around in the narrow alley around the pattern.
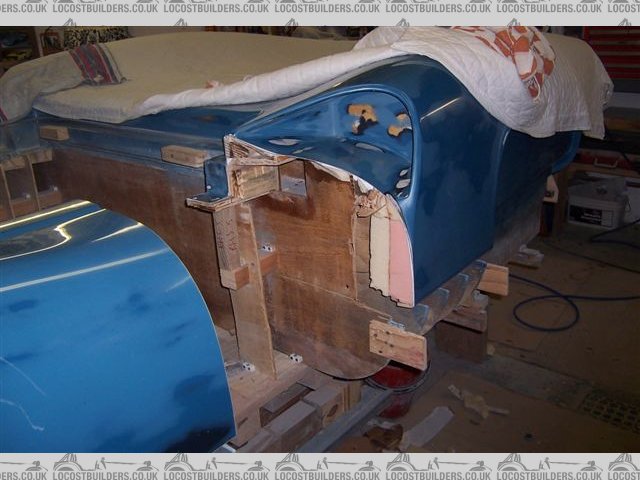
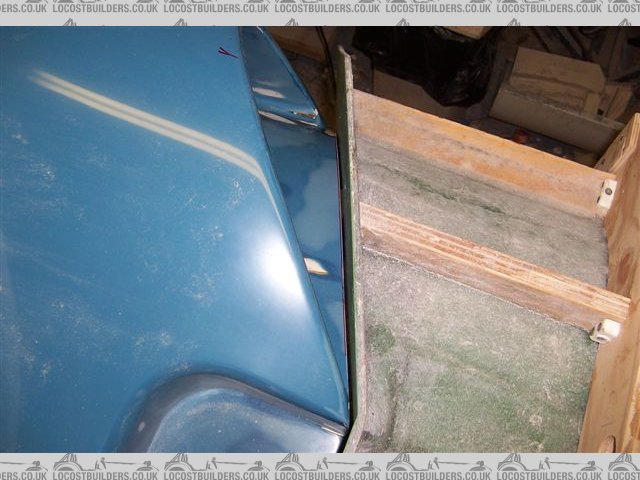
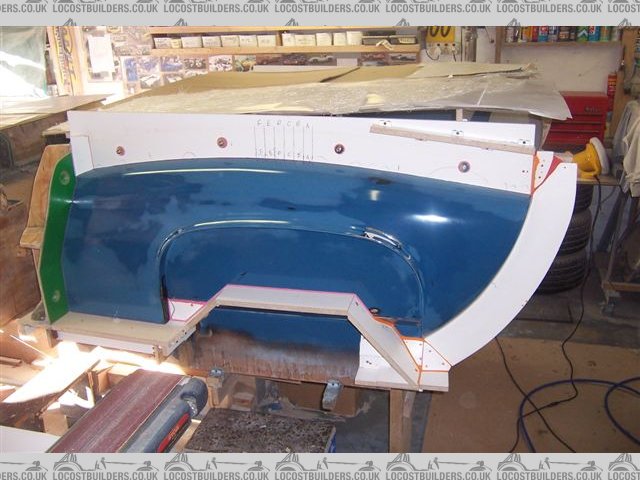
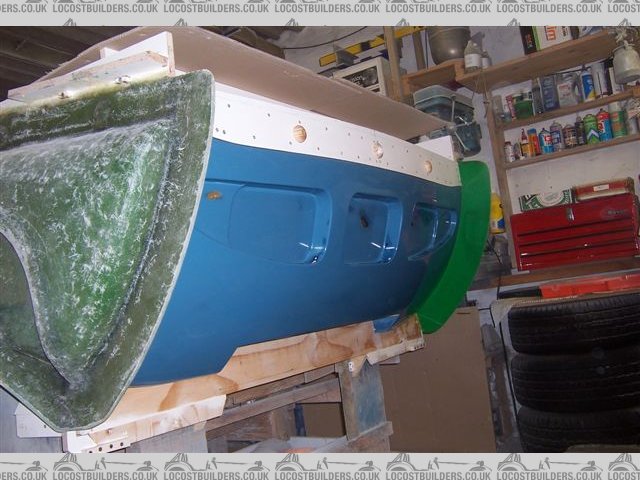
Currently making progress on cutting the rear sections of the doors out of the pattern. This so I can then make the forward facing surfaces of the
rear body section that are in the door gap. You can see the 3 mm gap that will become the door gap in the lower pictures
Cheers
Fred W B

[Edited on 15/12/11 by Fred W B]
You can do it quickly. You can do it cheap. You can do it right. Pick any two.
|
|
|
|
|
Fred W B
|
| posted on 1/1/12 at 09:59 AM |
|
|
quote:
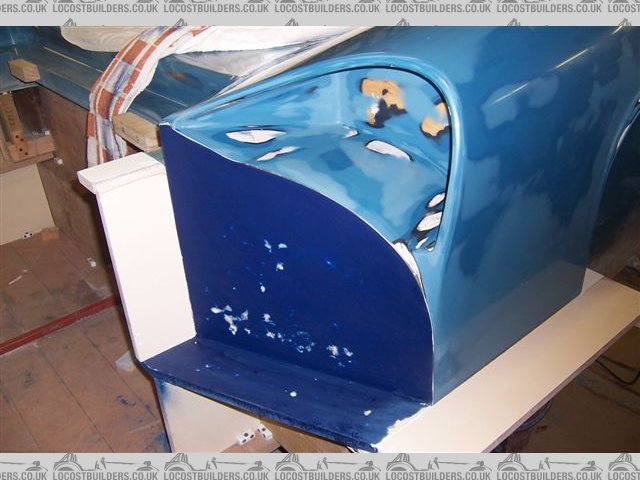
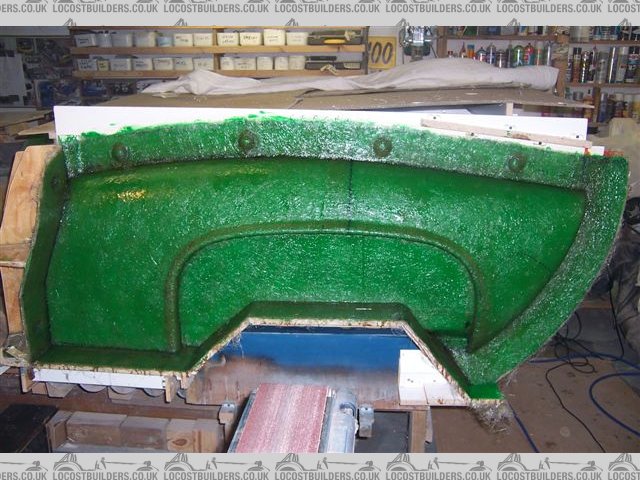
make the forward facing surfaces of the rear body section that are in the door gap
Like this
Happy new year all
Fred W B
[Edited on 1/1/12 by Fred W B]
You can do it quickly. You can do it cheap. You can do it right. Pick any two.
|
|
|
Fred W B
|
| posted on 22/1/12 at 06:46 PM |
|
|
Ready to start cutting matt for and laying up the first parts of the tail mold, the inserts for the hip ducts
Cheers
Fred W B
You can do it quickly. You can do it cheap. You can do it right. Pick any two.
|
|
|
Fred W B
|
| posted on 9/2/12 at 06:59 PM |
|
|
Laying these up to proving to be a bit of a fiddle. Access is difficult, some of it has to be done upside down and you struggle to see what you are
doing.
Cheers
Fred W B
[Edited on 9/2/12 by Fred W B]
[Edited on 9/2/12 by Fred W B]
You can do it quickly. You can do it cheap. You can do it right. Pick any two.
|
|
|
smart51
|
| posted on 9/2/12 at 07:22 PM |
|
|
Looks like its coming along nicely. Can't wait to see the finished item.
|
|
|
mangogrooveworkshop
|
| posted on 11/4/12 at 11:11 PM |
|
|
Got a trip brewing in a few months ........going to put you on my route for a beer and a gawk
|
|
|
MakeEverything
|
| posted on 12/4/12 at 08:34 AM |
|
|
quote:
Originally posted by mangogrooveworkshop
Got a trip brewing in a few months ........going to put you on my route for a beer and a gawk
Make sure you get some photos!  Oh, and dont forget to take a toy for the dog!! Oh, and dont forget to take a toy for the dog!!
Kindest Regards,
Richard.
...You can make it foolProof, but youll never make it Idiot Proof!...
|
|
|
mangogrooveworkshop
|
| posted on 12/4/12 at 12:31 PM |
|
|
Will do
|
|
|
Fred W B
|
| posted on 22/4/12 at 06:46 PM |
|
|
quote:
Got a trip brewing in a few months ........going to put you on my route for a beer and a gawk
Hay Mango, will be pleased to meet you, give us a shout when your planning is confirmed.
Not posted for a while, had some things going on that kept me out of the garage for a while.
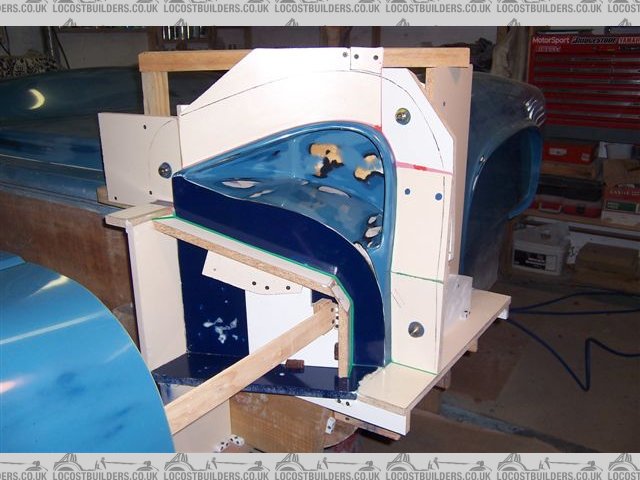
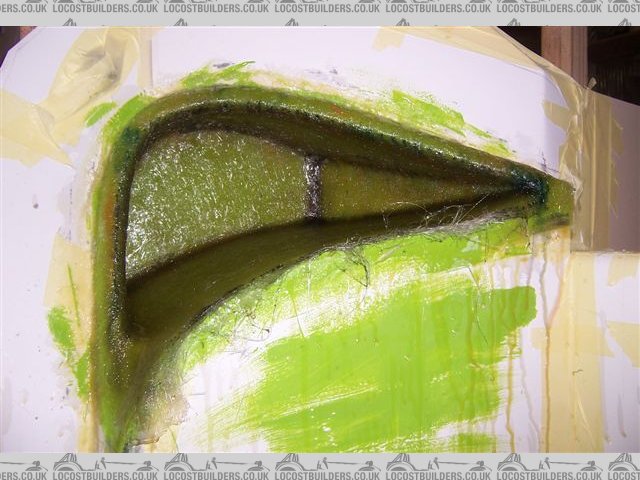
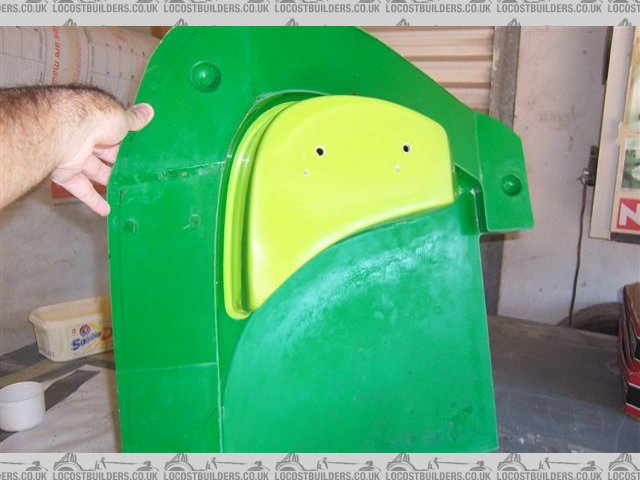
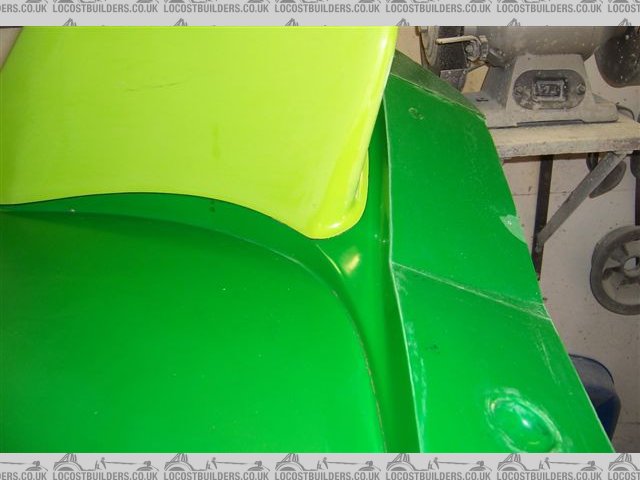
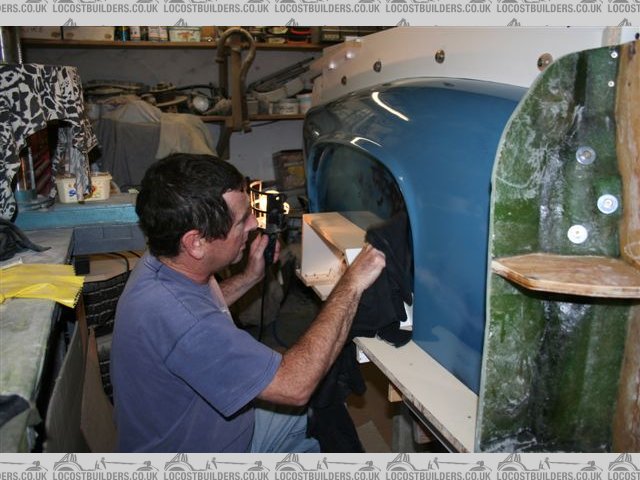
I have now finished the first 2 sections of what will be a 6 piece tail mould, these being the outer face sections of the forward facing areas of the
tail, including the inserts that make it possible to form the inner surfaces of the "hip ducts".
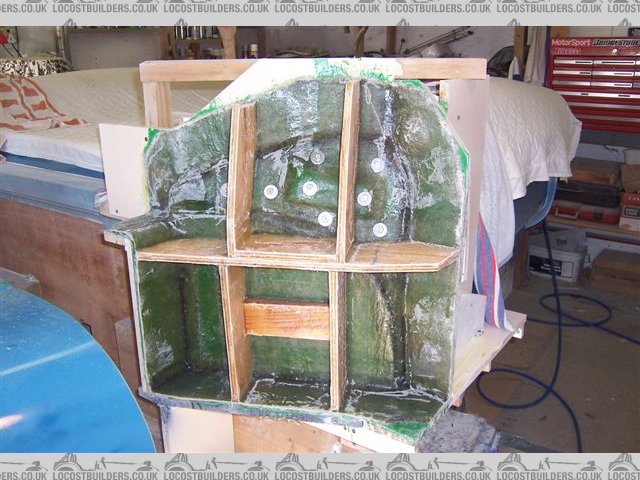
After making the insert moulds, these were closed off, and another mould made over them over the full forward facing surfaces. The surface down
towards the belt line may be bigger than necessary, I can cut the parts back if needed later. I incorporated a step out block to give a register
between the insert and face moulds. The insert section moulds are secured to the face moulds with screws.
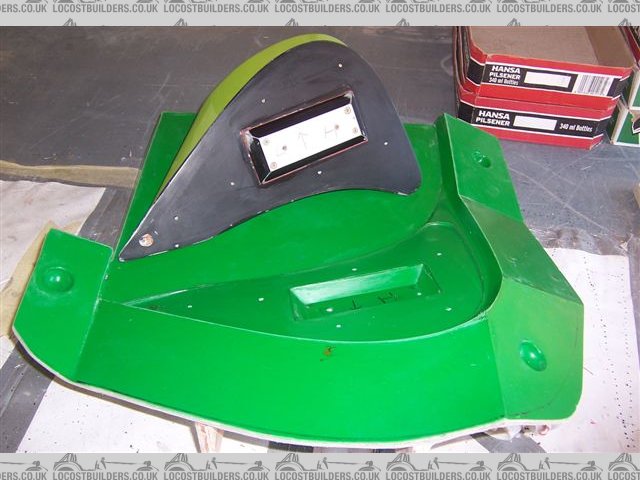
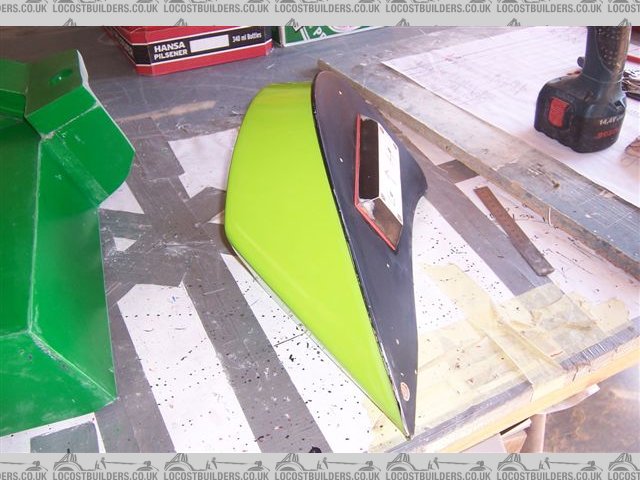
The idea is that the full tail part is first made with the insert section removed from the face mould. The open area of the duct is then cut out, up
to the join line. The insert mould is than screwed to the removed face mould and a moulding made separately of the insert. The insert part is then
trimmed to the join line, the insert part put back onto the mould and the face mould bolted back into the full part mould, so that it positions the
insert part in the correct place. The insert part is then bonded into the tail part.
Hope that makes sense, the pictures may help explain what I am trying to do. The insert and face moulds happen to be made with different colour green
tooling gel, which make the join line easy to see
Cheers
Fred W B
[Edited on 22/4/12 by Fred W B]
You can do it quickly. You can do it cheap. You can do it right. Pick any two.
|
|
|
smart51
|
| posted on 22/4/12 at 07:39 PM |
|
|
Looks like you've put a lot of thought into that. The moulds are looking good. How much work do you think is left before all the moulds are
pulled?
|
|
|
Fred W B
|
| posted on 22/4/12 at 08:56 PM |
|
|
Thanks Smart. I did agonize over it for ages, but I've also been given some very good advice on how to tackle that bit.
I've given up predicting when things will be finished, but hopefully not many more months before the moulds are finished.
Cheers
Fred W B
[Edited on 22/4/12 by Fred W B]
You can do it quickly. You can do it cheap. You can do it right. Pick any two.
|
|
|
mangogrooveworkshop
|
| posted on 22/4/12 at 09:31 PM |
|
|
Fred
On your bigger panel are you sticking some airline PCL connections to use when releasing the parts from the moulds.
I was watching a video making a body shell for the new shelby cobra and they had them installed in the mould.
When the release came it was blow air in and pop out it came.
Will defo make a trip to PE on the garden route in a hertz rental
|
|
|
Fred W B
|
| posted on 23/4/12 at 04:34 PM |
|
|
Hi Mango
It's not the bigger panels I'm worried about, as my multipart split molds should make it easy to demould. I did use air to help release
the insert "bucket" moulds from the pattern, you can see two holes in the back face of one in a picture above. I didn't bother to
add connections, I just held the air nozzle firmly into the suitably sized hole and it released well enough.
Thanks for the thought.
Cheers
Fred W B
You can do it quickly. You can do it cheap. You can do it right. Pick any two.
|
|
|
Fred W B
|
| posted on 8/7/12 at 07:15 PM |
|
|
So lately progress has been slow albeit steady.
The entire tail section has been waxed, and all the parting fences made and installed.
You can do it quickly. You can do it cheap. You can do it right. Pick any two.
|
|
|
Fred W B
|
| posted on 8/7/12 at 07:16 PM |
|
|
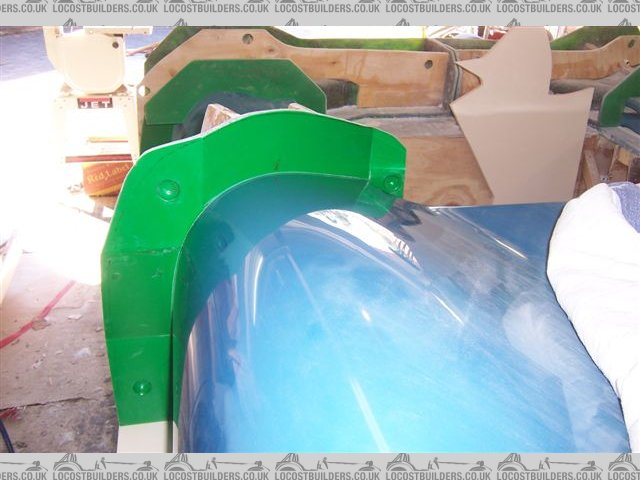
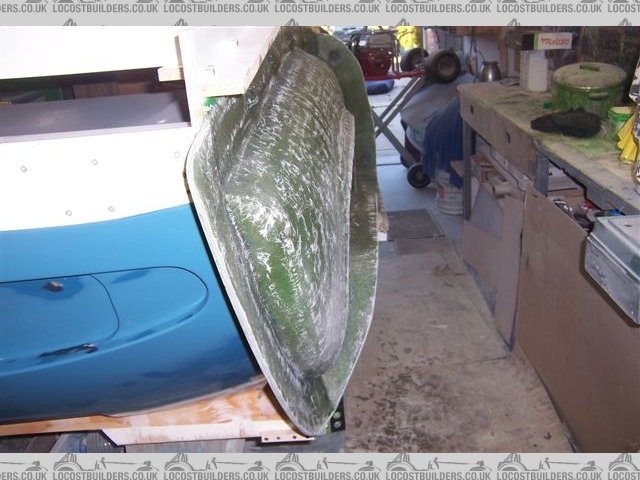
Working now on the next section of the tail mould, all matt templates have been made, matt cut, and today at 10.30 I started with tooling gel
application, then once it had gone off I applied tissue, then one layer of 300 gram mat on the surface and flanges, + fillets in the corners, then a
layer of 600 and 2 layers of 600 on all the flanges.
[Edited on 8/7/12 by Fred W B]
You can do it quickly. You can do it cheap. You can do it right. Pick any two.
|
|
|
Fred W B
|
| posted on 8/7/12 at 07:18 PM |
|
|
The fiddly pieces around/under the wheel arch return are a pain.
By 5.30 it looked like this.
Needless to say I didn't see any sport on TV today
Cheers
Fred W B
You can do it quickly. You can do it cheap. You can do it right. Pick any two.
|
|
|
smart51
|
| posted on 8/7/12 at 07:26 PM |
|
|
Still in awe Fred. Keep up the good work.
|
|
|
MRLuke
|
| posted on 8/7/12 at 07:31 PM |
|
|
Wow. How on earth did they make these so quickly in the first place 
|
|
|
Fred W B
|
| posted on 8/7/12 at 07:44 PM |
|
|
Thanks guys
quote:
How on earth did they make these so quickly in the first place
Luke, I guss the difference is that I am one bloke, doing this part time and learning as I go. Lola would have had a team of seasoned experts and
subcontractors working full time? Otherwise I have no idea.
Cheers
Fred W B
[Edited on 8/7/12 by Fred W B]
You can do it quickly. You can do it cheap. You can do it right. Pick any two.
|
|
|
Fred W B
|
| posted on 20/8/12 at 05:53 PM |
|
|
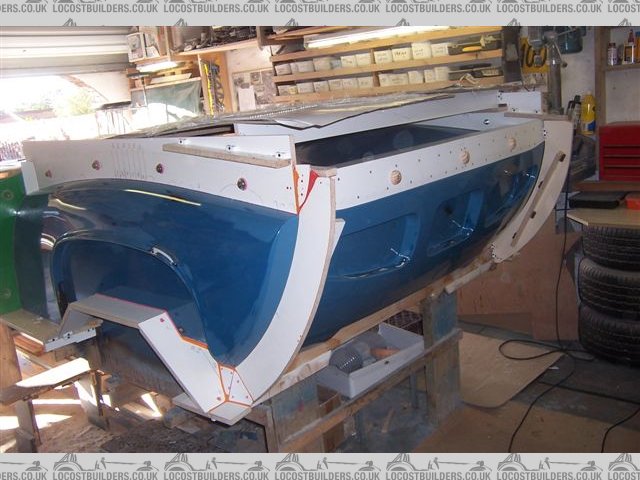
So after yet more polishing (the lead light is in order to see wax streaks left on the surface), tailoring of matt pieces and the consumption of yet
another 25 kg bucket of resin the LH and RH sides of the tail mold are up to full thickness, and I can now get on with the transom panel section.
Cheers
Fred W B
You can do it quickly. You can do it cheap. You can do it right. Pick any two.
|
|
|
chrsgrain
|
| posted on 20/8/12 at 06:15 PM |
|
|
Not much left to go - or is that just an optical illusion?
Looks amazing as ever..
Chris
Spoing! - the sound of an irony meter breaking...
|
|
|
smart51
|
| posted on 20/8/12 at 07:07 PM |
|
|
I'm always pleased to see updates on your fine work Fred. Is there just the back panel to go?
|
|
|
Fred W B
|
| posted on 20/8/12 at 07:24 PM |
|
|
Thanks guys
Still to go is the back panel, the top surface of the tail, and then finally the internal surfaces in the scuttle.
Cheers
Fred W B
You can do it quickly. You can do it cheap. You can do it right. Pick any two.
|
|
|
alistairolsen
|
| posted on 27/9/12 at 09:04 PM |
|
|
Simply stunning, a real pleasure to watch this!
My Build Thread
|
|
|
andygtt
|
| posted on 11/10/12 at 08:08 AM |
|
|
Looking good, long process making moulds.
when do you think you will start to pull a body and what materials do you plan?
Andy
please redefine your limits.
|
|
|