John Bonnett
|
| posted on 13/1/13 at 01:18 PM |

|
|
Great progress Dominic despite the heat, well done. I particularly like the way you are tackling the sheet metal work. It all looks very professional.
Didn't you fancy making the wings in aluminium?
Keep up the good work
Best regards
John
|
|
|
|
|
TheGecko
|
| posted on 13/1/13 at 01:45 PM |

|
|
quote:
Originally posted by John Bonnett
Didn't you fancy making the wings in aluminium?
John,
I keep thinking about it  But, given the amount of effort (and money But, given the amount of effort (and money  ) now invested in the fibreglass ones, I'll stick with them for now.
If the enthusiasm remains after the car is on the road, I might have a try at making a form and knocking up some wings, just for the exercise.
Doesn't really need to be that hard, if the form is right. ) now invested in the fibreglass ones, I'll stick with them for now.
If the enthusiasm remains after the car is on the road, I might have a try at making a form and knocking up some wings, just for the exercise.
Doesn't really need to be that hard, if the form is right.
Best regards,
Dominic
|
|
|
TheGecko
|
| posted on 16/1/13 at 01:09 PM |

|
|
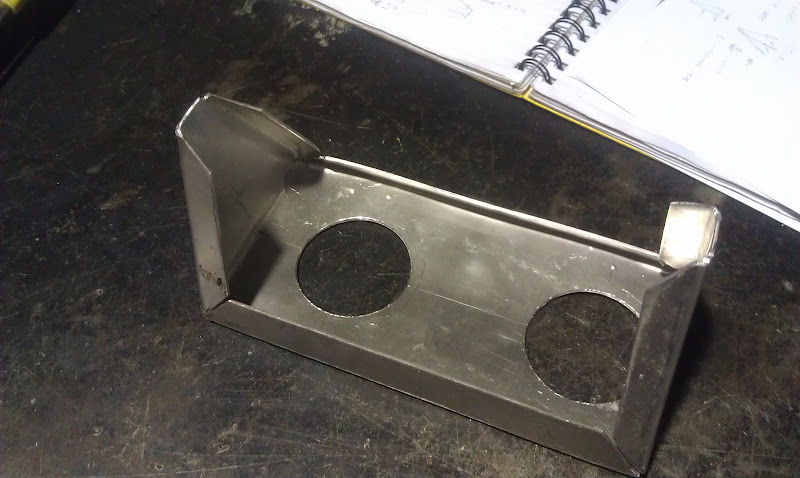
Tuesday night was a stab at making the first light box. Not a complete success  Mostly the problem was me grabbing some leftovers from the same
1.6mm material used to make the main part. Just too thick for something this fiddly and the design is too fiddly as well Mostly the problem was me grabbing some leftovers from the same
1.6mm material used to make the main part. Just too thick for something this fiddly and the design is too fiddly as well  Oh well, at least it
lets me (re)check clearances and spacing etc. This will get remade in something lighter, either 1.2 or 1.0, next workshop visit. Oh well, at least it
lets me (re)check clearances and spacing etc. This will get remade in something lighter, either 1.2 or 1.0, next workshop visit.


|
|
|
TheGecko
|
| posted on 28/1/13 at 03:36 AM |

|
|
And Mk2 of the light boxes (left & right) in 1mm ali were much easier to make plus, Mk1 gave me some tips on folding sequence, which was a
multi-stage affair.


I know it looks like the don't fit - the cross piece had been wedged open a bit to mark, drill and dimple drain holes in the light box area.
It'll squash back into shape in the chassis.
A few rivets and they'll be mounted. Need some M4 spacers/standoffs for the lights now, which Mr H is kindly going to machine from some sort of
plastic (I think - the rain on the shed roof was literally too loud to hear over at some points  ) )
The east coast of Australia is in disarray at present, with serious fires in the south and heavy rain plus flooding further north where I am. Just got
an SMS alert from work to say all of our campuses are closed tomorrow so I've got a day at home unless called in. Given the last minute
"Oh shit. We need to bring these systems down RIGHT NOW!" we had last time, a phone call is not impossible 
Dominic
|
|
|
TheGecko
|
| posted on 26/3/13 at 02:05 PM |

|
|
Some updates that hadn't made it into this build diary yet.
Built radiator mounts to suit the existing pegs on the eBay Civic radiator - generic rubber top hat bush in a short tube. Two at the bottom:


And a removable central one for the top:


End result:

There's also been some more fiddling about with panels, including pinning down the size and location of the side vents:

Some interesting work to come making a template to form nice rounded edges on those vent holes - more pics (and possibly a video) once that
happens.
I also did a quick mockup test of one panel in plain paper to resolve a question about what size sheet it needed to be cut from. Unfortunately,
leaving a plain paper panel stuck on the car with a bored Mr H leads to unexpected "enhancements" 

Last but not least, a variety of small manufactured bits have come back from plating (zinc + gold passivating + de-embrittlement) - must try to get a
better photo than this one:

Top and bottom are the rear toe links with their adjustable chassis end mounts posts on the left. They use a LH threaded 5/8" rose joint on the
inside end and the OEM Toyota tie rod end on the outside. In the middle are two front tie rod extensions and the steering intermediate shaft -
Mitsubishi Lancer column spline to Ford (Ka) UJ through to 17mm hex on modified Gemini (Chevette) rack. Hey, why make it easy on myself 
Present goal is to get all the structural and panel work completed and shift the car back to my workshop for plumbing/wiring/trimming sometime in the
next 6-8 weeks. Need to extract my digit plus find some way of spending less hours in the office 
|
|
|
TheGecko
|
| posted on 7/4/13 at 01:18 PM |

|
|
I feel like I'm in the department of dribs-and-drabs at the moment. Lots of little invisible bits of stuff happening and very little to
show.
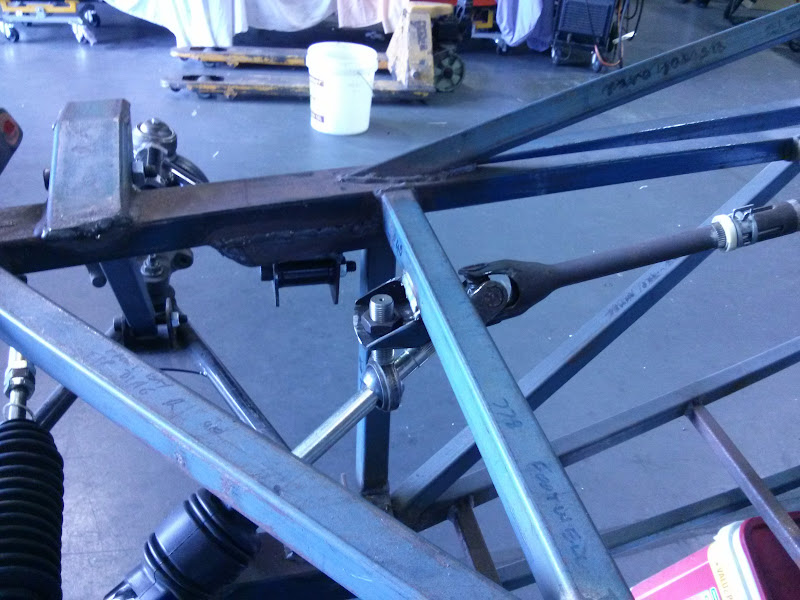
Made up the footwell panels - drivers side needs to be set back a bit to meet the back of the pedal box.


Needs some holes - one for the column and three for the master cylinders - to be finished.
The above leaves out the column support etc all in place...
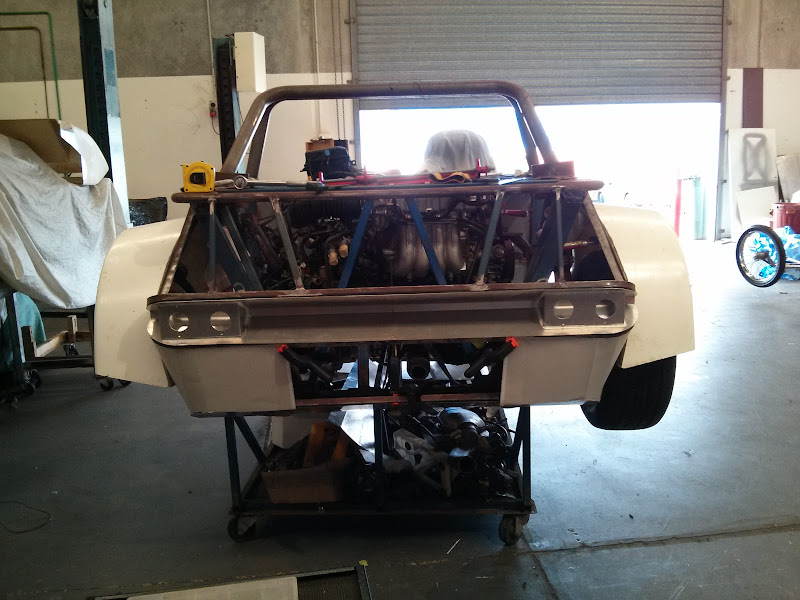
And today, finished some hidden metal work that will support the ali panel behind the rear guards. Mocked up a bit of that panel in cardboard and had
a look -the guard will need a small fillet to meet the curve of the panel.

Did the other side and added in the central lighting/grille panel then stood back for a look. Doesn't look awful
Have also made the retainers for the fuel tanks but nothing to show of them yet - soon.
Dominic
|
|
|
maccmike
|
| posted on 7/4/13 at 01:45 PM |

|
|
nice sheet metal work
|
|
|
John Bonnett
|
| posted on 7/4/13 at 02:52 PM |

|
|
It doesn't look awful at all Dominic, it looks really nice and very well executed. You have achieved some really tidy bends on the square tube.
Wherever you look on your project there are some very nice touches. A great thread and a great read. Thank you.
Regds
John
|
|
|
TheGecko
|
| posted on 8/4/13 at 07:26 AM |

|
|
Macmike, thanks - I assume you're referencing the light/grille box? It certainly passes the "looks alright at a glance from a few metres
away" test. Up close, there's some rough edges 
John, thanks also - I've spent a LOT of time sketching and fiddling with various scale models to find pleasant shapes from simple elements.
I.e. there's no double curvature panels on the car (other than the fibreglass guards) but I think it all works pretty well. Somewhere
I've got a sketch of how the various single curvature pieces intersect at the back - it's harder to draw than it is to build  It's a little influenced by Ford's "New Edge" design language, which used the
intersection lines between curves to form styling highlights.
The bends in the square tube were all made with a borrowed (cheap Chinese) bender and are in 3/4" (19mm) tube rather than 25mm to ease the
process. Hilariously, at the time I made the bends, I was still sketching the final rear end layout so the bends were just short pieces with a
(roughly) 90 degree corner and short straight tails. The "proper" way which would have been to bend them to length as continuous pieces.
I did at least get lots of practice butt welding bits of 3/4"-18g tube together 
If I ever built another (Hah!) I'd know so many better ways of doing things  Oh well, Per ardua ad astra and all that. Oh well, Per ardua ad astra and all that.
Dominic
|
|
|
TheGecko
|
| posted on 28/4/13 at 12:05 PM |

|
|
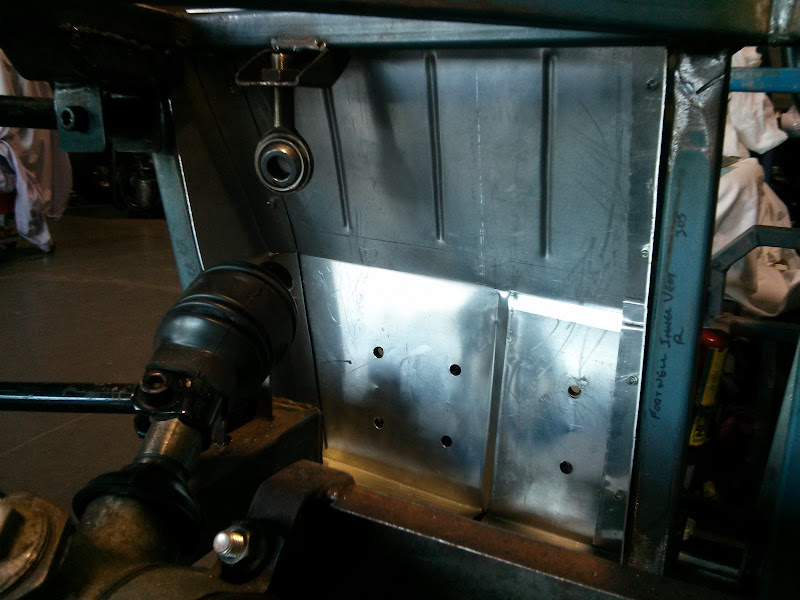
Stuffing around with the footwell panel ended with me making it again. It needed a 3mm step in it because, for reasons known only to Willwood, their
clutch pedal assembly is 1/8" longer than the brake one 
Anyway, here's the end result, along with the floor panel to get ones feet up to the same level as the pedals. Just need a trio of 1-3/8"
holes for the master cylinders and one for the steering intermediate shaft and it's done.



Might finally get onto something other than footwells in the next session 
D
|
|
|
John Bonnett
|
| posted on 28/4/13 at 01:09 PM |

|
|
Another example of the care and attention to detail Dominic. The stiffening swages have been beautifully executed. Have you got a beading machine or
did you put them in by hand? The fit and the folding is superb. Well done
John
|
|
|
TheGecko
|
| posted on 28/4/13 at 01:55 PM |

|
|
John,
The swages were put on with a set of jenny rolls - one of the advantages of the car being in the workshop it currently is. I'm a little annoyed
about the beads in the floor panel - they should go down rather than up but I forgot what side of the sheet I was working on  That part of the
floor will get covered with carpet or something non-slip anyway so it probably doesn't matter a whole lot. Still annoying though That part of the
floor will get covered with carpet or something non-slip anyway so it probably doesn't matter a whole lot. Still annoying though 
With the completion of these panels I feel like the car is finally starting to come together, which is nice after all this time.......
Next workshop sessions are Wednesday & Thursday nights this week. More updates as they happen.
D
|
|
|
John Bonnett
|
| posted on 28/4/13 at 05:02 PM |

|
|
quote:
Originally posted by TheGecko
John,
The swages were put on with a set of jenny rolls - one of the advantages of the car being in the workshop it currently is. I'm a little annoyed
about the beads in the floor panel - they should go down rather than up but I forgot what side of the sheet I was working on  That part of the
floor will get covered with carpet or something non-slip anyway so it probably doesn't matter a whole lot. Still annoying though That part of the
floor will get covered with carpet or something non-slip anyway so it probably doesn't matter a whole lot. Still annoying though 
With the completion of these panels I feel like the car is finally starting to come together, which is nice after all this time.......
Next workshop sessions are Wednesday & Thursday nights this week. More updates as they happen.
D
Ah, but being that way up, they won't fill up with dirt 
|
|
|
TheGecko
|
| posted on 16/5/13 at 02:05 PM |

|
|
So, no updates here for a while but still plenty going on.
Bolted on the neat little mount for the High Level Brake Light (manufacture by Mr H)....

Made a tunnel to cover the water pipes etc that will run from the front to the back. Was originally folded up in one piece but I had to split and
join it with rivnuts to make it possible to get in or out of the chassis Still a little bit of trimming etc to do on mounting flanges.


Then some careful measuring was done to establish maximum load size in the front luggage area 

Based on that, I made a boot floor to keep the carton off the passengers legs:

Can't do the same thing on the drivers side because the column etc is in the way. So made a little version which will serve to hold jack,
tools, etc.

There's still a flat panel to come to cover the column area - ran out of time tonight.
All in all, pretty happy with the last week's progress. Still aiming to get all of the panel-type work done over the next 6-8 weeks and get the
car back into my workshop for wiring, plumbing, and trimming.
More soon.
D
|
|
|
TheGecko
|
| posted on 24/5/13 at 01:18 AM |

|
|
Made the cover panel for the column area - still needs rivnuts etc.


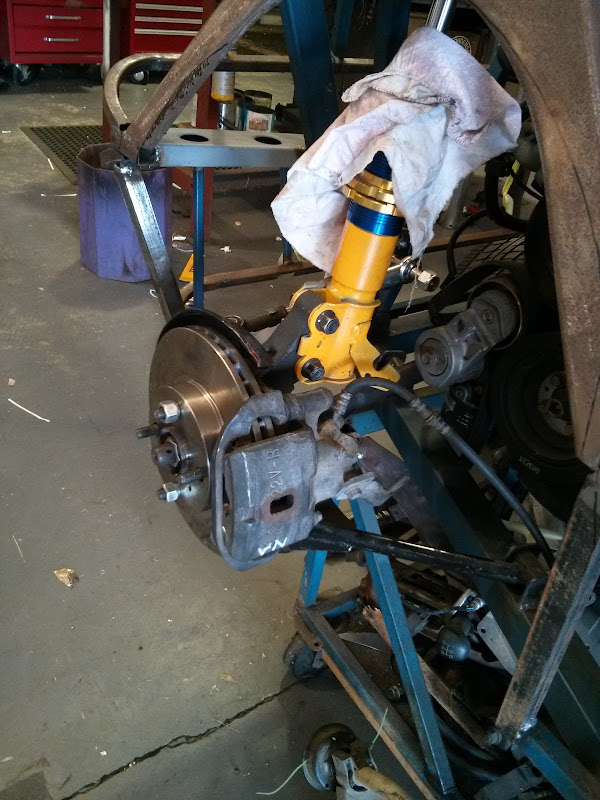
Also realised I hadn't posted these pics. Rear calipers are finalised after I sourced a pair of late-Mk2 MR2 (SW20) rear calipers. These fit
over the Corolla 22mm discs, have a handbrake mechanism, and (best of all) bolt straight up to the Corolla upright. No adapters etc required 
Although nowhere near as light as the XF Falcon calipers I was looking at using, the ease of mounting sold me on these.

Back to bodywork.... There was an appropriately sized scrap of 1.2mm ali lying there on Wednesday night so I dragged out the partially complete
nosecone buck and had a little play....
 
Trim the sheet (roughly, this is just a trial) and wrap it around the buck with a couple of wood screws into the back to hold it still....

Smash away at the leading edge with the rawhide hammer for a bit and discover pretty quickly that I'd left waaaay too much edge to knock over,
particularly in the corners  End result was that I had to snip roughly into the corners to untangle the mess and at least let the rest wrap
over. So, some lessons learned about sizing etc, which was the point of the exercise after all. If you ignore the chewed up corners, the rest
doesn't actually look too bad for what was probably 30 minutes work End result was that I had to snip roughly into the corners to untangle the mess and at least let the rest wrap
over. So, some lessons learned about sizing etc, which was the point of the exercise after all. If you ignore the chewed up corners, the rest
doesn't actually look too bad for what was probably 30 minutes work 

Looks both better and worse in the photo than in real life 
This weekend will be back on the welder for little bits of bracketry like bottom harness mounts, handbrake lever, fuel filler, and plenty of others I
can't recall right now.
It's progress I suppose.....
D
|
|
|
TheGecko
|
| posted on 1/7/13 at 02:51 PM |

|
|
Despite the lack of updates I've been slowly getting things done.
Cut-and-shut the Lancer donor filler neck:


Just found I don't have a decent photo of the engine bay side of that but there's a full metal cover over the pipe so it's not
"in" the engine bay.
Have spent an inordinate amount of time faffing around with the grille that will fill the space between the rear lights. First I cut and spaced five
ali-strips (temporary bolts obviously):

Then, with some posts to mount the lights on, I could trim some ali angle down like so:

and end up with this result:

All of this will, of course, be painted black when it's finished. Need to make some more bits for the outer corners plus the proper top and
bottom mounting tabs for the main grille piece, and it's done.
Have also mounted a handbrake lever and measured up but not yet mounted the gear lever. Just waiting now for the custom cables for both of those
(which should be by the end of the week) and there'll be some fitting up and bracket making to do.
D
|
|
|
TheGecko
|
| posted on 2/9/13 at 10:09 AM |

|
|
Been too busy with work, home, and organising committee for the Nationals (in pretty much that order) to do
much work that actually shows. However, here's a few updates.
Gear shift mechanism has been chopped, flipped, swapped, fiddled, and generally buggerised-around-with until it moves the cables in the right
direction for a given stick movement. Temp mount need to be replaced with something more permanent and the relationship between the gear shift cables
and the handbrake, with its own set of cables and compensator, needs some addressing 
My recommendation for aspiring middy builders - start your design with the gearshift and handbrake and then work outwards from there  

Said handbrake compensator, manufactured from raw materials by mine own fair hands 

Have also been doing a bit of tin bashing, resulting in the following:


Two updates rolled into one here..... a few days later
Trimmed up the panel a bit more so the gap is virtually nil and clamped up a rear guard for a look:

Offered up the lower rear panel too - still needs to be trimmed and have its edges knocked over for riveting. Looks good already though 

Next step is opening up various vent holes and flangeing over the edges - will become more clear once it's done.....
D
[Edited on 2/9/2013 by TheGecko]
|
|
|
TheGecko
|
| posted on 8/9/13 at 09:55 AM |

|
|
Another successful few afternoons and evenings in the workshop.
Got the lower rear panel trimmed and knocked over onto its frame

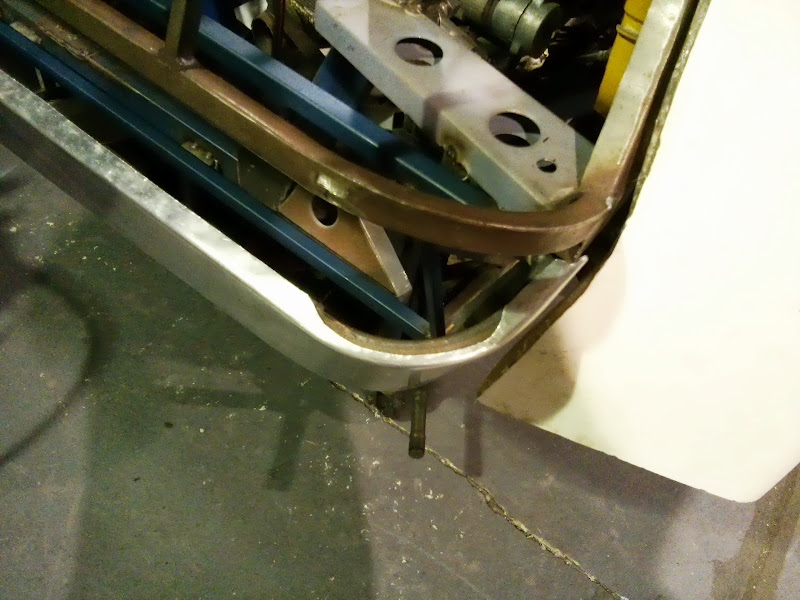
And stuck the under tray portion on to see how it looks

Wrapped a paper template around the side and upper-rear corner (checked the guard and light bar while I was there)
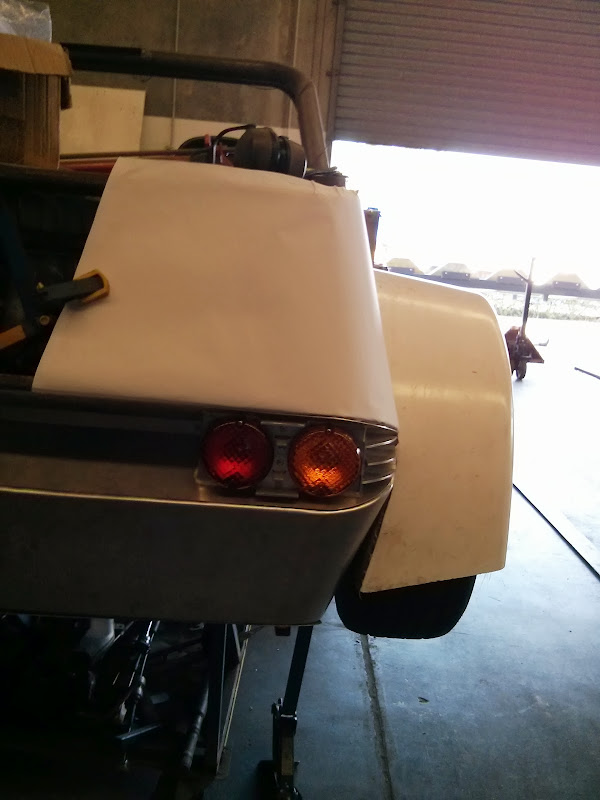
And with the centre part of the grille bars (and backing mesh) loosely in

Drop the template onto the remains of a sheet of 1.2

Yay for air-shears 

And spot through the existing rivet holes to locate the sheet in prep ready for rolling the corner, trimming, etc

Ran out of time to roll the corner today - probably Tuesday night's job.
D
|
|
|
coozer
|
| posted on 8/9/13 at 10:11 AM |

|
|
Smashing work there, some good tips for other builders to follow.
Keep it up 
1972 V8 Jago
1980 Z750
|
|
|
TheGecko
|
| posted on 9/9/13 at 03:21 AM |

|
|
Thanks for the support coozer. It makes the sore hands and back feel a bit more worthwhile
D
|
|
|
TheGecko
|
| posted on 10/9/13 at 01:35 PM |

|
|
Another fairly successful night bashing tin 
Put a 90 degree roll in the panel

Then clamped it in place and marked edges for trimming etc
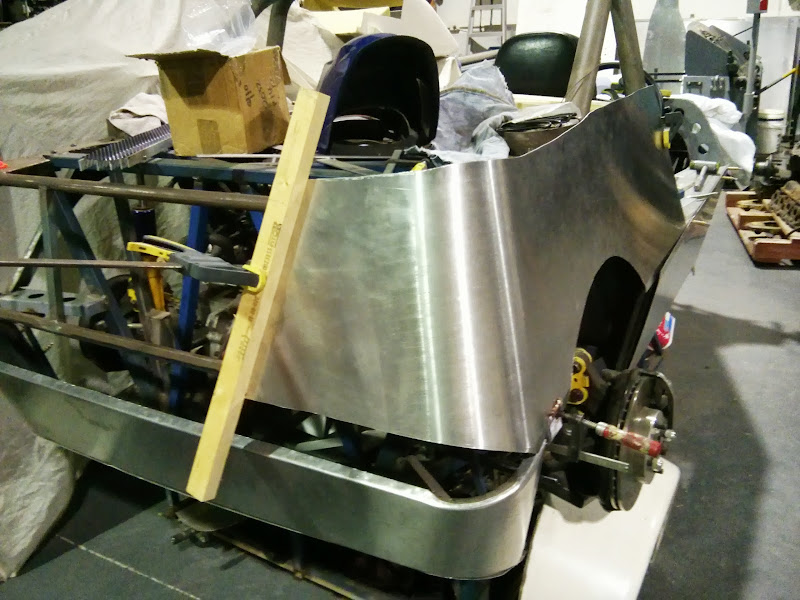
Did the bottom edge first
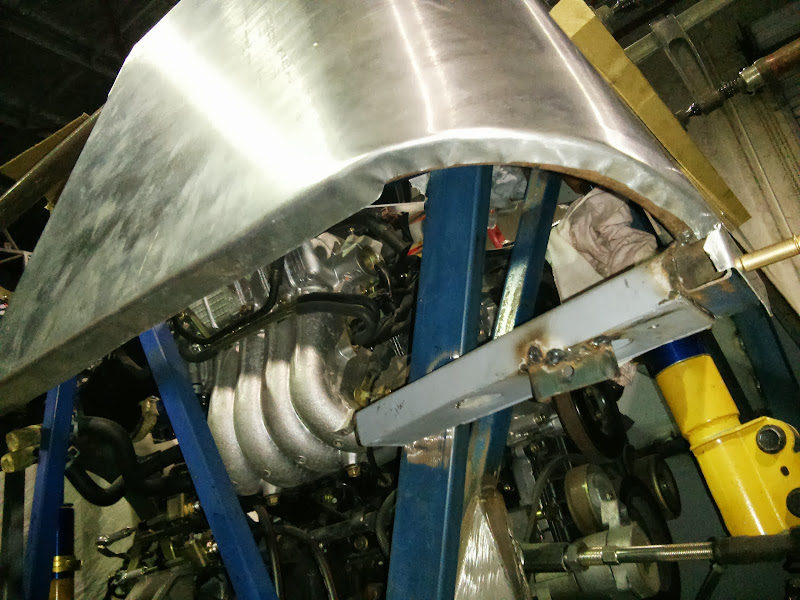
No detail photos of the top edge going over (because some of it's not all that pretty yet  ) but here's the end result with the lower
tail and grille panel in place ) but here's the end result with the lower
tail and grille panel in place

Now I need to make another one for the other side and then the little removable "boot lid" panel that goes between them.....
D
|
|
|
TheGecko
|
| posted on 14/9/13 at 09:27 AM |

|
|
Not getting much opportunity to work on the car - trade-off with it being in Paul's workshop is that it's a 50km round trip 
Still, got the top edges of the side/rear panel tidied up enough to be presentable 

Plus, I've been doing some wood-work.....

Which, with a test scrap of ali in it, looks like this...

And makes parts like this..

Some adjustments needed to various dimensions before it's ready for prime time (i.e. to use on an existing panel  ) )
Nothing more until some time next week now.....
|
|
|
John Bonnett
|
| posted on 14/9/13 at 10:11 AM |

|
|
quote:
Originally posted by TheGecko
Not getting much opportunity to work on the car - trade-off with it being in Paul's workshop is that it's a 50km round trip 
Still, got the top edges of the side/rear panel tidied up enough to be presentable 

Plus, I've been doing some wood-work.....

Which, with a test scrap of ali in it, looks like this...

And makes parts like this..

Some adjustments needed to various dimensions before it's ready for prime time (i.e. to use on an existing panel  ) )
Nothing more until some time next week now.....
Ah, you've discovered the joys of hammerforming Dominic. You're on the slippery slope now. I did warn you that metal shaping can take
over your life 
The whole project is absolutely magnificent and I really enjoy reading about it and of course looking at the pictures.
I'd appreciate your advice on how best to load pictures up and i'll then update my project.
Best regards
John
|
|
|
TheGecko
|
| posted on 14/9/13 at 10:19 AM |

|
|
Thanks John. In some ways I wish I was at the beginning of the project again because there's so much I've learned along the way that
I'd like to apply 
I'll write you a direct email about how I post images here - hopefully it'll work for you.
D
|
|
|
John Bonnett
|
| posted on 14/9/13 at 12:38 PM |

|
|
quote:
Originally posted by TheGecko
Thanks John. In some ways I wish I was at the beginning of the project again because there's so much I've learned along the way that
I'd like to apply 
I'll write you a direct email about how I post images here - hopefully it'll work for you.
D
That would be really good Dominic, thank you. I think we have all been in that position where you have learned from your experience and realise that
there are sometimes other and possibly better ways to tackle a job or even maybe an improvement in the design. But you have every reason to be really
proud of what you have achieved. It is a terrific undertaking to build a car from scratch and the first drive will be absolutely memorable.
You'll think, "I made this, and I'm driving it" And then you'll smile  
|
|
|


