FuryRebuild
|
| posted on 22/9/12 at 09:49 AM |

|
|
footwell access hatch complete, lots of pictures
Following on from this blog post about how I needed to change
my footwell configuration a bit (i.e. chop it all out and start again), I thought I'd share the access hatch design and fabrication with you.
Once I've got it all welded in (today's job) then more pics will follow.
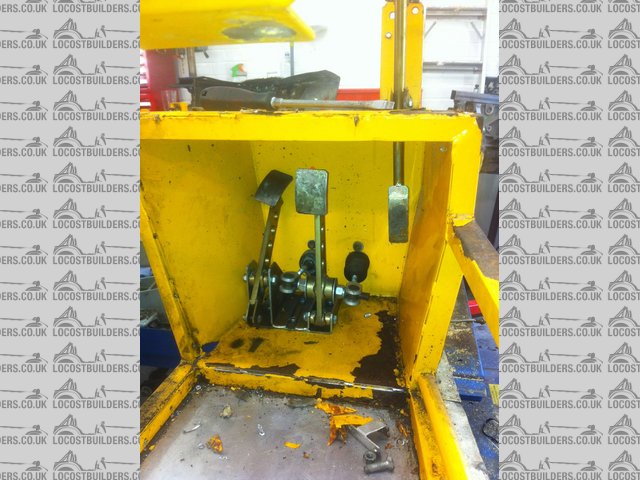
First of all, this is the original Fury setup:
Description
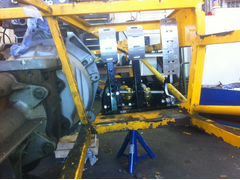
And this is how it looks with the engine in place and the new bellhousing somewhat intruding, like a horny drunk at a funeral:
Description
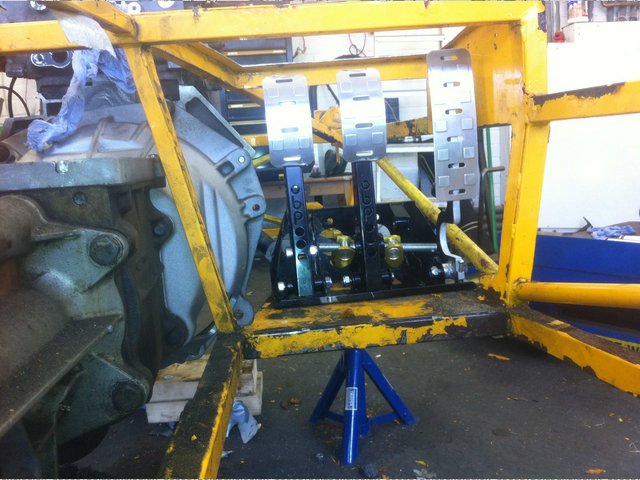
Here things are with the new cross member in there, duratec still in place for reference:
 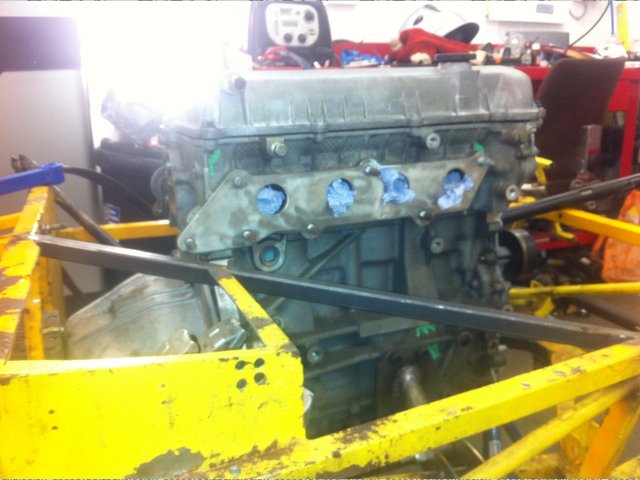
Description
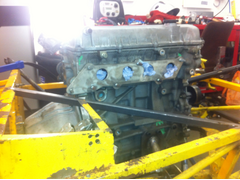
And now everything's been cut away
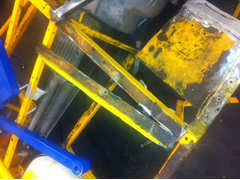 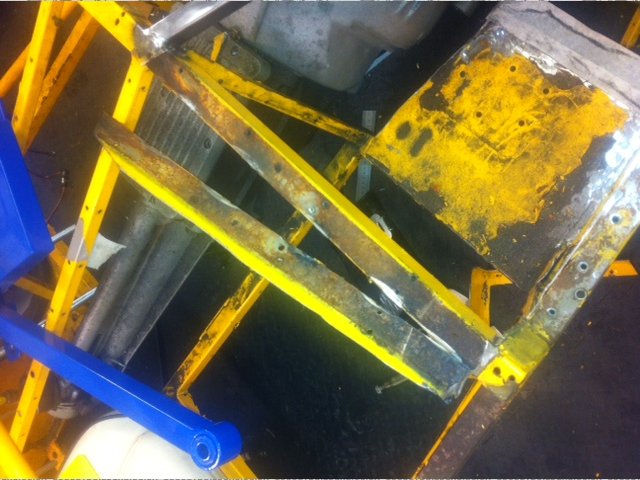
Description
New cardboard/hardboard formers made. Lots and lots of hot-glue and gaffer tape went into this.
 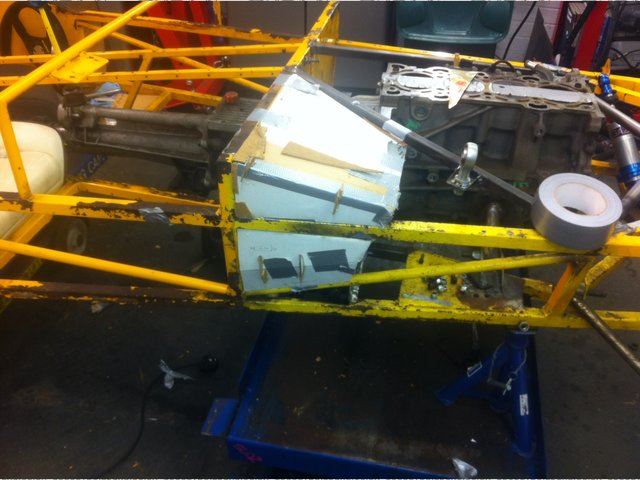
Description
which became this:
Description
which became this:
Description
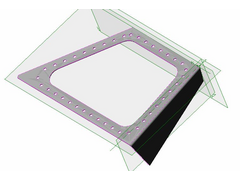
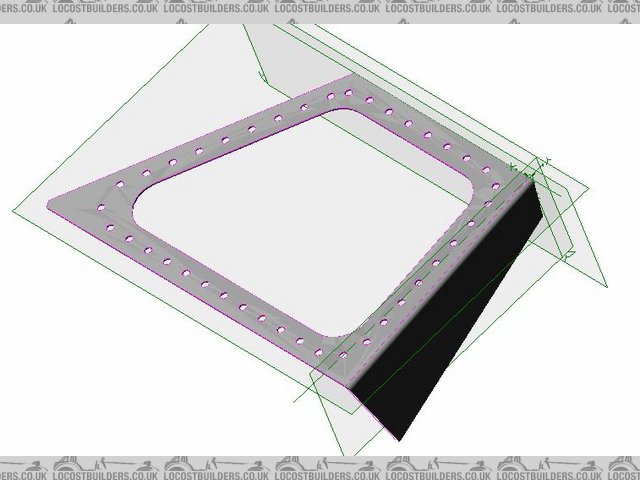
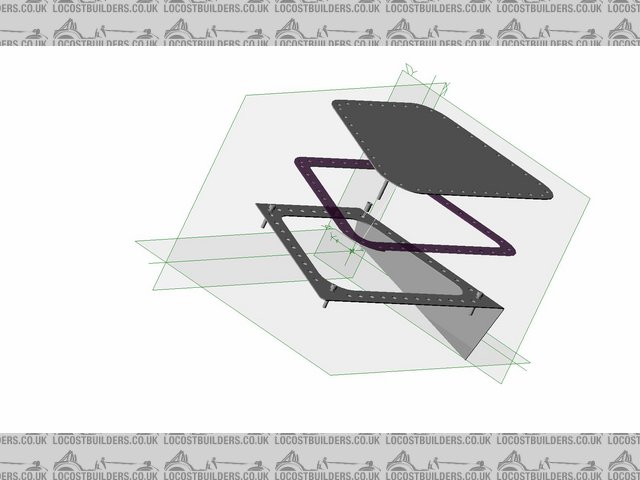
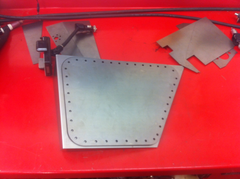
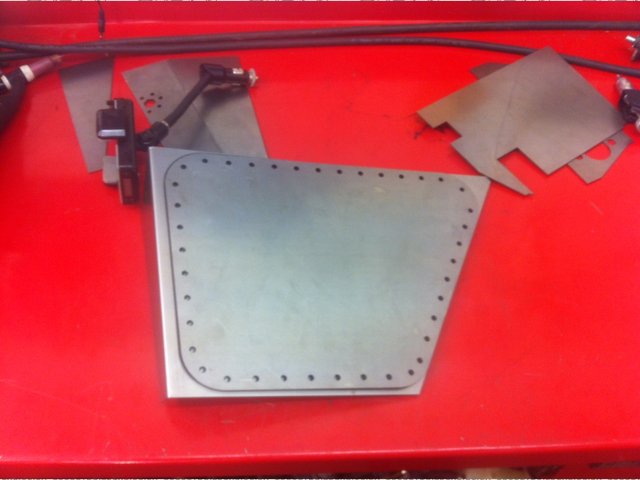
Then the happy moment - the laser cutters gave birth to this:
 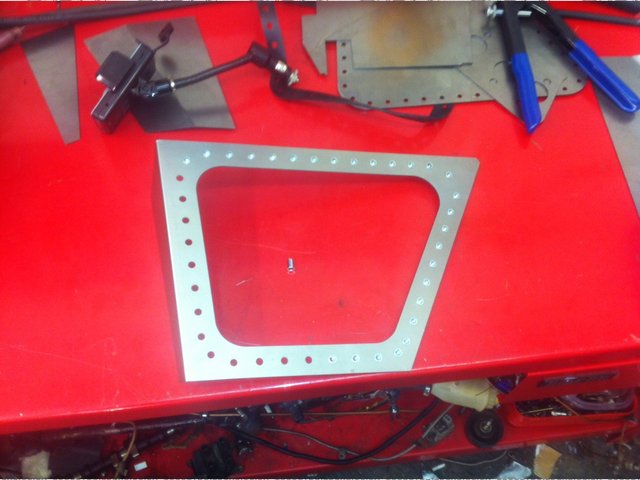
Description
and I added the nutserts so I didn't have to suffer lots of grief unbolting the top panel - this is meant to give easy access to the the
footwell, not make it worse:
 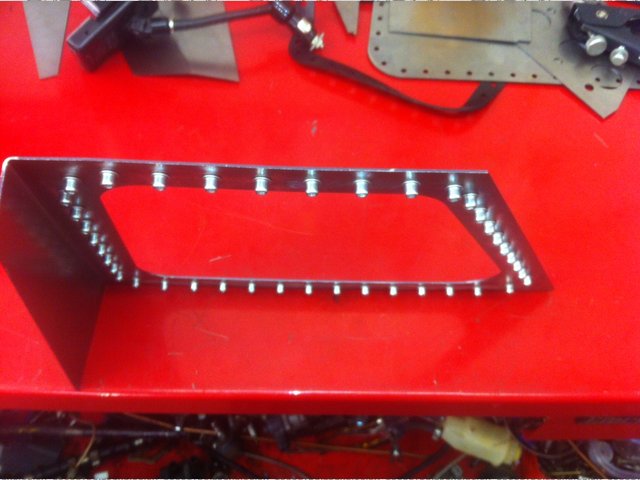
Description
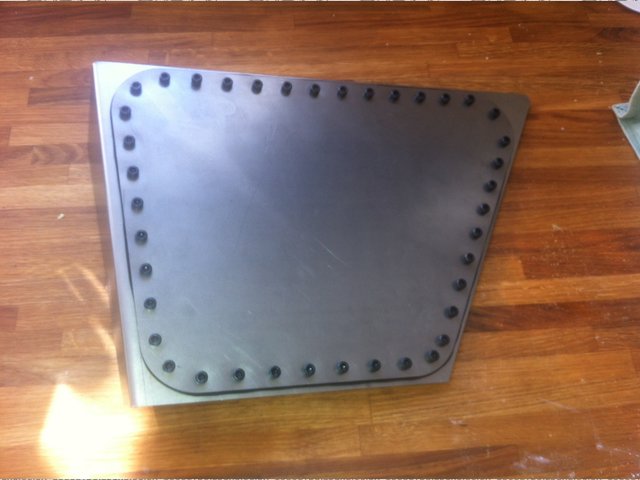
here's the trial fit of the 3mm nitrile rubber gasket. The holes in the rubber are 1mm diameter greater than the holes the nutserts went into
(7mm) to allow for the slightly wider diameter of the nutsert - everything should fit flush
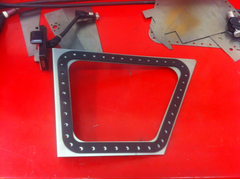 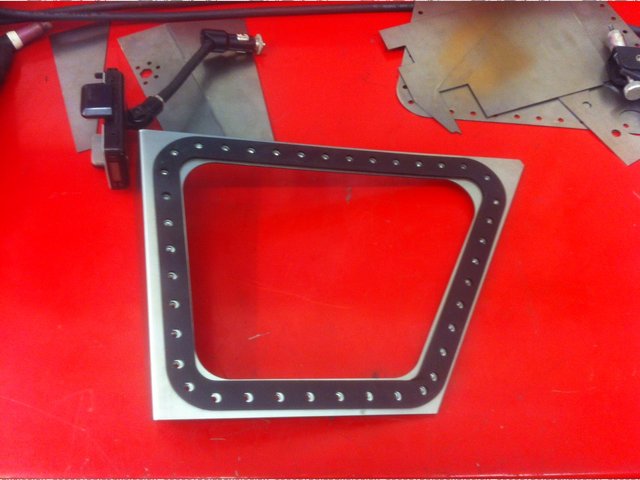
Description
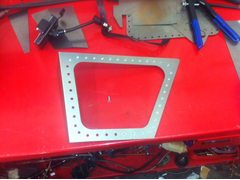
Finally, the top panel is trial fitted
Description
and bolted 
Description
All that's left to do is to dissasemble, and tack weld each nutsert in place from the back - they can lose their grip and spin, rendering them
useless. A simple tack on the other hand makes them an excellent solution.
This is what they look like up close - they protrude 0.5mm so nearly flush
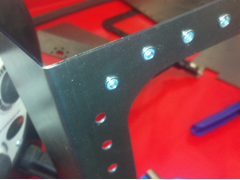 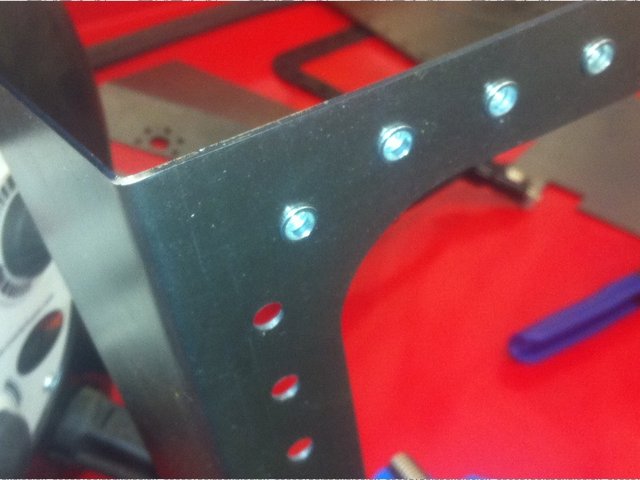
Description
[Edited on 22/9/12 by FuryRebuild]
When all you have is a hammer, everything around you is a nail.
www.furyrebuild.co.uk
|
|
|
|
|
HowardB
|
| posted on 22/9/12 at 09:56 AM |
|
|
very impressive, clearly you own more than just a hammer!
Howard
Fisher Fury was 2000 Zetec - now a 1600 (it Lives again and goes zoom)
|
|
|
FuryRebuild
|
| posted on 22/9/12 at 10:36 AM |
|
|
Thanks Howard.
I choose to reply using a photograph:
 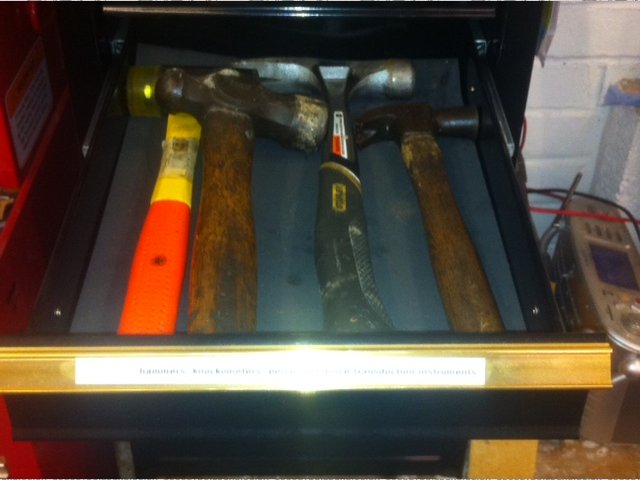
Description
The label on that drawer is "hammers, knockometers, percussive force transducers".
When all you have is a hammer, everything around you is a nail.
www.furyrebuild.co.uk
|
|
|
blakep82
|
| posted on 22/9/12 at 10:39 AM |
|
|
how many times do you think you'll use ALL of those rivnuts? 
________________________
IVA manual link http://www.businesslink.gov.uk/bdotg/action/detail?type=RESOURCES&itemId=1081997083
don't write OT on a new thread title, you're creating the topic, everything you write is very much ON topic!
|
|
|
bi22le
|
| posted on 22/9/12 at 11:22 AM |
|
|
Looks very neat. I do agree. Little with Blake thinking that quick easy access is not undoing 50 dome head screws to get a panel off!
Nice execution though.
Track days ARE the best thing since sliced bread, until I get a supercharger that is!
Please read my ring story:
http://www.locostbuilders.co.uk/forum/13/viewthread.php?tid=139152&page=1
Me doing a sub 56sec lap around Brands Indy. I need a geo set up! http://www.youtube.com/watch?v=EHksfvIGB3I
|
|
|
FuryRebuild
|
| posted on 22/9/12 at 11:24 AM |
|
|
Well, there are a couple of aspects behind my decision to go hog wild with the nutserts:
1) getting down into the footwell is a pig when adjusting anything to do with the brakes or throttle cables, so having to get my arm in there to undo
anything on the back of the hatch will be nearly as bad as not bothering with the hatch, and will require two people to do it
2) lots of smaller (5mm) cap screws spreads the clamping force around better than larger ones, and the gaps between are about where the diameter of
the clamping force meets, hence getting something uniform
3) in the case of an impact I have a lot more bolts to spread the sheer force around, hopefully making it stronger
4) aesthetics
5) these 5mm cap screws match the length of the nutsert when tightened with the 3mm offset of the rubber gasket, so it's the minimum protrusion
into the footwell
When all you have is a hammer, everything around you is a nail.
www.furyrebuild.co.uk
|
|
|
omega 24 v6
|
| posted on 22/9/12 at 11:24 AM |
|
|
Nice but surely you must have shares in a rivnut company?
If it looks wrong it probably is wrong.
|
|
|
FuryRebuild
|
| posted on 22/9/12 at 11:25 AM |
|
|
I buy them in bulk (50 off at a time - then they cost a tenner).
When all you have is a hammer, everything around you is a nail.
www.furyrebuild.co.uk
|
|
|
designer
|
| posted on 22/9/12 at 11:26 AM |
|
|
Good work but, over-engineered, way too many fasteners. They don't use that many on planes.
|
|
|
FuryRebuild
|
| posted on 22/9/12 at 11:27 AM |
|
|
Hi Bizzle.
With an electric or air screw-driver it is quick enough - 5 mins max. Access isn't for spot maintenance, but in case something serious needs
doing. I've worked in the fury footwell before and it's a good job I like caving. When you're lying on your back on the seat with
your legs in the air and your head in the footwell it can get a little claustrophobic.
I also have a remote bias adjuster so I shouldn't need to adjust down there very often, but even for fitting the pedal box and setting it up the
first time, the access hatch will have paid for itself.
When all you have is a hammer, everything around you is a nail.
www.furyrebuild.co.uk
|
|
|
FuryRebuild
|
| posted on 22/9/12 at 11:32 AM |
|
|
Hi Designer
Porsche 962 - structural rivet gaps - 25mm with alternate interference rivets if you need them.
My spacings between cap screws - 25mm. I'm confident it's the right solution to get a structural panel connection.
When all you have is a hammer, everything around you is a nail.
www.furyrebuild.co.uk
|
|
|
designer
|
| posted on 22/9/12 at 11:57 AM |
|
|
quote:
Porsche 962 - structural rivet gaps - 25mm with alternate interference rivets if you need them.
Agree, but they are structural!!
Access panel openings usually have a frame, or are swaged, and the panel held on by very few fastenings.
http://westfieldbec.weebly.com/build-diary.html
http://pitstopusa.com/i-5076707-allstar-performance-access-panel-kit-6-x-6.html
|
|
|
phelpsa
|
| posted on 22/9/12 at 12:00 PM |
|
|
quote:
Originally posted by FuryRebuild
Hi Designer
Porsche 962 - structural rivet gaps - 25mm with alternate interference rivets if you need them.
My spacings between cap screws - 25mm. I'm confident it's the right solution to get a structural panel connection.
Maybe in 16 gauge ali, not necessarily in 14 gauge steel...
|
|
|
bi22le
|
| posted on 22/9/12 at 12:24 PM |
|
|
Hey lets not beat furyrebuild down about this. Its his car and I think he can hear our opinions loud and clear.
He went down the effort of desinging and laser cutting the parts, im sure he thought hard about the amount of fixings used.
Track days ARE the best thing since sliced bread, until I get a supercharger that is!
Please read my ring story:
http://www.locostbuilders.co.uk/forum/13/viewthread.php?tid=139152&page=1
Me doing a sub 56sec lap around Brands Indy. I need a geo set up! http://www.youtube.com/watch?v=EHksfvIGB3I
|
|
|
TheGiantTribble
|
| posted on 22/9/12 at 03:17 PM |
|
|
I was impressed with the cardboard/hardboard bit
as for the rest
WOW well impressed
|
|
|
FuryRebuild
|
| posted on 22/9/12 at 03:43 PM |
|
|
I've been fighting it a little since I posted this.
I've welded all the bazillion nutserts into place, and had a few of them have the weld leak a little onto the thread.
Turns out my m5*.8 tap is blunt. So, off to buy a new set.
Crap; it's a difficult job fabricating this, but the end result should be worth it. I tend to find the time invested in making something
sensibly demountable is always worth it.
to quote Douglas Adams: "the major difference between a thing that might go wrong and a thing that cannot possibly go wrong is that when a
thing that cannot possibly go wrong goes wrong, it usually tuens out impossible to get at or repair"
[Edited on 22/9/12 by FuryRebuild]
When all you have is a hammer, everything around you is a nail.
www.furyrebuild.co.uk
|
|
|
ashg
|
| posted on 22/9/12 at 05:47 PM |
|
|
quote:
Originally posted by FuryRebuild
I buy them in bulk (50 off at a time - then they cost a tenner).
bulk? they come in boxes of 1000
i have got 8 m5 fixings holding the inspection plate on over the top of my pedal box and that is a pain in the ass to undo, hope you never have to
take it off at the side of the road if you balance bar or something moves down there.
Anything With Tits or Wheels Will cost you MONEY!!
Haynes Roadster (Finished)
Exocet (Finished & Sold)
New Project (Started)
|
|
|
FuryRebuild
|
| posted on 22/9/12 at 06:27 PM |
|
|
We have a great motor factor in Harrogate who buys in quantities like that, then sells in lots of 100 (minimum spend). It means I never think about
reusing a locknut for instance.
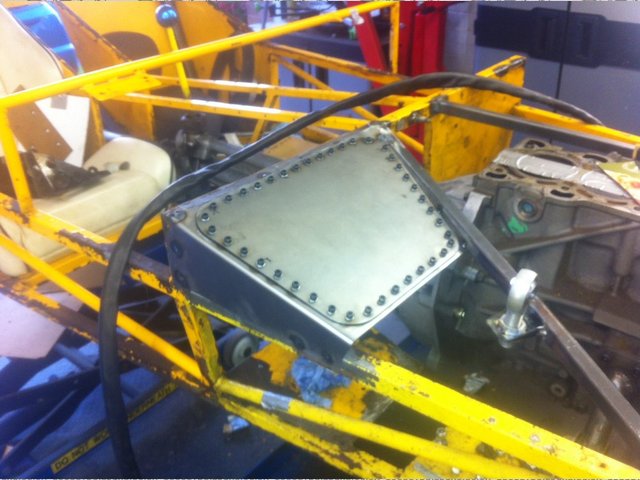
Here is the top tacked in place, ready for the rest of the footwell to get tacked in.
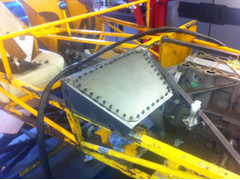 
Description
When all you have is a hammer, everything around you is a nail.
www.furyrebuild.co.uk
|
|
|
Doctor Derek Doctors
|
| posted on 23/9/12 at 12:44 PM |
|
|
quote:
Originally posted by FuryRebuild
2) lots of smaller (5mm) cap screws spreads the clamping force around better than larger ones, and the gaps between are about where the diameter of
the clamping force meets, hence getting something uniform
Your rivnuts sit proud of the plate so you have no clamping force between your two plates, you only have a clamping load between the cover plate and
the small amount of Rivnut that sits proud from the flange plate. If you want a clamping load you'll need to use nuts and bolts or rivets that
actually clamp the plates together.
You'd probably get a much better result using about 1/4 of the amount of nuts and bolts or rivets than all of those rivnuts.
Designer and Supplier of the T89 Designs - Single Seater Locost. Build you own Single Seater Racecar for ~£5k.
Plans and Drawings available, U2U or e-mail for details.
Available Now: The Sports Racer Add-On pack, Build a full bodied Sports Racer for Trackdays, Sprints and Racing.
www.t89.co.uk
www.racecarwings.co.uk
callan@t89.co.uk
|
NOTE:This user is registered as a LocostBuilders trader and may offer commercial services to other users
|
Doctor Derek Doctors
|
| posted on 23/9/12 at 02:10 PM |
|
|
Just noticed the gasket.... doh
Designer and Supplier of the T89 Designs - Single Seater Locost. Build you own Single Seater Racecar for ~£5k.
Plans and Drawings available, U2U or e-mail for details.
Available Now: The Sports Racer Add-On pack, Build a full bodied Sports Racer for Trackdays, Sprints and Racing.
www.t89.co.uk
www.racecarwings.co.uk
callan@t89.co.uk
|
NOTE:This user is registered as a LocostBuilders trader and may offer commercial services to other users
|
ashg
|
| posted on 23/9/12 at 03:02 PM |
|
|
quote:
Originally posted by ashg
quote:
Originally posted by FuryRebuild
I buy them in bulk (50 off at a time - then they cost a tenner).
bulk? they come in boxes of 1000
i have got 8 m5 fixings holding the inspection plate on over the top of my pedal box and that is a pain in the ass to undo, hope you never have to
take it off at the side of the road if you balance bar or something moves down there.
again i come back to my previous comment. 50 rivnuts for £10. your having your pants well and truely pulled down. a box of 1000 is only £15-20
even buying them in 50's from memfast is only £3 for 50 including posting them out in a stamped envelope
http://www.memfast.co.uk/shop/Vcat1.asp?cat=2251005045
Anything With Tits or Wheels Will cost you MONEY!!
Haynes Roadster (Finished)
Exocet (Finished & Sold)
New Project (Started)
|
|
|
RoadkillUK
|
| posted on 23/9/12 at 03:58 PM |
|
|
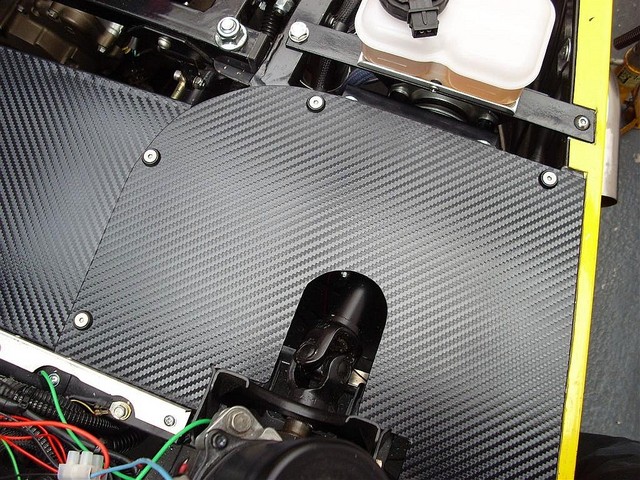
This is ours, as you can see, that was in 2004 and it's fine still.
That means 2 things
1) It's fine with only a few self tappers, and ...
2) I'm taking you to court Apple Style!
OK, admittedly yours shows a bit more quality, back to that Apple Style again 

Roadkill - Lee
www.bradford7.co.uk
Latest Picture (14 Sept 2014)
|
|
|
40inches
|
| posted on 23/9/12 at 08:20 PM |
|
|
I used 4 screws on mine, perhaps the MK chassis is stronger, so the panel doesn't need to be structural?
Carbon fibre2?
|
|
|
FuryRebuild
|
| posted on 23/9/12 at 08:29 PM |
|
|
HI 40 inches
The fury chassis is already very strong (I've had one off on the track with it), but where my feet are concerned, I wanted it in a nice, strong
sealed box regardless. That's also why I've used nitrile rubber for the gasket; it's fuel proof and means I can maintain a full
fluid seal to the engine bay and it'll clamp down good and tight and never rattle.
The effort in doing all the holes in cad was about 30 minutes, and it took more time to align the parts to do an interference fit check than it did to
make the holes, panels, etc.
When all you have is a hammer, everything around you is a nail.
www.furyrebuild.co.uk
|
|
|
DavidW
|
| posted on 23/9/12 at 08:38 PM |
|
|
quote:
Originally posted by 40inches
I used 4 screws on mine, perhaps the MK chassis is stronger, so the panel doesn't need to be structural?
Carbon fibre2?
Did you put something under that access panel to make it sit flat on the chassis?
I made my panel as one piece - once I'm I'm through IVA and into winter I'll be changing it. I'd rather have all those rivnuts
than the huge disassembly I have to face just adjust the pedals....
David
|
|
|