40inches
|
| posted on 23/9/12 at 08:41 PM |

|
|
quote:
Originally posted by FuryRebuild
HI 40 inches
The fury chassis is already very strong (I've had one off on the track with it), but where my feet are concerned, I wanted it in a nice, strong
sealed box regardless. That's also why I've used nitrile rubber for the gasket; it's fuel proof and means I can maintain a full
fluid seal to the engine bay and it'll clamp down good and tight and never rattle.
The effort in doing all the holes in cad was about 30 minutes, and it took more time to align the parts to do an interference fit check than it did to
make the holes, panels, etc.
That sounds reasonable  The MK footwell is a welded steel box, so I suppose a light lid is acceptable. The MK footwell is a welded steel box, so I suppose a light lid is acceptable.
|
|
|
|
|
FuryRebuild
|
| posted on 23/9/12 at 09:04 PM |
|
|
Yeah - the original fury pedal box is 1.5mm folded and stitch welded. It's not a bad affair, but isn't compatible with a good pedal-box
and was designed for cable, not hydraulic clutch. Even after the pedal box, there isn't room for the duratec housing. Either way, it was coming
out and the new shape was necessarily more complex to handle the bellhousing and travel for the pedals.
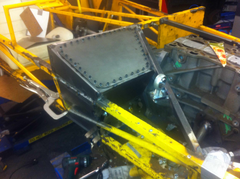
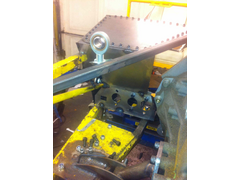
Here's the top down view of it all tacked in place. You can just see the throttle pedal poking through ready to get a little box made for it.
Description
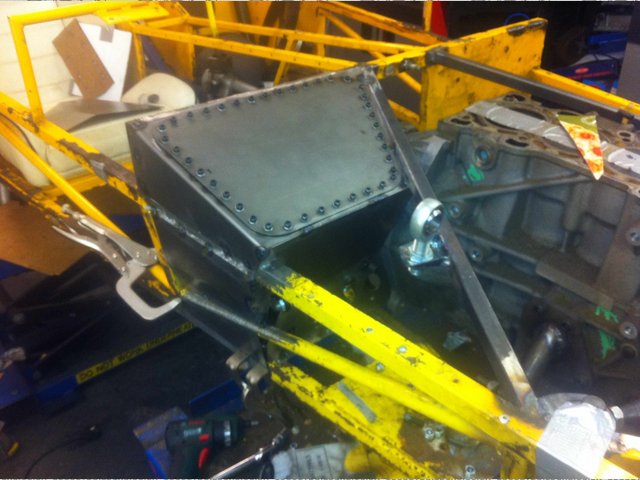
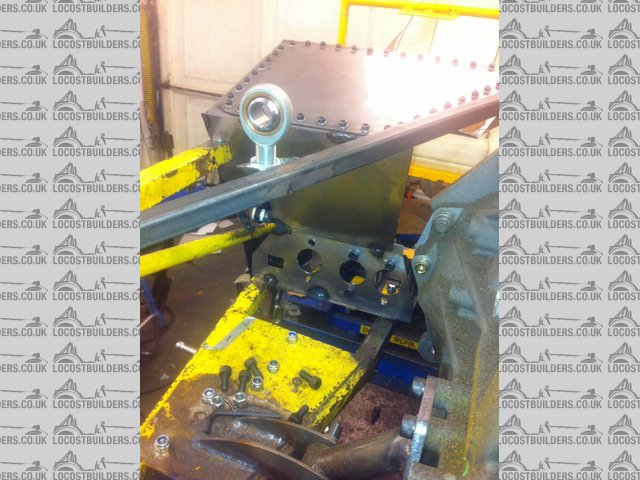
Here's the view ready for the brake cylinders to go in. I only had one bolt-hole with a missmatch, and it needed opening out by 1mm.
Description
All that remains is to put the complex transmission tunnel panel in, but that will require taking the engine off its mounts and moving it over a
little. No hassle doing this.
Once complete, the engine and box can come out so everything can be seam welded.
I deliberately made the side panel in several pieces to be welded to the cross members. The main reason for this was to be sure the sand-blaster and
powder-coater could get in there and no panel remained exposed.
When all you have is a hammer, everything around you is a nail.
www.furyrebuild.co.uk
|
|
|
FuryRebuild
|
| posted on 23/9/12 at 09:07 PM |
|
|
Roadkill
My panel is round, yours is square. I used nutserts. I think we're fine for patent battles.
When all you have is a hammer, everything around you is a nail.
www.furyrebuild.co.uk
|
|
|
40inches
|
| posted on 23/9/12 at 09:16 PM |
|
|
That will look the biz when it's all powder coated. Good feeling when a plan comes together, isn't it?
|
|
|
loggyboy
|
| posted on 24/9/12 at 01:25 PM |
|
|
Was the gasket cut out of a large sheet or a carefully placed 1inch wide roll?
Mistral Motorsport
|
|
|
FuryRebuild
|
| posted on 24/9/12 at 01:30 PM |
|
|
Hi loggyboy
It's 3mm fuel resistant nitrile, water jet cut to my pattern. It was the most expensive part and I also bought a spare.
When all you have is a hammer, everything around you is a nail.
www.furyrebuild.co.uk
|
|
|
loggyboy
|
| posted on 24/9/12 at 01:36 PM |
|
|
quote:
Originally posted by FuryRebuild
It was the most expensive part and I also bought a spare.
Thats all i need to know, i'l stick with the plan to use this for my pedal box seal! NEOPRENE RUBBER SELF ADHESIVE STRIP 25mm
x 3mm X 10MTR | eBay
Mistral Motorsport
|
|
|
FuryRebuild
|
| posted on 24/9/12 at 01:47 PM |
|
|
That's a good choice.
I wanted to be sure I was protected from the fuel, but at the same time that was the stock rubber my engineering shop carried. The gaskets were £25
each! Needless to say the costs come down considerably when ordering in bulk
When all you have is a hammer, everything around you is a nail.
www.furyrebuild.co.uk
|
|
|
nick205
|
| posted on 25/9/12 at 06:11 PM |
|
|
I like the detail and execution of the design myself. I've been following your rebuild for a while and like the attention to detail
you're applying. Should be a very tidy car when completed and very satisfying too.
|
|
|
JonT
|
| posted on 25/9/12 at 06:28 PM |
|
|
Holy moly, that's a recipe for RSI 
I also have just four bolts on the cover over my Striker footwell. Definitely agree it's VERY handy to have...there are just sometimes some jobs
where you don't want to be hanging upside down in the footwell with your feet dangling over the rollbar...been there before!
Jon
"People were created to be loved, things were created to be used. The reason why the world is in CHAOS is because things are being loved and people
are being used"
|
|
|
mcerd1
|
| posted on 27/9/12 at 12:39 PM |
|
|
personally I think its a bit OTT but very nicely executed 
but then plenty of folk on this site have gone way OTT on at least one part of there cars
.
I don't even want to admit how much time, effort and cash have gone into some bits of my car - and mine doesn't even look like a car yet !
-
|
|
|
FuryRebuild
|
| posted on 27/9/12 at 02:30 PM |
|
|
Hi Mcerd1
It was a pain when I originally built the car, so I wanted to do something very different.
Designing the parts for the top and hatch, gasket etc. wasn't too much effort; probably three hours all in. The footwell needed replacing anyway
to accommodate the pedal box. Of the 3 hours, maybe an extra 30 minutes went into the extra design of the hatch.
It takes about 5 mins to screw all the cap-screws into place with a good electric screw driver; not a major hassle for something I never intended to
be an on-again, off again part.
You're right - we all tend to obsess about some things. I wanted the pedal box to remain very strong even with a gurt hole cut in the top,
rather than lose it's structural integrity.
It's taken a lot of time to seam weld it all in place (rather than stitch) but I'm nearly there now. Once it's powder coated,
it'll look the muts. I remember watching an episode of top gear where St Jeremy got the bonnet up on a Alfa 3.0 156 and pointed out that the
exhuast manifold pipes were chromed. Unnecessary but great. I think I've engineered my bits a bit the same, but I was working to my own spec of
"lots of access, lots of strength, no rattles, reliable fluid seal in the bulkhead area".
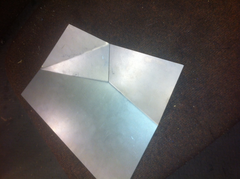
Of all the panels I designed and had made, this is my favourite. It gives the clearance around the bellhousing at the same time as enough clearance
with the clutch pedal. It was bent up from flat, and when bent properly, the slit is less than 0.5mm wide.
Description
When all you have is a hammer, everything around you is a nail.
www.furyrebuild.co.uk
|
|
|
mcerd1
|
| posted on 27/9/12 at 03:10 PM |
|
|
I feel a new thread coming on here
quote:
Originally posted by FuryRebuildI think I've engineered my bits a bit the same, but I was working to my own spec of "lots of
access, lots of strength, no rattles, reliable fluid seal in the bulkhead area".
Sound like my plan for this area on my dax, although strength should be much less of an issue (the dax chassis is quite different)
quote:
Originally posted by FuryRebuild
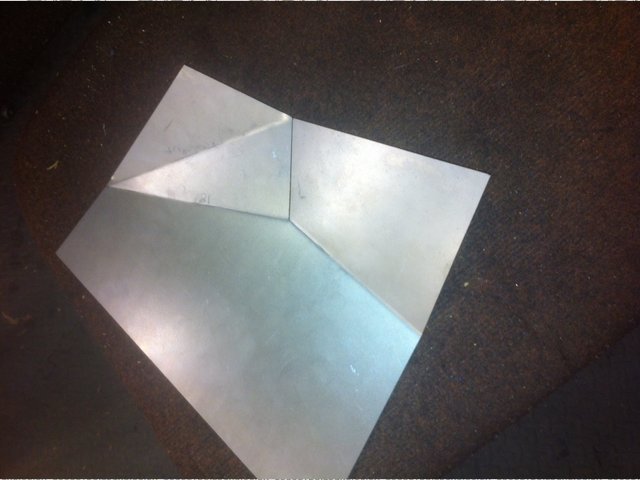
Of all the panels I designed and had made, this is my favourite. It gives the clearance around the bellhousing at the same time as enough clearance
with the clutch pedal. It was bent up from flat, and when bent properly, the slit is less than 0.5mm wide.
Description
I take it you had that waterjet/laser cut too ?
for the most part I'll end up just using my dads guillotine and box pan folder with some thin alloy sheet, not quite as fancy but it should make
a neat enough job
-
|
|
|
FuryRebuild
|
| posted on 27/9/12 at 03:47 PM |
|
|
Yes - that was laser cut and put through the robot press brake.
I think you'd get very good results that way - I happened to have good CAD software and went down that route but it did feel like evenings
working on the CAD weren't getting my hands dirty but now it feels like good time invested. there were only a couple of parts that didn't
fit perfectly, and a little adjustment did the job.
When all you have is a hammer, everything around you is a nail.
www.furyrebuild.co.uk
|
|
|
FuryRebuild
|
| posted on 29/9/12 at 04:45 PM |
|
|
time to undo the panel using an electric screw-driver: 2:50. Not a major ball-ache.
When all you have is a hammer, everything around you is a nail.
www.furyrebuild.co.uk
|
|
|
Furyous
|
| posted on 29/9/12 at 08:00 PM |
|
|
That's less time than it took me to get the 8 screws off my access panel after finding the cap heads had rounded off and none of my allen keys
fit.
What about when you have the steering rack and other things in the way?
[Edited on 29/9/12 by Furyous]
|
|
|
DIY Si
|
| posted on 1/10/12 at 09:01 PM |
|
|
More importantly, how long when the screw driver's flat, it's dark and the throttle cable's snapped?
Note, I've only ever had to do this to mine in the day light. But the MK roll bar is just the right height for my feet to rest on! Although it
did give the police officer pause when they came to see what the problem was. Although it
did give the police officer pause when they came to see what the problem was.
Let your plans be dark and as impenetratable as night, and when you move, fall like a thunderbolt.
Sun Tzu, The Art of War
My new blog: http://spritecave.blogspot.co.uk/
|
|
|