John Bonnett
|
| posted on 30/11/19 at 07:10 PM |

|
|
quote:
Originally posted by Oddified
The links fitted at the moment on mine are 1" x 1/8" cds (so just slightly thicker wall than your thinking) with 1/2" unf rod ends
but i always er on the thicker/stronger side than probably necessary....my motto is if in doubt go thicker/stronger! lol. Decent power and grip drag
racing does test things.
Ian
Sorry to be a pain Ian but do you have any photos of your set up. Your design and build obviously works and if you don't mind I'd very
much like to copy it.
I think I'm happy with the specs I've been looking at because at best, my engine will only be knocking out half the power of yours.
[Edited on 30/11/19 by John Bonnett]
|
|
|
|
|
John Bonnett
|
| posted on 17/12/19 at 07:39 AM |

|
|
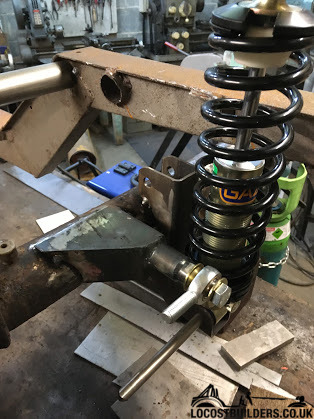
Without the benefit of 3D CAD anymore I have to work out in my head the way things are going to work but we get there in the end. So it's taken
a bit longer to sort out the five link but I'm pretty happy with the design now. I've made a start on putting it together with the
Panhard rod and suspension axle mounts tacked in place.
|
|
|
Mr Whippy
|
| posted on 17/12/19 at 12:31 PM |

|
|
Really quite a sturdy chassis design, would look great if you galvanised it 
|
|
|
John Bonnett
|
| posted on 21/12/19 at 08:10 AM |

|
|
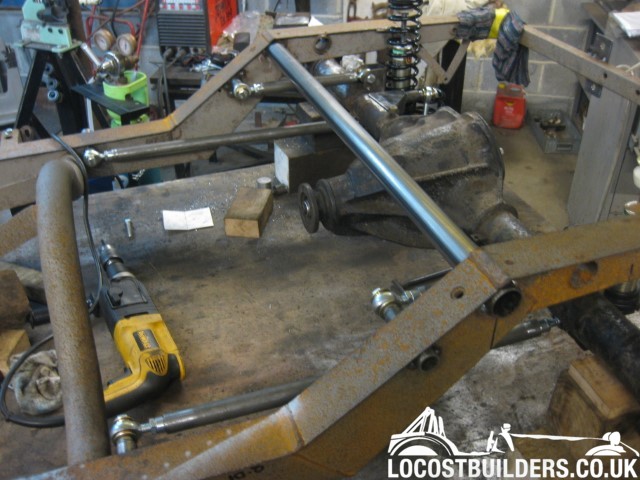
The rear suspension is coming together now with most of it tacked in place. The Panhard rod will complete it which is the next task.
|
|
|
Oddified
|
| posted on 21/12/19 at 09:07 PM |

|
|
Haven't had chance to send you any pictures of my link setup sorry.The lower points are pretty much identical, top links are longer/connect to
the chassis further forward on mine.
My only concern would be bending the stubby tubes running through the chassis with the rod ends screwed into the ends on your setup (all depends on
how much grip and power you have of course though).
Ian
|
|
|
John Bonnett
|
| posted on 21/12/19 at 09:51 PM |

|
|
quote:
Originally posted by Oddified
Haven't had chance to send you any pictures of my link setup sorry.The lower points are pretty much identical, top links are longer/connect to
the chassis further forward on mine.
My only concern would be bending the stubby tubes running through the chassis with the rod ends screwed into the ends on your setup (all depends on
how much grip and power you have of course though).
Ian
Good point Ian and it did cross my mind too. I still haven't ruled out bracing them.
|
|
|
John Bonnett
|
| posted on 24/12/19 at 04:44 PM |

|
|
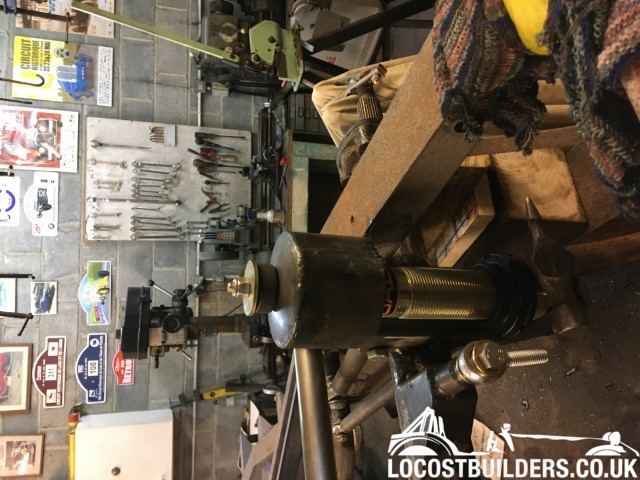
Using my air planishing hammer I've formed a couple of dished ends and rolled two tubes all in 2mm thick mild steel sheet. The ends were welded
to the tubes which will form the top mounts for the rear dampers.

[Edited on 24/12/19 by John Bonnett]
|
|
|
John Bonnett
|
| posted on 2/1/20 at 06:26 PM |

|
|
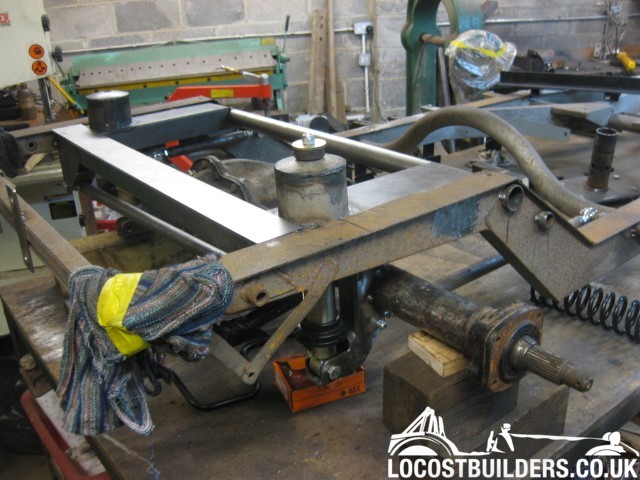
The five link rear suspension is now complete and tacked up.
[Edited on 2/1/20 by John Bonnett]
|
|
|
John Bonnett
|
| posted on 16/2/20 at 05:36 PM |

|
|
Slight change of plan to keep the car legal. Rather than use the MGB axle I'm opting to stay with the Reliant offering. This will then give
more than the minimum 8 points necessary to satisfy the DVLA. I have it on good authority that the internals are good for 150bhp but the weakness is
in the casing. The diff case is alloy and the steel axle tubes an interference fit and secured by taper pins. Evidently the axle doesn't respond
well to 5-link systems. In fact, they break. But if I can address this weakness I stay on the right side of legal, save weight and keep the same stud
pattern back and front.
Bit of a longshot but if anyone on here has any experience using the Reliant axle and a five link set up I'd be pleased to hear from you
|
|
|
John Bonnett
|
| posted on 27/3/20 at 09:59 PM |

|
|
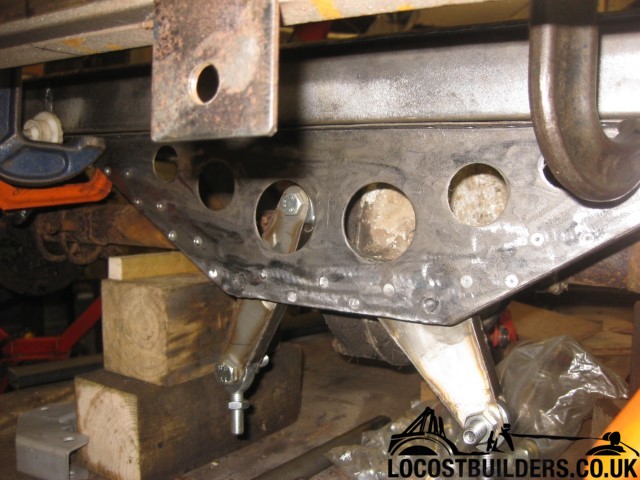
Following my last offering, I'm going to use the Reliant axle and build a Mumford link suspension which has a number of advantages including
confining the loads to the strong part of the axle casing and a roll centre that can be pre-set. I've fabricated the pivoted arm and bell crank
from stainless steel and incorporated oil lite bushes and precision shoulder bolts to act as pivots.
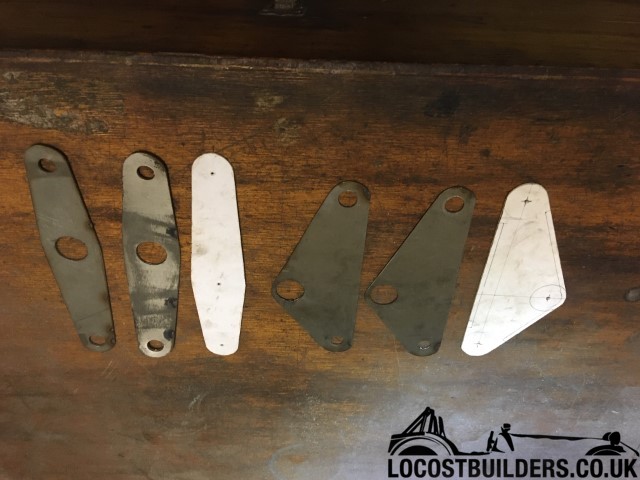
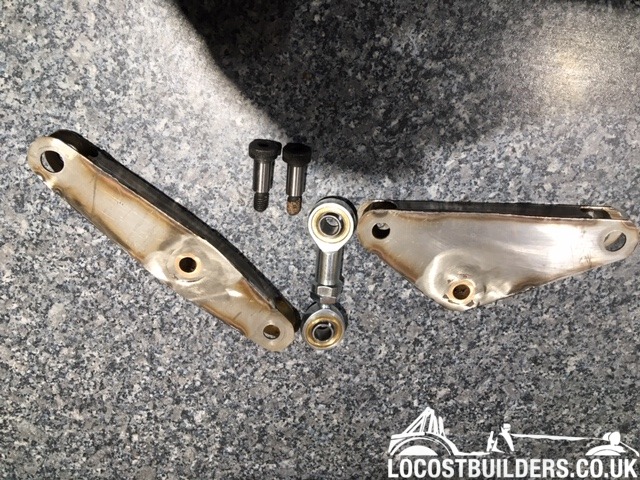
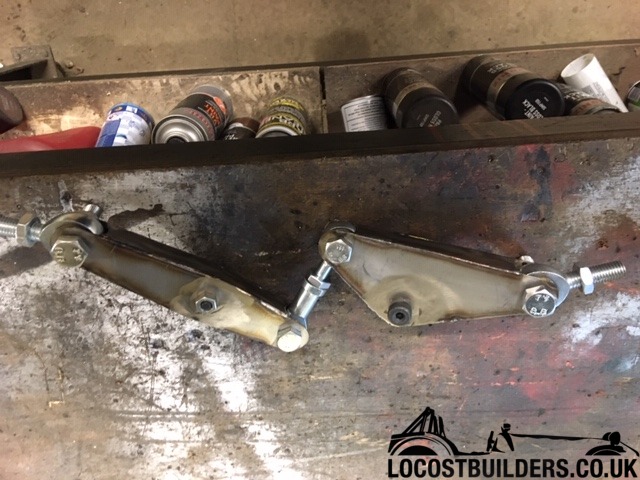
|
|
|
John Bonnett
|
| posted on 30/3/20 at 05:15 PM |

|
|
The Mumford link assembly is now finished and ready to tack onto the chassis.
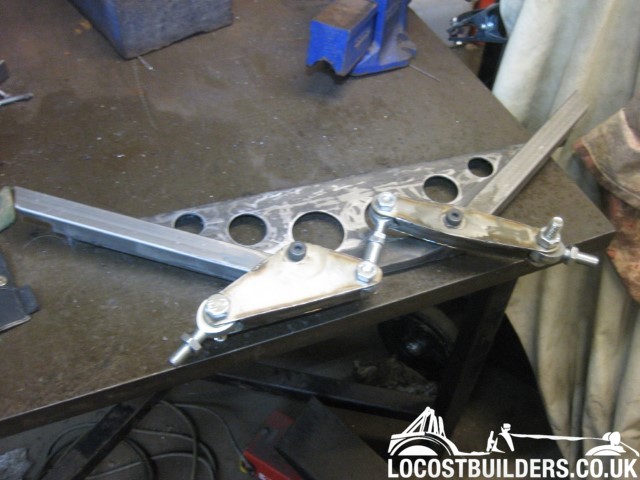
http://locostbuilders.co.uk/upload/3IMG_9023.JPG
|
|
|
John Bonnett
|
| posted on 3/4/20 at 06:33 PM |

|
|
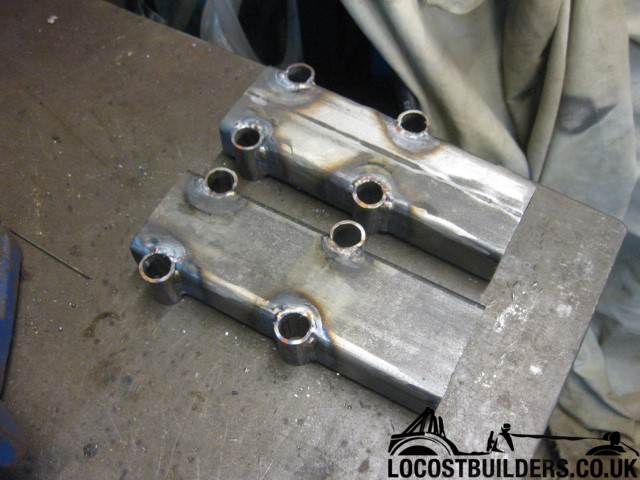
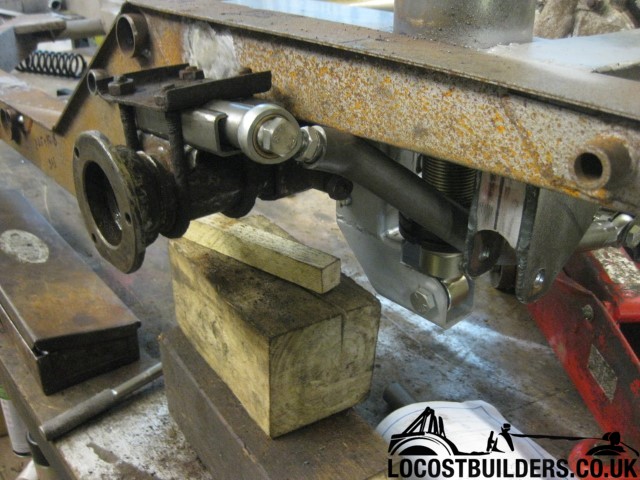
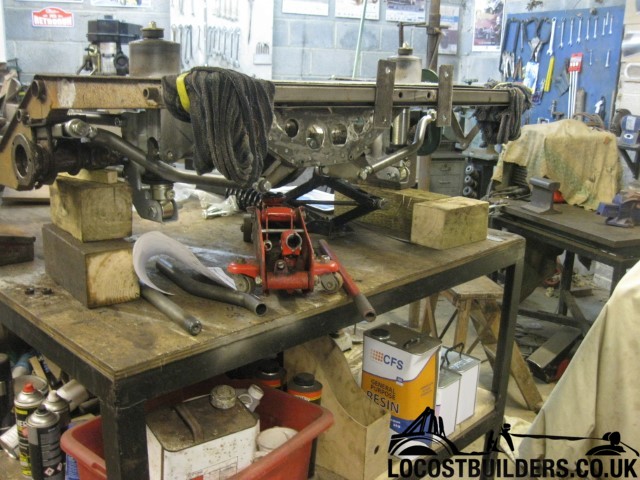
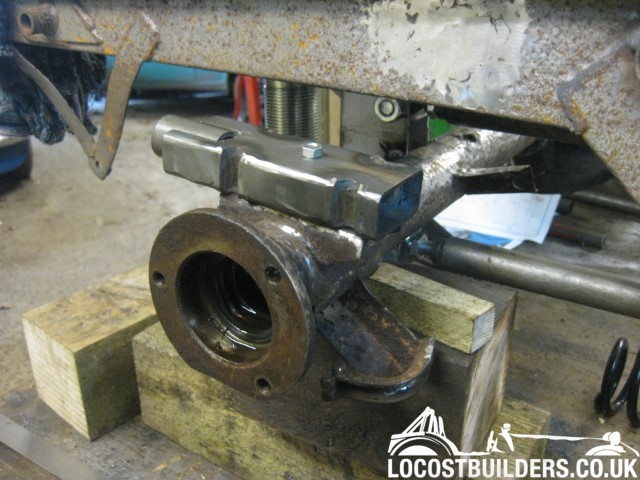
I've done a bit more work on the suspension and it is coming together. The axle mounts will be held in place on the spring saddles by the
original U bolts. There is a clearance problem on full bump where the transverse links foul the chassis but this can be rectified quite easily.

[Edited on 3/4/20 by John Bonnett]
[Edited on 3/4/20 by John Bonnett]
|
|
|
John Bonnett
|
| posted on 5/4/20 at 06:54 AM |

|
|
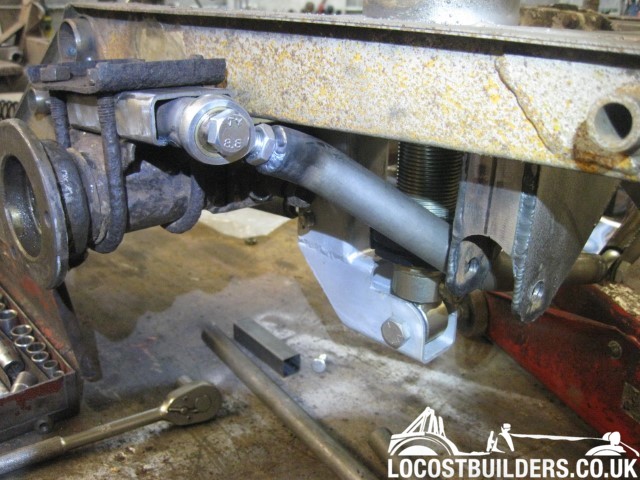
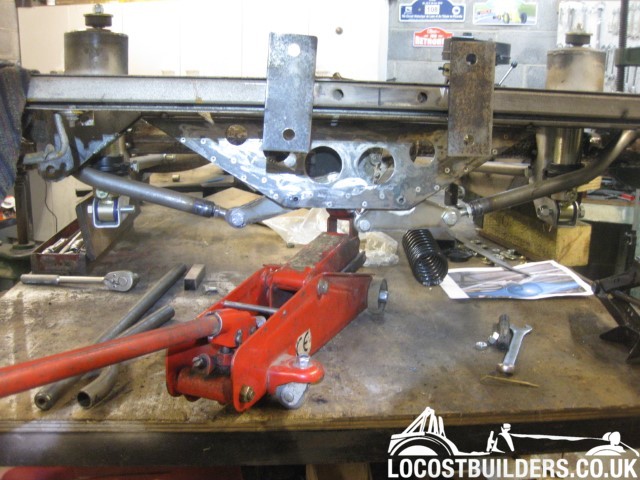
On full bump the link is very close to the chassis and it will probably actually hit the chassis when the bump stop compresses. Jacking the axle
through its entire range of travel hasn't highlighted and other problems. Contrary to what I was expecting, as the axle is jacked up the bell
crank and arm raise up increasing the ground clearance.
I'll gusset the bends on the links for added strength and the ends of the axle mounts will be blanked off with closure pieces.
The roll centre is the point where if extended the transverse links would meet and this can be preset by setting the angle of the links.
[Edited on 5/4/20 by John Bonnett]
[Edited on 5/4/20 by John Bonnett]
[Edited on 5/4/20 by John Bonnett]
|
|
|
John Bonnett
|
| posted on 6/4/20 at 06:12 PM |

|
|
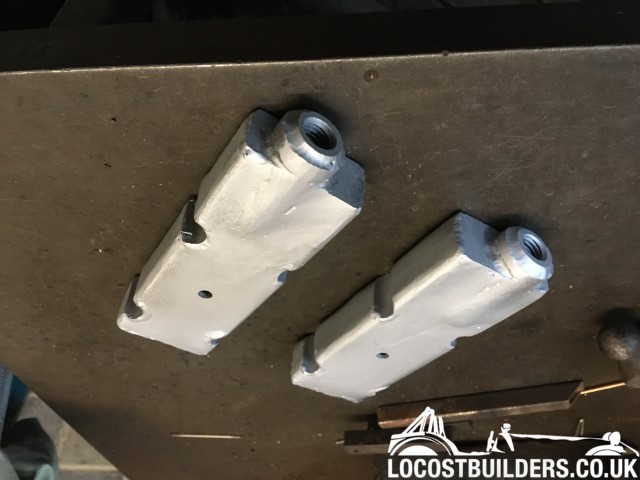
Today was spent consolidating the work I have recently carried out. These are the axle fixings for the ends of the transverse links and they will be
mounted on the spring saddles which are in a perfect position.
[Edited on 8/4/20 by John Bonnett]
|
|
|
John Bonnett
|
| posted on 8/4/20 at 06:39 AM |

|
|
Having been running a Mumford Link rear suspension on my V8 MGB for a couple of years I am very happy with the system and am confident that it will
work well in this application too.
All the fabrication is finished now and I have trial fitted it. I'm never keen on bends in tube but it was unavoidable with the dampers set
behind the axle. There would probably have been no problem but just to set my mind at rest, I have gusseted them for added strength. The springs are
150 lbs which is just a guess but for road use may not be far off.
The rear brakes are standard Mini so it was easier to purchase the complete built-up assemblies from Mini Spares than trying to refurbish the old ones
of which not much would have been salvageable.

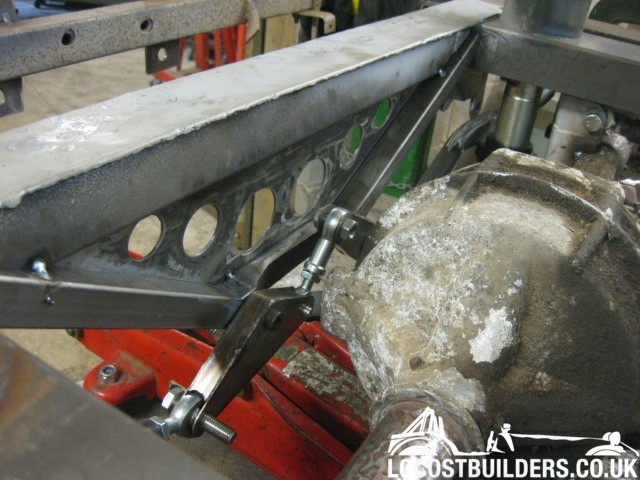
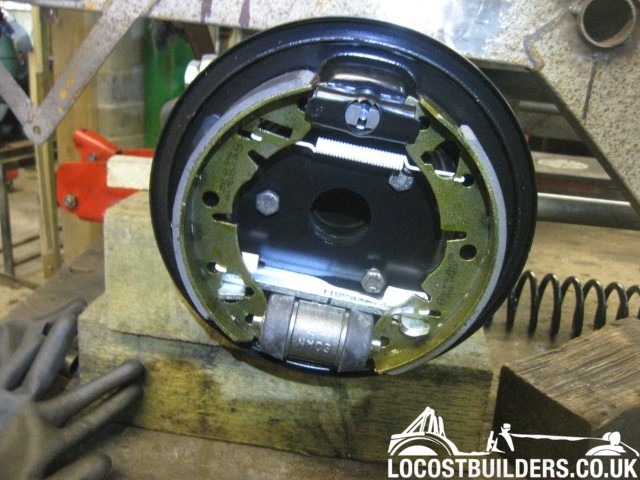
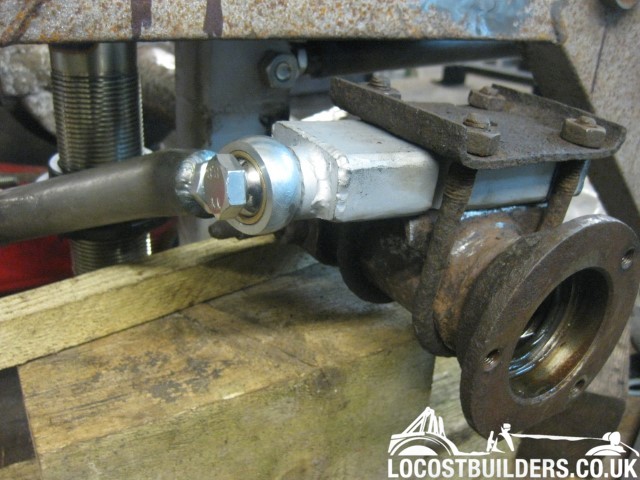
[Edited on 8/4/20 by John Bonnett]
|
|
|
John Bonnett
|
| posted on 8/4/20 at 10:47 AM |

|
|
Next on the agenda is to get it to a rolling chassis stage. This is important for establishing clearances for the future bodywork. I'm going to
set the ride height by substituting the coil overs for fixed rods using the damper mounting points. And that brings me to the choice of wheels and
tyres, always an emotive subject where everyone has his or her own opinion. For a light car I have always favoured a narrow section tyre inspired by
the Lotus Elan. The target weight of my car is about the same as the Elan so I see no reason not to go for the 145 or 155 section 13 inch tyres that
work so well on that car. Granted the rear suspension on the Elan is more sophisticated than a live axle so I agree that there may well be a
difference. Personally, I like a well located live axle which I've always found gives predictable handling and a reasonable ride quality.
So, choice of wheels, not easy when aftermarket widths start at 5 inch which is the very minimum recommended for 155 section tyres and perhaps too
wide for a 145 section. Stud pattern is 4" so for starters at least I have ordered from Andy Jennings a set of 13 inch Sprite wheels with tyres
which will serve their purpose during the build up stage very nicely.
|
|
|
John Bonnett
|
| posted on 13/4/20 at 01:05 PM |

|
|
Some pleasing progress made both with learning Sketch Up, a 3D cad package that I'm now totally addicted to and with the project itself.
I've fitted new shaft seals and completely new rear brakes and put everything back together. The chassis sits at ride height using fixed struts
rather than the coil overs and with the 145 80 13 tyres ride height is 5.5 inches which is what I was aiming at.
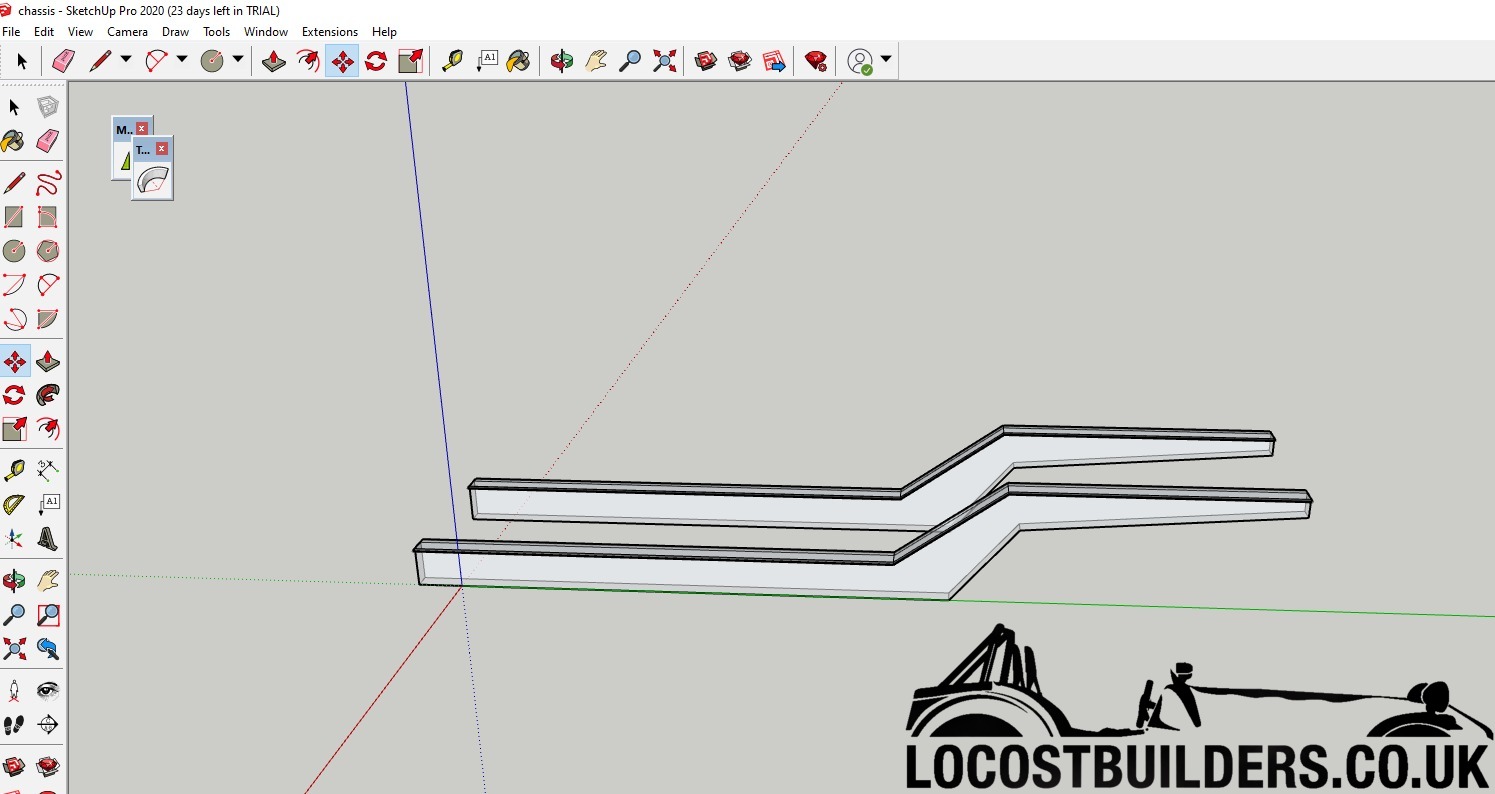
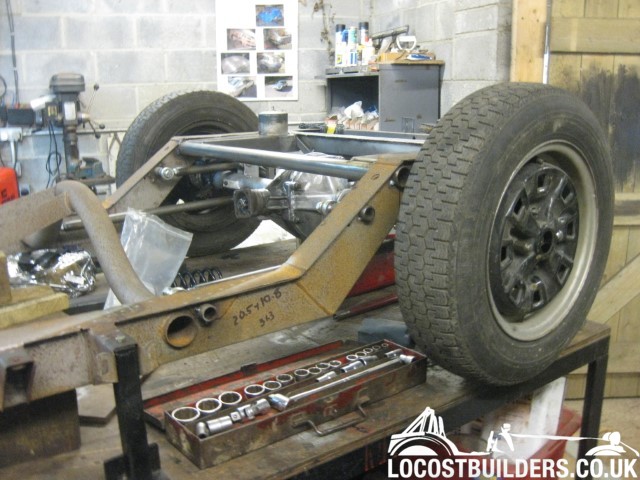
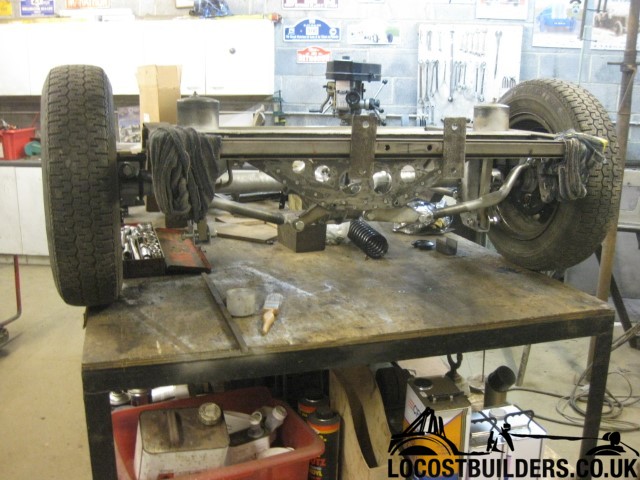
|
|
|
John Bonnett
|
| posted on 28/4/20 at 03:56 PM |

|
|
First attempt to fit gearbox to engine could have gone badly but fortunately no damage done. So an alternative single operator method was devised.
This worked a treat. They say necessity is the mother of invention and how true. You may have spotted the clutch fork and release bearing. I
hadn't forgotten to fit it. This was just a dummy run to prove the method.
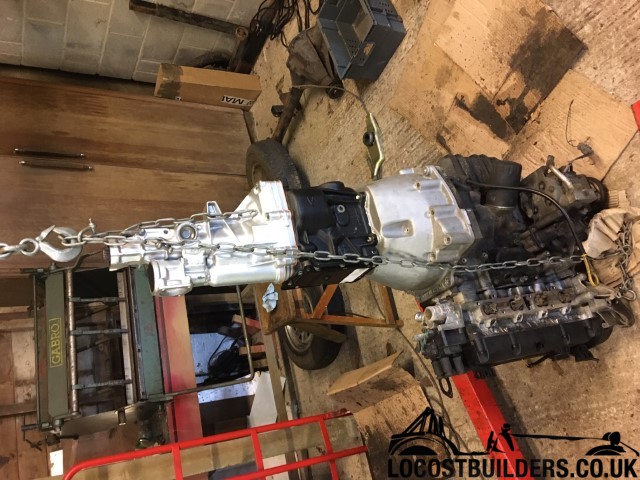

[Edited on 28/4/20 by John Bonnett]
|
|
|
John Bonnett
|
| posted on 28/5/20 at 06:46 AM |

|
|
I notice that it's a month since the last offering but in that time I've managed to get to grips with,although not by a long chalk master,
Autodesk Fusion 360 which has enabled me to produce drawings of the 38mm diameter round tube hoops to give to the supplier and bender of the tubing.
It has also enabled me to tweak the dimensions on screen rather than fabbing something up and trying it for size.
I'm trying to build something with a nod to the Italian designers and a strong hint of the Lancia HPE a sports estate of the 80s but hopefully
without the same penchant of dissolving in the wet.
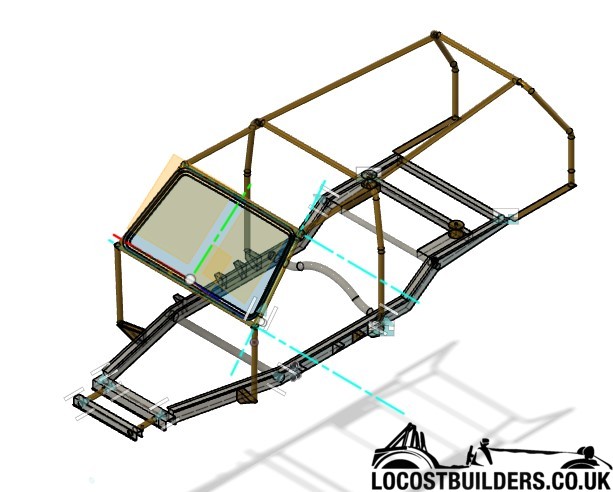
[Edited on 28/5/20 by John Bonnett]
|
|
|
ettore bugatti
|
| posted on 31/5/20 at 11:43 AM |

|
|
Interesting to see how this develops, an aluminium bodied shooting break will be quite something.
My personal favourite is the Lamborghini 400gt flying star 2 by Touring.
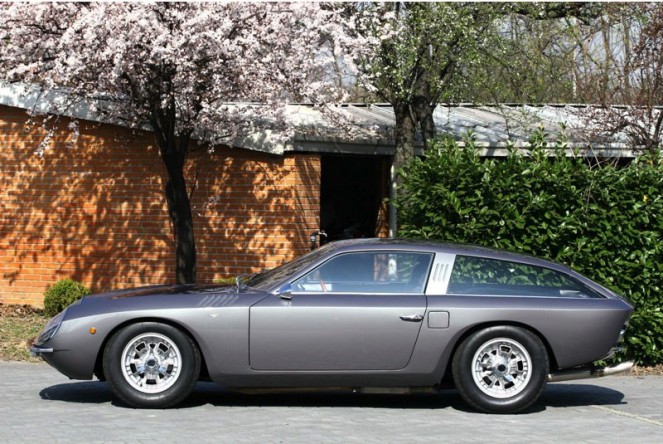
[Edited on 31/5/20 by ettore bugatti]
|
|
|
John Bonnett
|
| posted on 31/5/20 at 12:09 PM |

|
|
quote:
Originally posted by ettore bugatti
Interesting to see how this develops, an aluminium bodied shooting break will be quite something.
My personal favourite is the Lamborghini 400gt flying star 2 by Touring.
It's a massive project and I have never underestimated the challenges, not the least being forming the roof when the time comes. At the moment,
I'm working on mounting the engine whilst retaining the air conditioning compressor. I'll put some photos up when I'm a bit further
on.
|
|
|
John Bonnett
|
| posted on 3/6/20 at 09:05 PM |

|
|
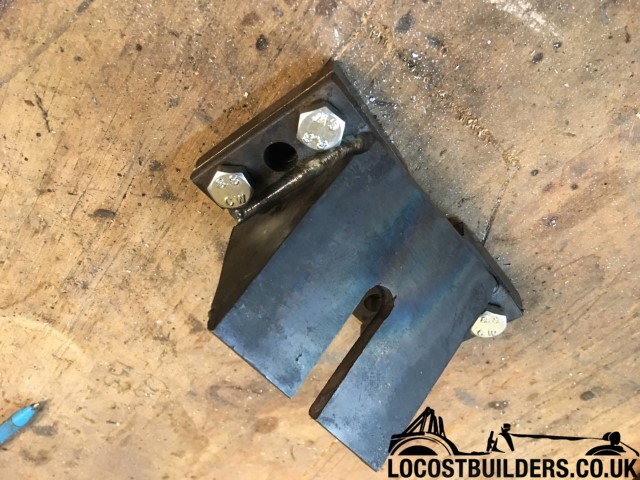
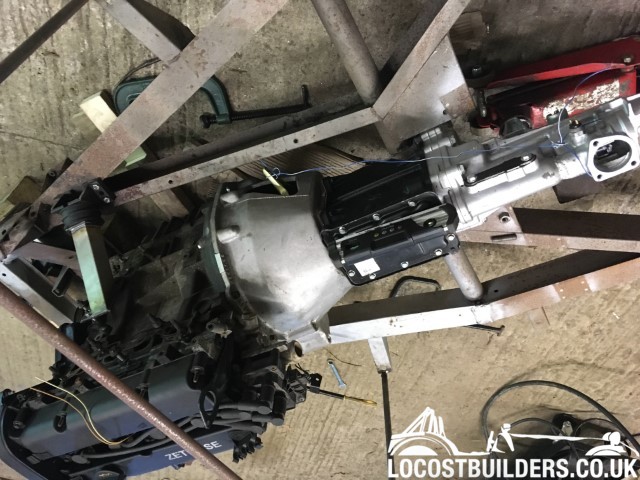
The engine sits quite nicely in the frame and the mounts tacked in. The mounting are screwed to a base plate which will be welded to the chassis. This
feature allows for adding shims if necessary to make sure the engine is level.
[Edited on 3/6/20 by John Bonnett]
|
|
|
Mr Whippy
|
| posted on 4/6/20 at 06:53 AM |

|
|
This project may actual disprove the saying "You can't polish a turd" 
|
|
|
John Bonnett
|
| posted on 4/6/20 at 08:00 AM |

|
|
The MK1 Focus is proving to be an excellent choice of donor vehicle with parts being plentiful and very cheap. I bought two complete Zetec SE engines
with all ancillaries for £200 which is probably a reflection on their lack of popularity among kit car builders. But the engine has a lot going for
it. It was developed as a joint venture between Yamaha and Ford and is all aluminium. Confusingly it is referred to as a Sigma or Zetec SE. It weighs
around 80kg and in the 1.6 Focus develops 100bhp. This can be easily increased to 150bhp without major and costly work. My aim is to produce a light
nimble car following Colin Chapman's philosophy, that looks pretty and is an enjoyable drive. It will have air conditioning and a decent audio
system like the Alpine Freestyle with all the modern features including a 7 inch screen, comfortable seats and plenty of room for luggage for
Continetal trips. It is nice to have a relatively clean sheet of paper to be able to design and build a car to my own spec. Very early days yet but
that is my objective so we'll see how it develops.
|
|
|
HowardB
|
| posted on 4/6/20 at 09:16 AM |

|
|
It will have air conditioning and a decent audio system like the Alpine Freestyle with all the modern features including a 7 inch screen,
comfortable seats and plenty of room for luggage for Continetal trips. It is nice to have a relatively clean sheet of paper to be able to design and
build a car to my own spec. Very early days yet but that is my objective so we'll see how it develops.
and you have a level that goes beep,.. perhaps Binky has been an influence?
H
Howard
Fisher Fury was 2000 Zetec - now a 1600 (it Lives again  and goes zoom) and goes zoom)
|
|
|


