Steve Hignett
|
| posted on 19/7/11 at 10:52 PM |

|
|
I haven't checked on your progress just recently as had a bit of rough week and a bit, but it's looking fantastic Ben!!!
Anything you need, just drop me a text and I may be able to help out (grommets for eg. I have a box full of all diff sizes etc) Happy to help if I can
matey!!!
|
|
|
|
|
BigMac
|
| posted on 24/7/11 at 08:45 PM |
|
|
Very quick update (a beer beckons!)
All removable panels have had 2 flats back and three coats, now leaving to harden for a week or so before attempt at flat and polish (not too shabby
for a roller job though!)


Bodywork has had it's first coat today, another two coats and we should be looking good!


Ta,
Ben.
|
|
|
BigMac
|
| posted on 26/7/11 at 08:54 PM |
|
|
OK, so I've learnt the hard way the past 24 hours.
Decided that as the Mrs was too run down after work to help paint the car, figured I'd flat down the last coat to the body and prep it for the
next. Once done, thought "this painting malarky can't be THAT hard"... So cracked the roller out and gave it a go. I came to the
conclusion very quickly that in order to paint the stuff properly, you need the patience of a saint and in order to get it right need fists made of
something other than ham. Needless to say I finished doing the rear of the car and gave up promptly, deciding that now I've made the back end
look like a shattered Aero Chocolate bar it was time to step AWAY from the roller!
So I got a decent telling off for ruining her precious paint work (and I'm not being sarcastic, honestly I've no idea how she does it!),
before being shut in the garage to wet send it all back to how it was, that was a nightmare in itself... One thing comes to mind:

Still, minor set-back. Onward and upward!
Ta,
Ben.
|
|
|
Rocket_Rabbit
|
| posted on 26/7/11 at 10:02 PM |
|
|
Looks good mate - something i'll be doing with my Westfield. Even the Mrs said she'd muck in 
Are you going to be ready for 2nd September and Anglesey? Be good to have you there.
|
|
|
andyfiggy2002
|
| posted on 26/7/11 at 10:14 PM |
|
|
have to admit your the first person ive seen who has painted a car this way, be aware that the front wheels throw up a lot of stones especially if
your running AO48,s or R888,s so i hope they dont chip & also the bottom of the rear arches take a hammering to
|
|
|
BigMac
|
| posted on 27/7/11 at 08:47 AM |
|
|
quote:
Originally posted by andyfiggy2002
... be aware that the front wheels throw up a lot of stones especially if your running AO48,s or R888,s so i hope they dont chip & also the bottom
of the rear arches take a hammering to...
Thanks Andy :-) When I flatted the car back I found a few spots that were hammered with stone chips. As you say, primarily the bottom of the rear
arches (these looked like a minefield in mine) and also the bottom of the tub where the side panel bowsto accomodate the footwells, found quite a few
there! I'm hoping that it doesn't chip too! That said, all the research I've done seems to show that you just need to put sufficient
layers of paint on and allow it to harden properly before you do any serious driving, so I'd rather get it right before taking it back out on
the road- I'm determined to get this $50 paintjob working! Also have a set of Carbon rear arch guards ready to go on after we've finished
painting ;-)
quote:
Originally posted by Rocket_Rabbit
... Even the Mrs said she'd muck in
Are you going to be ready for 2nd September and Anglesey? Be good to have you there...
If she's anything like mine, I'd let her do the painting if you prefer your mechanical tinkering to aesthetic! Mine just won't do
the sanding/cutting back, apparently that's the man's job...
I've still got another month before September, so that should be plenty of time to let the paint harden and get everything finished, will keep
you posted!
|
|
|
BigMac
|
| posted on 31/7/11 at 04:46 PM |
|
|
Final (5th) coat went on yesterday, now leaving for a few days to cure!


So now just the odd bits and bobs to get sorted, bleed the brakes, new throttle cable, finish off the dashboard and do the wiring. Update to follow
soon!
Ta,
Ben.
|
|
|
Stuart_B
|
| posted on 31/7/11 at 06:06 PM |
|
|
that is looking fantastic 
nice work
stu
black mk indy, 1.6pinto on cbr600 bike carb's.
|
|
|
Rocket_Rabbit
|
| posted on 31/7/11 at 10:42 PM |
|
|
Looks brilliant and a great locost/high quality job.
You and Kat should be very pleased with yourselves
|
|
|
Steve Hignett
|
| posted on 31/7/11 at 11:16 PM |
|
|
As (directly) above...
Money spent in the right area's on the right thing - really decent upgrades/mods and then care/attention/skill paid to the non-expensive
upgrades...
Once again, all praise to you and your lovely "other-alf"!!!
It's not often a KC floats my boat, but this one certainly does and as I mentioned to you, really looking forward to watching it lap Oulton!
[Edited on 31/7/11 by Steve Hignett]
|
|
|
BigMac
|
| posted on 4/8/11 at 10:22 PM |
|
|
Thanks for the kind words everyone, good to know I'm on the right tracks :-)
Have to say I think I'm starting to experience the 'lull' during the build/rebuild now. Can just see more and more little jobs and
extra little expenses, a silicone hose bend here, a throttle cable, steering rack boots there etc. Starting to get wound up by the fact that the
Pareto principle seems to be in full swing. Funny how you read everyone's posts similar to this and say "nah, won't be me!".
My daily driver's even had a thorough clean inside and out, a full service and tidy up of the paintwork.
Haven't worked on the car in a week or so, but just finished sorting out the garage, putting all the tools away, cleaning the place up, trying
to make it less of an "oh dear god" every time I open the door. Pushed the car out in the evening light and have to say, felt better
looking at it now it's nearly there. Also decided to make a list of jobs that need doing to finish the car, unfortunately most of them cost some
money, but it's helping a little. Still think the whole process of wiring the CBS module in is dragging me down somewhat; I take one look at the
diagram and the module and immediately want to do another job on the car.
Part of me really wants to finish this car at the weekend, so I can get it out in the sun and have some fun- a nice gentle (serious!) drive up the Cat
and Fiddle, chill out and look at some of the other cars. The other part of me wants to take my time, do things right and accept that I may miss
RocketRabbit's track days and the remaining sunshine for the year. The way the Mrs is going on, may well be the only kit car I build*, so
I'd rather be safe in the knowledge I did things properly and exactly how I wanted...
Still, I started the first item on the list of ordering some new steering rack boots, cheap and easy, so will do that little job and hopefully I can
pick myself up that way.
Ta,
Ben.
* That's what she thinks ;-)
|
|
|
Steve Hignett
|
| posted on 4/8/11 at 11:25 PM |
|
|
The wiring loom worked fine before you took it to bits and absolutely ZERO has changed between now and then, so get it plugged back In and enjoy the
car for the amazing thing it is while we still have a couple of summer weeks left man!!!
|
|
|
BigMac
|
| posted on 14/8/11 at 06:47 PM |
|
|
OK, so have done a few more jobs over the weekend, still not the electrics though!
* Steering rack boots on;
* Battery tray in;
* Roll bar on;
* Driveshaft bolts lock-tite'd and torque'd up;
* Dashboard switch gear in (just needs wiring!);
* Front indicators in;
* Nosecone grille on;
* Fuel gauge sender wiring done;
* Handbrake gaitor trimmed;
I really am starting to see the Pareto Principle in full swing here, 20% of my time was doing 80% of the build, now I'm finishing the last 20%
and it's taking 80% of the build time!! Still, got my list, so working through it, bit-by-bit. Pictures:


Ta,
Ben
|
|
|
BigMac
|
| posted on 15/8/11 at 03:48 PM |
|
|
No point putting it off anymore, have been bigging myself up all day, time to hit the electrics, figured I'd just have a go at the side lights
tonight, something small and easy!...
[CHARGE!] Aaaaaahhhhhhh!!!!...
|
|
|
BigMac
|
| posted on 23/8/11 at 08:07 PM |
|
|
Figured I hadn't been on the thread in a while, so best do an update!
All the wiring is now in, cable tied, p clipped, and spiral bound. Finished off the earthing point and connections for the front of the car this
evening, had to file for quite a bit to get past the paint, primer, zinc coating in order to get some bare metal! Tested all the wiring and
connections, everything working as it should!
Next job is to do all the earthing points for the rear of the car and test those connections. Once everything is earthed up, I can start wiring
everything up to the dashboard and CBS Wiring Module. I know this may seem I'm doing things a long winded route, but I find doing things
methodically means I don't miss anything important!
Not really eventful, but here's the pictures of the front loom now fitted, it's only cable tied to the chassis at the moment, but as soon
as I get the rivet gun back, they'll be p-clipped in properly! Pictures were also taken before I tided up the earthing connections, so the mess
of wires at the front is gone now!


Cheers all!
Ben.
|
|
|
BigMac
|
| posted on 28/8/11 at 05:05 PM |
|
|
OK, so electrics are nearly there, just the hazard switch and manual rad fan switch to wire in! Only reason I've not done them yet is because
I'm slightly confuzzled on the circuit side of things. Decided to mount the CBS wiring module to the removable panel, but with enough wire
travel for me to be able to move the panel around without having to un-couple everything. Also mounted the module 5mm from the panel itself, so worst
case I get caught out in the rain, the water runs underneath the unit, and not over it!
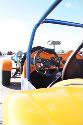
Dashboard all wired up, LEDs now come on with the toggle switches, an easy spot for which ones are on/off!

Wiring module in, with the cover on, still need to find a way of keeping cover on!

Wiring module without the cover, I'm hardly using any of the circuits on the module! Radio- No. Heater- No. Windscreen wipers- No...
etc!

Gap between panel and module, just in case it rains!

Headlights in and working, indicators work too, but no hazard switch wired up to show them working at the same time yet.

Tail lights in and working, along with rear fog...

Thanks,
Ben.
|
|
|
Ivan
|
| posted on 29/8/11 at 03:17 AM |
|
|
Looking good - don't forget the grommet where the wires pass through the bulkhead.
|
|
|
BigMac
|
| posted on 29/8/11 at 09:49 AM |
|
|
quote:
Originally posted by Ivan
Looking good - don't forget the grommet where the wires pass through the bulkhead.
Thanks Ivan, it's on order courtesy of eBay!
|
|
|
Benzo
|
| posted on 29/8/11 at 11:14 AM |
|
|
Looks great big mac.. Mine is certainly getting a colour change and a wiring tidy up this winter!
Did you have any other colours in mind?
I'm considering White as well but with the black arches and nose to break it up
|
|
|
BigMac
|
| posted on 29/8/11 at 02:23 PM |
|
|
quote:
Originally posted by Benzo
Looks great big mac.. Mine is certainly getting a colour change and a wiring tidy up this winter!
Did you have any other colours in mind?
I'm considering White as well but with the black arches and nose to break it up
Thanks Benzo :-)
I considered doing it Black or a lime green, but figured that the Kevlar looks much better against the white! The $50 paintjob is good so far, the
paint's hardened pretty well, dropped the ratchet on the rear wing yesterday and no so much as a chip... It's a lot of effort, lots of
sanding back between coats, but if you're prepared to put the time in during the prep stage (and have a Mrs that's good with a foam
roller!) then you'll get a good result!
Black highlights is a good idea, I've got some additional Kevlar parts to go on yet, so hoping those will break the colour up nicely...
|
|
|
Benzo
|
| posted on 29/8/11 at 03:19 PM |
|
|
quote:
Originally posted by BigMac (and have a Mrs that's good with a foam roller!).
Unfortunately not.. mine spends her time, reading daily mail and shopping.. thats a hard days work to her! 
There is a guy in my Racing Series, his is Kawasaki Green which would have been my other choice..
So yeah i think the white with the black arches/nose and my Carbon detailing will be the job..
What colour of white did you use? until i started looking at whites i didn't realise there was such a variation, id say it will end up Audi Ibus
white for BMW Alpine white... Which ever is easier to paint!!
PS i really like the bike gauges.. could a fuel sender now have been used to match up to the bikes fuel gauge?
|
|
|
beaver34
|
| posted on 29/8/11 at 03:46 PM |
|
|
coming along great, mine and your look quite alike!

|
|
|
Benzo
|
| posted on 29/8/11 at 04:17 PM |
|
|
^ nice
|
|
|
BigMac
|
| posted on 29/8/11 at 04:23 PM |
|
|
quote:
Originally posted by beaver34
coming along great, mine and your look quite alike!
Mmmmm, I like! What section are those tyres?? > 205?? I was thinking about doing a full cage for mine at some point, what brand is that? Caged?
Good looking piece of kit! I'm trying to get Carbon Mods to make me an aeroscreen out of the remaining Kevlar fabric, but no one's agreed
yet. I'd settle for a Carbon one, but they've stopped making them!
Benzo- I ended up using Rustoleum's Gloss White colour, but thinking about it, Audi's White is a good one, that or the Balloon White used
on Murcielago's, mmm! In terms of the gauges, the dash is actually a Koso rather than a specific bike one, you can buy an adaptor so you can use
most senders with the gauge. Only problem I found though, is the fuel readout is difficult at best, no low fuel light either! The gauge came with the
car and is good enough for me, for now... I may eventually swap everything for a Dash2 or similar...
[Edited on 29/8/11 by BigMac]
|
|
|
Benzo
|
| posted on 29/8/11 at 04:32 PM |
|
|
quote:
Originally posted by BigMac
the dash is actually a Koso
[Edited on 29/8/11 by BigMac]
Ahh, very good, where did you source that from? i was just about to get a new sender for my Fuel Guage to change to a Tube type sender.. I might price
one of those gauges.. how does it pick up mileage? is see yours has 18k already lol did you get the dash 2nd hand?
Thanks mate, keen on this kind of install.. looks great!!
Any more close up pics? is that a shift light on the top right?
Tempted
[Edited on 29/8/11 by Benzo]
[Edited on 29/8/11 by Benzo]
|
|
|


.jpg)