907
|
| posted on 6/1/10 at 03:41 PM |

|
|
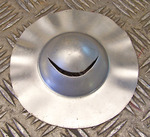
A little progress.
Rescued attachment tc3.jpg
|
|
|
|
|
907
|
| posted on 6/1/10 at 03:43 PM |
|
|
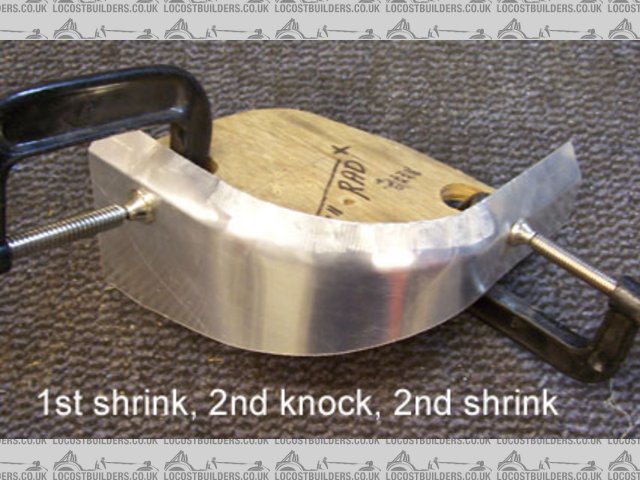
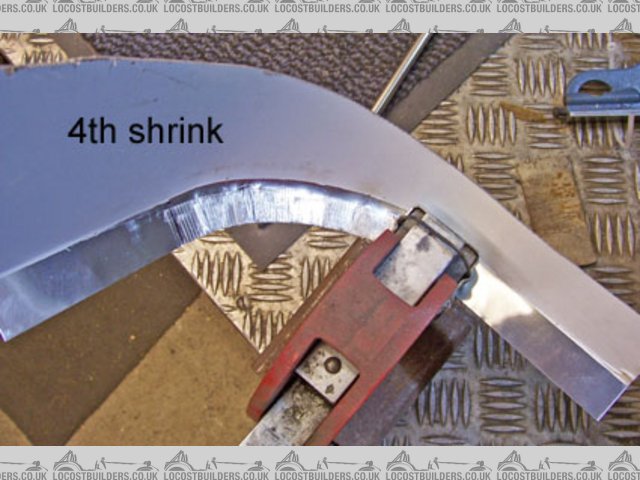
If your ally is hard then annealing could be done at this stage.
Rescued attachment tc4.jpg
|
|
|
907
|
| posted on 6/1/10 at 03:45 PM |
|
|
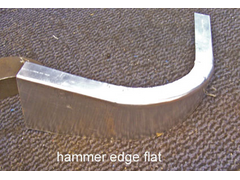
A tad more with the hammer.
Rescued attachment tc5.jpg
|
|
|
907
|
| posted on 6/1/10 at 03:49 PM |
|
|
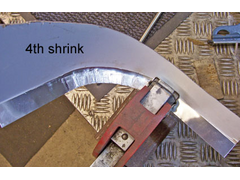
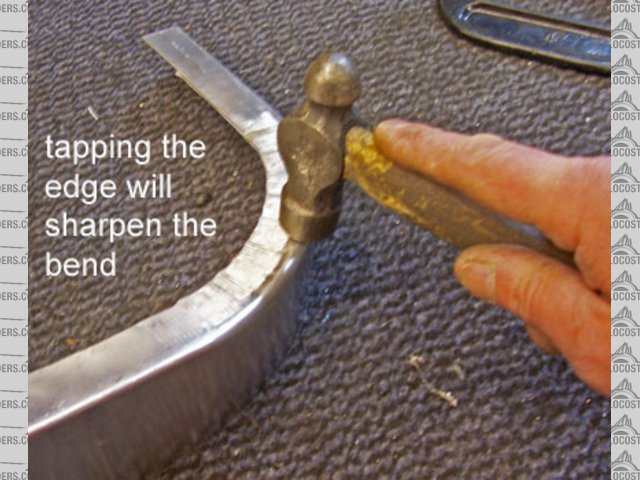
The corner of the bend may not be as sharp as you would like so a dress very near the edge will sharpen it.
Rescued attachment tc6.jpg
|
|
|
907
|
| posted on 6/1/10 at 04:03 PM |
|
|
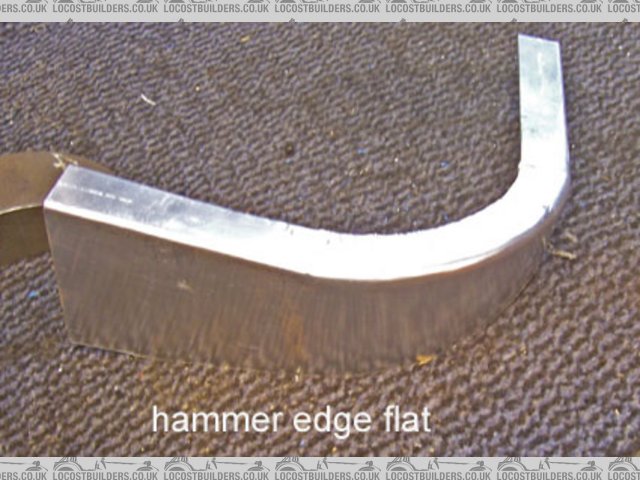
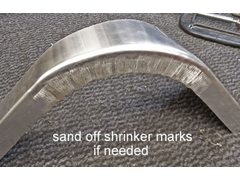
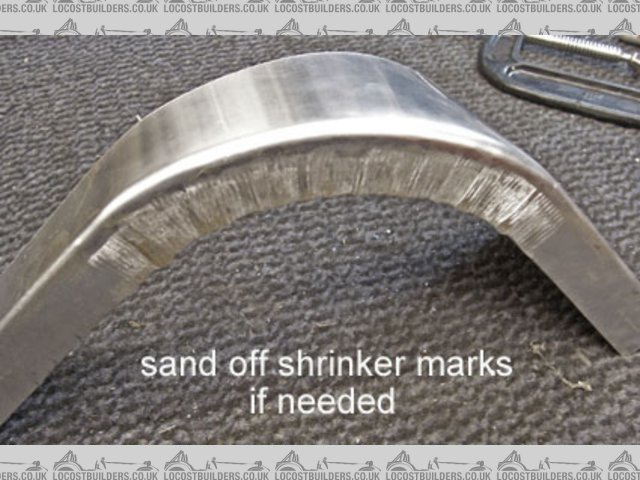
The finished corner. Took about an hour including pics.
On a full scuttle you would do a bit to each side before un-clamping so progress would be quicker.
The shrinker marks can be taken out with a sanding block but mine are covered by the dash one side and the angle on the bulkhead side.
It looks out of shape in the pic but that's a trick of the light.
I hope this gives you a little more help and that number two is pleasing to the eye.
Cheers
Paul G
Rescued attachment tc7.jpg
|
|
|
TheGecko
|
| posted on 7/1/10 at 01:14 PM |
|
|
Paul,
Thanks very much for posting that detailed tutorial. Two questions:
- when will your book "The Straightforward Guide to Metal Work for Locost Builders and other Like-Minded Nutters" be available?  You
have the rare combination of both actual skills (in this case, metalwork) plus the knack for explaining/illustrating it. Even a series of detailed
tutorial posts here on LB would be very welcome to me and, I'm sure, many others. You
have the rare combination of both actual skills (in this case, metalwork) plus the knack for explaining/illustrating it. Even a series of detailed
tutorial posts here on LB would be very welcome to me and, I'm sure, many others.
- what is your opinion (and everyone else's for that matter) on using these techniques to make a set of front cycle guards? I don't want
ones with the edges rolled over very far so there wouldn't have to inordinate amounts of shrinking. I was thinking an MDF buck with routed
round-over edges. Do edges on on a part like that need wiring to be stiff enough?
Anyway, thanks again for your posts - they've been saved into my "Useful Tips & techniques" folder.
Dominic
|
|
|
907
|
| posted on 7/1/10 at 03:59 PM |
|
|
quote:
Originally posted by TheGecko
Paul,
Thanks very much for posting that detailed tutorial. Two questions:
- when will your book "The Straightforward Guide to Metal Work for Locost Builders and other Like-Minded Nutters" be available? You
have the rare combination of both actual skills (in this case, metalwork) plus the knack for explaining/illustrating it. Even a series of detailed
tutorial posts here on LB would be very welcome to me and, I'm sure, many others.
- what is your opinion (and everyone else's for that matter) on using these techniques to make a set of front cycle guards? I don't want
ones with the edges rolled over very far so there wouldn't have to inordinate amounts of shrinking. I was thinking an MDF buck with routed
round-over edges. Do edges on on a part like that need wiring to be stiff enough?
Anyway, thanks again for your posts - they've been saved into my "Useful Tips & techniques" folder.
Dominic
Hi Dominic,
Mmmm, that's a bit of a long winded name mate.
It would have to be a big book just to fit the title on. 
Add to that the speed at which I type then I can only suggest that you don't hold your breath.
Cycle guards / mud guards / fenders (got to keep this thread international  ) can be made this way but the tucks ) can be made this way but the tucks
that would reach back into the metal from the shrinker would need taking out with an English Wheel.
It's best IMHO to then wire the edges to give an appearance of thickness.
A thin edge of metal to me always looks "unfinished" somehow.
Now if I may I'd like to ask a question.
Since the forming of metal is such a fascinating subject, well it is to me, how come the few that have posted on this
subject are spread so thinly across the globe? Just a thought.
Thanks, and all the best,
Paul G
|
|
|
C10CoryM
|
| posted on 8/2/10 at 08:45 PM |
|
|
Thanks for the good posts Paul and sorry for the delayed response. Life has been stupid lately.
My 2nd attempt was much better but still ended badly. I annealed all the edges, was scary watching it warp from the heat, but relieving to watch
it go right back to shape when quenching I'd never annealled a large piece before. The aluminum was soft enough I didn't bother
trying the shrinker again. Looked like I was getting a good enough edge without shrinking (I trimmed the flange off in the curved part). Since I
will be painting I can use a little filler to hide any folded parts.
Anyhow, I had it shaped over reasonably well until I realized I was getting way too much material in the middle of the scuttle. As I was shaping
it must have curved the piece more. Trying to work it so that there was less material there wasn't working and I ended with a giant dent there.
Crap. End of piece #2.
I know with some more practice I could get it. But I'm not willing to ruin that much aluminum. Im going to start making my forming buck into
a kevlar/carbon fibre buck once Im over this horrible cold.
Thanks for all the help. What I have learned I will be using elsewhere and Im sure others will too.
Cheers,
Cory
"Our watchword evermore shall be: The Maple Leaf Forever!"
|
|
|
MikeRJ
|
| posted on 8/2/10 at 08:49 PM |
|
|
quote:
Originally posted by 907
I hope this gives you a little more help and that number two is pleasing to the eye.

That's a great little tutorial, I've been itching to get myself a shrinker and have a go at alloy arches for a while.
|
|
|
907
|
| posted on 8/2/10 at 11:37 PM |
|
|
Sorry to hear your giving up Cory.
If it makes you feel any better I have my share of failures.
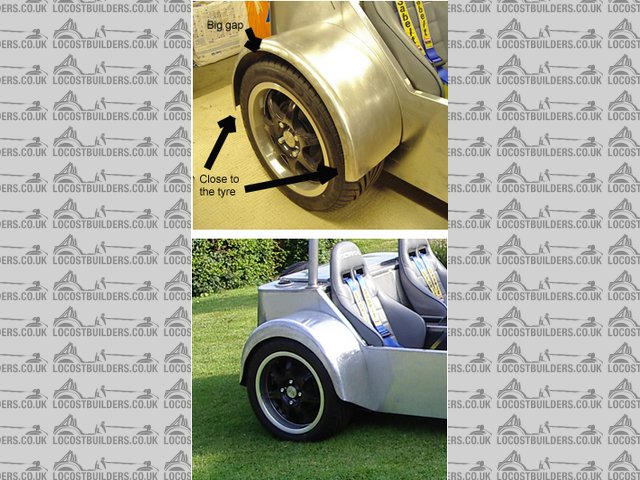
My first attempt at a rear wheel arch flew through the air like superman.
I cocked up the width of the sheet and it ended up more suitable for a bike.
Number two was crap. Sort of just didn't look right.
The ends finished in the middle of nowhere and it sort of hovered above the tyre.
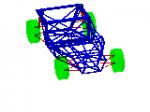
I'm pleased with number three. When the car is viewed from the side the edge of the arch is an equal
distance from the centre of the wheel all the way round, while still allowing for suspension travel.
The bigger the challenge the more satisfaction you get when you get it right.
(Well, apart from painting. I get runs with garage floor paint.)
Cheers
Paul G
Mike, go for it mate. The worst thing that can happen is that you end up selling it on ebay.
In fact, if you pick up a second hand one you could even make a profit.
Cheers
Paul G
Rescued attachment rear arch 2and3.jpg
|
|
|