jonabonospen
|
| posted on 8/9/12 at 05:52 PM |

|
|
Cracking thread. Thats rubbish news about the engine. Hope you get it sorted.
|
NOTE:This user is registered as a LocostBuilders trader and may offer commercial services to other users
|
|
|
SausageArm
|
| posted on 8/9/12 at 06:17 PM |
|
|
Really bad news regarding the engine, the car was looking and sounding great, here's hoping for a quick fix! :-)
|
|
|
sdh2903
|
| posted on 8/9/12 at 07:11 PM |
|
|
What's the plan repair/rebuild or replace?
|
|
|
yellowcab
|
| posted on 4/12/12 at 10:27 PM |
|
|
Not been on here much recently as been extremely busy with other projects, apologies for the late reply sdh2903.
The plan was always to rebuild the engine, but with a dry sump setup so it wouldn't happen again lol
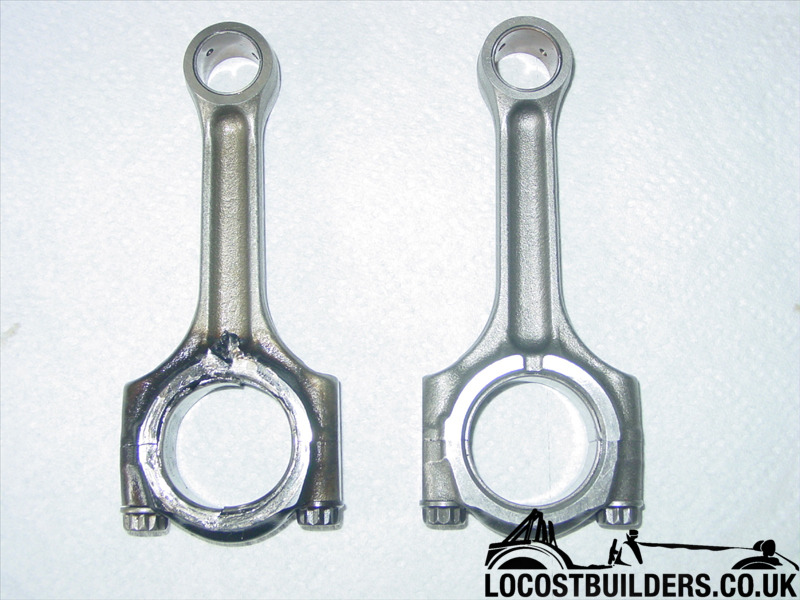
So a very good friend of mine volunteered to rebuild my engine for me due to other commitments that I have, I would never have had the time to do so,
within only a couple of weekends, it was done - so it's had a new crank, new rod, new bearings & shells, and new gasket set through &
through.
He even managed to sort me a dry sump setup - to which he fitted and also located the trick parts to put the idler pulley on that looks incredibly
standard, to which we all know, isn't.
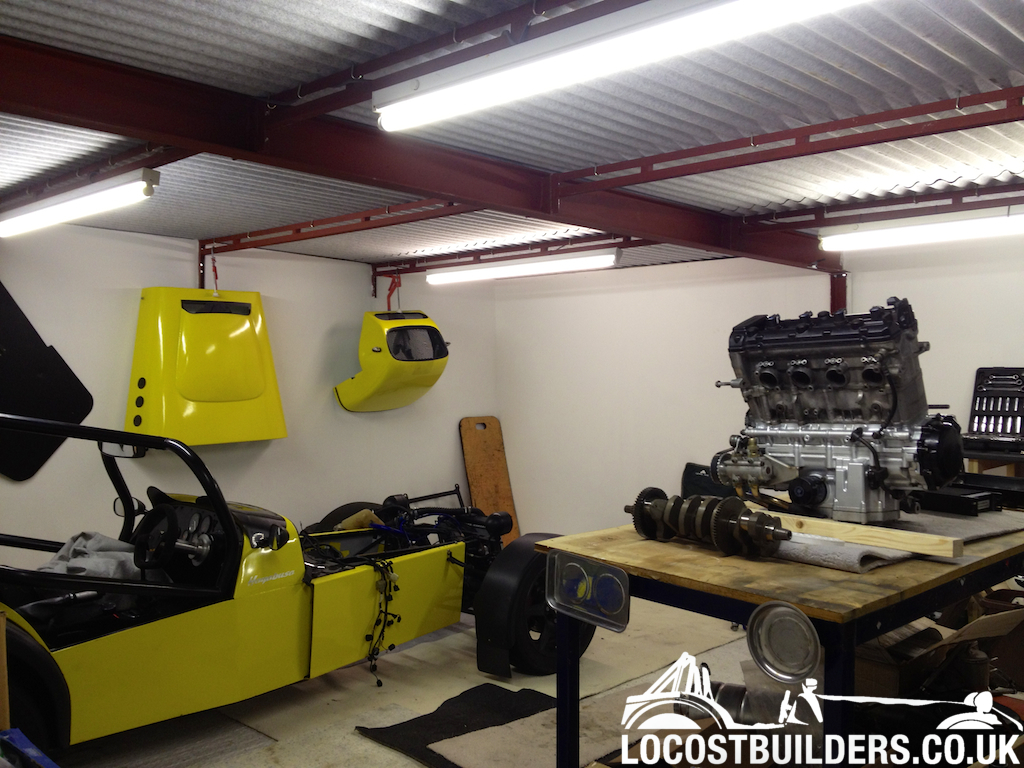
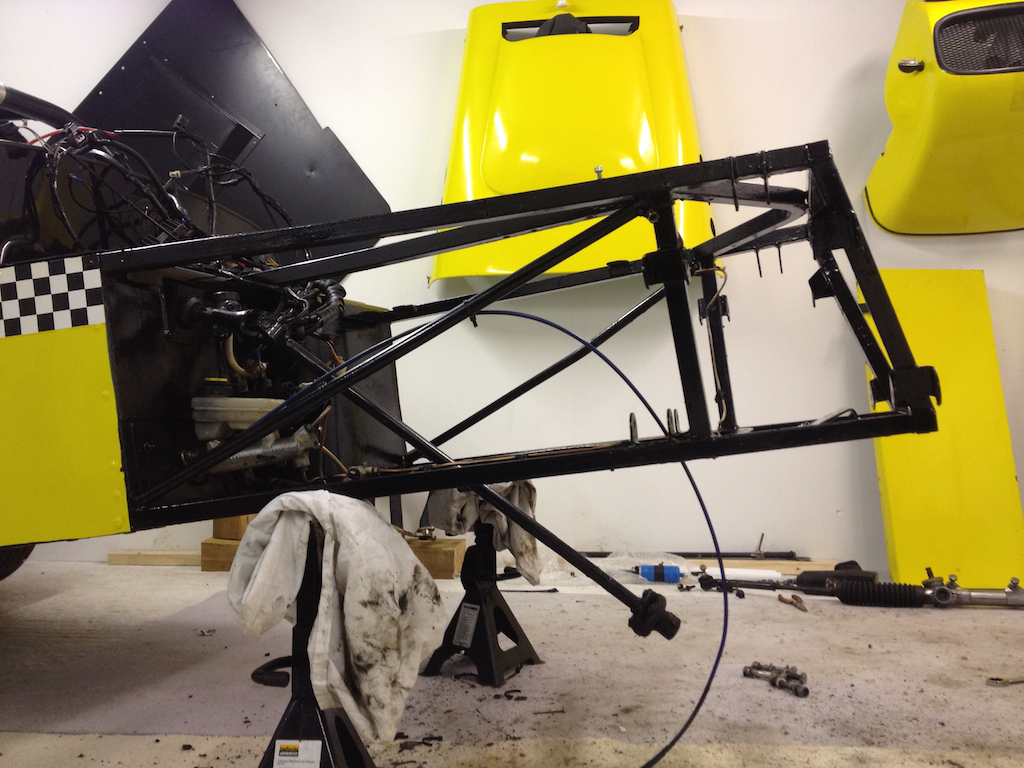
Here are some photos of the rebuild:
hmmm, whats up with these:
Crank cases all cleaned, sand blasted & sprayed
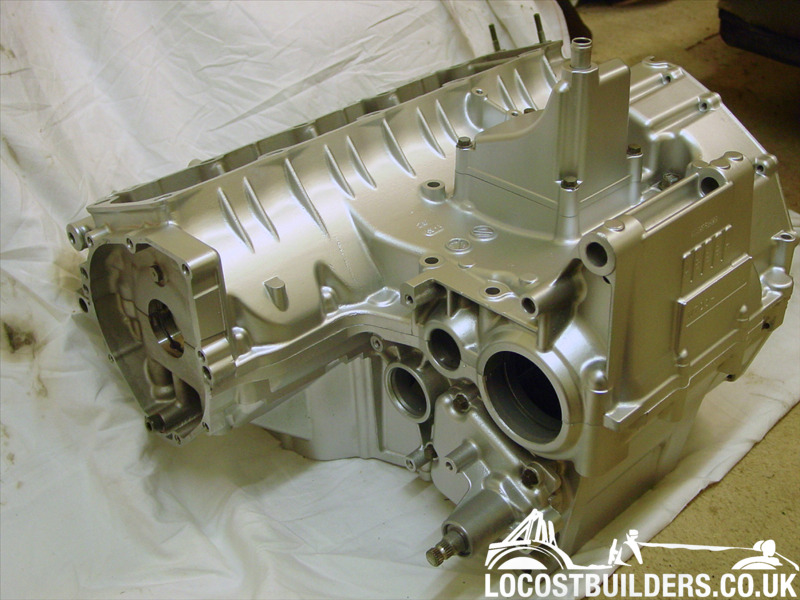
Back together again...
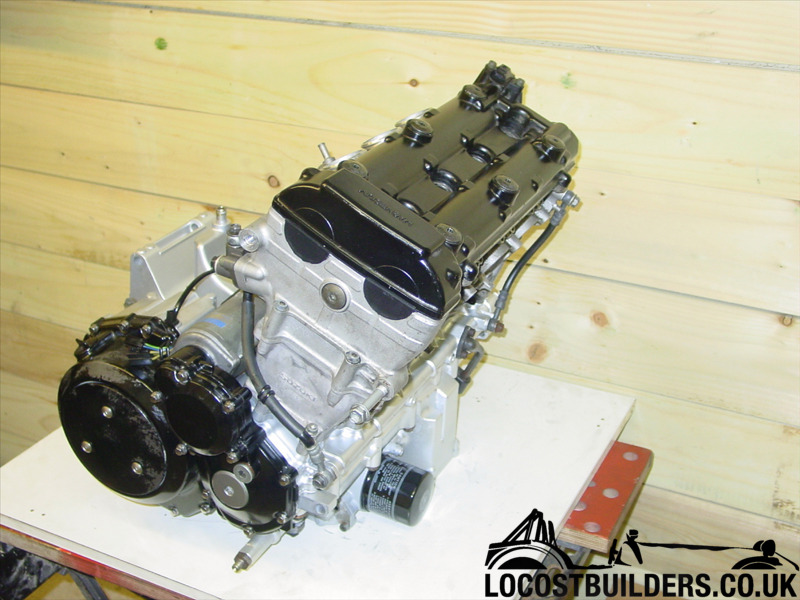
New bits...
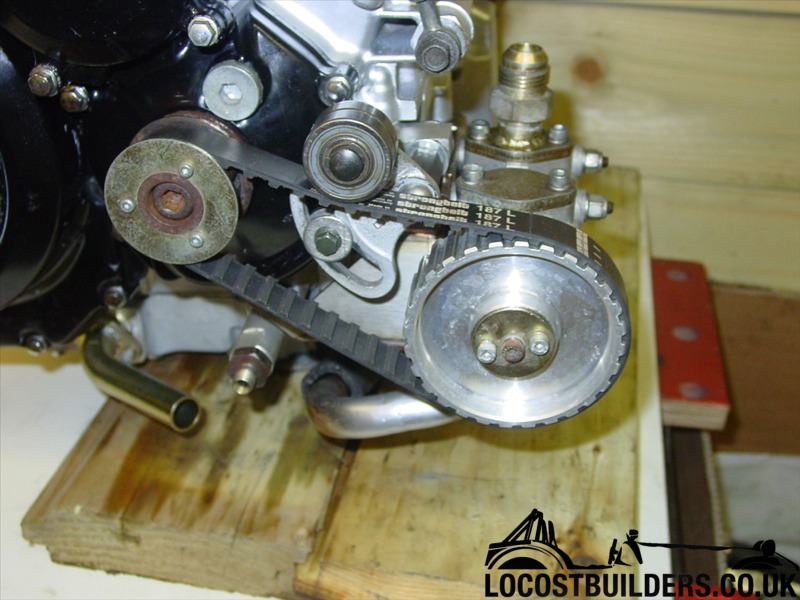
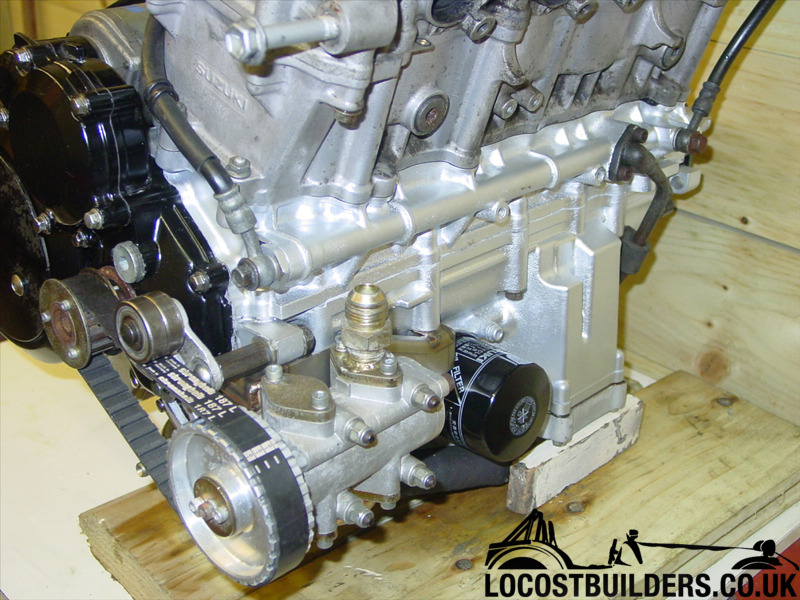
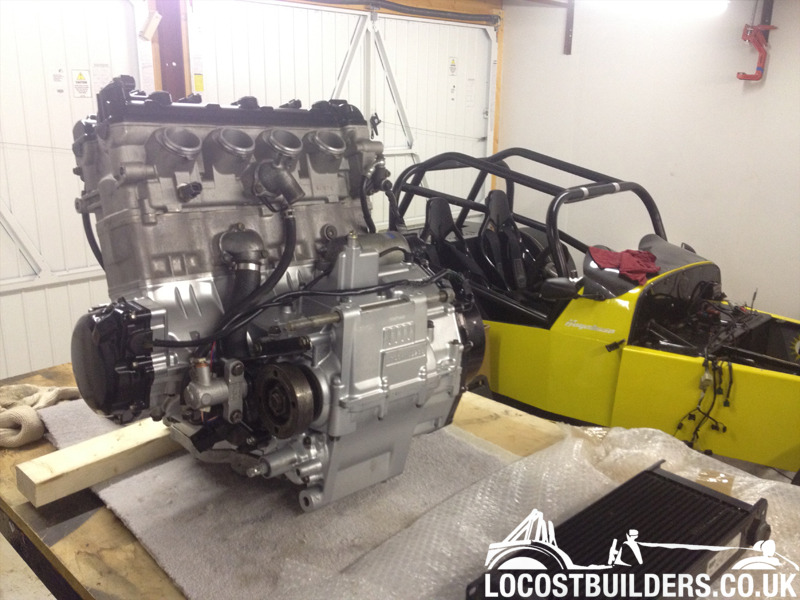
Awaiting to go back in...
Must say a massive thanks to Mike for doing this for me!
[Edited on 4/12/12 by yellowcab]
[Edited on 4/12/12 by yellowcab]
|
|
|
yellowcab
|
| posted on 4/12/12 at 10:40 PM |
|
|
Sorry, but 22'000 thread views?
Bloody 'eck!
|
|
|
RK
|
| posted on 5/12/12 at 02:49 AM |
|
|
I've been through the duff engine thing and can relate to your woes. It will get better! You'll never stop doing things to your car; best
get used to it now! Spring is just around the corner.
|
|
|
yellowcab
|
| posted on 16/1/13 at 03:51 PM |
|
|
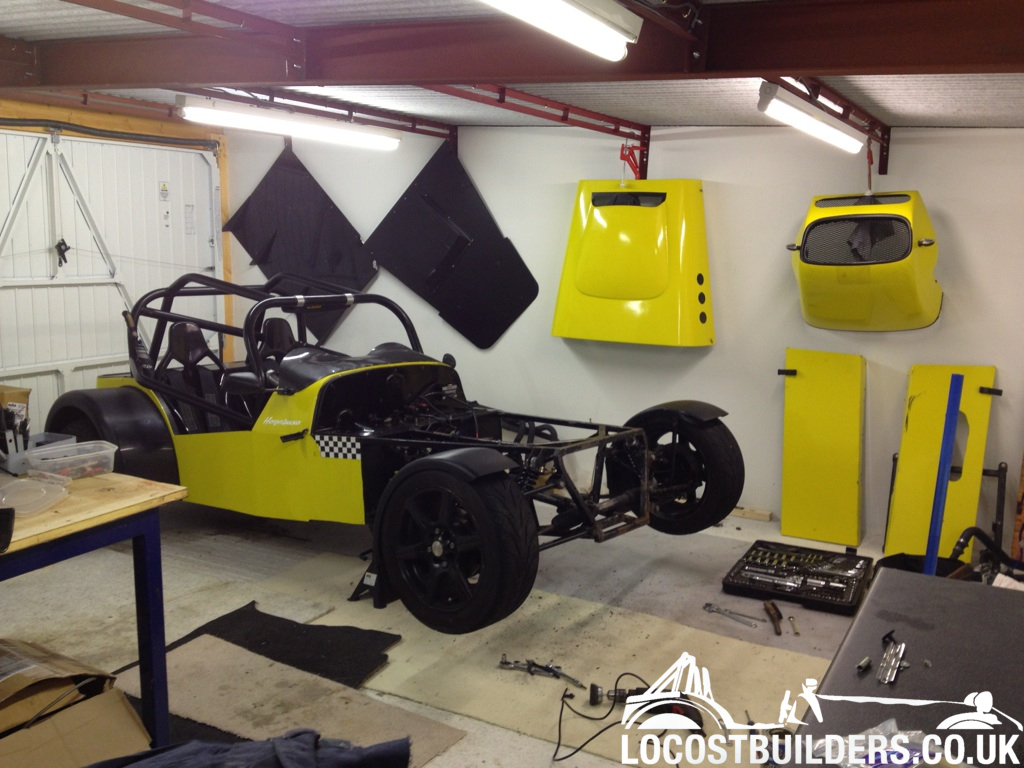
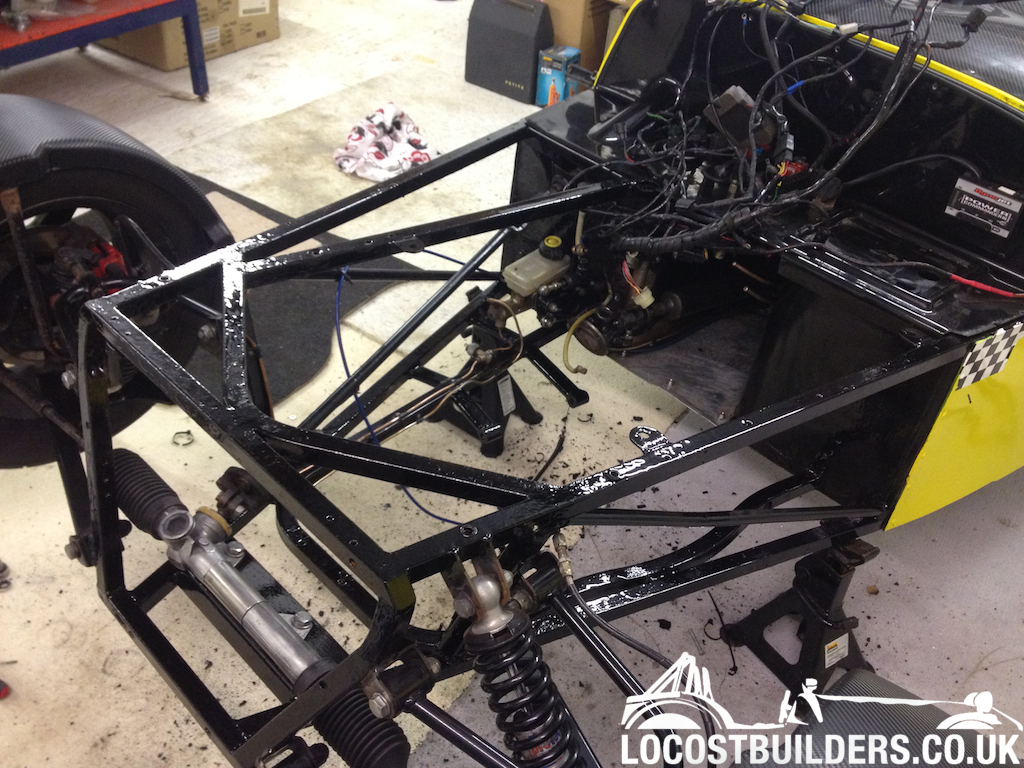
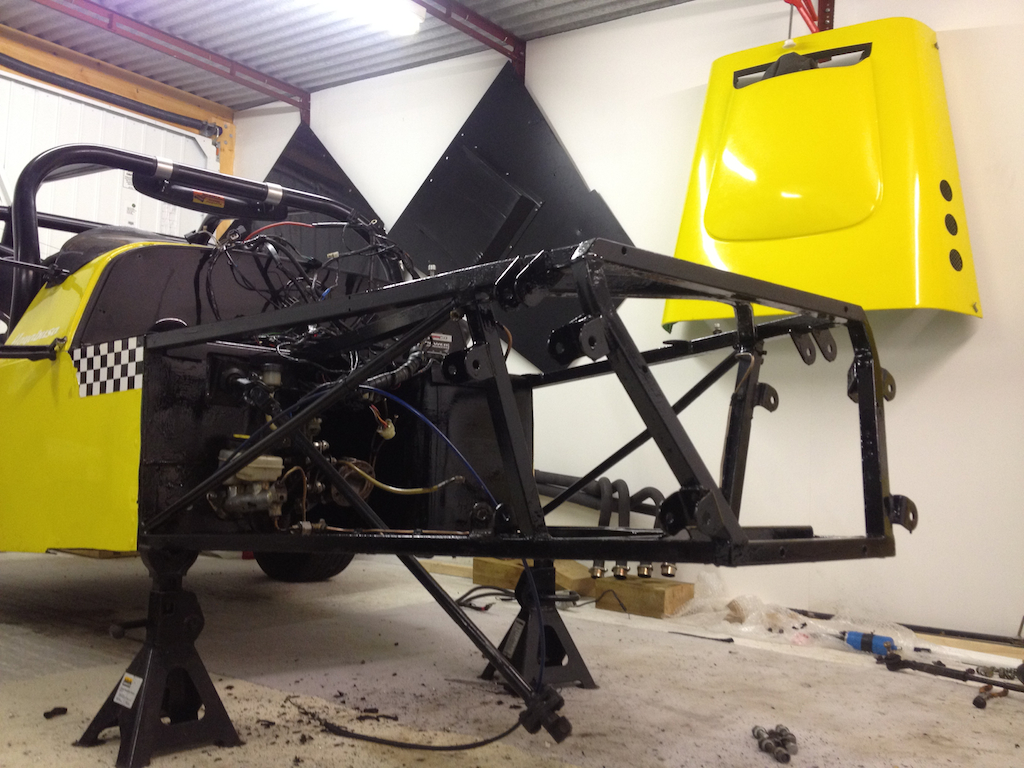
So I've been threatening for a while to actually start doing things to my car, so I spent half hour in the garage yesterday just tidying up and
generally making myself feel better about the state the car was in
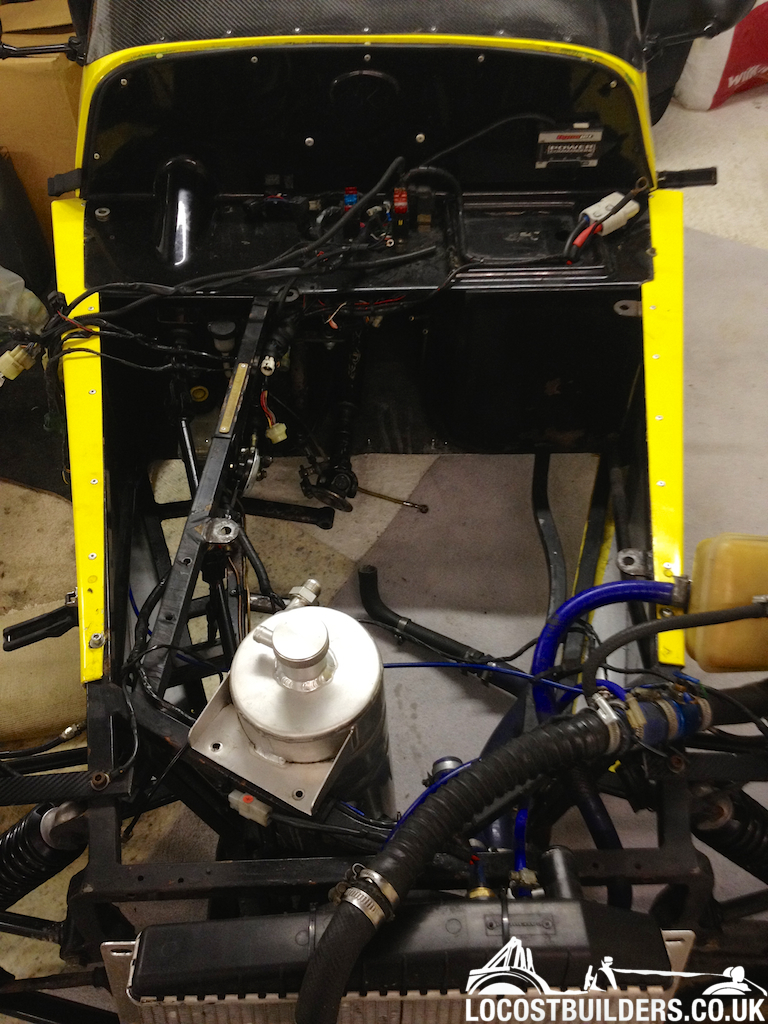
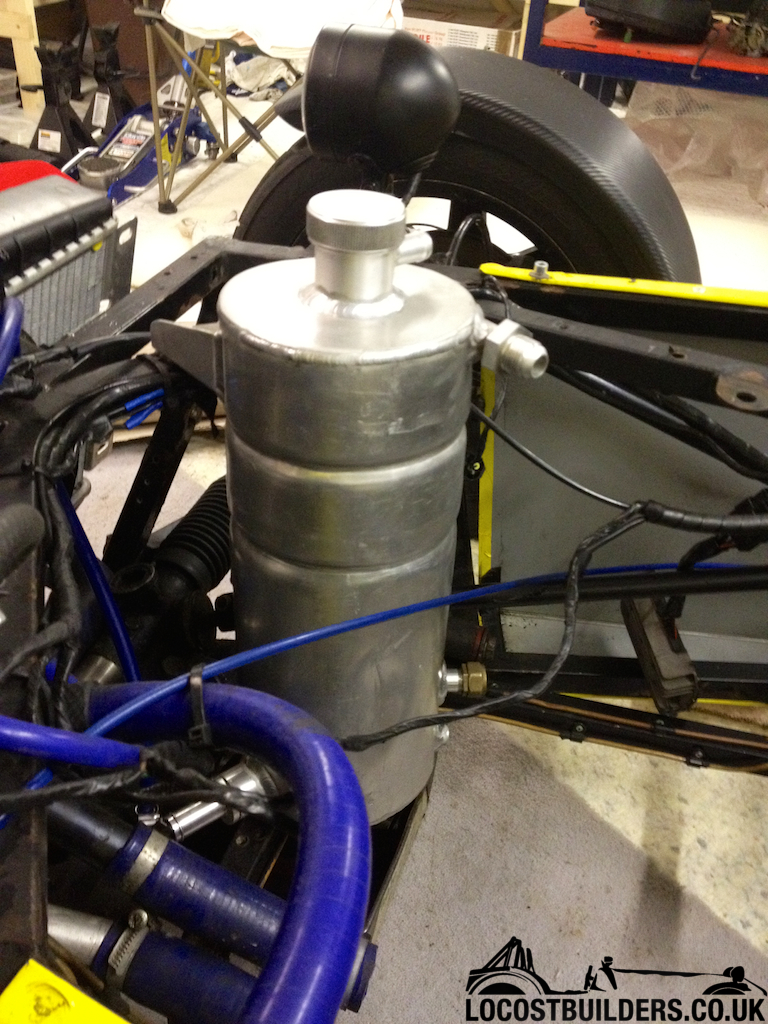
First up was to offer up the dry sump tank, I presume this is the normal position to which it shouldn't foul anything obvious, I know its where
it sits in a Westfield, but presume it can sit in a similar position?
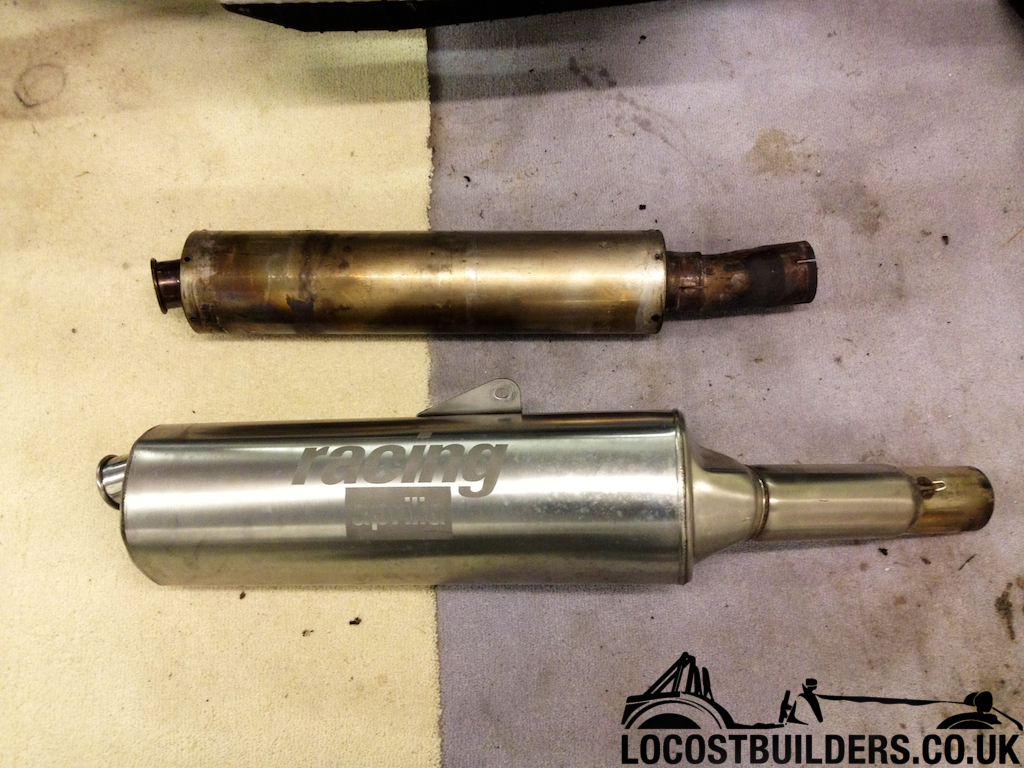
Took my old exhaust can off the manifold, and it was rattling like a bag of nails - all the old rivets that I had drilled out to repack it had
obviously fell inside, it now sounds like some kind of musical instrument... anyway - a new Aprillia RSV Mille can should make my car a little quieter
which is what I wanted

General tidy up, and get things off the floor so I have space around
Tonights task is to strip the side panels off, and freshen up the chassis
|
|
|
yellowcab
|
| posted on 16/1/13 at 06:33 PM |
|
|
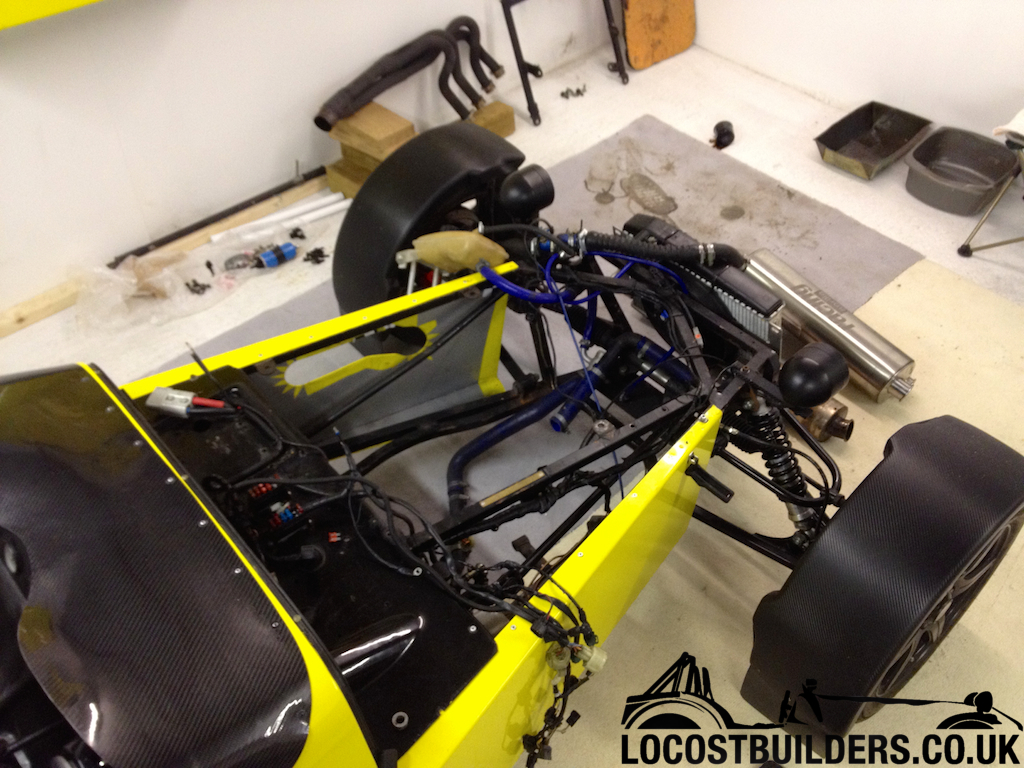
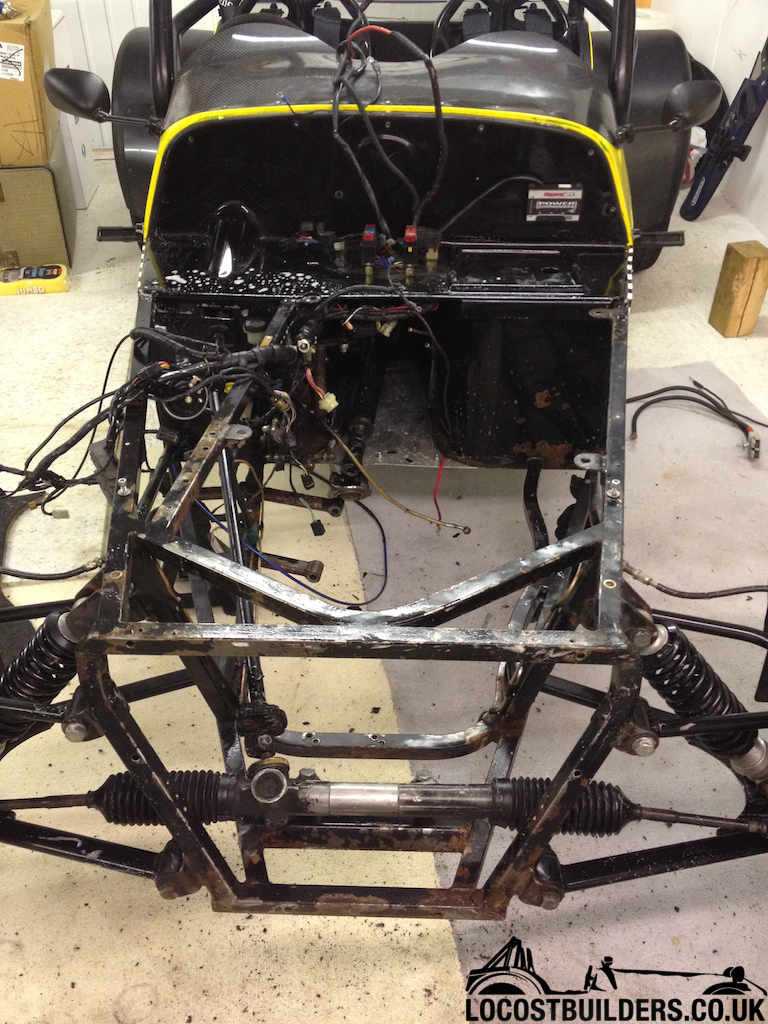
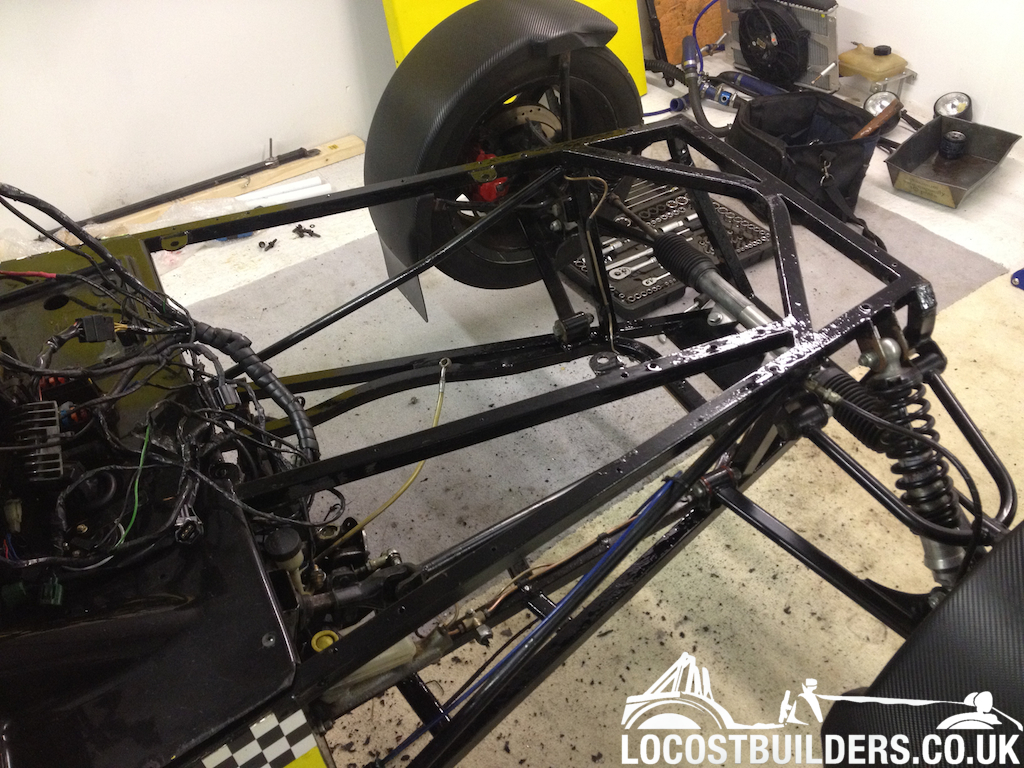
Popped down again tonight but only had 20 minutes, so whipped off the side panels to give me better access to the bay
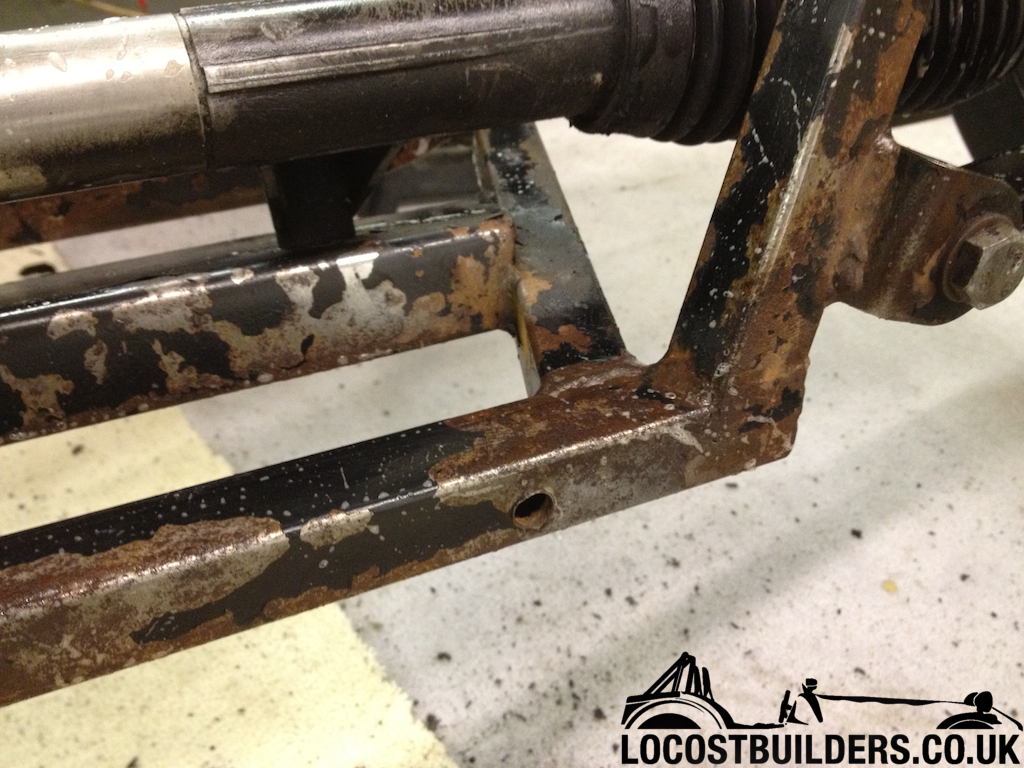
Can see the kinked chassis bar by the exhaust primary on on the nearside here
more pieces of the car hanging up lol
The loom looks scary as hell, for someone who isn't over confident with wiring, i hope it all goes back together lol
|
|
|
ReMan
|
| posted on 16/1/13 at 06:44 PM |
|
|
Hope you are well, good progress I see.
But whoever put the engine back together should have put the long wobbly metal thing next to it, inside it
www.plusnine.co.uk
|
|
|
yellowcab
|
| posted on 16/1/13 at 07:08 PM |
|
|
yeah I thought the engine felt lighter than before...
How are you? Sorry not been in touch for a while, hectic home life, this is the first time I've seen the car since it went bang pretty much!
[Edited on 16/1/13 by yellowcab]
|
|
|
maccmike
|
| posted on 16/1/13 at 07:34 PM |
|
|
that once beautifully clean floor....
|
|
|
yellowcab
|
| posted on 17/1/13 at 08:47 PM |
|
|
I'll just repaint it when the car is out lol
Oh, and when the weather has warmed up a little so it actually dries! lol
|
|
|
yellowcab
|
| posted on 23/1/13 at 06:44 PM |
|
|
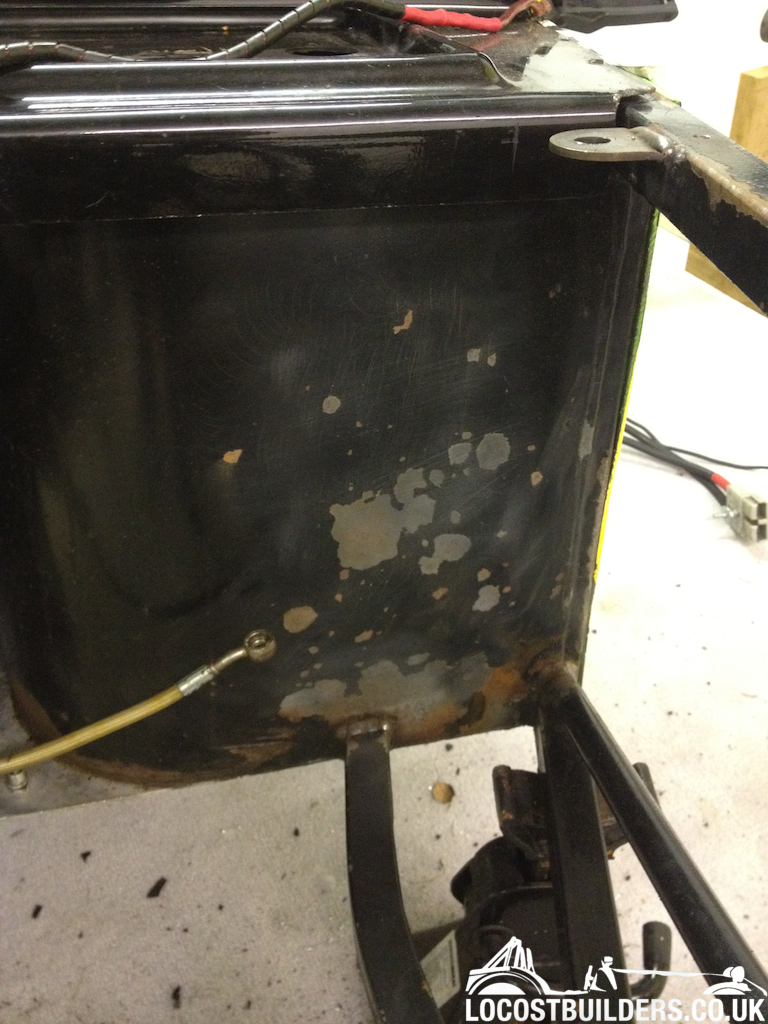
My god it's farking cold outside, couldn't stand much more than a couple of hours down there, here is the very little, but satisfying
progress I made lol
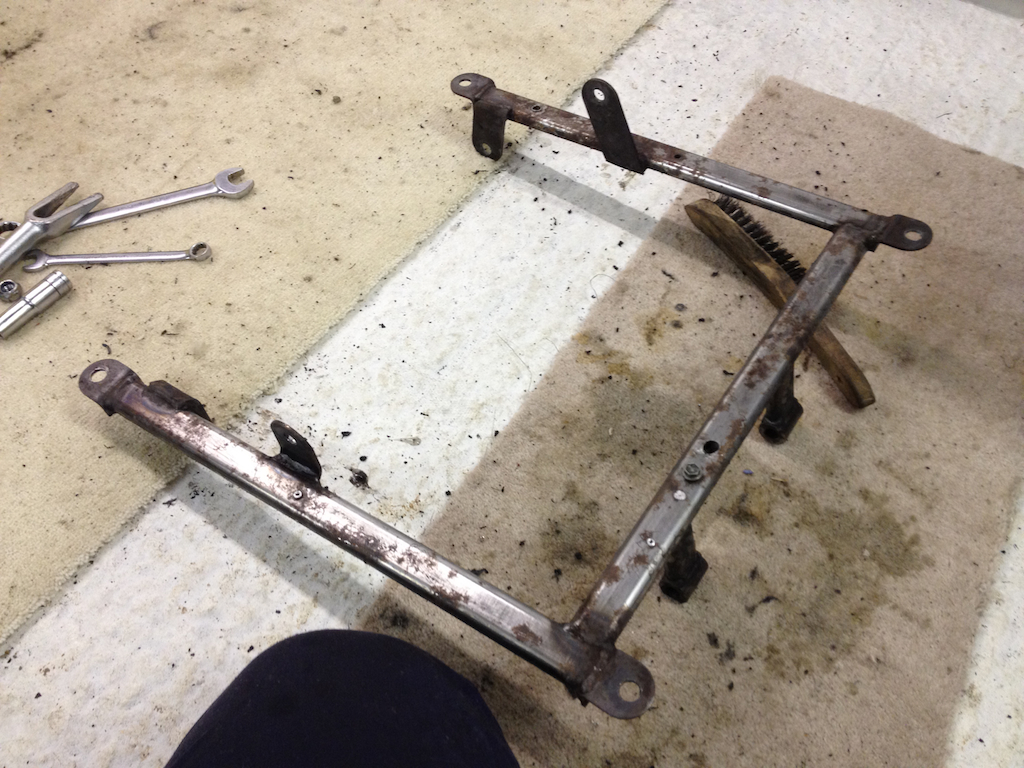
Gave the chassis a wash down with warm soapy water, and got rid of any stubborn road grease
Scraped off the flakey shitty paint (doesn't look powdercoated?!) and applied a thin film of Nitromorz
Back to bare
Still working away, before I wirebrush it all off
Odd place on the bulk head for paint to flake, but over the years I guess it's stone chips and gravel traps lol
Begin the job... only the very first coat done tonight - as its not exactly ideal painting conditions
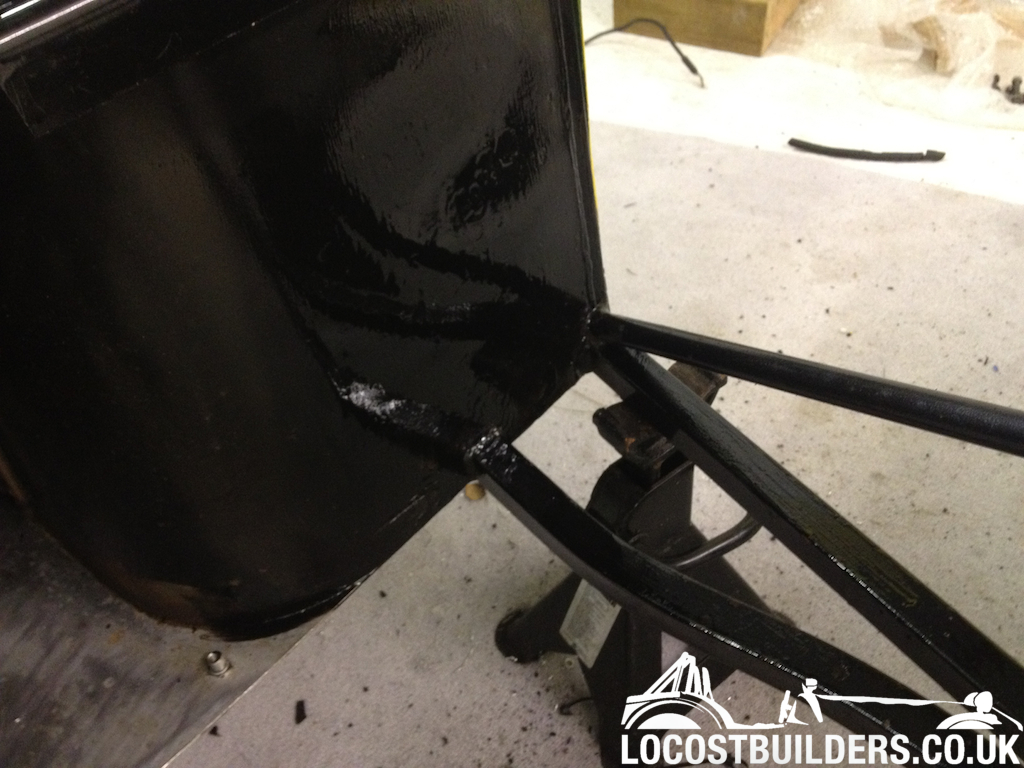
First coat
Looking better already
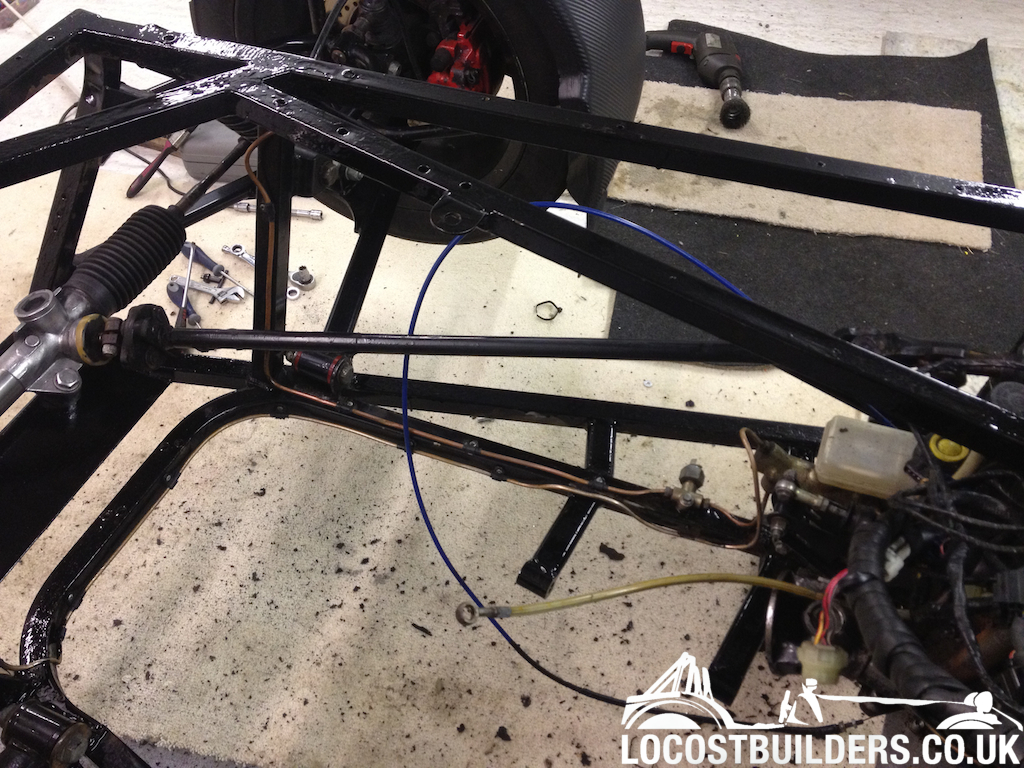
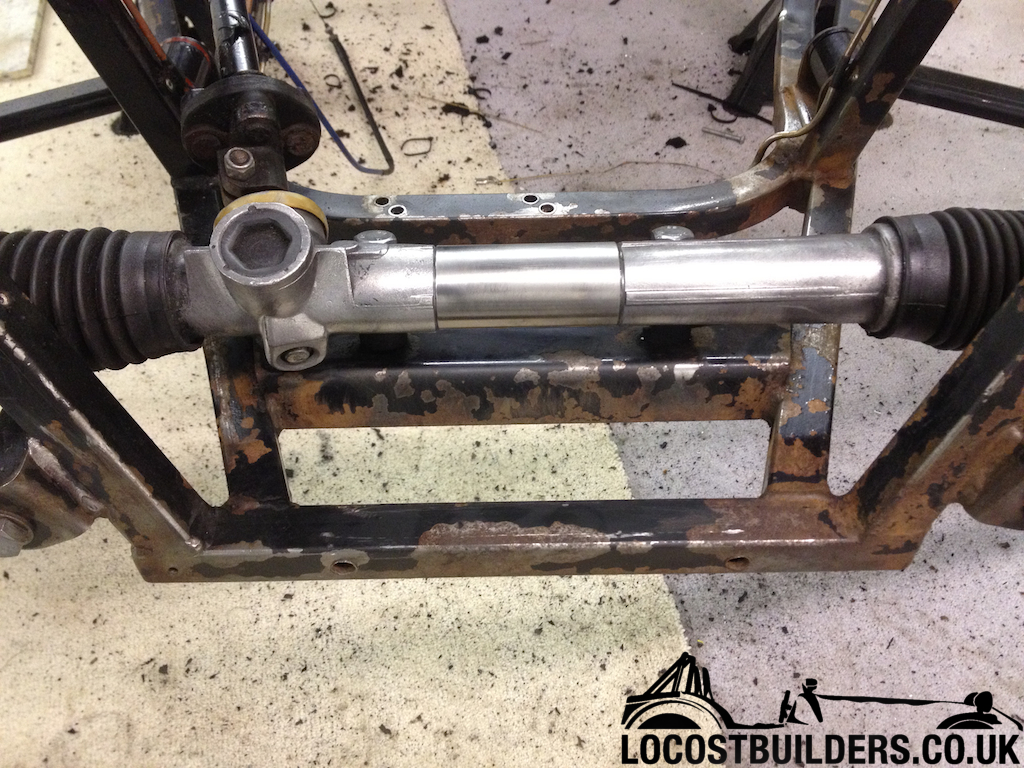
You'll notice that I still haven't removed the steering rack, suspension etc - its bceause I need the car mobile for now, once I come to
do the second coat, and tart it up - it'll all be removed.
The ideal painting temperatures are between 8 and 12 degrees, so in a garage which is minus 2... I have a feeling I'll go down tomorrow night
and it will have all reacted... we'll seeeeeee
That's all folks!
[Edited on 23/1/13 by yellowcab]
|
|
|
yellowcab
|
| posted on 23/1/13 at 06:46 PM |
|
|
Also I've spoken with Danny and ordered some rear adjustable arms complete with rose joints so I can finally solve my rear wheel geometry
problem!
Looking forward to them arriving!
|
|
|
yellowcab
|
| posted on 24/1/13 at 06:50 PM |
|
|
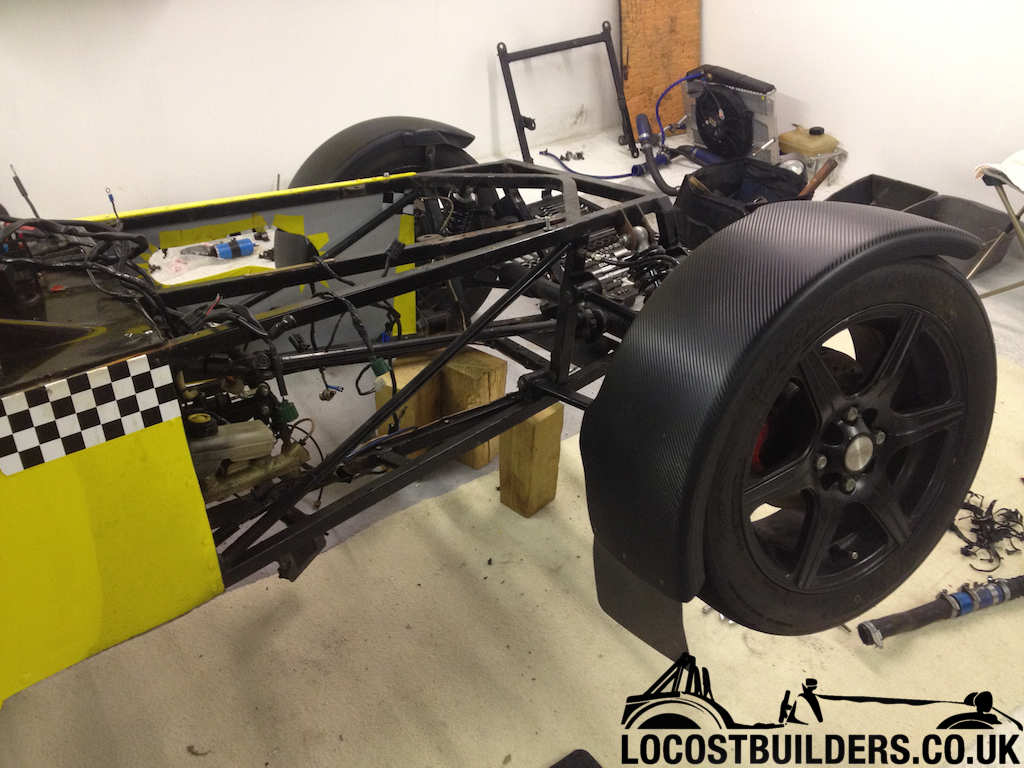
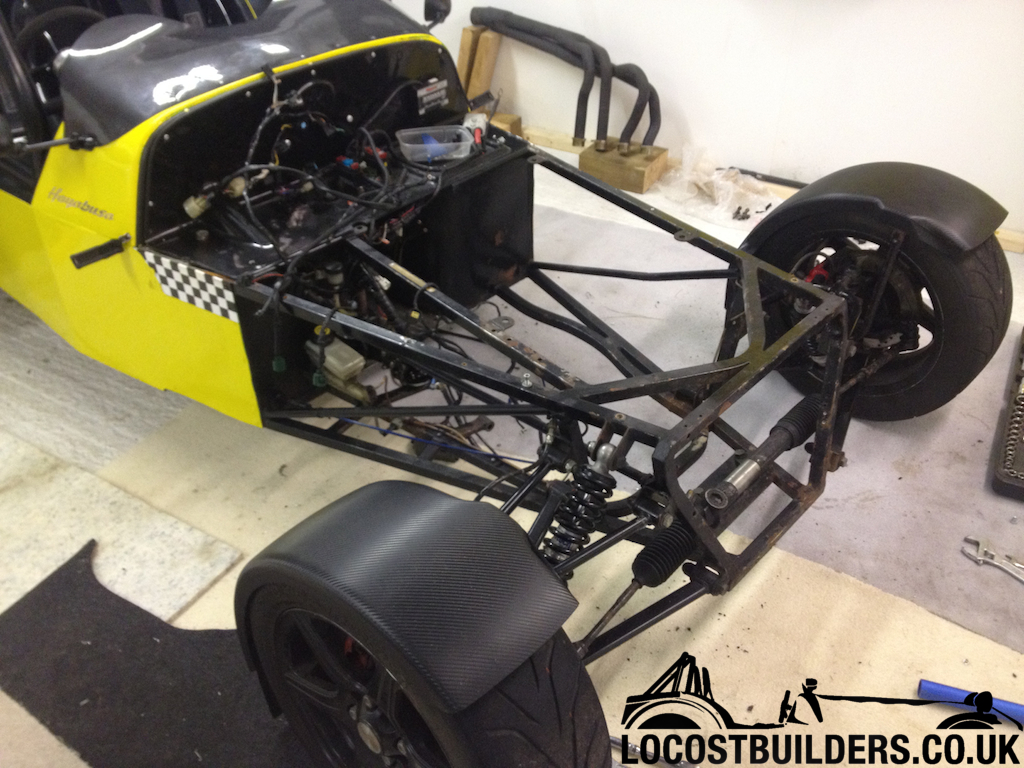
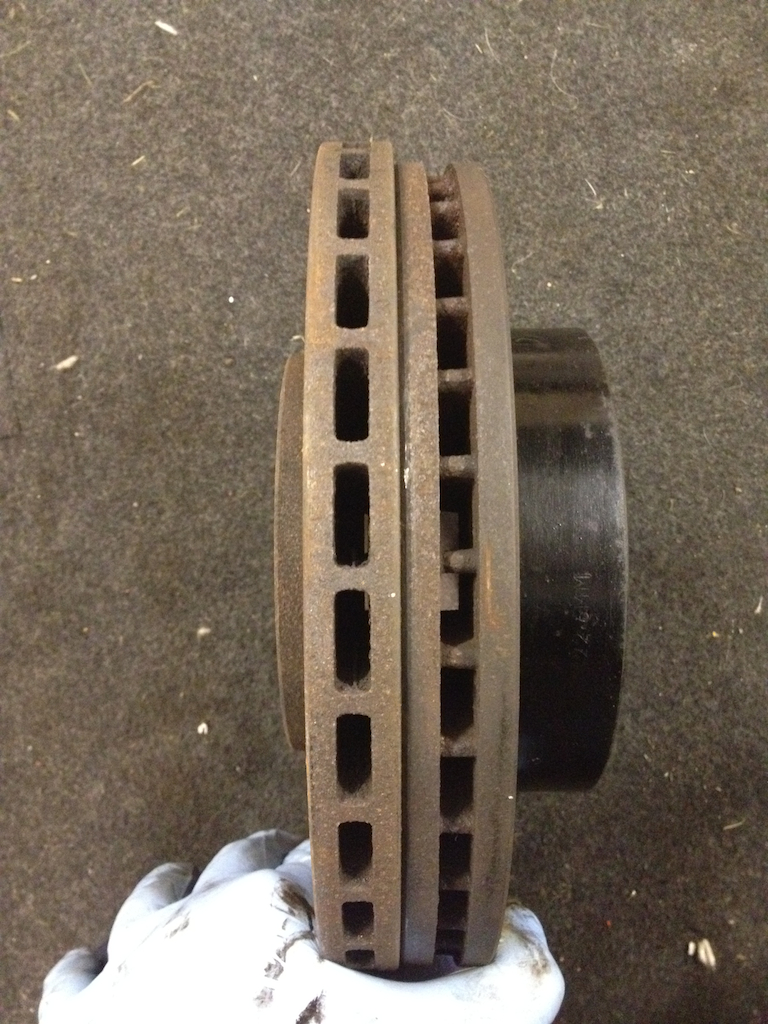
Went down the garage again for a couple of hours, stripped the rest of the front end of wheels, suspension, arms, brakes, steering rack etc so I could
continue refreshening up the chassis
Not very interesting, but pics nonetheless
One side gone
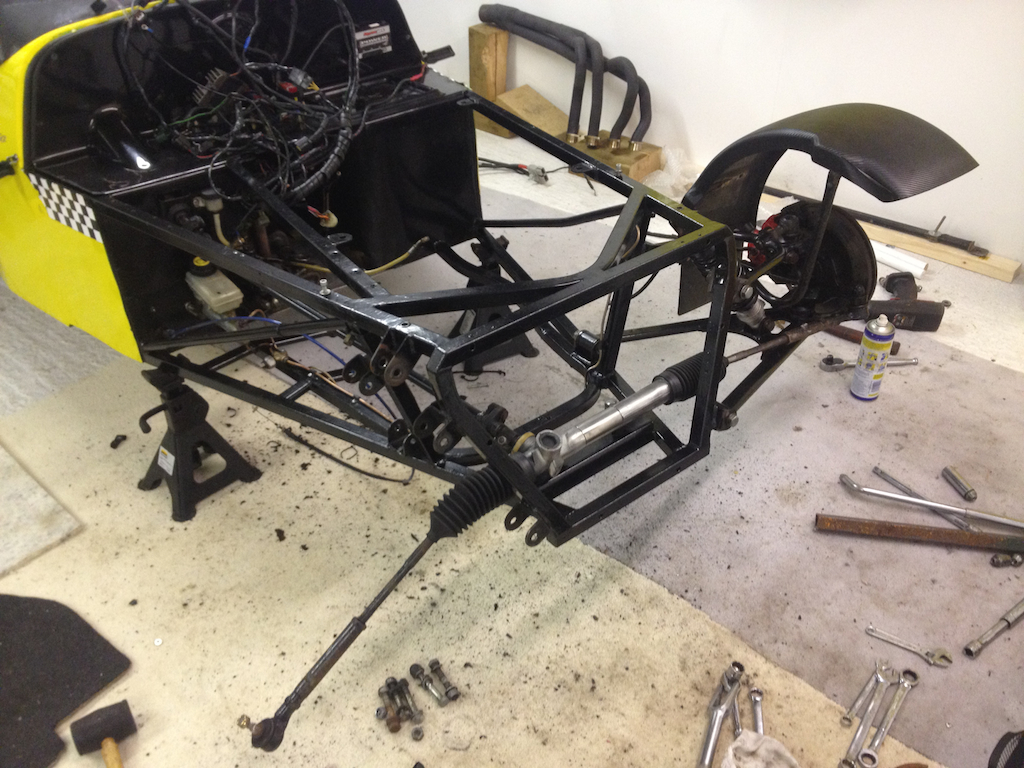
Couldn't split the hub carriers, from the arms for love nor money - so I removed them as is... however I do need to get the brake disks off, as
I'm replacing them - any tips anyone?

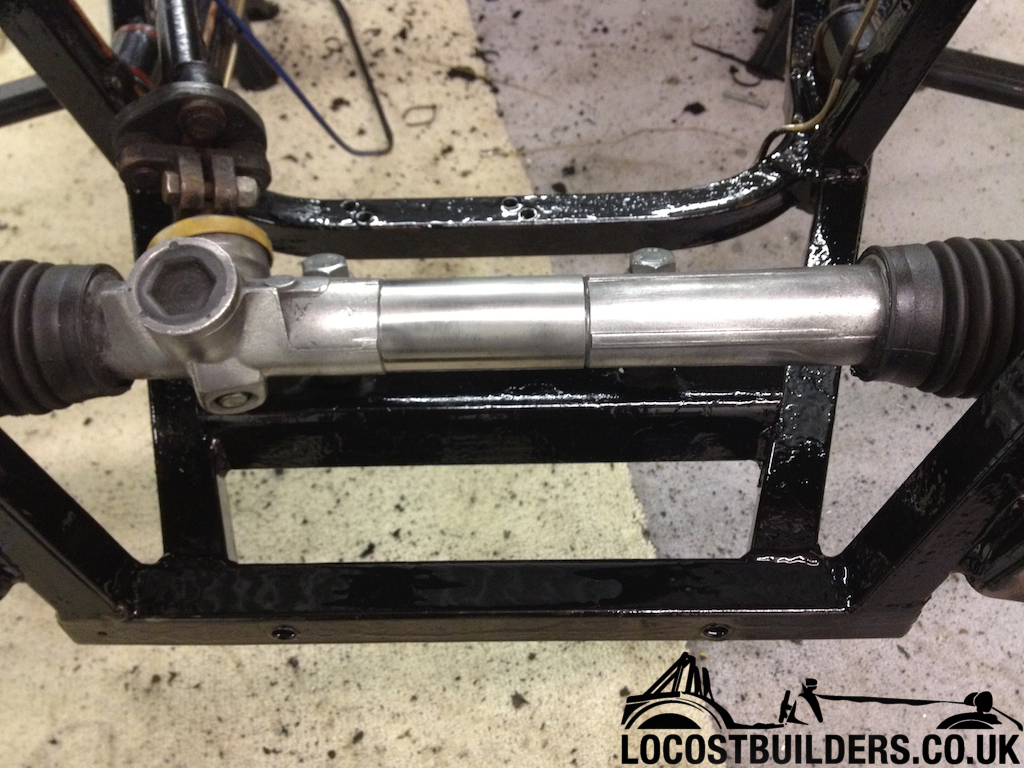
Freshen up continues, all mounting points now painted, and second coat applied to rest of the chassis


That's all for now folks, any help and advice in splitting the fronts would be greatly appreciated lol
[Edited on 25/1/13 by yellowcab]
|
|
|
yellowcab
|
| posted on 25/1/13 at 02:29 PM |
|
|
Photos above now working - can't upload them to the Photo Archive on here for some reason?
Had an unexpected call from Danny Keenan from MK Sportscar today to say that my adjustable rosejointed rear arms had been fabricated, and powder
coated, and are awaiting despatch.
Yet again top notch service, considering I only called him on Wednesday, so 10/10 yet again for looking after me.
Cheers Danny!
|
|
|
Dangle_kt
|
| posted on 25/1/13 at 02:58 PM |
|
|
What paint are you using on the chassis? Brush or rattle can?
Brilliant thread by the way, remember reading it a while back - shame the engine went west! 
|
|
|
yellowcab
|
| posted on 25/1/13 at 03:45 PM |
|
|
I'm brushing it, so I can choose how much to apply in certain places.
I was sure to by proper Hammerite/ Smoothrite though, as the quality of the paint is amazing... it's had a good two coats so far, and letting it
set for 24 hours in between each coat.
Dead neat finish, and you can't see brushlines etc.
Thanks for the comments about the thread - looking forward to building it back up now all the components are going to be clean lol
|
|
|
Benzo
|
| posted on 25/1/13 at 04:01 PM |
|
|
Looks much tidier! 
|
|
|
yellowcab
|
| posted on 25/1/13 at 04:11 PM |
|
|
Cheers Benzo - just about to head out to the garage again now, to clean up the rack & arms, and second coat the front wings.
Next up is probably the rear end... we'll see how cold I get...
Buying a Clarke Space Heater tomorrow, looking forward to it not being minus 3 degrees in there!
|
|
|
Ben_Copeland
|
| posted on 25/1/13 at 04:14 PM |
|
|
Olz, removing discs..... hit them with a hammer towards the hub if your not keeping them!
Ben
Locost Map on Google Maps
Z20LET Astra Turbo, into a Haynes
Roadster
Enter Your Details Here
http://www.facebook.com/EquinoxProducts for all your bodywork needs!
|
|
|
yellowcab
|
| posted on 25/1/13 at 04:21 PM |
|
|
I am replacing the disks, as I bought some from Jon Ison, when I bought his Wilwood 4-pots...
I presume my current disks & brake setup isn't worth anything is it?
They're not very old you see....
[Edited on 25/1/13 by yellowcab]
|
|
|
yellowcab
|
| posted on 25/1/13 at 08:17 PM |
|
|
Got the disks off, just used a rubber mallet...
Had my new replacements out the box that I got from Jon, and it seems that they're wrong stud pattern... the holes for the wheel bolts to go
through are tiny, and also look like 4x98, as opposed to 4x10⁸, so looks like I'll need new disks...
Would use my current disks, but they don't fit in between the jaws of my Wilwood calipers - grrrr
|
|
|
yellowcab
|
| posted on 25/1/13 at 08:23 PM |
|
|
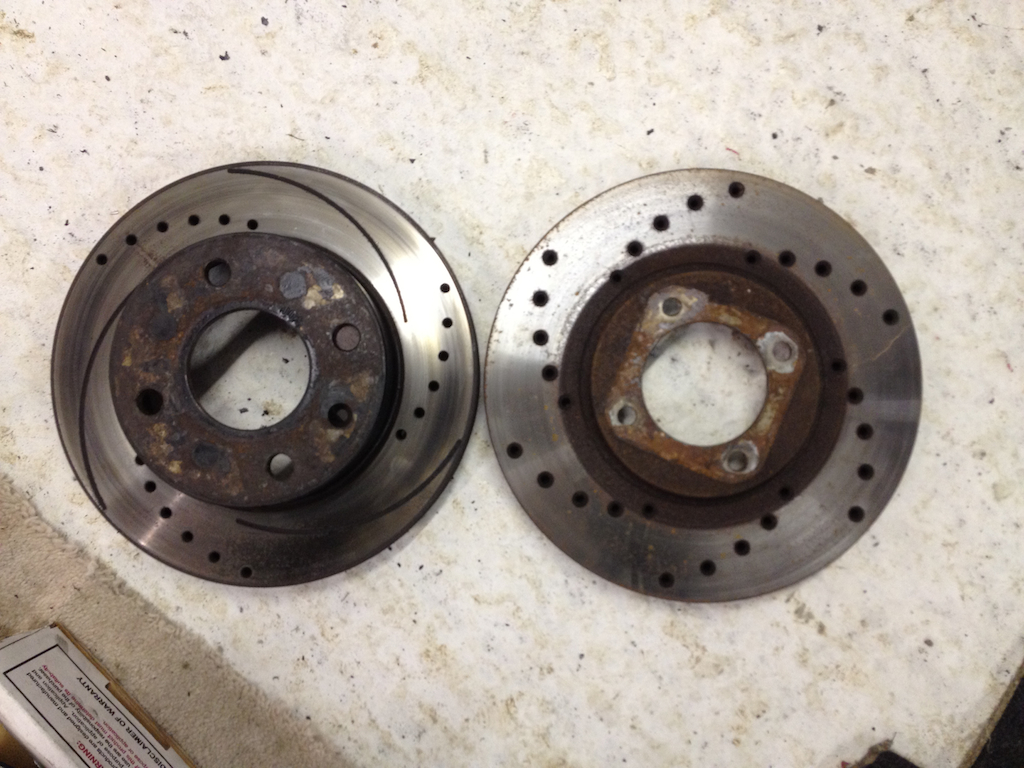
Old disks off

New disk on left, old on right... ohhhh

Old disk thicker, and also hub carrier part deeper
PCD well off, and smaller holes
On a brighter note, Nitromors'd the engine cradle, its awesome stuff
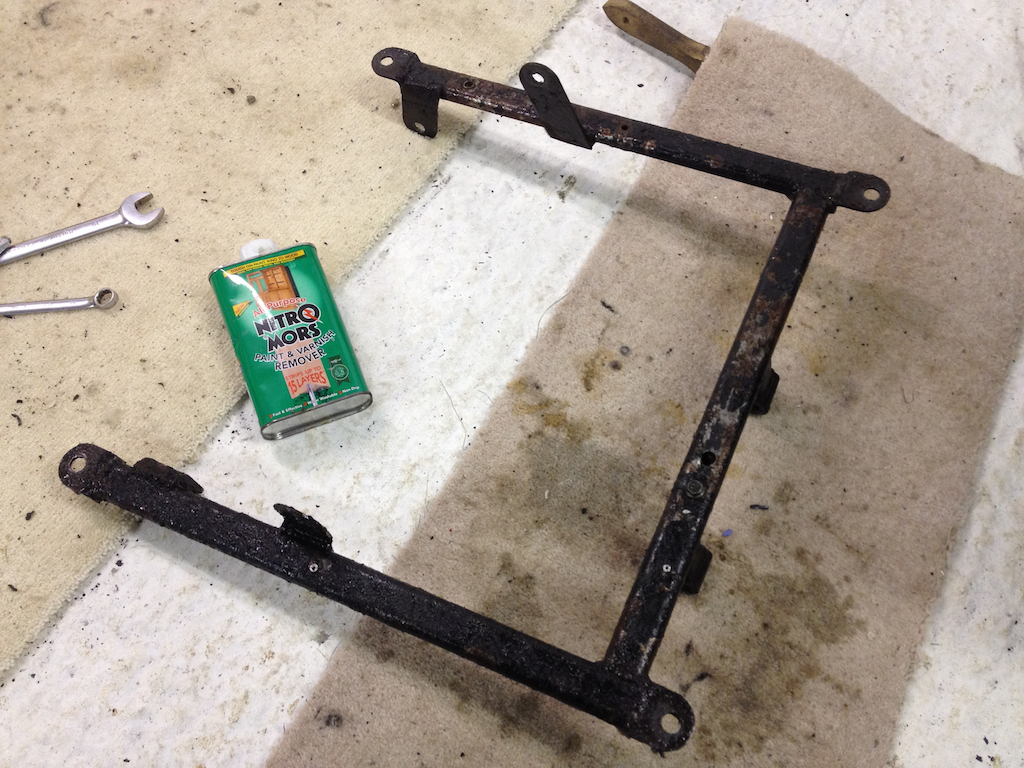
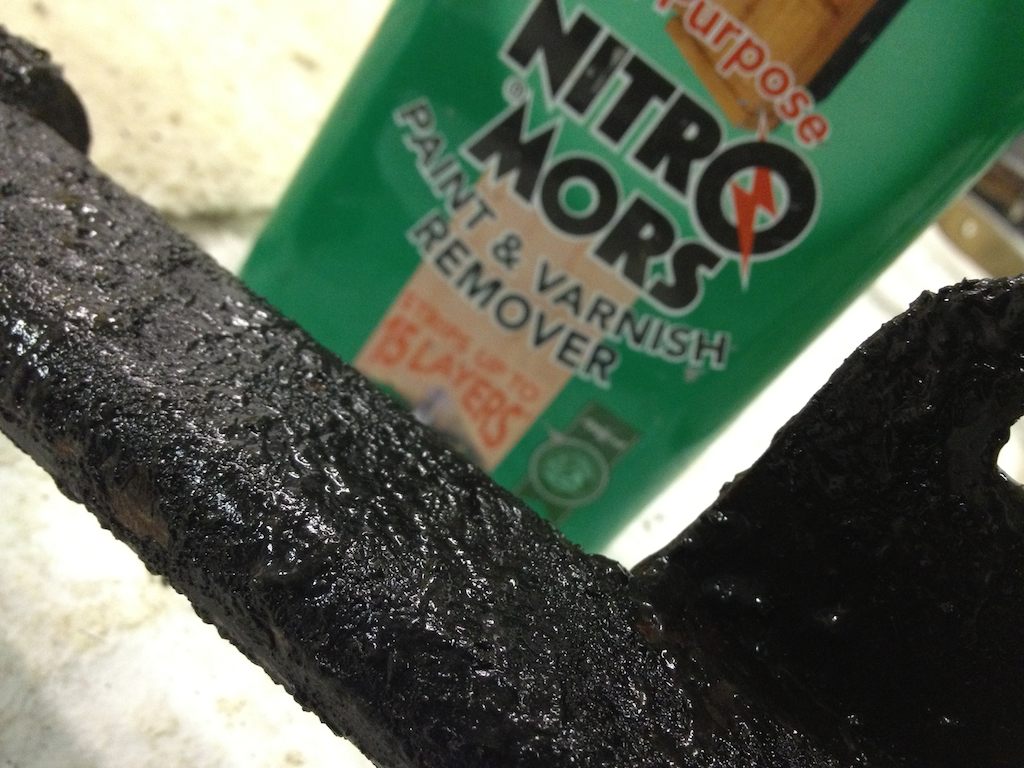
Done
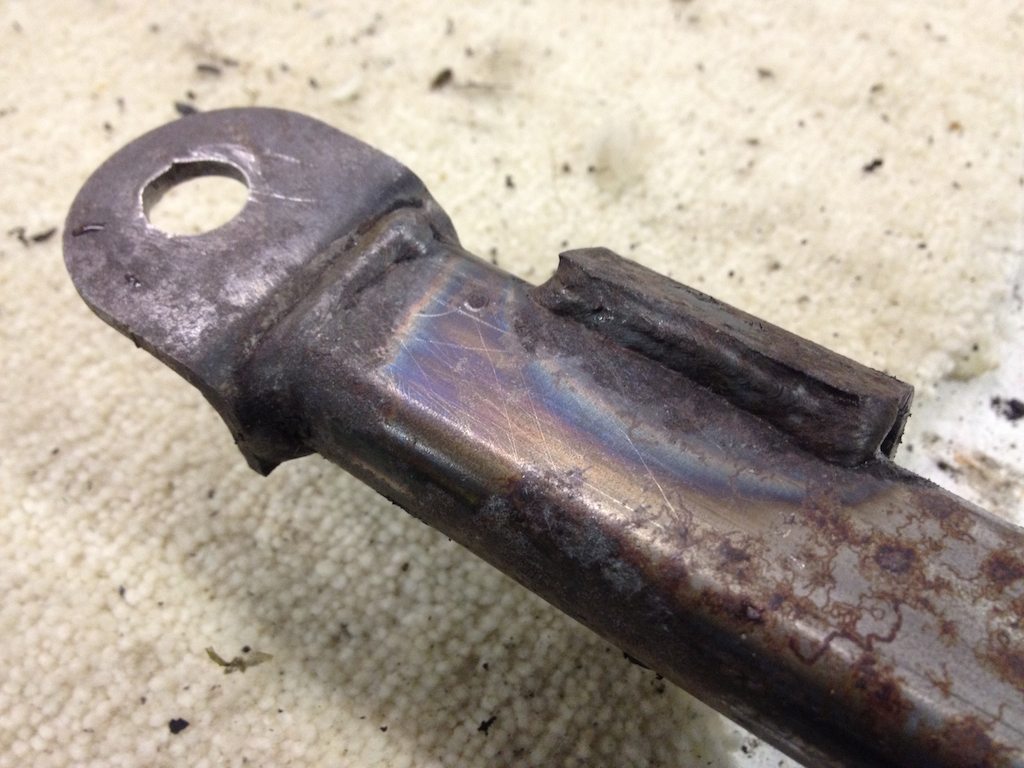
Final coat applied
[Edited on 25/1/13 by yellowcab]
|
|
|
perksy
|
| posted on 25/1/13 at 09:42 PM |
|
|
Fair play some good work going on there
Don't want to tell you how to suck eggs but i really wouldn't be using Hammerite on the chassis, It'll chip really easily
(Its ok used inside the cockpit to match the black powdercoat of a black chassis etc)
Used POR 15 before with really good results on a chassis and wishbones, ok it needs overcoating afterwards but it lasted so much better
than Hammerite
|
|
|